Home>Garden Essentials>How To Plant Bottle Gourd Seeds
Garden Essentials
How To Plant Bottle Gourd Seeds
Modified: March 16, 2024
Learn how to plant bottle gourd seeds in your garden and enjoy a bountiful harvest. Follow our step-by-step guide for successful cultivation.
(Many of the links in this article redirect to a specific reviewed product. Your purchase of these products through affiliate links helps to generate commission for Storables.com, at no extra cost. Learn more)
Introduction
Welcome to the world of gardening! If you’re looking to add a unique and versatile plant to your garden, bottle gourd is an excellent choice. Bottle gourd, also known as calabash, is a warm-season vegetable that belongs to the gourd family. It is known for its elongated shape and smooth, light-green skin.
Not only does bottle gourd add aesthetic appeal to your garden with its beautiful, sprawling vines, but it also offers a variety of culinary uses. From stir-fries to soups and even juices, bottle gourd is a versatile ingredient in various cuisines around the world.
Whether you’re a seasoned gardener eager to try something new or a beginner looking to cultivate your green thumb, this article will guide you through the steps of planting bottle gourd seeds. By following these steps, you’ll have healthy bottle gourd plants flourishing in your garden in no time.
Before we delve into the planting process, let’s take a moment to understand the ideal conditions for growing bottle gourd. Bottle gourd plants thrive in warm climates with full sun exposure. They prefer well-draining soil that is rich in organic matter. By providing the right environment, you’ll ensure optimal growth and a bountiful harvest.
Now, let’s get our hands dirty and start planting!
Key Takeaways:
- Prepare the soil, choose a sunny spot, soak the seeds, and provide consistent watering to grow healthy and delicious bottle gourds in your garden. Enjoy the process and the rewards of gardening!
- Support the vines, monitor for pests, and harvest the mature gourds for a bountiful yield. Embrace the joy of gardening and continue exploring the wonders of nature in your garden.
Read more: How Long Before Gourds Germinate
Step 1: Prepare the Soil
Before planting bottle gourd seeds, it’s crucial to prepare the soil properly. This step sets the foundation for healthy plant growth and ensures that your bottle gourd plants receive the necessary nutrients. Follow these simple steps to prepare the soil:
- Clear the area: Start by removing any existing vegetation or weeds from the planting area. This helps prevent competition for nutrients and allows the bottle gourd plants to establish themselves more easily.
- Loosen the soil: Use a garden fork or a tiller to loosen the soil to a depth of about 12 inches. This helps improve soil aeration and drainage, allowing the roots to penetrate deeper for better nutrient absorption.
- Add compost: Incorporate well-rotted organic compost into the soil. This enriches the soil with essential nutrients, improves its structure, and enhances moisture-retention capabilities. Aim for a compost-to-soil ratio of about 1:3 to ensure a balanced blend.
- Check the pH level: Bottle gourd plants prefer a slightly acidic to neutral soil pH ranging from 6.0 to 7.0. Use a soil testing kit available at garden centers to check the pH level. If the pH is too acidic or alkaline, adjust it accordingly by adding lime to raise the pH or sulfur to lower it.
By following these steps, you’ll create an optimal growing environment for your bottle gourd plants. The enriched soil will provide the necessary nutrients, while the improved drainage will help prevent waterlogging, which can lead to root rot.
Now that the soil is well-prepared, it’s time to move on to the next step: choosing the right location for planting your bottle gourd seeds.
Step 2: Choose the Right Location
Choosing the right location for planting bottle gourd seeds is essential for their successful growth and development. Bottle gourd plants require a warm and sunny environment to thrive. Follow these guidelines to select the ideal location:
- Sunlight requirements: Bottle gourd plants need at least 6 to 8 hours of direct sunlight per day. Choose a spot in your garden that receives ample sunlight throughout the day, preferably with minimal shade from nearby trees or structures.
- Space availability: Bottle gourd plants are vigorous climbers that require ample space to spread their vines. Choose an area in your garden that provides enough room for the vines to grow horizontally or vertically with the support of trellises or fences.
- Soil type: Bottle gourds thrive in well-draining soil that is rich in organic matter. Avoid areas with heavy clay or compacted soil, as these can lead to poor drainage and hinder root development. Sandy loam or loamy soil is ideal for bottle gourd cultivation.
- Avoid waterlogged areas: Ensure that the chosen location does not have a history of waterlogging or poor drainage. Excess water can cause root rot and other diseases in bottle gourd plants. If necessary, consider improving drainage by adding organic matter or creating raised beds.
By selecting the right location for your bottle gourd plants, you’ll provide them with the ideal growing conditions they need to thrive. The ample sunlight, proper spacing, and well-draining soil will contribute to healthy vine growth and a successful harvest.
Once you’ve chosen the perfect location, it’s time to move on to the next step: soaking the bottle gourd seeds to enhance germination.
Step 3: Soak the Seeds
Soaking bottle gourd seeds before planting can help improve germination rates and speed up the seedling emergence. Follow these steps to soak the seeds:
- Select healthy seeds: Choose mature and healthy bottle gourd seeds for soaking. Look for seeds that are plump, firm, and free from any signs of damage or disease.
- Fill a container with water: Take a small bowl or container and fill it with room temperature water. Make sure it’s deep enough to fully submerge the seeds.
- Add a seed disinfectant (optional): To prevent any potential fungal or bacterial infections, you can add a seed disinfectant solution to the water. This step is optional but can help ensure healthier seedlings.
- Place the seeds in the water: Gently place the bottle gourd seeds into the water, ensuring that they are fully submerged. Allow them to soak for about 6 to 8 hours or overnight.
- Drain and rinse the soaked seeds: After the soaking period, drain the water and rinse the seeds thoroughly with clean water. This helps remove any remaining seed disinfectant and prepares the seeds for planting.
Soaking bottle gourd seeds helps soften their tough outer shells and jump-starts the germination process. This can lead to quicker and more uniform seedling emergence, giving your plants a head start in their growth.
Now that the seeds are soaked and ready, it’s time to move on to the next step: digging the holes in the prepared soil.
Step 4: Dig the Holes
With the soaked bottle gourd seeds ready to be planted, it’s time to dig the holes in the prepared soil. Follow these steps to ensure proper hole preparation:
- Choose the spacing: Bottle gourd plants require sufficient spacing to allow their vines to spread and grow. Leave a gap of about 2-3 feet between each planting hole to ensure adequate air circulation and prevent overcrowding.
- Dig the holes: Use a garden trowel or a small shovel to dig holes that are approximately 1-2 inches deep. Make sure the holes are wide enough to accommodate the soaked seeds and provide some additional space around them.
- Place the seeds: Take the soaked bottle gourd seeds and carefully place one seed in each hole. Position them horizontally with the pointed end facing towards the center of the hole.
- Cover and firm the soil: Gently cover the seeds with soil, ensuring that they are completely covered but not buried too deep. Press the soil gently around the seeds to firm it and provide good seed-to-soil contact.
Proper hole preparation is crucial for ensuring successful seed germination and seedling establishment. The spacing between the holes allows the bottle gourd plants to develop without competing for nutrients or space, while the correct depth and firm soil contact promote optimal seedling growth.
Now that you’ve dug the holes and planted the seeds, it’s time to move on to the next step: providing adequate watering for the newly planted seeds.
Read more: How Long To Germinate Bitter Gourd
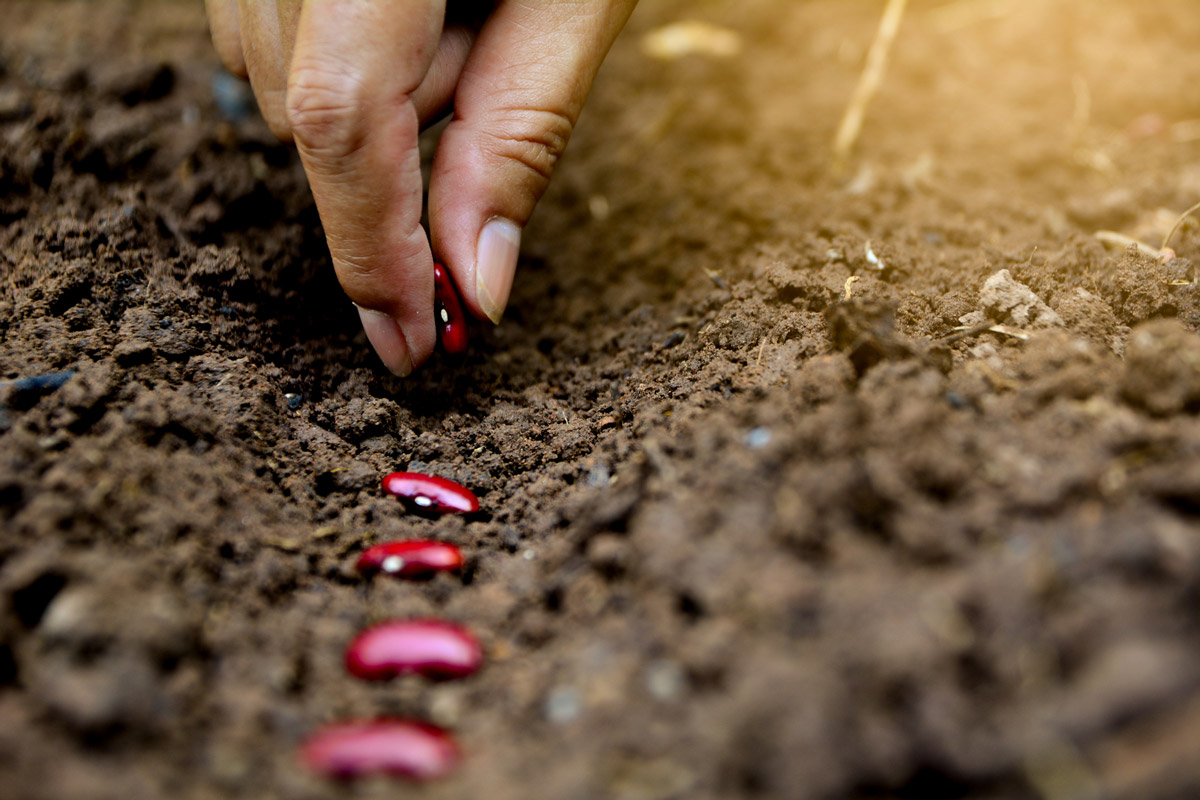
Step 5: Plant the Seeds
The moment has come to plant the bottle gourd seeds in the prepared holes. Follow these steps to ensure proper seed planting:
- Water the holes: Before planting the seeds, moisten the holes with a gentle sprinkle of water. This helps create a favorable environment for seed germination.
- Take the seeds: Carefully remove the soaked bottle gourd seeds from the water, making sure not to damage the delicate seedlings that may have started to emerge.
- Plant the seeds: Place one seed in each prepared hole, making sure it is centered and positioned horizontally, with the pointed end facing towards the center of the hole.
- Cover the seeds: Gently cover the seeds with the moist soil from the surrounding area, ensuring that they are completely covered but not buried too deep. The soil should be firm but not compacted.
- Label the planting area: Use plant labels or stakes to mark the planting area. This will help you keep track of the location and variety of the bottle gourd plants.
By following these steps, you’ll ensure that the bottle gourd seeds are properly planted and that they have a good chance of germinating and establishing healthy seedlings. Remember to water the soil regularly, especially during the germination phase, to provide the necessary moisture for the seeds to sprout.
Now that the seeds are planted, it’s time to move on to the next step: providing adequate watering for the newly planted seeds.
When planting bottle gourd seeds, make sure to choose a sunny spot with well-drained soil. Plant the seeds 1 inch deep and 3 feet apart. Water regularly and provide support for the vines to climb.
Step 6: Provide Adequate Watering
Watering is a crucial aspect of nurturing bottle gourd plants and ensuring their healthy growth. Follow these guidelines to provide adequate watering:
- Keep the soil consistently moist: Bottle gourd plants require consistently moist soil, especially during the germination and early growth stages. Water the plants regularly, aiming for a moist but not waterlogged soil. Avoid letting the soil dry out completely between waterings.
- Water deeply: When watering, make sure to water deeply to encourage the roots to grow deeper into the soil. This helps the plants access nutrients and ensures their stability.
- Water at the base: Direct the water at the base of the plants, near the roots. This helps prevent the foliage from getting excessively wet, reducing the risk of fungal diseases.
- Mulch to retain moisture: Apply a layer of organic mulch, such as straw or wood chips, around the base of the plants. This helps retain soil moisture, suppresses weed growth, and regulates soil temperature.
- Adjust watering as needed: Pay attention to the weather conditions and adjust your watering schedule accordingly. During hot and dry periods, you may need to water more frequently, while cooler and rainy periods may require less watering.
Remember, overwatering can be as harmful as underwatering, so it’s important to strike a balance. Too much water can lead to root rot and other diseases, while too little water can stunt the growth of the plants.
By providing adequate and consistent watering, you’ll ensure that your bottle gourd plants receive the moisture they need to grow healthily and produce a bountiful harvest.
Now that you’ve taken care of watering, let’s move on to the next step: adding mulch around the plants.
Step 7: Add Mulch
Adding mulch around your bottle gourd plants offers numerous benefits, including moisture retention, weed suppression, and soil temperature regulation. Follow these steps to add mulch to your garden:
- Select organic mulch: Choose organic mulch, such as straw, dried leaves, or wood chips. Organic mulch breaks down over time, enriching the soil with nutrients.
The mulch layer serves as a protective barrier, preventing weed growth and reducing soil temperature fluctuations. It also helps retain soil moisture, reducing the frequency of watering required. This can be especially beneficial during hot and dry periods.
By adding mulch to your bottle gourd plants, you’ll create a healthier and more conducive growing environment. It also adds a neat and aesthetically pleasing touch to your garden.
With the mulch in place, let’s move on to the next step: monitoring and controlling pests that may pose a threat to your bottle gourd plants.
Step 8: Monitor and Control Pests
Pests can pose a threat to your bottle gourd plants and affect their health and productivity. It’s important to regularly monitor your plants for signs of pest activity and take prompt action to control them. Follow these steps to monitor and control pests effectively:
- Inspect your plants: Regularly inspect your bottle gourd plants for any signs of pest damage, such as chewed leaves, holes, or wilting. Look for pests like aphids, squash bugs, cucumber beetles, and vine borers.
- Handpick pests: If you spot individual pests, such as beetles or caterpillars, you can handpick them and remove them from the plants. Wear gloves if necessary and dispose of the pests away from the garden area.
- Use organic pest control methods: Employ organic pest control methods to minimize the use of chemicals. For example, you can spray a homemade insecticidal soap solution or use neem oil spray to deter pests. These methods are safer for beneficial insects and the overall environment.
- Encourage beneficial insects: Attract and encourage beneficial insects, such as ladybugs and lacewings, which naturally prey on garden pests. Planting companion plants like marigolds and dill can help attract these helpful insects to your garden.
- Practice crop rotation: Rotate your crops each year to prevent the buildup of pests in the soil. Avoid planting bottle gourds or other members of the cucumber family in the same spot year after year.
Regular monitoring and early intervention are key to preventing pest infestations from damaging your bottle gourd plants. By adopting organic pest control methods and promoting a balanced ecosystem in your garden, you can effectively manage pests and safeguard the health of your plants.
With pests under control, let’s move on to the next step: supporting the vine as it grows.
Step 9: Support the Vine
Bottle gourd plants are vigorous climbers that produce long, sprawling vines. To ensure proper growth and prevent damage to the vines and fruit, it’s important to provide support as the plants grow. Follow these steps to support the vine effectively:
- Select a sturdy support structure: Choose a strong and sturdy support structure, such as a trellis, arbor, or fence. Ensure that it can bear the weight of the growing vines and the fruit.
Providing proper support for your bottle gourd vine not only prevents damage but also helps maximize space in your garden. It promotes better air circulation, sunlight exposure, and easier access for watering and harvesting.
With the vine now supported, it’s time to move on to the final step: harvesting and storage of your bottle gourd.
Step 10: Harvesting and Storage
After putting in the time and effort to grow your bottle gourd plants, it’s time to reap the rewards by harvesting the fruit at the right time. Follow these steps to harvest and store your bottle gourd:
- Observe maturity signs: Bottle gourds are ready to be harvested when they reach maturity. Look for signs such as a firm outer skin, a light green or yellow color, and a dried, corky stem.
Bottle gourds can be stored for several weeks if properly harvested and stored. They can be enjoyed in a variety of recipes, including soups, stir-fries, curries, and even desserts.
By following these steps, you’ll ensure that your bottle gourds are harvested and stored correctly, allowing you to enjoy their delicious flavor and versatility throughout the season.
Congratulations! You’ve completed all the necessary steps to successfully plant, grow, and harvest bottle gourd in your garden. Enjoy the fruits of your labor and continue exploring the world of gardening with other exciting plants and vegetables!
Conclusion
Congratulations on successfully learning how to plant and grow bottle gourd seeds! By following the ten steps outlined in this guide, you have gained the knowledge and skills to cultivate healthy bottle gourd plants in your garden. From preparing the soil to supporting the vines and finally harvesting and storing the fruit, you have taken each step with care and dedication.
Bottle gourd, with its sprawling vines, attractive appearance, and culinary versatility, is a valuable addition to any garden. Not only does it add a touch of beauty and greenery, but it also offers a variety of culinary uses. From refreshing juices to savory stir-fries and soups, bottle gourd can be enjoyed in a multitude of dishes.
Remember, providing the ideal growing conditions, including well-prepared soil, proper watering, and organic pest control, is key to the success of your bottle gourd plants. By monitoring their growth and taking prompt action when necessary, you can ensure a bountiful harvest.
Whether you are an experienced gardener or a beginner, the joy of witnessing your bottle gourd plants thrive and produce delicious fruit is a reward in itself. Take pride in the journey you embarked upon, from planting the seeds to reaping the fruits of your labor.
As you continue your gardening adventure, don’t be afraid to explore other plants and vegetables. Experiment with different varieties, techniques, and companionship plants to create a diverse and flourishing garden ecosystem.
Remember to enjoy the process, observe nature’s wonders, and embrace the therapeutic benefits of gardening. Take the time to connect with the earth, nurture your plants, and revel in the beauty of nature’s bounty.
Happy gardening!
Frequently Asked Questions about How To Plant Bottle Gourd Seeds
Was this page helpful?
At Storables.com, we guarantee accurate and reliable information. Our content, validated by Expert Board Contributors, is crafted following stringent Editorial Policies. We're committed to providing you with well-researched, expert-backed insights for all your informational needs.


0 thoughts on “How To Plant Bottle Gourd Seeds”