Home>Garden Essentials>How To Plant Tobacco Seeds
Garden Essentials
How To Plant Tobacco Seeds
Modified: March 15, 2024
Learn how to plant tobacco seeds in your garden and enjoy the satisfaction of growing your own tobacco at home. Follow our step-by-step guide for successful cultivation.
(Many of the links in this article redirect to a specific reviewed product. Your purchase of these products through affiliate links helps to generate commission for Storables.com, at no extra cost. Learn more)
Introduction
Welcome to the world of gardening and the fascinating journey of planting and growing tobacco seeds. Whether you are a seasoned gardener looking to expand your repertoire or a beginner eager to try your hand at a new project, this article will guide you through the process of successfully planting tobacco seeds.
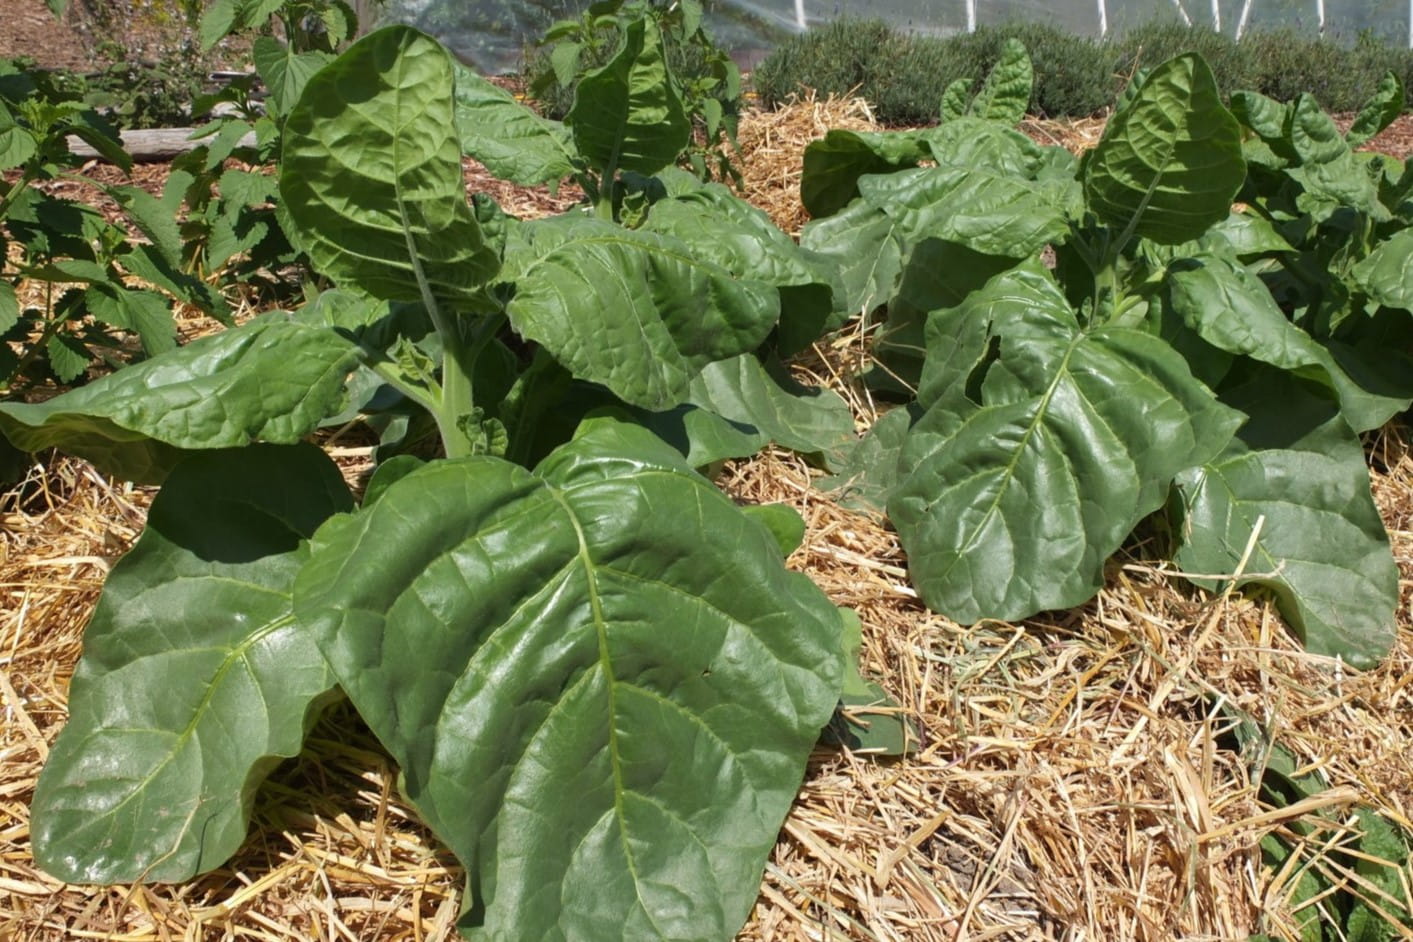
Tobacco, a member of the Solanaceae family, is an annual plant that is grown for its leaves, which are cured and used for various purposes, including smoking and making cigars. While tobacco is not widely grown in home gardens, the process can be immensely rewarding and provide a deeper understanding of the plant’s lifecycle.
Before you embark on this gardening adventure, it’s essential to note that tobacco contains nicotine, a highly addictive substance. Therefore, planting tobacco seeds should be done responsibly and in compliance with local regulations. It’s vital to be mindful of the potential health risks associated with tobacco use and to always use tobacco products responsibly, if at all.
Now, let’s dive into the exciting world of planting tobacco seeds and explore the steps involved in successfully growing this unique plant.
Key Takeaways:
- Growing tobacco from seeds requires gathering materials, preparing the soil, selecting the right seeds, and providing proper care. It’s an exciting and rewarding process that involves attention to detail and patience.
- Harvesting and curing tobacco leaves is a crucial step in the process. Proper timing, handling, and storage are essential to preserve the flavor and aroma of the tobacco. Enjoy the fruits of your labor responsibly!
Read more: Where Is The Tobacco Plant Native To
Step 1: Gathering Materials
Before you begin planting tobacco seeds, it’s crucial to gather all the necessary materials. Here’s a list of the items you’ll need:
- Tobacco seeds: Obtain high-quality tobacco seeds from a reputable source. There are various types of tobacco available, so choose a variety that suits your preferences and climatic conditions.
- Seed starting trays: These trays will provide a conducive environment for germinating the tobacco seeds. Opt for trays with individual cells to ensure proper spacing.
- Seed starting mix: Use a lightweight, well-draining seed starting mix to provide the ideal growing medium for the tobacco seeds.
- Watering can or spray bottle: You’ll need a watering can or spray bottle to gently water the seeds without causing damage.
- Grow lights or sunny windowsill: Tobacco seeds require ample light for germination and growth. If you don’t have access to a sunny windowsill, invest in grow lights to provide the necessary light intensity.
- Plastic wrap or humidity dome: Covering the seed trays with plastic wrap or a humidity dome helps maintain moisture levels and creates a greenhouse-like environment for germination.
- Fertilizer: Consider using a balanced, water-soluble fertilizer to provide essential nutrients as the seedlings grow.
- Transplanting containers: As the seedlings grow, they’ll need to be transplanted into larger individual containers or pots. Prepare these containers in advance.
- Garden tools: Have essential gardening tools such as a trowel, gardening gloves, and a watering hose readily available.
Once you have gathered all the necessary materials, you are ready to move on to the next step of preparing the soil.
Step 2: Preparing the Soil
Preparing the soil properly is vital for the successful growth of tobacco plants. Follow these steps to ensure the soil is ready for planting:
- Choose the right location: Tobacco plants thrive in full sun, so select a spot in your garden that receives at least 6-8 hours of direct sunlight each day.
- Clear the area: Remove any weeds, rocks, or debris from the chosen area to create a clean space for planting.
- Loosen the soil: Use a garden fork or tiller to loosen the soil to a depth of 8-10 inches. This will create a loose, well-drained soil structure that allows the tobacco roots to grow freely.
- Improve soil fertility: Incorporate organic matter such as compost or well-rotted manure into the soil. This will enrich the soil with nutrients and improve its overall fertility.
- Test the soil pH: Tobacco plants prefer a slightly acidic to neutral soil pH range of 5.5-7.0. Use a soil testing kit or send a soil sample to a local extension service to determine the pH level. If the soil pH is not within the desired range, make necessary adjustments by adding lime to raise the pH or sulfur to lower it.
- Rake the soil: Once you have incorporated organic matter and made any necessary pH adjustments, use a garden rake to level the soil surface and remove any large clumps.
By following these steps, you will create an optimal growing environment for your tobacco plants. With the soil prepared, you are now ready to move on to the next step: selecting the tobacco seeds.
Step 3: Selecting the Tobacco Seeds
Choosing the right tobacco seeds is crucial for a successful harvest. Here are some factors to consider when selecting your tobacco seeds:
- Variety: There are several varieties of tobacco available, each with its own unique characteristics and flavors. Consider what type of tobacco you want to grow, whether it’s for smoking, cigar making, or ornamental purposes.
- Climatic suitability: Different tobacco varieties thrive in different climates. Research which varieties are best suited for your specific region and growing conditions.
- Nicotine content: Tobacco plants contain varying levels of nicotine. If you prefer a milder tobacco, choose a variety with lower nicotine content.
- Seed quality: Select seeds from a reputable source to ensure high germination rates and healthy plants. Look for seeds that are fresh and free from damage or signs of mold.
- Resistances: Some tobacco varieties are bred to be resistant to diseases or pests. Consider choosing a variety with resistance to common tobacco diseases in your area to ensure a higher chance of success.
It’s important to note that tobacco seeds are tiny and can be challenging to handle. To make sowing easier, consider mixing the tobacco seeds with a small amount of sand or vermiculite before planting. This will help spread the seeds evenly and prevent overcrowding.
Once you have selected the tobacco seeds that meet your preferences and growing conditions, you are ready to move on to the next step: planting the tobacco seeds.
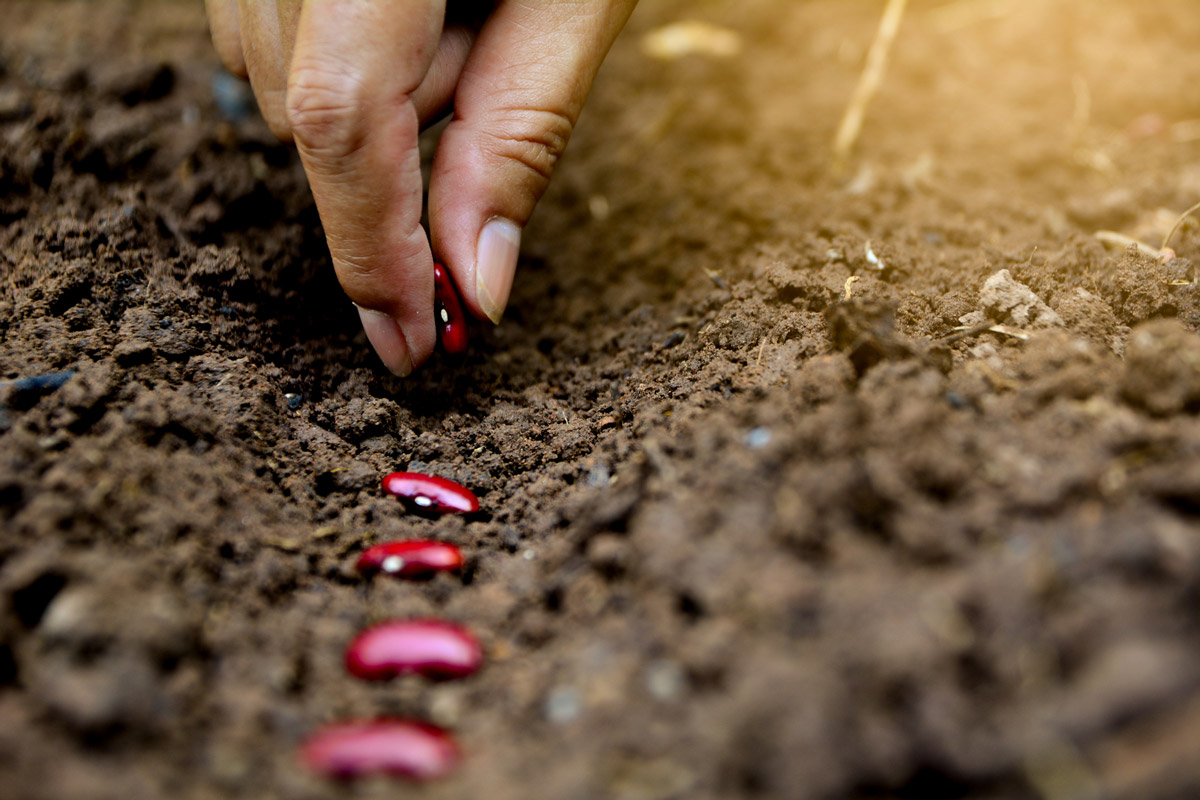
Step 4: Planting the Tobacco Seeds
Now that you have prepared the soil and selected your tobacco seeds, it’s time to plant them. Follow these steps to ensure successful germination and growth:
- Fill the seed trays: Fill the seed starting trays with the prepared seed starting mix, ensuring that each cell is evenly filled. Gently pat down the soil to create a firm but not compacted surface.
- Plant the seeds: Create small indentations in the soil with your finger or a pencil, about 1/8 inch deep. Place one or two tobacco seeds in each indentation and cover them lightly with soil. Aim for a spacing of about 1 inch between seeds.
- Water the seeds: Use a watering can or spray bottle to moisten the soil gently. Avoid overwatering, as excessive moisture can lead to fungal issues. Ensure that the soil remains consistently moist throughout the germination period.
- Create a greenhouse effect: Cover the seed trays with plastic wrap or a humidity dome to create a greenhouse-like environment. This will help retain moisture and increase the chances of successful germination.
- Provide warmth and light: Place the seed trays in a warm location with temperatures between 70-80°F (21-27°C). If necessary, use a heating mat to maintain the optimal temperature. Additionally, ensure that the seeds receive plenty of light. If using grow lights, position them about 6-12 inches above the trays.
- Monitor and maintain moisture: Check the moisture levels of the soil regularly and mist if necessary to keep it consistently moist. Avoid letting the soil dry out or become waterlogged.
- Germination and seedling growth: Tobacco seeds typically take around 10-14 days to germinate. Once the seedlings emerge, remove the plastic wrap or humidity dome and continue to provide adequate light and moisture.
As the tobacco seedlings grow and develop their true leaves, they will need to be transplanted into individual containers. We will explore this transplanting process in the next step.
Read more: How To Germinate A Plant
Step 5: Providing Proper Care
Now that your tobacco seedlings have emerged, it’s important to provide them with proper care to ensure healthy growth. Follow these steps to give your tobacco plants the best chance of success:
- Watering: Water the tobacco plants consistently to keep the soil evenly moist. Avoid overwatering, as this can lead to root rot. Water at the base of the plants, ensuring that the foliage remains dry to prevent the spread of diseases.
- Fertilizing: Once the seedlings have developed their first set of true leaves, begin fertilizing them with a balanced, water-soluble fertilizer. Follow the instructions on the packaging for proper dilution and application. Fertilize the plants every two weeks to provide them with essential nutrients.
- Thinning: If multiple seedlings have germinated in the same cell or container, thin them out by removing the weaker seedlings. This will allow the remaining plant to grow without competition and have sufficient space to develop.
- Pruning: As the tobacco plants grow, pinch off any sucker shoots that emerge in the leaf axils. This will help direct energy towards leaf production rather than vegetative growth.
- Supporting: Depending on the tobacco variety you are growing, some plants may require support as they grow taller. Use stakes or cages to provide support and prevent the plants from toppling over.
- Weeding: Regularly weed the area around the tobacco plants to prevent competition for nutrients and water. Be careful when weeding to avoid damaging the shallow tobacco roots.
- Pest control: Monitor your tobacco plants for any signs of pests, such as aphids or caterpillars. If necessary, use organic pest control methods or insecticidal soaps to mitigate pest infestations.
By providing proper care and attention to your tobacco plants, you will facilitate their healthy growth and development. In the next step, we will discuss the process of transplanting the seedlings into larger containers.
When planting tobacco seeds, make sure to start them indoors in a warm, well-lit area. Use a seed starting mix and keep the soil consistently moist. Once the seedlings are established, transplant them to a sunny outdoor location with well-drained soil.
Step 6: Transplanting the Seedlings
As your tobacco seedlings grow and develop, they will outgrow their initial seed starting trays and require more space to continue thriving. Follow these steps to transplant your tobacco seedlings into larger containers:
- Prepare the transplanting containers: Select individual pots or containers that are at least 4-6 inches deep and have drainage holes. Fill the containers with a well-draining potting mix.
- Water the seedlings: Before transplanting, water the seedlings thoroughly. This will help moisten the soil and make it easier to remove the seedlings from the seed starting trays.
- Gently remove the seedlings: Carefully loosen the soil around each seedling in the seed starting trays. Hold the seedling by its leaves or root ball, avoiding pinching or damaging the delicate stem.
- Plant the seedlings: Dig a small hole in the center of each transplanting container and place a seedling in the hole. The top of the root ball should be level with or slightly below the soil surface. Backfill the hole and gently press down the soil around the seedling to secure it in place.
- Water thoroughly: After transplanting, water the seedlings again to settle the soil and remove any air pockets around the roots. Ensure that the containers have proper drainage to prevent waterlogged soil.
- Place in a suitable location: Find a location where the tobacco plants will receive plenty of sunlight, ideally 6-8 hours per day. If needed, provide shading during the hottest part of the day to prevent wilting or sunburn.
Transplanting the seedlings into larger containers will allow their roots to continue growing and developing. Ensure that you continue to provide proper care, including watering, fertilizing, and pest control, as discussed in the previous step.
In the next step, we will explore how to protect your tobacco plants from potential threats.
Step 7: Protecting the Tobacco Plants
Tobacco plants, like any other garden plants, can be vulnerable to various threats such as pests, diseases, and adverse weather conditions. Follow these steps to protect your tobacco plants and ensure their health and productivity:
- Pest prevention: Regularly inspect your tobacco plants for signs of pests such as aphids, tobacco hornworms, or flea beetles. Use organic pest control methods, like insecticidal soaps or neem oil, to deter and control pest infestations.
- Disease management: Tobacco plants can be susceptible to diseases such as tobacco mosaic virus, black shank, or blue mold. Practice good garden hygiene by removing any infected plants or leaves promptly. Avoid overhead watering to minimize the spread of fungal diseases. In severe cases, consult with your local extension service for appropriate disease management strategies.
- Weed control: Regularly remove weeds from around your tobacco plants, as they compete for nutrients and water. Mulching around the plants can help suppress weeds and conserve moisture in the soil.
- Weather protection: Tobacco plants are sensitive to extreme weather conditions. Provide shade during scorching heat to prevent the plants from wilting or burning. If frost is expected, cover the plants with protective frost blankets or move them indoors temporarily.
- Support and staking: As your tobacco plants grow taller, some varieties may require support to prevent them from bending or breaking. Use stakes or cages to support the plants and ensure their upright growth.
- Regular inspection: Regularly inspect your tobacco plants for any signs of stress, damage, or discoloration. Early detection of problems allows for timely intervention and can prevent further damage to the plants.
By implementing these protective measures, you can minimize the risks to your tobacco plants and help them thrive. Remember to continue providing proper care, such as watering, fertilizing, and pruning, to support healthy growth and development.
In the next step, we will explore the exciting process of harvesting the tobacco leaves.
Step 8: Harvesting the Tobacco Leaves
Harvesting tobacco leaves is an exciting and rewarding part of the growing process. Proper timing and techniques are essential to achieve optimal leaf quality. Follow these steps to harvest your tobacco leaves:
- Determine the right time: The ideal time to harvest tobacco leaves is when they have reached maturity but are still green and have not started to yellow or dry out. This is typically when the lower leaves of the plant are ripe, while the upper leaves may still be green.
- Choose a dry day: Select a dry day to harvest your tobacco leaves. Moisture can increase the risk of mold or damage during the curing process.
- Harvest from the bottom: Start by harvesting the ripest leaves from the bottom of the plant. Use sharp scissors or shears to cut the leaves off the stalk, leaving a small portion of the stem attached.
- Leave a few leaves on the plant: As you harvest the lower leaves, leave a few upper leaves intact to continue supplying nutrients to the remaining plant.
- Handle with care: Handle the harvested leaves gently to avoid bruising or tearing. Damaged leaves may not cure properly and can negatively affect the flavor and quality of the tobacco.
- Continue harvesting: Over the following weeks, continue harvesting additional leaves as they ripen. Be mindful of the plant’s growth and avoid removing too many leaves at once, which can weaken the plant.
Once you have harvested your tobacco leaves, you are ready to move on to the next step: curing them to develop the desired flavors and aromas.
In the next step, we will explore the curing process in more detail.
Read more: How To Plant Seed
Step 9: Curing the Tobacco Leaves
Curing is a crucial step in the tobacco-growing process as it develops the flavor and aroma of the harvested leaves. There are different methods of curing tobacco, including air curing, flue curing, and fire curing. Here, we will focus on air curing, which is a common and straightforward method. Follow these steps to cure your tobacco leaves:
- Prepare a curing location: Find a well-ventilated, dry, and dark location for curing your tobacco leaves. This can be a shed, barn, or any other suitable space.
- Hang the leaves: Bundle the harvested tobacco leaves together and hang them upside down on a horizontal pole or string. Leave enough space between the bundles for air circulation.
- Avoid touching: Ensure that the leaves do not touch each other to prevent the spread of moisture or mold. You can use clothespins or twist ties to secure the bundles.
- Monitor temperature and humidity: Maintain a temperature of around 70-80°F (21-27°C) and a humidity level of around 60-70%. Use a hygrometer to monitor these conditions and make adjustments if necessary.
- Allow the leaves to air cure: Let the tobacco leaves air cure for several weeks to several months, depending on the desired flavor and texture. During this time, the leaves will gradually transform from green to a deep brown color.
- Check for dryness: To determine if the leaves are sufficiently cured, perform the “snap test.” Take a leaf and attempt to fold it. If it snaps easily without bending, the leaf is dry and ready for the next step.
Remember that the curing process is crucial in achieving the desired flavor and characteristics of your tobacco. Proper monitoring and patience are key to achieving the best results.
In the final step, we will discuss how to store and use your cured tobacco leaves.
Step 10: Storing and Using the Tobacco
After the tobacco leaves have been successfully cured, it’s time to store them and prepare for their use. Follow these steps to store and utilize your cured tobacco:
- Remove the stems: Once the leaves are fully cured, remove the stems by gently pulling them away from the leaf. The stems are not typically used in tobacco products and can affect the taste if included.
- Seal in airtight containers: Store the cured tobacco leaves in airtight containers, such as mason jars or vacuum-sealed bags. This helps preserve the flavor and aroma of the tobacco for a longer period.
- Store in a cool, dark place: Place the sealed containers in a cool, dark location, away from direct sunlight and excessive heat. Ideally, the temperature should be around 70°F (21°C) to maintain the quality of the tobacco.
- Allow aging (optional): If desired, you can age the stored tobacco leaves for a period of time, typically several months to a few years. Aging can further develop the flavor and smoothness of the tobacco.
- Prepare for use: When you’re ready to use the stored tobacco leaves, remove the desired amount and handle them with care. Grind or chop the leaves to the desired size, depending on your intended use.
- Explore various uses: Cured tobacco leaves can be used for smoking, cigar making, or even as decorative accents. Experiment with different blends and techniques to discover your preferred method of utilizing the tobacco.
Remember to use tobacco products responsibly and in compliance with local regulations. It’s important to be aware of the potential health risks associated with tobacco use and to only use tobacco products if you are of legal age and understand the risks involved.
Congratulations! You have successfully completed the process of planting, growing, harvesting, curing, and storing your own tobacco. Enjoy the fruits of your labor responsibly and savor the unique flavors and aromas of your homegrown tobacco.
Thank you for joining us on this gardening journey, and we hope you found this guide helpful and informative. Happy gardening!
Frequently Asked Questions about How To Plant Tobacco Seeds
Was this page helpful?
At Storables.com, we guarantee accurate and reliable information. Our content, validated by Expert Board Contributors, is crafted following stringent Editorial Policies. We're committed to providing you with well-researched, expert-backed insights for all your informational needs.


0 thoughts on “How To Plant Tobacco Seeds”