Home>Garden Essentials>How To Start Nasturtium Seeds
Garden Essentials
How To Start Nasturtium Seeds
Modified: August 17, 2024
Learn how to start nasturtium seeds in your garden and enjoy the vibrant colors of these beautiful flowers. Follow our step-by-step guide for successful seed germination.
(Many of the links in this article redirect to a specific reviewed product. Your purchase of these products through affiliate links helps to generate commission for Storables.com, at no extra cost. Learn more)
Introduction
Welcome to the wonderful world of gardening! If you’re looking to add a burst of color and a touch of whimsy to your garden, then growing nasturtiums from seeds is a great place to start. Nasturtiums are vibrant flowers that are easy to grow and can add a cheerful and decorative element to your outdoor space.
With their edible flowers and peppery leaves, nasturtiums also offer a unique culinary twist. Whether you have a large yard or a small balcony, these versatile plants can thrive in various settings. In this article, we’ll guide you through the process of starting nasturtium seeds and help you create a thriving garden filled with these beautiful and useful plants.
Before we dive into the details, it’s essential to understand why nasturtiums deserve a spot in your garden. These plants not only bring aesthetic beauty but also serve various functional purposes. Nasturtiums are natural pest repellents, particularly for aphids, whiteflies, and squash bugs. They can help protect neighboring vegetables and herbs from these common garden nuisances.
Furthermore, nasturtiums attract beneficial insects such as bees and butterflies, which play a crucial role in pollination. By adding nasturtiums to your garden, you’re not only creating a visually stunning space but also supporting the overall health and balance of your garden ecosystem.
Now that you’re acquainted with the value of nasturtiums let’s delve into the step-by-step process of growing them from seeds. From selecting the right seeds to transplanting seedlings, we’ve got you covered. Grab your gardening gloves, and let’s get started!
Key Takeaways:
- Add a burst of color and whimsy to your garden by growing easy-to-care-for nasturtiums from seeds. Enjoy vibrant blooms, natural pest repellent properties, and edible flowers and leaves.
- Choose from a variety of nasturtium seeds based on color, size, leaf shape, and heirloom or hybrid options. Create a thriving garden with these versatile and visually stunning plants.
Read more: How To Harvest Nasturtium Seeds
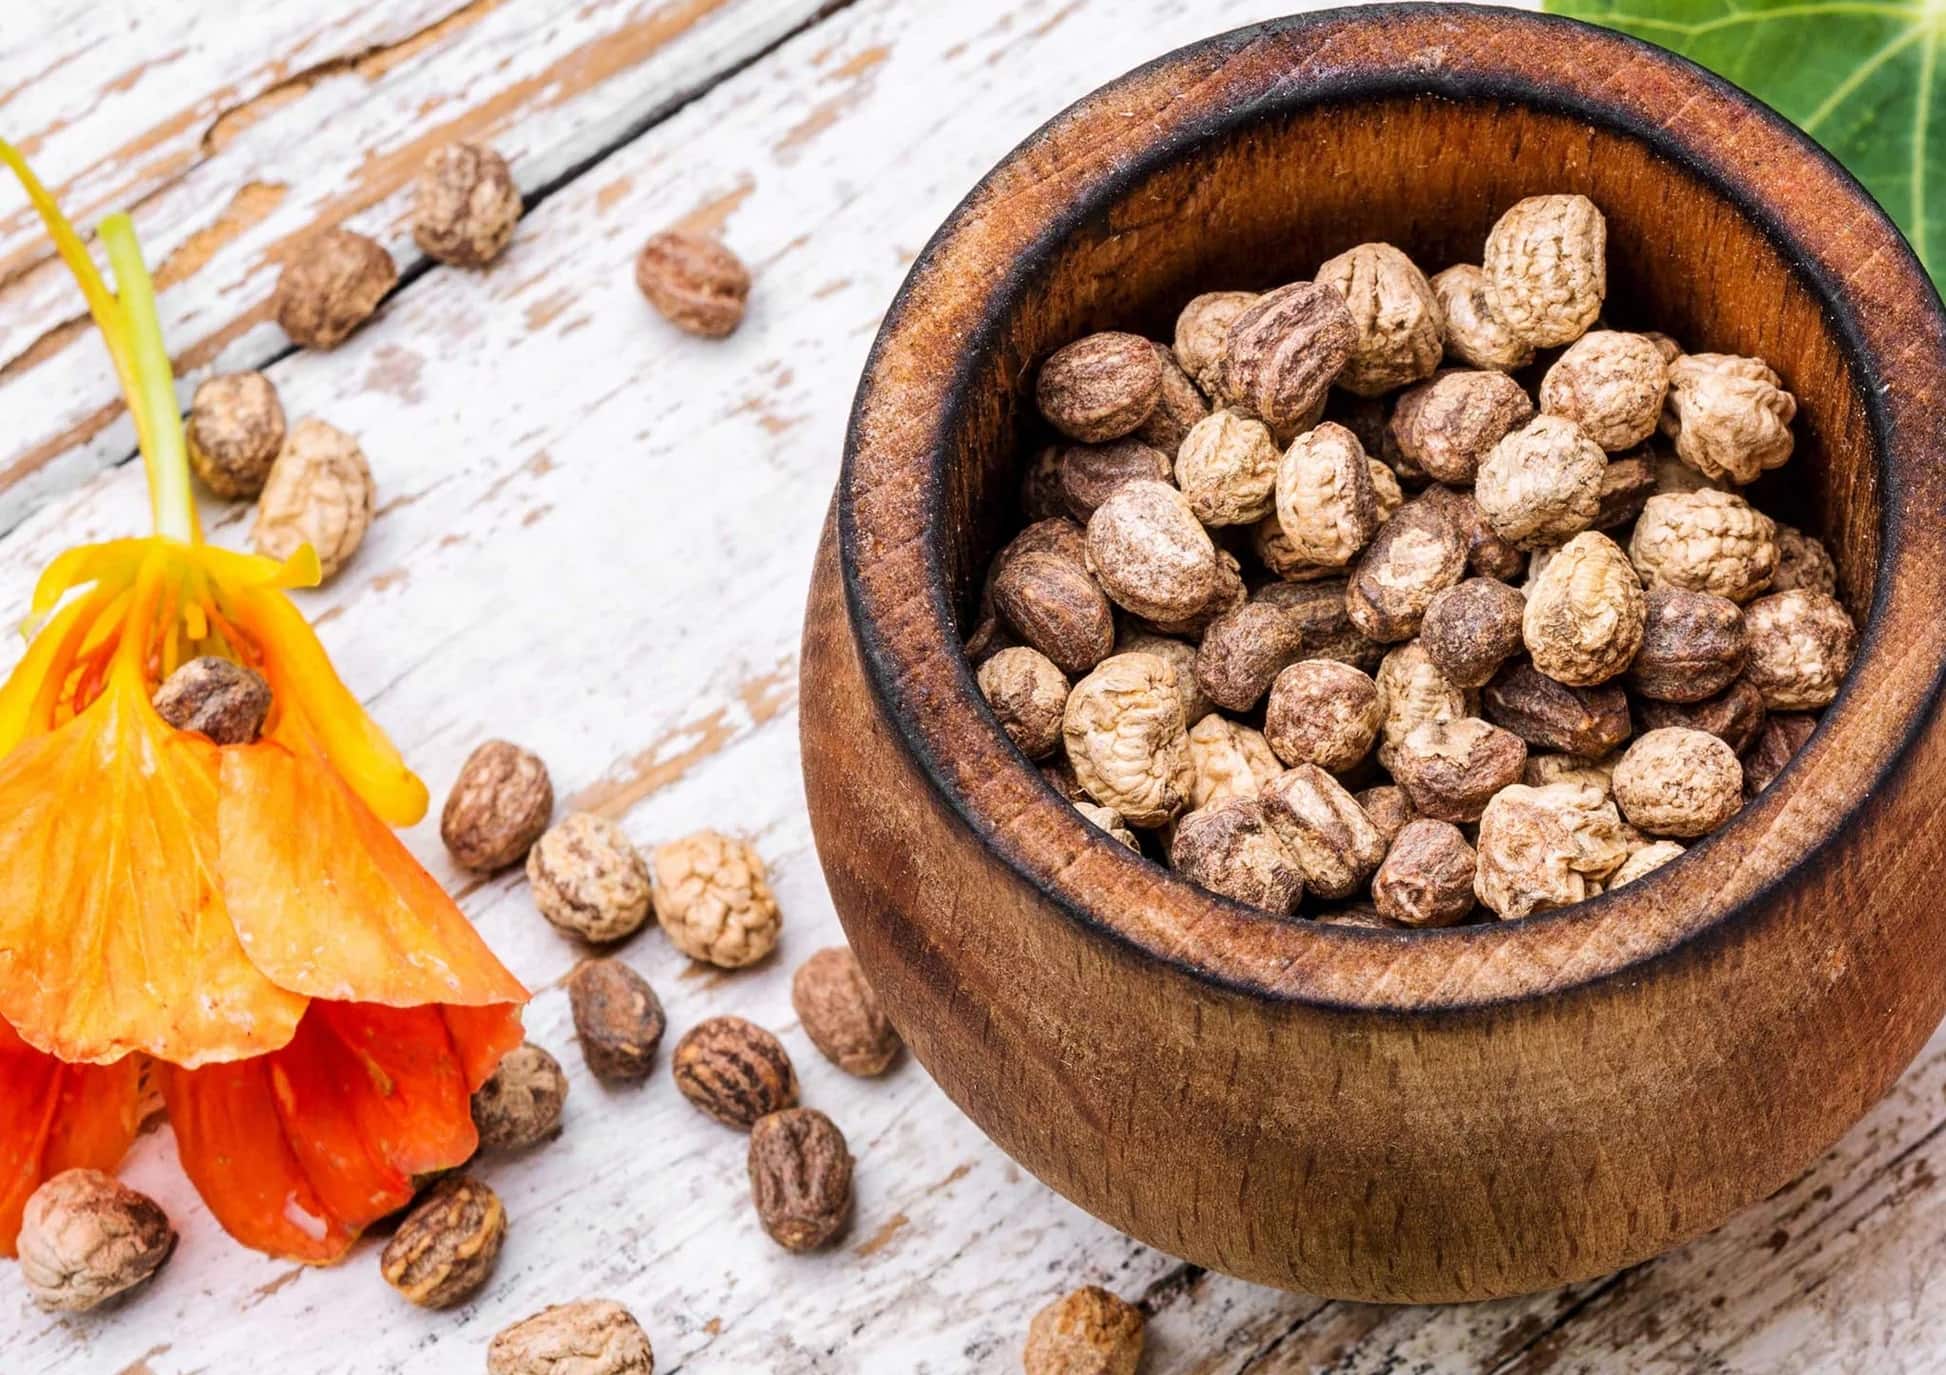
Choosing Nasturtium Seeds
When it comes to choosing nasturtium seeds, you have a plethora of options to explore. Nasturtiums come in a wide variety of colors, sizes, and even different leaf shapes. Here are some factors to consider when selecting your seeds:
- Color: Nasturtiums are known for their vibrant and eye-catching blooms. You can find seeds in shades of orange, yellow, red, and even variegated combinations. Choose colors that complement your existing garden palette or opt for a mix of different hues for a vibrant display.
- Size: Nasturtiums come in both compact and trailing varieties. Compact varieties are perfect for borders, containers, and smaller spaces, while trailing varieties can beautifully cascade over walls, hanging baskets, or trellises. Consider the available space in your garden and choose the right size accordingly.
- Leaf Shape: In addition to their colorful blooms, nasturtiums have distinctive round, shield-shaped leaves. However, some varieties come with more intricate and unique leaf shapes, such as deeply divided or variegated foliage. If you’re looking for an extra touch of visual interest, opt for these varieties.
- Heirloom or Hybrid: Nasturtium seeds are available in both heirloom and hybrid varieties. Heirloom seeds come from open-pollinated plants and have been passed down for generations, often known for their unique characteristics. Hybrid seeds, on the other hand, are bred for specific traits, such as larger blooms or disease resistance. Consider your preferences and gardening goals when deciding between the two.
When purchasing nasturtium seeds, ensure that they are fresh and have been properly stored. Look for reputable seed suppliers who have a track record of delivering high-quality seeds. If possible, opt for organic seeds to ensure a more sustainable and environmentally friendly approach to gardening.
Once you have selected your preferred nasturtium seeds, you are ready to start the exciting journey of growing these delightful plants. In the next section, we will guide you through the necessary steps of preparing the planting medium.
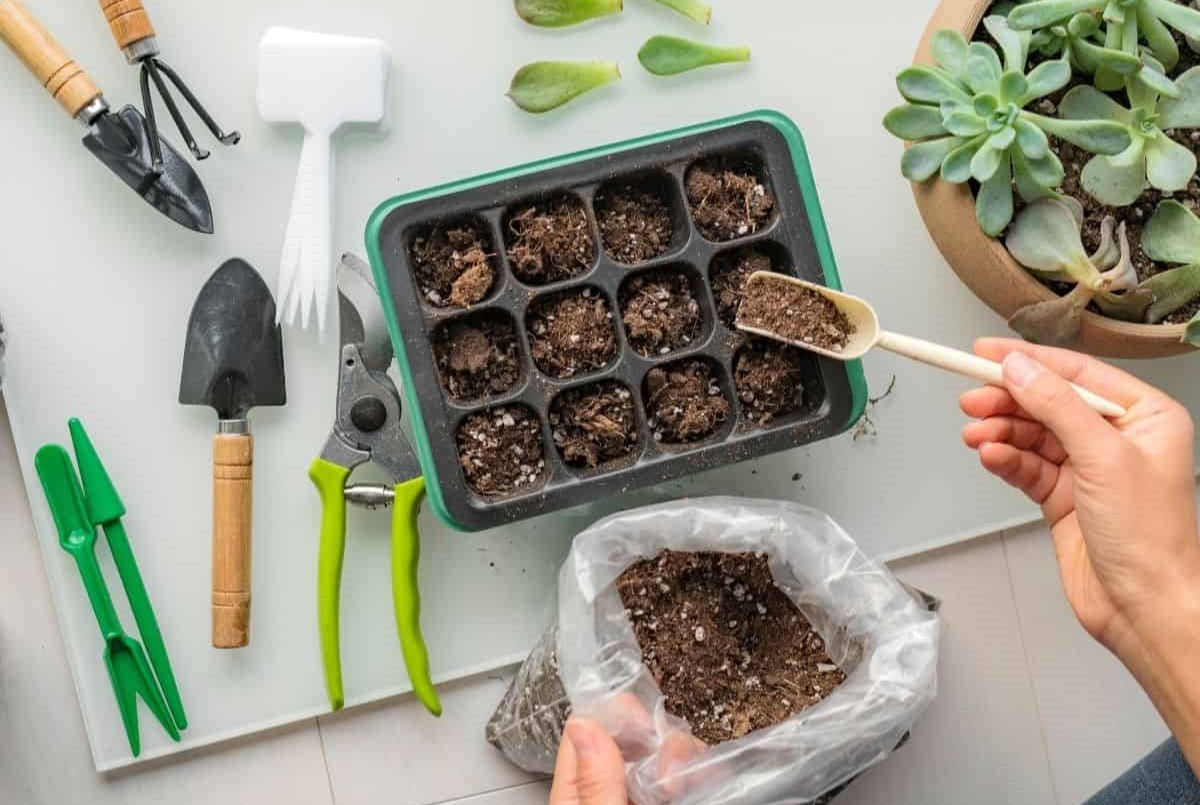
Preparing the Planting Medium
Preparing the right planting medium is crucial for the successful growth of your nasturtium seeds. Nasturtiums are not particularly fussy about soil conditions, but they do prefer well-draining, fertile soil. Here’s how you can create an optimal planting medium:
- Choose the Right Location: Nasturtiums thrive in full sun to partial shade. Select a location in your garden that receives at least 6 hours of direct sunlight per day. If you’re growing them in containers, place them in an area that offers the required amount of sunlight.
- Prepare the Soil: Start by removing any weeds, rocks, or debris from the planting area. Loosen the soil using a garden fork or tiller to improve drainage and ensure that the roots can penetrate easily. Adding organic matter, such as compost or well-rotted manure, can enhance the soil’s fertility and moisture retention.
- Amend the Soil, If Needed: Conduct a soil test to determine its pH level and nutrient content. Nasturtiums prefer slightly acidic to neutral soil, with a pH range of 6.0 to 7.0. If your soil is too acidic, you can add lime to raise the pH. Conversely, if it’s too alkaline, you can add sulfur or peat moss to lower the pH.
- Consider Container Gardening: If you have limited garden space or prefer the convenience of container gardening, you can grow nasturtiums in pots or hanging baskets. Ensure that the containers have adequate drainage holes to prevent waterlogging. Use a high-quality potting mix that is specially formulated for container plants.
- Watering Needs: Nasturtiums prefer a moderate amount of water. Once the soil is prepared, water it thoroughly before sowing the seeds. The soil should be evenly moist but not overly saturated. During dry periods, monitor the moisture levels and water whenever the top inch of soil feels dry to the touch.
By preparing the planting medium properly, you provide your nasturtium seeds with the best possible environment to germinate and grow into healthy plants. In the next section, we will guide you through the process of planting your nasturtium seeds and ensuring their proper care.
Planting Nasturtium Seeds
Now that you have prepared the planting medium, it’s time to sow your nasturtium seeds and kickstart their journey towards becoming beautiful plants. Follow these steps to ensure successful seed planting:
- Sow at the Right Time: Nasturtium seeds are typically sown directly outdoors after the danger of frost has passed. The ideal time for planting varies depending on your location and climate. Aim for spring or early summer when temperatures have warmed up, and there is no longer a risk of frost.
- Sow the Seeds: Create small furrows or holes in the prepared soil or potting mix, about 1/2 inch deep and 6 inches apart. Place the seeds in the furrow or hole, spacing them according to the recommendations on the seed packet. Gently cover the seeds with soil and pat it down lightly to ensure good seed-to-soil contact.
- Water the Seeds: After planting, water the seeds gently but thoroughly. Use a watering can or a gentle spray from a hose nozzle to avoid displacing the tiny seeds. Moistening the soil will help trigger germination and provide the necessary moisture for the seeds to sprout.
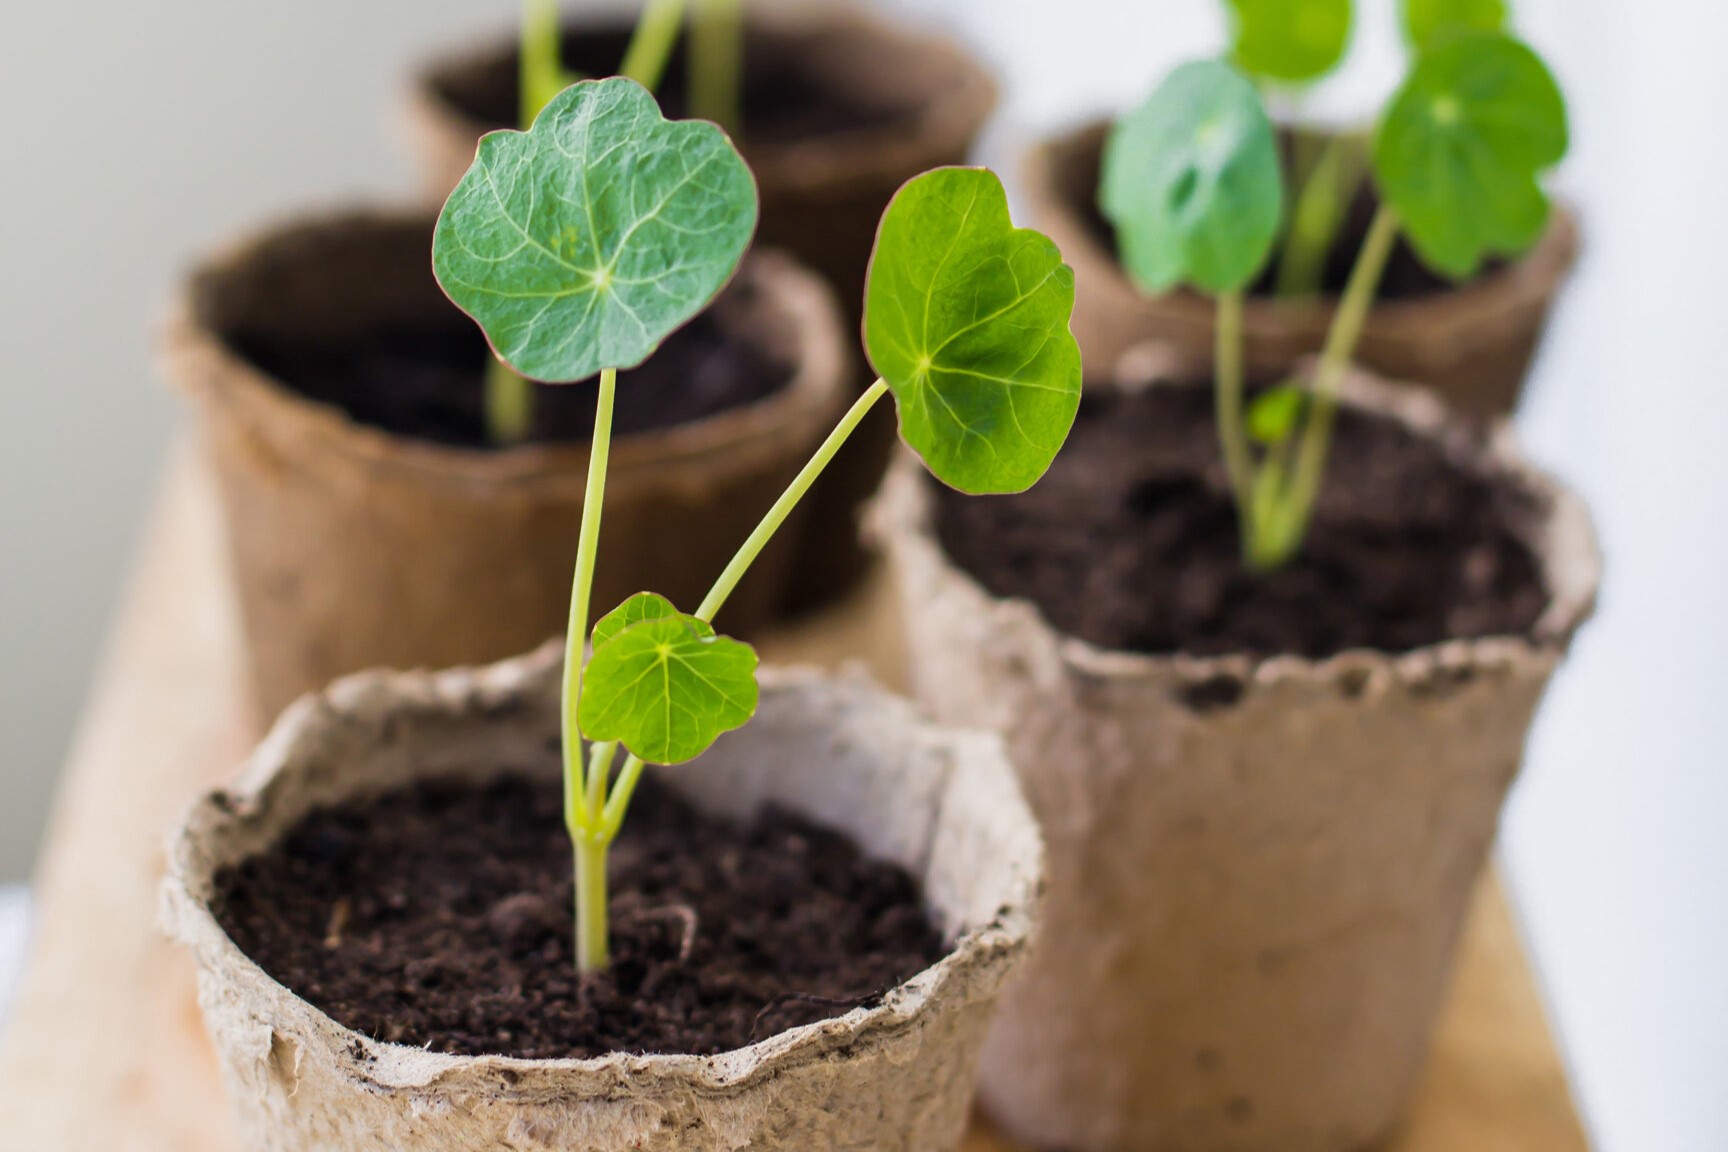
- Provide Proper Care: Nasturtium seeds usually germinate within 7-14 days, depending on the temperature and conditions. As the seedlings emerge, continue to water them regularly to keep the soil moist. Avoid overwatering, as excessive moisture can lead to fungal diseases.
- Thin Out the Seedlings: Once the seedlings have grown a few inches tall and developed their first set of true leaves, it’s time to thin them out. Remove the weakest seedlings to allow proper spacing between the remaining plants. Nasturtiums need room to spread and thrive, so aim for a spacing of about 10-12 inches between them.
Remember to label the planted area or mark the containers so that you can easily identify the seedlings as they grow. This will help you keep track of their progress and allow you to provide the necessary care and attention.
Now that your nasturtium seeds are in the ground and starting to grow, it’s important to ensure they receive proper water and light to support their development. In the next section, we will discuss how to provide optimal water and light conditions for your nasturtium seedlings.
Plant nasturtium seeds directly in well-drained soil after the last frost. Sow them 1 inch deep and 10-12 inches apart. Keep the soil moist and watch them grow!
Providing Proper Water and Light
Water and light are two essential factors for the healthy growth of nasturtium seedlings. By providing the right amount of water and ensuring they receive adequate light, you can help them thrive and reach their full potential. Here’s what you need to know:
Watering:
Nasturtiums prefer moderate watering, as they can tolerate drought to some extent. Here are some guidelines to follow when it comes to watering:
- Consistent Moisture: Maintain consistent soil moisture by watering your nasturtiums when the top inch of soil feels dry. Aim to keep the soil evenly moist, but avoid overwatering, as it can lead to root rot and other moisture-related issues.
- Deep Watering: When you water, make sure to water deeply. This encourages the roots to grow deeper into the soil and promotes healthier and more resilient plants.
- Watering in the Morning: It’s best to water your nasturtiums in the morning. This allows the foliage and soil to dry out during the day, reducing the risk of fungal diseases. Avoid watering in the evening, as moist conditions overnight can promote fungal growth.
Light Requirements:
Nasturtiums thrive in full sun to partial shade. Here’s what you need to know about providing proper light conditions:
- Full Sun: Nasturtiums perform best in full sun, which is defined as at least 6 hours of direct sunlight per day. If possible, choose a location in your garden that receives plenty of sunlight. In hotter climates, they might benefit from some afternoon shade to protect them from intense heat.
- Partial Shade: If you don’t have access to full sun, don’t worry! Nasturtiums can tolerate partial shade as well. They will still bloom and grow, but they might have slightly fewer flowers compared to those grown in full sun.
- Indoor Growing: If you’re growing nasturtiums indoors, place them near a bright window that receives direct or indirect sunlight for most of the day. You can also supplement natural light with fluorescent or LED grow lights to ensure they get enough light for healthy growth.
By providing the right amount of water and ensuring your nasturtium seedlings receive adequate light, you’ll be promoting their overall health and vigor. Next, we will discuss the importance of taking care of your nasturtium seedlings as they continue to grow and develop.
Taking Care of Nasturtium Seedlings
As your nasturtium seedlings continue to grow, they will require some care and attention to ensure they develop into healthy and beautiful plants. Here are some important care tips to keep in mind:
1. Mulch: Applying a layer of organic mulch, such as straw or wood chips, around your nasturtium seedlings can help retain soil moisture, suppress weed growth, and regulate soil temperature. Mulch also adds nutrients to the soil as it breaks down.
2. Fertilization: Nasturtiums generally don’t require heavy fertilizer applications. However, if your soil is poor in nutrients, you can use a balanced, organic fertilizer during the growing season to provide a gentle boost. Avoid over-fertilizing, as this can lead to excessive foliage growth at the expense of flowers.
3. Pinching Back: To encourage bushier growth and more prolific flowering, you can pinch back the growing tips of your nasturtium seedlings. This can be done once the plants have developed a few sets of true leaves. Pinching back promotes lateral branching and results in more abundant blooms.
4. Deadheading: Removing spent flowers, known as deadheading, helps prolong the blooming period of nasturtiums. As the flowers begin to fade and wilt, simply pinch or snip them off at the base. This prevents the plant from putting energy into producing seeds and encourages it to produce more flowers.
5. Support for Climbing Varieties: If you’re growing climbing or trailing varieties of nasturtiums, such as ‘Climbing Nasturtium’ or ‘Moonlight’, provide them with support structures such as trellises or small fences. This will help them climb and add vertical interest to your garden.
6. Pest and Disease Control: Nasturtiums are generally resistant to pests and diseases. However, they can occasionally be attacked by aphids, caterpillars, or snails. Monitor your plants regularly and take appropriate action if you notice any signs of pest damage. You can use organic pest control methods such as handpicking, insecticidal soap, or biological controls.
By following these care tips, you’ll be ensuring the health and vitality of your nasturtium seedlings as they continue to mature. In the next section, we will discuss the process of transplanting your nasturtium seedlings into their permanent growing location.
Transplanting Nasturtium Seedlings
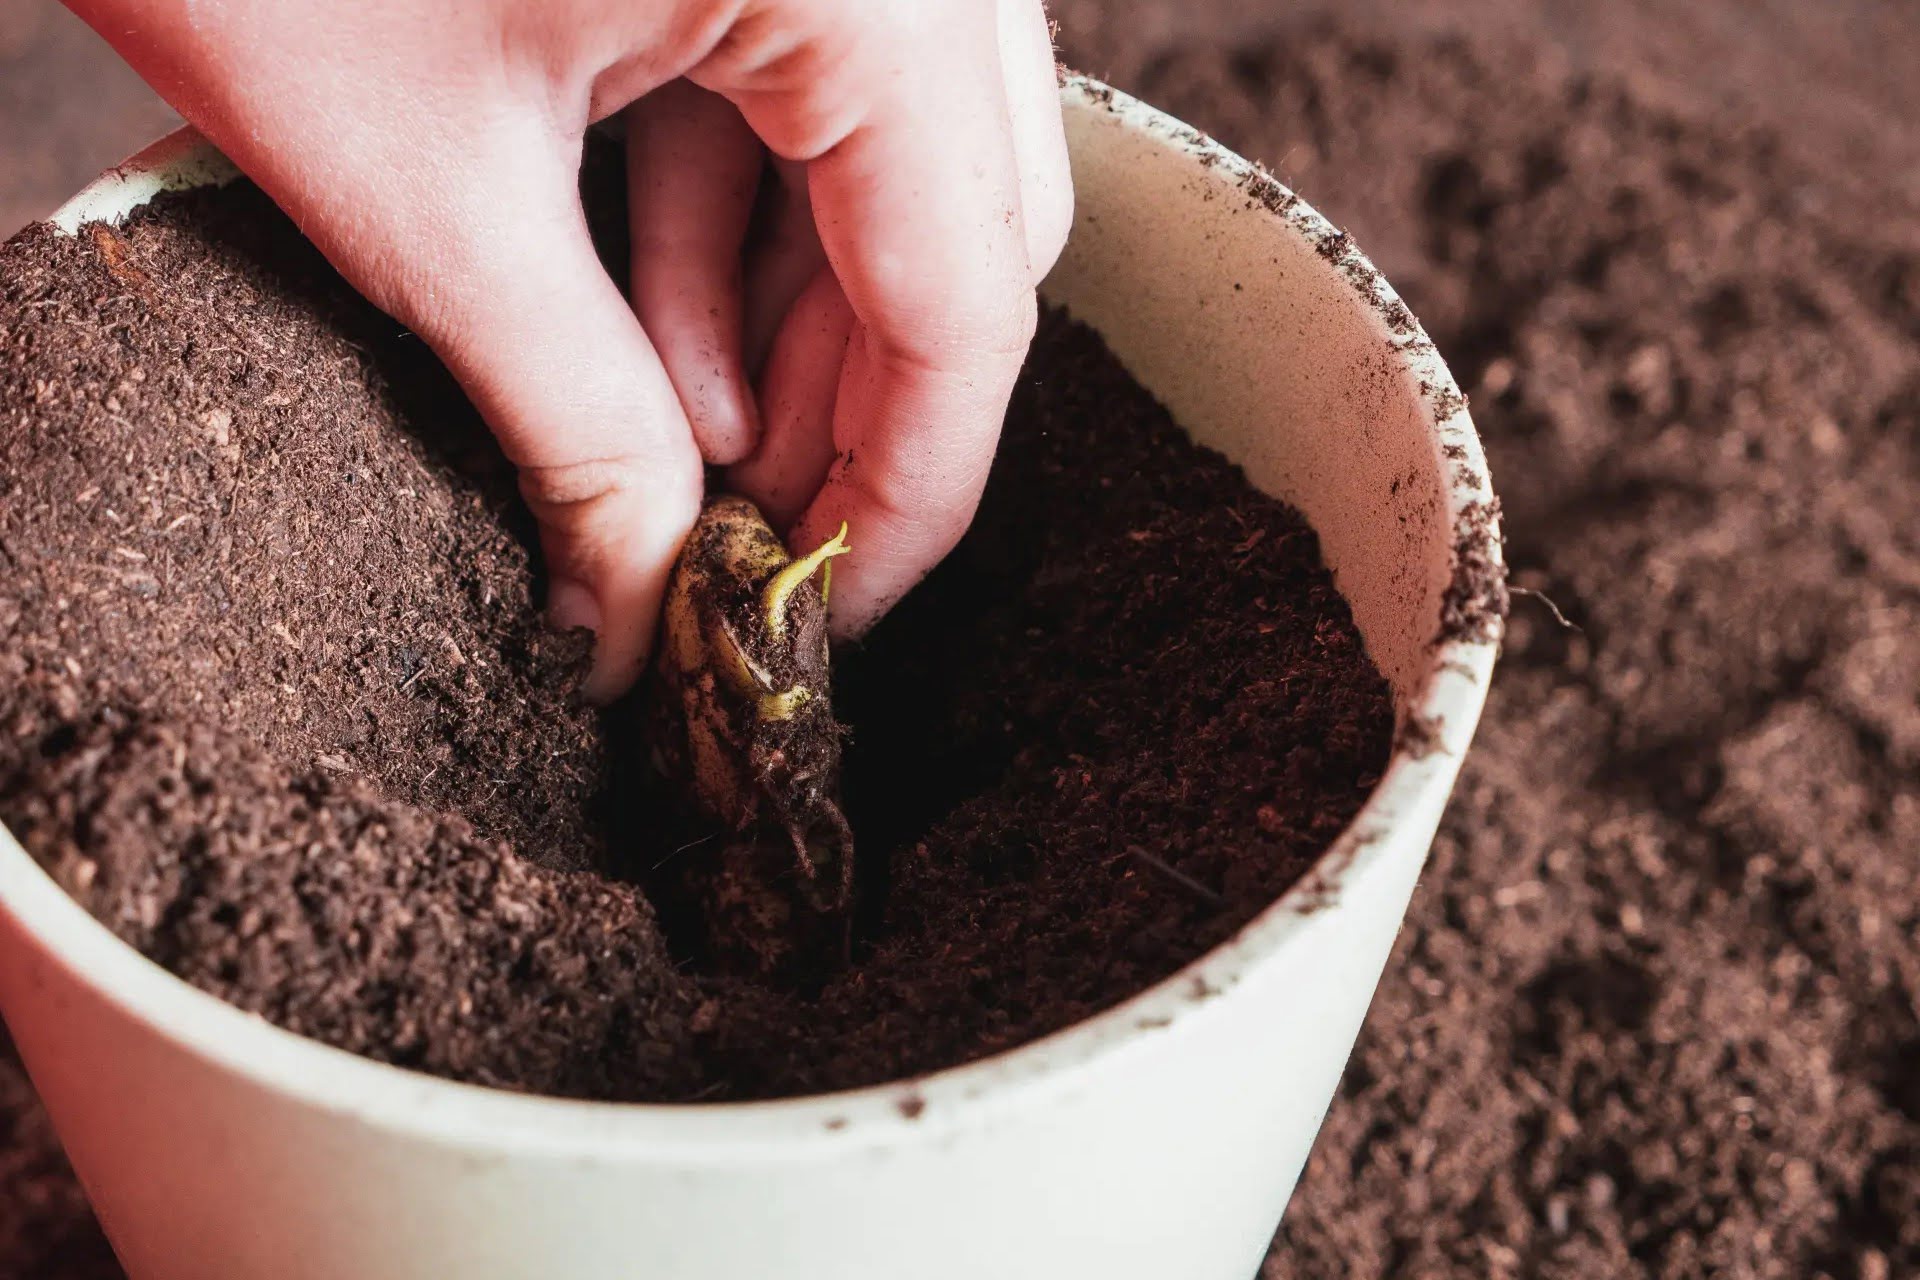
As your nasturtium seedlings grow and become stronger, it’s time to transplant them into their permanent growing location. Transplanting allows the seedlings more space to spread their roots and ensures they have optimal growing conditions. Follow these steps when transplanting your nasturtium seedlings:
- Choose the Right Timing: Transplant your nasturtium seedlings when they have developed a good root system and are at least 4-6 inches tall. Ideally, choose a cloudy day or transplant in the late afternoon to minimize stress on the seedlings.
- Prepare the Planting Holes: Dig holes in the soil that are slightly larger and deeper than the root ball of the seedlings. Space the planting holes according to the recommended spacing for the specific variety of nasturtiums you are growing.
- Remove Seedlings from Containers: Gently remove the seedlings from their containers, taking care not to damage the delicate roots. If the seedlings are in biodegradable pots, you can plant them directly into the ground without disturbing the roots.
- Place Seedlings in the Holes: Carefully place each seedling into its respective planting hole. Ensure that the soil level of the seedlings matches the level of the surrounding soil. Backfill the holes with soil and gently firm it around the seedlings.
- Water Thoroughly: After transplanting, give the seedlings a thorough watering. This helps settle the soil and provides the necessary moisture for their establishment. Water them regularly in the following weeks to help them adjust to their new surroundings.
Remember to provide adequate spacing between the transplanted seedlings to allow them room to grow and spread. The exact spacing will depend on the specific variety you are growing, so refer to the seed packet or plant label for guidance.
After transplanting, continue to care for your nasturtium plants as mentioned earlier, including regular watering, mulching, and fertilizing if needed. With proper care and attention, your transplanted nasturtium seedlings will continue to thrive and reward you with vibrant blossoms.
Now that you have learned the process of transplanting, it’s time to sit back, relax, and enjoy the upcoming blossoms and beauty of your nasturtium plants! In the final section, we will wrap up with some closing thoughts.
Final Thoughts
Congratulations on successfully starting and growing your nasturtium seeds! By now, you should have a garden filled with vibrant flowers and lush foliage, adding life and beauty to your outdoor space. But the journey doesn’t end here—nasturtiums require ongoing care to continue thriving and blooming. Here are a few final thoughts to keep in mind:
Enjoy the Blooms: Take moments to simply enjoy the beauty and vibrancy of your nasturtium flowers. Whether they’re adorning your garden beds, containers, or trellises, their colorful and cheerful blooms will bring joy and delight to both you and any visitors to your garden.
Harvest and Enjoy the Edible Parts: Remember that nasturtium flowers and leaves are not just visually appealing but also edible. Add the peppery flavored blooms to salads, use them as decorative garnishes, or infuse them in vinegars and oils. The leaves can also be used in salads or as an alternative to basil in pesto recipes.
Save Seeds for Next Year: Nasturtiums are relatively easy to save seeds from. Allow some of the flowers to mature and form seed pods. Once the pods have dried and turned brown, carefully collect the seeds and store them in a cool, dry place for next year’s planting.
Experiment and Have Fun: Gardening is a creative endeavor, so don’t be afraid to experiment and try new things with your nasturtiums. Mix different colors, grow them in unique containers, or train them to climb up an arbor or trellis. Let your imagination soar and have fun with your gardening journey.
Remember, gardening is not only about the end result but also about the process and the joy it brings. Take the time to connect with nature, appreciate the small miracles of growth, and experience the therapeutic benefits of nurturing plants.
With their vibrant blooms, pest-repelling properties, and culinary potential, nasturtiums are truly versatile and delightful additions to any garden. By following the steps outlined in this article and providing them with the care they need, you’re on your way to a garden filled with these charming and beneficial plants.
So get out there, get your hands dirty, and watch your nasturtiums thrive and enchant you throughout the growing season. Happy gardening!
Frequently Asked Questions about How To Start Nasturtium Seeds
Was this page helpful?
At Storables.com, we guarantee accurate and reliable information. Our content, validated by Expert Board Contributors, is crafted following stringent Editorial Policies. We're committed to providing you with well-researched, expert-backed insights for all your informational needs.


0 thoughts on “How To Start Nasturtium Seeds”