Home>Gardening & Outdoor>Outdoor Entertaining>How To Build A Picnic Table From Pallets
Outdoor Entertaining
How To Build A Picnic Table From Pallets
Modified: August 16, 2024
Learn how to create a budget-friendly picnic table for outdoor entertaining using pallets. Follow our step-by-step guide. Perfect for DIY enthusiasts!
(Many of the links in this article redirect to a specific reviewed product. Your purchase of these products through affiliate links helps to generate commission for Storables.com, at no extra cost. Learn more)
Introduction
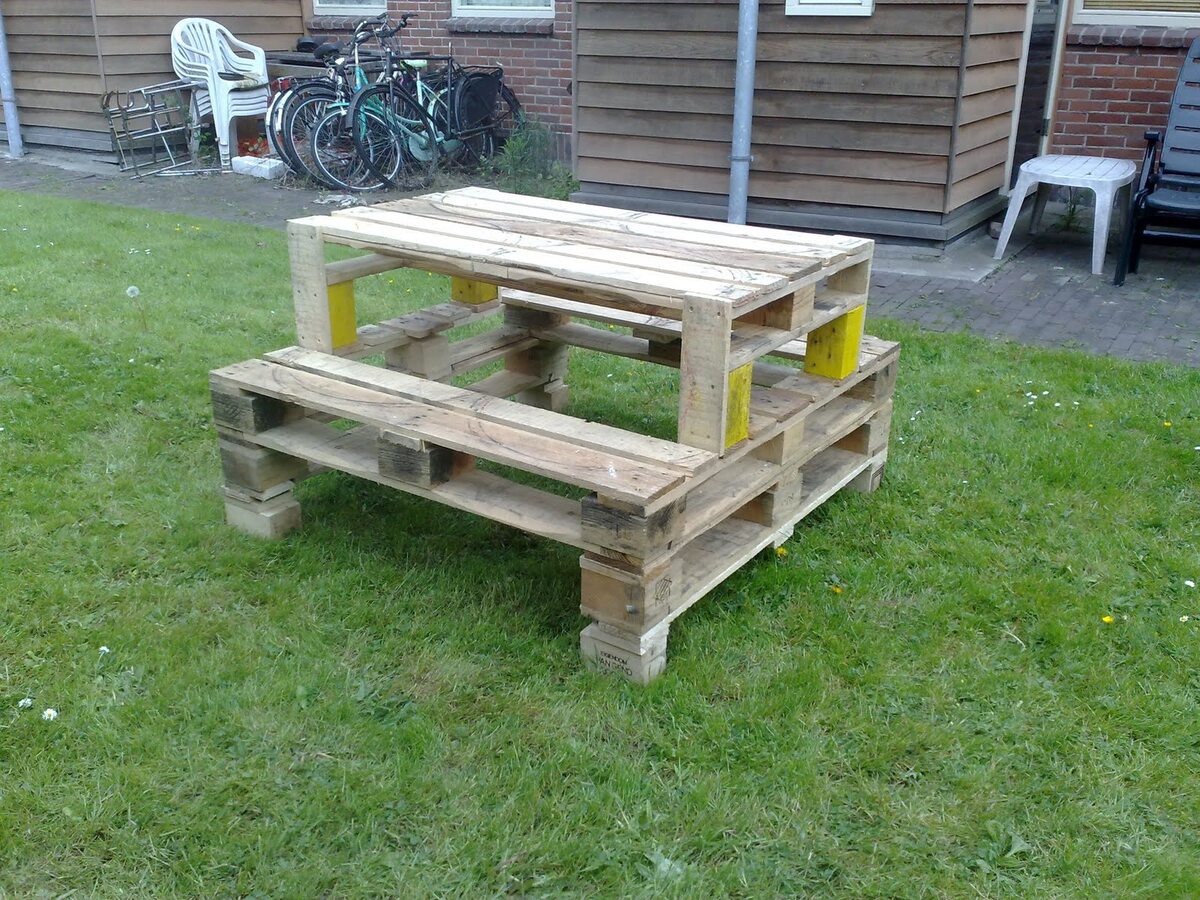
Are you looking to add a touch of rustic charm to your outdoor entertaining space? Building a picnic table from pallets can be a rewarding and budget-friendly DIY project that not only provides a functional outdoor dining area but also repurposes materials in an eco-friendly manner. Pallets, often discarded as waste, can be transformed into a beautiful and sturdy picnic table with a little creativity and effort.
In this guide, we will walk you through the step-by-step process of building a picnic table from pallets, providing you with the knowledge and inspiration to embark on this fulfilling project. From disassembling the pallets to sanding and finishing the table, we will cover each stage in detail, ensuring that you have all the information you need to create a stunning piece of outdoor furniture. So, roll up your sleeves, gather your tools, and let's dive into the world of pallet-based DIY craftsmanship!
Key Takeaways:
- Transform discarded pallets into a charming picnic table with basic tools and careful craftsmanship. Enjoy eco-friendly outdoor dining while showcasing your DIY skills and commitment to sustainability.
- Embrace the joy of creating a functional and beautiful picnic table from reclaimed pallets. Elevate your outdoor space with a unique, handcrafted centerpiece for memorable gatherings and sustainable living.
Read more: How To Build A Wood Tool Shed From Pallets
Materials Needed
Before diving into the construction process, it’s essential to gather all the necessary materials. Here’s a list of items you’ll need to build a picnic table from pallets:
- Pallets: Look for sturdy, undamaged pallets in good condition. The number of pallets required will depend on the size of the table you plan to build.
- Decking Screws: Opt for corrosion-resistant screws of appropriate length to secure the pallet boards.
- Wood Sealant or Stain: Choose a sealant or stain suitable for outdoor use to protect the table from the elements.
- Wood Preservative: To enhance the longevity of your picnic table, consider using a wood preservative to protect the pallet wood from rot and decay.
- Paintbrushes or Rollers: These will be needed for applying the wood sealant, stain, or preservative.
- Sandpaper: Invest in coarse and fine-grit sandpaper for smoothing the wood surfaces and removing splinters.
- Measuring Tape: Accurate measurements are crucial for ensuring the table’s stability and proportion.
- Sawhorses: These provide a stable platform for cutting the pallets and assembling the table.
- Protective Gear: Safety goggles, work gloves, and a dust mask are essential for personal protection during the construction process.
By ensuring you have all the necessary materials on hand, you can streamline the construction process and minimize interruptions, allowing you to focus on the creative aspects of building your picnic table.
Tools Required
Equipping yourself with the right tools is crucial for a successful pallet-to-picnic-table transformation. Here’s a list of essential tools you’ll need for this project:
- Power Drill: A versatile tool for driving screws and creating holes, a power drill will be indispensable throughout the construction process.
- Circular Saw or Reciprocating Saw: You’ll need a saw for cutting the pallets to the desired dimensions. A circular saw or reciprocating saw will make this task more manageable.
- Hammer: A basic but essential tool for disassembling pallets and making minor adjustments during assembly.
- Clamps: These will come in handy for securing the pallets in place during cutting and assembly.
- Screwdriver Set: Ensure you have a variety of screwdriver types and sizes to accommodate different screws.
- Paintbrushes or Rollers: These will be necessary for applying wood sealant, stain, or preservative to protect the table from the elements.
- Sandpaper or Electric Sander: To achieve a smooth and splinter-free finish, you’ll need sandpaper or an electric sander for the tabletop and bench surfaces.
- Square: A square is essential for ensuring accurate right angles during the assembly process.
- Workbench or Sawhorses: A stable work surface is crucial for cutting pallets and assembling the table.
By having these tools at your disposal, you’ll be well-prepared to tackle each stage of the construction process efficiently and effectively. With the right tools and a can-do attitude, you’re ready to bring your vision of a pallet picnic table to life.
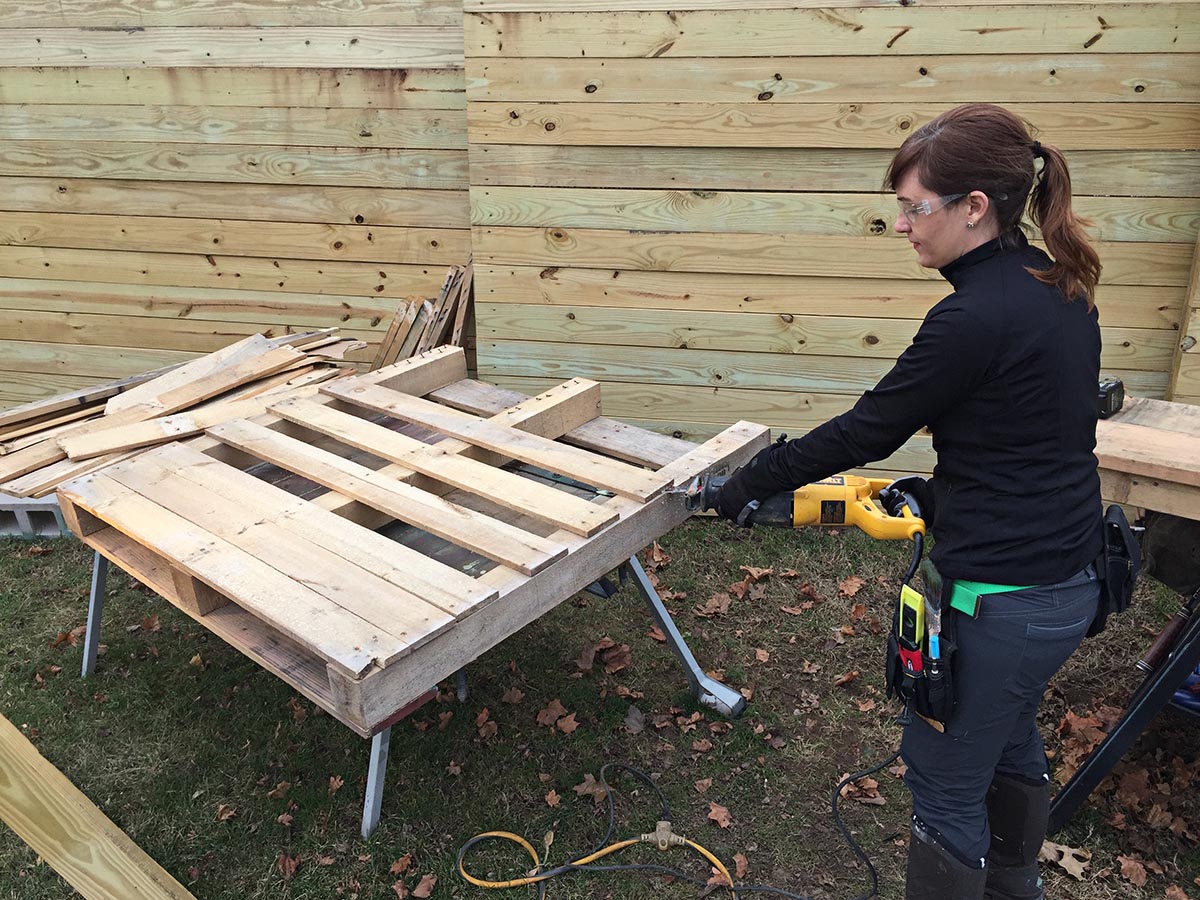
Step 1: Disassembling the Pallets
Before you can begin constructing your picnic table, you’ll need to disassemble the pallets to obtain the individual wooden planks. This process requires patience and care to ensure that the wood remains intact and usable for the table’s construction. Follow these steps to disassemble the pallets:
- Gather Your Tools: Equip yourself with a hammer, pry bar, and work gloves. The gloves will protect your hands from splinters and nails, while the hammer and pry bar will aid in separating the pallet components.
- Secure the Pallet: Place the pallet on a stable work surface or sawhorses to prevent it from moving during disassembly.
- Remove the Nails: Using the hammer and pry bar, carefully remove the nails securing the planks to the pallet frame. Work methodically to avoid damaging the wood.
- Separate the Planks: Once the nails have been removed, gently pry the individual planks away from the pallet frame. Take care not to force the wood, as excessive pressure can cause splintering or breakage.
- Inspect the Wood: After removing the planks, inspect each piece for damage, such as splits or cracks. Set aside any unusable planks and retain the ones in good condition for the table construction.
By carefully disassembling the pallets and salvaging the wooden planks, you’ll be one step closer to repurposing the material into a unique and environmentally friendly picnic table. Remember to exercise caution during the disassembly process to ensure the safety of both yourself and the wood you’re working with.
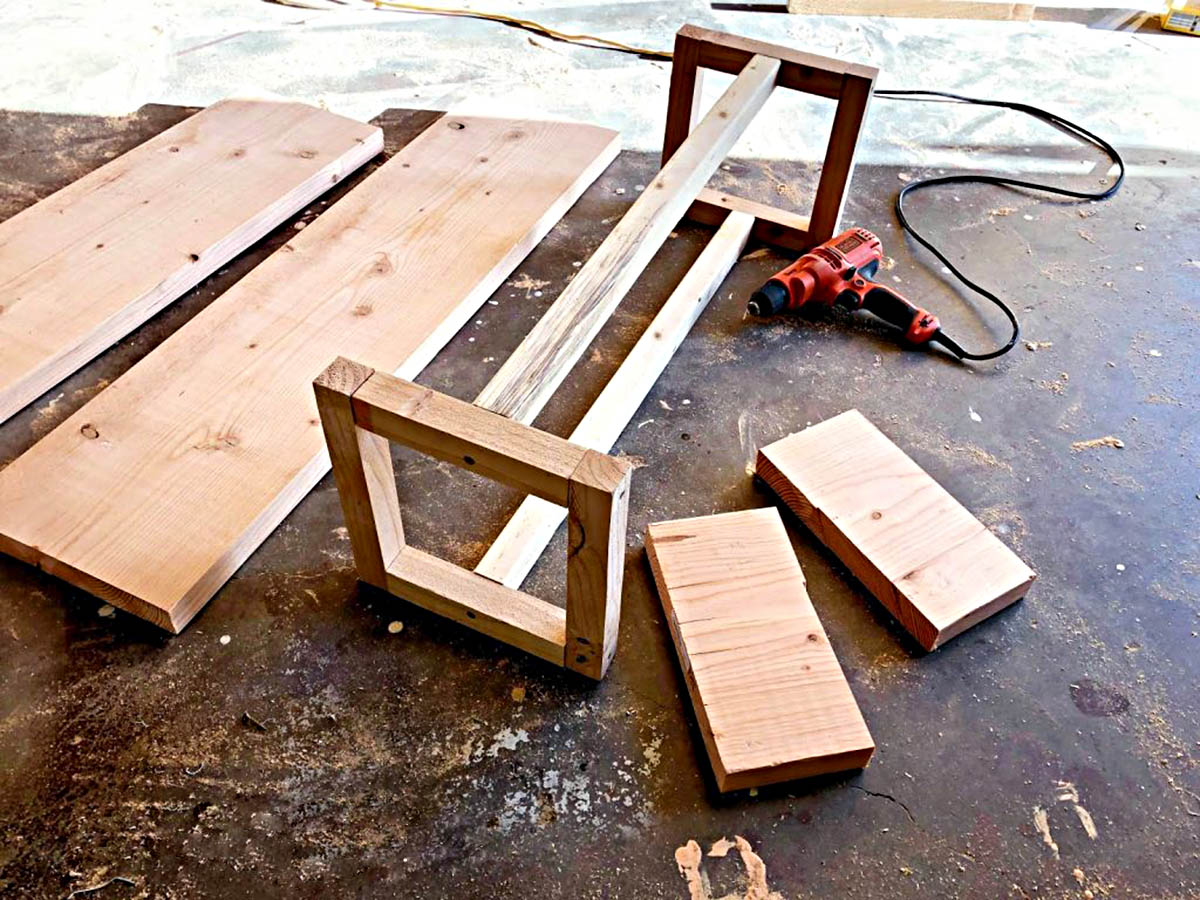
Step 2: Cutting the Pallets
With the pallets disassembled, it’s time to cut the wooden planks to the required dimensions for constructing the tabletop and bench seats of your picnic table. This step involves precision and attention to detail to ensure that the components fit together seamlessly. Follow these guidelines for cutting the pallet wood:
- Measure and Mark: Using a measuring tape and pencil, mark the dimensions for the tabletop and bench seats on the wooden planks. Double-check your measurements to ensure accuracy.
- Set Up Your Work Area: Secure the planks on a stable work surface or sawhorses, ensuring that they are firmly held in place to prevent movement during cutting.
- Use a Saw: Employ a circular saw or reciprocating saw to cut along the marked lines, dividing the planks into the individual pieces required for the tabletop and bench seats.
- Smooth the Edges: After cutting the planks, use sandpaper or an electric sander to smooth the edges and remove any rough or jagged areas. This will enhance the overall appearance and safety of the table.
By carefully measuring, marking, and cutting the pallet wood, you’ll create the foundational components for your picnic table. Precision in this step is essential for ensuring that the tabletop and bench seats fit together seamlessly during assembly, resulting in a professional-looking and functional piece of outdoor furniture.
When building a picnic table from pallets, make sure to sand down the wood to remove any rough edges or splinters. This will make the table safer and more comfortable to use.
Read more: How To Build A Picnic Style Dining Table
Step 3: Assembling the Tabletop
Assembling the tabletop is a pivotal stage in the construction of your pallet-based picnic table. This step involves arranging the cut wooden planks to form a sturdy and visually appealing surface for dining and socializing. Follow these steps to assemble the tabletop with precision and care:
- Arrange the Planks: Lay out the cut wooden planks on a flat and spacious work surface, ensuring that they are positioned side by side in the desired configuration for the tabletop.
- Ensure Alignment: Check that the planks are aligned evenly, with minimal gaps between them. Make any necessary adjustments to achieve a uniform and balanced layout.
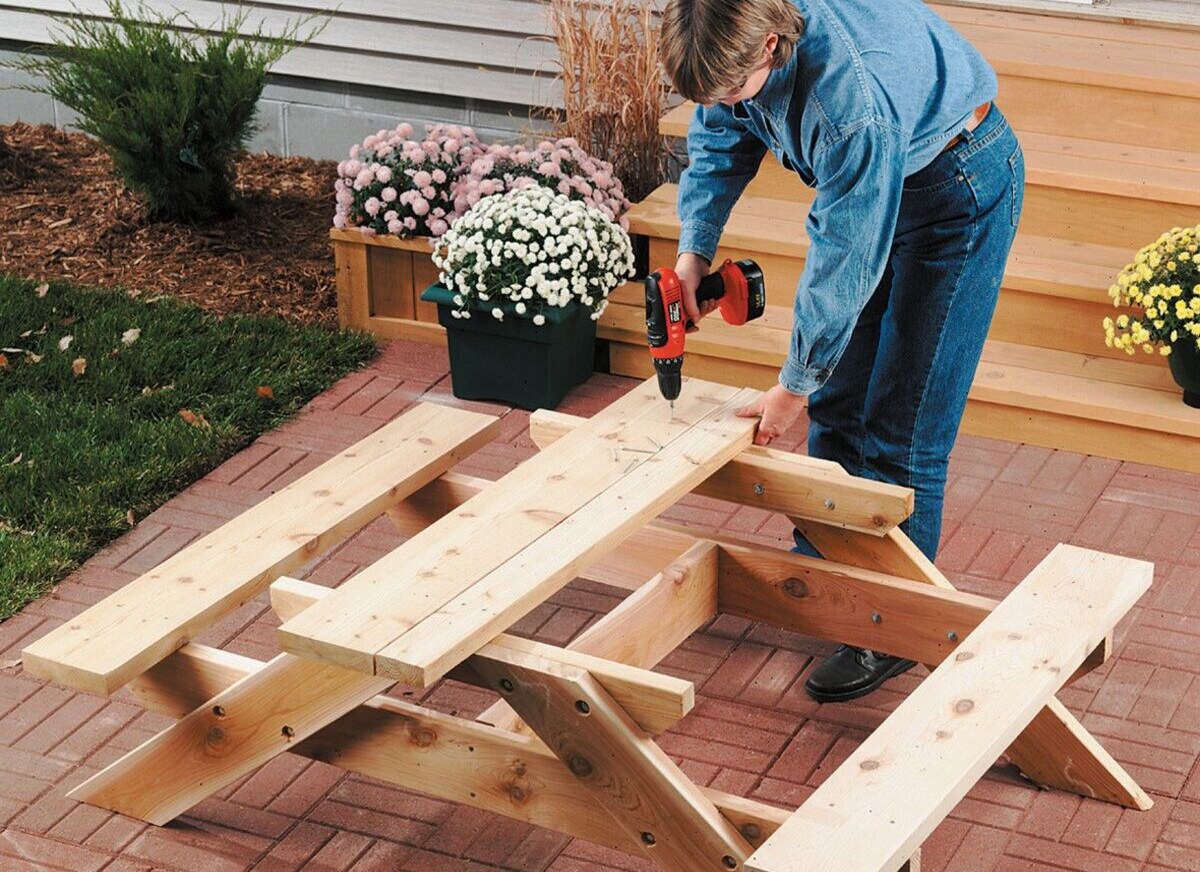
- Secure the Planks: Using decking screws and a power drill, fasten the planks together from underneath to create a cohesive tabletop. Position the screws at regular intervals along the length of each plank to ensure stability.
- Reinforce the Underside: To further strengthen the tabletop, consider attaching additional support beams or braces underneath the planks. This will enhance the table’s durability and weight-bearing capacity.
By following these steps, you’ll transform the individual wooden planks into a robust and visually appealing tabletop for your picnic table. Attention to detail and precision during the assembly process will contribute to the table’s overall stability and aesthetic appeal, setting the stage for enjoyable outdoor gatherings and meals.
Step 4: Building the Table Base
The table base serves as the foundation for your pallet picnic table, providing stability and support for the tabletop and seating. Constructing a sturdy and well-balanced base is essential for ensuring the functionality and longevity of the table. Follow these steps to build the table base with precision and attention to detail:
- Prepare the Pallet Components: Select additional pallet components, such as beams or larger sections of wood, to serve as the legs and supports for the table base. Ensure that these pieces are in good condition and free from damage.
- Measure and Cut: Determine the appropriate dimensions for the table legs and supports, marking the pallet components accordingly. Use a saw to cut the wood to the required lengths, ensuring uniformity for a balanced appearance.
- Assemble the Base Structure: Position the cut pallet components to form the structure of the table base, ensuring that the legs are securely attached to the tabletop and the supports provide stability and reinforcement.
- Secure the Components: Utilize decking screws and a power drill to fasten the base components together, creating a robust and well-anchored foundation for the picnic table.
- Check for Stability: Test the stability and levelness of the table base, making any necessary adjustments to ensure that it provides a solid and secure platform for the tabletop and seating.
By following these steps, you’ll construct a reliable and well-proportioned base for your pallet picnic table, laying the groundwork for a functional and aesthetically pleasing outdoor dining and gathering space. Attention to detail and a focus on structural integrity will contribute to the table’s overall strength and durability.
Step 5: Sanding and Finishing
Once the structural components of your pallet picnic table are in place, it’s time to focus on refining the surface and enhancing the overall appearance of the table. Sanding and finishing the wood will not only contribute to the table’s visual appeal but also ensure a smooth and splinter-free surface for comfortable use. Follow these steps to sand and finish your picnic table with care and attention to detail:
- Sand the Wood Surfaces: Use coarse-grit sandpaper or an electric sander to smooth the tabletop, bench seats, and any exposed wooden components of the table base. Pay attention to the edges and corners, ensuring that all surfaces are free from roughness and splinters.
- Transition to Fine-Grit Sandpaper: After addressing any imperfections with coarse-grit sandpaper, switch to fine-grit sandpaper to achieve a polished and refined finish. This step will enhance the tactile comfort and visual appeal of the table.
- Apply Wood Sealant or Stain: Choose a high-quality wood sealant or stain suitable for outdoor use, and apply it to the sanded surfaces of the picnic table using a paintbrush or roller. Ensure even coverage, and follow the manufacturer’s instructions for drying and curing times.
- Consider Wood Preservative: To further protect the table from the elements and prolong its lifespan, consider applying a wood preservative to the untreated areas of the pallet wood. This additional step can safeguard the table against rot and decay.
- Final Inspection: Once the sealant, stain, and preservative have dried, inspect the table for any touch-ups or additional finishing touches. Address any areas that may require further attention to achieve a flawless and professional finish.
By meticulously sanding and finishing your pallet picnic table, you’ll elevate its aesthetic appeal and ensure that it provides a safe and inviting outdoor dining experience. The combination of smooth, sealed surfaces and protective treatments will contribute to the table’s resilience and longevity, allowing you to enjoy it for years to come.
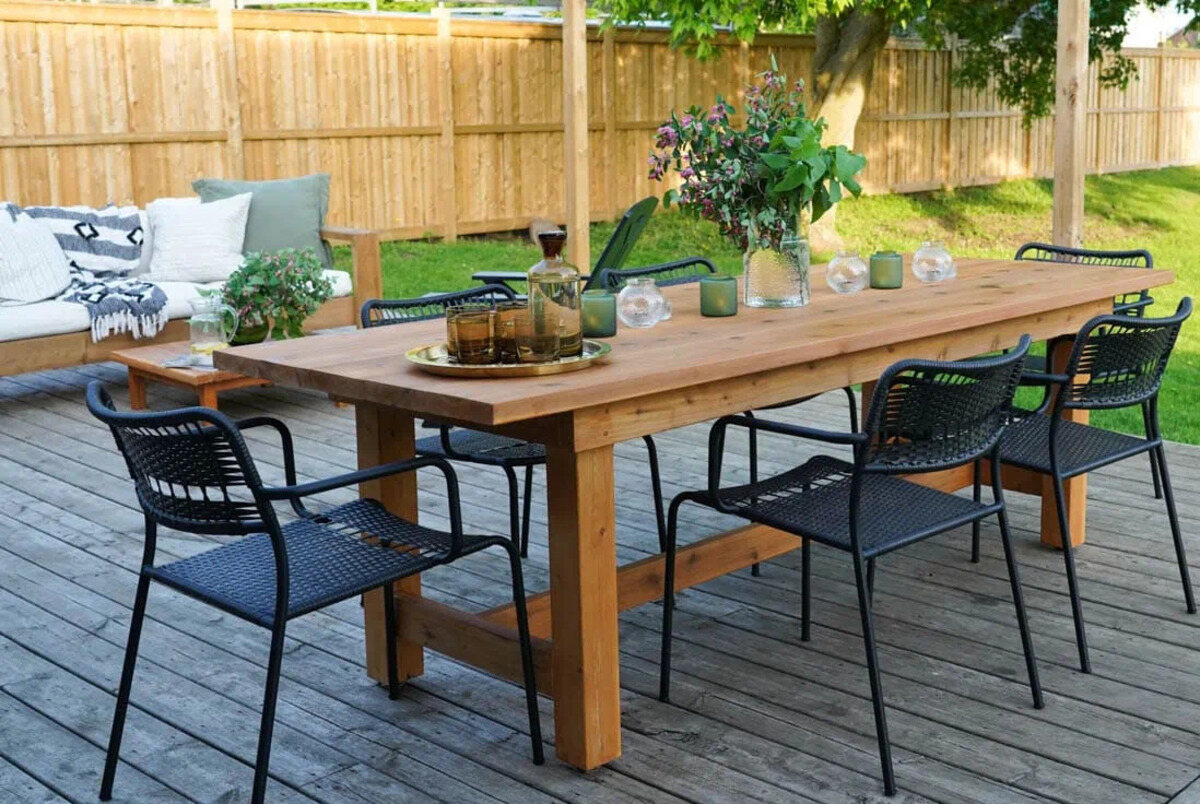
Conclusion
Congratulations on successfully completing the construction of your very own picnic table from pallets! This eco-friendly and cost-effective DIY project has not only provided you with a unique piece of outdoor furniture but has also allowed you to repurpose materials in a creative and sustainable manner. As you admire your handiwork, envision the delightful gatherings and memorable meals that will take place around this one-of-a-kind table.
By disassembling, cutting, and assembling the pallets with precision and care, you’ve transformed reclaimed wood into a functional and visually appealing picnic table. The attention to detail in building the table base, along with the meticulous sanding and finishing process, has resulted in a durable and inviting outdoor dining space that reflects your craftsmanship and dedication.
As you place the finishing touches on your newly constructed picnic table, consider the joy and satisfaction that comes from creating a practical and beautiful piece of furniture with your own hands. This project not only enhances your outdoor entertaining area but also serves as a testament to your resourcefulness and commitment to sustainable living.
Whether you’re hosting a casual outdoor brunch, a family barbecue, or a relaxing afternoon tea, your pallet picnic table will be at the center of cherished moments and meaningful connections. Embrace the versatility and charm of this handmade creation, and revel in the knowledge that you’ve contributed to both the functionality and the aesthetics of your outdoor space.
As you embark on future DIY endeavors, may the experience of building a picnic table from pallets inspire you to explore further opportunities for creativity, sustainability, and hands-on craftsmanship. Your newfound skills and the sense of accomplishment derived from this project will undoubtedly fuel your passion for transforming raw materials into practical and beautiful creations.
With your pallet picnic table standing as a testament to your ingenuity and dedication, you’re now poised to savor the pleasures of outdoor dining and entertainment in a space that truly reflects your personal touch and commitment to sustainable living.
Frequently Asked Questions about How To Build A Picnic Table From Pallets
Was this page helpful?
At Storables.com, we guarantee accurate and reliable information. Our content, validated by Expert Board Contributors, is crafted following stringent Editorial Policies. We're committed to providing you with well-researched, expert-backed insights for all your informational needs.


0 thoughts on “How To Build A Picnic Table From Pallets”