Home>Home Security and Surveillance>How To Install MIPC Outdoor Camera
Home Security and Surveillance
How To Install MIPC Outdoor Camera
Modified: September 1, 2024
Increase your home security and surveillance with our step-by-step guide on how to install the MIPC Outdoor Camera. Ensure the safety of your property with this easy-to-use and reliable device.
(Many of the links in this article redirect to a specific reviewed product. Your purchase of these products through affiliate links helps to generate commission for Storables.com, at no extra cost. Learn more)
Introduction
Welcome to our guide on how to install an MIPC outdoor camera. In today’s fast-paced world, security and surveillance have become essential components of any home. Whether it’s monitoring your property, deterring criminal activity, or keeping an eye on your loved ones, having a reliable outdoor camera system can provide you with peace of mind and enhance the safety of your premises.
The MIPC outdoor camera is a popular choice among homeowners due to its advanced features and user-friendly interface. With its high-resolution video capabilities, night vision, and remote monitoring capability via the MIPC mobile app, this camera is designed to meet the demands of modern home security. By following our step-by-step guide, you’ll be able to install and set up your MIPC outdoor camera with ease.
Before we dive into the installation process, it’s important to gather all the necessary equipment. This includes the MIPC outdoor camera itself, a power supply, an Ethernet cable (optional), a screwdriver, a ladder, and any additional mounting hardware that may be required based on your installation location.
Once you have everything ready, we’ll guide you through the installation process, from choosing the right location to configuring the camera settings. So let’s get started and ensure your home is equipped with top-notch security and surveillance.
Key Takeaways:
- Installing an MIPC outdoor camera is a breeze with our step-by-step guide. From choosing the right location to testing its functionality, you’ll have peace of mind and enhanced security for your home.
- By following our guide, you can easily set up your MIPC outdoor camera and enjoy features like motion detection, remote monitoring, and clear video quality. Stay safe and secure with this reliable surveillance solution.
Read more: How To Install A Vivint Outdoor Camera
Step-by-Step Guide
Installing an MIPC outdoor camera may seem daunting, but with our step-by-step guide, you’ll have it up and running in no time. Follow these instructions carefully to ensure a successful installation:
- Gather Required Equipment: Before you begin, gather all the necessary equipment mentioned in the introduction.
- Choose and Prepare Installation Location: Select an optimal location for the camera, keeping in mind the areas you want to monitor and any structural limitations. Ensure that the mounting surface is sturdy and can support the weight of the camera.
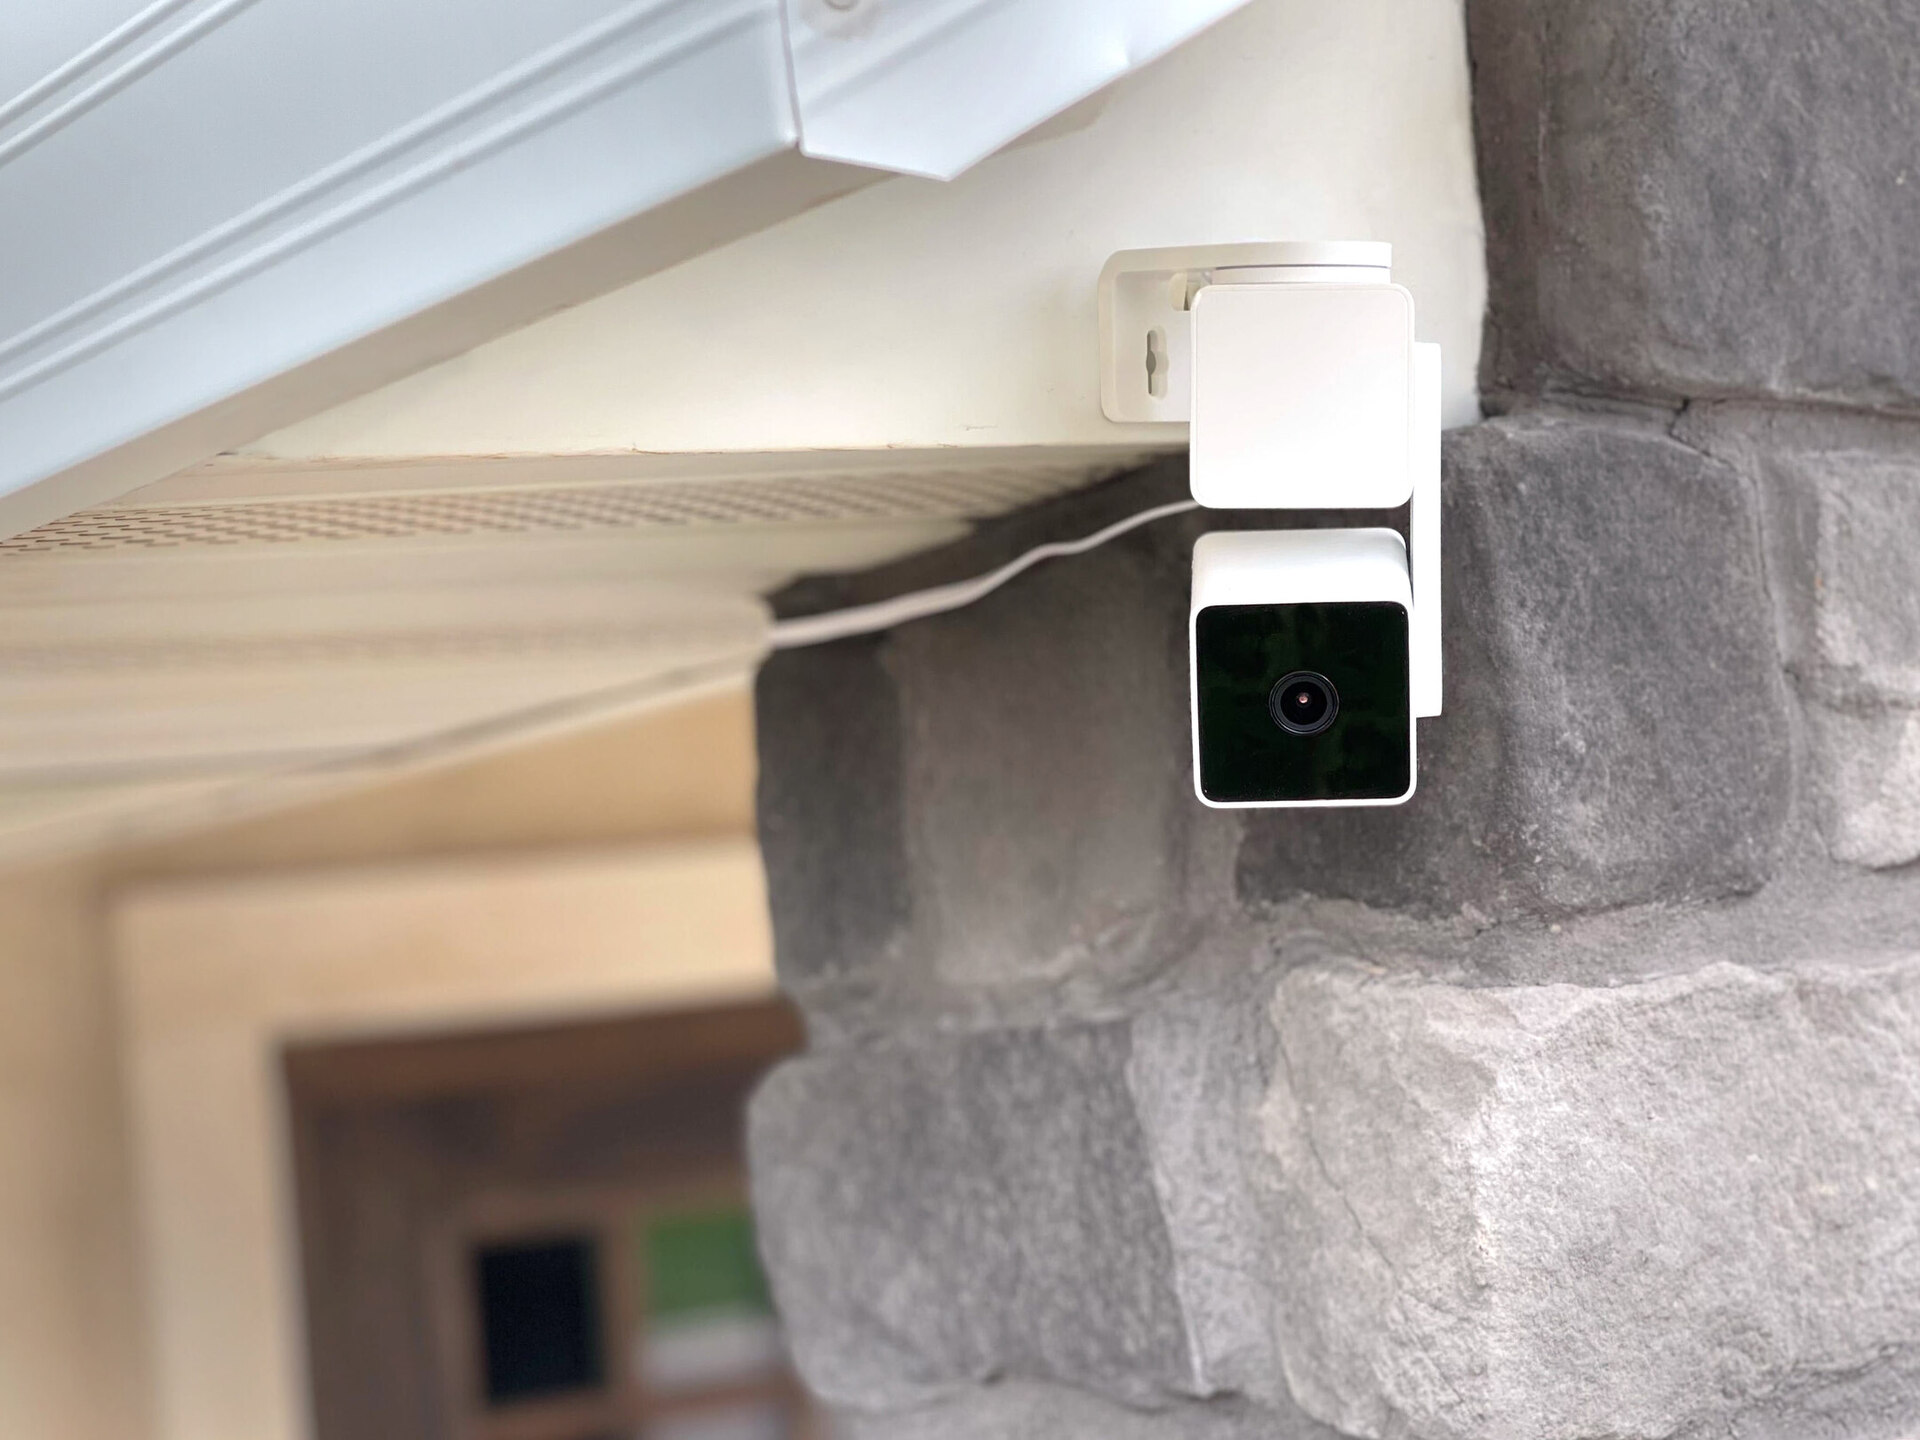
- Mount the Camera Bracket: Using the provided screws and a screwdriver, attach the camera bracket securely to the chosen surface. Make sure it is level and properly aligned.
- Connect Power Supply: Connect the power supply to the camera and plug it into an electrical outlet nearby. Ensure that the power source is stable and uninterrupted.
- Connect Ethernet Cable (optional): If you prefer a wired connection, connect one end of the Ethernet cable to the camera and the other end to your router. This step is optional if you plan to use Wi-Fi.
- Access the MIPC App: Download and install the MIPC mobile app from the App Store or Google Play Store. Create an account or log in if you already have one.
- Add Camera to MIPC App: Open the app and navigate to the camera addition section. Follow the instructions to add your newly installed camera to the app by scanning the QR code on the camera or entering the serial number manually.
- Configure Camera Settings: Once the camera is added, you can customize various settings such as resolution, motion detection, recording preferences, and notifications according to your preferences.
- Check Camera Connection: Ensure that the camera is connected to the internet and can communicate with the MIPC app. Check the signal strength and connectivity status in the app.
- Test Camera Functionality: After completing the setup, perform a test to ensure that the camera is capturing clear video, the audio is working, and all features are functioning properly.
By following these steps carefully, you’ll successfully install your MIPC outdoor camera. Enjoy the enhanced security and peace of mind that comes with having a reliable surveillance system at your home.
Step 1: Gather Required Equipment
Before you begin the installation process, it’s important to gather all the necessary equipment. Having everything on hand will help ensure a smooth and efficient installation. Here are the items you’ll need:
- MIPC outdoor camera: This is the main component of the system and will be responsible for capturing and recording video footage.
- Power supply: The camera will require a power source for operation. Ensure you have the appropriate power supply that is compatible with your camera model.
- Ethernet cable (optional): If you prefer a wired connection for your camera, you’ll need an Ethernet cable to connect it to your router. This will provide a stable and reliable connection.
- Screwdriver: A screwdriver is necessary for attaching the camera bracket to the mounting surface. Make sure you have a screwdriver that fits the screws provided with the camera.
- Ladder: Depending on the installation location, you may need a ladder to reach the desired height for mounting the camera.
- Additional mounting hardware: Depending on your installation location and surface, you may need additional mounting hardware such as screws, anchors, or brackets. Ensure you have the appropriate hardware before starting the installation.
It’s important to note that the specific equipment requirements may vary depending on the model of the MIPC outdoor camera you have purchased. Refer to the manufacturer’s instructions or documentation for any additional equipment or specific requirements for your camera model.
Having all the necessary equipment ready before you start the installation process will save you time and ensure a smoother installation experience. Double-check that you have everything listed above, and once you’re confident you have everything, you’re ready to move on to the next step.
Step 2: Choose and Prepare Installation Location
Choosing the right installation location for your MIPC outdoor camera is crucial to maximize its effectiveness in monitoring and securing your property. Consider the following factors when selecting a suitable spot:
- Area coverage: Assess the areas you want the camera to monitor. Identify high-risk areas such as entry points or blind spots that require surveillance. Ensure the camera’s field of view covers these areas effectively.
- Line of sight: Find a location with an unobstructed view of the monitored area. Avoid installing the camera behind obstacles like trees, walls, or other structures that may hinder the camera’s visibility.
- Height and angle: Mount the camera at an appropriate height and angle for optimal coverage. Consider the ideal vantage point to capture facial details and maintain a clear view of the area.
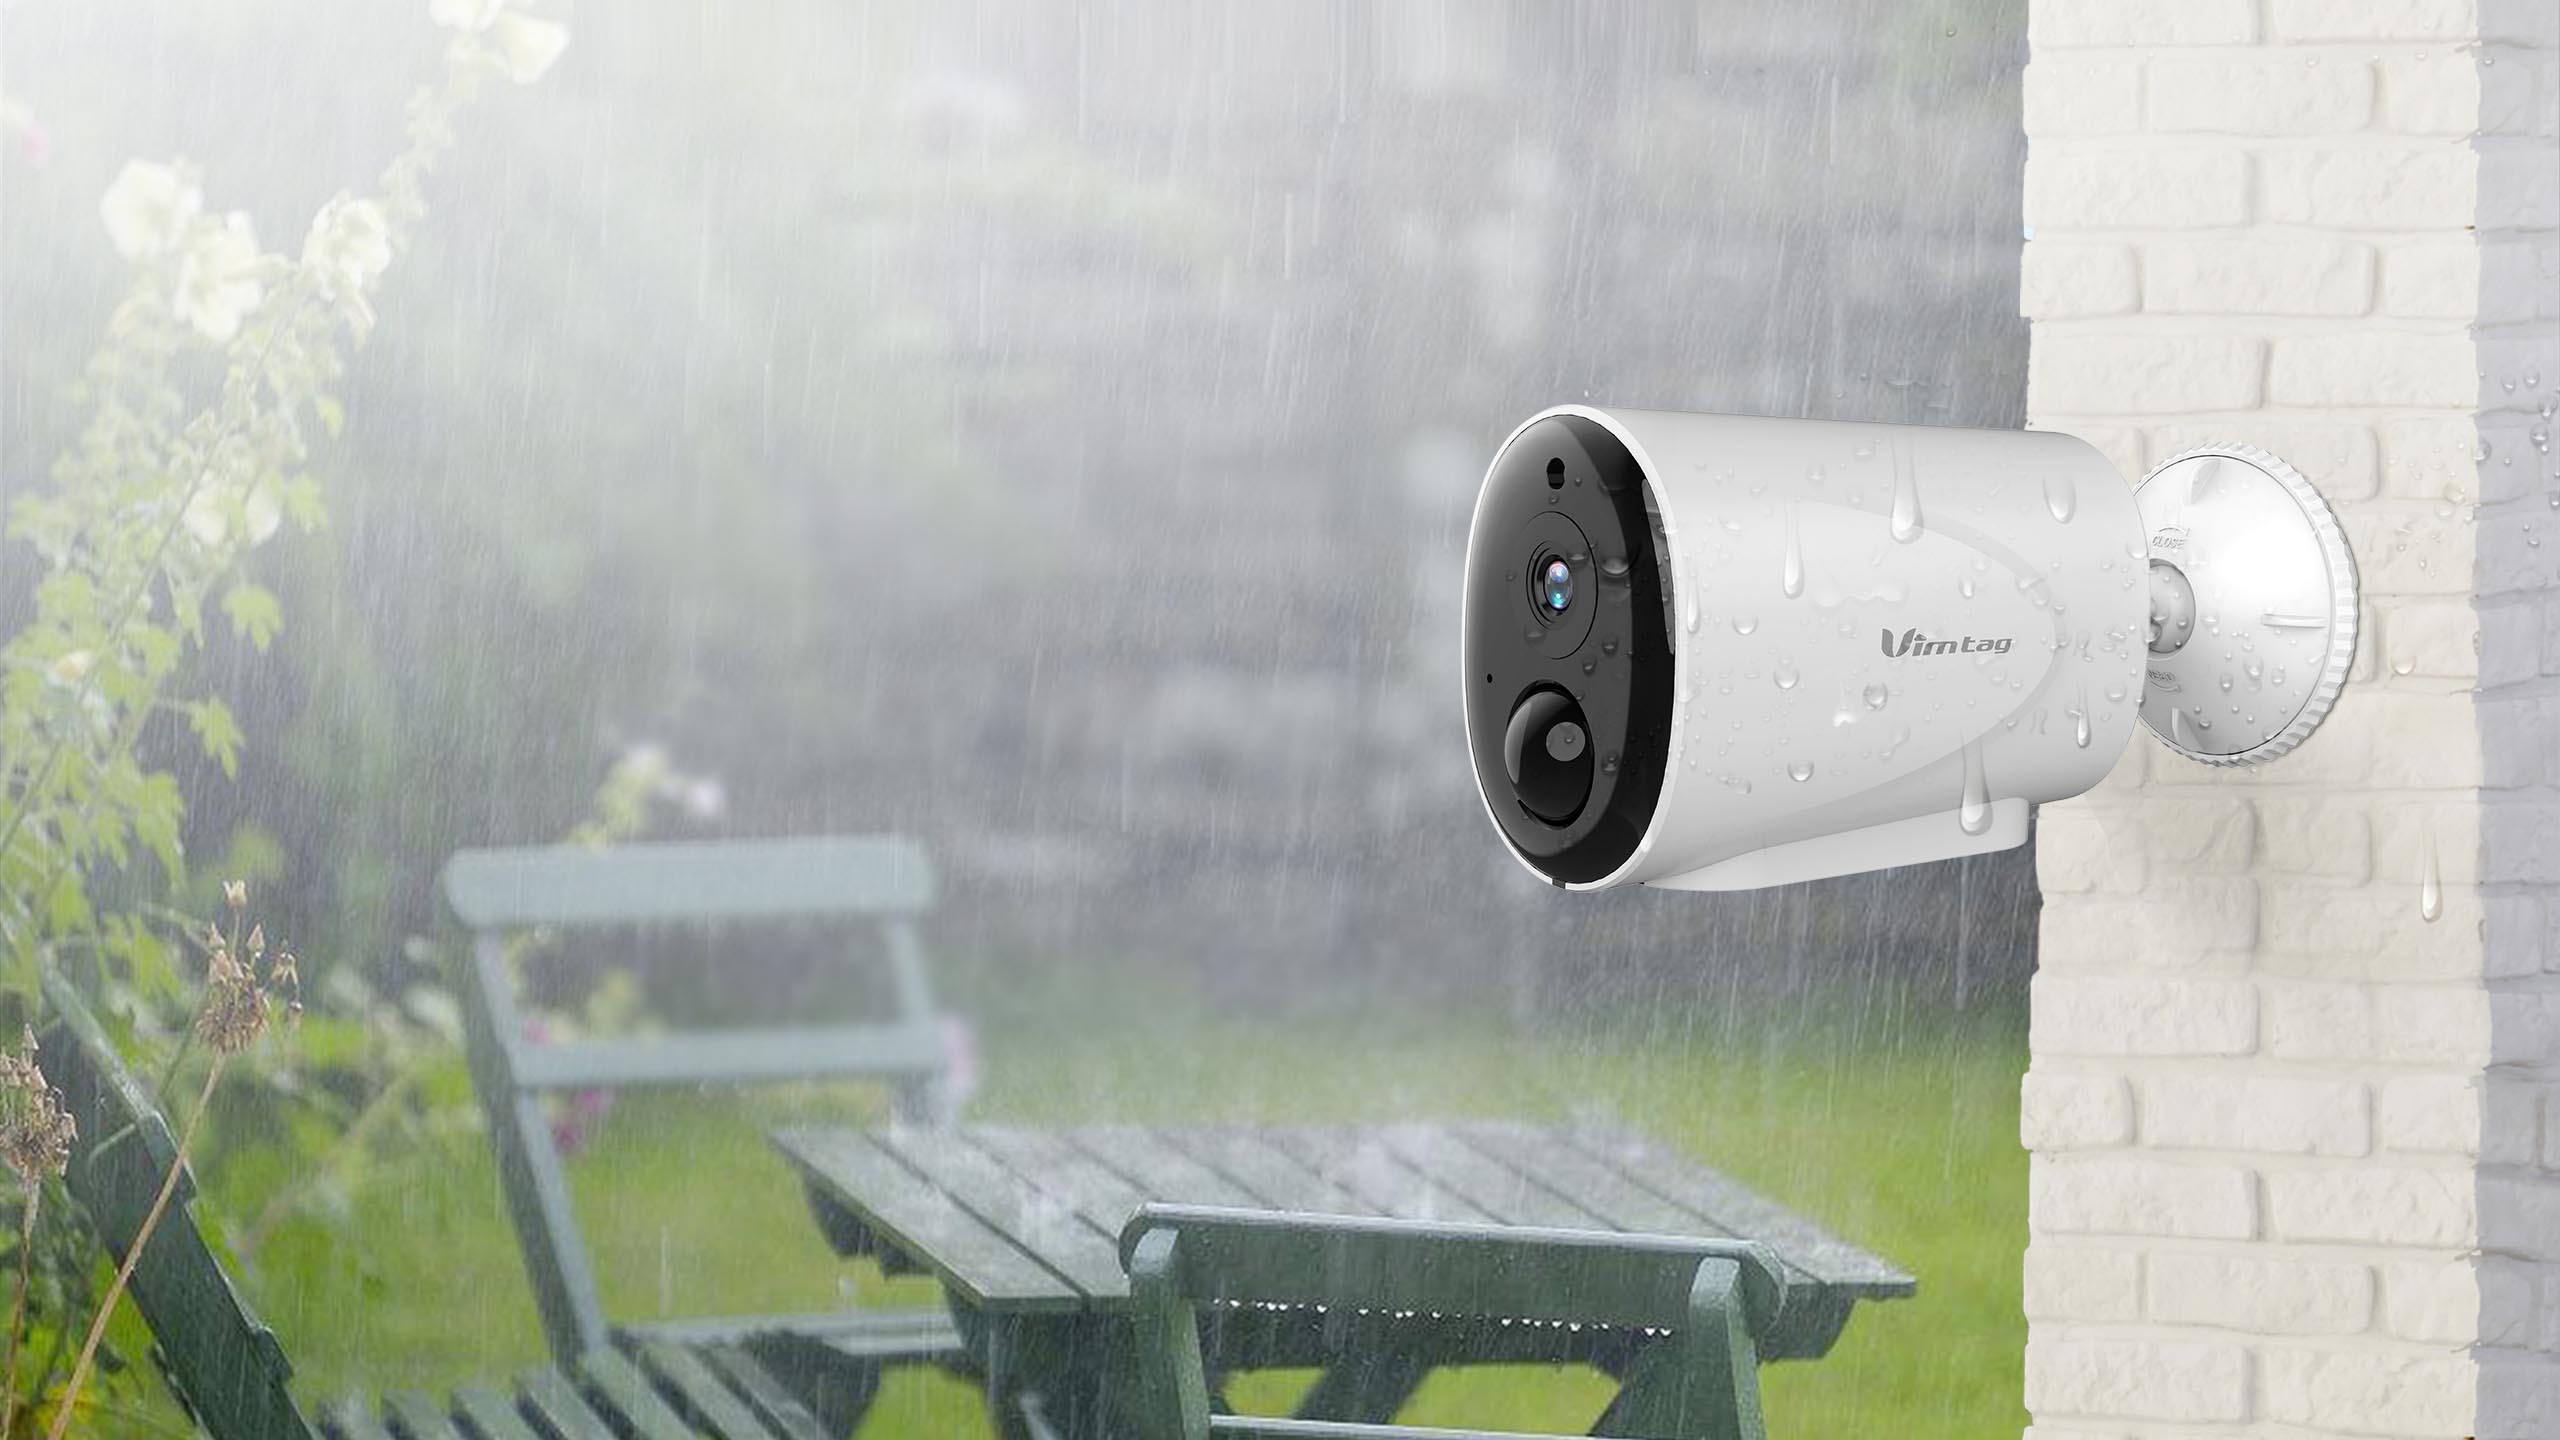
- Weather protection: Select an installation location that offers protection from harsh weather conditions such as rain, snow, and extreme temperatures. Ensure the camera is designed for outdoor use and can withstand the elements.
- Accessibility: Take into account the accessibility of the camera for maintenance and adjustments. Choose a location that allows easy access for cleaning, lens adjustments, and other necessary tasks.
- Power source proximity: Consider the proximity of an electrical outlet to provide power to the camera. Installing the camera close to an outlet will eliminate the need for long power cables or the use of extension cords.
Once you have identified the ideal installation location, you’ll need to prepare it before mounting the camera. Here’s how:
- Clean the area: Clear away any debris, dirt, or cobwebs from the selected installation location. A clean and tidy area will ensure optimal camera performance and minimize potential interference.
- Check the mounting surface: Ensure that the mounting surface is sturdy and capable of supporting the camera and bracket securely. If necessary, reinforce the mounting surface with additional support or consult a professional for assistance.
- Mark the mounting points: Use a pencil or marker to mark the spots where the camera bracket will be mounted. Double-check the alignment and levelness of the marks to ensure a straight installation.
- Prepare additional mounting hardware: If your installation requires additional mounting hardware, such as screws or anchors, gather them and ensure they are compatible with the mounting surface.
By carefully choosing the installation location and properly preparing the area, you’ll lay the foundation for a successful camera installation. Take your time in this step to ensure the best possible positioning for your MIPC outdoor camera.
Step 3: Mount the Camera Bracket
Now that you have chosen the installation location and prepared the area, it’s time to mount the camera bracket. The camera bracket serves as the base for securely attaching the MIPC outdoor camera to the chosen surface. Follow these steps to mount the bracket:
- Align the bracket: Hold the camera bracket against the marked mounting points on the wall or surface. Ensure that it is level and aligns with the desired angle of view. Use a spirit level if necessary to ensure accuracy.
- Mark the screw holes: Use a pencil or marker to mark the positions of the screw holes on the mounting surface. These marks will guide you during the screwing process.
- Pre-drill pilot holes (if required): Depending on the surface material, you may need to pre-drill pilot holes at the marked positions. This step will make it easier to insert the screws and reduce the risk of damaging the surface.
- Attach the bracket: Securely screw the camera bracket onto the mounting surface using the appropriate screws and a screwdriver. Make sure the bracket is firmly attached and does not wobble or move.
- Adjust the angle: Once the bracket is mounted, you can rotate and adjust it to achieve the desired angle of view. Ensure that the camera is properly aligned with the area you intend to monitor.
During the mounting process, keep in mind the weight and size of the camera. Ensure that the bracket can adequately support the camera’s weight to prevent any mishaps or damage to the equipment. If you have any concerns about the stability of the installation, consult a professional or seek assistance.
After mounting the camera bracket, take a step back and double-check the alignment and stability of the bracket. Ensure that it is securely fastened and ready for the next steps of the installation process.
With the camera bracket successfully mounted, you’re one step closer to completing the installation of your MIPC outdoor camera. The next step will guide you through the process of connecting the power supply to the camera.
Read more: How To Install Blink Outdoor Cameras
Step 4: Connect Power Supply
With the camera bracket securely mounted, it’s time to connect the power supply to your MIPC outdoor camera. Follow these steps to ensure a proper connection:
- Locate the power input: Identify the power input port on the camera. It is usually located on the back or bottom of the camera body.
- Prepare the power supply: Ensure that you have the correct power supply for your camera model. Check the voltage and connector type to match the camera’s requirements. Plug the power supply into a nearby electrical outlet.
- Connect the power cable: Plug one end of the power cable firmly into the power input port on the camera. Ensure a secure connection to prevent any accidental disconnections.
- Test the power connection: Turn on the power supply and check if the camera receives power. You may see an LED indicator or other signs of power, indicating that the connection is successful.
- Ensure a stable power source: Make sure the power source is reliable and uninterrupted. Avoid using extension cords or inadequate power outlets that may introduce power fluctuations or interruptions.
During the power connection process, always prioritize safety. Ensure that the power supply and cables are handled with care, kept away from water or other liquids, and that all connections are secure and properly insulated.
Once the power supply is connected, the camera should power on and be ready for the next steps of the installation process. Proceed to the next step to learn about connecting an Ethernet cable (if desired) for a wired network connection.
Step 5: Connect Ethernet Cable (optional)
If you prefer a wired connection for your MIPC outdoor camera, you have the option to connect an Ethernet cable directly from the camera to your router. This can provide a stable and reliable network connection. Follow these steps to connect the Ethernet cable:
- Identify the Ethernet port: Locate the Ethernet port on the back or bottom of the camera. It is usually labeled “LAN” or “Ethernet.”
- Connect the Ethernet cable: Take one end of the Ethernet cable and insert it firmly into the Ethernet port on the camera. Ensure that it fits snugly and securely.
- Connect the other end to the router: Take the other end of the Ethernet cable and plug it into an available Ethernet port on your router. Ensure a secure connection to the router.
- Check the network connection: Once the cable is connected, the camera will establish a wired network connection with your router. Verify the connection status using the camera’s indicator lights or check the network settings in the camera’s configuration interface.
Keep in mind that using an Ethernet cable for a wired connection eliminates any potential issues related to Wi-Fi signal strength or interference. It can be particularly beneficial for outdoor cameras where the signal may be weakened by distance or physical obstacles.
If you decide not to use an Ethernet cable, you can proceed with setting up your camera’s Wi-Fi connection in the next steps. Additionally, ensure that your router’s settings allow for connections from wired devices and that your internet service provider’s connection is stable and reliable.
With the Ethernet cable connected (if desired), you can move on to the next step, which involves accessing the MIPC app to configure your camera settings.
When installing the MIPC outdoor camera, make sure to carefully follow the manufacturer’s instructions for mounting and connecting the camera. It’s important to choose a secure location with a good Wi-Fi signal for optimal performance.
Step 6: Access the MIPC App
To configure and control your MIPC outdoor camera, you’ll need to download and install the MIPC mobile app. The app provides a user-friendly interface to manage your camera settings, view live video streams, and access recorded footage. Follow these steps to access the MIPC app:
- Download the MIPC app: Open the App Store (for iOS devices) or Google Play Store (for Android devices) on your smartphone or tablet. Search for “MIPC” and download the official MIPC app developed by MIPC Technology.
- Create an account or log in: Launch the MIPC app on your device and create a new account if you don’t have one. Alternatively, if you have an existing account, you can log in using your credentials.
- Add your MIPC outdoor camera: Once you’re logged in, follow the on-screen instructions within the app to add your camera to your account. You can typically do this by scanning the QR code located on the camera or entering the camera’s serial number manually.
It’s important to note that the steps to add the camera to the app may vary slightly depending on the specific model of your MIPC outdoor camera. Refer to the camera’s user manual or the app’s guidelines for any specific instructions related to your camera model.
By accessing the MIPC app, you’ll gain full control over your camera’s settings and functionalities. You’ll be able to adjust video resolution, set up motion detection, configure recording options, and more. The app will serve as your central hub for managing and monitoring your camera.
After successfully adding your camera to the MIPC app, you can proceed to the next step, which involves configuring the camera settings according to your preferences.
Step 7: Add Camera to MIPC App
Now that you have downloaded the MIPC app and logged in, it’s time to add your MIPC outdoor camera to the app. This step allows you to establish a connection between the camera and the app for seamless control and monitoring. Follow these steps to add your camera to the MIPC app:
- Open the MIPC app: Launch the MIPC app on your smartphone or tablet. Ensure that you are logged in to your MIPC account.
- Access the camera addition section: In the app’s main interface, locate and tap on the option to add a new camera. This section is usually indicated by a “+” or “Add” button.
- Choose the camera addition method: Depending on your camera model, you may have different options for adding the camera. The most common methods include scanning the QR code on the camera or manually entering the camera’s serial number.
- Scan the QR code: If you choose the scanning option, align your device’s camera with the QR code on the camera itself. Ensure that the QR code is within the frame and wait for the app to detect and process the code.
- Manually enter the serial number: If you choose the manual entry option, enter the camera’s serial number accurately into the provided field in the app. This information can typically be found on the camera or its packaging.
- Follow the on-screen instructions: Once the app recognizes the camera through the QR code or serial number, follow the on-screen instructions to complete the camera addition process. This may involve naming the camera, setting a password, or configuring network settings.
- Confirm camera addition: After completing the necessary steps, confirm the camera addition in the app. The app will establish a connection with the camera and display a live video feed if the camera is properly installed and configured.
By successfully adding your camera to the MIPC app, you’ll have full access to its features and functions. You’ll be able to view live video feeds, adjust camera settings, set up motion detection, and receive notifications on your mobile device. The app provides a convenient and intuitive interface for managing and monitoring your MIPC outdoor camera.
Once you have added the camera to the MIPC app, you can proceed to the next step, which involves configuring the camera settings to suit your preferences and needs.
Read more: How To Install A Kasa Outdoor Camera
Step 8: Configure Camera Settings
Now that your MIPC outdoor camera is successfully added to the MIPC app, it’s time to configure the camera settings to customize its functionality according to your preferences. Follow these steps to configure the camera settings:
- Access the camera settings: Open the MIPC app on your mobile device and navigate to the camera’s settings section. This is usually represented by a gear or settings icon.
- Adjust video resolution: Depending on your camera model, you can adjust the video resolution to prioritize either higher quality or smoother streaming. Choose the resolution that suits your needs while considering factors such as available bandwidth and storage capacity.
- Configure motion detection: Enable motion detection to receive alerts and notifications when the camera detects any movement within its field of view. Set the sensitivity level according to your preference and adjust the detection area to focus on specific zones.
- Set up recording preferences: Determine how you want the camera to record video footage. You can choose to continuously record, schedule specific recording times, or trigger recording based on motion detection. Adjust the duration and quality settings to optimize storage usage.
- Enable audio: Decide whether you want to capture audio along with the video feed. This can be helpful for monitoring conversations or additional context in various situations. Keep in mind any legal considerations related to audio recording in your jurisdiction.
- Configure network settings: If necessary, you can adjust network settings such as Wi-Fi connection, DNS settings, or IP addressing. Ensure that the camera has a stable and reliable network connection to enable smooth operation.
- Set up remote access: If you want to monitor the camera remotely, enable remote access features such as cloud storage, remote viewing, or the ability to control the camera from anywhere via the MIPC app.
- Explore additional features: Depending on your camera model, there may be additional features and settings available. Take the time to explore and familiarize yourself with the various options provided in the app to make the most of your camera.
While configuring the camera settings, consider your specific needs, the purpose of the camera, and any legal requirements applicable in your area. Experiment with different settings to find the configuration that best meets your surveillance and security requirements.
Once you have configured the camera settings to your satisfaction, you’re ready to move on to the next step and ensure the camera is properly connected before testing its functionality.
Step 9: Check Camera Connection
After configuring the settings of your MIPC outdoor camera, it’s important to check the camera’s connection to ensure it is properly connected to the network and the MIPC app. Follow these steps to check the camera connection:
- Launch the MIPC app: Open the MIPC app on your mobile device and ensure that you are logged in to your account.
- Select the camera: Locate and select your MIPC outdoor camera from the list of cameras within the MIPC app. This will open the camera’s live feed or settings page.
- Check the network status: Look for indicators or icons within the app that display the camera’s network status. It should show that the camera is connected to the network such as Wi-Fi or Ethernet, and an internet connection is present.
- Verify signal strength: If your camera is connected wirelessly, check the signal strength displayed in the app. A strong signal ensures stable communication between the camera and your mobile device.
- Test the camera feed: Check the live feed from the camera within the MIPC app to ensure that the camera is capturing and transmitting video properly. Verify that the image is clear, and there is no lag or disruption in the feed.
- Monitor any error messages: If there are any error messages or prompts indicating a connection issue, carefully review them to troubleshoot and resolve any connectivity problems. Check your internet connection and follow any suggested steps or recommendations provided within the app.
- Restart if necessary: If you encounter any persistent issues with the camera connection, try restarting both the camera and your mobile device. This can help refresh the connection and resolve temporary glitches.
Checking the camera connection ensures that the camera is properly communicating with your mobile device and that the feed is being transmitted successfully. By monitoring the camera connection, you can address any potential issues promptly and ensure uninterrupted surveillance.
If you encounter significant issues with the camera connection and troubleshooting steps do not resolve the problem, consult the camera’s user manual or contact technical support for further assistance.
Once you have verified the camera’s connection, you’re ready to move on to the final step and test the functionality of your MIPC outdoor camera.
Step 10: Test Camera Functionality
With your MIPC outdoor camera properly connected and configured, it’s time to test its functionality to ensure that it is working as expected. Follow these steps to test your camera’s functionality:
- Access the live feed: Open the MIPC app on your mobile device and select your camera from the list. This will display the live feed from your MIPC outdoor camera.
- Check video quality: Observe the video quality to ensure that it is clear and the colors are accurate. Monitor for any pixelation or distortion that may affect the viewing experience.
- Test pan and tilt functions (if applicable): If your camera supports pan and tilt capabilities, use the controls within the app to move the camera and ensure smooth and responsive movement. Verify that the camera can cover the desired viewing angles effectively.
- Trigger motion detection: Create some motion within the camera’s field of view, such as walking or waving your hand. Confirm that the motion detection feature is working correctly by receiving notifications or recording footage when motion is detected.
- Test night vision: If your camera has night vision capability, dim the lights or switch to a dark environment to evaluate the clarity and range of the night vision mode. Ensure that objects and individuals are still visible in low-light conditions.
- Listen for audio: If your camera captures audio, make sure that you can hear sound clearly. Test the two-way audio communication feature (if available) to ensure that you can both hear and communicate through the camera.
- Review recorded footage: If you have enabled recording, check the recorded footage to ensure that it is being saved properly and that you can access it within the app or through a cloud storage service, if applicable.
- Repeat tests: Perform these tests at different times of the day and under various conditions to verify consistent performance. This will ensure that your MIPC outdoor camera functions reliably in all situations.
By thoroughly testing your camera’s functionality, you can identify any potential issues or adjustments that may be necessary. If you encounter any problems during the testing process, refer to the camera’s user manual or consult the manufacturer’s support resources for troubleshooting steps.
Once you are satisfied with the performance of your MIPC outdoor camera, you can enjoy the enhanced security and peace of mind it provides. Regularly monitor the camera’s feed and review the recorded footage to stay informed about any activity around your property.
Congratulations! You have successfully installed, configured, and tested your MIPC outdoor camera. Your home is now equipped with a powerful surveillance tool to help protect your property and loved ones.
End of the Step-by-Step Guide. Enjoy your MIPC outdoor camera!
Conclusion
Congratulations on completing the installation and setup of your MIPC outdoor camera! By following our step-by-step guide, you have taken important steps in securing your home and enhancing your peace of mind. The camera’s advanced features, combined with the convenience of the MIPC app, provide you with effective surveillance and monitoring capabilities.
Throughout the installation process, you gathered the necessary equipment, chose an ideal installation location, mounted the camera bracket securely, connected the power supply, and optionally connected an Ethernet cable for a wired connection. We then guided you through accessing the MIPC app, adding the camera to the app, configuring camera settings, checking the camera’s connection, and finally, testing its functionality.
Now that your MIPC outdoor camera is up and running, you can enjoy its benefits, such as real-time monitoring, motion detection alerts, and the ability to view and manage the camera remotely through the app. You can have peace of mind knowing that your property is protected against potential threats and you can keep a watchful eye on your surroundings.
Remember to periodically review and adjust your camera’s settings as needed, and ensure that the camera remains properly connected to the network and power supply. Regularly test the camera’s functionality to ensure optimal performance.
Should you have any questions or encounter any issues with your MIPC outdoor camera, consult the documentation provided by the manufacturer or reach out to their customer support team for assistance. They will be able to provide you with the necessary guidance and support.
By investing in a reliable and robust security system, such as the MIPC outdoor camera, you have taken a significant step towards safeguarding your home. Enjoy the added security and peace of mind that comes with having a comprehensive surveillance solution at your fingertips.
Thank you for choosing the MIPC outdoor camera and trusting our guide to install and set it up. We hope this guide has been helpful in navigating the installation process and ensuring a successful outcome. Stay safe and secure!
Frequently Asked Questions about How To Install MIPC Outdoor Camera
Was this page helpful?
At Storables.com, we guarantee accurate and reliable information. Our content, validated by Expert Board Contributors, is crafted following stringent Editorial Policies. We're committed to providing you with well-researched, expert-backed insights for all your informational needs.