Home>Interior Design>How To Wallpaper A Corner: 5 Steps For Getting Pro Results
Interior Design
How To Wallpaper A Corner: 5 Steps For Getting Pro Results
Modified: October 20, 2024
Learn how to wallpaper a corner like a pro with these 5 essential steps. Achieve stunning interior design results with our expert guide.
(Many of the links in this article redirect to a specific reviewed product. Your purchase of these products through affiliate links helps to generate commission for Storables.com, at no extra cost. Learn more)
Introduction
Wallpapering a corner can be a challenging task, but with the right techniques and a bit of patience, you can achieve professional-looking results that will transform the look of your space. Whether you’re redecorating your home or giving a new lease of life to a commercial property, properly wallpapering a corner can make a significant difference to the overall aesthetic.
This step-by-step guide will walk you through the process of wallpapering a corner, providing you with the knowledge and skills needed to achieve a flawless finish. From preparing the corner to trimming and adding finishing touches, each step is essential in ensuring a successful wallpaper installation.
Before you begin, gather all the necessary tools and materials. This includes wallpaper paste, a wallpaper brush, a razor knife, a tape measure, a straightedge, a wallpaper smoother, a sponge, a bucket, and of course, your chosen wallpaper.
Remember, practice makes perfect. Don’t be discouraged if you encounter some challenges along the way – learning from mistakes is a part of the process. So let’s dive in and discover how to wallpaper a corner like a pro!
Key Takeaways:
- Achieve professional-looking results by properly preparing the corner, taking accurate measurements, and applying the right amount of wallpaper paste. Attention to detail and patience are key for a flawless finish.
- Transform any corner with confidence by following step-by-step techniques for wallpapering. Embrace creativity, practice, and learn from mistakes to achieve stunning, personalized results.
Step 1: Preparing the Corner
Properly preparing the corner before applying the wallpaper is crucial for a smooth and long-lasting result. Here are the steps to follow:
- Clean the surface: Start by ensuring that the corner and the surrounding walls are clean and free from any dust, dirt, or grease. Use a mild detergent and water solution to gently wipe down the walls, and allow them to dry completely before proceeding.
- Fill any imperfections: Inspect the corner for any cracks, holes, or other imperfections. Use a suitable filler or joint compound to fill in these areas, and smooth it out with a putty knife. Allow the filler to dry according to the manufacturer’s instructions, and then sand it lightly to create a smooth and even surface.
- Prime the walls: Applying a primer to the corner walls will ensure better adhesion of the wallpaper and prevent any color bleeding or stains. Choose a primer that is suitable for your wall type, and brush it onto the walls evenly. Allow the primer to dry completely before moving on to the next step.
- Protect adjacent surfaces: To avoid getting any wallpaper paste or paint on the adjacent walls or surfaces, use painter’s tape to mask them off. Apply the tape carefully, making sure it adheres well and creates a clean boundary between the corner and the surrounding areas.
- Plan the layout: Before cutting your wallpaper, take the time to plan the layout and pattern placement. By starting at the most visible corner or focal point and working your way outwards, you can ensure a visually appealing result. Measure and mark the center of the corner as a starting point.
By following these preparatory steps, you will create an ideal surface for the wallpaper to adhere to, resulting in a professional-looking finish. Take your time and be meticulous in preparing the corner, as this will set the foundation for the rest of the wallpapering process.
Step 2: Measuring and Cutting the Wallpaper
Accurate measurements and precise cutting of the wallpaper are essential for a seamless installation. Here’s how to measure and cut the wallpaper:
- Measure the height: Starting from the floor, use a tape measure to measure the height of the corner. Add a few extra inches at the top and bottom for trimming purposes. Remember to account for any baseboards or crown moldings that may affect the height measurement.
- Measure the width: Measure the width of the corner from one side to the other. Add a couple of inches to allow for adjustments and matching the pattern if necessary.
- Mark and cut the first strip: Roll out your wallpaper on a clean, flat surface, pattern side down. Measure and mark the height of the corner on the back of the wallpaper. Use a straightedge or ruler to create a straight line, and then cut along the marked line using a sharp razor knife or wallpaper scissors.
- Cut additional strips: Repeat the process for each subsequent strip, ensuring that the pattern matches and lines up correctly with the previous strip. This step is crucial for achieving a seamless and visually appealing result. Make sure to align the pattern properly and cut each strip accurately.
- Label and organize the strips: To avoid confusion during the installation process, it’s essential to label and organize each cut strip. Use a pencil or sticky notes to label the top edge of each strip with a number or letter corresponding to its position in the corner. This will help you maintain the sequence and ensure a smooth installation.
Remember to handle the wallpaper with care while cutting to avoid tears or damage. Additionally, always refer to the manufacturer’s instructions regarding any specific cutting techniques or recommendations.
By taking accurate measurements and cutting the wallpaper precisely, you’ll create the foundation for a successful wallpaper installation that fits perfectly in the corner.
Step 3: Applying Wallpaper Paste
Applying the right type and amount of wallpaper paste is crucial for proper adhesion and a long-lasting result. Follow these steps to apply wallpaper paste:
- Read the instructions: Different types of wallpaper require different types of paste. Before starting, carefully read the instructions provided by the wallpaper manufacturer to determine the appropriate paste to use.
- Prepare the paste: Follow the instructions on the wallpaper paste packaging to prepare the paste mixture. Typically, this involves mixing the paste with water in the right proportions, using a bucket and a stir stick. Stir well until the paste reaches a smooth and creamy consistency.
- Start from the center: Begin by applying a thin, even layer of wallpaper paste to the back of the first strip of wallpaper. Start from the center of the strip and work your way out towards the edges using a wallpaper brush or roller. Ensure that the paste is evenly spread, with no lumps or excess in any areas.
- Fold the strip: Once the paste is applied, carefully fold the strip in half with the paste sides touching. This is known as “booking” the wallpaper, and it helps activate the paste and allows it to penetrate the paper evenly for better adhesion. Allow the strip to “book” for the recommended amount of time indicated in the wallpaper manufacturer’s instructions.
- Repeat for each strip: Continue applying the wallpaper paste and booking each subsequent strip, making sure to align the pattern correctly. Take your time and ensure that the paste is evenly applied to avoid any issues during the installation.
It’s important not to oversaturate the wallpaper with paste, as this can lead to bubbling, tearing, or difficulty in positioning the wallpaper. Follow the instructions provided by the manufacturer in terms of paste application techniques and drying times.
By applying the right amount of wallpaper paste in a consistent and even manner, you’ll ensure proper adhesion and a smooth installation of the wallpaper in the corner.
When wallpapering a corner, always start from the corner and work your way out. This will ensure a seamless and professional-looking result.
Step 4: Hanging the Wallpaper in the Corner
Hanging the wallpaper in the corner requires precision and attention to detail to create a seamless and visually pleasing result. Follow these steps to hang the wallpaper:
- Start at the top: Begin at the top of the corner and unfold the first booked strip of wallpaper. Carefully position the top edge of the wallpaper against the ceiling or crown molding, making sure it is straight and aligned with the corner.
- Smooth and press: Using a wallpaper smoother or a clean, damp sponge, gently smooth the wallpaper from the center outward, removing any air bubbles or wrinkles as you go. Be careful not to stretch or distort the wallpaper while smoothing it out.
- Continue with subsequent strips: Unfold the next booked strip of wallpaper and position it next to the first strip, matching the pattern and aligning the edges. Repeat the smoothing and pressing process for each strip, ensuring they are properly aligned and seamlessly joined at the edges.
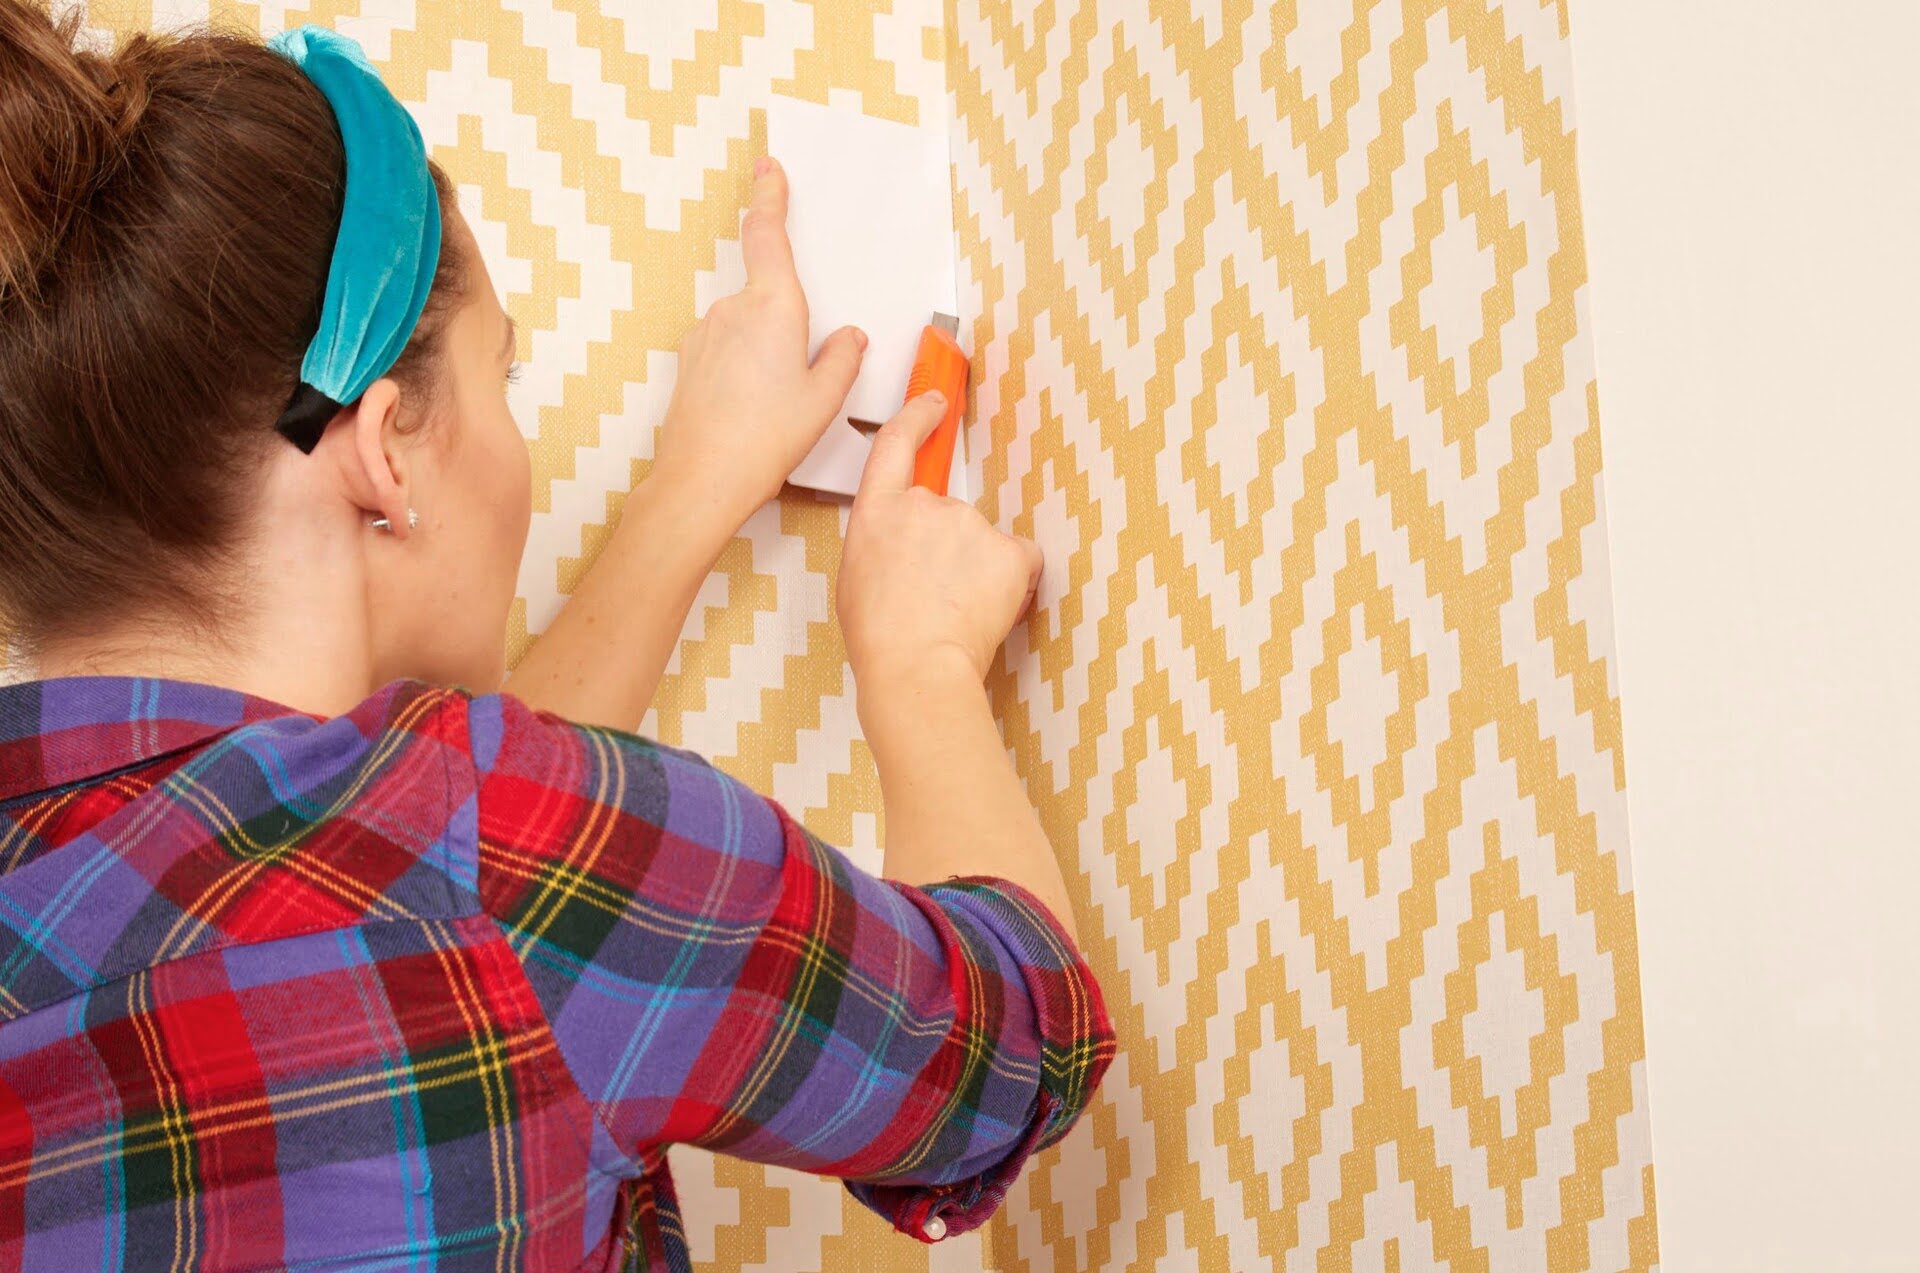
- Trim excess wallpaper: As you hang each strip, there will likely be excess wallpaper extending beyond the edges of the corner. Use a sharp razor knife or wallpaper scissors to carefully trim off the excess, following the edge of the wallpaper corner for a clean and precise cut.
- Overlap and match the pattern: In some cases, the wallpaper pattern may require overlapping and matching along the edges of the corner. Follow the instructions provided by the wallpaper manufacturer to achieve a seamless pattern match. Use a straightedge or ruler to guide your cuts and ensure precise alignment.
Take your time and work methodically, ensuring that each strip is properly positioned, smoothed, and trimmed. Regularly step back and inspect your work to make sure the pattern is aligned and there are no visible seams or wrinkles.
By carefully hanging the wallpaper in the corner, you’ll achieve a professional-looking result that enhances the overall aesthetic of the space.
Step 5: Trimming and Finishing Touches
Trimming and adding the finishing touches to your wallpapered corner will give it a polished and professional appearance. Follow these steps to complete the installation:
- Trim any remaining excess: After hanging all the wallpaper strips, thoroughly inspect the corner for any remaining excess wallpaper. Use a sharp razor knife or wallpaper scissors to carefully trim off any excess along the edges, ensuring clean and straight cuts.
- Smooth out any imperfections: If you notice any air bubbles, wrinkles, or imperfections in the wallpaper, use a wallpaper smoother or a clean, damp sponge to gently smooth them out. Work from the center of the imperfection and gradually smooth towards the edges to avoid creating additional issues.
- Seal the edges: To prevent the wallpaper from peeling or lifting at the edges, apply a small amount of wallpaper adhesive or clear drying glue along the seams and edges. Use a clean fingertip or a small brush to carefully seal the edges, ensuring a secure and long-lasting bond.
- Remove painter’s tape: If you used painter’s tape to protect adjacent surfaces during the wallpapering process, gently remove it once the wallpaper is fully installed. Take care not to damage the wallpaper or disturb the freshly applied adhesive.
- Clean up and admire your work: Once the wallpaper installation is complete, clean up any tools or materials and admire your beautifully wallpapered corner. Step back and take in the transformation, appreciating the effort and craftsmanship that went into creating a stunning focal point in your space.
It’s important to note that different types of wallpaper may have specific trimming and finishing requirements, so always refer to the manufacturer’s instructions for guidance. Additionally, allow the wallpaper to fully dry according to the recommended time frame before adding any decorative elements or furniture near the corner.
By taking the time to trim and add those final touches, you’ll elevate the overall appearance of your wallpapered corner and create a space that exudes style and sophistication.
Conclusion
Wallpapering a corner may seem like a daunting task, but with the right techniques and a little patience, you can achieve professional-looking results that will transform the look and feel of your space. By following the steps outlined in this guide – from preparing the corner to trimming and adding finishing touches – you’ll be able to wallpaper a corner with confidence.
Remember to begin by properly preparing the corner, ensuring it is clean, smooth, and free from imperfections. Accurate measurements and precise cutting of the wallpaper are essential to create a seamless fit. Applying the right amount of wallpaper paste and allowing the strips to book will enhance adhesion and ensure a long-lasting finish.
Hanging the wallpaper in the corner requires careful alignment, smoothing, and trimming to achieve a visually pleasing result. Take the time to match patterns and ensure seamless transitions between strips. Lastly, don’t forget the importance of trimming excess wallpaper and adding the finishing touches to create a polished and professional appearance.
Throughout the process, remember that practice makes perfect. Don’t be discouraged if you encounter challenges along the way. Learning from mistakes and adapting your technique will help you improve and achieve better results with each wallpapering project.
Now, armed with the knowledge and skills gained from this guide, you’re ready to confidently transform any corner in your home or commercial space. Embrace your creativity, choose a beautiful wallpaper design, and enjoy the process of wallpapering a corner to create a stunning focal point that reflects your personal style.
Happy wallpapering!
Frequently Asked Questions about How To Wallpaper A Corner: 5 Steps For Getting Pro Results
Was this page helpful?
At Storables.com, we guarantee accurate and reliable information. Our content, validated by Expert Board Contributors, is crafted following stringent Editorial Policies. We're committed to providing you with well-researched, expert-backed insights for all your informational needs.

0 thoughts on “How To Wallpaper A Corner: 5 Steps For Getting Pro Results”