Home>Renovation & DIY>Tools & Equipment>How Many Coats Of Spackle Before Sanding
Tools & Equipment
How Many Coats Of Spackle Before Sanding
Published: December 19, 2023
Learn how to properly apply spackle and sand it down for a smooth finish with the right tools and equipment. Find out the ideal number of coats for a professional result.
(Many of the links in this article redirect to a specific reviewed product. Your purchase of these products through affiliate links helps to generate commission for Storables.com, at no extra cost. Learn more)
Introduction
Welcome to the world of home improvement, where even the smallest details can make a significant difference. If you've ever taken on a painting project, you know that achieving a smooth, flawless surface is essential for a professional-looking finish. This is where spackle comes into play. Whether you're a seasoned DIY enthusiast or just dipping your toes into the realm of home repairs, understanding how to properly apply spackle and sand it to perfection is crucial for a successful paint job.
In this comprehensive guide, we'll delve into the intricacies of spackling and sanding, focusing on the number of coats of spackle required before sanding. By the end of this journey, you'll gain a thorough understanding of the spackling process, equipping you with the knowledge to tackle your next home improvement project with confidence.
So, grab your spackle knife, put on your DIY cap, and let's explore the world of spackling and sanding to uncover the secrets of achieving a flawless finish for your walls and ceilings.
Key Takeaways:
- Achieving a flawless paint finish requires patience and precision when applying spackle. Feather edges, apply multiple coats, and sand meticulously for a professional-quality result.
- Select the right spackle for your project based on the imperfections you need to address. Apply multiple coats, feather edges, and sand thoroughly for a flawless surface ready for painting.
Read more: How Long Spackle Takes To Dry Before Sanding
Understanding Spackle
Before we delve into the intricacies of applying and sanding spackle, let’s take a moment to understand what spackle is and its role in the realm of home improvement. Spackle, also known as spackling compound, is a versatile paste that serves as a crucial element in repairing and preparing surfaces for painting. It is commonly used to fill small cracks, holes, and imperfections in walls and ceilings, creating a smooth and even base for painting.
Spackle is available in various formulations, including traditional spackling paste and lightweight spackling compounds. Traditional spackle is suitable for filling larger holes and cracks, while lightweight spackling compounds are ideal for smaller imperfections and offer quick drying times.
When selecting spackle for your project, consider the size and nature of the imperfections you need to address. Additionally, some spackling compounds are tinted to indicate when they are dry and ready for sanding, simplifying the application process.
Understanding the characteristics of different spackling compounds and their suitability for specific repair needs is essential for achieving optimal results. Now that we’ve laid the groundwork for spackling, let’s move on to the application process, starting with the first coat of spackle.
Applying the First Coat
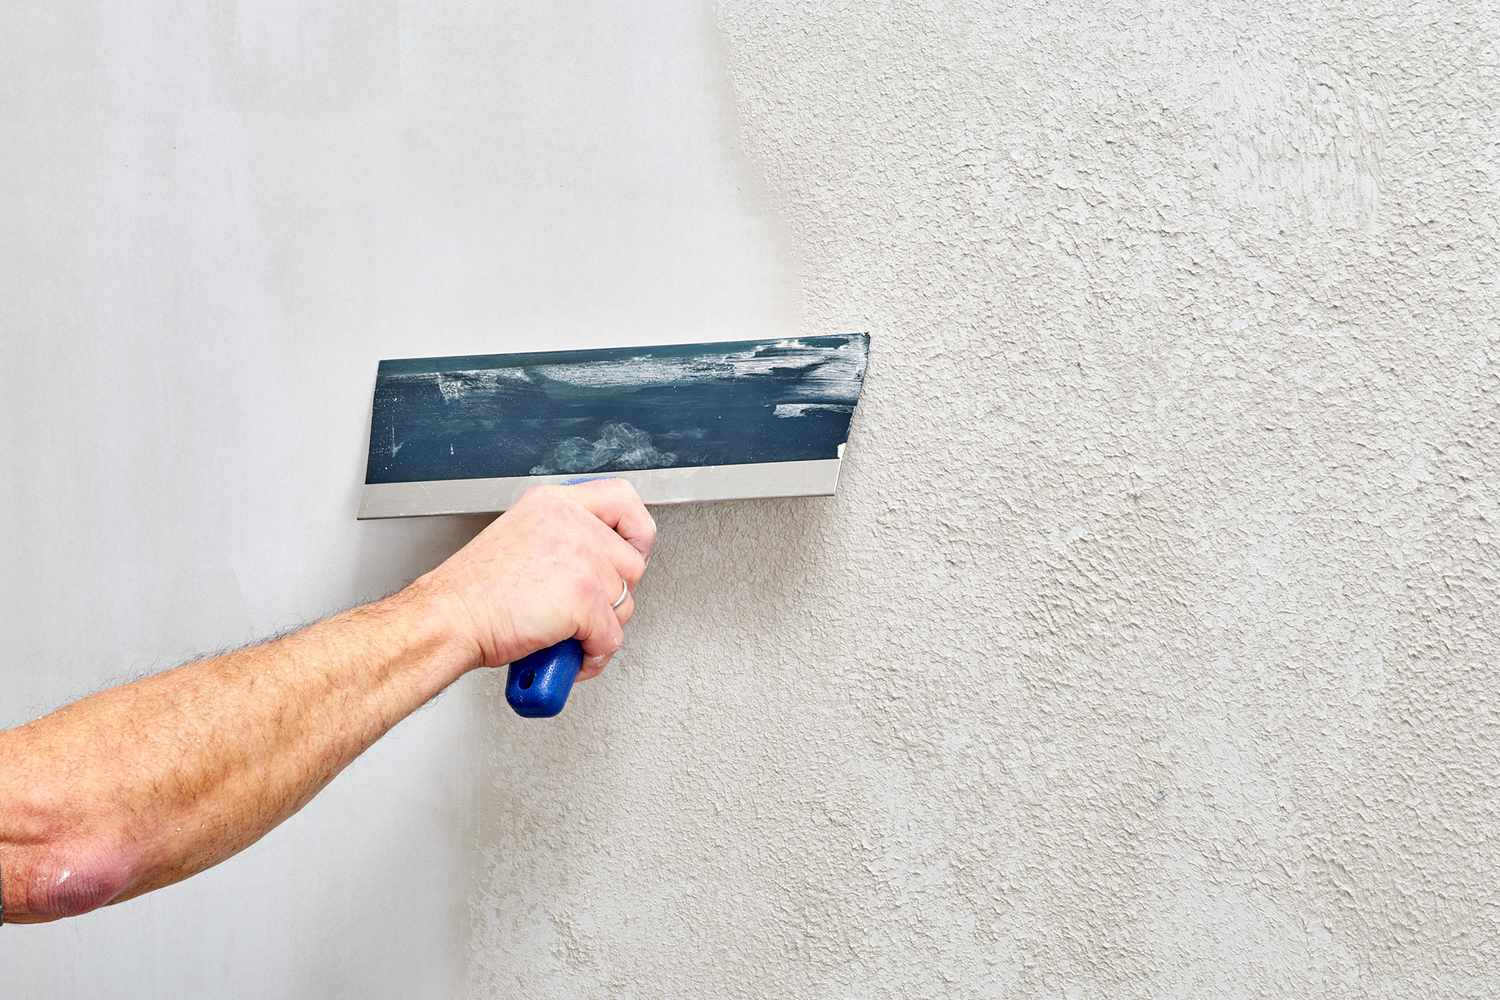
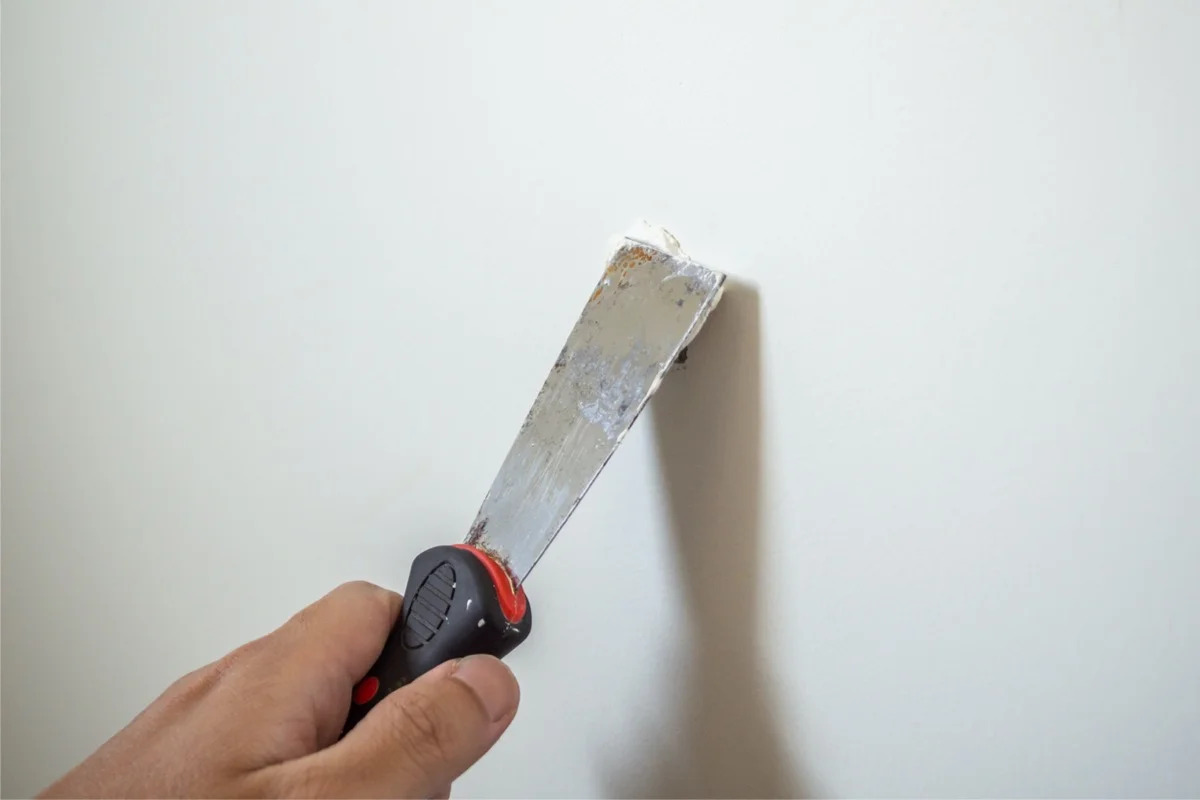
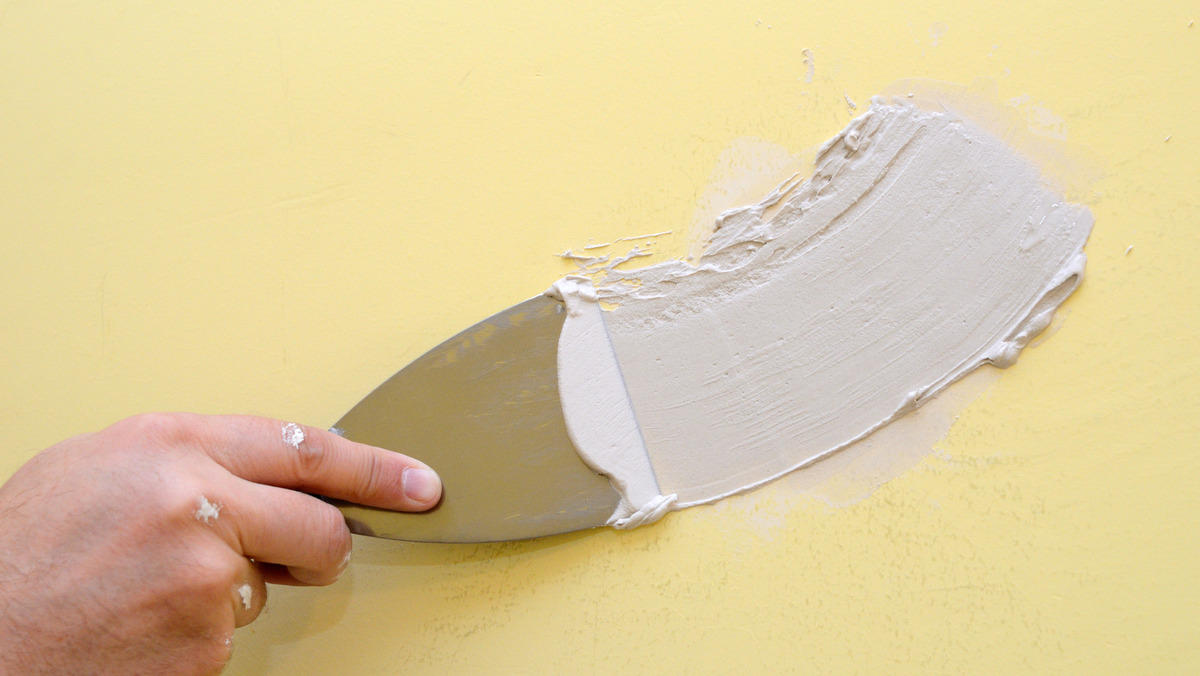
Embarking on a spackling project begins with preparing the surface for the first application of spackle. Before you start, ensure that the area to be repaired is clean and free of dust and debris. Use a putty knife to remove any loose particles and create a smooth surface for the spackle to adhere to.
Once the surface is prepped, it’s time to apply the first coat of spackle. Using a putty knife, scoop a small amount of spackle onto the blade and apply it to the imperfection in a smooth, even motion. For larger imperfections, it’s advisable to slightly overfill the area to ensure complete coverage.
After the spackle is applied, use the putty knife to feather the edges, blending the spackle seamlessly with the surrounding surface. This technique helps to create a smooth transition between the repaired area and the rest of the wall or ceiling, minimizing the visibility of the repair once the painting is complete.
As you work on applying the first coat of spackle, keep in mind that patience is key. Allow the spackle to dry completely according to the manufacturer’s instructions before moving on to the next step. Once the spackle is dry, it’s time to assess the results and determine if additional coats are needed to achieve a flawless finish.
Now that the first coat of spackle has been applied, let’s explore the process of applying subsequent coats to further refine the repaired area and prepare it for sanding.
Applying the Second Coat
After the first coat of spackle has dried, it’s time to evaluate the repaired area and determine if additional coats are necessary. When inspecting the spackled surface, look for any remaining indentations, unevenness, or areas where the spackle has settled or shrunk during the drying process. These imperfections may require the application of a second coat of spackle to achieve a flawless result.
If the surface still exhibits visible imperfections after the first coat, it’s advisable to proceed with applying a second coat of spackle. Before doing so, lightly sand the first coat using fine-grit sandpaper to smooth out any rough edges and create a uniform surface. Wipe away the sanding dust with a clean, damp cloth before applying the second coat of spackle.
When applying the second coat of spackle, focus on feathering the edges and blending the spackle seamlessly with the surrounding surface, just as you did with the first coat. This step is crucial for achieving a smooth transition and ensuring that the repaired area seamlessly integrates with the rest of the wall or ceiling.
Similar to the first coat, allow the second coat of spackle to dry completely according to the manufacturer’s instructions. Once dry, inspect the repaired area to assess the results. If the surface appears smooth and free of imperfections, it may be ready for painting. However, in some cases, a third coat of spackle may be necessary to achieve the desired level of smoothness and uniformity.
As we proceed to explore the application of the third coat, it’s essential to maintain a meticulous approach, ensuring that each coat of spackle contributes to a flawless and seamless surface. With the second coat applied and dried, we’re one step closer to achieving a professional-quality finish for your painting project.
Apply 2-3 thin coats of spackle, allowing each to dry completely before sanding. This will ensure a smooth and even surface without overfilling the area.
Applying the Third Coat
As you progress through the spackling process, the application of a third coat may be necessary to achieve a perfectly smooth and seamless surface. Before applying the third coat, carefully inspect the repaired area to identify any remaining imperfections or unevenness that may require further attention.
If the surface still exhibits visible imperfections after the second coat, it’s time to proceed with applying the third coat of spackle. Before doing so, lightly sand the second coat using fine-grit sandpaper to refine the surface and ensure that it is uniform and free of any rough spots or ridges. Wipe away any residual sanding dust with a clean, damp cloth to prepare the surface for the next application of spackle.
When applying the third coat of spackle, focus on blending the spackle seamlessly with the surrounding surface and feathering the edges to create a smooth transition. This step is crucial for achieving a flawless and seamless repair that seamlessly integrates with the rest of the wall or ceiling, setting the stage for a professional-quality paint job.
After applying the third coat, allow the spackle to dry completely according to the manufacturer’s instructions. Once dry, carefully inspect the repaired area to assess the results. If the surface appears smooth, uniform, and free of imperfections, it is now ready for the final step in the spackling process: sanding.
With the third coat of spackle applied and dried, you’ve taken the necessary steps to ensure that the repaired area is flawlessly prepared for the next phase of the project. Now, let’s explore the critical process of sanding the spackle to achieve a smooth and paint-ready surface.
Read more: How To Spackle Before Painting
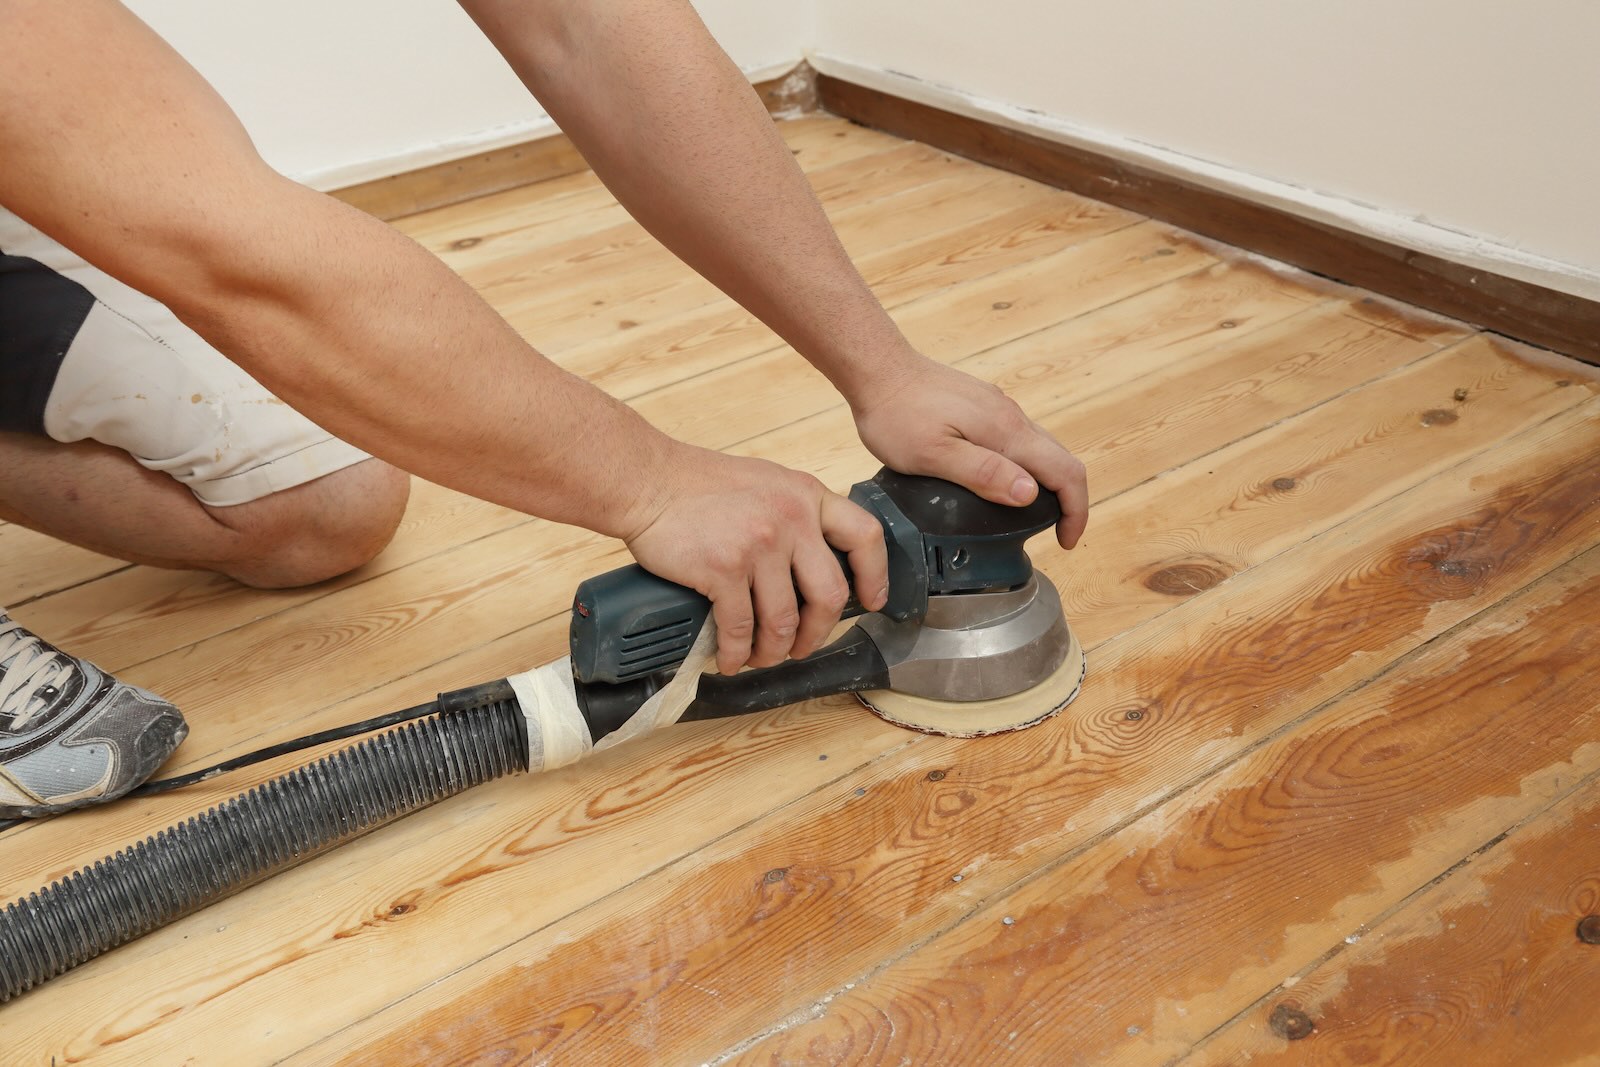
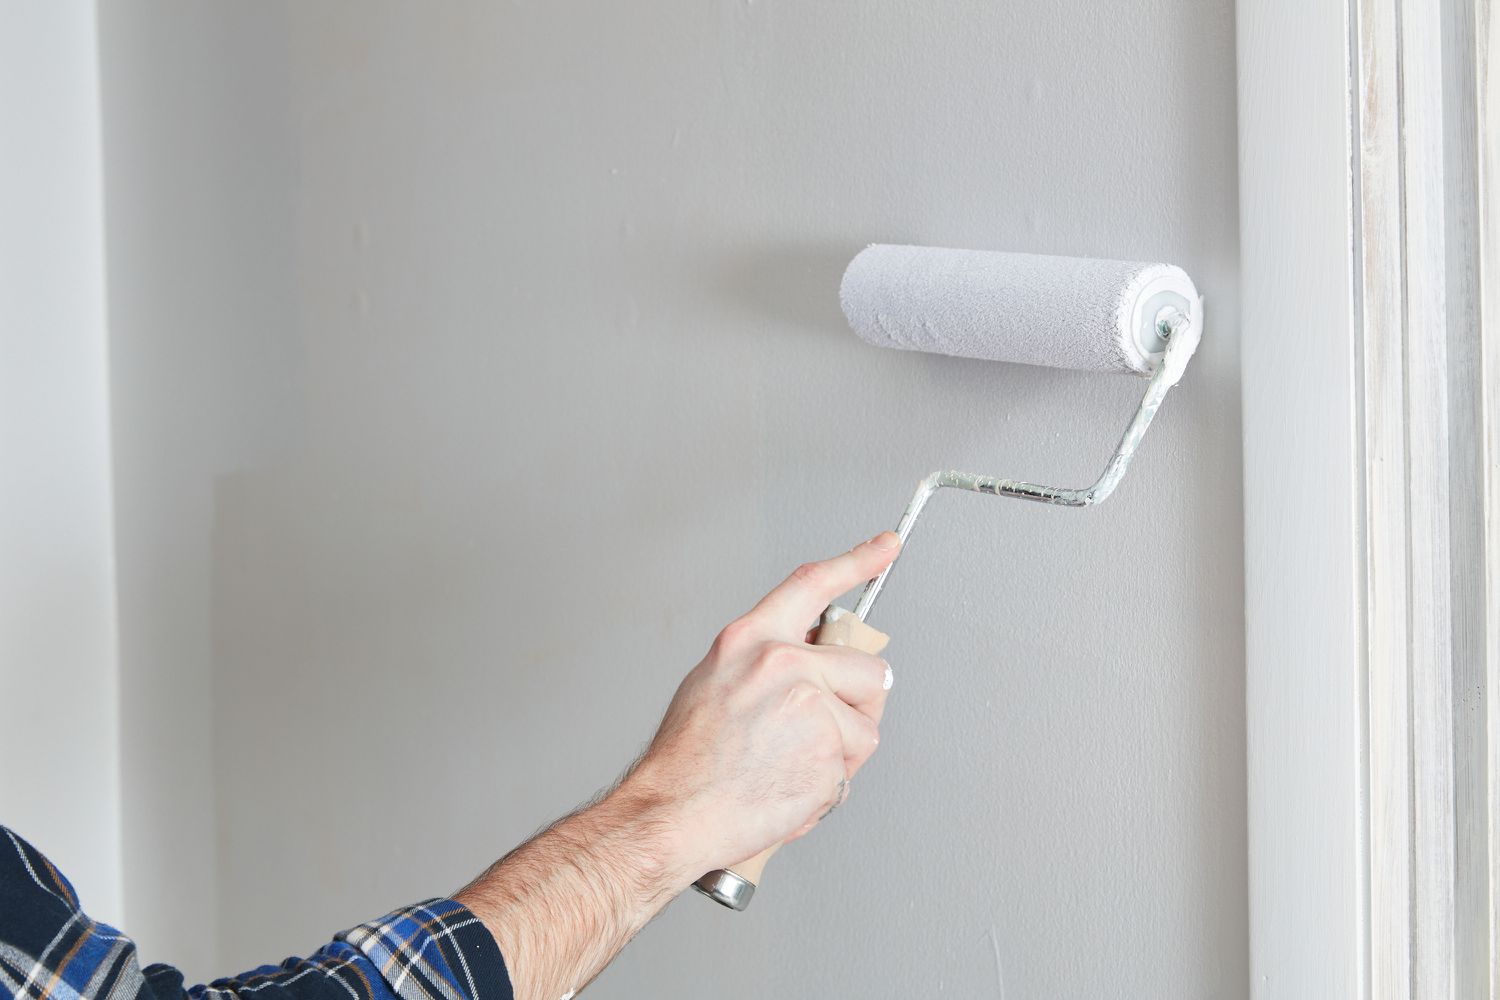
Sanding the Spackle
Once the spackled area has been meticulously repaired with the necessary coats of spackle and has dried to perfection, the next crucial step is sanding. Sanding the spackled surface is essential for achieving a smooth and seamless finish, preparing the area for painting and ensuring that the repaired section seamlessly integrates with the rest of the wall or ceiling.
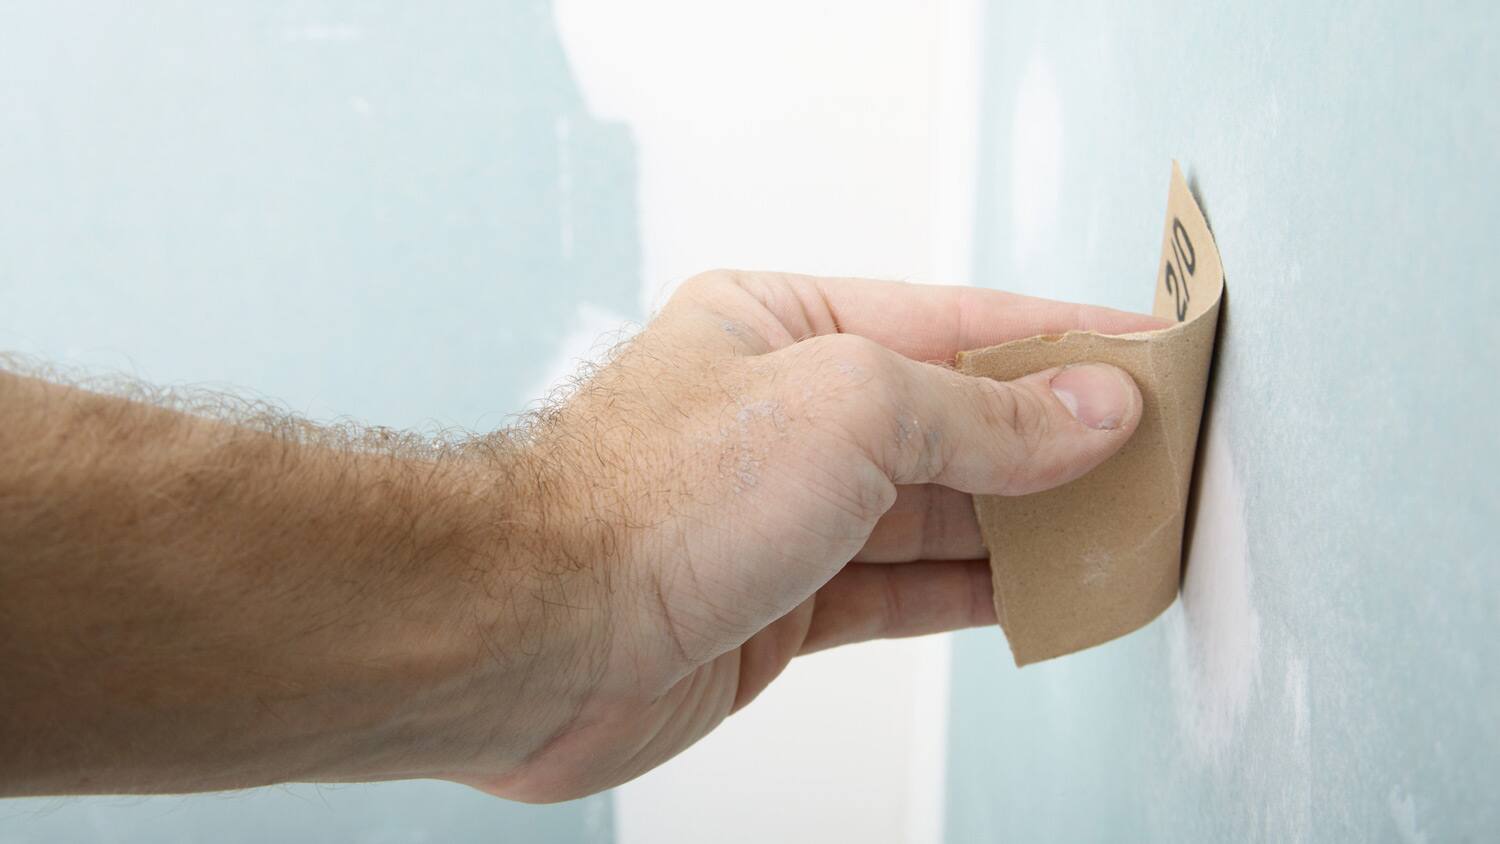
Before you begin sanding, it’s important to gather the necessary materials, including fine-grit sandpaper or sanding sponges and a clean, damp cloth. These tools will enable you to refine the spackled surface and create a uniform, paint-ready finish.
Start by lightly sanding the spackled area using fine-grit sandpaper or a sanding sponge. The goal is to smooth out any ridges, bumps, or unevenness, ensuring that the surface is uniform and free of imperfections. As you sand, periodically wipe away the sanding dust with a clean, damp cloth to assess the progress and reveal the true condition of the repaired area.
During the sanding process, pay close attention to the edges of the spackled area, ensuring that they seamlessly blend with the surrounding surface. This meticulous approach will result in a flawless transition between the repaired section and the rest of the wall or ceiling, setting the stage for a professional-quality paint job.
As you continue to sand, periodically run your hand over the surface to detect any remaining rough spots or imperfections. This tactile approach will help you identify areas that may require additional attention, ensuring that the spackled surface is impeccably smooth and ready for painting.
Once the spackled area has been thoroughly sanded and feels uniformly smooth to the touch, it is now primed for painting. The meticulous sanding process has refined the repaired section, ensuring that it seamlessly integrates with the surrounding surface, setting the stage for a flawless finish.
With the spackling and sanding process complete, you’ve taken the necessary steps to prepare the surface for painting, setting the stage for a professional-quality result that will elevate the aesthetic appeal of your space.
Conclusion
Congratulations! You’ve embarked on a journey through the world of spackling and sanding, gaining valuable insights into the process of achieving a flawless and professional-quality finish for your painting projects. By understanding the nuances of spackling and the meticulous approach required for sanding, you’ve equipped yourself with the knowledge and skills to tackle home improvement projects with confidence and precision.
Throughout this guide, we’ve explored the significance of spackle as a versatile paste that plays a pivotal role in repairing and preparing surfaces for painting. Understanding the characteristics of different spackling compounds and their suitability for specific repair needs has empowered you to make informed choices when selecting the right spackle for your projects.
From applying the first coat of spackle and meticulously feathering the edges to the application of subsequent coats and the critical process of sanding, you’ve embraced a meticulous approach to achieving a flawless finish. Each step in the spackling and sanding process has been carefully detailed, emphasizing the importance of patience, precision, and attention to detail.
As you’ve navigated through the application of multiple coats of spackle and the meticulous sanding process, you’ve honed your skills and developed a keen eye for achieving a smooth and seamless surface. By mastering the art of spackling and sanding, you’ve elevated your ability to transform imperfect surfaces into flawless canvases ready for a fresh coat of paint.
Armed with the knowledge and insights gained from this guide, you’re now prepared to tackle your next painting project with confidence and precision. Whether you’re repairing minor imperfections, filling small cracks, or preparing surfaces for a complete transformation, the principles of spackling and sanding will serve as your trusted allies in achieving professional-quality results.
So, as you pick up your spackle knife and embark on your next home improvement endeavor, remember the meticulous approach and attention to detail that have been the hallmark of your journey through the world of spackling and sanding. With these skills in your toolkit, you’re well-equipped to elevate the aesthetic appeal of your living spaces and unleash your creativity with confidence.
Happy spackling and sanding!
Frequently Asked Questions about How Many Coats Of Spackle Before Sanding
Was this page helpful?
At Storables.com, we guarantee accurate and reliable information. Our content, validated by Expert Board Contributors, is crafted following stringent Editorial Policies. We're committed to providing you with well-researched, expert-backed insights for all your informational needs.


0 thoughts on “How Many Coats Of Spackle Before Sanding”