Home>Interior Design>How To Make A Wreath Bow: 6 Easy Steps For Beginners
Interior Design
How To Make A Wreath Bow: 6 Easy Steps For Beginners
Modified: August 28, 2024
Learn how to make a stunning wreath bow in just 6 simple steps. Perfect for beginners, this interior design tutorial will elevate your home decor effortlessly.
(Many of the links in this article redirect to a specific reviewed product. Your purchase of these products through affiliate links helps to generate commission for Storables.com, at no extra cost. Learn more)
Introduction
Wreaths are a timeless and versatile decoration that can be used to add a touch of elegance and charm to any space. Whether you want to spruce up your front door, adorn your fireplace mantel, or beautify your dining table, a wreath can be the perfect finishing touch.
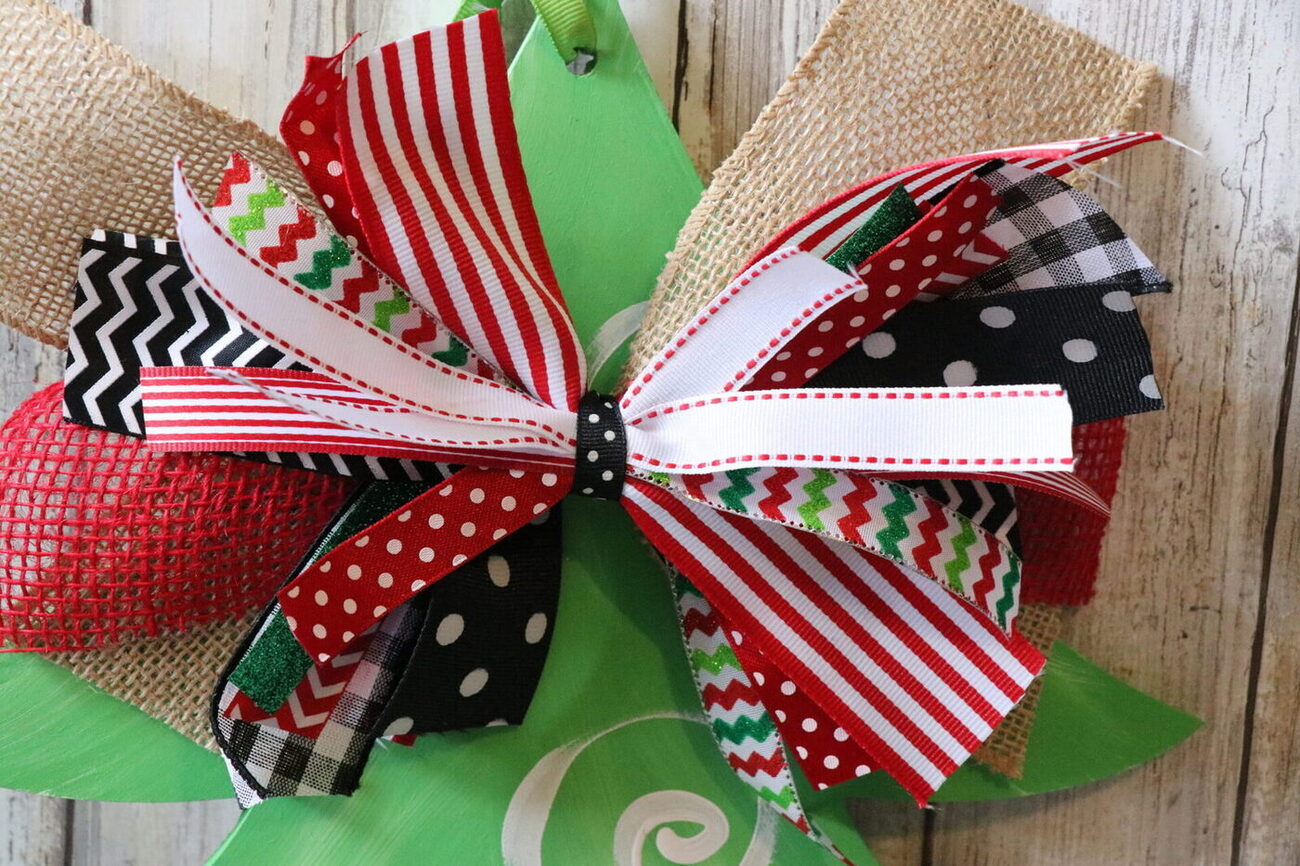
One essential element of a wreath is a beautiful bow. The bow serves as the centerpiece and adds a pop of color and texture to the overall design. Making a wreath bow may seem daunting for beginners, but with a little practice and guidance, you can create a professional-looking bow in no time.
In this article, we will walk you through six easy steps to help you master the art of making a wreath bow. Whether you’re a crafting enthusiast or a beginner looking to add a personal touch to your wreath, these steps will provide you with the foundation you need to create a stunning bow.
So, let’s gather our materials and get started!
Key Takeaways:
- Master the art of making a stunning wreath bow with these 6 easy steps, from preparing the ribbon to attaching the bow to your wreath. Elevate your décor projects with personalized, professional-looking bows.
- Gather your materials and follow these simple steps to create beautiful wreath bows. With practice and patience, you’ll soon be adding a touch of elegance to your space with your handmade creations.
Step 1: Gather your materials
Before you begin making your wreath bow, it’s important to gather all the necessary materials. Here’s what you’ll need:
- Wire-edged ribbon: Choose a ribbon that is about 2-3 inches wide and has wire edges. This type of ribbon holds its shape well and makes it easier to create a full and voluminous bow.
- Scissors: Make sure you have a sharp pair of scissors to cut the ribbon cleanly.
- Floral wire: Floral wire will be used to secure the bow and attach it to the wreath.
- Wire cutters: If your floral wire is too long, you’ll need wire cutters to trim it down to size.
Once you have gathered all your materials, find a comfortable and well-lit workspace. It’s also helpful to have a flat surface to work on, such as a table or countertop.
Now that you have everything you need, let’s move on to preparing the ribbon for your wreath bow.
Step 2: Preparing your ribbon
Before you start shaping your ribbon into a bow, it’s important to prepare it properly. Follow these steps to ensure that your bow looks neat and well-formed:
- Measure and cut your ribbon: Start by measuring the length of ribbon you’ll need for your desired bow size. Depending on the size of your wreath, you may need anywhere from 2 to 4 feet of ribbon. Use a sharp pair of scissors to cut the ribbon at the appropriate length.
- Seal the ends: To prevent fraying, use a lighter to gently seal the cut ends of the ribbon. Be careful not to hold the flame too close to the ribbon, as this can cause the ribbon to melt or catch fire. A quick pass over the flame should be sufficient to seal the ends.
- Create V-shaped tails: Using your scissors, cut a V shape into each end of the ribbon. This will give your bow a polished and professional look.
Once you have prepared your ribbon, it’s time to start creating the bow loops. This is where the magic happens and your wreath bow begins to take shape. Keep reading to learn how to create the center loop.
Step 3: Creating the center loop
The center loop is the foundation of your wreath bow. By starting with a well-formed center loop, you can easily build upon it to create a full and beautiful bow. Here’s how:
- Hold the ribbon: Take your ribbon and hold it vertically in front of you, ensuring that the printed or patterned side is facing outwards. The length of ribbon should be in a slightly loose and relaxed state.
- Create a loop: Using your thumb and forefinger, pinch the ribbon about two-thirds of the way down from the top. This will be the size of your center loop.
- Secure the loop: With your other hand, twist the base of the loop in the opposite direction to create a twist in the ribbon. This twist will serve as the anchor point for the rest of the bow.
- Fluff the loop: Gently pull the sides of the center loop to create a rounded shape. Adjust the size and shape of the loop until you are satisfied with the result.
Now that you have your perfectly shaped center loop, it’s time to move on to the next step: making the first bow loop. Keep reading to learn how to create a symmetrical and balanced bow.
When making a wreath bow, use wired ribbon for easier shaping and manipulation. This will help you create a fuller and more professional-looking bow.
Step 4: Making the first bow loop
With your center loop in place, it’s time to start creating the bow loops. The first bow loop will be the largest one and will set the tone for the rest of the bow. Follow these steps to create the first bow loop:
- Hold the ribbon: Take the longer end of the ribbon and bring it over the center loop, forming a loop of your desired size. The loop should have the printed or patterned side facing outwards.
- Pinch and twist: Pinch the base of the loop between your thumb and forefinger, securing it in place. Twist the loop once in a clockwise direction, creating a twist similar to the center loop.
- Position the loop: Adjust the position of the first bow loop so that it rests slightly to the left of the center loop. This will add balance and symmetry to the overall bow.
- Fluff the loop: Gently pull the sides of the first bow loop to create a rounded and full shape. Make sure the loop is evenly distributed and free of any creases or folds.
Now that you have your first bow loop complete, it’s time to move on to the next step: creating the second bow loop. This will add layers and dimension to your wreath bow. Keep reading to learn how to make the second loop.
Step 5: Creating the second bow loop
With the first bow loop in place, it’s time to add another layer of beauty and dimension to your wreath bow. Follow these steps to create the second bow loop:
- Hold the ribbon: Take the longer end of the ribbon and bring it over the existing bow loops, forming a second loop parallel to the first one. Again, make sure the printed or patterned side is facing outwards.
- Pinch and twist: Pinch the base of the second loop between your thumb and forefinger, securing it in place. Twist the loop once in a clockwise direction, just like you did with the previous loops.
- Position the loop: Adjust the position of the second bow loop so that it rests slightly to the right of the first loop. This will create a layered and visually pleasing effect.
- Fluff the loop: Gently pull the sides of the second bow loop to create a full and rounded shape. Ensure that the loop is balanced and complementary to the rest of the bow.
By creating the second bow loop, you are adding depth and texture to your wreath bow. Now, it’s time for the final step: adding the finishing touches and attaching the bow to your wreath. Keep reading to learn how to complete your wreath bow with finesse.
Step 6: Finishing touches and attaching the bow
Now that you have created all the bow loops, it’s time to add the finishing touches and attach the bow to your wreath. Follow these final steps to complete your wreath bow:
- Fluff and adjust: Take a moment to fluff each bow loop, ensuring that they are evenly shaped and symmetrical. Adjust any loops as needed to create a balanced and visually appealing bow.
- Cut the excess ribbon: Trim the ribbon, leaving enough length to work with but ensuring that it’s not too long or overwhelming. Use your scissors to cut the ribbon at an angle for a clean and polished look.
- Secure the bow: Take a piece of floral wire and tightly wrap it around the base of the bow, securing all the loops together. Twist the wire tightly to ensure the bow is held in place.
- Attach the bow to the wreath: Depending on the type of wreath you have, you can attach the bow using the floral wire. Wrap the wire around the wreath form, weaving it through the branches or securing it to the frame. Make sure the bow is centered and securely attached.
- Fluff and adjust again: Once the bow is attached, take a moment to fluff and adjust the loops one final time. Ensure that all the loops are facing the right direction and that the bow is positioned exactly as desired.
And there you have it! With these easy steps, you have successfully created a beautiful wreath bow. Step back and admire your handiwork – your wreath is now complete!
Remember, practice makes perfect, so don’t be discouraged if your first attempt isn’t exactly as you imagined. With a bit of practice and patience, you’ll soon be able to create stunning wreath bows with ease.
Now go ahead and showcase your newfound bow-making skills by adding gorgeous bows to all your wreaths and décor projects!
Conclusion
Creating a wreath bow is a delightful and rewarding craft that allows you to add a personal and decorative touch to your wreaths. By following the six easy steps outlined in this guide, you can master the art of making a wreath bow and elevate the overall look of your wreath.
Remember to gather all the necessary materials, including wire-edged ribbon, scissors, floral wire, and wire cutters. Preparing your ribbon by measuring, cutting, and sealing the ends will ensure a neat and polished bow. Creating the center loop serves as the foundation for the bow, while making the first and second bow loops adds volume and dimension.
Take the time to fluff and adjust each bow loop, ensuring that they are symmetrical and visually pleasing. Once you are satisfied with the bow’s appearance, secure it with floral wire and attach it to your wreath. Finally, trim any excess ribbon and make any final adjustments before stepping back and admiring your beautiful creation.
While it may take a bit of practice to perfect your wreath bow-making skills, don’t be discouraged. Embrace the process and enjoy the creative journey. With each bow you make, you’ll gain more confidence and finesse.
So, unleash your creativity and let your imagination run wild. Experiment with different ribbon colors, patterns, and textures to create bows that suit your personal style and complement your wreaths. Whether you’re decorating for a holiday, a special occasion, or simply expressing your love for all things beautiful, the art of making wreath bows allows you to infuse your spaces with charm and elegance.
Now that you have learned the steps to make a wreath bow, don’t hesitate to explore other variations and techniques. With time and practice, you’ll refine your skills and develop your own unique style of wreath bow-making.
So go ahead, embrace your inner creativity, and have fun adorning your wreaths with beautifully crafted bows. Your handiwork will surely bring joy and admiration to all who see it.
Frequently Asked Questions about How To Make A Wreath Bow: 6 Easy Steps For Beginners
Was this page helpful?
At Storables.com, we guarantee accurate and reliable information. Our content, validated by Expert Board Contributors, is crafted following stringent Editorial Policies. We're committed to providing you with well-researched, expert-backed insights for all your informational needs.


0 thoughts on “How To Make A Wreath Bow: 6 Easy Steps For Beginners”