Articles
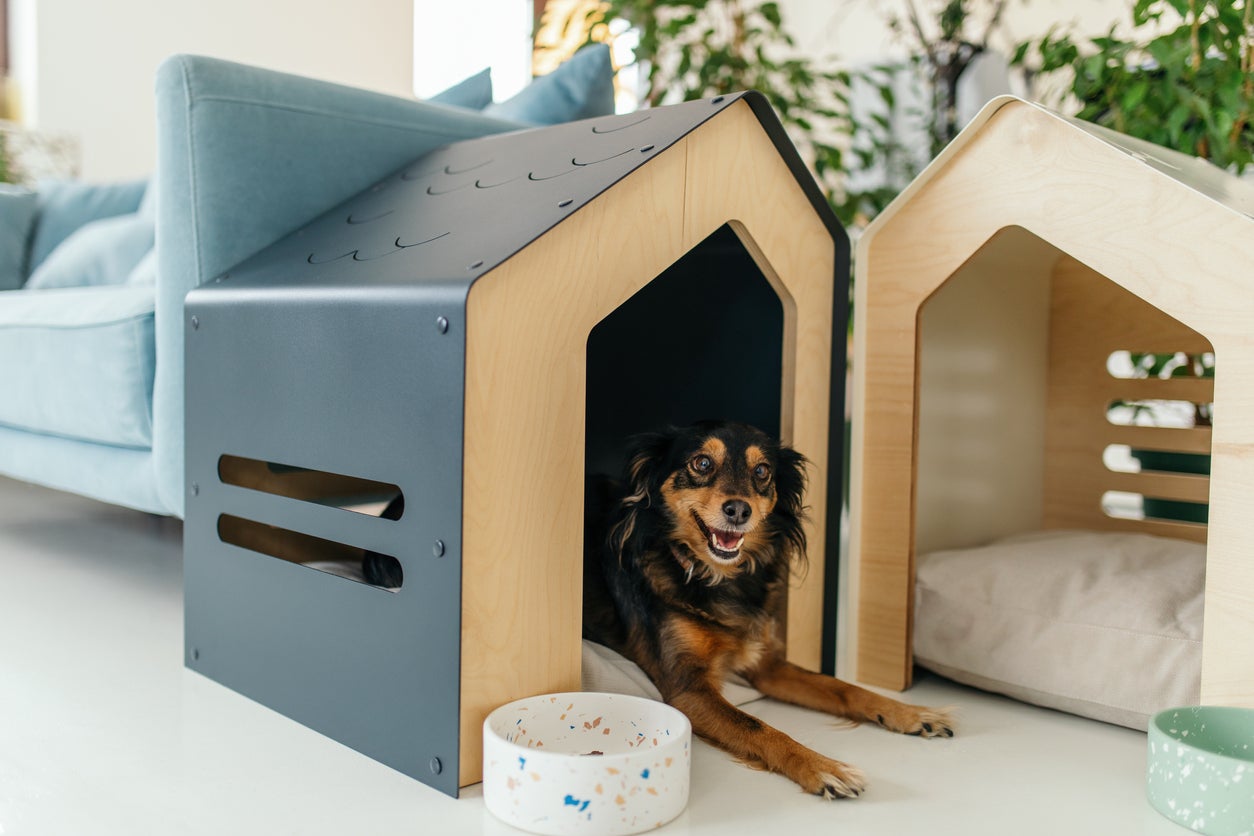
How To Build A Doghouse
Modified: May 6, 2024
Learn how to build a doghouse with step-by-step articles. Perfect for DIY enthusiasts looking to create a cozy space for their furry friends.
(Many of the links in this article redirect to a specific reviewed product. Your purchase of these products through affiliate links helps to generate commission for Storables.com, at no extra cost. Learn more)
Introduction
Welcome to this comprehensive guide on how to build a doghouse. Whether you’re a seasoned DIY enthusiast or a beginner looking to take on a new project, constructing a doghouse can be a rewarding and practical endeavor. Not only will it provide your furry friend with a comfortable and safe space of their own, but it will also showcase your creativity and craftsmanship.
Building a doghouse is more than just a construction task; it’s an opportunity to create a haven for your four-legged companion. The process involves careful planning, precise measurements, and proper execution to ensure the structure is sturdy, weather-resistant, and aesthetically pleasing. Through this step-by-step guide, we will take you on a journey to construct the perfect doghouse.
Before we dive into the building process, it’s important to note that every dog is unique, and their specific needs should be considered when designing and constructing their shelter. Factors such as size, breed, and climate will play a role in determining the dimensions, materials, and insulation requirements for the doghouse. We will cover these aspects throughout the guide to ensure you create a customized and comfortable space for your furry friend.
So, let’s gather our tools, unleash our creativity, and embark on this exciting journey of building a doghouse that your beloved pet will truly appreciate!
Key Takeaways:
- Building a doghouse is a rewarding DIY project that provides your furry friend with a safe and comfortable space. Customization and attention to detail ensure a unique and special shelter for your pet.
- Regular maintenance and observation of your dog’s behavior are crucial for ensuring the longevity and comfort of the doghouse. Showcasing your commitment and care through this project will be rewarded with your pet’s joy and gratitude.
Read more: How To Build A House Out Of A Metal Building
Step 1: Gathering Materials
Before you begin the construction of your doghouse, it’s essential to gather all the necessary materials and tools. By having everything on hand, you can work efficiently and avoid interruptions during the building process.
Here is a list of essential materials and tools you will need:
- Wood: Select a suitable type of wood that is weather-resistant, such as cedar or pressure-treated lumber.
- Screws and nails: Choose corrosion-resistant screws and nails to ensure the durability of the doghouse.
- Roofing materials: Options include shingles, corrugated metal, or waterproof roofing panels.
- Insulation: If you live in an area with extreme temperatures, consider insulating the doghouse.
- Hinges and latches: These will be used for the door of the doghouse.
- Drill and screwdriver: These tools are necessary for assembling the various components.
- Saw: You will need a saw to cut the wood to the desired measurements.
- Measuring tape: Accurate measurements are crucial for a well-built doghouse.
- Sandpaper: Smooth out any rough edges for a finished look.
- Paint or sealant: Add a layer of protection and enhance the appearance of the doghouse.
Once you have gathered all the necessary materials and tools, you are ready to move on to the next step of the construction process. Make sure to have everything organized and easily accessible before proceeding to measure and cut the wood for the doghouse.
Step 2: Measuring and Cutting the Wood
Now that you have all the materials and tools ready, it’s time to measure and cut the wood for your doghouse. This step is crucial in ensuring that the components fit together properly and the final structure is sturdy and well-proportioned.
Follow these steps to measure and cut the wood:
- Begin by measuring the size of your dog. Take note of their height, length, and width. These measurements will help determine the appropriate dimensions for the doghouse.
- Using a measuring tape, mark the dimensions on the wood according to the design you have in mind. Take into consideration the length, width, and height of the doghouse, as well as the thickness of the wood you are using.
- Once marked, use a saw to cut the wood along the measured lines. Ensure that your cuts are precise and straight to achieve accurate dimensions.
- Repeat the process for each component of the doghouse, including the base, walls, and roof. Remember to account for any additional features you plan to include, such as windows or a porch.
- After cutting the wood, use sandpaper to smooth out any rough edges or splinters. This will create a safer and more polished finish.
It’s crucial to measure carefully and double-check your markings before making any cuts. Taking the time to be precise in this step will save you from any potential issues during assembly and ensure a well-fitted doghouse.
Once you have measured and cut all the necessary pieces of wood, you are ready to move on to the next step: assembling the base of the doghouse.
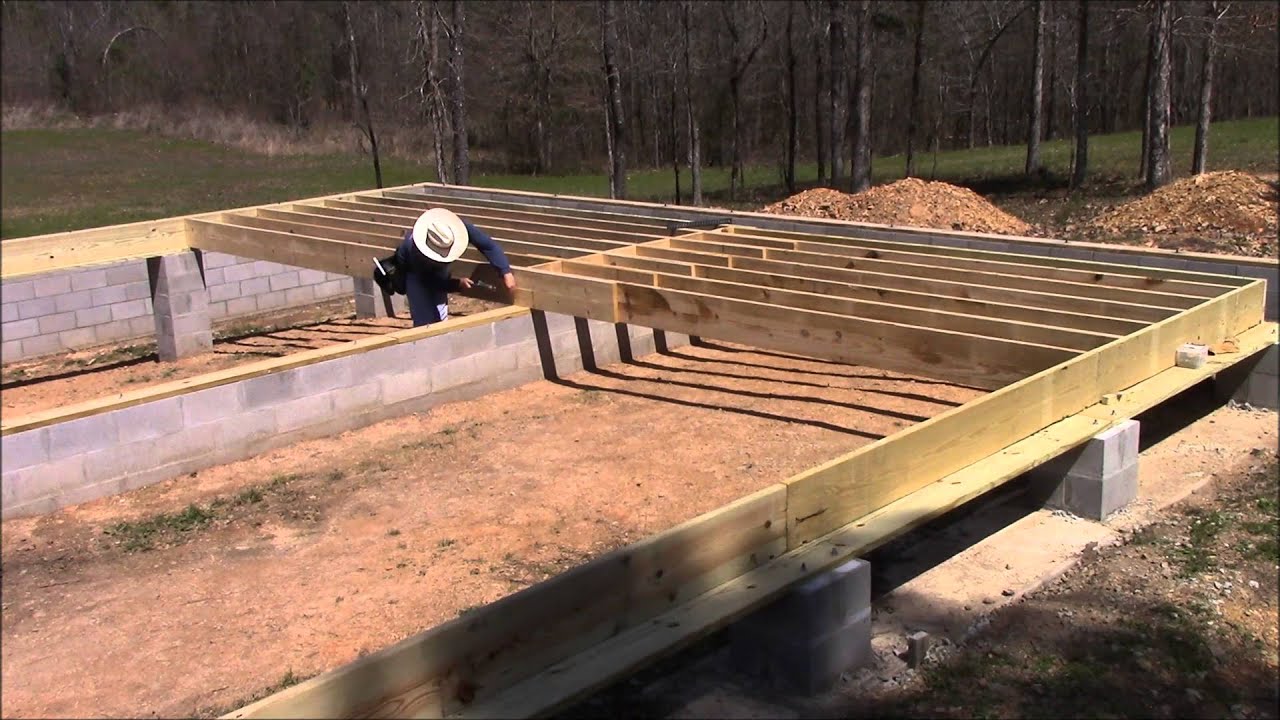
Step 3: Assembling the Base
With the wood cut to the desired measurements, it’s time to start assembling the base of your doghouse. The base is the foundation that provides stability and support for the entire structure.
Follow these steps to assemble the base:
- Lay out the pieces of wood that will form the base in the desired shape and size. Ensure that they align properly and create a solid foundation.
- Using your drill, pre-drill holes in the wood where the screws or nails will be inserted. This will prevent the wood from splitting when fastening the pieces together.
- Apply a suitable wood adhesive along the mating surfaces of the pieces. This will further strengthen the joint between the boards.
- Align the pieces and secure them together using screws or nails in the pre-drilled holes. Make sure to fasten the boards tightly for a secure and stable base.
- Check for any unevenness or wobbling in the base. If necessary, adjust the positioning of the boards and secure them again.
Once the base is assembled and sturdy, it’s important to check that it is level and sits flat on the ground. This will ensure the stability and longevity of the doghouse.
You have now completed the third step and successfully assembled the base of your doghouse. In the next step, we will focus on building the walls of the structure.
Step 4: Building the Walls
With the base of the doghouse securely in place, it’s time to move on to building the walls. The walls will provide structure, insulation, and protection for your furry friend.
Follow these steps to build the walls:
- Measure and cut the wood pieces for the walls according to the dimensions you have planned. Each wall should correspond to one side of the doghouse.
- If you plan to add windows or ventilation, mark and cut out the appropriate openings on the wall panels.
- Apply wood adhesive to the mating surfaces of the pieces, ensuring a strong bond between the boards.
- Align the pieces and fasten them together using screws or nails. Check for any unevenness or gaps and adjust as needed.
- Repeat the process for each wall panel, making sure to maintain consistent measurements and a tight fit.
As you assemble the walls, it’s important to keep in mind any additional features you want to incorporate, such as a door or a window. Ensure that the openings are properly measured and cut, allowing for easy access and ventilation.
Once the walls are securely assembled, place them on top of the base and check for proper alignment. The walls should fit snugly, with no gaps or instability.
With the walls in place, your doghouse is starting to take shape! In the next step, we will focus on creating the roof of the structure.
When building a doghouse, make sure to use weather-resistant materials and provide proper insulation to keep your dog comfortable in all seasons.
Read more: How To Build A Sunroom
Step 5: Creating the Roof
Now that the walls of your doghouse are in place, it’s time to move on to creating the roof. The roof serves as a protective barrier against the elements, keeping your furry friend dry and comfortable.
Follow these steps to create the roof:
- Measure and cut the wood pieces for the roof according to your desired dimensions. The roof panels should be slightly larger than the dimensions of the doghouse to provide adequate coverage.
- Attach the roof panels to the top of the walls using screws or nails. Make sure they are aligned and positioned securely.
- If you are using roofing materials such as shingles or corrugated metal, follow the manufacturer’s instructions for installation.
- Ensure that the roof is fully secured and there are no gaps or loose areas that could allow water to seep in.
When creating the roof, it’s important to consider the slope or pitch. This will help water to drain effectively, preventing any pooling or leakage. A gentle slope is typically sufficient to allow rainwater to run off easily.
After the roof is installed, check for any gaps or openings along the edges. Use caulking or sealant to fill in any gaps and provide additional weatherproofing.
With the roof in place, your doghouse is almost complete! In the next step, we will focus on installing the door for easy access.
Step 6: Installing the Door
Now that the main structure of your doghouse is complete, it’s time to install the door. The door provides easy access for your furry friend and allows them to come and go as they please.
Follow these steps to install the door:
- Measure and cut the wood for the door according to the size of the opening you have created on one of the walls.
- Attach hinges to one side of the door and then attach the hinges to the corresponding side of the opening.
- Make sure the door swings freely and opens and closes smoothly. If necessary, adjust the hinges to ensure proper alignment.
- Install a latch or lock mechanism to keep the door securely closed when needed.
It’s important to consider the size of your dog when determining the size of the door. You want to ensure that your furry friend can comfortably enter and exit the doghouse without any difficulties.
Once the door is installed and functioning properly, take a moment to test it. Open and close the door a few times to ensure smooth operation and a secure latch.
With the door in place, your doghouse is almost ready for your furry friend to move in! In the next step, we will focus on adding some finishing touches to complete the construction process.
Step 7: Adding Finishing Touches
With the major construction of your doghouse complete, it’s time to add the final finishing touches. These small details will not only enhance the overall appearance of the doghouse but also contribute to the comfort and functionality for your furry friend.
Follow these steps to add the finishing touches:
- Sand any rough edges or surfaces to ensure a smooth and safe finish. Pay attention to corners and edges where your dog may brush against.
- Apply a protective sealant or paint to the exterior of the doghouse. Choose a pet-friendly and weather-resistant option. This will help protect the wood from moisture, UV rays, and other elements.
- Add insulation to the walls if you live in an area with extreme temperatures. This will help regulate the temperature inside the doghouse and keep your furry friend comfortable year-round.
- Consider adding a raised floor inside the doghouse to keep your pet elevated from the ground. This will help prevent moisture, pests, and drafts from entering the living space.
- Include bedding or a comfortable cushion inside the doghouse to provide a cozy and inviting space for your furry friend. Choose materials that are easy to clean and resistant to moisture.
- Decorate the exterior of the doghouse with personalized touches, such as your dog’s name or a custom design. This will make the doghouse feel more unique and special.
Remember to prioritize the safety and comfort of your dog throughout the finishing touches. Choose materials that are non-toxic and safe for your furry friend. Additionally, ensure that the doghouse remains well-ventilated to provide proper airflow.
With the finishing touches in place, your doghouse is now complete! Stand back and admire your handiwork, knowing that you have created a comfortable and stylish shelter for your beloved pet.
Congratulations on successfully building a doghouse from scratch! Your furry friend will surely appreciate their new home.
Remember to regularly inspect and maintain the doghouse to ensure its longevity and your pet’s continued comfort. With proper care, your doghouse will provide a safe and cozy haven for your furry friend for years to come.
Thank you for following this comprehensive guide on how to build a doghouse. Happy building!
Conclusion
Building a doghouse is a fulfilling project that benefits both you and your furry friend. Throughout this comprehensive guide, we have covered the step-by-step process of constructing a doghouse, from gathering materials to adding the finishing touches.
By following these steps and putting in the time and effort, you have created a safe and comfortable space for your beloved pet. Your dog now has a dedicated place of their own, where they can seek shelter, relax, and enjoy some privacy.
Remember, building a doghouse is not just about creating a functional structure; it’s an opportunity to showcase your creativity, craftsmanship, and love for your four-legged companion. Customizing the design, incorporating personal touches, and ensuring the doghouse meets your dog’s specific needs will make it a truly unique and special space.
Regular maintenance is essential to keep the doghouse in optimal condition. Inspect the structure periodically, repair any damage, and apply necessary treatments to protect it from weather elements. Additionally, maintain cleanliness by regularly removing debris and keeping the interior hygienic for your pet’s well-being.
Lastly, be sure to observe your dog’s behavior and make any necessary adjustments to the doghouse. Monitor their comfort level, especially during extreme weather conditions, and make adaptations to provide adequate insulation or ventilation as needed.
Building a doghouse is an act that demonstrates your commitment and care for your furry friend. The time and effort you put into constructing a comfortable and functional shelter will be rewarded with the joy and gratitude of your canine companion.
Thank you for following this guide, and we hope you and your pet enjoy the new doghouse for years to come!
Now that you've mastered building a doghouse, why not tackle more projects that can spruce up your skills and your space? Check out our guide on woodworking for fresh ideas that will keep you busy and your tools buzzing. Or, if you're feeling adventurous, dive into a variety of outdoor projects guaranteed to transform any backyard into a personal paradise. Both guides offer practical tips and creative inspiration to enhance your DIY journey.
Frequently Asked Questions about How To Build A Doghouse
Was this page helpful?
At Storables.com, we guarantee accurate and reliable information. Our content, validated by Expert Board Contributors, is crafted following stringent Editorial Policies. We're committed to providing you with well-researched, expert-backed insights for all your informational needs.


0 thoughts on “How To Build A Doghouse”