

Articles
How To Change A Tail Light Bulb
Modified: August 26, 2024
Learn how to change a tail light bulb with step-by-step instructions and helpful tips in this informative article. Get your car back on the road in no time!
(Many of the links in this article redirect to a specific reviewed product. Your purchase of these products through affiliate links helps to generate commission for Storables.com, at no extra cost. Learn more)
Introduction
Having a working tail light is crucial for your safety on the road. Not only does it help other drivers see your vehicle at night or in poor weather conditions, but it also indicates your intentions while driving, such as braking or turning. When a tail light bulb burns out, it’s important to replace it promptly to ensure your safety and avoid a potential traffic violation.
In this article, we will guide you through the step-by-step process of changing a tail light bulb. Whether you’re a seasoned DIY enthusiast or a beginner, with the right tools and a little patience, you can easily replace a tail light bulb yourself and save money on labor costs.
Before we delve into the steps, let’s briefly mention the tools and materials you will need for this task:
- Replacement tail light bulb
- Screwdriver (if necessary)
- Gloves (optional)
Now that you have your tools ready, let’s begin the process of changing a tail light bulb.
Key Takeaways:
- Ensure your safety and save on labor costs by replacing a tail light bulb yourself. Gather the right tools, follow the step-by-step process, and test the new bulb for proper functionality.
- Opt for LED bulbs for longevity and energy efficiency. Always consult your vehicle’s manual for specific instructions and consider keeping spare bulbs in your emergency kit for future convenience.
Read more: What Is The Size Of A Tail Light Bulb Finder
Tools and Materials Needed
Before you start changing a tail light bulb, it’s important to gather the necessary tools and materials. Here are the items you’ll need for the task:
- Replacement tail light bulb: This is the most crucial item you’ll need. Make sure you have the correct bulb size and type for your specific vehicle model. Refer to your vehicle’s owner’s manual or consult with a local automotive store to find the right bulb.
- Screwdriver (if necessary): Depending on your vehicle’s make and model, you may need a screwdriver to remove the tail light assembly. Check to see if there are any screws or fasteners holding the assembly in place.
- Gloves (optional): While not essential, wearing gloves can help protect your hands from dirt, debris, and any residue on the tail light assembly.
When purchasing a replacement tail light bulb, consider opting for an LED (Light Emitting Diode) bulb if your vehicle supports it. LED bulbs are known for their longevity, energy efficiency, and enhanced brightness compared to traditional incandescent bulbs. However, if you prefer to stick with the original type of bulb installed in your vehicle, make sure to get the correct wattage and base type.
It’s always a good idea to have spare bulbs on hand, just in case another tail light bulb fails in the future. Keeping a set of spare bulbs in your vehicle’s emergency kit can save you time and hassle later on.
Now that you have gathered all the necessary tools and materials, let’s move on to the step-by-step process of changing a tail light bulb.
Step 1: Accessing the Tail Light Assembly
The first step in changing a tail light bulb is to gain access to the tail light assembly. Here’s how to do it:
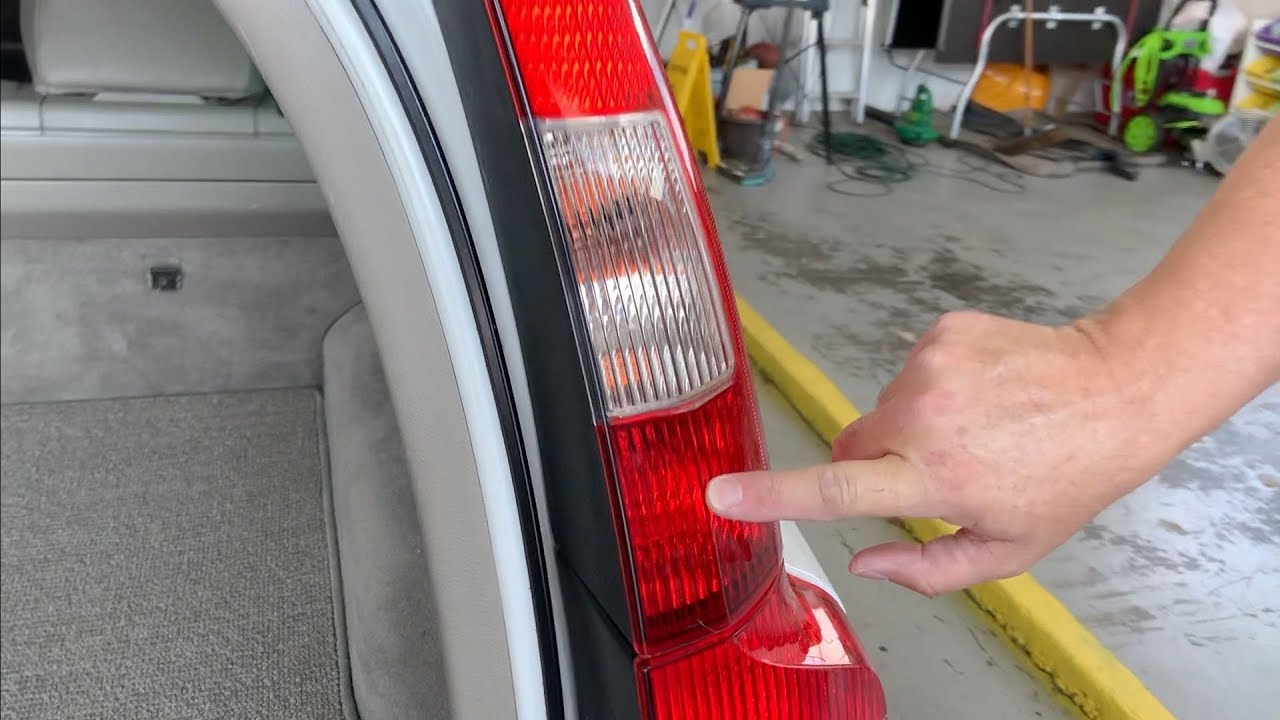
- Locate the tail light assembly: The tail light assembly is usually located on the rear of your vehicle. Depending on the make and model of your vehicle, it may be housed in the trunk/boot, on the side of the vehicle, or on the rear bumper.
- Remove any covers or trim panels: In some cases, there may be covers or trim panels that need to be removed to access the tail light assembly. Check for any screws, clips, or fasteners securing these panels and remove them using the appropriate tools (e.g., screwdriver).
- Inspect the assembly for screws or bolts: Some tail light assemblies are held in place by screws or bolts. If you see any, use the appropriate tool to loosen and remove them.
- Remove the tail light assembly: Once any covers, trim panels, and fasteners have been removed, gently pull the tail light assembly away from the vehicle. Be careful not to force it, as you don’t want to damage the assembly or the vehicle’s body.
It’s worth noting that the process of accessing the tail light assembly may vary slightly depending on your vehicle’s make and model. Always refer to your vehicle’s owner’s manual for specific instructions or consult with a professional if you’re unsure.
With the tail light assembly now accessible, you can move on to the next step: removing the old bulb.
Step 2: Removing the Old Bulb
Now that you have accessed the tail light assembly, it’s time to remove the old bulb. Follow these steps:
- Identify the bulb socket: Look for the socket that holds the bulb inside the tail light assembly. It’s usually a plastic or rubber piece with wires connected to it.
- Remove the socket: Depending on the design, you may need to twist the socket counterclockwise or squeeze and pull it out. Some sockets may have retaining clips that need to be squeezed or released to remove them.
- Extract the old bulb: Once the socket is removed, you can now access the old bulb. Gently pull it straight out from the socket. If the bulb is stuck, you may need to give it a slight twist while pulling to loosen it.
- Inspect the old bulb: Take a moment to examine the old bulb for any signs of damage, such as a broken filament or blackened glass. This will help you identify if the bulb was indeed faulty.
When handling the old bulb, be cautious not to touch the glass part with your bare hands. The oils from your skin can cause the bulb to burn out more quickly. If you accidentally touch the bulb, clean it with rubbing alcohol or a lint-free cloth before installing the new one.
With the old bulb removed, it’s time to proceed to the next step: installing the new bulb.
When changing a tail light bulb, make sure to wear gloves to avoid getting oils from your skin on the new bulb, which can cause it to burn out prematurely.
Step 3: Installing the New Bulb
Now that you have removed the old bulb, it’s time to install the new one. Follow these steps to properly install the replacement tail light bulb:
- Prepare the new bulb: Before inserting the new bulb, make sure it is the correct type and matches the specifications of the old bulb. Avoid touching the glass part of the new bulb with your bare hands. If you do, clean it with rubbing alcohol or a lint-free cloth.
- Insert the new bulb into the socket: Align the base of the new bulb with the socket and gently push it in. Ensure that the bulb is securely seated in the socket.
- Reinsert the socket into the tail light assembly: Place the socket back into its original position in the tail light assembly. If it’s a twist-in type, turn it clockwise until it locks into place. If there are retaining clips, ensure they snap back into position to secure the socket.
It’s important to note that some bulbs may require a specific orientation or alignment when inserting them into the socket. Check the bulb packaging or consult your vehicle’s manual for any specific instructions.
Once you have installed the new bulb, it’s essential to test it to ensure it’s functioning correctly.
Read more: How To Change A Light Bulb
Step 4: Testing the New Bulb
After installing the new tail light bulb, it’s crucial to test it to ensure it’s working correctly. Follow these steps to verify the functionality of the new bulb:
- Turn on your vehicle’s lights: Start by turning on your vehicle’s headlights to illuminate the tail lights.
- Check for proper illumination: Walk to the rear of your vehicle and observe the newly replaced tail light bulb. Ensure that it is emitting a steady and bright light.
- Activate your turn signals: Engage your vehicle’s turn signals, both left and right. Verify that the new bulb is blinking in synchronization with the appropriate turn signal.
- Test the brake lights: Ask someone to press the brake pedal while you observe the rear of your vehicle. Confirm that the new tail light bulb illuminates brightly when the brakes are applied.
If the new bulb is not functioning correctly or if there are any issues with its performance, you may need to double-check the installation or consider replacing the bulb with another one from a reliable source.
Once you are satisfied with the testing and functionality of the new bulb, it’s time to reassemble the tail light assembly.
Step 5: Reassembling the Tail Light Assembly
Now that you have successfully installed and tested the new tail light bulb, it’s time to reassemble the tail light assembly. Follow these steps to complete the process:
- Align the tail light assembly: Position the tail light assembly back into its original location on the vehicle. Ensure that all the alignment tabs and hooks line up correctly.
- Push the assembly into place: Apply gentle pressure and push the assembly firmly into place until it snugly fits against the vehicle’s body.
- Secure the assembly: If there were any screws or bolts holding the assembly, reinsert and tighten them using the appropriate tool. Make sure to follow the manufacturer’s guidelines for the correct torque specifications.
- Reattach any covers or trim panels: If you had to remove any covers or trim panels to access the tail light assembly, reinstall them and secure them using the proper screws, clips, or fasteners.
Once you have reassembled the tail light assembly, take a moment to visually inspect it to ensure that it is properly seated and securely fastened. Test the tail light again to verify that it is still working correctly before hitting the road.
And there you have it! You have successfully changed a tail light bulb and restored the functionality of your vehicle’s tail lights.
Remember, if you encounter any difficulties during the process or if you prefer professional assistance, don’t hesitate to consult a qualified auto mechanic or technician.
Safe travels!
Conclusion
Changing a tail light bulb may seem like a daunting task, but with the right tools and a little guidance, it can be a simple and rewarding DIY project. By following the step-by-step instructions outlined in this article, you can confidently replace a faulty tail light bulb and ensure your safety on the road.
Remember to gather the necessary tools and materials before starting the process. Having a replacement tail light bulb that matches your vehicle’s specifications is crucial. Additionally, wearing gloves can help protect your hands during the process.
Accessing the tail light assembly is the first step, which may require removing covers or trim panels and potentially loosening screws or bolts. Once you have gained access, carefully remove the old bulb by extracting it from the socket. Inspect the old bulb for any signs of damage.
Installing the new bulb involves preparing and inserting it into the socket. Take care not to touch the glass of the new bulb with bare hands, as it can shorten its lifespan. Securely reinsert the socket back into the tail light assembly.
After the installation, testing the new bulb is essential to ensure its proper functionality. Verify that it illuminates when the headlights are on, blinks with the turn signals, and brightens when the brakes are applied.
Finally, reassemble the tail light assembly by aligning and pushing it gently into place, securing any screws or bolts, and reattaching covers or trim panels if necessary.
Remember, if you encounter any difficulties or have concerns about the process, it’s always best to consult a professional auto mechanic or technician for assistance. They can provide expertise and ensure that the tail light bulb replacement is done correctly.
By successfully changing a tail light bulb, you maintain your vehicle’s visibility and safety on the road. So, stay proactive and address any faulty tail light bulbs promptly. Don’t let a simple bulb replacement compromise your driving experience and safety.
Now, armed with the knowledge, tools, and confidence, you are ready to tackle the task of changing a tail light bulb. Safe travels!
Frequently Asked Questions about How To Change A Tail Light Bulb
Was this page helpful?
At Storables.com, we guarantee accurate and reliable information. Our content, validated by Expert Board Contributors, is crafted following stringent Editorial Policies. We're committed to providing you with well-researched, expert-backed insights for all your informational needs.




0 thoughts on “How To Change A Tail Light Bulb”