
Articles
How To Change Refrigerator Light Bulb
Modified: October 20, 2024
Discover step-by-step instructions on changing the light bulb in your refrigerator with this helpful article. Learn how to easily replace the bulb and brighten your fridge!
(Many of the links in this article redirect to a specific reviewed product. Your purchase of these products through affiliate links helps to generate commission for Storables.com, at no extra cost. Learn more)
Introduction
Welcome to this comprehensive guide on how to change the light bulb in your refrigerator. The refrigerator light bulb is an essential component that allows you to see inside the fridge and locate your food items easily. However, over time, the bulb may burn out and need replacement. While it may seem like a daunting task, changing the refrigerator light bulb is actually quite simple and can be done in just a few steps.
In this article, we will walk you through the process of changing the light bulb in your refrigerator, ensuring that you have all the necessary tools and knowledge to complete the task safely and efficiently. Whether you have a side-by-side refrigerator, a top-freezer model, or a French door fridge, the steps outlined here will apply to most common refrigerator types.
Before we dive into the step-by-step instructions, let’s go over the tools you will need to gather in order to successfully change the light bulb in your refrigerator.
Key Takeaways:
- Changing the light bulb in your refrigerator is a simple process that can be completed with the right tools and precautions. Follow the step-by-step guide to enjoy a well-lit and organized fridge.
- Ensure your safety by unplugging the refrigerator before changing the light bulb. Properly dispose of the old bulb and marvel at the improved visibility inside your fridge with the new light bulb.
Step 1: Gather the necessary tools
Before you begin the process of changing the light bulb in your refrigerator, it’s important to gather the necessary tools. Having these tools ready will save you time and make the process much smoother. Here’s a list of tools you will need:
- Safety gloves: It’s always a good idea to wear safety gloves to protect your hands from any potential sharp edges or glass fragments.
- Phillips screwdriver: Most refrigerator light bulbs are secured with screws, so a Phillips screwdriver will be essential in removing the cover or lens.
- Replacement light bulb: Make sure to check the manual of your refrigerator or the existing bulb to determine the correct wattage and type of bulb needed for your specific model.
- Ladder or step stool: Depending on the height of your refrigerator, you may need a ladder or step stool to reach the light bulb housing.
Once you have gathered these tools, you are now ready to move on to the next step of the process: unplugging the refrigerator.
Step 2: Unplug the refrigerator
Before starting any work on your refrigerator, it’s important to ensure your safety by unplugging the appliance. This will prevent any potential electrical shock while you are working on changing the light bulb.
To unplug the refrigerator, locate the power cord at the back of the appliance. It is usually near the bottom. Gently pull the plug out of the electrical outlet. Double-check that the refrigerator is no longer receiving power by trying to turn on the light inside the fridge. If the light doesn’t turn on, you can proceed to the next step.
Unplugging the refrigerator is a crucial step as it eliminates the risk of electric shock during the bulb replacement process. It is always better to be safe than sorry!
Once you have successfully unplugged the refrigerator, you can move on to the next step: locating the light bulb housing.
Step 3: Locate the light bulb housing
Now that the refrigerator is safely unplugged, it’s time to locate the light bulb housing. The location of the housing may vary depending on the make and model of your refrigerator, but it is typically found inside the refrigerator compartment.
Start by opening the refrigerator door and examining the interior. Look for a cover or lens that is protecting the light bulb. In some cases, the cover may be clear, while in others, it may be opaque or translucent. The housing is usually situated near the top or the side of the refrigerator compartment.
If you have trouble locating the light bulb housing, consult the owner’s manual of your refrigerator. The manual will provide detailed instructions and diagrams specific to your model.
Once you have identified the light bulb housing, you are ready to move on to the next step: removing the cover or lens to access the old light bulb.
Step 4: Remove the cover or lens
With the light bulb housing identified, it’s time to remove the cover or lens that is protecting the old light bulb. The method of removal may vary depending on the make and model of your refrigerator, so it’s essential to consult your owner’s manual if you are unsure of the specific steps for your appliance.
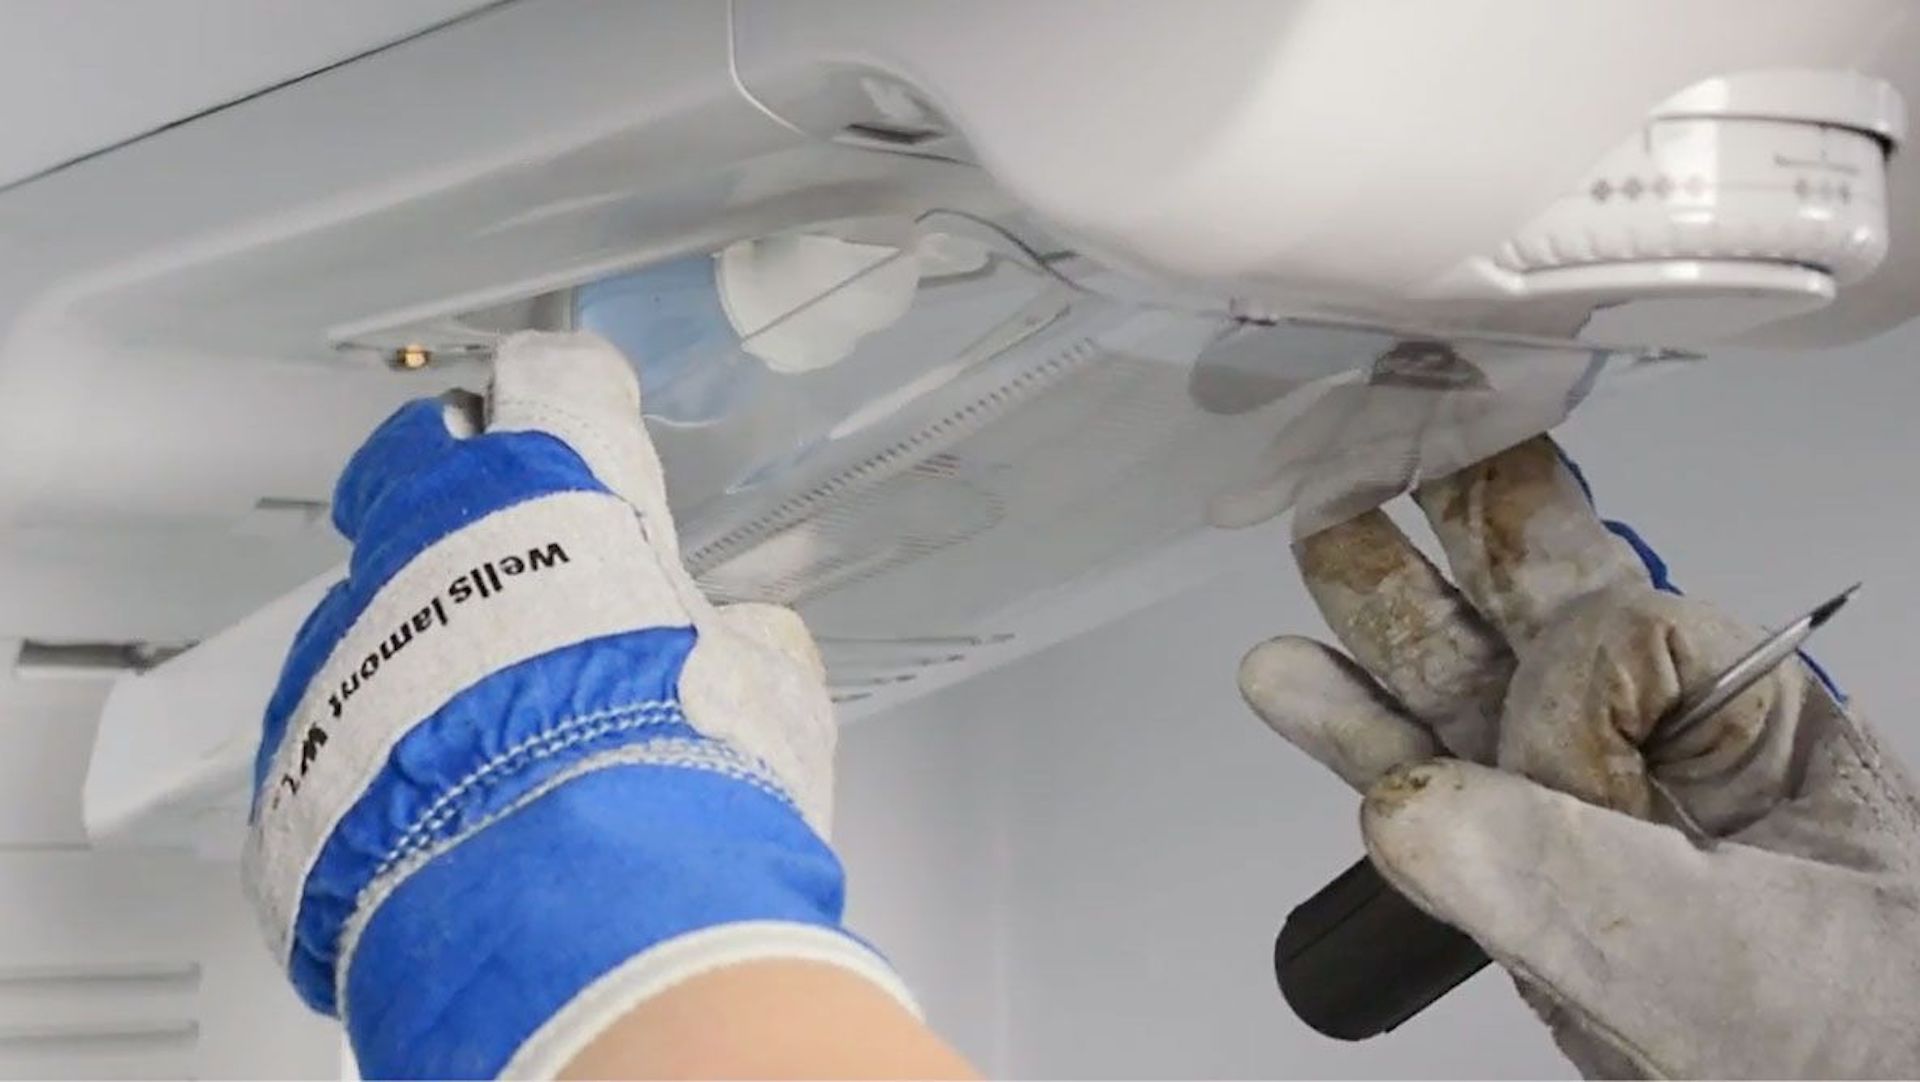
In most cases, the cover or lens is held in place by screws or clips. Use a Phillips screwdriver to remove the screws or gently release the clips. Set aside the screws or clips in a safe spot to avoid misplacing them.
Once the screws or clips are removed, carefully lift or slide the cover or lens off the bulb housing. Take note of any tabs or slots that may be holding the cover in place. Be gentle during this step to avoid any damage to the cover or lens.
Now that the cover or lens is removed, you will have clear access to the old light bulb. Proceed to the next step to safely remove and replace it.
Before changing the refrigerator light bulb, make sure to unplug the refrigerator to avoid any electrical accidents. Then, carefully remove the old bulb and replace it with a new one of the same wattage and size.
Read more: How To Change A Light Bulb
Step 5: Remove the old light bulb
With the cover or lens removed, it’s time to remove the old light bulb from the housing. Before touching the bulb, put on your safety gloves to ensure a secure grip and protect your hands from any potential broken glass.
Gently twist the old light bulb counterclockwise to loosen it from the socket. Be cautious not to apply excessive force, as this may cause the bulb to break. Slowly pull the bulb out of the socket once it is loose.
Inspect the old light bulb for any signs of damage or burnout. If the bulb is burnt out or broken, it’s time for a replacement. If it appears to be in good condition, you may consider keeping it as a spare.
Properly dispose of the old light bulb according to your local regulations. This may involve wrapping the bulb in newspaper or placing it in a sealed bag before disposing of it in the appropriate waste bin.
Now that the old light bulb is removed, you are ready to proceed to the next step: inserting the new light bulb.
Step 6: Insert the new light bulb
With the old light bulb removed, it’s time to insert the new light bulb into the housing. Before doing so, double-check the specifications of the new bulb to ensure it matches the wattage and type recommended for your refrigerator.
Hold the new light bulb by its base, making sure to avoid touching the glass with your bare hands. Oils from your skin can reduce the lifespan of the bulb. If you accidentally touch the bulb, clean it with rubbing alcohol before inserting it.
Align the base of the new light bulb with the socket in the housing. Insert the bulb into the socket and twist it clockwise until it is tightly secured. Make sure the bulb is securely twisted in place but be cautious not to overtighten it, as that may cause damage.
Once the new light bulb is securely inserted, give it a gentle twist to ensure it is properly seated in the socket. This will ensure a good electrical connection and prevent any flickering or intermittent lighting issues.
Now that the new light bulb is in place, it’s time to move onto the next step: replacing the cover or lens.
Step 7: Replace the cover or lens
With the new light bulb securely inserted, it’s time to replace the cover or lens that protects it. This step will help to ensure the bulb is properly shielded and provide a uniform distribution of light within the refrigerator compartment.
Take the cover or lens that was removed earlier and align it with the housing. Carefully slide or place it back into position, making sure it fits snugly. If there were screws or clips holding the cover in place, reattach them using a Phillips screwdriver.
As you secure the cover or lens, verify that it is properly aligned and doesn’t obstruct the new light bulb in any way. Ensure that all sides are secure and there are no gaps or loose sections.
Give the cover or lens a gentle push or twist to confirm it is firmly in place. It should feel stable and not move or wobble when touched.
With the cover or lens replaced, your new light bulb is now protected and ready for use. You’re almost done! Just one more step to go.
Step 8: Plug the refrigerator back in
Now that you’ve successfully changed the light bulb and replaced the cover or lens, it’s time to plug the refrigerator back in. This step will restore power to the appliance and ensure that the new light bulb is functioning properly.
Locate the power cord at the back of the refrigerator and gently insert it into the electrical outlet. Make sure that the plug is securely inserted and the refrigerator is receiving power. You can confirm this by checking if the interior light turns on when you open the fridge door.
Once the refrigerator is plugged back in, give it a few moments to power up. Listen for any humming sounds or vibrations to ensure that the appliance is functioning correctly.
After confirming that the refrigerator is properly powered, close the refrigerator door. Take a moment to admire the newly installed light bulb and the improved visibility it provides inside the fridge.
Congratulations! You have successfully changed the light bulb in your refrigerator. You can now enjoy a well-lit refrigerator, making it easier to find and access your food items.
Remember to keep your old light bulb as a spare in case you need it in the future. Properly dispose of any packaging or materials from the new light bulb according to your local waste regulations.
Thank you for following this step-by-step guide. We hope it has been helpful and that you’ve found it easy to follow. If you have any further questions or troubleshooting needs, consult your refrigerator’s owner’s manual or contact a professional for assistance.
Enjoy your well-lit and functioning refrigerator!
Read more: How To Change A Brake Light Bulb
Conclusion
Changing the light bulb in your refrigerator may have initially seemed like a daunting task, but with the right tools and guidance, it is a simple and straightforward process. By following the steps outlined in this guide, you can confidently replace the light bulb in your refrigerator and enjoy a well-lit interior once again.
Remember to gather the necessary tools, such as safety gloves, a Phillips screwdriver, and a replacement light bulb, before starting the process. Unplug the refrigerator to ensure your safety, locate the light bulb housing, and remove the cover or lens to access the old bulb.
Take precautionary measures when removing the old bulb and dispose of it appropriately. Insert the new light bulb, making sure it is securely seated in the socket, and replace the cover or lens to protect it. Finally, plug the refrigerator back in and marvel at the improved lighting inside your fridge.
By following these steps, you will have successfully changed the light bulb in your refrigerator and improved visibility for finding and organizing your food items.
Should you encounter any challenges or have specific questions related to your refrigerator’s make and model, always consult the owner’s manual provided by the manufacturer. Additionally, reaching out to a professional for assistance is recommended if you’re unsure or uncomfortable performing the task on your own.
We hope this comprehensive guide has been helpful to you in changing the light bulb in your refrigerator. Enjoy the well-lit and functional fridge, and may it continue to serve you for many years to come!
Now that you've mastered changing your refrigerator's light bulb, why stop there? Brighten up every corner of your home with our guide on stylish LED mirrors that offer brilliant lighting solutions. And for those who love a spotless kitchen, our next piece on refrigerator maintenance will show you how to keep your ice maker in tip-top shape. Dive into these reads to keep your home sparkling and shining!
Frequently Asked Questions about How To Change Refrigerator Light Bulb
Was this page helpful?
At Storables.com, we guarantee accurate and reliable information. Our content, validated by Expert Board Contributors, is crafted following stringent Editorial Policies. We're committed to providing you with well-researched, expert-backed insights for all your informational needs.


0 thoughts on “How To Change Refrigerator Light Bulb”