Articles
How To Connect Conduit Together
Modified: August 27, 2024
Learn how to connect conduit together with these helpful articles. Find step-by-step guides and tips to ensure a secure and professional installation.
(Many of the links in this article redirect to a specific reviewed product. Your purchase of these products through affiliate links helps to generate commission for Storables.com, at no extra cost. Learn more)
Introduction
Connecting conduit together is an essential aspect of electrical installations and plays a crucial role in ensuring the safe and efficient distribution of electrical wiring. Conduit, also known as electrical conduit or conduit pipe, is a protective tubing that encloses electrical wires, cables, or other types of conductors. It serves as a conduit system to route and protect the electrical wiring from damage caused by external factors such as moisture, heat, physical impact, or chemical exposure.
Properly connecting conduit sections is vital for maintaining the integrity of the electrical system and preventing potential hazards. Whether you are working on a residential, commercial, or industrial project, understanding the different methods of connecting conduit together is crucial for a successful installation.
In this article, we will explore the various types of conduit connections and provide tips for connecting conduit effectively and safely.
Key Takeaways:
- Properly connecting conduit sections is crucial for maintaining the safety, integrity, and functionality of electrical installations. It provides protection to the wiring, reduces the risk of electrical hazards, ensures compliance with regulations, and allows for easier maintenance and future expansion.
- The various methods of connecting conduit, such as using couplings, compression connectors, threaded adapters, conduit connectors, and welding, offer flexibility and adaptability for different installation requirements. By following the tips provided and considering future expansion or modifications, you can ensure a successful conduit connection that meets all safety standards and complies with electrical codes and regulations.
Read more: How To Connect Conduit To Flexible Conduit
Importance of Connecting Conduit Together
Connecting conduit together is a critical step in electrical installations due to its importance in ensuring the safety and functionality of the electrical system. Here are some key reasons why connecting conduit is essential:
- Protection of Electrical Wiring: One of the primary purposes of conduit is to protect electrical wiring from external elements such as moisture, dirt, dust, and physical damage. By properly connecting conduit sections, you create a continuous pathway that shields the wires from potential hazards.
- Prevention of Electrical Shorts and Fire Hazards: When conduit sections are connected securely, the risk of electrical shorts is significantly reduced. Loose or improperly connected conduits can result in exposed wires, which may come into contact with each other or other conductive materials, potentially causing short circuits and electrical fires.
- Enhanced Durability: Connecting conduit sections with the appropriate methods ensures that the system remains durable and resistant to environmental factors. Strong connections help maintain the integrity of the conduit and prevent any disconnections or damage that could compromise the electrical system’s functionality.
- Compliance with Electrical Codes and Regulations: Properly connecting conduit is essential to comply with electrical codes and regulations set forth by local authorities. These codes outline specific requirements for conduit connections to ensure the safety and effectiveness of electrical installations. Failure to adhere to these standards can result in significant penalties and may jeopardize the overall project.
- Easier Maintenance and Repairs: Well-connected conduit systems make maintenance and repairs more efficient. When conduit sections are properly joined, it becomes easier to access and replace wiring components if necessary. This reduces downtime and minimizes disruptions to the electrical system.
- Flexibility and Future Expansion: By connecting conduit sections effectively, you create a flexible electrical system that can accommodate future changes or expansions. If additional wiring needs to be installed or if modifications are required, a properly connected conduit system allows for easier reconfiguration without the need for significant changes or disruptions.
Overall, connecting conduit sections is crucial for maintaining the safety, integrity, and functionality of electrical installations. It provides protection to the wiring, reduces the risk of electrical hazards, ensures compliance with regulations, and allows for easier maintenance and future expansion.
Types of Conduit Connections
There are several methods available for connecting conduit together, each with its own advantages and suitable applications. Here are the most common types of conduit connections:
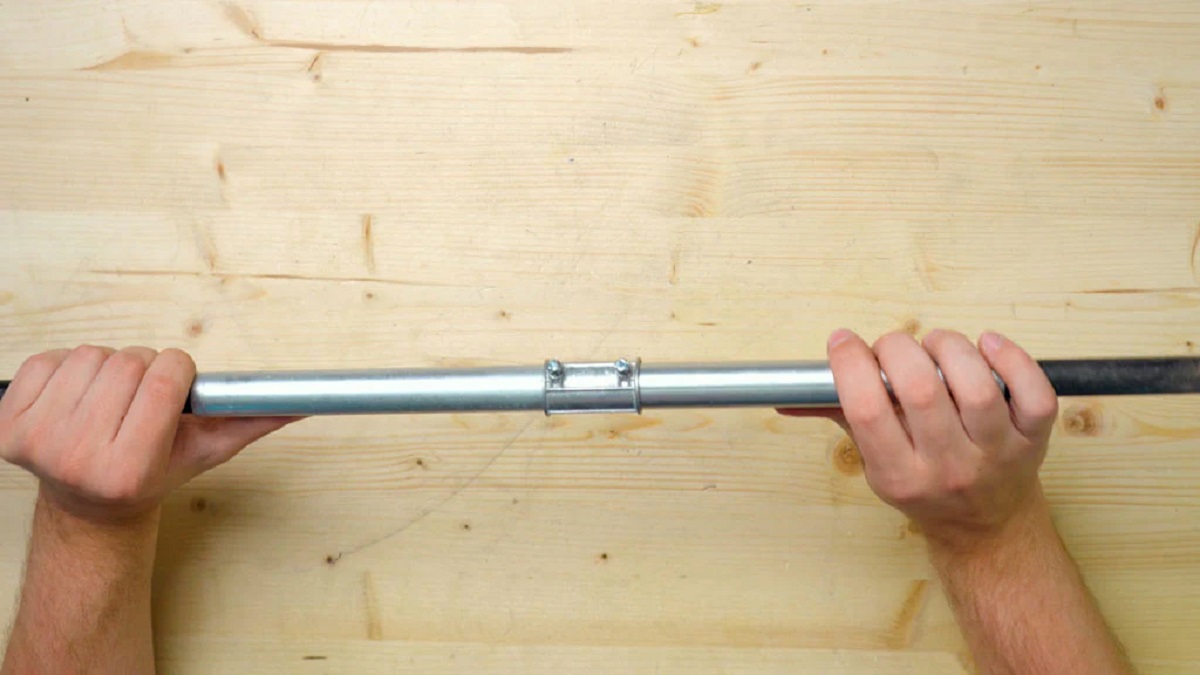
- Connecting Conduit with Couplings: Couplings are widely used for connecting two sections of conduit together. They typically consist of two separate pieces that are threaded on the inside, allowing them to be easily screwed onto the ends of the conduit. Couplings come in various materials such as steel, aluminum, or PVC, depending on the type of conduit being used. They provide a secure and reliable connection and are commonly used in both rigid metal conduit (RMC) and intermediate metal conduit (IMC) installations.
- Joining Conduit with Compression Connectors: Compression connectors offer a tight and secure connection by compressing the conduit onto the connector. These connectors are commonly made of steel and feature a flange or ring that compresses against the conduit when tightened. They provide excellent resistance to vibration and are suitable for applications that require extra durability, such as outdoor installations or areas with heavy machinery. Compression connectors are commonly used with rigid metal conduit (RMC) and rigid non-metallic conduit (RNC).
- Using Threaded Adapters for Conduit Connection: Threaded adapters, also known as threaded connectors or reducers, are used when connecting conduit sections of different sizes. They feature male and female threads that allow you to connect two conduit sections with different diameters. Threaded adapters are commonly made of steel or brass and can also be used to connect conduit to electrical boxes or junction boxes.
- Bonding Conduit with Conduit Connectors: Conduit connectors, also known as conduit fittings, are used to bond conduit sections together and provide a secure electrical connection. They can be in the form of elbows, tees, or couplings, and are available in various materials, including steel, aluminum, or PVC. These connectors not only join conduit sections but also provide a means for pulling wires or cables through the conduit.
- Welding Conduit Sections Together: Welding is a method used to permanently join metal conduit sections. It involves heating the ends of the conduit and fusing them together using a welder. This type of connection provides ultimate strength and durability, making it suitable for applications where rigidity and resistance to movement are crucial.
These various types of conduit connections offer flexibility and adaptability for different installation requirements. It is important to choose the appropriate method based on the type of conduit, the application, and compliance with electrical codes and regulations.
Connecting Conduit with Couplings
Connecting conduit with couplings is one of the most common and straightforward methods used in electrical installations. Couplings are designed to connect two sections of conduit together, providing a secure and reliable connection. Here’s how to connect conduit with couplings:
- Measure and cut the conduit sections: Start by measuring and cutting the conduit sections to the desired lengths using a conduit cutter or hacksaw. Ensure that the cuts are straight and clean to facilitate a proper connection.
- Prepare the conduit ends: Use a deburring tool or a file to remove any sharp edges or burrs from the cut ends of the conduit. This will make it easier to insert the conduit into the coupling.
- Thread the coupling onto one conduit end: Take the coupling and thread it onto one end of the conduit. Make sure it is securely tightened but avoid overtightening, as it may damage the conduit.
- Insert the other conduit end into the coupling: Insert the other conduit end into the open side of the coupling. Gently push and twist the conduit until it is fully inserted into the coupling. Ensure that the conduit is seated properly and aligned with the coupling.
- Tighten the coupling: Using a wrench or conduit pliers, tighten the coupling onto the conduit to ensure a secure connection. Make sure the coupling is tightened evenly on both sides of the joint. Be cautious not to overtighten, as it may deform or damage the coupling or conduit.
- Inspect the connection: After connecting the conduit with couplings, visually inspect the connection to ensure it is properly aligned and secure. Verify that the conduit is fully seated within the coupling without any gaps or misalignment. This will help prevent issues such as water ingress or wire damage.
- Repeat for additional conduit connections: If you need to connect more conduit sections, simply repeat the process with additional couplings. Make sure to measure accurately and align the conduit sections properly to ensure a seamless connection.
Connecting conduit with couplings offers a versatile and widely accepted method for joining conduit sections. It is commonly used in both residential and commercial electrical installations. However, it’s essential to select the appropriate coupling material based on the type of conduit being used (metal or PVC) and to follow electrical codes and regulations for proper installation.
Joining Conduit with Compression Connectors
Joining conduit with compression connectors is a reliable method that provides a tight and secure connection between conduit sections. Compression connectors are commonly used in applications requiring extra durability and resistance to vibration. Here’s a step-by-step guide on how to join conduit with compression connectors:
- Prepare the conduit ends: Measure and cut the conduit sections to the desired lengths using a conduit cutter or hacksaw. Clean any sharp edges or burrs from the cut ends of the conduit using a deburring tool or a file.
- Choose the right connector: Select the appropriate compression connector based on the type and size of the conduit. Compression connectors are typically available in different sizes and materials, such as steel, and often have a flange or ring design to compress the conduit.
- Slide the connector onto one end of the conduit: Slide the compression connector onto one end of the conduit, ensuring that it is securely positioned. The connector should cover a sufficient length of the conduit to provide a stable and secure connection.
- Insert the other conduit end into the connector: Insert the other end of the conduit into the compression connector. Make sure the conduit is fully inserted and seated properly within the connector.
- Tighten the compression connector: Use a wrench or a specialized tool designed for compression connectors to tighten the connector onto the conduit. Apply even pressure on the compression ring or flange to compress it against the conduit. Continue tightening until the connection is secure and tight.
- Inspect the connection: After joining the conduit with compression connectors, visually inspect the connection to ensure it is properly aligned and secure. Verify that the conduit is fully seated within the connector and that the compression ring or flange is evenly compressed around the conduit.
- Repeat for additional conduit connections: If you need to join more conduit sections, repeat the process with additional compression connectors. Make sure to select the appropriate size and type of connector for each connection, and ensure proper alignment and tightening.
Joining conduit with compression connectors provides a strong and durable connection that is resistant to vibration and movement. It is commonly used in outdoor installations, areas with heavy machinery, and applications where extra durability is required. As with any conduit connection method, it is important to adhere to electrical codes and regulations and select connectors specifically designed for the type and size of the conduit being used.
When connecting conduit together, make sure to use the appropriate connectors and fittings for a secure and code-compliant installation. Tighten all connections properly to ensure a safe and reliable electrical system.
Read more: How To Connect Conduit To Box
Using Threaded Adapters for Conduit Connection
When connecting conduit sections of different sizes, threaded adapters, also known as threaded connectors or reducers, prove to be incredibly useful. These adapters feature male and female threads, allowing you to join two conduit sections with different diameters. Here’s how to connect conduit using threaded adapters:
- Measure and cut the conduit sections: Begin by measuring and cutting the conduit sections to the desired lengths using a conduit cutter or hacksaw. Ensure that the cuts are clean and straight to facilitate a proper connection.
- Select the appropriate threaded adapter: Choose a threaded adapter that matches the size of the conduit section you want to connect to the larger or smaller conduit. Threaded adapters are commonly made of materials such as steel or brass.
- Thread the adapter onto the larger conduit: Take the threaded adapter and thread it onto the larger conduit section. Rotate it in a clockwise direction until it is snugly fitted onto the conduit. Use a conduit wrench or pliers to tighten it further, ensuring a secure connection.
- Insert the smaller conduit into the adapter: Once the adapter is secure on the larger conduit, insert the smaller conduit into the female threaded end of the adapter. Rotate the smaller conduit in a clockwise direction, ensuring it is fully inserted and tightly seated within the adapter.
- Inspect the connection: After connecting the conduit using threaded adapters, visually inspect the connection to verify that both conduits are securely joined. Ensure that there are no gaps or misalignments between the adapter and the conduits, as this can cause issues such as water ingress or wire damage.
- Repeat for additional conduit connections: If you need to connect more conduit sections of different sizes, simply repeat the process with additional threaded adapters. Ensure accurate measurements and proper alignment to achieve seamless connections.
Using threaded adapters for conduit connections allows for a simple and efficient way to join conduit sections of different diameters. It offers versatility and adaptability in various electrical installations, enabling easy adaptation to changing project requirements. As always, it is important to follow electrical codes and regulations and use the correct size and type of adapters for the conduit being used.
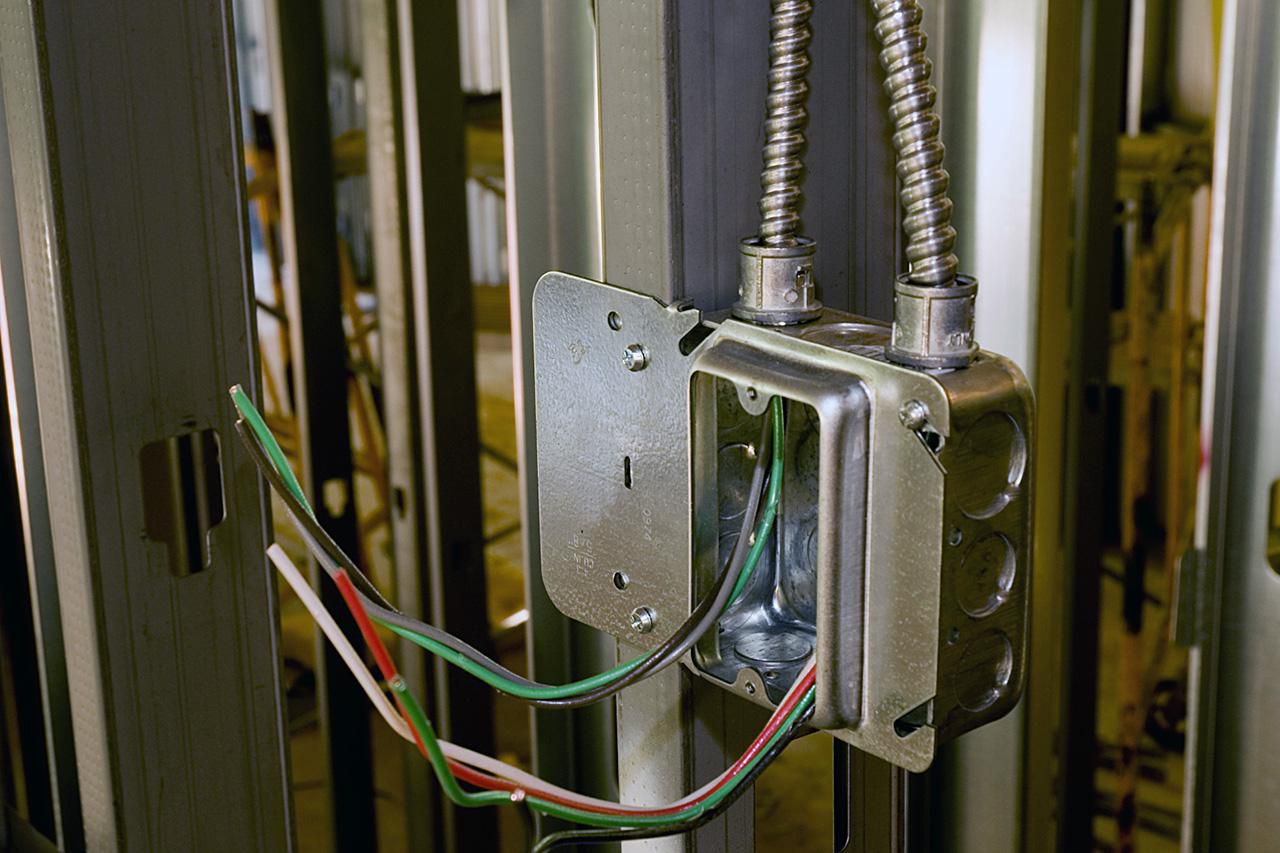
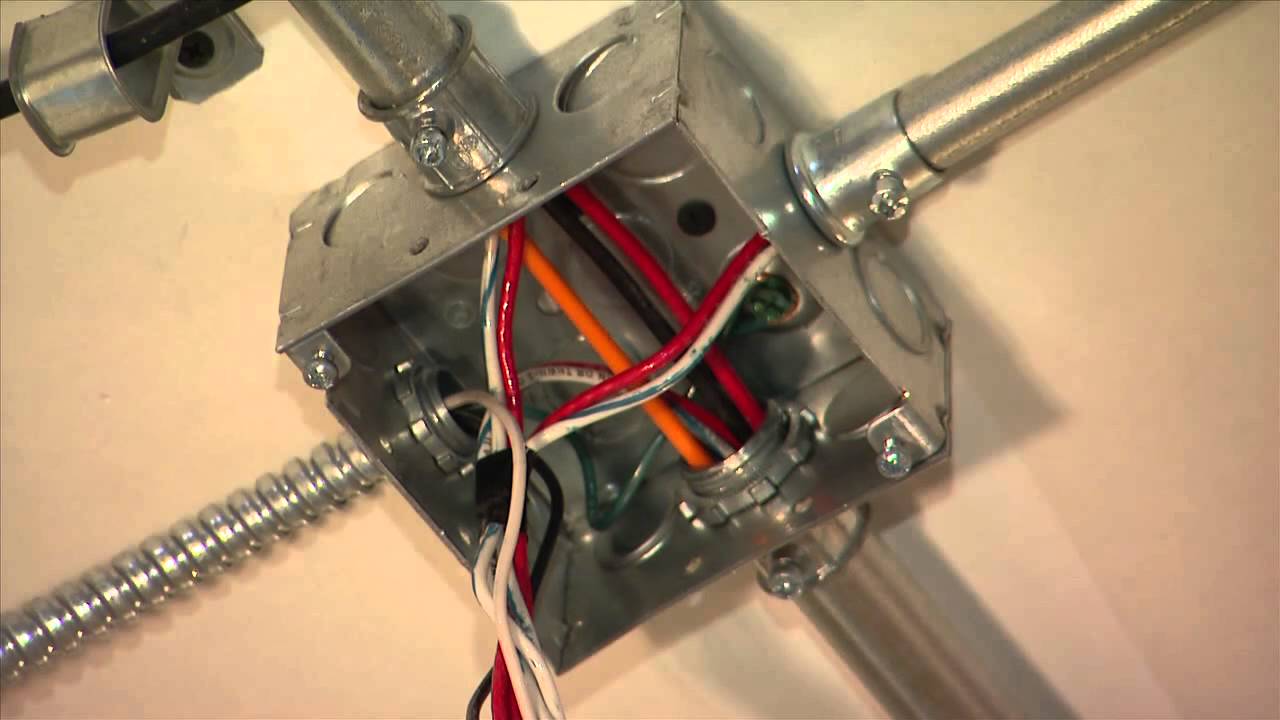
Bonding Conduit with Conduit Connectors
Bonding conduit with conduit connectors, also known as conduit fittings, is a popular method used to join conduit sections while providing a secure electrical connection. Conduit connectors come in various forms, such as elbows, tees, or couplings, and play a crucial role in both the alignment of conduit sections and the overall functionality of the electrical system. Here’s how to bond conduit with conduit connectors:
- Measure and cut the conduit sections: Begin by measuring and cutting the conduit sections to the desired lengths using a conduit cutter or hacksaw. Ensure that the cuts are clean and straight for proper alignment and connection.
- Select the appropriate conduit connector: Choose a conduit connector that matches the size and type of conduit you are using. Conduit connectors are commonly available in materials like steel, aluminum, or PVC.
- Prepare the conduit ends: Use a deburring tool or a file to remove any sharp edges or burrs from the cut ends of the conduit. This allows for easy insertion into the conduit connectors and prevents wire damage during installation.
- Insert the conduit into the connector: Insert one end of the conduit into the conduit connector, ensuring a snug fit. Push the conduit into the connector until it is fully seated and aligned to maintain proper continuity and electrical connection.
- Secure the conduit connector: Use an appropriate wrench or pliers to tighten the conduit connector onto the conduit. Ensure that it is securely fastened while avoiding overtightening, which may damage the connector or conduit.
- Repeat the process for additional sections: If you need to bond more conduit sections, repeat the above steps with additional conduit connectors. Make sure to align the conduit properly and tighten the connectors securely for each connection.
- Verify the connection: After bonding the conduit with conduit connectors, visually inspect the connections for proper alignment and secure attachment. Ensure that the conduit is fully seated within the connectors and that there are no gaps or misalignments.
Bonding conduit with conduit connectors not only joins the conduit sections but also provides a means for pulling wires or cables through the conduit. These connectors enhance the overall integrity of the electrical system and facilitate easier maintenance and future modifications. It is important to choose connectors suitable for the type of conduit being used and to follow electrical codes and regulations for proper installation.
Welding Conduit Sections Together
Welding conduit sections together is a method used to create a permanent and robust connection between metal conduit sections. Welding provides ultimate strength and durability, making it suitable for applications that require rigidity and resistance to movement. Here are the steps involved in welding conduit sections together:
- Measure and cut the conduit sections: Begin by measuring and cutting the metal conduit sections to the desired lengths using a conduit cutter or hacksaw. Ensure that the cuts are clean and straight for proper alignment during the welding process.
- Prepare the conduit ends: Clean the cut ends of the conduit sections thoroughly using a wire brush or abrasive tool to remove any dirt, debris, or oxidation. It is important to have clean, bare metal surfaces to achieve a strong weld.
- Position the conduit sections for welding: Place the conduit sections in the desired position, ensuring proper alignment. Secure the sections in place using vise grips or clamps to prevent movement during the welding process.
- Apply welding techniques: Use a welding machine, such as a stick welder or MIG welder, in accordance with the appropriate welding technique. Follow the manufacturer’s instructions for setting the correct voltage, amperage, and electrode type based on the conduit material and thickness.
- Weld the conduit sections: With the proper safety gear, such as welding gloves and a welding helmet, begin the welding process. Apply the welding arc or electrode to the joint where the conduit sections meet, focusing on creating a strong and consistent weld along the length of the joint.
- Allow the welds to cool: Once the welding is complete, allow the welded conduit sections to cool naturally. Do not touch or disturb the welds until they have cooled entirely to prevent any damage or distortion.
- Inspect the welds: After the welded joints have cooled, visually inspect them for quality and integrity. Look for any signs of incomplete or weak welds, cracks, or other irregularities that may affect the durability and safety of the connection.
- Perform any necessary post-welding treatments: Depending on the conduit material and specific requirements, you may need to perform post-welding treatments, such as cleaning, grinding, or applying anti-corrosion coatings. Follow the appropriate procedures for these treatments, if necessary.
Welding conduit sections together provides a permanent and secure connection, ensuring excellent strength and durability. It is commonly used in industrial settings or applications where stability and resistance to movement are crucial. It is important to have the necessary welding skills and knowledge to ensure proper execution and adhere to safety precautions during the welding process for optimal results.
Tips for Connecting Conduit Successfully
Connecting conduit successfully requires attention to detail and adherence to proper techniques. Here are some helpful tips to ensure a successful conduit connection:
- Plan and measure accurately: Before cutting and connecting conduit sections, plan the layout of your electrical system and measure accurately. This will help ensure that you have the correct lengths of conduit and the necessary connectors for a seamless and efficient installation.
- Choose the right connectors: Select connectors that are compatible with the type and size of conduit you are using. It is essential to use connectors that are designed to provide a secure and reliable connection while maintaining the integrity of the conduit system.
- Properly prepare the conduit ends: Clean and deburr the cut ends of the conduit to remove sharp edges or burrs. This will facilitate smooth insertion into connectors and prevent wire damage during installation.
- Tighten connectors securely: Use appropriate tools, such as wrenches or pliers, to tighten connectors securely. Ensure that they are tightened evenly and firmly to create a strong and reliable connection. However, be cautious not to overtighten, as it may damage the connectors or deform the conduit.
- Follow electrical codes and regulations: Familiarize yourself with local electrical codes and regulations to ensure compliance throughout the installation process. Adhering to these standards will help guarantee the safety and legality of your electrical system.
- Inspect the connections: After connecting conduit sections, visually inspect the connections for proper alignment, secure fastening, and no gaps or misalignments. This will help identify any issues that need to be addressed before proceeding with the installation.
- Ensure proper grounding: If required by electrical codes, make sure to properly ground your conduit system. Use appropriate grounding bushings, straps, or connectors to establish a solid electrical connection to the grounding system.
- Consider expansion and future modifications: Plan for future expansion or modifications by leaving enough space between conduit sections or installing junction boxes as needed. This will make it easier to add or modify wiring in the future without major disruptions or changes to the conduit system.
- Seek professional assistance if needed: If you are unsure about any aspect of connecting conduit or if the project involves complex or specialized requirements, it is advisable to seek the assistance of a professional electrician. They can provide expert guidance and ensure the installation meets all safety and code requirements.
Following these tips will help you achieve successful conduit connections, ensuring a safe and efficient electrical system. It is essential to prioritize precision, compliance with codes, and attention to detail throughout the installation process to guarantee the long-term reliability and functionality of the conduit system.
Read more: How To Connect EMT Conduit
Conclusion
Connecting conduit together is a crucial step in electrical installations, ensuring the safe and efficient distribution of electrical wiring. The various methods discussed in this article – connecting conduit with couplings, joining conduit with compression connectors, using threaded adapters, bonding conduit with conduit connectors, and welding conduit sections together – provide flexibility and adaptability for different installation requirements.
When connecting conduit, it is important to measure and cut accurately, choose the right connectors or adapters, and properly prepare the conduit ends. Securing the connections tightly, following electrical codes and regulations, and inspecting the connections for proper alignment and secure attachment are vital for a successful installation.
Each method has its own advantages and suitable applications based on factors such as the type of conduit being used, the environment, and the level of durability required. Whether you are working on a residential, commercial, or industrial project, understanding and using the appropriate conduit connection method is essential for the safety and functionality of the electrical system.
By following the tips provided and considering future expansion or modifications, you can ensure a successful conduit connection that meets all safety standards and complies with electrical codes and regulations. Remember, if you have any doubts or need assistance, it is always advisable to consult a professional electrician who can provide expert guidance.
In conclusion, proper conduit connections are vital for maintaining the integrity and safety of electrical installations. By employing the appropriate methods and techniques, you can ensure a reliable and durable conduit system that facilitates the smooth flow of electricity and minimizes the risk of electrical hazards.
Frequently Asked Questions about How To Connect Conduit Together
Was this page helpful?
At Storables.com, we guarantee accurate and reliable information. Our content, validated by Expert Board Contributors, is crafted following stringent Editorial Policies. We're committed to providing you with well-researched, expert-backed insights for all your informational needs.


0 thoughts on “How To Connect Conduit Together”