
Articles
How To Fix Fireplace Cracks
Modified: October 20, 2024
Learn how to fix fireplace cracks with our informative articles. Find step-by-step instructions and expert tips to repair and restore your fireplace.
(Many of the links in this article redirect to a specific reviewed product. Your purchase of these products through affiliate links helps to generate commission for Storables.com, at no extra cost. Learn more)
Introduction
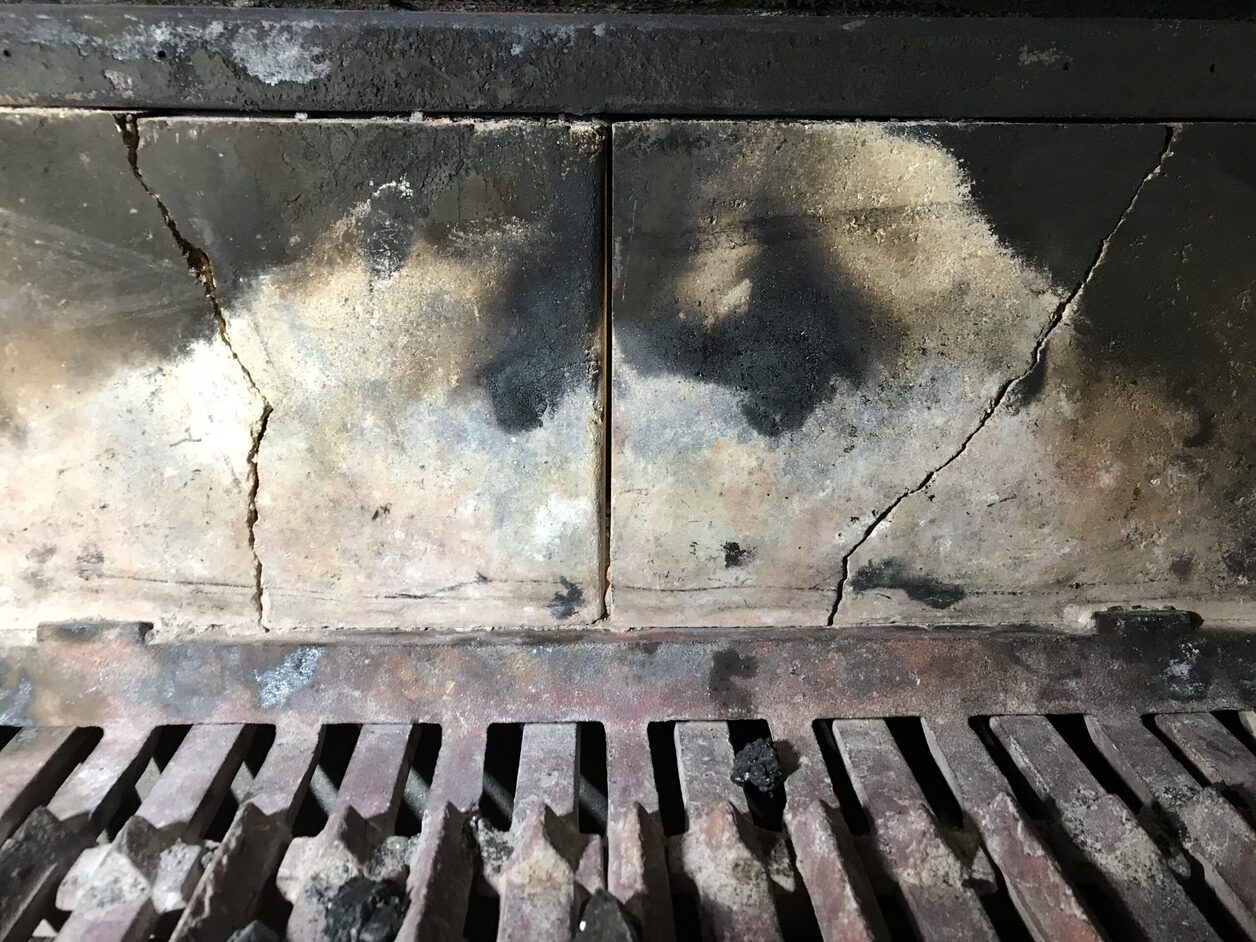
Fireplaces are a cherished feature in many homes, adding warmth and ambiance to any living space. However, over time, cracks can develop in the fireplace, compromising its structural integrity and detracting from its aesthetic appeal. Fireplace cracks can lead to various problems, including smoke leakage, heat loss, and potential fire hazards. It is essential to address these cracks as soon as possible to prevent further damage and ensure the safe and efficient operation of your fireplace.
In this article, we will guide you through the process of fixing fireplace cracks, helping you restore your fireplace to its former glory. We will provide step-by-step instructions, tips, and valuable insights to make the repair process as smooth as possible. Whether you are dealing with small cracks or more extensive damage, this comprehensive guide will equip you with the necessary knowledge and skills to tackle the task effectively.
Before delving into the repair process, it is crucial to understand the different types of fireplace cracks and their implications. Fireplace cracks can occur in the firebox, chimney, or hearth, and they can vary in size, shape, and severity. Some smaller cracks may be cosmetic in nature and can be easily addressed with quick fixes, while larger, more extensive cracks may require more extensive repair work.
It is essential to assess the severity of the fireplace cracks before proceeding with any repairs. This will help determine the appropriate repair method and ensure the longevity and safety of the fireplace. We will walk you through the process of evaluating the cracks and provide insights into when it’s necessary to seek professional assistance.
To undertake the repair process, you will need a few essential tools and materials. These include heat-resistant sealant, fireplace mortar, a trowel, wire brush, sandpaper, and a paintbrush, among others. Having these tools on hand will enable you to complete the repair job efficiently and effectively.
Now that we have provided a brief overview, let’s dive into the step-by-step guide to fixing fireplace cracks. We will walk you through the process of filling small cracks with heat-resistant sealant and repairing larger cracks with fireplace mortar. Additionally, we will discuss painting and finishing touches to ensure your fireplace looks good as new.
Once the repairs are complete, it’s essential to maintain your fireplace to prevent future cracks. We will provide you with some maintenance tips and preventive measures to extend the lifespan of your fireplace and ensure its continued functionality.
Now, let’s get started and learn how to fix those unsightly fireplace cracks!
Key Takeaways:
- Address fireplace cracks promptly using heat-resistant sealant for small cracks and fireplace mortar for larger ones. Regular maintenance and professional inspections are crucial for ensuring the safety and longevity of your fireplace.
- Understanding the causes and types of fireplace cracks is essential for effective repair. Proper preparation, tool selection, and attention to detail during the repair process will help restore your fireplace to its former glory.
Read more: How To Fix Cracked Sink
Understanding Fireplace Cracks
Fireplace cracks can occur for various reasons, and understanding the root cause is crucial in addressing them effectively. Here are some common factors that contribute to the development of fireplace cracks:
- Heat Expansion and Contraction: Fireplaces are exposed to extreme temperatures, with the firebox experiencing intense heat. This constant cycle of heating and cooling can cause the masonry materials to expand and contract, leading to cracks over time.
- Moisture Damage: Moisture is a common enemy of fireplaces. Rainwater, snow, or even high humidity levels can seep into the masonry, causing it to deteriorate and crack. This is especially true in regions with harsh weather conditions.
- Poor Construction: Improper installation or construction techniques can contribute to the development of cracks in fireplaces. Insufficient support, weak mortar joints, or the use of subpar materials can make the fireplace more prone to cracking.
- Settling of the House: As a house settles over time, it can put stress on the fireplace structure, leading to cracks. This is often observed in older homes or in areas with unstable soil conditions.
It’s important to note that not all fireplace cracks are the same. They can differ in size, location, and severity, and categorizing them properly is key to determining the appropriate repair method.
Here are some types of fireplace cracks:
- Minor Hairline Cracks: These are thin cracks that are typically cosmetic in nature and do not pose significant structural concerns. They can be addressed using simple repairs.
- Major Cracks: These cracks are larger and deeper, extending into the masonry or firebrick. They may indicate a more serious structural issue and require professional attention.
- Smoke Chamber Cracks: These cracks occur in the area above the firebox and can impair the proper functioning of the fireplace. They should be repaired promptly to prevent smoke leakage into the living space.
- Chimney Crown Cracks: The chimney crown is the topmost part of the chimney. Cracks in the chimney crown can allow water to penetrate the masonry, leading to further damage. They should be repaired to maintain the integrity of the chimney.
- Cracked Firebricks or Firebox: Cracks in the firebox or firebricks can compromise the structural stability of the fireplace and should be addressed without delay for safety reasons.
By understanding the causes and types of fireplace cracks, you can better identify the issues you may encounter and determine the appropriate course of action. In the next section, we will discuss how to assess the severity of fireplace cracks, allowing you to determine whether the repairs can be done independently or if professional intervention is required.
Assessing the Severity of Fireplace Cracks
Before embarking on any fireplace crack repairs, it is essential to assess the severity of the cracks. This will help determine the appropriate repair method and provide insight into whether professional assistance is needed. Here are some steps to help you assess the severity of fireplace cracks:
1. Visual Inspection:
Start by visually examining the fireplace cracks. Look for the following indicators:
- The size of the cracks: Small, hairline cracks are generally less concerning than larger, more significant cracks. Measure the width and length of the cracks to determine their size.
- The depth of the cracks: Use a flashlight to check the depth of the cracks. Deeper cracks may indicate more severe structural damage.
- The location of the cracks: Note the location of the cracks, as different areas of the fireplace may have different implications. For example, cracks in the firebricks or firebox are more concerning than cracks in the chimney.
- The presence of other symptoms: Look for any additional signs of damage, such as crumbling mortar, bulging, or uneven surfaces. These signs may indicate more extensive issues.
2. Sound Test:
Tap on the cracked area lightly with a small hammer or the handle of a screwdriver. Listen for any hollow or empty sounds, which could suggest significant deterioration behind the crack.
Read more: How To Fix A Crack In Stucco
3. Professional Inspection:
If you are unsure about the severity of the cracks or if they appear to be large and extensive, it is recommended to seek professional advice. A professional chimney sweep or fireplace technician will have the expertise to assess the cracks thoroughly, identify any underlying issues, and provide an appropriate course of action.
Remember, addressing fireplace cracks promptly is crucial, as even minor cracks can worsen over time and lead to more significant structural damage. It’s always better to be safe than sorry, so if in doubt, consult a professional to ensure the safety and integrity of your fireplace.
Once you have assessed the severity of the cracks, you can move on to gather the necessary tools and materials for the repair process. In the next section, we will discuss the tools and materials needed to fix fireplace cracks effectively.
Tools and Materials Needed
Before you start repairing the fireplace cracks, it’s essential to gather the necessary tools and materials. Having the right equipment will make the repair process more efficient and ensure the longevity of your fireplace. Here are the tools and materials you will need:
Tools:
- Wire brush: A wire brush will be used to remove loose debris, dirt, and old mortar from the cracked area.
- Trowel: You will need a trowel to apply fireplace mortar or heat-resistant sealant to fill the cracks.
- Sandpaper: Sandpaper will be used to smooth the surface of the repaired area before painting or finishing.
- Pliers: Pliers will help remove any loose bricks or stones that may be causing the cracks.
- Safety goggles and gloves: Safety goggles and gloves are essential to protect yourself from any debris or harmful substances during the repair process.
- Flashlight: A flashlight will come in handy to inspect and assess the depth of the cracks.
- Paintbrush: A paintbrush will be used to apply paint or sealant to the repaired area for a seamless finish.
Materials:
- Heat-resistant sealant: For small cracks, a heat-resistant sealant is a suitable choice to fill and seal the cracks. Make sure to choose a sealant specifically designed for use in high-temperature environments.
- Fireplace mortar: For larger cracks or areas that require more structural integrity, fireplace mortar is the ideal choice. It can withstand the high temperatures and provide a durable repair.
- Primer and paint: Once the cracks are repaired, you may need to repaint the fireplace to restore its aesthetic appeal. Choose a high-quality primer and paint that are suitable for use on masonry surfaces.
- Concrete patching compound: In some cases, you may need a concrete patching compound to repair more extensive damage, such as spalling or crumbling bricks.
- Masonry caulk: If there are any gaps or joints that need sealing, masonry caulk can be used to provide a strong and watertight bond.
Make sure to gather all the necessary tools and materials before you begin the repair process. This will save you time and ensure a smooth and efficient repair job. Once you have everything prepared, it’s time to follow the step-by-step guide to fix those fireplace cracks. In the next section, we will walk you through the process of filling small cracks with heat-resistant sealant.
Read more: How To Fix A Crack In Glass
Step-by-Step Guide to Fixing Fireplace Cracks
Now that you have gathered all the necessary tools and materials, it’s time to get started on repairing those fireplace cracks. This step-by-step guide will walk you through the process, ensuring that your fireplace is restored to its former glory:
Step 1: Preparation
Start by cleaning the cracked area thoroughly. Use a wire brush to remove any loose debris, dirt, and old mortar from the cracks. This will provide a clean surface for the repair materials to adhere to.
Step 2: Applying Heat-Resistant Sealant
For small, hairline cracks, heat-resistant sealant is the ideal choice. Dip a trowel into the sealant and apply it directly into the cracks, ensuring that they are completely filled. Smooth out the surface using the trowel, and remove any excess sealant.
Step 3: Allow Drying and Curing
Follow the manufacturer’s instructions regarding the drying and curing time for the heat-resistant sealant. This will ensure that it sets properly and provides a strong bond. Allow sufficient time for the sealant to dry completely before moving on to the next steps.
Read more: How To Fix Cracked Siding
Step 4: Sanding
Once the sealant has dried, use sandpaper to smooth out the repaired area. Sand gently to create a seamless finish and remove any rough edges. This step will prep the surface for painting or further finishing if desired.
Step 5: Painting and Finishing Touches
If desired, apply a coat of primer to the repaired area and let it dry. Then, choose a high-quality paint suitable for masonry surfaces and apply a coat or two for a uniform appearance. Allow the paint to dry completely between coats and follow the manufacturer’s instructions for drying and curing time.
Step 6: Regular Maintenance
Regularly inspect your fireplace for any new cracks or signs of damage. Address any issues promptly to prevent further deterioration. Keep the fireplace clean and free from debris, and consider scheduling annual maintenance by a professional chimney sweep to maintain the longevity and safety of your fireplace.
Remember, while this guide outlines the general process of fixing fireplace cracks, every fireplace is unique, and the severity and type of cracks may vary. If you encounter larger or more extensive cracks, it is advisable to seek professional assistance to ensure the appropriate repairs are carried out.
By following these steps and taking the necessary precautions, you can restore your fireplace’s functionality and aesthetical appeal. Now that you know how to fix small cracks with heat-resistant sealant, let’s move on to repairing larger cracks with fireplace mortar in the next section.
Filling Small Cracks with Heat-Resistant Sealant
Small cracks in your fireplace can be effectively repaired using a heat-resistant sealant. This step-by-step guide will walk you through the process of filling small cracks to ensure a durable and seamless repair:
Step 1: Preparation
Start by cleaning the cracked area thoroughly using a wire brush. Remove any loose debris, dirt, and old mortar from the cracks. This will ensure a clean surface for the sealant to adhere to and provide a better bond.
Step 2: Choose the Right Sealant
Select a heat-resistant sealant specifically designed for use in high-temperature environments, such as fireplaces. Ensure that the sealant is compatible with masonry surfaces and can withstand the heat generated by the fireplace.
Step 3: Apply the Sealant
Using a trowel, scoop up some sealant and apply it directly into the cracks. Fill the cracks completely, ensuring that the sealant is evenly distributed. Use the trowel to smooth out the surface, removing any excess sealant.
Step 4: Smooth and Blend
Use the trowel or a putty knife to smooth out the surface of the sealant, creating a seamless blend with the surrounding area. This will ensure that the repaired cracks are not noticeable and provide a professional finish.
Read more: How To Fix A Cracked Shower Floor
Step 5: Allow Drying and Curing
Follow the manufacturer’s instructions regarding the drying and curing time for the heat-resistant sealant. It is essential to allow sufficient time for the sealant to dry and cure properly, enhancing its durability and strength.
Step 6: Sanding (if necessary)
If the sealant has any rough edges or uneven surfaces after drying, you can use sandpaper to gently smooth out the repaired area. Sand lightly to create a seamless finish, being careful not to damage the surrounding materials.
Step 7: Final Inspection
Closely inspect the repaired cracks to ensure that they are properly filled and blended with the surrounding area. Check for any remaining gaps or imperfections, and if necessary, apply additional sealant and repeat the smoothing process.
By following these steps, you can effectively fill small cracks in your fireplace using a heat-resistant sealant. Keep in mind that while this method is suitable for small cracks, larger or deeper cracks may require additional repair techniques, such as using fireplace mortar. If you have any doubts or encounter more extensive damage, it is advisable to consult with a professional for guidance.
Now that you have successfully learned how to fill small cracks with heat-resistant sealant, let’s move on to repairing larger cracks using fireplace mortar in the next section.
Repairing Larger Cracks with Fireplace Mortar
If you have larger or more significant cracks in your fireplace, it is recommended to use fireplace mortar for a durable and long-lasting repair. This step-by-step guide will walk you through the process of repairing larger cracks using fireplace mortar:
Step 1: Preparation
Begin by cleaning the cracked area thoroughly using a wire brush. Remove any loose debris, dirt, and old mortar from the cracks. It is important to have a clean and stable surface for the fireplace mortar to adhere to.
Step 2: Choose the Right Fireplace Mortar
Select a high-quality fireplace mortar that is suitable for your specific fireplace material. Make sure to choose a mortar that is heat-resistant and designed for use in fireplaces. Read the manufacturer’s instructions for application and specific mixing ratios.
Step 3: Mix the Mortar
Follow the manufacturer’s instructions to mix the fireplace mortar. Typically, you will need to add water slowly and gradually to the mortar powder while stirring until you achieve a thick, paste-like consistency. Ensure that the mortar is well-mixed and free of any lumps.
Step 4: Apply the Mortar
Using a trowel, scoop up the mixed fireplace mortar and apply it to the cracks in a generous and even manner. Press the mortar into the cracks, ensuring that they are completely filled and covered. Use the trowel to smooth out the surface, removing any excess mortar.
Read more: How To Fix A Crack In Concrete Floor
Step 5: Blend with Surrounding Surface
Using the trowel or a putty knife, blend the applied mortar with the surrounding surface to create a seamless and natural appearance. Smooth out any rough edges or uneven surfaces, creating a professional finish.
Step 6: Allow Drying and Curing
Follow the manufacturer’s instructions regarding the drying and curing time for the fireplace mortar. It is crucial to allow sufficient time for the mortar to dry and cure properly, ensuring its strength and durability. Avoid disturbing or applying pressure to the repaired area during this time.
Step 7: Final Inspection
Once the fireplace mortar has dried and cured, inspect the repaired cracks to ensure that they are adequately filled and blended with the surrounding surface. Check for any remaining gaps or imperfections, and if necessary, apply additional mortar and repeat the blending process.
Repairing larger cracks with fireplace mortar requires precision and attention to detail. While this method provides a more structural repair, it is important to note that severe structural damage may require professional assistance. If you are unsure or concerned about the extent of the cracks, it is recommended to consult with a professional before proceeding with the repairs.
Now that you have learned how to repair larger cracks with fireplace mortar, let’s move on to the final steps of painting and adding finishing touches to complete the repair process.
Painting and Finishing Touches
Once you have completed the repair of your fireplace cracks, the next step is to paint and add finishing touches to ensure a seamless and aesthetically pleasing result. Here is a step-by-step guide to painting and adding those final touches:
Read more: How To Fix Cracked Ceiling Paint
Step 1: Clean the Surface
Prior to painting, make sure the repaired area is clean and free from any dust or debris. Use a soft brush or cloth to gently remove any particles that may have settled on the surface.
Step 2: Apply a Primer (if necessary)
If you are changing the color or if the repaired area is significantly discolored, applying a primer will help ensure a uniform final coat of paint. Choose a primer that is suitable for masonry surfaces and follow the manufacturer’s instructions for application.
Step 3: Choose the Right Paint
Select a high-quality paint specifically designed for use on masonry surfaces. Consider the type of fireplace material, such as brick or stone, and choose a paint that is suitable for that particular surface. Opt for a heat-resistant paint if the repaired area is closer to the firebox.
Step 4: Paint the Repaired Area
Using a paintbrush, apply a thin layer of paint to the repaired area. Work in even strokes to ensure a smooth and consistent coat. Allow the first coat to dry completely before applying a second coat, if necessary. Follow the manufacturer’s instructions regarding drying time between coats.
Read more: How To Fix A Cracked Concrete Patio
Step 5: Blend with the Surrounding Surface
To achieve a seamless finish, feather the edges of the painted area to blend it with the surrounding surface. Use a clean brush or sponge to lightly blend the paint with the adjacent area, avoiding any noticeable lines or color variations.
Step 6: Apply a Clear Sealant (optional)
If desired, apply a clear sealant over the painted area to enhance its durability and protect it from moisture and stains. Choose a sealant appropriate for masonry surfaces and follow the manufacturer’s instructions for application and drying time.
Step 7: Final Inspection
Once the paint and sealant have dried, step back and inspect the repaired area. Check for any imperfections or areas that may need touch-ups. If necessary, apply additional paint or sealant until you are satisfied with the overall appearance.
By following these steps, you can complete the repair process by painting and adding those finishing touches to your fireplace. It’s important to note that regular maintenance and inspection of your fireplace will help prevent future cracks and prolong its lifespan. Keep your fireplace clean, avoid excessive heat exposure, and consider scheduling regular professional inspections to ensure its optimal functionality and safety.
With the repair process now complete, take a moment to appreciate your beautifully restored fireplace and enjoy the warmth and ambiance it brings to your home!
Maintenance and Preventive Measures
Proper maintenance and preventive measures are essential to keep your fireplace in excellent condition and prevent future cracks from occurring. By following these tips, you can ensure the longevity and safety of your fireplace:
Read more: How To Fix Cracked Toilet Seat
Regular Cleaning
Regularly clean your fireplace to remove any debris, ashes, or soot buildup. Use a vacuum cleaner or a brush and dustpan to gently clean the firebox and surrounding areas. Avoid using water or cleaning agents unless specified by the manufacturer.
Annual Inspection
Schedule an annual inspection by a professional chimney sweep or fireplace technician. They will thoroughly examine your fireplace, checking for any cracks, damage, or buildup that may need attention. Regular inspections can help detect and address any issues before they become significant problems.
Keep the Area Clear
Ensure that the area surrounding your fireplace is clear of flammable materials. Keep furniture, curtains, and other combustible items at a safe distance to prevent accidental fires. This will also help maintain proper airflow and prevent heat buildup around the fireplace.
Use Fire Screens or Glass Doors
Install fire screens or glass doors in front of your fireplace to prevent sparks or embers from escaping. This will also help in preventing accidental contact with the fire, protecting both your family and your furnishings from potential hazards.
Read more: How To Fix Cracks In Porcelain Sink
Maintain Proper Airflow
Ensure that your fireplace has adequate airflow for proper combustion and ventilation. Keep the damper open when using the fireplace and ensure that the chimney flue is clear of any obstructions. Good airflow will help prevent the buildup of smoke, gas, and dangerous fumes.
Avoid Excessive Heat Exposure
Avoid exposing your fireplace to extreme heat sources or prolonged periods of intense heat. Excessive heat can cause the mortar and masonry materials to expand and contract, leading to cracks. Additionally, avoid drastic temperature changes as this can also contribute to cracking.
Address Cracks Promptly
If you notice any new cracks or signs of damage in your fireplace, address them promptly. Small cracks can worsen over time, compromising the structural integrity of your fireplace. Repairing cracks early can prevent further damage and potential safety hazards.
By following these maintenance and preventive measures, you can keep your fireplace in good condition and reduce the risk of cracks and other problems. Regular maintenance and inspections will help identify any issues early on, allowing for timely repairs and peace of mind.
Remember, safety should always be a priority when it comes to fireplace maintenance. If you are unsure about any aspect of fireplace repair or maintenance, it is advisable to consult with a professional chimney sweep or fireplace technician for expert guidance and assistance.
With proper care and attention, your fireplace will continue to provide warmth, comfort, and an inviting atmosphere for years to come.
Conclusion
Fireplace cracks are a common issue that can compromise the safety and aesthetics of your beloved fireplace. However, with the right knowledge and tools, you can effectively fix these cracks and restore your fireplace to its former glory. Throughout this comprehensive guide, we have provided you with a step-by-step process to address both small and larger cracks in your fireplace, using heat-resistant sealant and fireplace mortar. By following these instructions, you can achieve a durable repair that ensures the longevity and safety of your fireplace.
Remember, it is crucial to assess the severity of the cracks and determine if professional assistance is needed. Be sure to gather the necessary tools and materials before beginning the repair process, including wire brush, trowel, heat-resistant sealant, fireplace mortar, sandpaper, and paintbrush. These tools will enable you to complete the repair job effectively and efficiently.
In addition to the repair process, we have discussed the importance of regular maintenance and preventive measures to keep your fireplace in excellent condition. Clean your fireplace regularly, schedule annual inspections, maintain proper airflow, and avoid excessive heat exposure to prevent the occurrence of future cracks. Taking these steps will ensure that your fireplace remains a safe and enjoyable feature in your home.
Lastly, safety should always be a priority. If you feel unsure or uncomfortable with any aspect of the repair process or if you encounter severe cracks or structural issues, it is highly recommended to seek professional assistance. Professional chimney sweeps and fireplace technicians have the expertise and experience to handle complex repairs and ensure your fireplace’s safety and functionality.
We hope this guide has provided valuable insights and guidance on how to fix fireplace cracks. By addressing these cracks promptly and properly, you can enjoy the warmth and ambiance of your fireplace with peace of mind. Remember to regularly maintain and inspect your fireplace to prevent future issues and to consult with professionals when needed.
Now, armed with this knowledge, it’s time to roll up your sleeves, grab your tools, and embark on the journey to revitalize your fireplace. Happy repairing!
Frequently Asked Questions about How To Fix Fireplace Cracks
Was this page helpful?
At Storables.com, we guarantee accurate and reliable information. Our content, validated by Expert Board Contributors, is crafted following stringent Editorial Policies. We're committed to providing you with well-researched, expert-backed insights for all your informational needs.

0 thoughts on “How To Fix Fireplace Cracks”