Articles
How To Fix Nostalgia Electric Kegerator
Modified: October 19, 2024
Looking for articles on how to fix your Nostalgia Electric Kegerator? Discover expert tips and tricks to get your kegerator up and running again.
(Many of the links in this article redirect to a specific reviewed product. Your purchase of these products through affiliate links helps to generate commission for Storables.com, at no extra cost. Learn more)
Introduction
Welcome to our comprehensive guide on how to fix the Nostalgia Electric Kegerator. If you’re a beer enthusiast who enjoys the convenience of having a kegerator at home, you know how frustrating it can be when your favorite appliance encounters issues. But fear not! In this article, we will walk you through some common problems with the Nostalgia Electric Kegerator and provide step-by-step instructions on how to troubleshoot and fix them.
The Nostalgia Electric Kegerator is a popular choice for beer lovers who want to enjoy draft beer from the comfort of their own home. It is known for its sleek design, compact size, and user-friendly controls. However, like any electrical appliance, it is not immune to occasional malfunctions.
Whether you’re experiencing temperature control issues, power supply problems, or CO2 leaks, this article will guide you through the troubleshooting process. We’ll also discuss the tools and materials you’ll need to have on hand, ensuring that you’re well-prepared to tackle any issue that may arise.
It’s important to note that while this guide will provide valuable insights into fixing common problems, it is always recommended to refer to the Nostalgia Electric Kegerator’s user manual for specific instructions and safety precautions. Now, let’s dive into the details and get your kegerator back up and running!
Key Takeaways:
- Keep your Nostalgia Electric Kegerator running smoothly by troubleshooting power supply, temperature control, CO2 levels, and more. Regular cleaning and maintenance ensure optimal performance and the perfect pour every time.
- With the right tools and step-by-step instructions, you can fix common issues with your Nostalgia Electric Kegerator, from power supply problems to excessive foam. Enjoy refreshing, draft beer at home with confidence.
Read more: What Size Co2 Tank For A Kegerator Nostalgia
Overview of Nostalgia Electric Kegerator
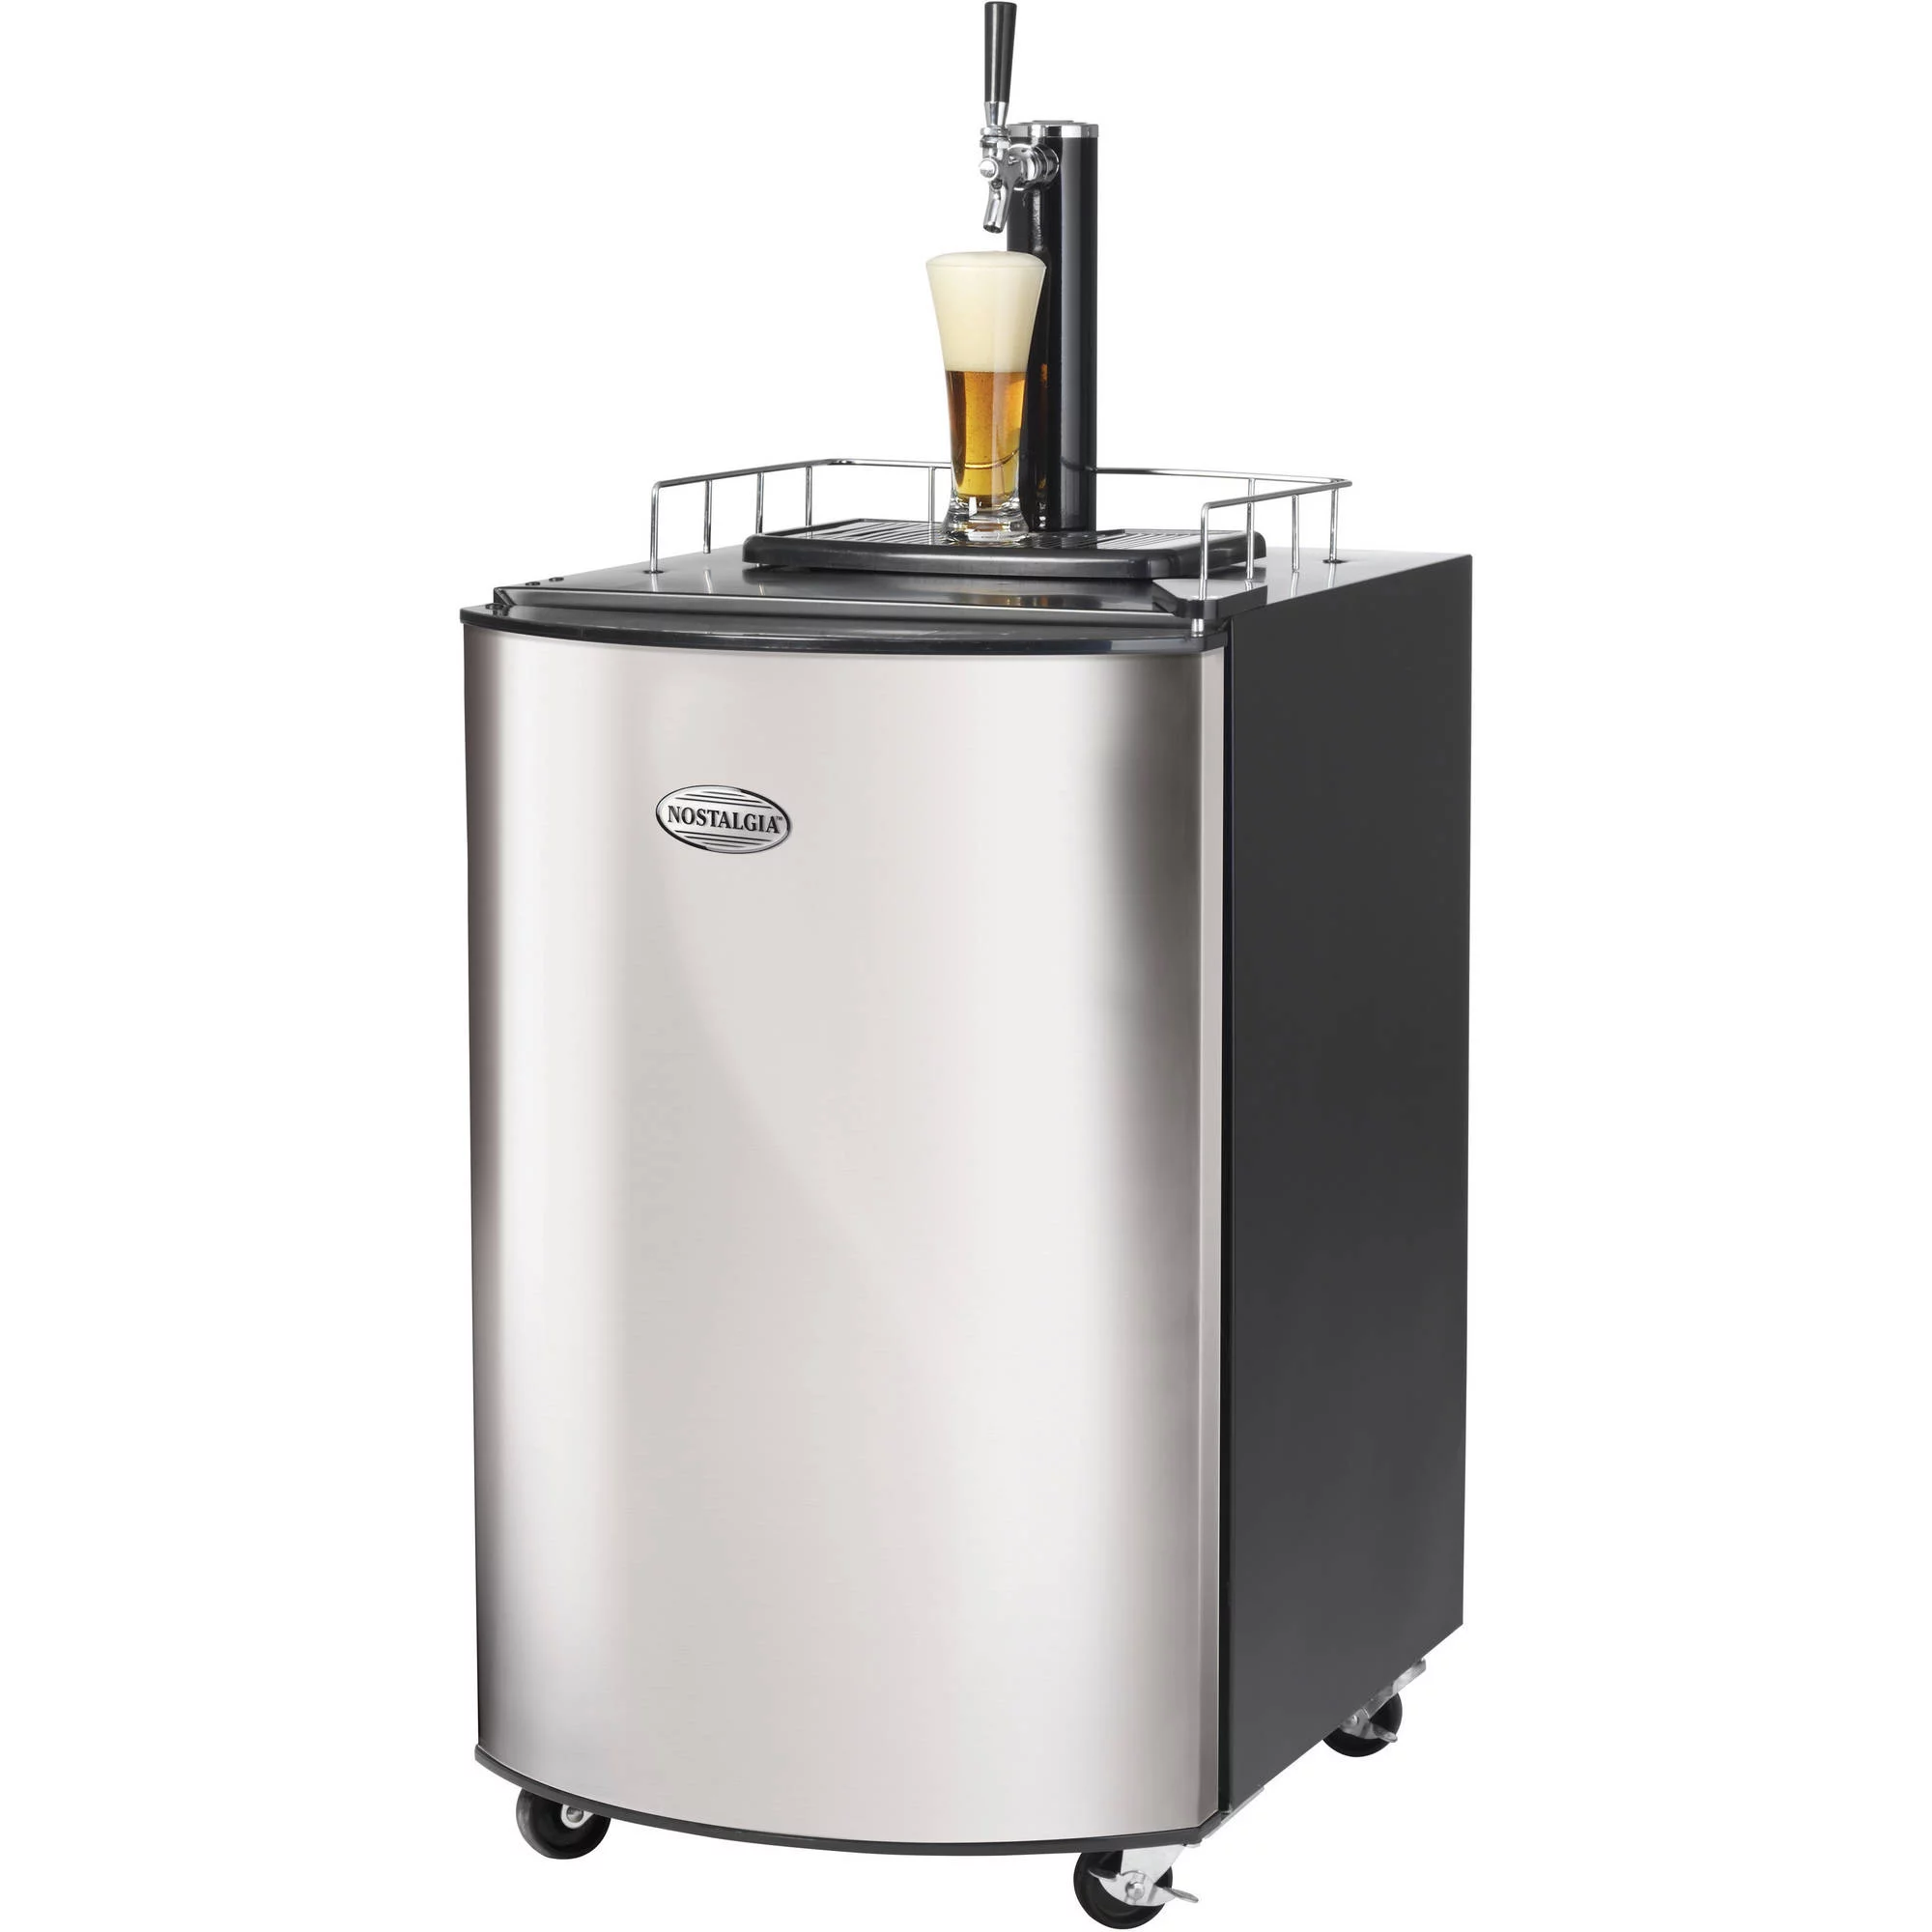
The Nostalgia Electric Kegerator is a versatile and stylish appliance designed to bring the joy of having draft beer at home. With its compact size and sleek design, it fits seamlessly into any living space, providing convenience and a touch of nostalgia.
This kegerator is equipped with advanced features to ensure optimal performance. It has a digital temperature control system that allows you to adjust the temperature to suit your beer preferences. Additionally, it boasts a large capacity, accommodating up to 5-liter mini kegs or two 5-liter mini kegs and a 19-liter keg.
One of the standout features of the Nostalgia Electric Kegerator is its compatibility with various keg sizes. Whether you prefer classic 5-liter mini kegs or larger 19-liter kegs, this appliance has you covered. It also includes a CO2 regulator and can accommodate up to 2 CO2 cartridges, ensuring that your beer is always carbonated to perfection.
Furthermore, the Nostalgia Electric Kegerator is designed for ease of use and maintenance. It features a removable drip tray, making it easy to clean up any spills or excess foam. The adjustable beer tower allows you to pour your beer directly into a glass without any mess. With its stainless steel construction, it’s not only stylish but also durable, ensuring years of use.
Overall, the Nostalgia Electric Kegerator is a reliable and efficient appliance for beer enthusiasts. It combines functionality, convenience, and style, making it a popular choice for those who want to enjoy draft beer in the comfort of their own home.
Now that we have covered the overview of the Nostalgia Electric Kegerator, let’s dive into some of the common issues that you may encounter and how to fix them.
Common Issues with Nostalgia Electric Kegerator
While the Nostalgia Electric Kegerator is a reliable appliance, it can occasionally encounter some common issues. Understanding these issues and how to troubleshoot them will help ensure that you can quickly get your kegerator back in working order. Here are some of the most common problems you may encounter:
- Lack of power: If your kegerator is not powering on, the first thing to check is the power supply. Ensure that the unit is plugged into a working electrical outlet and that the power cord is securely connected. If the kegerator still doesn’t turn on, you may need to check the fuse or circuit breaker.
- Inconsistent temperature: Temperature fluctuations can affect the quality of your beer. If you notice that your kegerator is not maintaining a consistent temperature, it could be due to a faulty temperature control system or a buildup of ice on the cooling element. Cleaning the cooling element and resetting the temperature control settings may resolve this issue.
- CO2 leaks: CO2 leaks can result in flat beer or a rapid depletion of CO2 cartridges. Inspect the CO2 connections and ensure they are tight and secure. If you notice any hissing sounds or the pressure gauge rapidly dropping, there may be a leak. Applying a soapy water solution to the connections can help identify the source of the leak.
- Excessive foam: If your beer pours with excessive foam, it could be due to a variety of reasons, including improper temperature settings, dirty beer lines, or incorrect CO2 pressure. Adjusting the temperature, cleaning the beer lines, and adjusting the CO2 pressure can help reduce foam and ensure a proper pour.
- Strange odors: If your kegerator emits strange odors, it could be a sign of bacterial growth or poor cleanliness. Regularly cleaning the interior of the kegerator, including the drip tray and beer lines, can help eliminate odors and maintain freshness.
By familiarizing yourself with these common issues, you will be better equipped to identify and resolve any problems that arise with your Nostalgia Electric Kegerator. In the following sections, we will provide step-by-step instructions on how to troubleshoot and fix these issues. Remember, always refer to your user manual for specific instructions and safety precautions.
Tools and Materials Needed
Before diving into the troubleshooting process for your Nostalgia Electric Kegerator, it’s essential to gather the necessary tools and materials. Having these items on hand will ensure that you can effectively diagnose and fix any issues that may arise. Here is a list of the tools and materials you will need:
- Owner’s Manual: The owner’s manual that came with your kegerator is an invaluable resource. It contains specific instructions and safety precautions that are specific to your model. Make sure to have it readily available for reference throughout the troubleshooting process.
- Multimeter: A multimeter is a versatile tool that measures voltage, current, and resistance. It can help you check the power supply, temperature control, and other electrical components of your kegerator.
- Cleaning Solution: A cleaning solution specifically designed for cleaning beer lines is essential to maintain the cleanliness of your kegerator. Look for cleaning solutions that are safe to use with food-grade materials.
- Sanitizing Solution: A sanitizing solution is used to ensure that all components of your kegerator are free from bacteria and contaminants. Look for sanitizing solutions that are suitable for use with brewing and beverage equipment.
- Adjustable Wrench: An adjustable wrench is a handy tool for tightening or loosening fittings and connections. It is essential for working with CO2 tanks and regulators.
- Bucket: A bucket is useful for soaking beer lines and other small components during the cleaning process.
- Cleaning Brush: A cleaning brush with soft bristles is ideal for scrubbing the beer lines and removing any residue or debris.
- Soapy Water Solution: A soapy water solution can help identify CO2 leaks by producing bubbles when applied to connections. It can be made by mixing dish soap with water.
- Towels or Rags: Having towels or rags nearby is essential for cleaning up spills, drying components, and maintaining cleanliness throughout the troubleshooting process.
By gathering these tools and materials, you will have everything you need to effectively troubleshoot and fix common issues with your Nostalgia Electric Kegerator. Now that you’re prepared, let’s move on to the step-by-step troubleshooting process!
Step 1: Troubleshooting the Power Supply
If your Nostalgia Electric Kegerator is not powering on, the first step is to troubleshoot the power supply. Here’s a step-by-step guide to diagnosing and fixing power-related issues:
- Check the Power Outlet: Ensure that the kegerator is plugged into a working electrical outlet. Sometimes, the issue might be as simple as a faulty power source.
- Inspect the Power Cord: Examine the power cord for any visible damage or frayed wires. If you notice any issues, replace the power cord before proceeding.
- Reset the Circuit Breaker: If the power outlet is functioning correctly, check if the circuit breaker has tripped. Locate the circuit breaker panel in your home and reset any tripped breakers related to the kegerator’s power source.
- Check the Fuse: If your kegerator has a fuse, inspect it to determine if it has blown. Replace the fuse with a new one if necessary, following the manufacturer’s instructions.
- Test the Power Source: If everything else seems to be in order, use a multimeter to test the power outlet and ensure proper voltage is reaching the kegerator. If there is no power, consult an electrician to resolve the issue.
If you’ve followed these steps and your kegerator still doesn’t power on, it may indicate a more significant electrical problem. In such cases, it’s recommended to contact the manufacturer or a professional technician for further assistance.
Remember to always prioritize safety when dealing with electricity. Disconnect the kegerator from the power source before inspecting any electrical components, and consult the owner’s manual for specific safety precautions.
In the next step, we will explore how to check and adjust the temperature control settings of your Nostalgia Electric Kegerator.
Check the power supply and ensure that the kegerator is plugged in properly. Also, clean the kegerator regularly to prevent any build-up that could affect its performance.
Read more: How To Fix Co2 Leak In Kegerator
Step 2: Checking the Temperature Control Settings
If you’re experiencing inconsistent or incorrect temperature readings on your Nostalgia Electric Kegerator, it’s important to check and adjust the temperature control settings. Follow these steps to ensure your kegerator is operating at the desired temperature:
- Locate the Temperature Control: Depending on the model of your kegerator, the temperature control may be located on the front panel or inside the unit. Refer to the owner’s manual to locate it.
- Set the Temperature: Use the temperature control knob or digital interface to adjust the desired temperature. It’s recommended to set the temperature between 34 to 40 degrees Fahrenheit (1 to 4 degrees Celsius) for optimal beer storage and serving conditions.
- Allow the Kegerator to Stabilize: After setting the desired temperature, give the kegerator some time to stabilize. This typically takes a few hours, so be patient and avoid making frequent adjustments during this period.
- Monitor the Temperature: Use a thermometer to monitor the temperature inside the kegerator. Place the thermometer in a glass of water inside the kegerator, away from direct contact with the cooling element. Check the temperature regularly to ensure it remains within the desired range.
- Adjust the Settings if Needed: If you find that the temperature is consistently outside the desired range, you may need to make further adjustments. Depending on the model, you may need to fine-tune the temperature control or consult the owner’s manual for additional instructions.
- Clean the Cooling Element: If the temperature control settings are correct, but the kegerator is still not maintaining the desired temperature, a buildup of ice on the cooling element could be the culprit. Switch off the kegerator and allow it to defrost. Once defrosted, clean the cooling element according to the manufacturer’s instructions.
By checking and adjusting the temperature control settings, you can ensure that your Nostalgia Electric Kegerator maintains the ideal temperature for storing and serving your favorite beers. In the next step, we will explore how to inspect the CO2 levels and connections of your kegerator.
Step 3: Inspecting the CO2 Levels and Connections
Proper CO2 levels and connections are crucial for ensuring your Nostalgia Electric Kegerator dispenses carbonated beer without any issues. Follow these steps to inspect the CO2 levels and connections:
- Check the CO2 Cartridges: Start by verifying that there are CO2 cartridges installed in the kegerator. Ensure they are not expired and have sufficient gas remaining. Replace the cartridges if necessary.
- Inspect the CO2 Regulator: Examine the CO2 regulator for any noticeable damage or leaks. A faulty regulator can result in inconsistent CO2 flow. If you notice any issues, replace the regulator following the manufacturer’s instructions.
- Tighten the CO2 Connections: Inspect the CO2 connections, including the regulator-to-CO2-tank connection and the regulator-to-keg connection. Ensure they are tightly secured using an adjustable wrench. Loose connections can result in CO2 leaks, leading to flat beer.
- Check for Leaks: Apply a soapy water solution to the CO2 connections. If there are any leaks, the solution will produce bubbles. Tighten the connections if you notice any leaks. In some cases, you might need to replace faulty seals or gaskets.
- Monitor the CO2 Pressure: Use the pressure gauge on the CO2 regulator to monitor the CO2 pressure. The recommended pressure typically ranges between 10 to 14 PSI (pounds per square inch) for most beers. Adjust the pressure as needed to ensure proper carbonation.
- Inspect the Beer Lines: Examine the beer lines for any kinks, blockages, or signs of wear. Clean the beer lines regularly using a beer line cleaning solution to avoid any buildup that could affect the flow and taste of the beer.
By inspecting the CO2 levels and connections, you can ensure that your Nostalgia Electric Kegerator dispenses properly carbonated beer. It’s important to regularly monitor the CO2 pressure and check for any leaks to maintain optimal performance. In the next step, we will discuss how to clean and maintain your kegerator to keep it in top condition.
Step 4: Cleaning and Maintaining the Kegerator
A clean and well-maintained Nostalgia Electric Kegerator not only ensures the quality of your beer but also extends the lifespan of the appliance. Follow these steps to clean and maintain your kegerator:
- Disconnect the Kegerator: Start by unplugging the kegerator from the power source and disconnecting any CO2 cartridges. This ensures your safety while cleaning and prevents any accidental damage to the appliance.
- Remove and Clean the Beer Lines: Detach the beer lines from the keg coupler and remove them from the kegerator. Soak the lines in a cleaning solution, following the manufacturer’s instructions. Use a cleaning brush to gently scrub the inside of the lines to remove any residue or debris. Rinse the lines thoroughly with clean water.
- Clean the Drip Tray and Interior: Remove the drip tray and wash it with warm, soapy water. Wipe down the interior of the kegerator using a clean cloth or sponge. Pay attention to any areas prone to buildup, such as around the beer faucets and seal. Rinse and dry the interior thoroughly.
- Sanitize the Components: Use a sanitizing solution to thoroughly sanitize all the removable components, including the beer lines, drip tray, and keg coupler. Follow the manufacturer’s instructions for proper sanitization procedures and ensure that all surfaces are well-covered and allowed to air dry.
- Clean the Exterior: Wipe down the exterior of the kegerator using a damp cloth and mild detergent. Avoid using abrasive cleaners that can damage the finish. Dry the exterior with a clean towel or cloth.
- Check and Replace Seals: Inspect the seals and gaskets on the kegerator, including those on the keg coupler and beer faucets. If you notice any signs of wear or damage, replace the seals to ensure a proper seal and prevent leakage.
- Reassemble and Reconnect: Once all the components are clean and dry, reassemble the kegerator and reconnect the beer lines and CO2 cartridges. Ensure all connections are tight and secure.
- Regular Maintenance: Implement a regular maintenance routine for your kegerator. This includes cleaning the beer lines at least once a month, checking and adjusting the CO2 pressure, and monitoring the temperature regularly. Refer to the owner’s manual for specific maintenance guidelines.
By regularly cleaning and maintaining your Nostalgia Electric Kegerator, you can ensure optimal performance and enjoy the best-tasting draft beer at home. In the next step, we will discuss how to identify and replace faulty components if necessary.
Step 5: Replacing Faulty Components
If you have tried troubleshooting and cleaning your Nostalgia Electric Kegerator but are still experiencing issues, it may be necessary to replace certain faulty components. Follow these steps to identify and replace any problematic parts:
- Diagnose the Problem: Identify the specific component that is causing the issue. It could be a faulty temperature sensor, a malfunctioning regulator, a damaged cooling element, or other internal parts. Refer to the owner’s manual or consult with the manufacturer for guidance on troubleshooting specific issues.
- Order Replacement Parts: Once you have identified the faulty component, contact the manufacturer or authorized retailers to order the appropriate replacement part. Ensure that you provide the model number and any other necessary details to ensure you receive the correct part.
- Prepare for Replacement: Before replacing the component, disconnect the kegerator from the power source and remove any CO2 cartridges. Make sure you have the necessary tools ready for the replacement, such as wrenches, screwdrivers, or other specialized tools as required.
- Follow the Manufacturer’s Instructions: Carefully follow the manufacturer’s instructions when replacing the faulty component. Each component may have specific installation steps and precautions, so it’s important to refer to the provided documentation.
- Test the Replacement: After replacing the component, reconnect the kegerator to power and any CO2 cartridges as necessary. Test the unit to ensure that the issue has been resolved. Monitor the temperature, CO2 flow, and other relevant factors to ensure everything is functioning correctly.
It’s important to note that some components may require the expertise of a professional technician or service provider for replacement. If you are unsure or uncomfortable with the replacement process, it is recommended to seek professional assistance to avoid any damage or safety hazards.
By following these steps, you can effectively identify and replace faulty components, ensuring the smooth operation of your Nostalgia Electric Kegerator. Remember to keep your user manual and any related documentation for future reference.
After completing these troubleshooting steps and addressing any issues, you should now have a properly functioning Nostalgia Electric Kegerator that will continue to provide you with cold, carbonated draft beer for years to come.
Read more: How To Fix A Kegerator That Doesn’t Get Cold
Conclusion
Congratulations! You have successfully learned how to troubleshoot and fix common issues with the Nostalgia Electric Kegerator. By following the step-by-step instructions provided in this guide, you can keep your kegerator in optimal condition, ensuring that you can enjoy refreshing, draft beer at home.
We started by understanding the overview of the Nostalgia Electric Kegerator, highlighting its features and benefits. Then, we delved into the most common issues that kegerator owners may encounter, such as power supply problems, temperature control issues, CO2 leaks, excess foam, and strange odors.
Throughout this guide, we emphasized the importance of having the right tools and materials on hand, such as a multimeter, cleaning solutions, a sanitizing solution, an adjustable wrench, a bucket, a cleaning brush, a soapy water solution, and towels or rags. These tools are essential for effective troubleshooting and maintenance.
We provided step-by-step instructions on how to troubleshoot the power supply, check and adjust the temperature control settings, inspect CO2 levels and connections, clean and maintain the kegerator, and even how to identify and replace faulty components if necessary.
Remember, always refer to the owner’s manual and follow the manufacturer’s instructions for specific details and safety precautions. Your kegerator’s manual is a valuable resource that provides you with information specific to your model.
By following these guidelines, you can save time, money, and frustration by fixing common issues with your Nostalgia Electric Kegerator on your own. However, if you ever encounter complex or severe problems that you’re unable to resolve, it’s always best to seek assistance from the manufacturer or a professional technician.
With proper maintenance and care, your Nostalgia Electric Kegerator will continue to provide you with the joy of enjoying perfectly chilled, carbonated draft beer in the comfort of your own home. Cheers!
Frequently Asked Questions about How To Fix Nostalgia Electric Kegerator
Was this page helpful?
At Storables.com, we guarantee accurate and reliable information. Our content, validated by Expert Board Contributors, is crafted following stringent Editorial Policies. We're committed to providing you with well-researched, expert-backed insights for all your informational needs.


0 thoughts on “How To Fix Nostalgia Electric Kegerator”