Articles
How To Install A Carpet In A Bedroom
Modified: January 19, 2024
Learn how to install a beautiful carpet in your bedroom with our comprehensive articles. Get step-by-step instructions and expert tips for a flawless carpet installation.
(Many of the links in this article redirect to a specific reviewed product. Your purchase of these products through affiliate links helps to generate commission for Storables.com, at no extra cost. Learn more)
Introduction
Installing a carpet in a bedroom is a great way to add comfort, warmth, and style to your space. Whether you’re replacing an old carpet or starting from scratch, this guide will walk you through the step-by-step process of installing a carpet in a bedroom. With the right tools, materials, and techniques, you’ll be able to achieve professional-looking results and enjoy a cozy and inviting bedroom.
Before diving into the installation process, it’s important to take some time to plan and prepare. Measure your room accurately, choose the right carpet and padding, and gather the necessary tools and materials. This will ensure a smooth and successful installation process.
Throughout this guide, we will provide detailed instructions on each stage of the carpet installation process. From preparing the room to securing the carpet in place, you’ll learn the techniques and tips to achieve a flawless result. Additionally, we will share cleaning and maintenance tips to help you keep your carpet looking fresh and beautiful for years to come.
So, if you’re ready to transform your bedroom with a soft and luxurious carpet, let’s get started! With a little bit of time and effort, you’ll soon have a bedroom that feels like a cozy sanctuary.
Key Takeaways:
- Transform your bedroom into a cozy sanctuary by following our step-by-step guide to installing a carpet. From preparation to maintenance, achieve professional results and enjoy a warm and inviting space.
- Properly measure, prepare, and secure your carpet for a flawless installation. Embrace the comfort and style of a well-installed carpet while maintaining its beauty for years to come.
Read more: How To Place Carpet In A Bedroom
Tools and Materials Needed
Before you begin the process of installing a carpet in your bedroom, gather the following tools and materials:
- Carpet
- Carpet padding
- Utility knife
- Carpet knife
- Measuring tape
- Straightedge
- Chalk line
- Staple gun
- Staples
- Hammer
- Knee kicker
- Carpet stretcher
- Seam roller
- Carpet tucker
- Masking tape
- Vacuum cleaner
When it comes to choosing the carpet and carpet padding, consider factors such as color, style, and durability. Measure your bedroom accurately to determine the amount of carpet and padding you’ll need. It’s important to allow for some extra material to account for fitting, cutting, and any potential mistakes.
Ensure that you have all the necessary tools on hand before you begin. This will make the installation process smoother and more efficient. Additionally, a clean and well-prepared work area will contribute to more professional-looking results.
Once you’ve gathered all the tools and materials, you’re ready to move on to the next step: preparing the room.
Preparing the Room
Before installing the carpet in your bedroom, it’s important to properly prepare the room. Follow these steps to ensure a smooth and successful installation:
- Remove all furniture: Start by clearing out all furniture from the room. This will give you ample space to work and prevent any obstacles during the installation process.
- Clean the room: Thoroughly clean the room, including vacuuming the floor to remove any dust, dirt, or debris. This will create a clean and smooth surface for the new carpet.
- Address any repairs: Take this opportunity to fix any existing issues with the subfloor. If there are any loose boards or squeaks, secure them or replace them before proceeding.
- Ensure proper ventilation: If your bedroom has poor ventilation, consider installing a vent or improving airflow. Proper ventilation will prevent moisture buildup, which can lead to mold and mildew issues.
- Check for level floors: Use a level or straightedge to check if your floors are level. If you notice any uneven areas, you may need to use a floor leveler to create a smooth and even surface.
- Remove baseboards: If you have baseboards installed, carefully remove them using a pry bar. This will allow for a neat and professional carpet installation. Keep track of any nails or screws to reattach the baseboards later.
By properly preparing the room, you’ll ensure that the carpet installation process goes smoothly and that the final result looks polished and professional.
Once the room is prepared, you can move on to the next step of measuring and ordering the carpet.
Measuring and Ordering the Carpet
Accurate measurements are crucial when it comes to ordering the right amount of carpet for your bedroom. Follow these steps to measure your room and ensure a proper fit:
- Measure the length and width: Use a measuring tape to measure the length and width of your bedroom. Start at one wall and measure to the opposite wall, accounting for any indentations or alcoves.
- Account for doorways: Measure the width of any doorways in the room to determine if the carpet needs to fit under or around them. Take note of any additional space required for proper installation.
- Consider patterned carpets: If you plan to install a patterned carpet, take into account any pattern repeats and ensure that you order enough material to match up the patterns seamlessly.
- Calculate square footage: Multiply the length and width measurements to determine the square footage of the room. Add an additional 10% to account for waste, cutting, and fitting.
- Choose a carpet style: Select a carpet style that suits your preference and matches the overall aesthetic of your bedroom. Consider factors like color, texture, and durability.
- Order the carpet: Once you have accurate measurements and chosen a carpet style, contact a reputable carpet supplier or visit a local store to place your order. Provide them with the square footage and any additional information required.
Keep in mind that some carpet suppliers may offer installation services or recommend professional installers. If you’re comfortable with DIY installation, you can proceed with installing the carpet yourself using the measurements you’ve gathered.
By taking precise measurements and ordering the correct amount of carpet, you’ll ensure a seamless and visually appealing installation in your bedroom. Once your carpet is ordered and on its way, you can move on to the next step: removing the old carpet (if applicable).
Removing Old Carpet (if applicable)
If you’re replacing an existing carpet in your bedroom, you’ll need to remove it before installing the new one. Follow these steps to properly remove the old carpet:
- Gather your tools: Before you begin, gather the necessary tools, including a utility knife, pliers, and a pry bar.
- Prepare the room: Clear the room of any furniture or obstacles to create space for the carpet removal process.
- Start in a corner: Begin by locating a corner of the room and use a pair of pliers to pull up the carpet and padding from one corner.
- Cut the carpet into manageable strips: Use a utility knife to cut the carpet into smaller, manageable strips, making it easier to remove. Roll up each strip as you go for easier disposal.
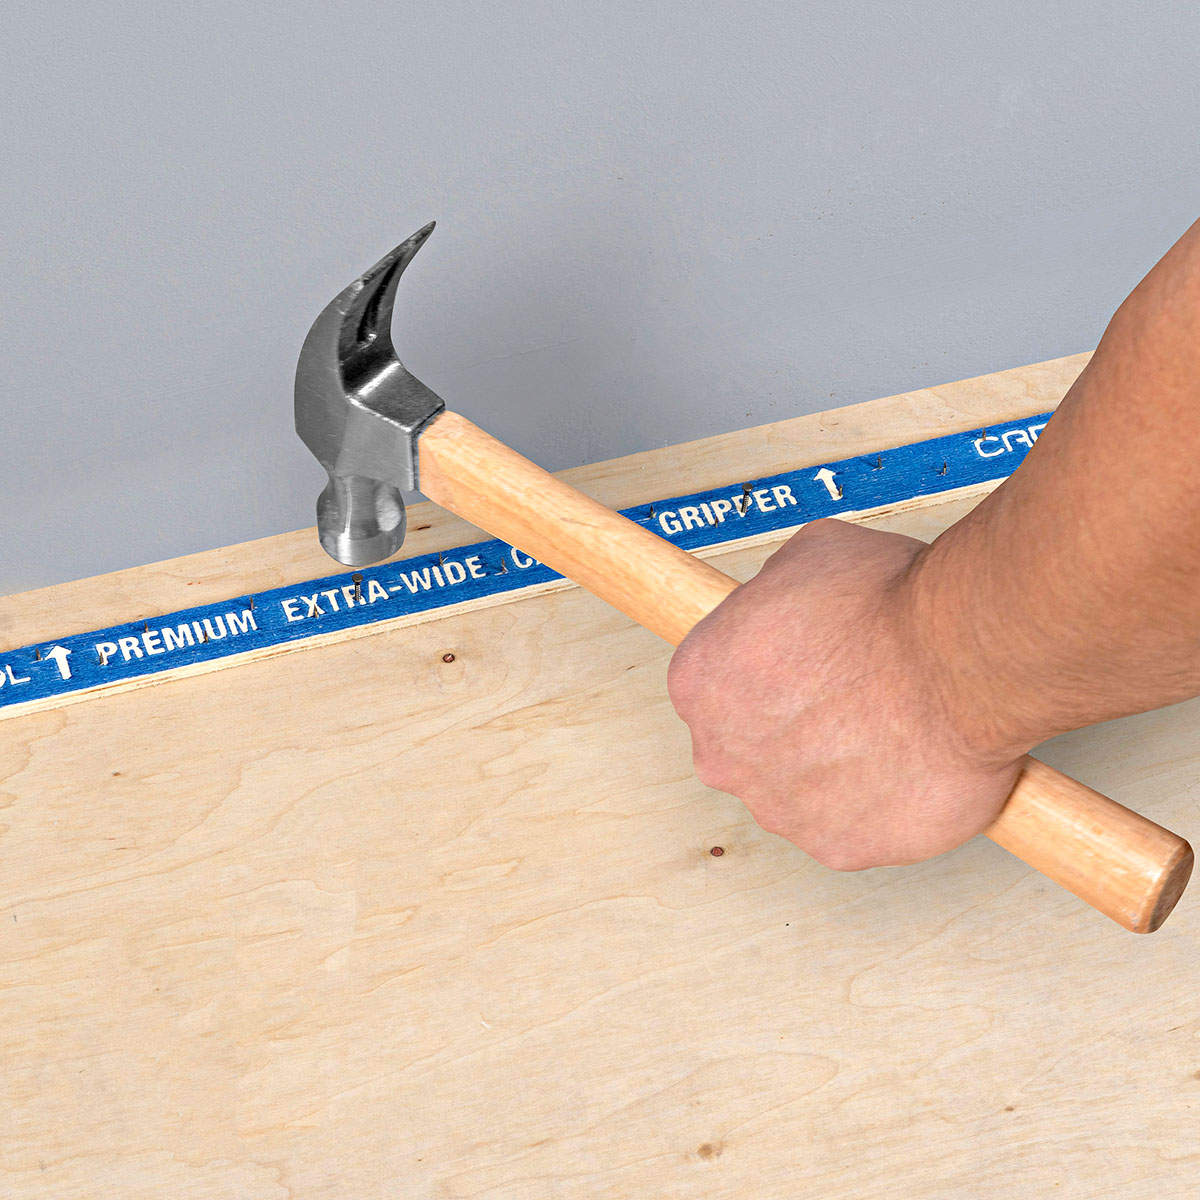
- Remove the tack strips: After removing the carpet, carefully pry up the tack strips along the perimeter of the room using a pry bar. Use caution to avoid damaging the walls or floor.
- Remove any remaining staples or adhesive: Once the carpet and tack strips are removed, inspect the subfloor for any remaining staples or adhesive. Use pliers or a putty knife to remove any leftover fasteners or adhesive residue.
- Clean and prepare the subfloor: Thoroughly clean the subfloor, removing any dust, debris, or adhesive remnants. Ensure the surface is smooth and free from any obstacles.
Removing the old carpet is an important step to ensure a clean and well-prepared surface for the new carpet installation. Dispose of the old carpet responsibly, either by contacting your local waste management facility or by arranging for professional disposal services if needed.
Once the old carpet has been removed and the subfloor is prepared, you can move on to the next step: preparing the subfloor for the new carpet.
Read more: What Is The Best Type Of Carpet For Bedrooms
Preparing the Subfloor
Before installing the new carpet in your bedroom, it’s essential to properly prepare the subfloor. The subfloor serves as the foundation for your carpet and needs to be clean, dry, and even for a successful installation. Follow these steps to prepare the subfloor:
- Inspect for any damage: Carefully assess the subfloor for any damage, such as cracks, holes, or rot. Repair any issues before proceeding to ensure a stable and secure surface.
- Remove any protruding nails or staples: Check for any nails or staples sticking out from the subfloor. Use pliers or a hammer to remove them or secure them flush with the floor.
- Clean the subfloor: Thoroughly clean the subfloor to remove any dirt, debris, or adhesive residue from the previous carpet installation. Sweep or vacuum the surface and use a damp mop to ensure it’s clean and free from contaminants.
- Address moisture issues: Check for any signs of moisture, such as dampness or water stains. If there are any moisture issues, address them before proceeding with the installation. Proper ventilation and addressing any leaks or water damage are crucial to prevent future problems.
- Level the subfloor: Use a long straightedge, such as a level, to check if the subfloor is level. Any uneven areas can cause premature wear and tear on the carpet. If necessary, use a floor leveling compound to even out any low spots or high areas.
- Ensure the subfloor is dry: Before installing the carpet, it’s essential to ensure that the subfloor is completely dry. Moisture can lead to mold or mildew growth and compromise the integrity of the installation. Use a moisture meter to test the subfloor’s moisture levels and allow ample time for it to dry if needed.
By properly preparing the subfloor, you’ll create a solid foundation for your new carpet installation. Taking the time to address any damage, clean the surface, and ensure it’s level and dry will contribute to a successful and long-lasting carpet installation in your bedroom. Once the subfloor is ready, you can move on to the next step: installing carpet padding.
Installing Carpet Padding
Carpet padding, also known as underlay or cushion, is an important layer that goes between the subfloor and the carpet itself. It provides an additional layer of cushioning, insulation, and noise reduction. Follow these steps to install carpet padding in your bedroom:
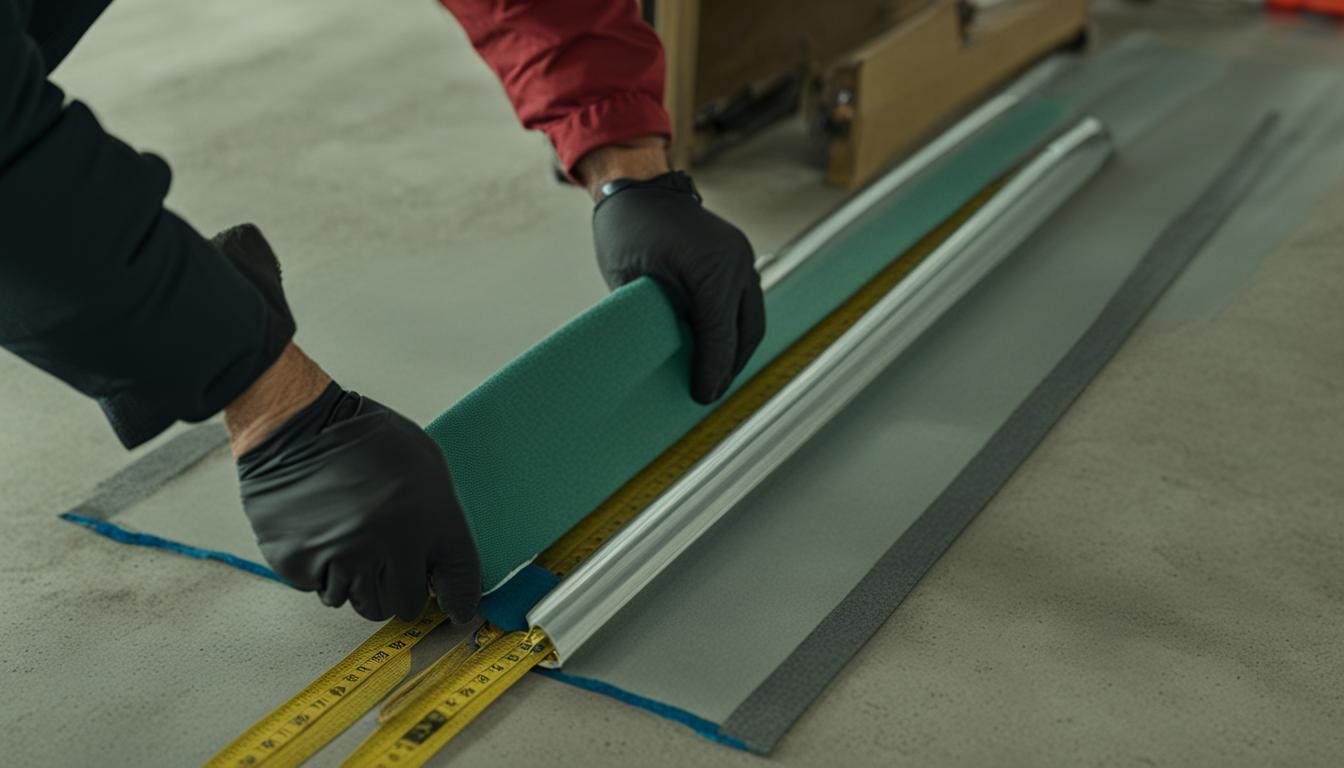
- Measure and cut the padding: Using your measurements, cut the carpet padding to fit the dimensions of your room. Use a sharp utility knife to make clean, straight cuts.
- Overlap the padding: If your room requires multiple pieces of carpet padding, overlap the edges by a few inches. This will ensure a seamless and even surface for the carpet.
- Secure the padding: Lay the padding down on the subfloor, making sure it covers the entire area. Use masking tape or adhesive spray to secure the padding in place, ensuring it doesn’t shift during the carpet installation process.
- Trim excess padding: Once the padding is in place, use a utility knife to trim any excess padding that extends beyond the perimeter of the room. This will create a clean and neat edge for the carpet installation.
- Check for a smooth surface: Walk over the installed padding and check for any areas where it feels uneven or bumpy. Make any necessary adjustments to ensure a smooth and comfortable surface.
Carpet padding not only provides added comfort and insulation, but it also helps to extend the lifespan of your carpet. The extra layer of padding helps to absorb impact and reduce wear and tear on the carpet fibers.
Once your carpet padding is properly installed, you’re ready to move on to the next step: laying the carpet in your bedroom.
Before installing a carpet in a bedroom, make sure to properly prepare the subfloor by cleaning and smoothing it out. This will ensure a smooth and long-lasting installation.
Laying the Carpet
Now that the room is prepared, the subfloor is ready, and the carpet padding is in place, it’s time to lay the carpet in your bedroom. Follow these steps to ensure a smooth and professional carpet installation:
- Acclimate the carpet: Unroll the carpet in the room and let it acclimate to the temperature and humidity for at least 24 hours. This allows the carpet to adjust and reduce the risk of shrinking or stretching after installation.
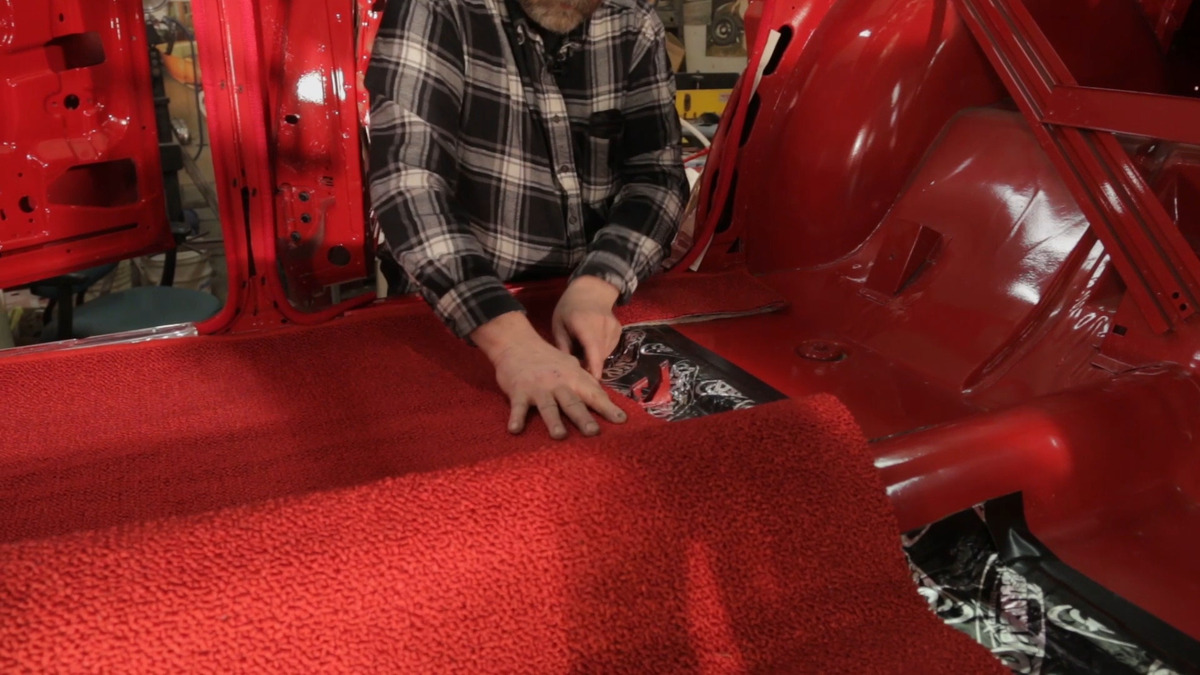
- Start in a corner: Begin in one corner of the room and ensure that the carpet is aligned with the walls and straight. Leave a slight excess of carpet along the walls to trim later.
- Position the carpet: Slowly unroll and position the carpet over the padding, taking care to avoid any wrinkles or folds. It’s helpful to have a second person assist with this step to ensure the carpet is properly positioned.
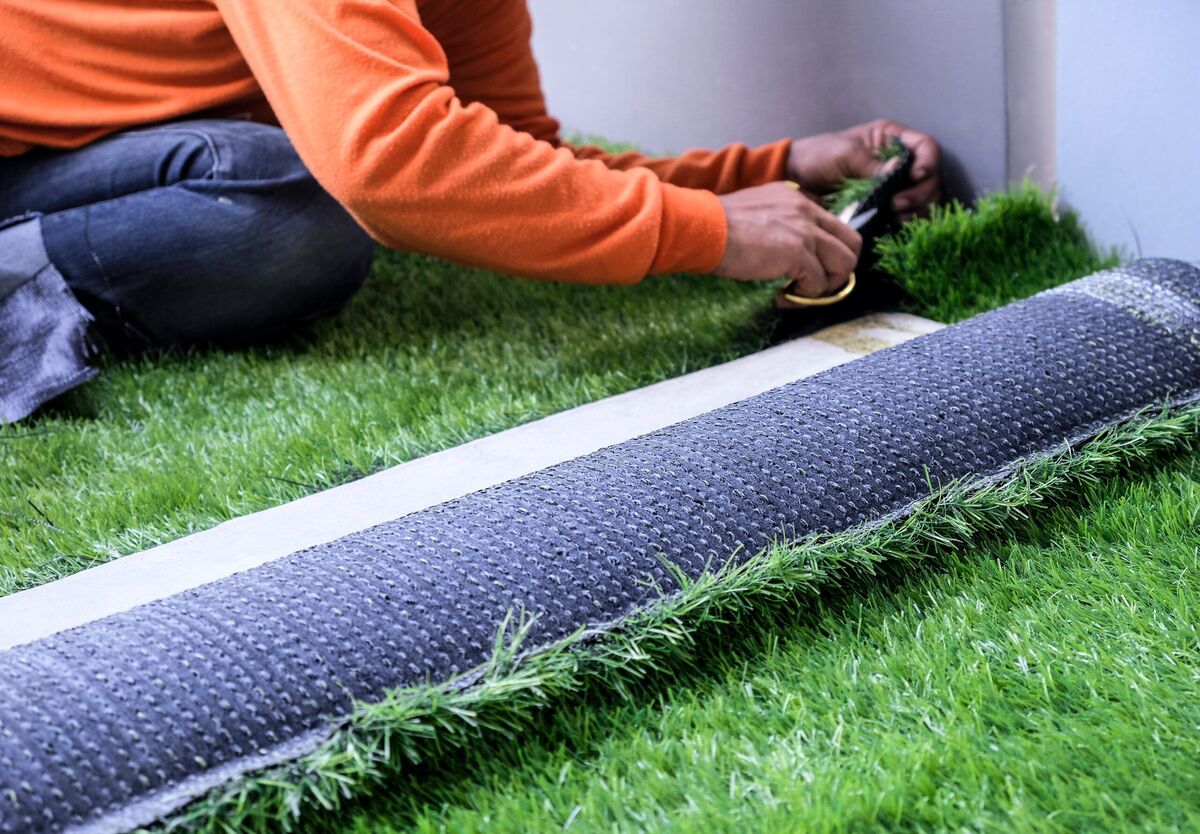
- Trim excess carpet: Use a carpet knife or utility knife to trim any excess carpet that extends beyond the walls. Ensure the cut is straight and neat, following the line of the wall.
- Create seams if necessary: If the room requires multiple pieces of carpet, carefully create seams by aligning the patterns and edges. Use a carpet seam tape and a heated carpet iron to secure the seams together.
- Smooth out the carpet: Use a carpet roller or a wide, smooth object to press down on the carpet and ensure it is fully adhered to the padding and subfloor. This will help remove any air bubbles and create a seamless look.
During the carpet installation process, it’s important to be patient and take your time to ensure a professional-looking result. Checking for wrinkles, aligning patterns, and trimming excess carpet are crucial steps to achieve a neat and aesthetically pleasing installation.
Once the carpet is properly laid, you can move on to the next step: stretching the carpet to ensure a secure fit.
Stretching the Carpet
Stretching the carpet is an essential step in the installation process to ensure a tight and wrinkle-free fit. Proper stretching will provide a smooth and professional-looking carpet in your bedroom. Follow these steps to stretch the carpet effectively:
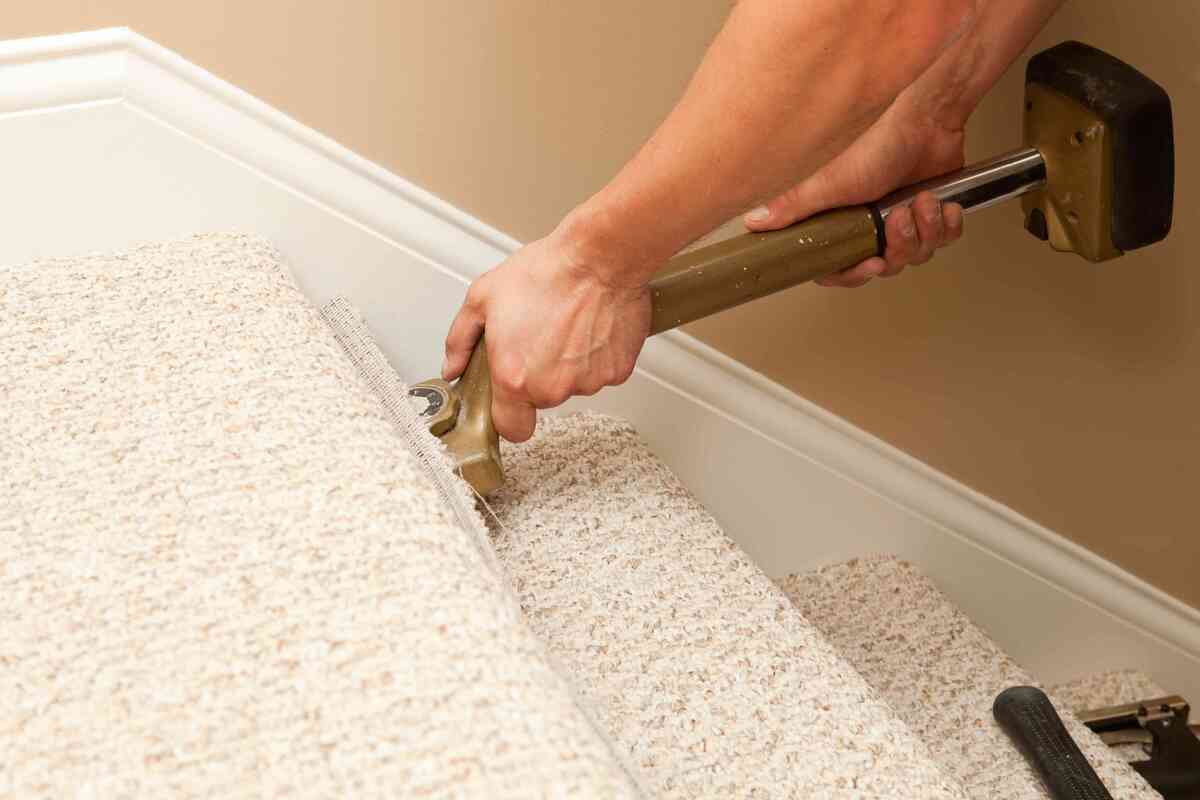
- Start at the center of the room: Begin by positioning a knee kicker about six inches away from the wall at the center point of one side of the room. A knee kicker is a tool used to push the carpet into place.
- Apply pressure with the knee kicker: Place your knee against the padded end of the knee kicker and firmly push it into the carpet. This should create tension and stretch the carpet towards the opposite wall.
- Align the carpet with the opposite wall: As you push and stretch the carpet with the knee kicker, use a carpet stretcher tool to hook onto the carpet and pull it towards the opposite wall. This will ensure a tight and even stretch.
- Repeat the process on the remaining sides: Move to the adjacent sides of the room and repeat the stretching process, using the knee kicker and carpet stretcher tool.
- Check for wrinkles or bubbles: As you stretch the carpet, be mindful of any wrinkles, bubbles, or folds that may form. Address them promptly by readjusting and restretching the carpet as necessary.
- Trim excess carpet: Once the carpet is fully stretched and in place, trim any excess carpet along the edges using a carpet knife or utility knife. Trim it close to the baseboard or wall, ensuring a clean and finished look.
Proper stretching of the carpet is crucial to prevent any trip hazards or premature wear. It helps to maintain the integrity of the carpet and ensures a longer lifespan.
Once the carpet is stretched and trimmed, you can move on to the next step: trimming and finishing the edges.
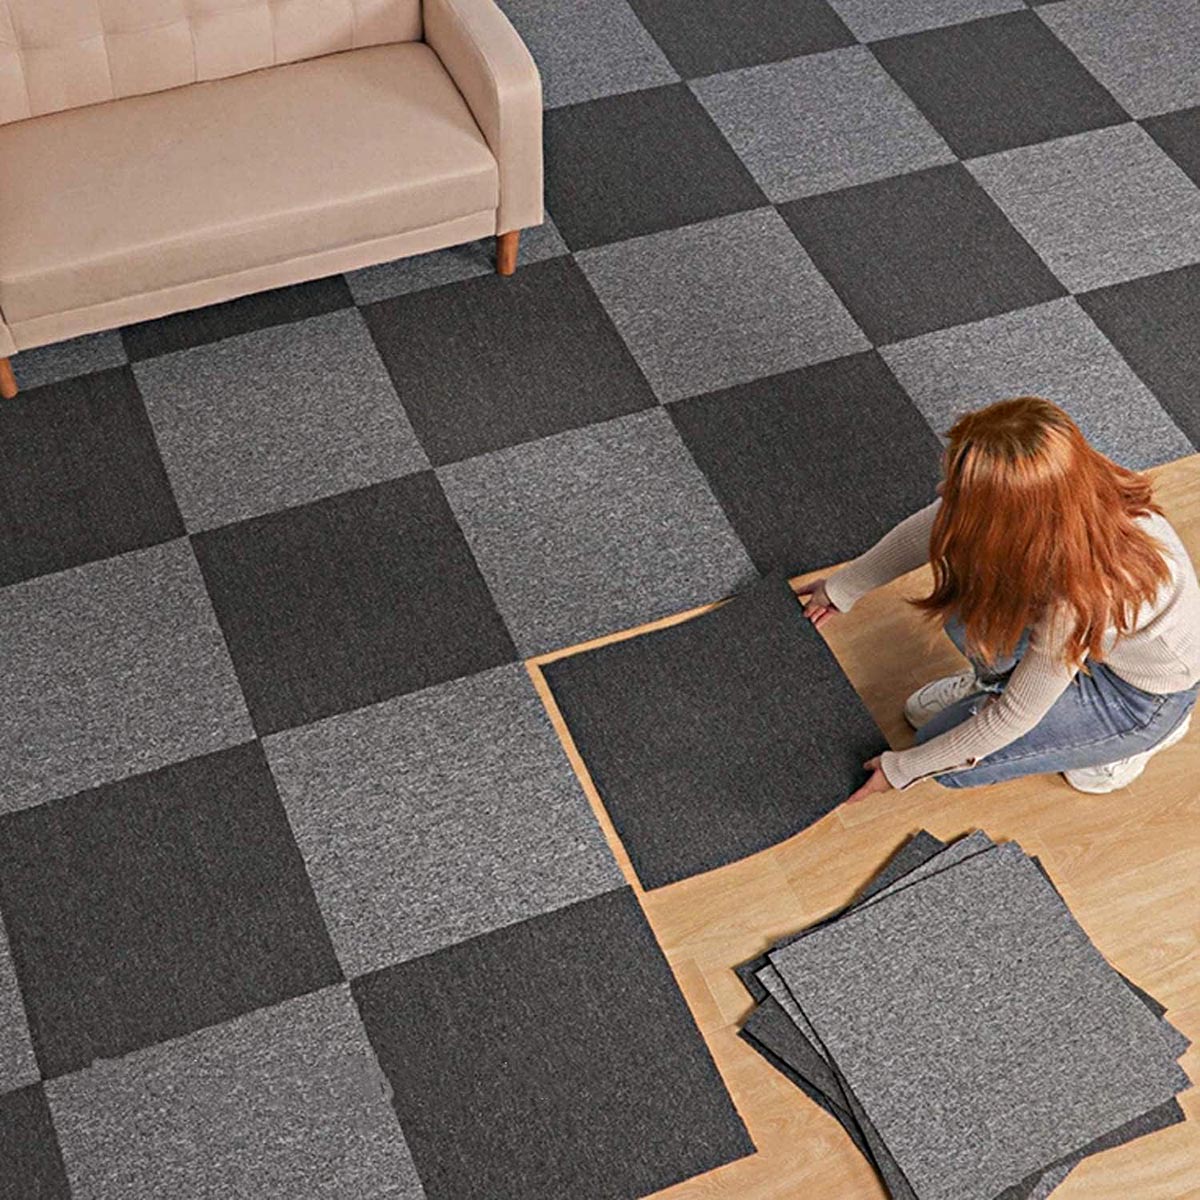
Read more: How To Install Carpet Squares
Trimming and Finishing the Edges
Trimming and finishing the edges of the carpet is the final step to achieve a polished and professional look in your bedroom. Follow these steps to trim and finish the edges of your newly installed carpet:
- Prepare the baseboards: If you had removed the baseboards earlier, now is the time to reattach them. Use a hammer and finishing nails to secure them back in place, ensuring they sit above the carpet.
- Trim excess carpet: Use a carpet knife or a trimmer tool to trim any excess carpet along the baseboards, leaving a small gap between the carpet and the edge of the baseboards. Take care to create clean and straight cuts.
- Tuck the carpet into the gaps: Use a carpet tucker or a putty knife to push the trimmed carpet edges into the gap between the carpet and the baseboards. This will create a seamless transition and prevent the carpet from fraying.
- Secure the carpet edges: For added security, use a staple gun to carefully staple the carpet edges against the baseboards, ensuring a secure fit. Place the staples about 6 to 8 inches apart.
- Check for any visible seams: Inspect the room for any visible seams, especially if you had to install multiple pieces of carpet. Ensure the seams are well-aligned and use a seam roller to press them down for a smooth and seamless appearance.
Trimming and finishing the edges of the carpet enhances the overall aesthetic and ensures a clean and professional installation. Taking the time to properly tuck and secure the carpet edges will prevent any tripping hazards and maintain a neat and tidy appearance.
With the edges trimmed and finished, you have successfully completed the carpet installation process in your bedroom. The next step involves securing the carpet in place, which we will discuss in the following section.
Securing the Carpet
Securing the carpet is the final step in the installation process, ensuring that the carpet stays in place and provides a stable and safe flooring surface. Follow these steps to securely fasten the carpet in your bedroom:
- Use a staple gun: Start by using a staple gun to attach the carpet along the edges, approximately 3 to 4 inches away from the baseboard. Space the staples about 6 to 8 inches apart, ensuring they securely hold the carpet in place.
- Avoid stapling in high-traffic areas: Be mindful of where you place the staples and avoid stapling excessively in high-traffic areas. This will prevent any discomfort or damage to the carpet due to the staple heads.
- Consider transition strips: If your carpet meets another type of flooring, such as hardwood or tile, consider using transition strips. These strips provide a smooth transition between the different flooring materials and help secure the carpet’s edges.
- Inspect for any loose areas: Walk over the installed carpet and check for any areas that may feel loose or have ripples. If you notice any, use a knee kicker and carpet stretcher to re-stretch and tighten those areas.
- Seal any gaps or seams: Pay attention to any gaps or seams that may still be visible. Use a seam sealer or adhesive to seal and secure any open seams, ensuring a seamless and unified look.
Securing the carpet properly will not only enhance its overall appearance but also prevent any tripping hazards or shifting of the carpet over time. Taking the time to secure the carpet ensures that you can enjoy a stable and long-lasting flooring solution in your bedroom.
With the carpet now securely in place, all that’s left to do is to give it a thorough cleaning and implement proper maintenance to keep it looking fresh for years to come. We’ll cover some cleaning and maintenance tips in the next section.
Cleaning and Maintenance Tips
Proper cleaning and maintenance are essential to keep your newly installed carpet in your bedroom looking fresh and beautiful for years to come. Follow these tips to ensure the longevity and cleanliness of your carpet:
- Vacuum regularly: Regular vacuuming, at least once or twice a week, helps to remove dirt, dust, and debris that can accumulate in the carpet fibers. Use a vacuum cleaner with a rotating beater bar or brush attachment for the most effective results.
- Address spills and stains promptly: Accidents happen, but it’s important to clean up spills and treat stains as soon as possible. Blot the spill with a clean cloth or paper towel, avoiding any rubbing that can spread the stain. Use a suitable carpet stain remover as directed.
- Place doormats or rugs in high-traffic areas: To reduce the amount of dirt and debris being tracked onto your carpet, place doormats or rugs in entryways and high-traffic areas. This helps to trap dirt and prevent it from spreading onto the carpet.
- Avoid excessive moisture: Moisture can result in mold and mildew growth, as well as damage the carpet fibers. Be cautious when cleaning the carpet and avoid over-wetting. If you need to deep clean the carpet, consider hiring a professional carpet cleaning service.
- Rotate furniture: Regularly move and rotate heavy furniture to prevent indentations and uneven wear on the carpet. Place furniture coasters or pads under the legs to distribute the weight more evenly.
- Protect the carpet during renovations: If you’re planning any home renovations or painting projects, take precautions to protect your carpet. Cover it with drop cloths or plastic sheeting to prevent any potential damage from debris or spills.
- Professional cleaning: Consider scheduling professional carpet cleaning every 12 to 18 months, depending on the amount of foot traffic and other factors. Professional cleaning can effectively remove deep-seated dirt and rejuvenate the appearance of your carpet.
By following these cleaning and maintenance tips, you can ensure that your carpet remains clean, fresh, and in optimal condition for years to come. Regular care and occasional professional cleaning will prolong its lifespan and keep it looking its best.
Congratulations! By completing the installation process and implementing proper cleaning and maintenance, you have successfully transformed your bedroom with a new carpet. Enjoy the cozy and inviting atmosphere it brings to your space!
ConclusionInstalling a carpet in your bedroom not only adds comfort and warmth but also enhances the overall aesthetic appeal of the space. By following the step-by-step guide we have provided, you can achieve a professional-looking carpet installation that will bring years of enjoyment.
Throughout the process, we covered essential steps such as preparing the room, measuring and ordering the carpet, removing old carpet (if applicable), preparing the subfloor, installing carpet padding, laying the carpet, stretching the carpet, trimming and finishing the edges, and securing the carpet. Each step contributes to a successful and visually pleasing installation.
We also provided tips on cleaning and maintenance to help you keep your carpet in pristine condition. Regular vacuuming, addressing spills promptly, and scheduling professional cleaning are all essential for maintaining the longevity and beauty of your carpet.
Remember, when installing a carpet, take the time to plan and prepare. Accurate measurements, choosing the right carpet and padding, and having the necessary tools and materials will make the installation process smoother and more efficient.
With a little bit of effort and attention to detail, you can transform your bedroom into a cozy and inviting oasis. A well-installed and well-maintained carpet will not only provide comfort underfoot but also contribute to the overall ambiance and style of your space.
So, embrace the warmth and beauty of a carpeted bedroom. Begin by preparing the room, measuring and ordering the carpet, removing old carpet if necessary, and then moving on to the installation process. Take your time, follow the steps, and enjoy the process of creating a comfortable and visually appealing sanctuary.
Congratulations on your new carpet installation, and we hope it brings you many years of comfort and satisfaction in your bedroom!
Frequently Asked Questions about How To Install A Carpet In A Bedroom
Was this page helpful?
At Storables.com, we guarantee accurate and reliable information. Our content, validated by Expert Board Contributors, is crafted following stringent Editorial Policies. We're committed to providing you with well-researched, expert-backed insights for all your informational needs.