Articles
How Far Should Farmhouse Sink Stick Out
Modified: October 28, 2024
Discover how far a farmhouse sink should stick out in your kitchen. Read our informative articles for expert advice and tips.
(Many of the links in this article redirect to a specific reviewed product. Your purchase of these products through affiliate links helps to generate commission for Storables.com, at no extra cost. Learn more)
Introduction
When it comes to kitchen remodeling, choosing the right sink is an important decision. Among the many options available, farmhouse sinks have gained significant popularity in recent years. With their elegant and rustic appeal, farmhouse sinks add a touch of charm to any kitchen. However, one question that often arises during the installation process is, “How far should a farmhouse sink stick out?”
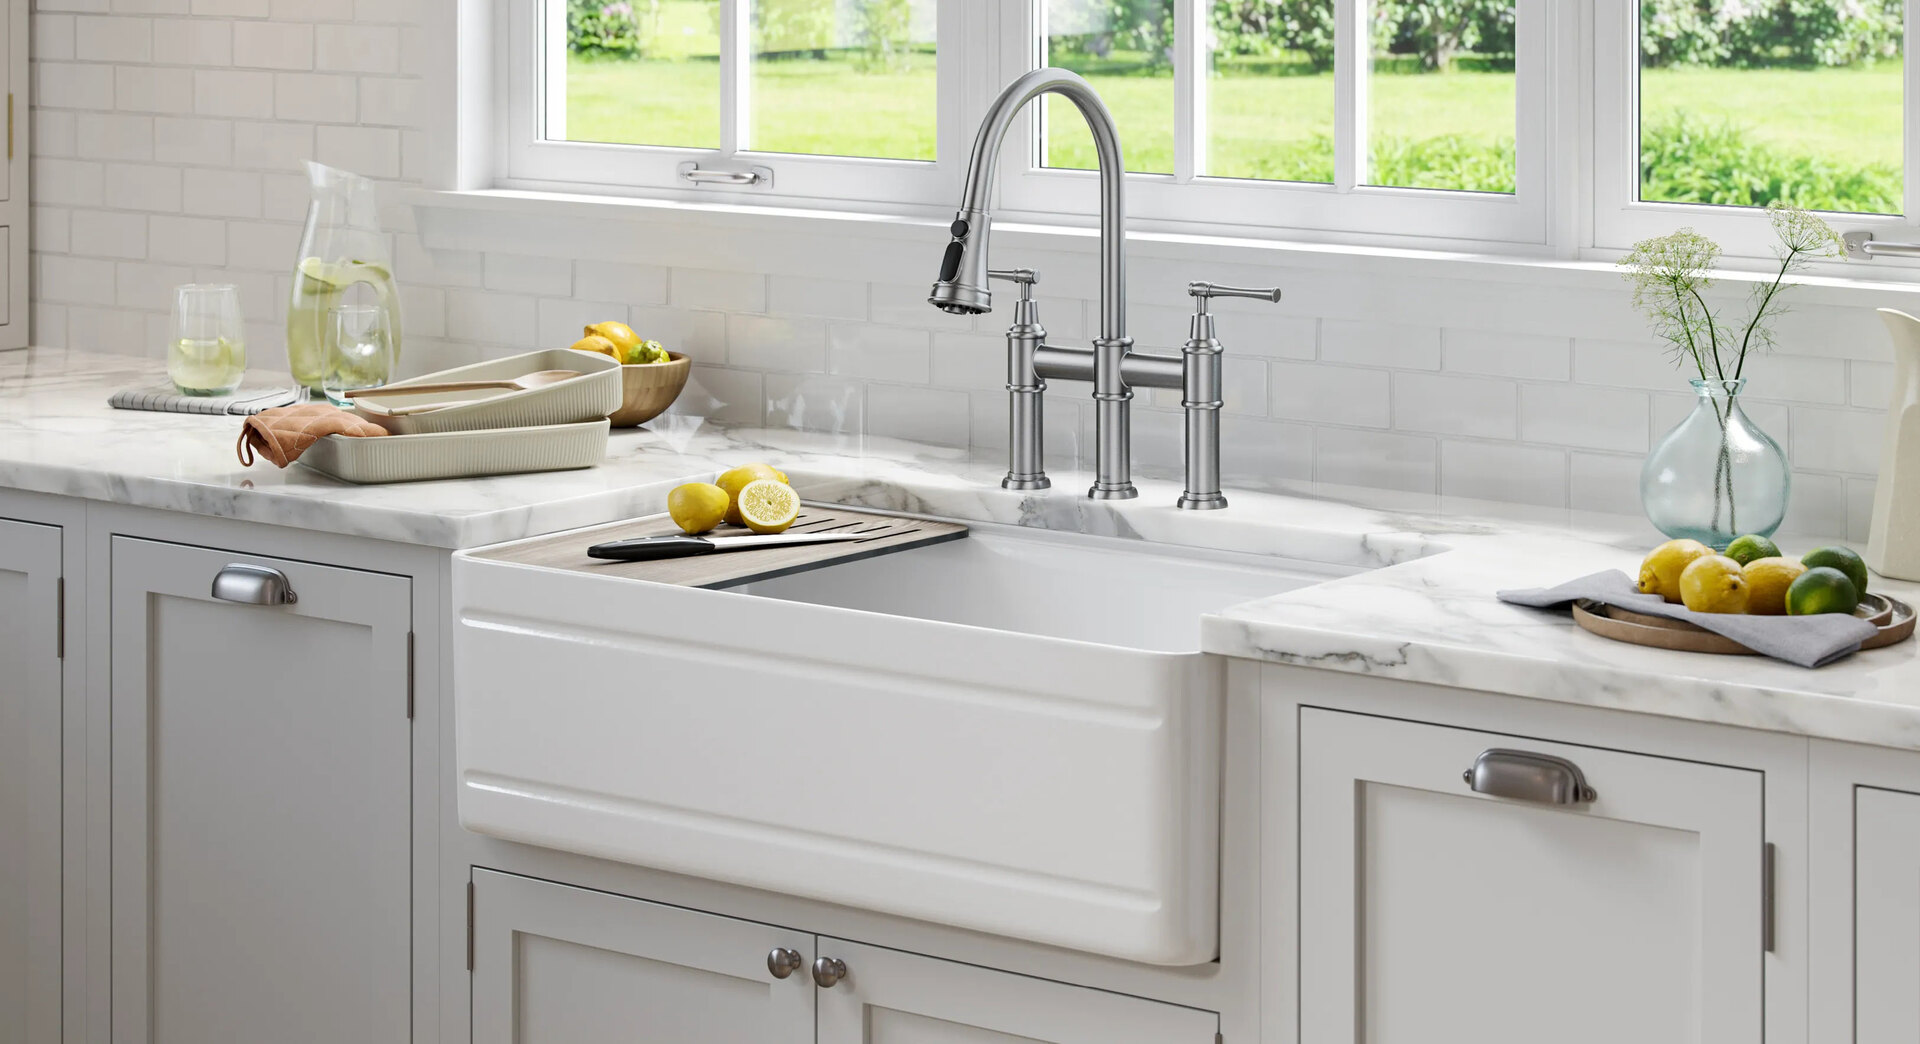
A farmhouse sink, also known as an apron sink, is characterized by its deep basin and exposed front. Unlike traditional sinks that are installed flush with the countertop, farmhouse sinks protrude slightly forward, creating a visually striking focal point in the kitchen. The amount of projection, or how far the sink sticks out, can vary depending on personal preference and certain design factors.
In this article, we will explore the factors to consider when determining how far a farmhouse sink should stick out, the advantages and disadvantages of different projections, and provide some tips for installing a farmhouse sink with the right amount of projection.
Key Takeaways:
- The ideal projection of a farmhouse sink depends on factors like kitchen layout, personal preference, and accessibility. Consider the balance between functionality and visual appeal when determining the right amount of projection.
- Installing a farmhouse sink with the right amount of projection can enhance both the functionality and aesthetics of your kitchen. Careful consideration of factors like space availability and installation requirements is crucial for achieving the desired result.
Read more: How Far Should Range Hood Stick Out
What is a farmhouse sink?
A farmhouse sink, also known as an apron sink, is a type of kitchen sink that is characterized by its exposed front and deep basin. These sinks originated from the traditional design found in rural farmhouses, hence the name “farmhouse sink.” Today, they have become a popular choice for homeowners looking to add a touch of elegance and vintage style to their kitchens.
Unlike conventional sinks that are mounted below the countertop, farmhouse sinks are typically installed with a slight overlap onto the countertop, creating a prominent front apron that extends beyond the edge of the cabinets. This design feature allows for easier access and eliminates the need to lean forward when using the sink.
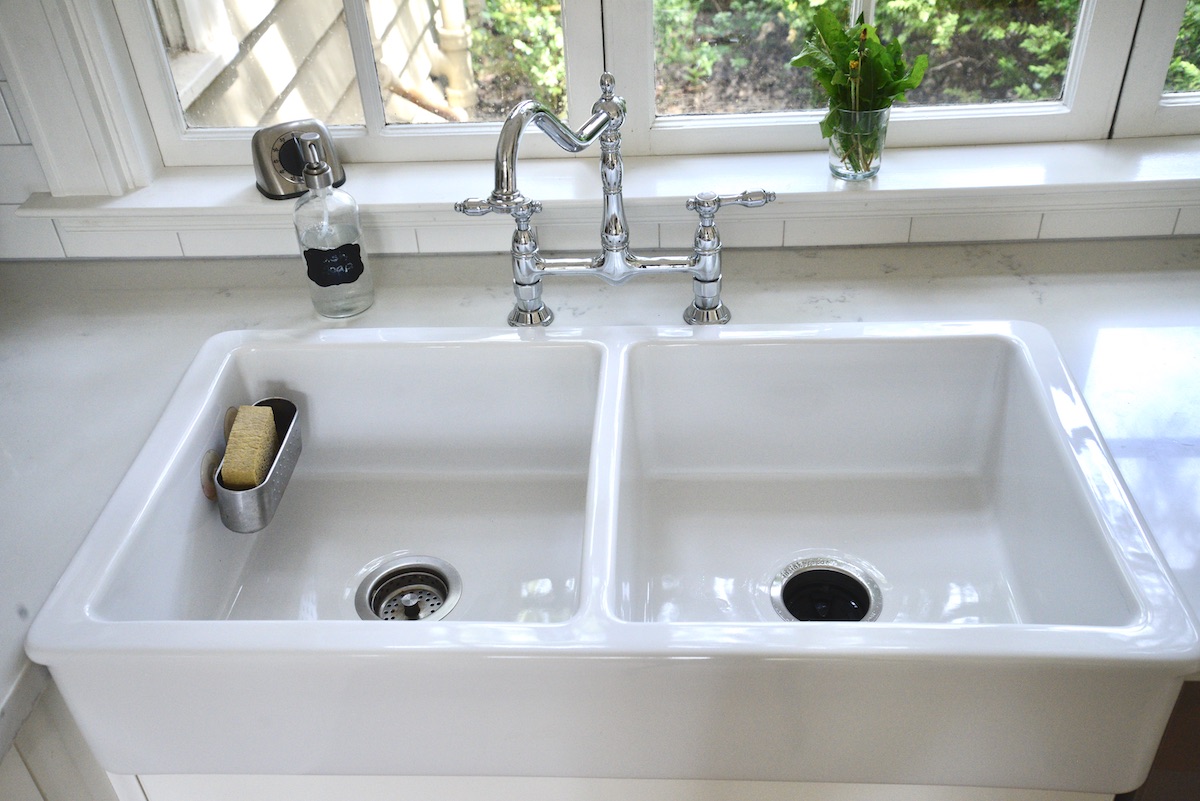
Farmhouse sinks are available in a variety of materials, including porcelain, stainless steel, cast iron, and fireclay. Each material offers unique benefits, such as durability, aesthetics, and ease of maintenance. The choice of material often depends on personal preference and the overall style of the kitchen.
With their rustic charm and deep basin, farmhouse sinks offer ample space for washing large pots, pans, and even baby bath time. Their deep structure also helps to minimize splashing and provides additional storage space underneath the sink.
Overall, a farmhouse sink is not only a functional addition to a kitchen but also a stylish statement piece that can transform the look and feel of the entire space. Its timeless design and practicality make it a versatile choice for both traditional and modern kitchen styles.
The purpose of a farmhouse sink
A farmhouse sink serves both functional and aesthetic purposes in a kitchen. Let’s delve into the key reasons why homeowners choose to install a farmhouse sink:
1. Enhanced usability: One of the primary purposes of a farmhouse sink is to provide a more ergonomic and user-friendly washing experience. The design of the sink, with its exposed front apron and deeper basin, allows for easy access and comfortable use. The added depth of the sink provides ample space for washing larger items, such as pots, pans, and baking sheets, without the water splashing out onto the countertops.
2. Increased versatility: The spacious basin of a farmhouse sink makes it more versatile compared to traditional sinks. It provides the freedom to wash a greater variety of items, from dishes and utensils to bulky kitchenware and even pets. The deep basin also allows you to fill the sink with more water, making it convenient for soaking and cleaning larger items.
3. Stylish focal point: Apart from its practicality, a farmhouse sink is often chosen for its aesthetic appeal. It adds a unique and visually captivating element to a kitchen, becoming the focal point of the space. With its exposed front, the sink becomes a statement piece that contributes to the overall design and style of the kitchen.
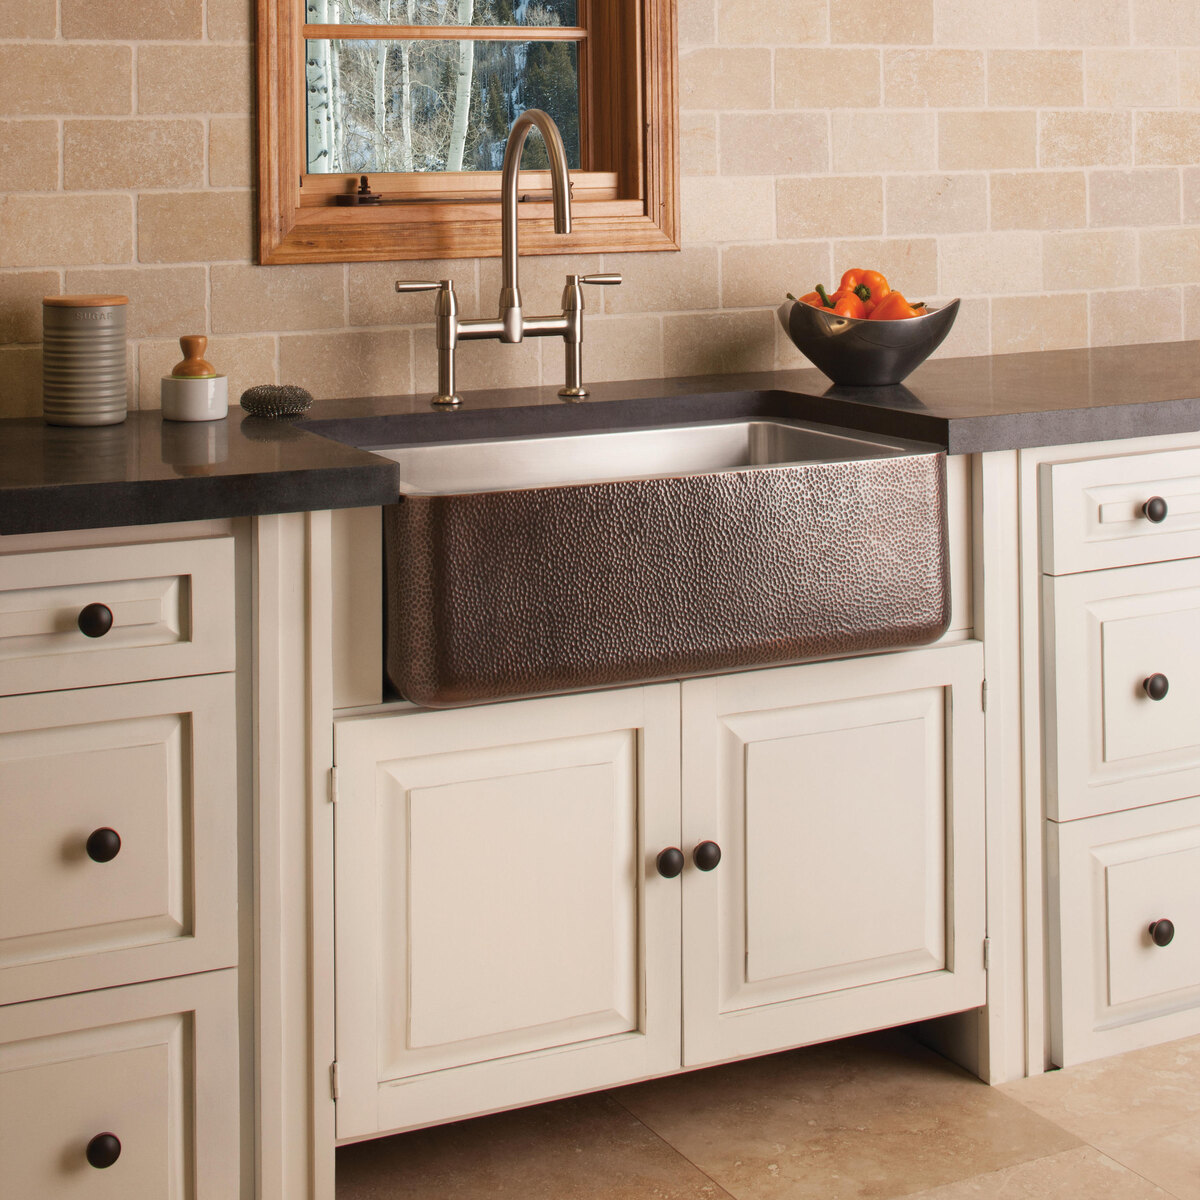
4. Enhanced durability: Farmhouse sinks are typically made from sturdy materials such as stainless steel, fireclay, or cast iron. These materials ensure the sink’s longevity and resistance to cracking, chipping, and staining. The durability of a farmhouse sink makes it a worthwhile investment that can withstand the demands of daily kitchen use.
5. Classic and timeless charm: Farmhouse sinks exude a classic, timeless charm that complements various kitchen styles, whether it be modern, rustic, or traditional. Their simple yet elegant design creates a warm and inviting atmosphere that adds value to any home.
6. Increased property value: Installing a farmhouse sink can enhance the overall value of your home. Its luxurious and stylish appearance, coupled with its practical functionality, can be an attractive selling point for potential buyers, making it a sound investment for the long term.
In summary, the purpose of a farmhouse sink goes beyond its functionality in the kitchen. It combines usability, versatility, and aesthetics to create a unique and elegant focal point. Whether you’re looking to improve the functionality of your kitchen or elevate its style, a farmhouse sink can be the perfect addition to your space.
Factors to consider when determining how far a farmhouse sink should stick out
When installing a farmhouse sink, the amount of projection, or how far it should stick out, is an important consideration. The ideal projection will depend on several factors, including:
1. Kitchen layout: The layout of your kitchen plays a vital role in determining the appropriate projection of your farmhouse sink. Consider the placement of other appliances and fixtures, such as the stove, dishwasher, and countertops. You’ll want to ensure there is enough space for proper functionality and convenient access to these areas without any obstructions from the sink’s projection.
2. Cabinet size: The size and depth of your kitchen cabinets will influence how far your farmhouse sink can stick out. Measure the width of the cabinet and ensure that it can accommodate the projection of the sink without any issues. It’s important to consider both the interior space of the cabinet and the clearance for the doors or drawers to open and close smoothly.
3. Countertop overhang: The amount of overhang on your countertop is another factor to consider when determining the projection of a farmhouse sink. The sink should align with the edge of the countertop or have a slight overlap for a seamless look. Take precise measurements of the countertop overhang to ensure a proper fit and balanced appearance.
4. Personal preference: Personal preference plays a significant role in determining the projection of your farmhouse sink. Some individuals prefer a subtle overhang that maintains a sleek and streamlined aesthetic, while others may opt for a more prominent projection to create a striking focal point. Consider the overall style and design of your kitchen and choose a projection that aligns with your preferred aesthetic.
5. Accessibility and ergonomics: The projection of your farmhouse sink should also take into account accessibility and ergonomics. A modest overhang can provide enough space for comfortable use and prevent excessive leaning or straining when using the sink. Consider the height of the sink and how it aligns with your own height and comfort level.
6. Maintenance and cleaning: Another factor to consider is how the projection of the sink may impact cleaning and maintenance. A sink that sticks out further may require more attention when it comes to wiping down the countertop around it or reaching behind the sink for cleaning purposes. Consider your cleaning routine and how the projection of the sink may affect your ability to maintain a clean and hygienic kitchen.
Keep in mind that each kitchen is unique, and what works for one may not necessarily work for another. Therefore, it’s important to carefully evaluate these factors and find the right balance for your specific kitchen layout, preferences, and needs when determining how far a farmhouse sink should stick out.
Advantages of having a farmhouse sink that sticks out further
Opting for a farmhouse sink with a greater projection, or one that sticks out further, can provide several advantages for your kitchen. Let’s explore some of the benefits:
1. Increased workspace: One of the primary advantages of a farmhouse sink with a greater projection is the additional workspace it provides. The extra depth and exposed front allow for more room to handle larger pots, pans, and dishes. This increased workspace is especially beneficial for those who frequently cook or entertain, as it makes meal preparation and cleanup more efficient.
2. Versatility in function: A farmhouse sink with a greater projection offers greater versatility in function. The added depth allows for soaking and washing larger items, such as cutting boards, baking sheets, or even small appliances. It can also accommodate oversized cookware that may not fit comfortably in standard-sized sinks. The versatility of a larger projection sink makes it ideal for homes with avid cooks who often require a more spacious and adaptable workspace.
3. Splashing prevention: The extended projection of a farmhouse sink can help prevent water splashing onto the countertops. The depth and front apron of the sink act as a barrier, containing water within the basin and reducing the chance of splashing onto surrounding surfaces. This is especially beneficial when dealing with large amounts of water or when washing items that require a greater amount of force, such as heavy pots or dishes.
4. Enhanced aesthetics: A farmhouse sink with a greater projection can create a bold and striking visual impact in your kitchen. Its exposed front apron becomes more prominent and draws attention, becoming a focal point that adds character and charm to the space. This style choice creates a unique and visually appealing aesthetic that sets your kitchen apart from the ordinary.
5. Increased storage space: Another advantage of a farmhouse sink that sticks out further is the potential to utilize the space underneath it for additional storage. With a greater projection, you can install custom cabinets or shelves to maximize the use of this area. It provides a convenient spot to store cleaning supplies, kitchen accessories, or even a recycling bin, freeing up valuable cabinet space elsewhere in the kitchen.
6. Easier cleaning: Cleaning around a sink can sometimes be challenging, especially in hard-to-reach areas. However, with a farmhouse sink that sticks out further, you have better accessibility to clean the area behind and around the sink. This makes maintaining a clean and sanitary kitchen easier and more convenient.
By opting for a farmhouse sink with a greater projection, you can enjoy the advantages of increased workspace, versatility, splashing prevention, enhanced aesthetics, additional storage space, and easier cleaning. Consider these benefits when making a decision about the projection of your farmhouse sink and how it can enhance both the functionality and appeal of your kitchen.
A farmhouse sink should typically stick out about 1-3 inches from the front of the cabinet. This allows for easier access and prevents water from dripping onto the cabinet doors.
Read more: How Far Out Should A Ladder Be From A Wall
Disadvantages of having a farmhouse sink that sticks out further
While there are many advantages to having a farmhouse sink with a greater projection, it is important to consider the potential disadvantages as well. Here are some factors to keep in mind:
1. Limited countertop space: One of the main drawbacks of a farmhouse sink that sticks out further is the impact it can have on available countertop space. The extended projection reduces the usable countertop area around the sink, making it more challenging to have adequate workspace for food preparation or placing kitchen appliances. This can be a disadvantage for those who require ample countertop surface for their cooking needs.
2. Restricted movement: With a larger projection, the space in front of the sink may become more limited, making it harder to move comfortably in the kitchen. This can be especially challenging in smaller kitchens where every inch of space is valuable. The extended apron of the sink can restrict movement and may require careful consideration of the kitchen’s layout to ensure there is enough room to navigate around the sink and other kitchen elements.
3. Higher cost and complexity of installation: Farmhouse sinks with a greater projection often require additional modifications during installation. The cabinets and countertops may need to be customized to accommodate the extended sink, which can result in higher costs and increased complexity. It is important to factor in the additional expenses and potential challenges associated with installation when considering a larger projection sink.
4. Limited accessibility for shorter individuals or children: The deeper basin of a farmhouse sink with a greater projection may make it less accessible for shorter individuals or children. It might require stretching or reaching over the sink’s edge, which can be uncomfortable and potentially pose safety concerns. It is essential to consider the needs and comfort of all individuals who will be using the sink regularly.
5. Potential for water splashing: While a larger projection can help prevent water from splashing onto the countertops, it does not completely eliminate the possibility. The design of a farmhouse sink, with its exposed front, can still allow some water to splash over the edge, particularly when dealing with high water pressure or when washing items vigorously. It is important to be mindful of this and take necessary precautions to minimize splashing in the surrounding area.
6. Cleaning and maintenance challenges: A farmhouse sink that sticks out further may pose certain cleaning and maintenance challenges. The extended projection can make it more difficult to clean the area behind and around the sink. Additionally, areas that are not easily visible may collect dirt or residue over time, requiring extra attention during regular cleaning routines.
Considering these disadvantages is crucial when deciding on the projection of your farmhouse sink. Understanding the potential drawbacks allows you to evaluate whether the benefits outweigh the challenges in relation to your specific kitchen needs and preferences.
Determining the ideal amount a farmhouse sink should stick out
The ideal amount that a farmhouse sink should stick out, or its projection, can vary depending on individual preferences, kitchen design, and practical considerations. Here are some factors to consider when determining the ideal amount for your farmhouse sink:
1. Kitchen style and aesthetics: Consider the overall style and aesthetics of your kitchen. The projection of the sink should complement the existing design elements and contribute to the desired visual appeal. For a more modern and sleek look, a subtle projection that aligns with the countertop edge may be preferable. In contrast, a more prominent projection may be suitable for kitchens with a rustic or farmhouse-inspired theme.
2. Functional requirements: Think about your specific functional needs. If you frequently work with larger pots and pans or need extra space for food preparation, a greater projection can provide the necessary workspace. On the other hand, if you have limited countertop space or prefer a minimalist look, a smaller projection may be more suitable.
3. Proportions and balance: Consider the proportions and balance of your kitchen. The projection of the sink should harmonize with the other elements in the space, such as the size of the cabinets, countertops, and other appliances. Aim for a balanced look where the sink neither dominates nor appears disproportionately small compared to the surrounding elements.
4. Space availability: Evaluate the available space in your kitchen. Determine the maximum projection that can comfortably fit within the dimensions of your cabinets and countertops. Taking accurate measurements is crucial to ensure a proper fit without hindering functionality or movement in the kitchen.
5. Ergonomics and accessibility: Consider the comfort and accessibility when using the sink. The projection should allow for easy access and comfortable reach into the basin, regardless of your height. It’s important to find a balance that promotes ergonomic use without causing unnecessary strain or discomfort.
6. Installation requirements: Consult with a professional or contractor to discuss the installation requirements for your chosen projection. Depending on the design and dimensions, certain modifications may be necessary to ensure the sink fits securely and functions properly. It’s essential to consider the cost, complexity, and feasibility of these installation requirements.
7. Personal preference: Ultimately, personal preference plays a significant role in determining the ideal projection for your farmhouse sink. Consider your own taste, style, and how the sink’s projection aligns with your vision for the kitchen. Whether you prefer a subtle or pronounced projection, prioritize your own satisfaction with the final result.
By carefully evaluating these factors, you can determine the ideal amount that a farmhouse sink should stick out in your kitchen. Remember to consider both the aesthetic and functional aspects to ensure a well-balanced and practical choice.
Tips for installing a farmhouse sink with the right amount of projection
Installing a farmhouse sink with the right amount of projection is crucial for achieving both aesthetic appeal and functional usability. Here are some tips to help you achieve the desired result:
1. Measure accurately: Take precise measurements of your sink, countertop, and cabinets before starting the installation process. Ensure that you have the correct dimensions to determine the amount of projection needed. Measure the width, depth, and height of the sink, and compare these measurements to the available space in your kitchen.
2. Consider the countertop overhang: Take into account the desired overhang of your farmhouse sink on the countertop. Whether you prefer a flush or slightly overlapping look, make sure that the projection will align with your chosen style. Measure the width of the countertop and factor in any desired overhang to determine the appropriate projection of the sink.
3. Consult with a professional: If you are unsure about the installation process or have specific design requirements, it is recommended to consult with a professional or contractor. They can provide valuable insights and expertise to help you determine the right projection and ensure a successful installation.
4. Assess cabinet modifications: Evaluate the cabinets underneath the sink area. Depending on the size and depth of your farmhouse sink, you may need to make modifications to the cabinet structure to accommodate the sink’s projection. Consider the additional space required for the sink and any necessary reinforcement needed for proper installation.
5. Ensure proper support: Farmhouse sinks tend to be heavier than traditional sinks due to their solid construction. Make sure to provide adequate support to handle the weight of the sink and prevent any sagging or damage to the cabinet structure. Use appropriate supports, braces, or brackets to reinforce the cabinet and create a sturdy foundation for the sink.
6. Follow manufacturer instructions: Always refer to the manufacturer’s instructions and guidelines for installing your specific farmhouse sink. Each sink may have different requirements and recommendations for installation, so it’s important to follow them carefully to ensure proper fit and functionality.
7. Test the fit before securing: Before finalizing the installation, test the fit of the sink in the cabinet and ensure that it aligns properly with the countertop. Make any necessary adjustments to achieve the desired projection and ensure a seamless integration with the surrounding elements. Once you are satisfied with the fit, securely fasten the sink in place according to the manufacturer’s instructions.
8. Consider plumbing and drainage: Plan for the plumbing and drainage configuration during the installation process. Properly connect the sink to the plumbing system and ensure that the drain and water lines are properly aligned with the sink’s location and projection. Seek professional assistance if needed to ensure the plumbing is installed correctly.
By following these tips, you can install a farmhouse sink with the right amount of projection, ensuring a visually appealing and functionally efficient addition to your kitchen. Attention to detail, accurate measurements, and professional guidance will help you achieve the desired result and enjoy the benefits of your farmhouse sink.
Conclusion
The installation of a farmhouse sink is an exciting opportunity to enhance the functionality and aesthetics of your kitchen. Determining the right amount of projection, or how far the sink should stick out, is a key consideration in achieving the desired result.
Throughout this article, we’ve explored various aspects related to farmhouse sink installation. We’ve discussed what farmhouse sinks are, their purpose, factors to consider when determining the projection, advantages and disadvantages of different projections, and tips for installing a farmhouse sink with the right amount of projection.
Ultimately, the ideal projection of a farmhouse sink will vary depending on individual preferences, kitchen layout, and practical considerations. It is important to strike a balance between functionality and visual appeal. Consider factors such as kitchen style, available space, countertop overhang, and personal preference when deciding on the right projection for your sink.
Remember to take accurate measurements, consult with professionals if needed, and prioritize proper support and installation techniques. Ensuring a secure and sturdy installation will not only improve the sink’s functionality but also extend its longevity.
Installing a farmhouse sink with the right amount of projection can transform your kitchen, adding a touch of elegance and charm. Whether you opt for a subtle or prominent projection, the farmhouse sink will serve as a focal point, enhancing both the functionality and aesthetics of your space.
By carefully considering the factors discussed in this article, you can confidently select and install a farmhouse sink that perfectly fits your kitchen’s style, meets your functional requirements, and brings joy and satisfaction for years to come.
Craving more handy home tips? If you're eager to revamp your kitchen's functionality, our article on kitchen design secrets offers invaluable insights. For those pondering a larger overhaul, check out our guide on selecting the best hardwood floors for home renovation. And if you're ready to tackle some DIY, our straightforward guide on sink installation will help you set up your new faucet with ease. Each piece is packed with expert advice to make your home improvement projects smoother and more stylish.
Frequently Asked Questions about How Far Should Farmhouse Sink Stick Out
Was this page helpful?
At Storables.com, we guarantee accurate and reliable information. Our content, validated by Expert Board Contributors, is crafted following stringent Editorial Policies. We're committed to providing you with well-researched, expert-backed insights for all your informational needs.


0 thoughts on “How Far Should Farmhouse Sink Stick Out”