Home>Articles>How To Install Can Lights In An Existing Ceiling

Articles
How To Install Can Lights In An Existing Ceiling
Modified: October 20, 2024
Learn how to install can lights in an existing ceiling with our step-by-step guide. Get expert advice and tips in our informative articles.
(Many of the links in this article redirect to a specific reviewed product. Your purchase of these products through affiliate links helps to generate commission for Storables.com, at no extra cost. Learn more)
Introduction
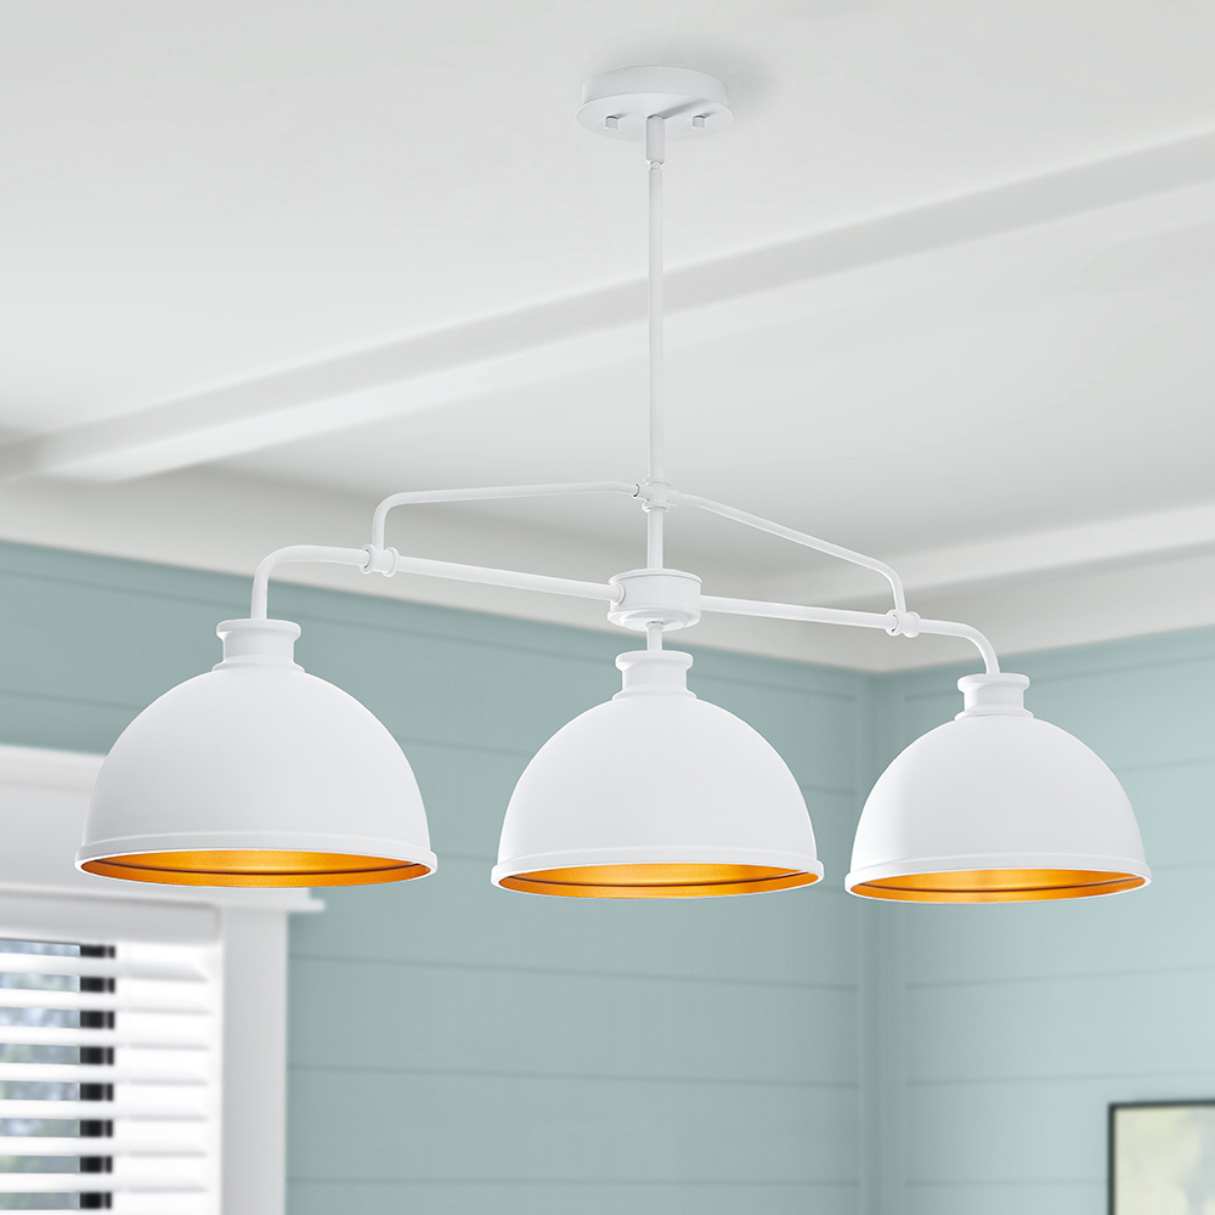
Welcome to our comprehensive guide on how to install can lights in an existing ceiling. Can lights, also known as recessed lights, are a popular lighting choice for homeowners looking to add a modern and sleek touch to their indoor spaces. These versatile fixtures provide a clean and unobtrusive lighting solution, perfect for illuminating specific areas or creating a well-lit ambiance throughout a room.
In this step-by-step tutorial, we will walk you through the process of planning, preparing, and installing can lights in your existing ceiling. We will cover everything from mapping out the layout to wiring and testing the lights. By following these instructions, you will be able to seamlessly integrate can lights into any room in your home.
Before we begin, it’s important to note that electrical work can be dangerous if not done correctly. Make sure to follow all safety precautions, turn off the power at the circuit breaker, and consider consulting a licensed electrician if you are not comfortable working with electricity.
Now, let’s dive into the first step of this installation process: planning the layout.
Key Takeaways:
- Planning, precision, and safety are crucial for installing can lights in an existing ceiling. From layout design to wiring and testing, following each step diligently ensures a seamless and visually appealing lighting upgrade.
- The final touch of patching and painting the ceiling around the can lights creates a professional and polished finish, seamlessly blending the new fixtures with the existing space. Safety and attention to detail are key throughout the installation process.
Step 1: Plan the Layout
The first step in installing can lights in an existing ceiling is to plan the layout. This involves determining the desired placement of the lights and measuring and marking the locations on the ceiling.
Start by considering the purpose of the lighting and the specific areas you want to highlight or illuminate. Take into account the size and shape of the room and the desired level of brightness. You may want to create a focal point by positioning the lights above a piece of furniture or artwork, or evenly distribute them for general lighting.
Once you have a clear idea of where you want your can lights to be installed, use a measuring tape to measure and mark the locations on the ceiling. It’s essential to ensure that the lights are evenly spaced and aligned with the room’s dimensions. Taking accurate measurements will help you create a balanced and visually appealing lighting layout.
Consider the distance between the can lights and any obstructions, such as ceiling joists or HVAC ducts. It’s important to avoid these obstacles to ensure a seamless installation process. Use a stud finder to locate any joists in the ceiling, as they may impact the placement of the can lights.
Using a pencil or a marker, mark the center point of each can light location on the ceiling. This will serve as a guide during the installation process. Double check your measurements and markings to ensure they are accurate and align with your desired layout.
With the layout planned and the locations marked, you are now ready to move on to the next step: turning off the power.
Step 2: Turn off Power
Before you begin any electrical work, it is crucial to ensure your safety by turning off the power. This step involves locating the circuit breaker that controls the intended area and switching off the power to prevent any accidents or electrical shocks during the installation process.
Start by identifying the circuit breaker panel in your home. This is usually located in a basement, utility room, or garage. The circuit breaker panel contains a series of switches or fuses that control the flow of electricity to different areas of your home.
Once you have located the circuit breaker panel, identify the switch or switches that correspond to the area where you will be installing the can lights. Look for labels or markings that indicate which switch controls which part of your home. If there are no clear labels, you may have to test each switch until you find the one that controls the intended area.
Once you have identified the correct switch, switch it off to cut off the power to that area. It is important to ensure that the power is completely off before proceeding with any electrical work. To be extra cautious, use a non-contact voltage tester to confirm that there is no electrical current present in the circuit.
Turning off the power is a crucial step in ensuring your safety during the installation process. It prevents any accidental electrical shocks while you are handling the wires or connecting the can lights to the electrical supply. It also helps protect the existing wiring in your home from any potential damage during the installation.
With the power safely turned off, you can now move on to the next step: cutting holes in the ceiling for the can lights.
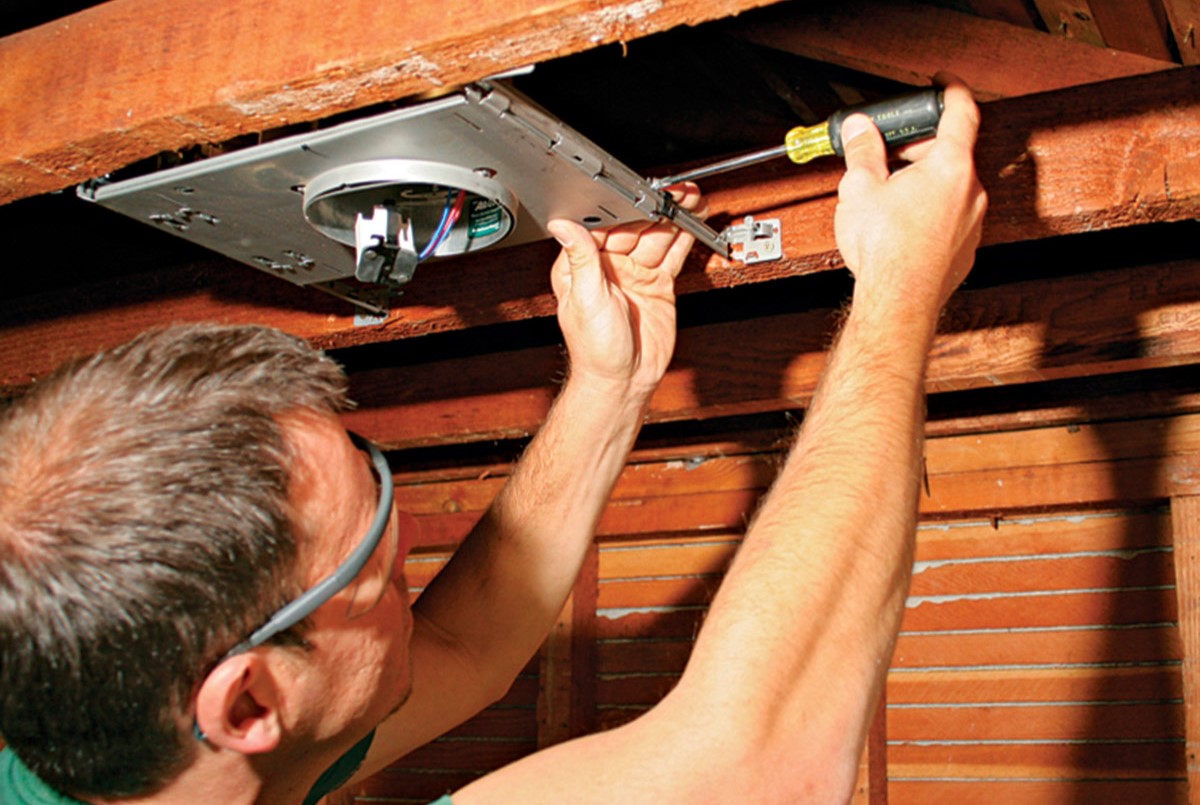
Step 3: Cut Holes for Can Lights
Once you have planned the layout and turned off the power, it’s time to cut holes in the ceiling for the can lights. This step requires careful measurement, precision, and the right tools to ensure a clean and professional-looking installation.
Start by using a stud finder to locate any ceiling joists or beams in the area where you plan to install the can lights. Ceiling joists provide structural support and can impact the placement of the lights. It’s important to avoid cutting into or too close to the joists.
Once you have identified the joists, mark their positions on the ceiling using a pencil or a marker. This will serve as a guide to help you determine where to cut the holes for the can lights.
Next, determine the size of the can light fixtures you will be installing. This will determine the size of the holes you need to cut. Most can lights require a hole diameter of around 4 to 6 inches, but be sure to check the specifications of the specific lights you are using.
With the measurements in mind, use a hole saw or a drywall saw to cut the holes in the ceiling. A hole saw is a handy tool specifically designed for cutting precise holes in various materials, including drywall. Make sure to follow the marked guidelines and cut carefully to create clean and accurate holes.
If you don’t have access to a hole saw, a drywall saw can also be used. Use the saw to cut along the marked lines, applying gentle pressure and following a slow and steady motion. Take your time to ensure that the holes are cut with precision.
As you cut the holes, be cautious of any electrical wires or cables that may be present in the ceiling. Make sure to avoid cutting into them to prevent any damage or safety hazards.
With the holes cut, you have completed the third step in the installation process. In the next step, we will prepare the wiring for the can lights.
Step 4: Wiring Preparation
With the holes cut for the can lights, it’s time to prepare the wiring for the installation. This step involves running electrical cable from the existing power source to each can light location and properly connecting the wires to the can light fixtures.
Start by determining the best route for the electrical cable from the power source to each can light location. This may involve running the cable through the ceiling, walls, or attic space, depending on the layout of your home. It’s important to plan the routing carefully to ensure that the cables are hidden and secure.
Next, turn off the power at the circuit breaker to avoid any accidents while working with the electrical wiring. Use a cable fish tape or a similar tool to run the electrical cable through the designated route. Carefully thread the cable through any drilled holes or openings and be mindful of any obstructions or existing wiring.
Once the cable is in place, strip the outer sheath of the cable at each can light location to expose the individual wires. Use a wire stripper tool to carefully remove the protective insulation, ensuring not to cut or damage the actual wires inside.
Now, you will connect the wires from the electrical cable to the can light fixtures. Each can light will have its own set of wires, typically a black (hot), white (neutral), and green or copper (ground) wire. Consult the manufacturer’s instructions or the wiring diagram on the can light fixture for specific details.
To make the connections, twist together the corresponding colored wires from the electrical cable and the can light fixture. For example, connect the black wire from the cable to the black wire from the fixture, the white wire to the white wire, and the green or copper wire to the ground wire. It’s important to make secure and tight connections to ensure proper electrical flow.
Once the wires are twisted together, use wire connectors or wire nuts to secure the connections. Simply twist the wire connectors clockwise over the twisted wires until they are tight and fully covering the connection. This will ensure a safe and reliable connection.
Before proceeding further, double-check that all the connections are secure and properly insulated. Make sure there are no exposed wires and that the wire connectors are tightly secured.
With the wiring prepared, you are now ready to move on to the next step: securing the can light fixtures in place.
When installing can lights in an existing ceiling, make sure to turn off the power to the area where you will be working. Use a stud finder to locate ceiling joists for secure installation. Always follow the manufacturer’s instructions for proper installation and safety precautions.
Read more: How To Install Can Lights In A Drop Ceiling
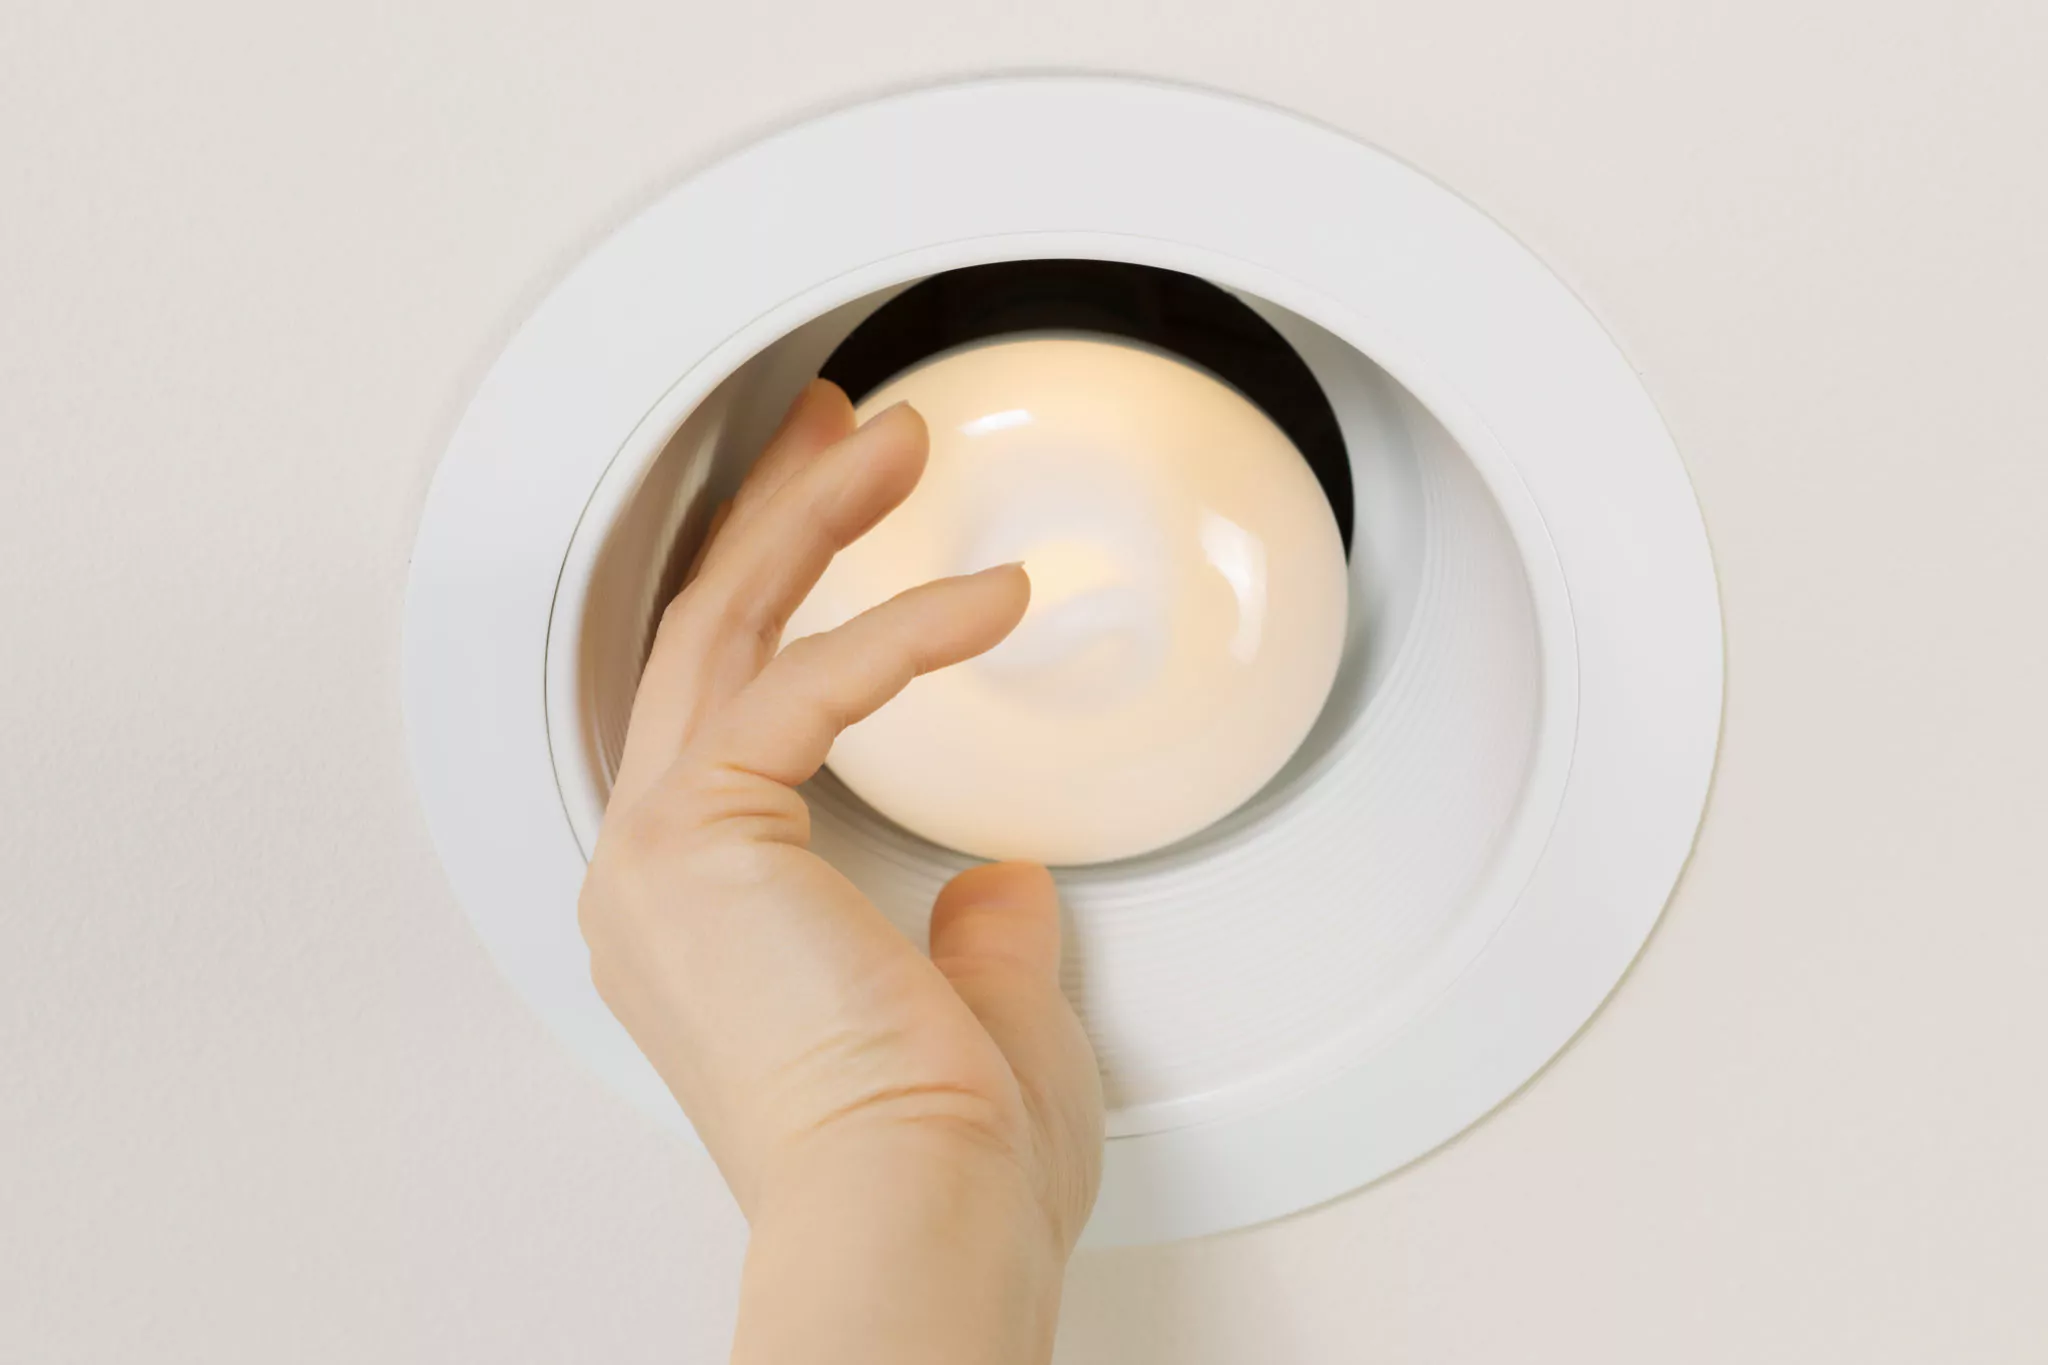
Step 5: Secure Can Light Fixtures
Now that the wiring is prepared, it’s time to secure the can light fixtures in place. This step involves inserting the fixtures into the ceiling holes and tightening the mounting clips or brackets to hold them securely.
Start by taking your can light fixture and positioning it above the hole you cut in the ceiling. Carefully insert the fixture into the hole, making sure it sits flush with the ceiling surface. Depending on the type of can light fixture you have, it may have clips or brackets that need to be attached to the ceiling for proper installation.
If your can light fixture has clips, extend them outwards and position them over the edges of the hole. Once in place, gently push the fixture up towards the ceiling while applying light pressure to engage the clips. This will secure the fixture in place.
If your fixture uses brackets, insert them into the holes on the sides of the fixture. Position the fixture in the hole and align the brackets with the edges of the hole. Use a screwdriver or a drill to secure the brackets to the ceiling, tightening them enough to hold the fixture securely in place.
Once the can light fixture is properly inserted and secured, give it a gentle tug to ensure that it is sturdily held in place. If you feel any movement or instability, adjust the clips or brackets as needed to achieve a secure fit.
Repeat these steps for each can light fixture, making sure they are evenly spaced and aligned according to your planned layout. Take your time with this step to ensure that the fixtures are securely fastened and will not move or become loose over time.
With the can light fixtures secured in place, you have completed the fifth step in the installation process. In the next step, we will connect and test the wiring to ensure everything is functioning properly.
Step 6: Connect and Test the Wiring
With the can light fixtures securely in place, it’s time to connect the wiring and test each light to ensure they are working properly. This step involves connecting the wiring from each can light to the main electrical supply and then turning on the power to test the lights.
Start by identifying the electrical cable that you ran from the main power source to each can light location. At each can light, locate the wires that you stripped and connected to the fixture in the previous steps.
Take the black (hot) wire from the electrical cable and the black wire from the can light fixture. Twist these wires together and secure them with a wire connector or wire nut. Similarly, connect the white (neutral) wires and the green or copper (ground) wires together.
Ensure that all connections are secure and tight. Double-check that no exposed wires are visible and that the wire connectors fully cover the connections.
Once all the wiring connections are made, it’s time to test the lights. Turn on the power at the circuit breaker panel for the area where the can lights are installed. It’s important to follow all safety precautions while working with electricity.
If the wiring is properly connected and the power supply is functioning correctly, each can light should turn on once the power is restored. Go to each can light and check if they are all illuminating. Observe the brightness and ensure that they are working as intended.
If a light does not turn on or is not functioning properly, double-check the wiring connections to make sure they are secure and correct. It’s also a good idea to use a voltage tester to check for any electrical issues that may be affecting the lights.
If you encounter any problems or are unsure about the wiring or the functionality of the lights, it is recommended to seek the assistance of a licensed electrician for further inspection and troubleshooting.
With all the lights tested and confirmed to be working properly, you have completed the sixth step of the installation process. In the final step, we will focus on patching and painting the ceiling to seamlessly integrate the can lights.
Step 7: Patch and Paint
After successfully connecting and testing the wiring for your can lights, the final step is to patch and paint the ceiling to seamlessly integrate the newly installed lights with the existing ceiling. This step involves filling in any holes or gaps around the can lights with drywall compound, followed by sanding and painting the ceiling to achieve a uniform finish.
To begin, inspect the area around each can light fixture for any gaps or openings between the fixture and the ceiling. Use a putty knife to carefully apply a thin layer of drywall compound around the edges of the fixture, filling in any gaps or spaces. Smooth out the compound with the putty knife to create an even surface.
Allow the drywall compound to fully dry according to the manufacturer’s instructions. Once dry, use a fine-grit sandpaper or a sanding block to gently smooth the patched areas. Be careful not to sand too aggressively, as this can damage the surrounding ceiling surface.
Once the patched areas are smooth, wipe away any dust or debris with a clean, damp cloth. This will ensure a clean surface for painting.
Next, it’s time to paint the ceiling to blend the newly installed can lights with the existing ceiling. Start by applying a coat of primer to the entire ceiling surface, including the patched areas. The primer helps create a uniform base for the paint and ensures proper adhesion.
After the primer has dried, apply a coat of paint that matches the color of the existing ceiling. Use a paint roller or brush to cover the entire ceiling, including the patched areas around the can lights. Apply additional coats if necessary to achieve a seamless and consistent finish.
Take care to blend the paint evenly, feathering the edges around the patched areas to achieve a smooth transition between the new and existing ceiling. Allow each coat of paint to dry fully before applying the next coat, as recommended by the paint manufacturer.
Once the paint has dried completely, step back and admire your newly installed can lights that seamlessly blend with the rest of the ceiling. The patched areas should be virtually indistinguishable from the surrounding ceiling, creating a finished look.
With the patching and painting complete, you have successfully installed can lights in your existing ceiling. Enjoy the enhanced ambiance and modern lighting that these fixtures bring to your space!
Thank you for following this comprehensive guide. Please remember to exercise caution and, if needed, seek the assistance of a licensed electrician for any electrical work.
Conclusion
Congratulations! You have reached the end of our comprehensive guide on how to install can lights in an existing ceiling. By following these step-by-step instructions, you have successfully transformed your indoor space with modern and sleek lighting fixtures.
Throughout this guide, we covered all the essential steps, from planning the layout and cutting holes for the can lights to wiring preparation, securing the fixtures, and patching and painting the ceiling. Each step plays a crucial role in achieving a seamless and professional installation that enhances both the functionality and aesthetics of your space.
Remember, when working with electricity, safety should always be a top priority. Turn off the power at the circuit breaker before beginning any electrical work and consult a licensed electrician if you are not comfortable with the process.
Installing can lights in an existing ceiling requires careful planning, precise measurements, and proper wiring connections. By following the steps outlined in this guide, you can create a well-lit environment that suits your needs and enhances the overall ambiance of your space.
Additionally, don’t forget to patch any holes and paint the ceiling to seamlessly blend the newly installed can lights with the existing ceiling. This final step ensures a professional and polished finish that will leave your space looking seamless and visually appealing.
Thank you for taking the time to read our guide. We hope it has provided you with the knowledge and confidence to tackle your own can light installation project.
Enjoy the benefits of your new can lights and the improved lighting they provide. Sit back, relax, and bask in the beautiful ambiance of your newly lit space!
Frequently Asked Questions about How To Install Can Lights In An Existing Ceiling
Was this page helpful?
At Storables.com, we guarantee accurate and reliable information. Our content, validated by Expert Board Contributors, is crafted following stringent Editorial Policies. We're committed to providing you with well-researched, expert-backed insights for all your informational needs.


0 thoughts on “How To Install Can Lights In An Existing Ceiling”