
Articles
How To Install A Drop-In Kitchen Sink
Modified: February 23, 2024
Learn how to easily install a drop-in kitchen sink with our step-by-step guide. Read more articles for helpful DIY tips and tricks.
(Many of the links in this article redirect to a specific reviewed product. Your purchase of these products through affiliate links helps to generate commission for Storables.com, at no extra cost. Learn more)
Introduction
Welcome to our step-by-step guide on how to install a drop-in kitchen sink. Whether you’re replacing an old sink or installing a new one, this process can be completed with a few basic tools and some patience. A drop-in kitchen sink, also known as a top-mount sink, is a popular choice for many homeowners due to its easy installation and versatile design options.
Before we dive into the installation process, it’s important to note that while this guide covers the general steps, specific instructions may vary depending on the sink manufacturer and model. Always refer to the manufacturer’s instructions for your particular sink to ensure proper installation.
Now, let’s get started on transforming your kitchen with a new drop-in sink!
Key Takeaways:
- Installing a drop-in kitchen sink is a manageable DIY project with the right tools and preparation. From removing the old sink to connecting the plumbing, this guide provides step-by-step instructions for a successful installation.
- Proper maintenance and care, along with following manufacturer’s guidelines, are essential for prolonging the lifespan of your new drop-in kitchen sink. Enjoy the satisfaction of a job well done and the enhanced functionality it brings to your kitchen!
Read more: How To Install A Drop-In Bathroom Sink
Step 1: Preparing for Installation
Before you begin installing your drop-in kitchen sink, it’s crucial to ensure that you have all the necessary tools and materials on hand. Here’s a list of items you’ll need:
- Drop-in sink
- Sink mounting clips
- Silicone caulk
- Screwdriver or drill
- Adjustable wrench
- Plumber’s putty
- Pipe wrench
- Tape measure
- Pipe joint compound
- Rags or towels
Once you have gathered all the necessary tools and materials, follow these steps to prepare for the installation:
- Turn off the water supply: Locate the shut-off valves underneath the sink and turn them clockwise to shut off the water supply. If you cannot find the proper shut-off valves, shut off the main water supply to your home.
- Clear the workspace: Remove any items from the area surrounding the sink, including dishes, cleaning supplies, and small appliances. This will provide you with ample space to work and prevent any damage to your belongings.
- Disconnect the plumbing: Using an adjustable wrench, loosen the nuts connecting the supply lines to the faucet. Place a bucket or towel underneath to catch any water that may spill out. Once the connections are loosened, remove the supply lines and set them aside.
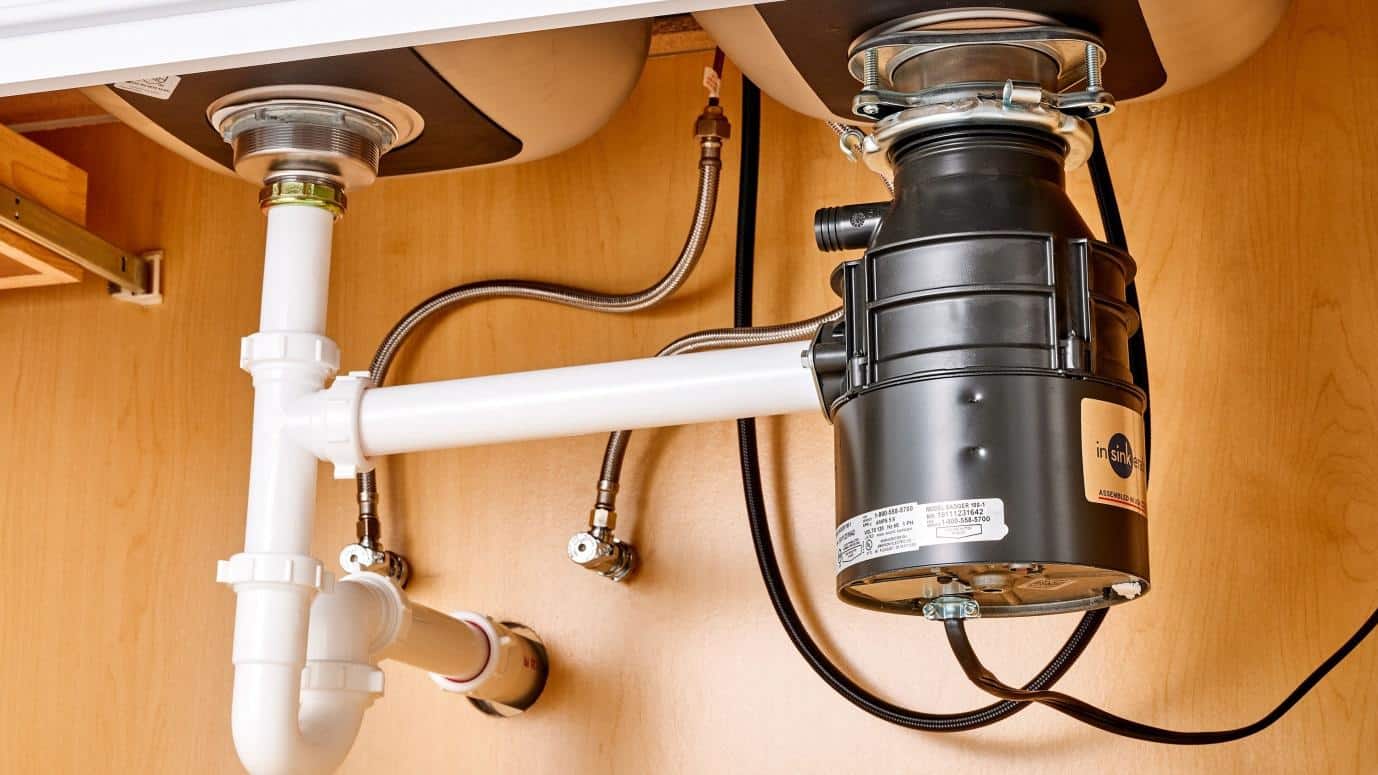
- Remove the garbage disposal (if applicable): If your old sink had a garbage disposal, you’ll need to disconnect it. Start by turning off the power to the disposal at the circuit breaker. Then, detach the drain pipe connecting the disposal to the sink. Finally, remove any mounting brackets securing the disposal to the sink.
- Clean the countertop: Thoroughly clean the countertop around the sink area, removing any debris, old caulk, or adhesive. Ensure that the surface is smooth and dry before moving forward with the installation.
By completing these steps, you’ll be well-prepared to begin the installation process of your new drop-in kitchen sink. Let’s move on to removing the old sink in the next step.
Step 2: Removing the Old Sink
Now that you’re prepared and the workspace is clear, it’s time to remove the old sink. Follow these steps to ensure a smooth removal:
- Disconnect the drain pipes: Using a pipe wrench, loosen the nuts connecting the drain pipes to the bottom of the sink. Be prepared with a bucket or towel to catch any water that may flow out.
- Detach the sink from the countertop: Most drop-in sinks are secured to the countertop with mounting brackets or clips. Locate these attachments and use a screwdriver or drill to remove them. Carefully lift the sink off the countertop and set it aside.
- Clean the sink area: With the old sink removed, take the opportunity to clean the area thoroughly. Remove any leftover caulk, adhesive, or debris from the countertop to provide a clean surface for the new sink installation.
Once the old sink has been successfully removed, you’re ready to move on to the next step: measuring and cutting the sink opening. This is a critical step to ensure a proper fit for your new drop-in kitchen sink.
Step 3: Measuring and Cutting the Sink Opening
Now that you have removed the old sink, it’s time to measure and cut the sink opening to accommodate your new drop-in sink. Follow these steps to ensure a precise fit:
- Measure the sink dimensions: Take accurate measurements of the width and depth of your new sink. Use a tape measure to measure the inside edge to inside edge of the sink, as this will be the size of the opening you need to cut in your countertop.
- Mark the cutting lines: Using a pencil or marker, mark the cutting lines on the countertop based on your measurements. Make sure to account for the lip or flange of the drop-in sink that will sit on top of the countertop.
- Prepare for cutting: Depending on the material of your countertop (such as laminate, granite, or wood), you’ll need to use an appropriate cutting tool. For laminate countertops, a jigsaw with a fine-tooth blade is recommended. For stone or solid surface countertops, a diamond blade on a circular saw is typically used. Follow the manufacturer’s instructions for your specific cutting tool.
- Protect the surrounding area: Place masking tape along the cutting lines to help prevent any chipping or splintering of the countertop surface during the cutting process.
- Cut the sink opening: Carefully cut along the marked lines, following the manufacturer’s instructions for your cutting tool. Take your time and make precise cuts to ensure a clean and accurate opening.
Once the sink opening has been cut, remove any masking tape and clean up any debris or dust from the countertop. You’re now ready to move on to the next step: placing the sink in position.
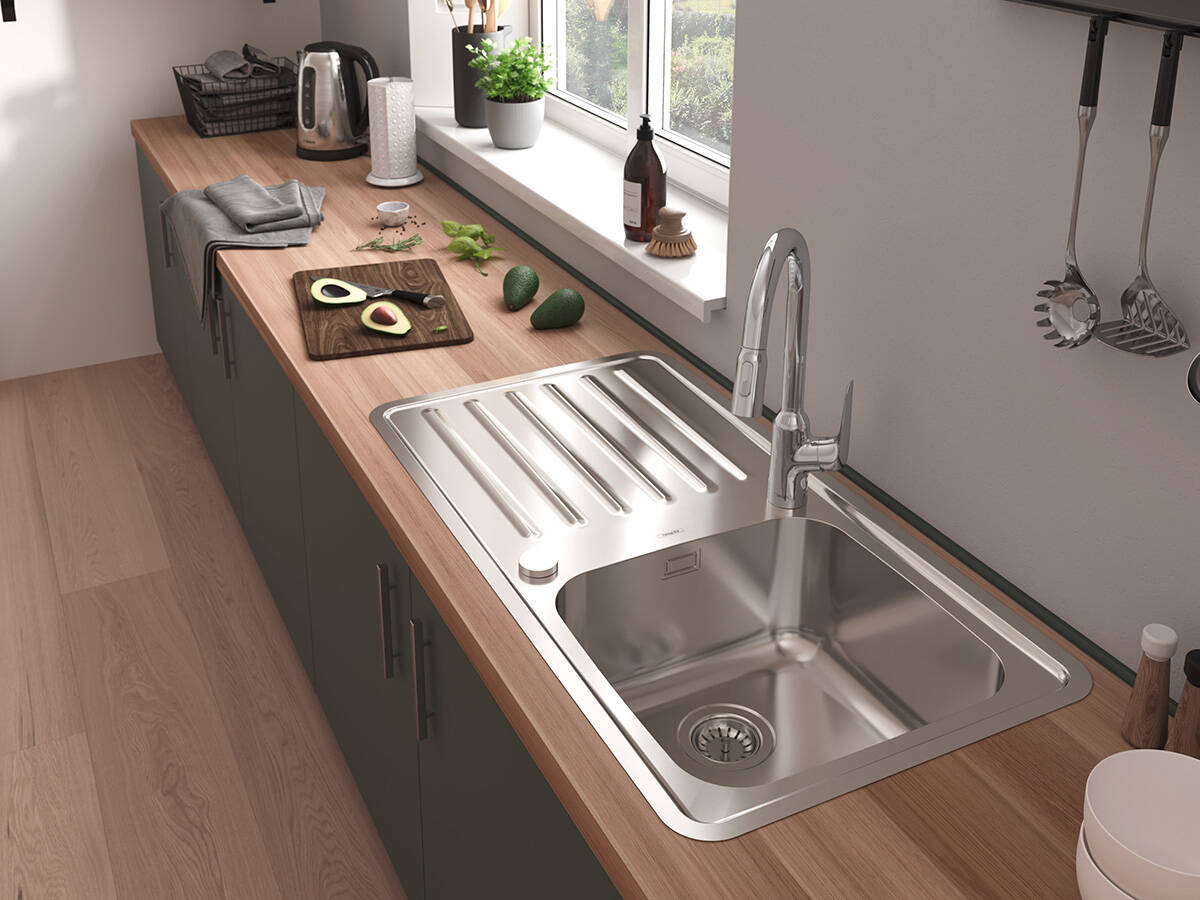
Step 4: Placing the Sink in Position
With the sink opening cut, it’s time to place your new drop-in kitchen sink in position. Follow these steps to ensure proper placement:
- Clean the underside of the sink: Before placing the sink, clean the underside with a damp cloth to remove any dirt or debris.
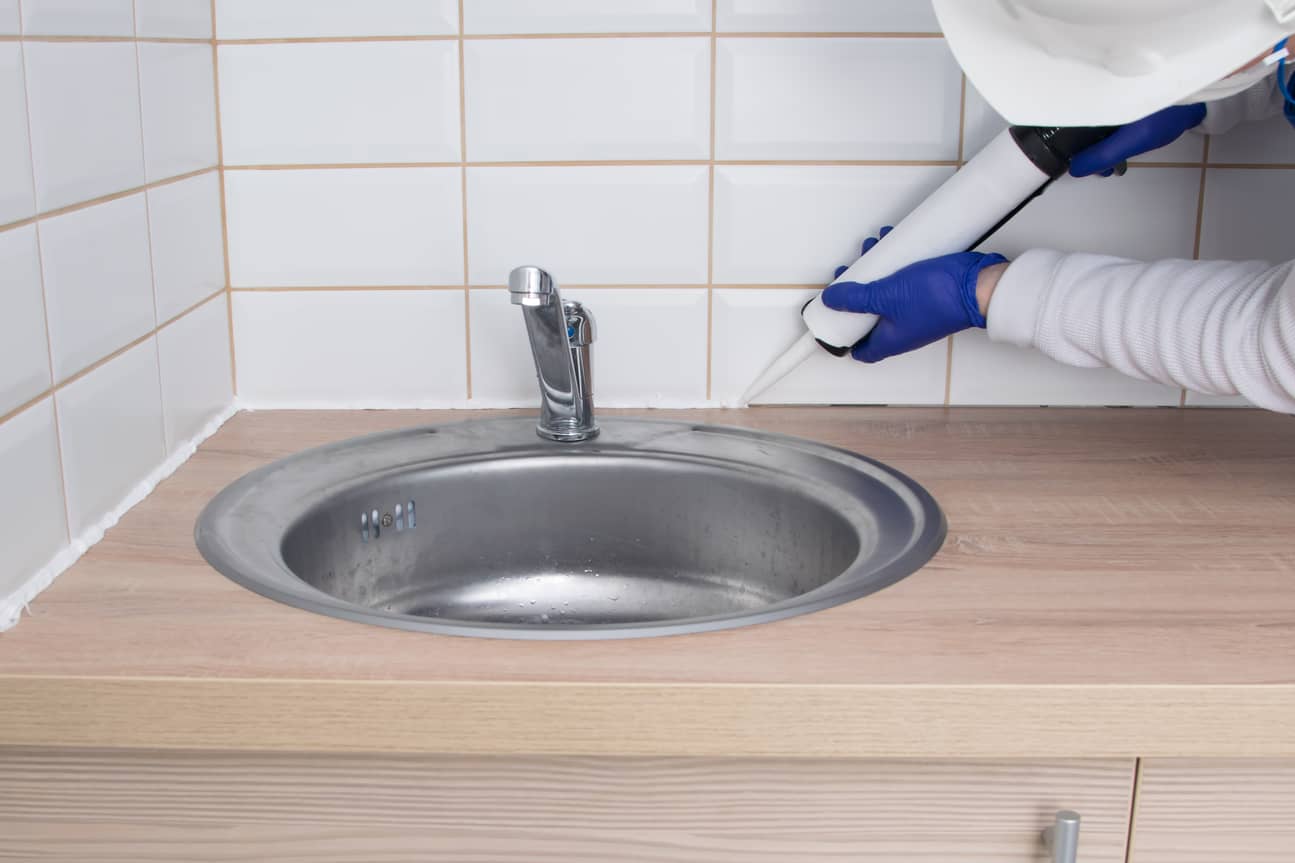
- Apply silicone caulk: Apply a thin bead of silicone caulk around the edge of the sink cutout on the countertop. This will create a watertight seal when the sink is installed.
- Set the sink in place: Carefully lower the sink into the opening, making sure the sink’s rim sits evenly on the countertop. Apply gentle pressure to secure the sink in position.
- Check for levelness: Use a level to ensure that the sink is sitting level both front to back and side to side. Make any necessary adjustments by adding or removing caulk under the sink if needed.
Once you’re satisfied with the placement and levelness of the sink, it’s time to move on to the next step: attaching the sink to the countertop.
When installing a drop-in kitchen sink, be sure to apply a thin bead of silicone caulk around the edge of the sink before placing it into the countertop cutout. This will help create a watertight seal and prevent any leaks.
Read more: How To Install Sink In Basement
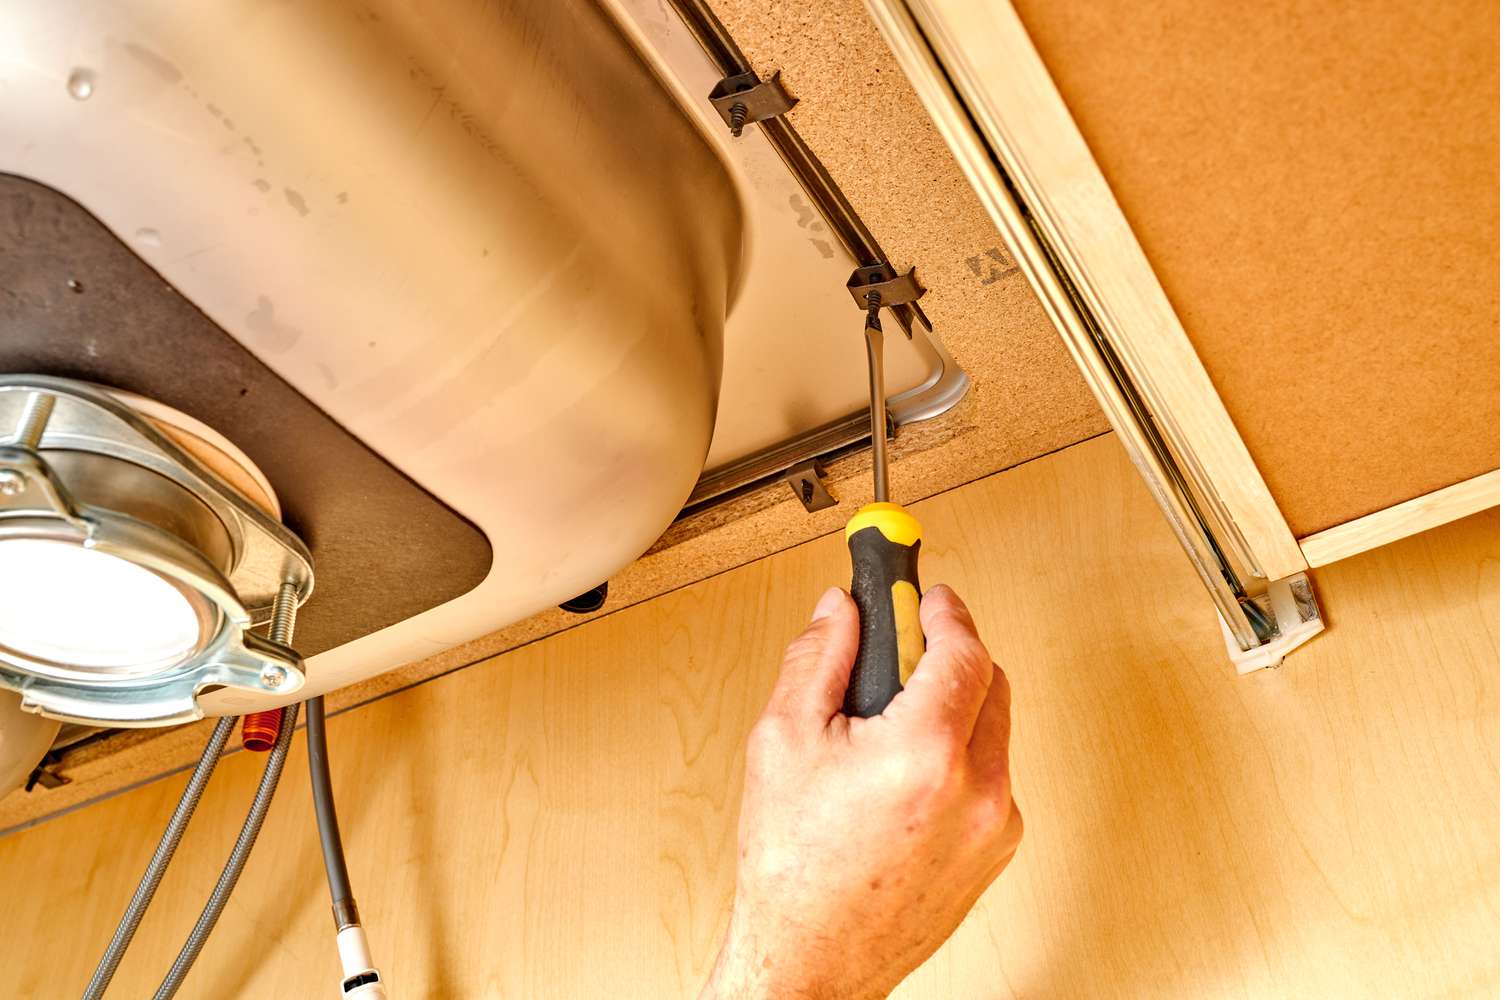
Step 5: Attaching the Sink to the Countertop
Now that your drop-in sink is in position, it’s time to securely attach it to the countertop. Follow these steps to ensure a sturdy installation:
- Install the sink mounting clips: Check the manufacturer’s instructions to determine the number and placement of the sink mounting clips. These clips will help hold the sink in place and provide additional support.
- Position the mounting clips: Place the mounting clips onto the sink’s rim, positioning them evenly around the perimeter. Use a screwdriver or drill to secure the clips in place, making sure they are snug but not over-tightened.
- Tighten the mounting clips: Once all the clips are in place, go around and gently tighten each one to ensure a secure fit. Be careful not to apply too much pressure, as this could damage the sink or countertop.
- Wipe away excess caulk: Use a damp cloth or sponge to wipe away any excess silicone caulk that may have been squeezed out during the installation process. This will give the sink a clean and finished appearance.
With the sink securely attached to the countertop, you’re ready to move on to the next step: connecting the plumbing.
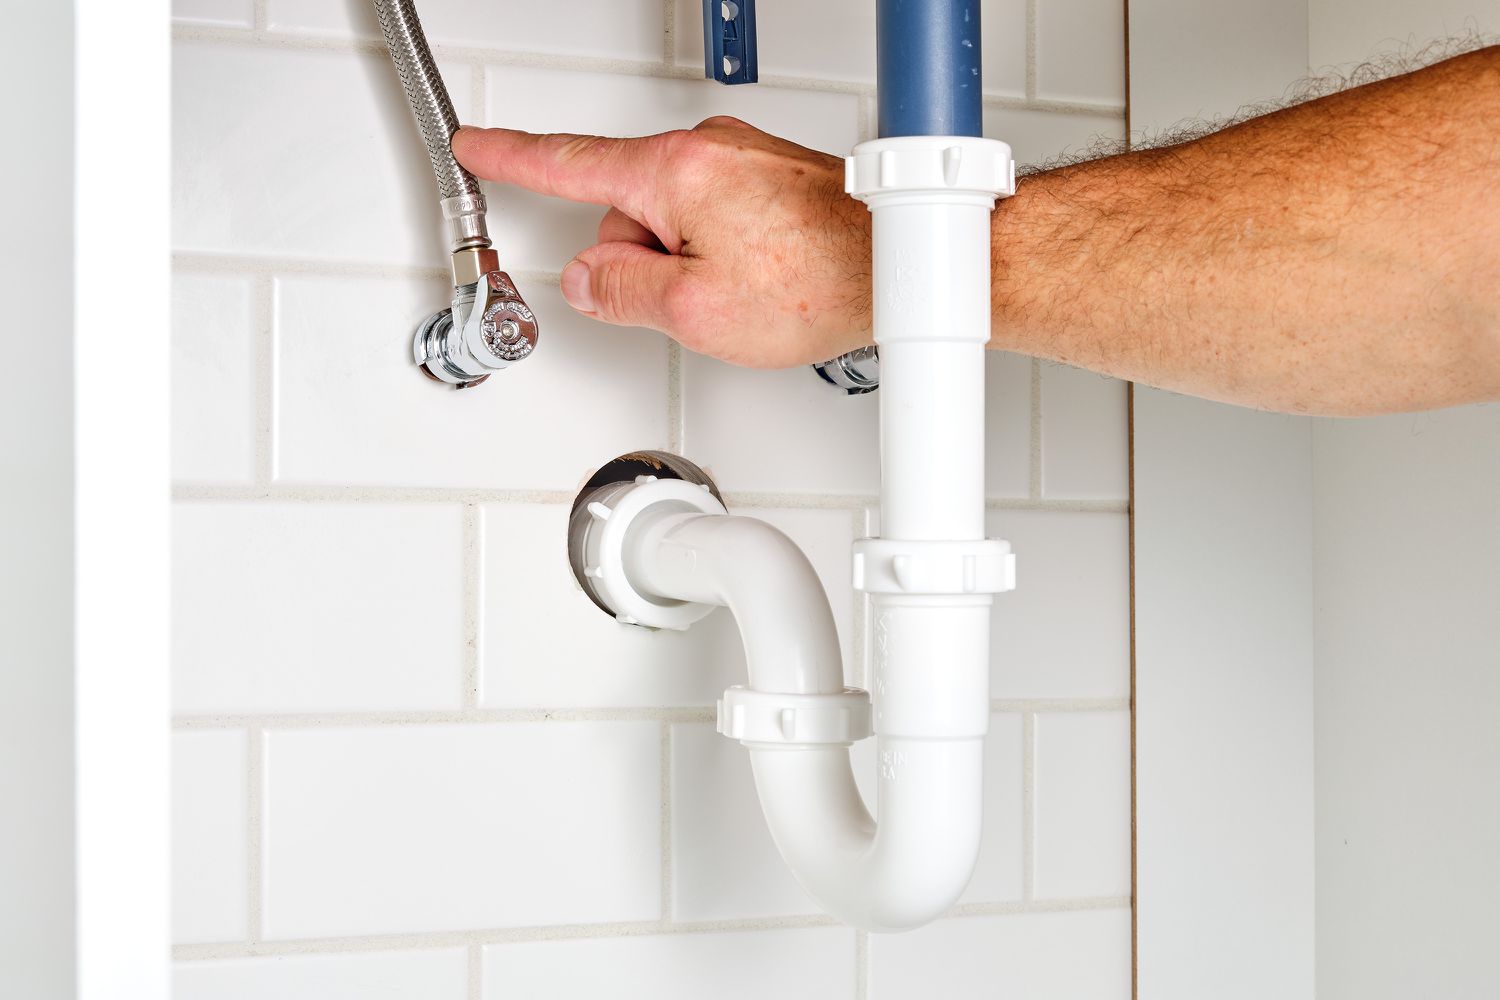
Step 6: Connecting the Plumbing
Now that your drop-in sink is securely attached to the countertop, it’s time to connect the plumbing. Follow these steps to ensure a proper and leak-free plumbing connection:
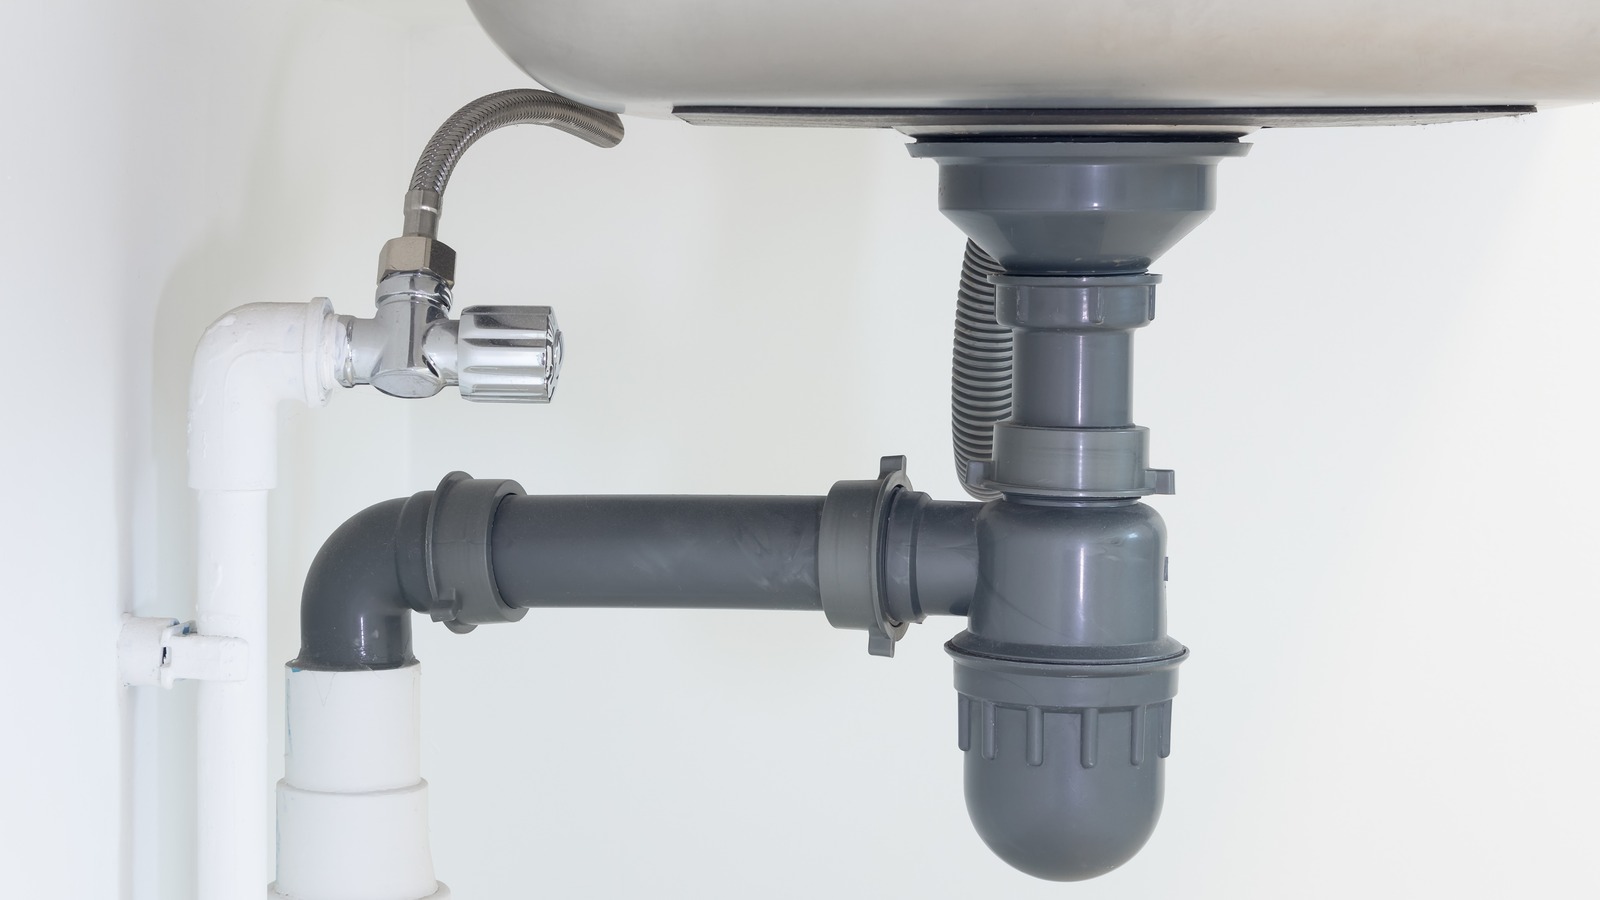
- Install the drain assembly: Start by installing the drain assembly. Apply plumber’s putty around the top flange of the drain and insert it into the sink drain opening. From beneath the sink, attach the rubber gasket, cardboard washer, and locknut to secure the drain assembly in place.
- Connect the water lines: Begin by reconnecting the water lines to the faucet. Apply pipe joint compound or plumber’s tape to the threaded ends of the supply lines to ensure a tight seal. Connect the supply lines to the corresponding hot and cold water valves and tighten them with an adjustable wrench.
- Reattach the garbage disposal (if applicable): If you had a garbage disposal, now is the time to reattach it. Follow the manufacturer’s instructions to reconnect the drain pipe, mounting brackets, and power supply. Ensure that all connections are secure and leak-free.
- Check for leaks: With the plumbing connections made, it’s important to check for any leaks. Turn on the water supply and carefully inspect the connections, drain assembly, and garbage disposal (if applicable). Make any necessary adjustments to ensure a watertight seal.
Take your time during the plumbing connection process to ensure that everything is properly aligned and tightened. This will help prevent any potential leaks that could cause water damage to your kitchen.
With the plumbing successfully connected, it’s time to move on to the next step: testing for leaks.
Step 7: Testing for Leaks
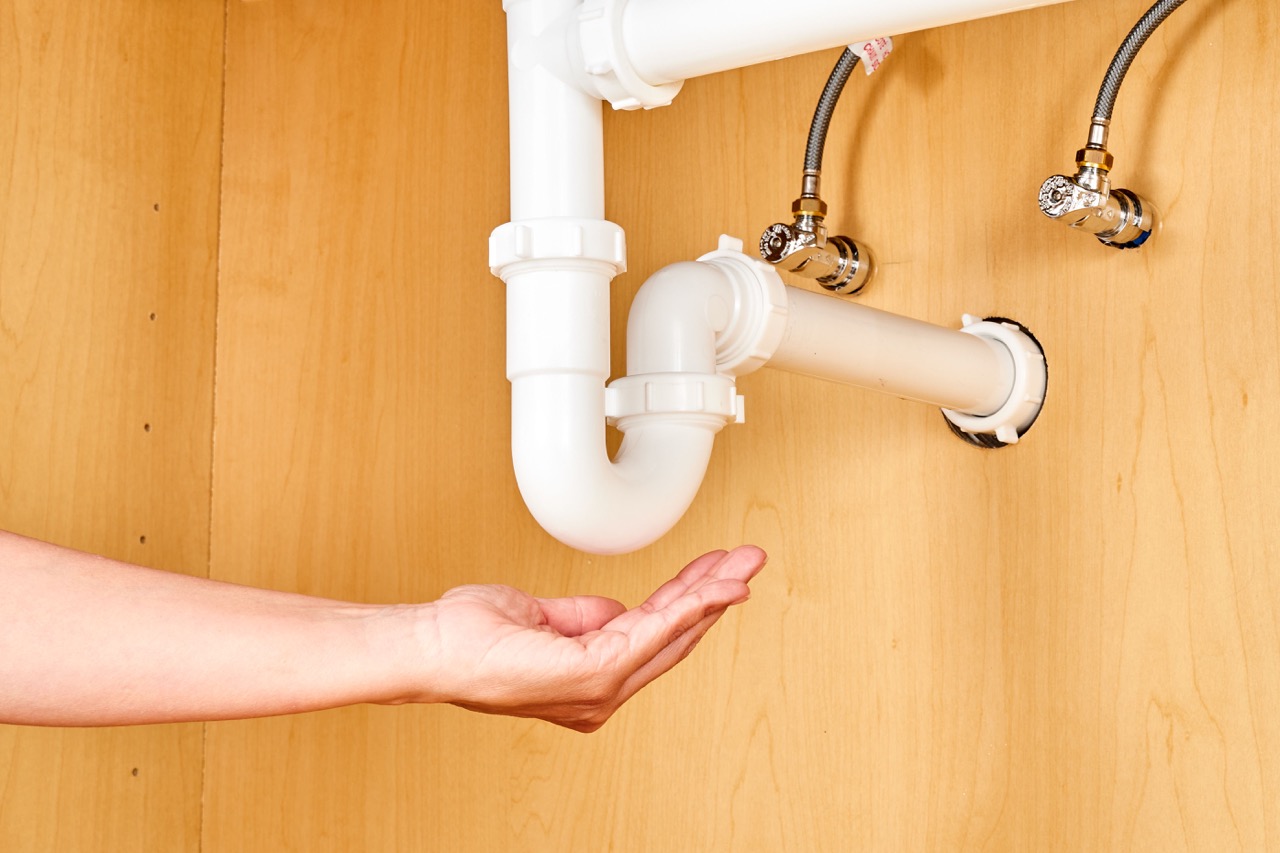
After connecting the plumbing, it’s crucial to test for any potential leaks. Here’s how to conduct a thorough leak test:
- Turn on the water supply: Slowly turn on the water supply valves underneath the sink. Allow the water to flow for a few minutes while closely observing the plumbing connections, drain assembly, and garbage disposal (if applicable).
- Check for drips or leaks: Carefully inspect all the connections and components for any signs of water leakage. Look for drips, pooling water, or wet spots around the sink, drain, and pipes.
- Feel for moisture: Gently touch the areas around the connections and supply lines to feel for any moisture. Wetness or dampness indicates a potential leak.
- Test the garbage disposal (if applicable): If you have a garbage disposal, run water through it and turn it on to ensure that it functions properly without any leaks or unusual noises.
If you notice any leaks or drips during the testing process, take immediate action to address them. Tighten any loose connections, replace damaged gaskets or washers, or apply additional sealant as needed. It’s crucial to have a watertight plumbing system to prevent water damage to your kitchen cabinets or surrounding areas.
Once you have completed the leak test and confirmed that there are no leaks, you’re ready for the final step: finishing touches and clean-up.
Step 8: Finishing Touches and Clean-up
Congratulations, you’re almost done with the installation process! The final step involves adding those finishing touches and tidying up your workspace. Here’s what you need to do:
- Trim any excess caulk: Inspect the area around the sink where the caulk was applied. Use a utility knife or caulk trimmer to carefully remove any excess caulk, ensuring clean and neat edges. This will give your sink a polished and professional appearance.
- Wipe down the sink and countertop: Take a damp cloth or sponge and wipe down the sink and countertop surface. This will remove any dust, debris, or smudges that may have accumulated during the installation process.
- Reconnect electrical appliances: If you had to disconnect any electrical appliances, such as a dishwasher, during the installation, now is the time to reconnect them. Follow the manufacturer’s instructions for proper electrical connections.
- Restore water supply: Once you have completed the necessary clean-up and finishing touches, turn on the water supply valves to restore the water flow to your sink. Test the faucet and other plumbing fixtures to ensure everything is working properly.
- Enjoy your new kitchen sink: With the installation complete and everything in working order, it’s time to enjoy your newly installed drop-in kitchen sink! Take a moment to admire your hard work and appreciate the enhanced functionality and aesthetic appeal it brings to your kitchen.
Remember, regular maintenance and proper care will prolong the lifespan of your sink. Follow the manufacturer’s guidelines for cleaning and maintenance to keep your sink looking and functioning its best.
By following these steps, you have successfully installed your drop-in kitchen sink. Enjoy the upgrade and the satisfaction of a job well done!
Thank you for using this step-by-step guide. If you have any further questions or need assistance, feel free to reach out. Happy sink installation!
Read more: How To Remove A Drop-In Sink
Conclusion
Congratulations! You have successfully learned how to install a drop-in kitchen sink. By following each step in this comprehensive guide, you have transformed your kitchen with a new sink that not only improves functionality but also enhances the overall aesthetic appeal.
From preparing for the installation to connecting the plumbing and conducting a thorough leak test, you have gained valuable knowledge and hands-on experience in completing this project. Remember to always refer to the manufacturer’s instructions for your specific sink model to ensure proper installation.
Installing a drop-in kitchen sink may seem like a daunting task, but with the right tools, preparation, and patience, it can be a rewarding DIY project. Not only does it save you money on professional installation, but it also allows you to personalize and customize your kitchen space.
It’s important to maintain and care for your new sink to ensure its longevity. Regular cleaning, proper use, and timely repairs will help prevent costly damage and extend its lifespan. Consult the manufacturer’s guidelines for specific maintenance instructions.
We hope this guide has been helpful in guiding you through the installation process. Whether you’re replacing an old sink or upgrading to a new one, the skills and knowledge you have gained will serve you well in future home improvement endeavors.
Thank you for choosing us as your guide, and we wish you many years of enjoyment with your new drop-in kitchen sink!
Frequently Asked Questions about How To Install A Drop-In Kitchen Sink
Was this page helpful?
At Storables.com, we guarantee accurate and reliable information. Our content, validated by Expert Board Contributors, is crafted following stringent Editorial Policies. We're committed to providing you with well-researched, expert-backed insights for all your informational needs.


0 thoughts on “How To Install A Drop-In Kitchen Sink”