Articles
How To Make Candles From Tallow
Modified: January 9, 2024
Learn how to make candles from tallow with our informative articles. Discover step-by-step guides and tips for creating beautiful and fragrant homemade candles.
(Many of the links in this article redirect to a specific reviewed product. Your purchase of these products through affiliate links helps to generate commission for Storables.com, at no extra cost. Learn more)
Introduction: Why Make Candles from Tallow?
When it comes to creating candles, there are various materials and techniques to choose from. One traditional and economical option that has been used for centuries is making candles from tallow. Tallow, which is rendered fat from animals such as cows or sheep, has been used as a candle-making ingredient since ancient times.
While soy and beeswax candles have gained popularity in recent years, tallow candles offer their unique set of benefits. Making candles from tallow allows you to create personalized, handmade candles that give off a warm and cozy glow. Moreover, tallow is relatively inexpensive compared to other candle-making materials, making it a cost-effective choice for those who enjoy candle making as a hobby or a way to add ambiance to their home.
But beyond the cost savings, there are several reasons why making candles from tallow can be a rewarding experience. First and foremost, it allows you to create a connection to the past and engage in a time-honored craft. Second, using tallow candles can foster a sense of sustainability, as it makes use of a byproduct that might otherwise go to waste. Additionally, tallow candles can emit a pleasant, natural scent and provide a longer burn time compared to other alternatives.
Whether you’re a beginner or a seasoned candle maker, learning to make candles from tallow can be a delightful and fulfilling endeavor. In this guide, we will take you through the step-by-step process of making tallow candles, from gathering the necessary supplies to adding fragrance and color, to molding and finishing touches.
Get ready to embark on a journey of creativity and craftsmanship as we explore the art of making candles from tallow.
Key Takeaways:
- Embrace the Timeless Craft of Tallow Candle Making
Discover the art of tallow candle making, from gathering supplies to lighting the finished product. Engage in a sustainable, cost-effective, and creative endeavor that brings warmth and charm to any space. - Create Personalized Tallow Candles for a Cozy Ambiance
Explore the rewarding process of making tallow candles, from adding fragrance and color to molding and finishing touches. Enjoy the warm and comforting glow of handmade candles that reflect your unique style and creativity.
Read more: How To Make Candles From Pool Noodles
Gathering Supplies and Equipment
Before you begin making candles from tallow, it’s essential to gather all the necessary supplies and equipment. Here’s a list of items you’ll need:
- Raw tallow: Obtain high-quality tallow from a trusted source, either by purchasing it or by rendering it yourself.
- Candle molds: Choose molds that suit your desired candle shape and size. Silicone and metal molds are commonly used for tallow candles.
- Wicks: Select wicks that are appropriate for the size of your candles. Consider using cotton-core or wooden wicks for optimal burn performance.
- Wick tabs or sustainer clips: These will secure the wicks to the bottom of the candle mold.
- Fragrance oils (optional): If you want scented candles, choose fragrance oils that are compatible with tallow. Experiment with different scents to find the ones that suit your preference.
- Candle dyes (optional): For adding color to your candles, use candle dyes specifically designed for tallow. Start with a small amount and adjust as needed to achieve the desired hue.
- Pot or double boiler: Use a heat-resistant pot or a double boiler system to melt the tallow. Never melt tallow directly over an open flame.
- Thermometer: A candy or candle thermometer will help you monitor the temperature of the melted tallow.
- Stirring utensil: Choose a heat-resistant tool like a stainless steel spoon or a silicone spatula to stir the tallow.
- Protective gear: To ensure safety, wear heat-resistant gloves and an apron to protect yourself from hot tallow splatters.
Once you’ve gathered all the necessary supplies and equipment, you’re ready to move on to the next step: preparing the tallow for candle making.
Preparing the Tallow
Before you can start making candles from tallow, you need to prepare the tallow by melting and filtering it. Follow these steps to prepare the tallow:
- Chop the tallow into small, uniform pieces to help it melt more evenly.
- Fill a heat-resistant pot or a double boiler with the chopped tallow.
- Place the pot or double boiler with the tallow over medium heat.
- Stir occasionally to ensure even melting and to prevent the tallow from sticking to the bottom of the pot.
- Use a candy or candle thermometer to monitor the temperature of the melted tallow. The ideal melting point for tallow is around 140-160°F (60-71°C).
- Once the tallow has completely melted and reached the desired temperature, remove it from the heat.
- Allow the melted tallow to cool slightly for a few minutes.
- To remove any impurities or debris, strain the melted tallow through a fine mesh strainer or cheesecloth into a clean container.
At this stage, you have prepared the tallow for candle making. If you wish to add fragrance or color to your candles, now is the time to do so. Keep in mind that fragrance oils and candle dyes should be added to the tallow while it’s still in a liquid state.
By properly preparing the tallow, you ensure that your candles will have a smooth and consistent texture. Now that the tallow is ready, let’s move on to the next step: adding fragrance and color to your candles (optional).
Adding Fragrance and Color (Optional)
If you want to enhance the sensory experience of your tallow candles, you can add fragrance and color to them. This step is entirely optional, but it can add a personalized touch to your candles. Here’s how you can add fragrance and color to your tallow candles:
- Fragrance:
- Choose a fragrance oil that is compatible with tallow. Look for oils specifically designed for candle making.
- Add a few drops of the fragrance oil to the melted tallow. Start with a small amount and adjust according to your preference.
- Stir the fragrance oil into the melted tallow thoroughly to ensure even distribution.
- Color:
- If you want to add color to your tallow candles, use candle dyes that are suitable for use with tallow.
- Add a small amount of the candle dye to the melted tallow. Start with a small quantity and gradually increase until you achieve your desired color intensity.
- Stir the candle dye into the melted tallow until it is well incorporated.
Remember, a little goes a long way when it comes to fragrance and color. It’s always better to start with a small amount and adjust as needed to avoid overpowering scents or overly saturated colors.
Once you have added fragrance and color (if desired) to the melted tallow, you’re ready to move on to the next step: choosing and preparing the wick for your tallow candles.
Choosing and Preparing the Wick
Choosing the right wick is crucial for ensuring that your tallow candles burn properly and evenly. Here are some considerations when selecting and preparing the wick for your candles:
- Size: The size of the wick should be appropriate for the diameter of your candle. A wick that is too small may result in a weak flame, while a wick that is too large can cause excessive smoke or uneven burning.
- Type: There are different types of wicks available, such as cotton-core wicks, wooden wicks, and pre-tabbed wicks. Each type has its own characteristics, so choose the one that suits your preference and candle size.
- Preparation: If you’re using a pre-tabbed wick, simply attach the tab to the bottom of the candle mold using a wick sustainer clip. If you’re using an untabbed wick, you can attach a wick tab to the end of the wick and secure it to the mold.
- Placement: Position the wick in the center of the mold and make sure it extends about an inch or two above the top of the mold. You can use a wick holder or pencil to keep the wick in place while pouring the melted tallow.
To ensure that the wick remains straight and centered during the candle-making process, consider using a wick centering tool or a wick sticker to secure it in place. This will help create a nice and straight burn throughout the life of the candle.
Once you have chosen and prepared the wick for your tallow candles, it’s time to move on to the next step: molding the candles.
When making candles from tallow, ensure that the tallow is fully melted and at the correct temperature before pouring it into the candle mold to avoid any lumps or uneven texture in the finished candle.
Read more: How To Make Scented Candles From Crayons
Molding the Candles
With your tallow melted, fragranced, and colored (if desired) and the wick prepared, it’s time to start molding your candles. Here’s a step-by-step guide to help you through the process:
- Ensure that your molds are clean and dry before pouring the melted tallow.
- Place the prepared wick in the center of the mold, making sure it is straight and secure.
- Slowly pour the melted tallow into the mold, being careful not to overfill it. Leave some space at the top to allow for any potential shrinkage during cooling.
- If you’re making container candles, fill the chosen container with the melted tallow and secure the wick in place using a wick sticker or a dab of melted tallow.
- Allow the tallow to cool and solidify completely. This process may take several hours depending on the size and thickness of your candles.
During the cooling process, the tallow will solidify and take the shape of the mold. Take care not to move or disturb the candles until they are completely set to ensure a neat and uniform appearance.
Once the candles have solidified, you can proceed to the next step: Allow the candles to set and fully cure.
Molding the candles is an exciting step in the candle-making process. As you wait for them to cool and solidify, you can anticipate the final result and prepare for the finishing touches that will make your tallow candles truly special.
Allowing the Candles to Set
After molding your tallow candles, it’s important to allow them to set and cure properly before moving on to the next steps. Allowing the candles to set ensures that they achieve their desired shape, texture, and stability. Here are some important considerations during this crucial step:
- Patience is key: It’s essential to exercise patience and give the candles enough time to set completely. The exact time required for the candles to set will depend on various factors, including the size and thickness of the candles. Generally, it can take anywhere from a few hours to overnight.
- Ensure a stable environment: Find a safe and stable location to let the candles set undisturbed. Make sure the area is free from drafts, vibrations, and any other factors that could interfere with the setting process.
- Avoid moving or disturbing the candles: It’s important to refrain from moving or handling the candles while they are setting. Any unnecessary movement can lead to misshapen or uneven candles.
- Monitor the cooling process: Keep an eye on the candles as they cool. If you notice any uneven or sinking areas, you can gently tap the sides of the molds to help distribute the tallow evenly and eliminate air pockets.
- Check for shrinkage: Tallow candles tend to shrink slightly as they cool and set. If you notice any significant shrinkage, you can top up the melted tallow to ensure a smooth and even surface on the finished candles.
By allowing the candles to set properly, you ensure that they achieve their desired quality and longevity. Once the candles have fully set, you can move on to the next step: trimming and adding finishing touches.
Take this time to prepare for the final stages of the candle-making process, and soon you’ll be ready to light up your beautifully crafted tallow candles.
Trimming and Finishing Touches
Once your tallow candles have set and cured, it’s time to give them some finishing touches to enhance their appearance and ensure optimal burning performance. Here’s what you need to do:
- Remove the candles from the molds: Carefully and gently release the candles from the molds. If necessary, you can place the molds in warm water for a few seconds to loosen the candles.
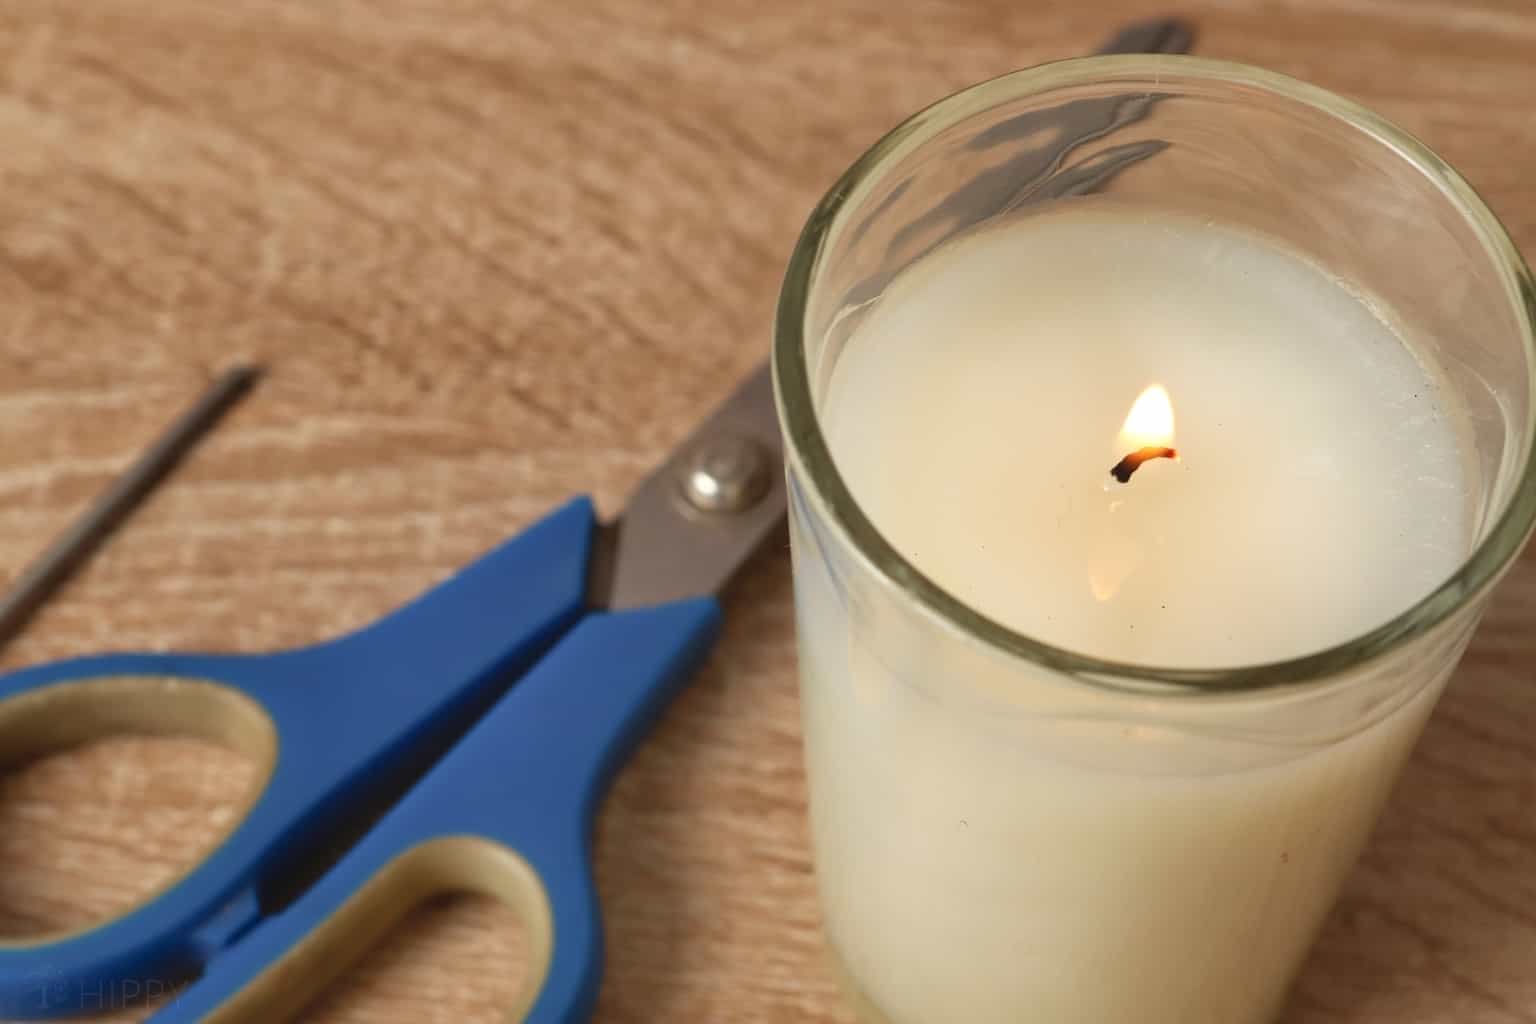
- Trim the wick: Using a pair of sharp scissors, trim the wick to a length of about ¼ to ½ inch (0.6 to 1.3 centimeters). This helps promote a clean and steady flame during burning.
- Inspect the candles: Examine each candle for any imperfections or blemishes. Smooth out any rough edges or uneven surfaces using a warm spoon or your fingers. Be cautious not to damage the candle’s shape.
- Add decorative elements (optional): If desired, you can add decorative elements to your candles to give them a personal touch. Consider tying a ribbon or twine around the base of the candle, or attaching a small charm or dried flowers to create a unique and visually appealing design.
- Create labels or tags (optional): If you plan to give your candles as gifts or sell them, you can create labels or tags to provide information about the scent, ingredients, or your brand. Customize them with your own logo or designs.
- Store the candles properly: To preserve the quality and integrity of your tallow candles, store them in a cool, dry place away from direct sunlight and extreme temperatures. This will help prevent any unwanted color fading or melting.
By trimming the wick and adding any desired finishing touches, you elevate the overall aesthetic appeal of your tallow candles and ensure that they are ready for illumination.
Now that your tallow candles are trimmed and beautifully finished, it’s time for the most satisfying part of candle making: lighting and enjoying the warm glow that they emit.
Lighting and Enjoying Your Tallow Candles
After all the hard work and creativity that went into making your tallow candles, it’s finally time to light them up and bask in their mesmerizing glow. Here’s how you can light and enjoy your tallow candles:
- Find a safe location: Place your candles on a sturdy, heat-resistant surface away from any flammable objects. Ensure that the area is well-ventilated and free from drafts.
- Remove any flammable packaging: Make sure to remove any labels, tags, or decorative elements that might catch fire when lighting the candles.
- Double-check the surroundings: Check that there are no flammable materials nearby, such as curtains or paper, that could accidentally come into contact with the flame.
- Light the wick: Use a lighter or a match to carefully ignite the wick. Hold the flame to the base of the wick until it catches fire. Be gentle to avoid extinguishing the flame.
- Enjoy the ambiance: Once the candles are lit, sit back, and enjoy the warm, inviting glow they emit. Take a moment to relax and unwind as the flickering flame creates a calming atmosphere.
- Practice safety precautions: Remember to never leave a burning candle unattended. Keep them out of reach of children and pets. Always extinguish the candles before leaving the room or going to sleep.
- Monitor the burn: While enjoying your candles, keep an eye on the burn. Ensure that the flame remains steady and doesn’t become too high or flicker excessively. If needed, trim the wick slightly to maintain the optimal burn.
As you light and enjoy your tallow candles, take a moment to appreciate the craftsmanship and expertise that went into creating them. The gentle glow and soothing fragrance will create a cozy and inviting atmosphere, perfect for relaxation, meditation, or setting a romantic ambiance.
Now that you know how to make and enjoy candles from tallow, let your creativity soar as you continue to experiment with different scents, colors, and designs. Making tallow candles is not only a satisfying craft but also a beautiful way to add warmth and charm to your home or give thoughtful handmade gifts to loved ones.
So go ahead, light up your tallow candles, and immerse yourself in the gentle ambiance they provide.
Enjoy the warm and comforting glow!
Read more: How To Store Beef Tallow
Conclusion
Crafting candles from tallow is a timeless and fulfilling activity that connects us to the past while allowing for creative expression. In this comprehensive guide, we’ve explored the process of making tallow candles, from gathering the necessary supplies to lighting and enjoying the finished product.
We’ve learned that tallow candles offer unique advantages, such as their cost-effectiveness, sustainability, longer burn time, and the ability to customize their fragrance and color. By choosing tallow as our candle-making material, we not only engage in a time-honored craft but also contribute to reducing waste and embracing a natural and cozy aesthetic in our living spaces.
Throughout the journey of candle making, we’ve discovered the importance of careful preparation, including rendering and filtering the tallow, adding fragrance and color, choosing the appropriate wick, and molding the candles with precision. We’ve also recognized the significance of allowing the candles to set properly and adding the final touches to enhance their appearance.
With safety in mind, we’ve emphasized the proper handling and lighting of tallow candles, ensuring that they are enjoyed responsibly and with utmost care. From the initial flicker of the flame to the warm glow that fills the room, tallow candles create an inviting and serene ambiance that soothes the mind and soul.
As you continue your journey in candle making, take the knowledge and skills you’ve gained from this guide and allow your creativity to flourish. Experiment with different scents, colors, and designs to create candles that reflect your personal style and captivate those around you.
Whether you’re making tallow candles for personal use, gifting to loved ones, or even starting your own candle-making business, embrace the joy and satisfaction that comes with this age-old tradition. With every flicker of the flame, you’ll be reminded of the hard work, passion, and dedication that went into crafting a candle that brings light and warmth to any setting.
So, gather your supplies, ignite your imagination, and immerse yourself in the art of making candles from tallow. Your journey awaits, and the possibilities are endless.
Frequently Asked Questions about How To Make Candles From Tallow
Was this page helpful?
At Storables.com, we guarantee accurate and reliable information. Our content, validated by Expert Board Contributors, is crafted following stringent Editorial Policies. We're committed to providing you with well-researched, expert-backed insights for all your informational needs.


