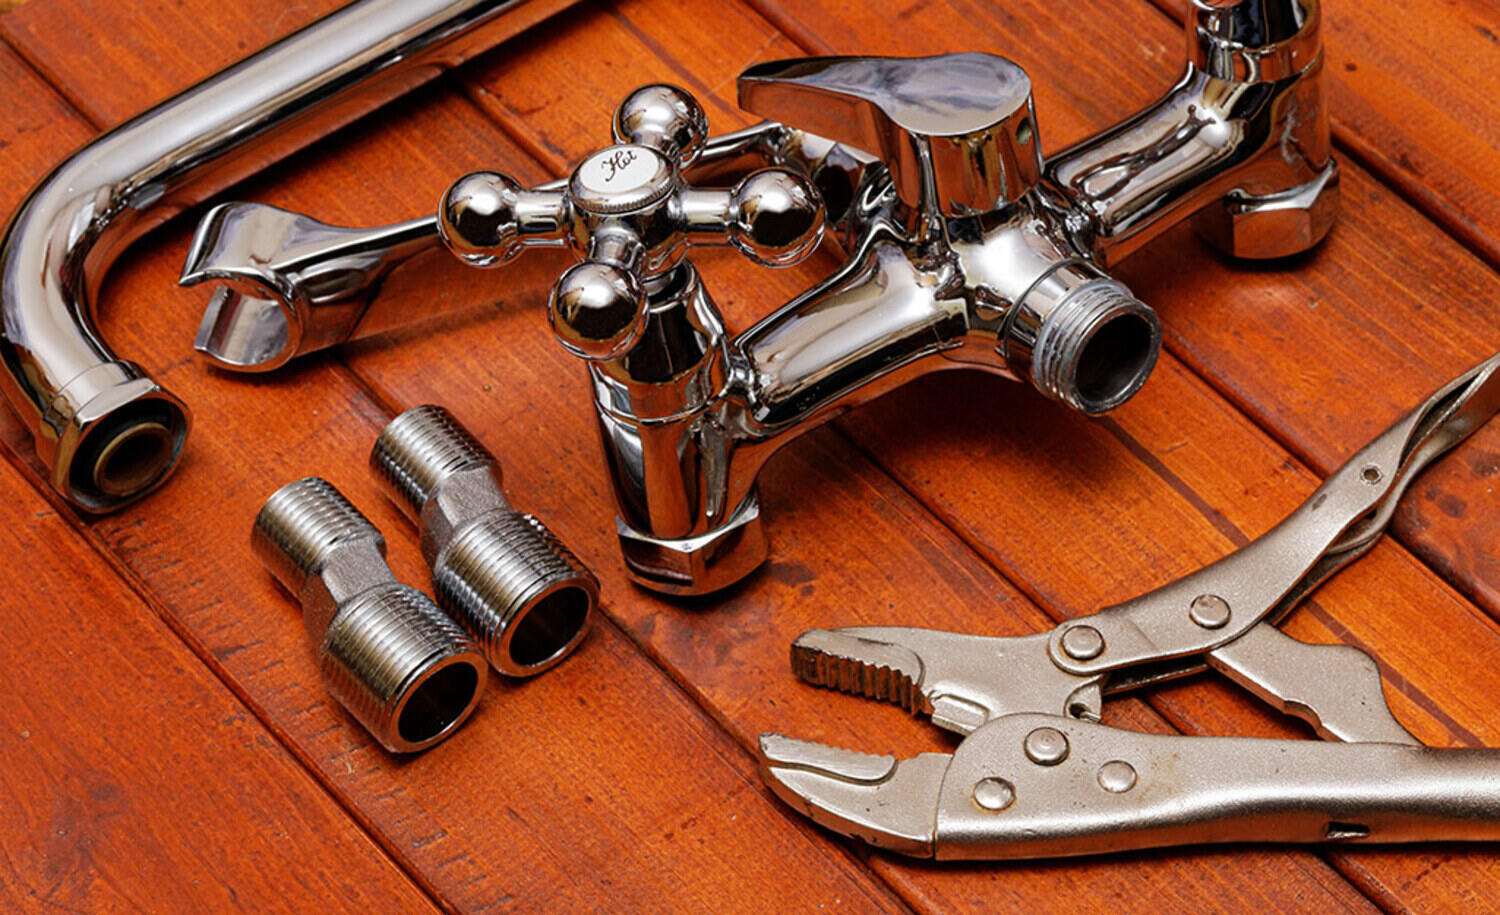

Articles
How To Take Apart A Kitchen Faucet
Modified: October 28, 2024
Learn how to take apart a kitchen faucet with our informative articles. Step-by-step guides and expert tips to help you tackle your DIY projects.
(Many of the links in this article redirect to a specific reviewed product. Your purchase of these products through affiliate links helps to generate commission for Storables.com, at no extra cost. Learn more)
Introduction
When it comes to the functionality and aesthetics of a kitchen, a well-functioning faucet plays a crucial role. Over time, faucets can become worn out or develop issues that affect their performance. In such cases, it may be necessary to take apart the kitchen faucet to identify and resolve the underlying problem.
This article will guide you through the step-by-step process of dismantling a kitchen faucet, allowing you to inspect and repair it as needed. Before we begin, it’s important to note that taking apart a kitchen faucet requires some basic plumbing knowledge and skills. If you’re unsure about your abilities or the complexity of the problem, it’s always recommended to consult a professional plumber.
To successfully disassemble a kitchen faucet, you’ll need a few essential tools and materials. These include:
- Adjustable wrench
- Phillips head screwdriver
- Allen wrench
- Plumber’s tape
- Bucket or towels to catch any water
Make sure you have these tools readily available before you begin the process.
Key Takeaways:
- Proper preparation and the right tools are essential for successfully disassembling a kitchen faucet. Remember to turn off the water supply, clear the workspace, and gather the necessary tools before starting the process.
- Thorough cleaning, inspection, and replacement of faulty parts are crucial for reassembling a kitchen faucet. Testing the faucet for functionality ensures optimal performance and reliability.
Read more: How To Take Apart A Lamp
Tools and Materials Needed
Before you start disassembling your kitchen faucet, it’s important to gather all the necessary tools and materials. Here’s a list of what you’ll need:
- Adjustable wrench: This tool will help you loosen and tighten different fittings on the faucet.
- Phillips head screwdriver: You’ll need this screwdriver to remove any screws holding the faucet together.
- Allen wrench: Some faucets may have hidden set screws that require an Allen wrench to remove.
- Plumber’s tape: This thin, white tape is used to create a watertight seal when reassembling the faucet.
- Bucket or towels: These will come in handy to catch any water that may come out when disassembling the faucet.
Having these tools and materials ready will ensure a smooth and efficient disassembly process.
It’s also worth noting that while these tools are commonly used for most kitchen faucets, the specific tools required may vary depending on the make and model of your faucet. Refer to your faucet’s instruction manual or consult with a professional if you’re unsure about the tools and materials you’ll need.
Now that you have all the necessary tools and materials, let’s move on to the step-by-step process of taking apart your kitchen faucet.
Step 1: Turn Off the Water Supply
Before you start disassembling your kitchen faucet, it’s important to turn off the water supply to prevent any potential water damage or accidents. Here’s how you can do it:
- Locate the shut-off valves: There are typically two shut-off valves located under your sink—one for hot water and one for cold water. These valves may be in the form of handles or knobs.
- Turn off the hot and cold water supply: Rotate the handles or knobs clockwise to close the valves. This will stop the flow of water to the faucet.
- Test the water supply: Turn on the faucet handles to verify that the water supply is indeed shut off. If water still flows, double-check that the valves are fully closed or consider shutting off the main water supply to your home.
It’s important to turn off the water supply before proceeding with the disassembly process to minimize the risk of water damage and avoid any potential accidents.
Now that the water supply is turned off, you can move on to the next step: preparing the work area.
Step 2: Prepare the Work Area
Before you begin disassembling your kitchen faucet, it’s important to prepare the work area to ensure a smooth and organized process. Follow these steps to prepare your work area:
- Gather your tools and materials: Make sure you have all the necessary tools and materials mentioned earlier within reach.
- Clear the workspace: Remove any objects or clutter from around the sink area to create a clean and spacious work surface.
- Lay down a protective cover: Place a towel or a waterproof mat over the countertop to protect it from any potential scratches or water damage during the disassembly process.
- Position a bucket or towels: Position a bucket or lay down towels underneath the sink area to catch any water that may drip out during the disassembly.
- Ensure proper lighting: Adequate lighting is crucial for a successful disassembly. Make sure you have sufficient lighting in the area to clearly see the faucet components.
By preparing the work area properly, you’ll minimize the risk of losing small parts, damaging your countertop, or encountering any unnecessary difficulties during the disassembly process.
Once you’ve prepared your work area, you’re ready to move on to the next step: removing the handle of the kitchen faucet.
Step 3: Remove the Handle
The handle is the part of the kitchen faucet that you use to control the water flow and temperature. Follow these steps to remove the handle:
- Locate the handle screw: Look for a small screw at the base of the handle. This screw is usually located underneath a decorative cap or cover.
- Remove the decorative cap: Use a flathead screwdriver or your fingers to carefully pry off the decorative cap or cover, exposing the handle screw.
- Loosen the handle screw: Use a Phillips head screwdriver to loosen and remove the handle screw. Set the screw aside in a safe place for reassembly.
- Remove the handle: Gently lift and remove the handle from the faucet, exposing the inner components.
It’s important to note that the handle removal process may vary depending on the make and model of your faucet. Some faucets may have a different mechanism, such as a set screw that requires an Allen wrench to remove. Refer to your faucet’s instruction manual or consult a professional if you encounter any difficulties during this step.
With the handle successfully removed, you can now proceed to the next step: unscrewing the cap or bonnet of the kitchen faucet.
Read more: How To Take A Dryer Apart
Step 4: Unscrew the Cap or Bonnet
Once you have removed the handle, the next step is to unscrew the cap or bonnet of the kitchen faucet. Follow these steps to proceed:
- Inspect the faucet body: Take a moment to examine the faucet body. You may notice a cap or bonnet covering the top of the faucet body.
- Identify the type of cap or bonnet: Depending on the faucet model, the cap or bonnet may be a separate piece or integrated into the handle assembly.
- Unscrew the cap or bonnet: Use an adjustable wrench or a pair of pliers to grip the cap or bonnet securely. Rotate it counterclockwise to unscrew it from the faucet body.
- Set the cap or bonnet aside: Once unscrewed, set the cap or bonnet aside in a safe place. Be cautious of any small components that may be attached to it to avoid losing them.
It’s important to note that the process of unscrewing the cap or bonnet may vary depending on the make and model of your faucet. Some faucets may have specific tools or techniques required for this step. Refer to your faucet’s instruction manual or consult a professional if you encounter any difficulties.
With the cap or bonnet removed, you’re now ready for the next step: removing the cartridge or valve of the kitchen faucet.
Before taking apart a kitchen faucet, make sure to turn off the water supply to the faucet to avoid any leaks or water damage.
Step 5: Remove the Cartridge or Valve
After unscrewing the cap or bonnet, the next step is to remove the cartridge or valve from the kitchen faucet. Follow these steps to proceed:
- Identify the cartridge or valve: The cartridge or valve is the component responsible for controlling the water flow and temperature in the faucet. Take a close look at the faucet body to locate it.
- Determine the removal method: Depending on the faucet model, the cartridge or valve may be secured in place by screws, clips, or locking mechanisms.
- Remove the screws or clips: If the cartridge or valve is held in place by screws or clips, use a screwdriver or pliers to remove them.
- Unscrew the cartridge or valve: In some cases, the cartridge or valve may need to be unscrewed from the faucet body. Use an adjustable wrench or pliers to carefully rotate it counterclockwise to loosen and remove it.
- Inspect the cartridge or valve: Once removed, examine the cartridge or valve for any signs of wear, damage, or debris that may be causing problems with your faucet.
It’s important to handle the cartridge or valve with care to avoid causing further damage. If you encounter any difficulties or if the cartridge or valve is stuck, consider lubricating it or seeking assistance from a professional plumber.
With the cartridge or valve removed, you’re now ready for the next step: disassembling the remaining components of the faucet.
Step 6: Disassemble the Faucet
With the cartridge or valve removed, it’s time to disassemble the remaining components of the kitchen faucet. Follow these steps to proceed:
- Inspect the faucet body: Take a moment to examine the inside of the faucet body. You may notice additional components such as washers, O-rings, or seals.
- Remove any visible components: Identify any washers, O-rings, or seals that are easily accessible and remove them using your fingers or a pair of pliers. These components may show signs of wear and tear or damage and may need to be replaced.
- Check for hidden components: Some faucet models may have additional hidden components that require further disassembly. Refer to your faucet’s instruction manual or do some research to identify any hidden screws, retaining rings, or other fasteners.
- Take note of the disassembly order: As you remove each component, it’s helpful to take note of the order in which they were removed. This will make reassembly easier later on.
It’s important to be gentle when disassembling the faucet components to avoid causing any accidental damage. Take your time and pay attention to any small parts that may be dislodged during the process.
Once you have successfully disassembled the faucet, it’s time to move on to the next step: cleaning and inspecting the components.
Step 7: Clean and Replace any Faulty Parts
After disassembling the kitchen faucet, it’s important to thoroughly clean all the components and identify any faulty parts that need replacement. Follow these steps to proceed:
- Clean the components: Use a mild detergent or vinegar solution to clean the various faucet parts, such as the cartridge, washers, O-rings, and seals. Remove any built-up debris, mineral deposits, or residue that may affect the faucet’s performance.
- Inspect for damage: While cleaning, carefully inspect each component for any signs of wear, corrosion, cracks, or other damage. Pay close attention to the washers, O-rings, and seals, as these are common culprits for faucet issues.
- Replace faulty parts: If you identify any faulty or damaged components, it’s essential to replace them with new ones. Make sure to choose the appropriate replacement parts that are compatible with your particular faucet model.
- Apply plumber’s tape: Before reassembling the faucet, apply a few wraps of plumber’s tape to the threaded parts of the faucet. This will help create a watertight seal and prevent any leaks.
Cleaning and replacing faulty parts will not only improve the performance of your kitchen faucet but also prolong its lifespan. It’s important to use high-quality replacement parts to ensure optimal functionality.
Once you have cleaned the components and replaced any faulty parts, you’re now ready to reassemble the kitchen faucet.
Read more: How To Take Apart A Dresser
Step 8: Reassemble the Faucet
With the cleaned and replaced components in hand, it’s time to reassemble your kitchen faucet. Follow these steps to proceed:
- Refer to your notes: If you took note of the disassembly order earlier, now is the time to refer to those notes. This will help ensure that you assemble the components in the correct order.
- Start with the replaced components: Begin by installing any newly replaced components, such as washers, O-rings, or seals, in their respective positions.
- Insert the cartridge or valve: Carefully place the cartridge or valve back into the faucet body, aligning it properly. Make sure it is securely seated in place.
- Secure the cap or bonnet: Screw the cap or bonnet back onto the faucet body, tightening it clockwise until it is snug. Use an adjustable wrench or pliers, if necessary, to ensure a tight fit without over-tightening.
- Attach the handle: Slide the handle back onto the faucet stem and secure it by tightening the handle screw. Replace the decorative cap or cover, if applicable.
It’s important to avoid over-tightening the components during reassembly, as this can cause damage or affect the proper functioning of the faucet. Use the appropriate tools and apply moderate pressure when necessary.
Now that you have reassembled the kitchen faucet, it’s time to move on to the final step: testing the faucet for functionality.
Step 9: Test the Faucet
After successfully reassembling the kitchen faucet, it’s important to test its functionality to ensure that everything is working as it should. Follow these steps to proceed:
- Turn on the water supply: Slowly turn on the shut-off valves under the sink to allow water to flow back into the faucet.
- Check for leaks: Inspect the faucet and all the connections for any signs of leaks. Pay close attention to the areas where you replaced components or applied plumber’s tape.
- Test the handle: Turn the faucet handle to different positions to test the water flow and temperature control. Make sure the handle moves smoothly without any sticking or resistance.
- Observe the water flow: Check that the water flow is steady and without any irregularities such as sputtering or fluctuating pressure.
- Verify hot and cold water functionality: Test both hot and cold water to ensure they are working properly and that the temperature changes accordingly.
If you notice any leaks or issues during the testing process, double-check your connections and make any necessary adjustments. If problems persist, it may be best to consult a professional plumber for further assistance.
By thoroughly testing the faucet, you can be confident that your reassembled kitchen faucet is functioning optimally and ready for daily use.
Congratulations! You have successfully completed the process of disassembling, cleaning, replacing faulty parts, and reassembling your kitchen faucet. Remember to keep a record of the steps and tools used for future reference. Regular maintenance and prompt repairs will help prolong the life of your faucet and ensure a smooth and reliable water supply in your kitchen.
Conclusion
Taking apart a kitchen faucet may seem like a daunting task, but with the right tools, knowledge, and patience, it can be a manageable process. By following the step-by-step guide in this article, you have learned how to disassemble your kitchen faucet, identify faulty components, clean and replace them, and successfully reassemble the faucet for optimal functionality.
Remember, it’s important to exercise caution and refer to the instruction manual or seek professional help if you encounter any difficulties or are unsure about certain steps. Plumbing systems can vary, and it’s essential to approach the disassembly and reassembly process with care.
Regular maintenance, such as cleaning and inspecting your faucet, can help prevent issues and extend its lifespan. By taking the time to address any problems promptly, you can avoid more significant and costly repairs in the future.
If you ever feel overwhelmed or lack the necessary skills or tools, don’t hesitate to consult a professional plumber. They have the expertise to handle complex faucet repairs or replacements effectively.
By following the steps outlined in this article and maintaining your kitchen faucet, you can ensure a well-functioning and reliable water supply in your kitchen for years to come. So, roll up your sleeves, gather your tools, and embark on the journey of dismantling and repairing your kitchen faucet with confidence.
Frequently Asked Questions about How To Take Apart A Kitchen Faucet
Was this page helpful?
At Storables.com, we guarantee accurate and reliable information. Our content, validated by Expert Board Contributors, is crafted following stringent Editorial Policies. We're committed to providing you with well-researched, expert-backed insights for all your informational needs.





0 thoughts on “How To Take Apart A Kitchen Faucet”