Furniture
How To Rewire A Chandelier
Modified: February 24, 2024
Learn how to rewire a chandelier and bring new life to your furniture. Step-by-step guide and expert tips to make the process easy and safe.
(Many of the links in this article redirect to a specific reviewed product. Your purchase of these products through affiliate links helps to generate commission for Storables.com, at no extra cost. Learn more)
Introduction
Chandeliers add a touch of elegance and sophistication to any space. Their intricate designs and beautiful lighting can instantly transform a room. However, over time, the wiring of a chandelier may become outdated or damaged, necessitating a rewiring process.
Rewiring a chandelier may seem like a daunting task, but with the right materials and instructions, it can be done safely and effectively. In this article, we will guide you through the step-by-step process of rewiring a chandelier, allowing you to restore its functionality and continue enjoying its beauty.
Before we dive into the rewiring process, it is important to note that dealing with electrical components can be dangerous. If you are not confident in your abilities or have little experience with electrical work, it is always recommended to hire a professional electrician. Safety should always be your top priority.
Now that we’ve covered the necessary precautions, let’s begin the journey of rewiring a chandelier!
Key Takeaways:
- Safely and effectively rewiring a chandelier requires gathering the right materials, turning off the power, removing old wiring, preparing and connecting new wiring, securing connections, testing, and reassembling the chandelier.
- By following the step-by-step process, you can restore the functionality and beauty of your chandelier while prioritizing safety. This DIY project allows you to maintain the design integrity and save money on purchasing a new chandelier.
Read more: How To Rewire A Thermostat
Step 1: Gathering the necessary materials
Before starting the rewiring process, it is essential to gather all the required materials. This will ensure that you have everything you need on hand and prevent any unnecessary delays or interruptions during the process.
Here is a list of materials you will need:
- A replacement wiring kit: This kit typically includes new wires, sockets, and any other necessary components. Make sure to choose a kit that is compatible with your chandelier.
- Wire cutters: These will be used to cut and strip the wires.
- Wire nuts: These small connectors will be used to secure the connections between the wires.
- A step ladder: This will allow you to safely reach the chandelier.
- A voltage tester: This tool is used to check if the power is properly turned off before starting the rewiring process.
- Electrical tape: This will be used to insulate the connections and provide added security.
- A screwdriver: You may need a screwdriver to remove any screws or fixtures holding the chandelier in place.
- A pen and paper: These will be handy for labeling and keeping track of the wires.
Once you have gathered all the necessary materials, ensure that you have a well-lit and spacious area to work in, allowing you to maneuver comfortably as you proceed with the rewiring process.
It is also a good idea to familiarize yourself with the chandelier’s wiring diagram or take photos of the existing wiring before removing it. This will serve as a helpful reference when connecting the new wires.
With all your materials ready, you are now prepared to move on to the next step: turning off the power.
Step 2: Turning off the power
Before you begin working on the chandelier, it is crucial to ensure that the power supply to the area is turned off. This step is essential for your safety and to prevent any electrical accidents.
Here’s how you can turn off the power:
- Locate and open your circuit breaker panel. This is usually found in the basement, garage, or utility room.
- Identify the circuit breaker that controls the power supply to the chandelier. If you’re not sure, you can refer to the electrical diagram or consult an electrician.
- Flip the switch of the identified circuit breaker to the “Off” position. This will cut off power to the chandelier and ensure that you can work safely.
- For added precaution, use a voltage tester to confirm that there is no electricity flowing to the wires. Place the voltage tester against the wires or socket and ensure that it does not detect any voltage. This step is crucial to prevent any accidental shocks.
Once you have confirmed that the power is turned off, it is safe to proceed with the rewiring process. Remember, always prioritize safety when working with electrical components.
In the next step, we will guide you through the process of removing the old wiring from the chandelier.
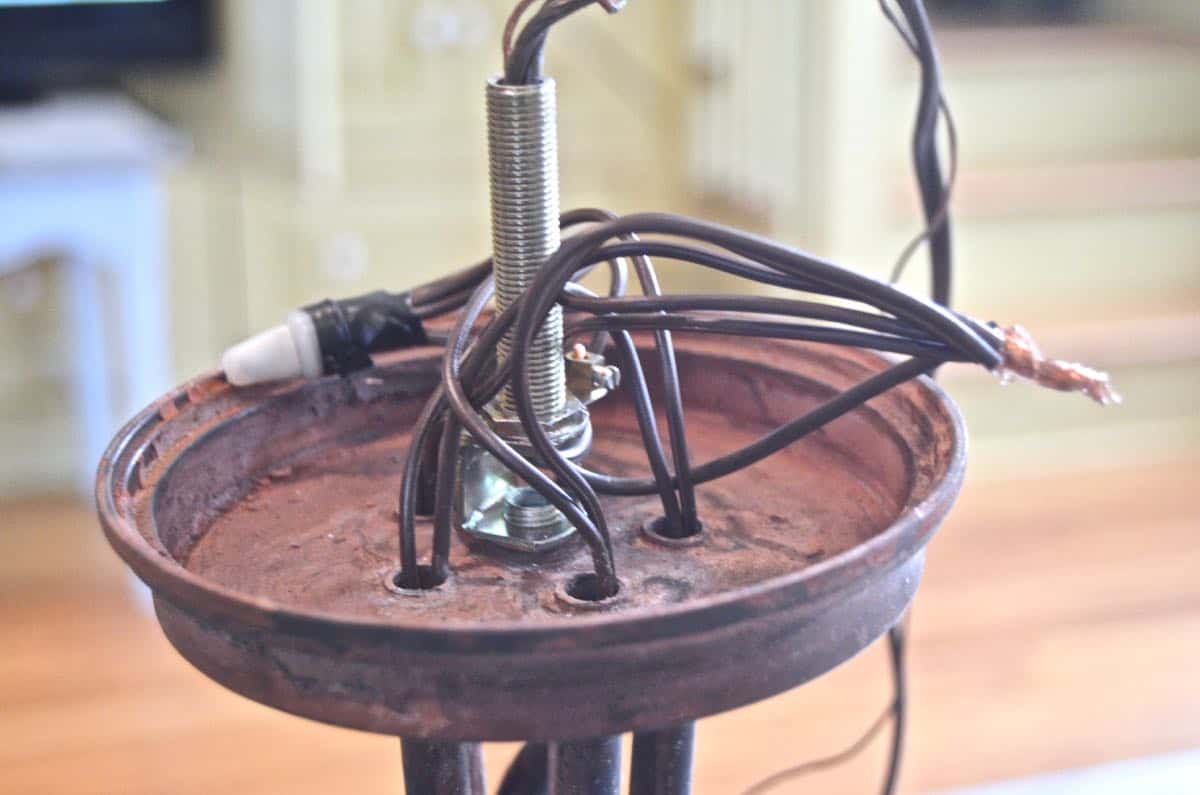
Step 3: Removing the old wiring
With the power turned off and safety ensured, it’s time to remove the old wiring from the chandelier. This step involves detaching the existing wires and sockets, making way for the new wiring.
Follow these steps to remove the old wiring:
- Using a screwdriver, carefully remove any screws or fixtures that are holding the chandelier in place. Be sure to provide support for the chandelier to prevent it from falling or dangling.
- Gently lower the chandelier from the ceiling, taking care not to strain the electrical wires or any delicate components.
- Identify the wire connections on the chandelier. You may find sockets, wires, and possibly a central junction box.
- Using wire cutters, carefully cut the wires near the sockets or junction box. Remember to leave enough length on the wires for easy access during the rewiring process.
- Once the wires are cut, remove any tape or wire nuts securing the connections. Take note of how the wires were connected and consider labeling them for easier reference later.
- Detach the old sockets from the chandelier by unscrewing them counterclockwise. Be careful not to damage any of the chandelier’s components.
- Inspect the chandelier’s frame and other parts for any signs of damage or wear. This is a good opportunity to clean and maintain the chandelier as well.
By following these steps, you can successfully remove the old wiring from your chandelier. Next, we will move on to preparing the new wiring for installation.
Step 4: Preparing the new wiring
Now that the old wiring has been removed, it’s time to prepare the new wiring for installation. This step involves organizing and making the necessary modifications to the new wires and sockets to ensure a proper fit and connection.
Follow these steps to prepare the new wiring:
- Start by examining the new wiring kit and familiarizing yourself with its components. This kit typically includes wires, sockets, and any other necessary pieces.
- If the new wires are longer than needed, measure and cut them to the appropriate length using wire cutters. Be sure to leave some extra length to work with during the installation process.
- Strip about half an inch of the outer insulation from each end of the new wires using wire strippers. This will expose the copper strands underneath.
- If the included sockets are not pre-wired, follow the manufacturer’s instructions to attach the wires to the sockets. Typically, you will need to strip a small section of insulation from the ends of the wires and secure them to the socket using screws or clips.
- Apply electrical tape to insulate the exposed copper strands and ensure a secure connection. Wrap the tape tightly around the exposed area, covering it completely.
- Repeat this process for each wire and socket, ensuring that they are properly prepared for installation.
By preparing the new wiring in this manner, you are getting it ready for the next step: connecting the wires and sockets to rewire the chandelier. Take your time to ensure that the connections are secure and the wiring is properly organized.
Now that the new wiring is prepared, we can move on to the next step: connecting the wires.
When rewiring a chandelier, make sure to turn off the power at the circuit breaker before starting any work. This will ensure your safety while working with electrical components.
Read more: How To Rewire A Floor Lamp
Step 5: Connecting the wires
With the new wiring prepared, it’s time to connect the wires to rewire the chandelier. This step involves carefully joining the wires of the chandelier to their corresponding counterparts in the new wiring kit.
Follow these steps to connect the wires:
- Refer to the chandelier’s wiring diagram or the notes you made during the removal process to identify the proper connections. This will ensure that you connect the wires correctly.
- Start by matching the colors of the wires from the chandelier to the corresponding wires in the new wiring kit. Typically, black wires are for hot/positive connections, white wires are for neutral connections, and green or bare wires are for ground connections.
- Twist together the exposed copper strands of each wire pair, making sure they are tightly and securely twisted. This will ensure a solid electrical connection.
- Place a wire nut over the twisted wires, and twist it clockwise until it is tightly secured. The wire nut provides insulation and holds the wires together.
- Repeat this process for each pair of wires, ensuring that the connections are secure and properly insulated.
Double-check your work to ensure that all the wires are properly connected and securely fastened. Make sure there are no loose or exposed wires, as this can be a safety hazard.
By successfully connecting the wires, you have completed an important step in the rewiring process. Next, we will move on to securing the connections.
Step 6: Securing the connections
After connecting the wires, it is crucial to properly secure the connections to ensure they remain stable and safe. This step involves using wire nuts and electrical tape to provide insulation and hold the wires together.
Follow these steps to secure the connections:
- Inspect each wire connection to ensure they are properly twisted together and inserted into the wire nuts.
- Place a wire nut over each connection, ensuring it covers the twisted wires completely.
- Twist the wire nut clockwise until it is snug and securely fastened. This will prevent the wires from coming loose.
- Once all the wire nuts are in place, use electrical tape to wrap around the wire nuts and the connected wires. This will provide additional insulation and help keep the connections in place.
- Wrap the electrical tape tightly and cover the entire connection, ensuring there are no exposed areas.
- Continue this process for each wire connection until all the connections are safely secured.
Take your time during this step to guarantee that each connection is properly secured and insulated. It is crucial to maintain the integrity of the connections to avoid any electrical issues or hazards in the future.
With the connections secured, we can now move on to the next step: testing the chandelier to ensure it is working properly.
Step 7: Testing the chandelier
After completing the rewiring process and securing the connections, it is important to test the chandelier to ensure that it is functioning properly. This step will allow you to verify that the new wiring has been successfully installed and that the chandelier is ready to be used again.
Here’s what you need to do to test the chandelier:
- Turn on the power to the chandelier by flipping the circuit breaker switch back to the “On” position.
- Verify that the chandelier is securely reassembled, with all the components properly attached.
- Switch on the light switch connected to the chandelier and observe if the lights turn on. Pay attention to any flickering or abnormalities in the light output.
- If the chandelier lights up and functions as expected, congratulations! Your rewiring job was successful. You can now move on to reassembling the chandelier. If there are any issues, turn off the power and check your connections to identify and rectify any problems.
It’s important to be cautious during the testing process and to immediately turn off the power if you notice any sparks, unusual noises, or if the lights do not turn on. These signs may indicate an electrical issue that needs to be addressed.
Once you have verified that the chandelier is in working order, you can proceed to the final step: reassembling the chandelier.
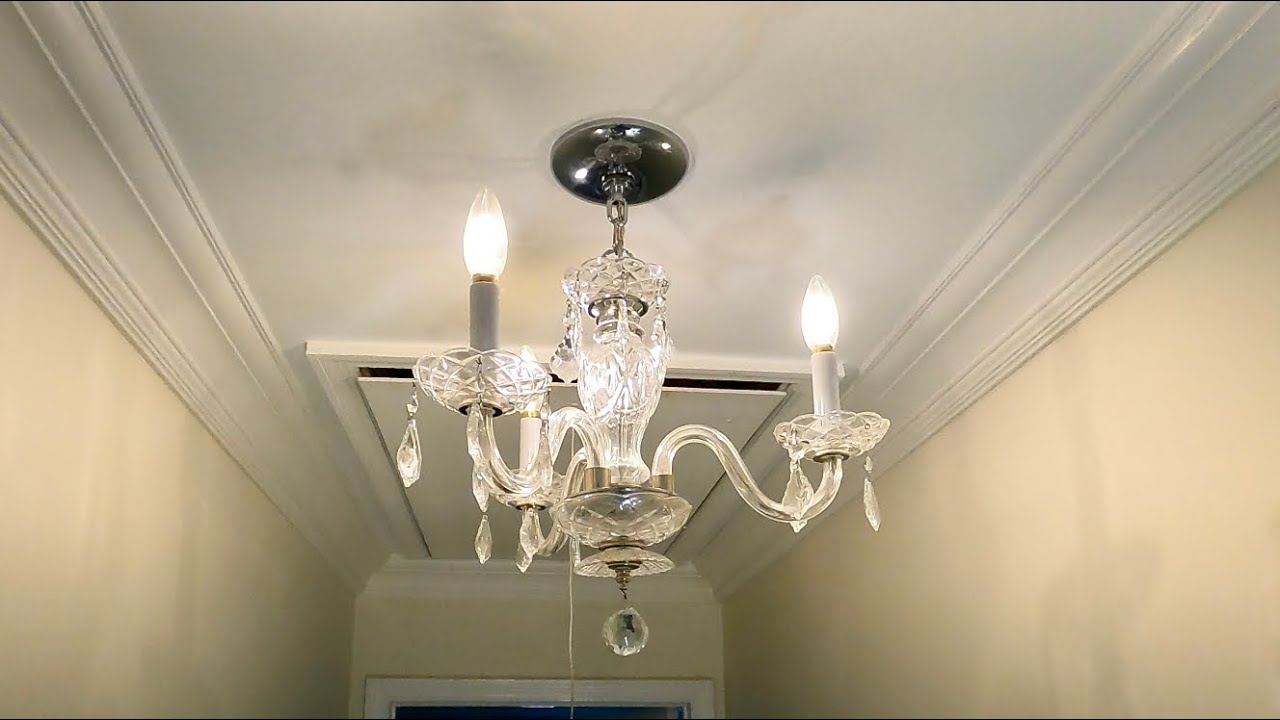
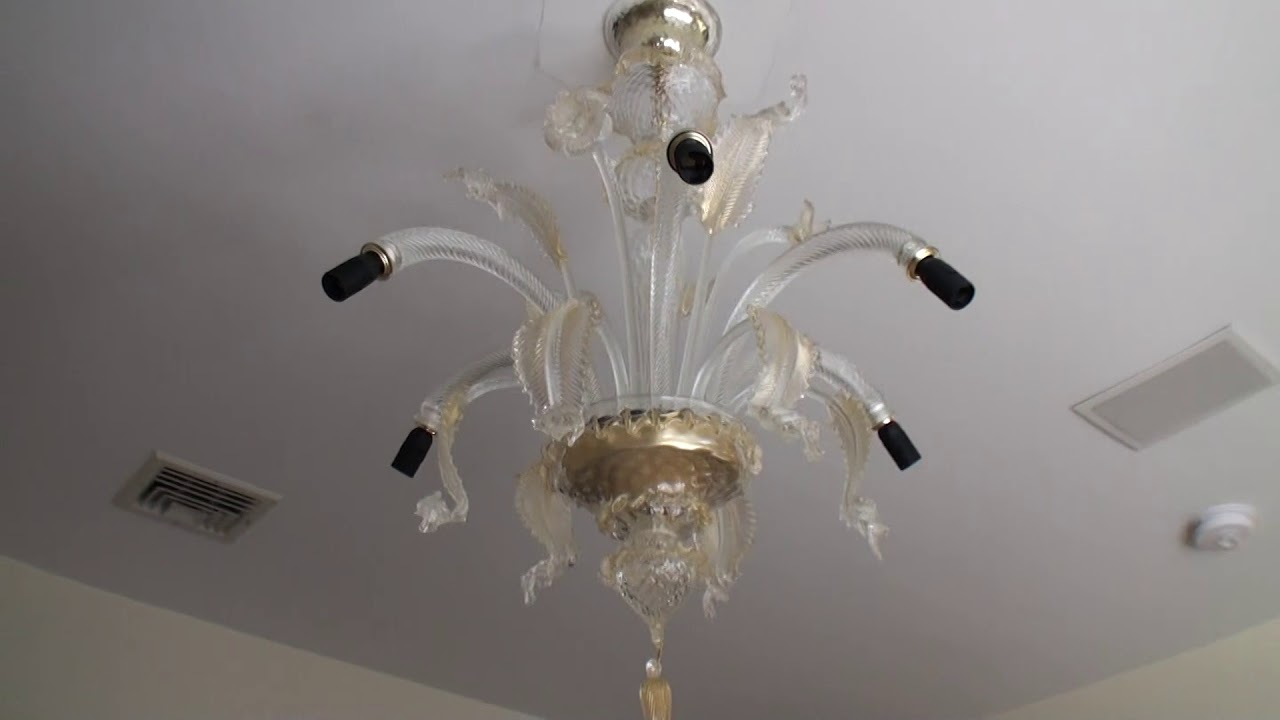
Step 8: Reassembling the chandelier
After successfully testing the chandelier and ensuring it is in proper working condition, it’s time to reassemble the various components and hang the chandelier back in its designated location. This final step will bring your rewiring project to a close, allowing you to fully enjoy the beauty and functionality of your restored chandelier.
Follow these steps to reassemble the chandelier:
- Retrieve the chandelier and carefully lift it back up to the ceiling using a step ladder or assistance if needed.
- Align the mounting bracket or plate of the chandelier with the electrical box in the ceiling. Secure the chandelier to the ceiling by tightening the screws or fasteners.
- Attach any additional components or decorative elements that were removed during the rewiring process, such as crystals or shades. Ensure that they are properly secured and evenly distributed.
- Double-check all the connections and ensure that they are still secure and free from any exposed wires. Make sure all wire nuts and electrical tape are in place.
- Turn on the power to the chandelier at the circuit breaker panel to activate the lights.
- Stand back and admire your newly rewired and reassembled chandelier!
Take a moment to ensure that the chandelier is securely attached to the ceiling and that it is level. Make any necessary adjustments to the positioning or tightening of the components to achieve the desired look.
With the chandelier reassembled and securely in place, you have successfully completed the rewiring process. By following these steps, you have not only restored the functionality of your chandelier but also ensured its safety and longevity.
Now, sit back, relax, and bask in the warm glow of your beautifully reinvigorated chandelier.
Read more: How To Rewire A Lamp
Conclusion
Rewiring a chandelier may seem like a daunting task, but with the right materials, knowledge, and precautions, it can be a rewarding and manageable project. By following the step-by-step process outlined in this article, you can successfully rewire your chandelier, restoring its functionality and beauty.
Throughout the process, it is essential to prioritize safety. Always remember to turn off the power before working on the chandelier and use a voltage tester to ensure it is properly disconnected. If you are unsure or uncomfortable with electrical work, it is advisable to seek the assistance of a professional electrician.
Gathering the necessary materials, removing the old wiring, preparing the new wiring, connecting and securing the wires, testing the chandelier, and reassembling the components are all integral steps in the rewiring process. Each step contributes to the overall success of the project, ensuring that the chandelier is safe, functional, and ready to enhance the ambiance of your space.
By taking the time and effort to rewire your chandelier, you not only save money on purchasing a new one but also have the opportunity to bring new life to a cherished piece. It allows you to maintain the design and aesthetic integrity of your chandelier while ensuring it meets modern electrical standards.
Remember, when working with electrical components, always prioritize safety and consult a professional if you have any concerns. Rewiring a chandelier requires careful attention to detail, but with patience and the right approach, it can be a rewarding DIY project.
Now that you are equipped with the knowledge and steps required to successfully rewire a chandelier, why not embark on this project and breathe new life into your lighting centerpiece? Enjoy the process, and may your rewired chandelier continue to illuminate your space with elegance and charm for years to come.
Frequently Asked Questions about How To Rewire A Chandelier
Was this page helpful?
At Storables.com, we guarantee accurate and reliable information. Our content, validated by Expert Board Contributors, is crafted following stringent Editorial Policies. We're committed to providing you with well-researched, expert-backed insights for all your informational needs.


0 thoughts on “How To Rewire A Chandelier”