Furniture
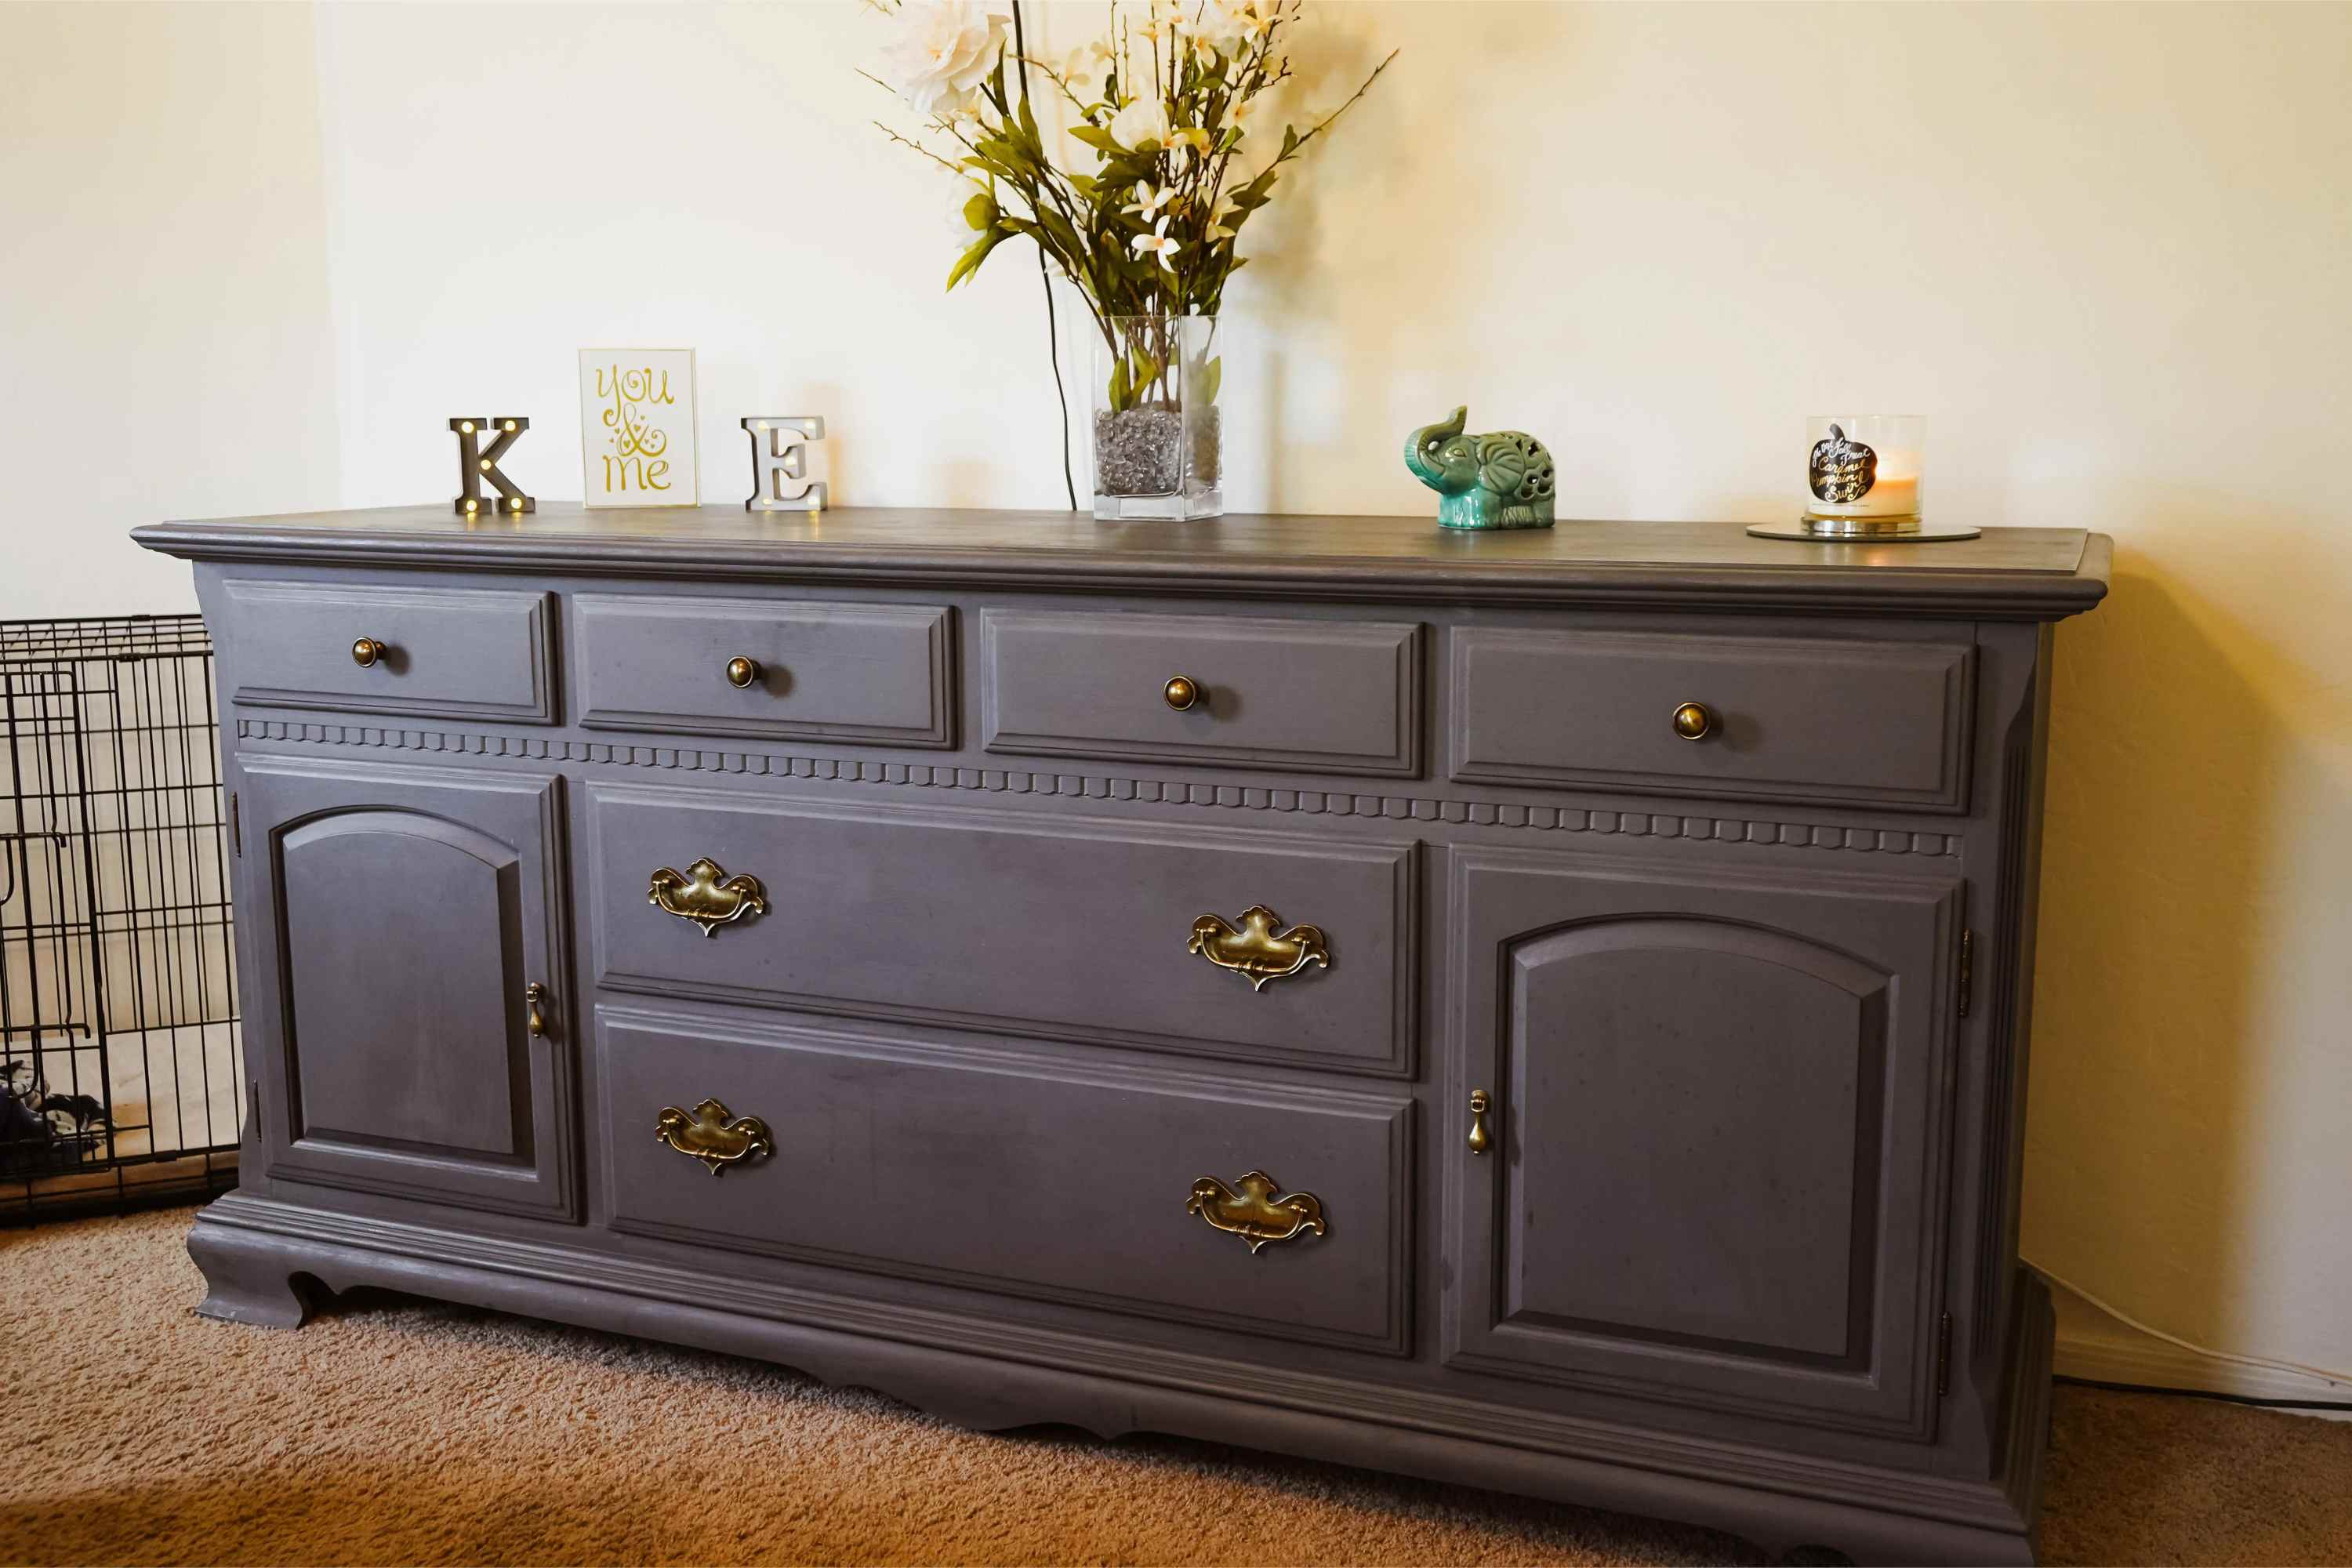
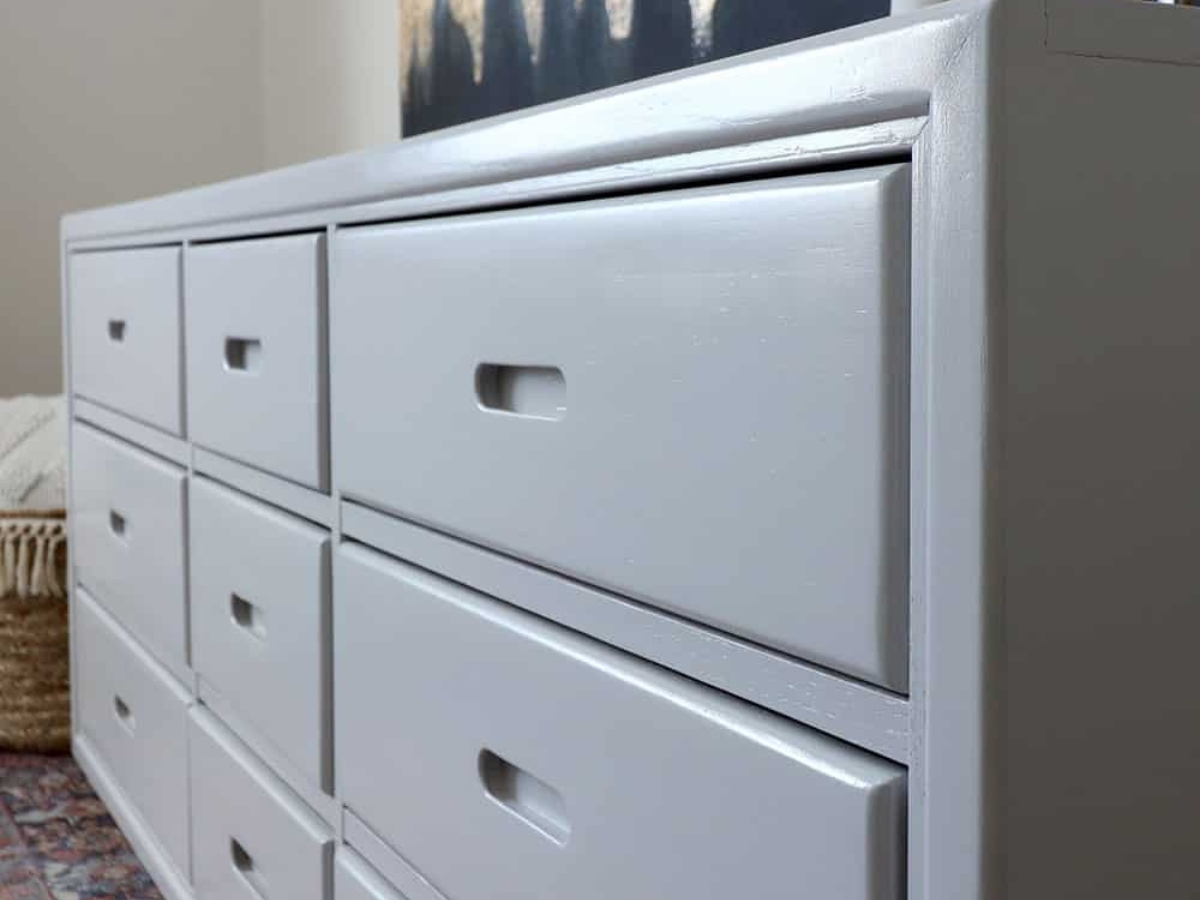
How To Paint Dresser Without Sanding
Modified: October 28, 2024
Learn how to transform your furniture with this easy guide on how to paint a dresser without sanding. Revamp your home decor with a fresh coat of paint without the hassle of sanding.
(Many of the links in this article redirect to a specific reviewed product. Your purchase of these products through affiliate links helps to generate commission for Storables.com, at no extra cost. Learn more)
Introduction
Welcome to our guide on how to paint a dresser without sanding. If you have an old or worn-out dresser that could use a fresh new look, painting is a great way to transform it into a stylish and updated piece of furniture. And the best part is, you can achieve this without the hassle of sanding!
Sanding furniture can be a time-consuming and messy process, requiring a lot of effort and elbow grease. However, by following the methods outlined in this guide, you will be able to achieve a professional-looking finish without the need for sanding.
The key to success lies in thorough preparation and using the right techniques and materials. By properly cleaning and priming the dresser, selecting the right paint and applying it correctly, you can achieve excellent results and give your dresser a new lease on life.
Whether you’re a DIY enthusiast looking for a weekend project or simply wanting to update your furniture on a budget, this guide will provide you with all the information you need to paint a dresser without sanding. So grab your paintbrushes, roll up your sleeves, and let’s get started!
Key Takeaways:
- Transform your old dresser into a stylish masterpiece without the hassle of sanding. Follow the steps for thorough preparation, proper painting techniques, and top coat application to achieve a professional finish.
- Choose your preferred painting method, whether it’s brushing, rolling, or spraying, to achieve the desired finish. Apply thin, even coats of paint, and consider adding a second coat for complete coverage and vibrancy.
Read more: How To Sand A Dresser
Gather Your Supplies
Before you begin painting your dresser, it’s essential to gather all the necessary supplies. Having everything on hand will ensure a smooth and efficient process. Here’s a list of supplies you’ll need:
- Drop Cloths or Newspaper: These protective coverings will help you shield your workspace from paint spills and drips.
- Cleaning Solution: Use a mild detergent or a mixture of water and vinegar to clean the dresser thoroughly. This will remove any dirt, grease, or grime from the surface.
- Lint-Free Cloths: You’ll need these cloths to wipe down the dresser after cleaning and to apply the paint and primer.
- Painter’s Tape: Use this tape to protect areas you don’t want to paint, such as handles or knobs.
- Primer: Choosing a high-quality primer suitable for the material of your dresser is crucial. Look for a primer specifically designed for use on furniture.
- Paint: Select a paint that is compatible with your primer and offers the finish you desire. Acrylic or latex paints work well for dressers and are available in various colors and finishes.
- Paintbrushes: Invest in good quality brushes of different sizes to ensure smooth and even application.
- Paint Roller (optional): If you prefer using a roller for larger surfaces, make sure to choose one suitable for your chosen paint.
- Paint Tray: This will come in handy if you decide to use a paint roller.
- Finishing Coat: Depending on the look you want to achieve, you may want to apply a finishing coat, such as a clear sealer or wax, to protect the paint and provide a smooth and durable finish.
- Brush Cleaner (if using oil-based paint): If you opt for oil-based paint, you’ll need a brush cleaner to remove the paint from your brushes.
Once you have gathered all the necessary supplies, you’re ready to move on to the next step: preparing the dresser for painting.
Prepare the Dresser
Once you have all your supplies ready, it’s time to prepare the dresser for painting. Follow these steps to ensure the best results:
- Remove Drawers and Hardware: Take out all the drawers from the dresser, and remove any knobs, handles, or other hardware. This will make it easier to clean and paint the dresser.
- Repair Any Damaged Areas: Inspect the dresser for any dents, scratches, or other damages. Fill in the imperfections with wood filler and sand them down until smooth. This will create a uniform surface for painting.
- Protect Surfaces: Use painter’s tape to cover any areas you want to keep paint-free, such as the edges of drawers or decorative trim.
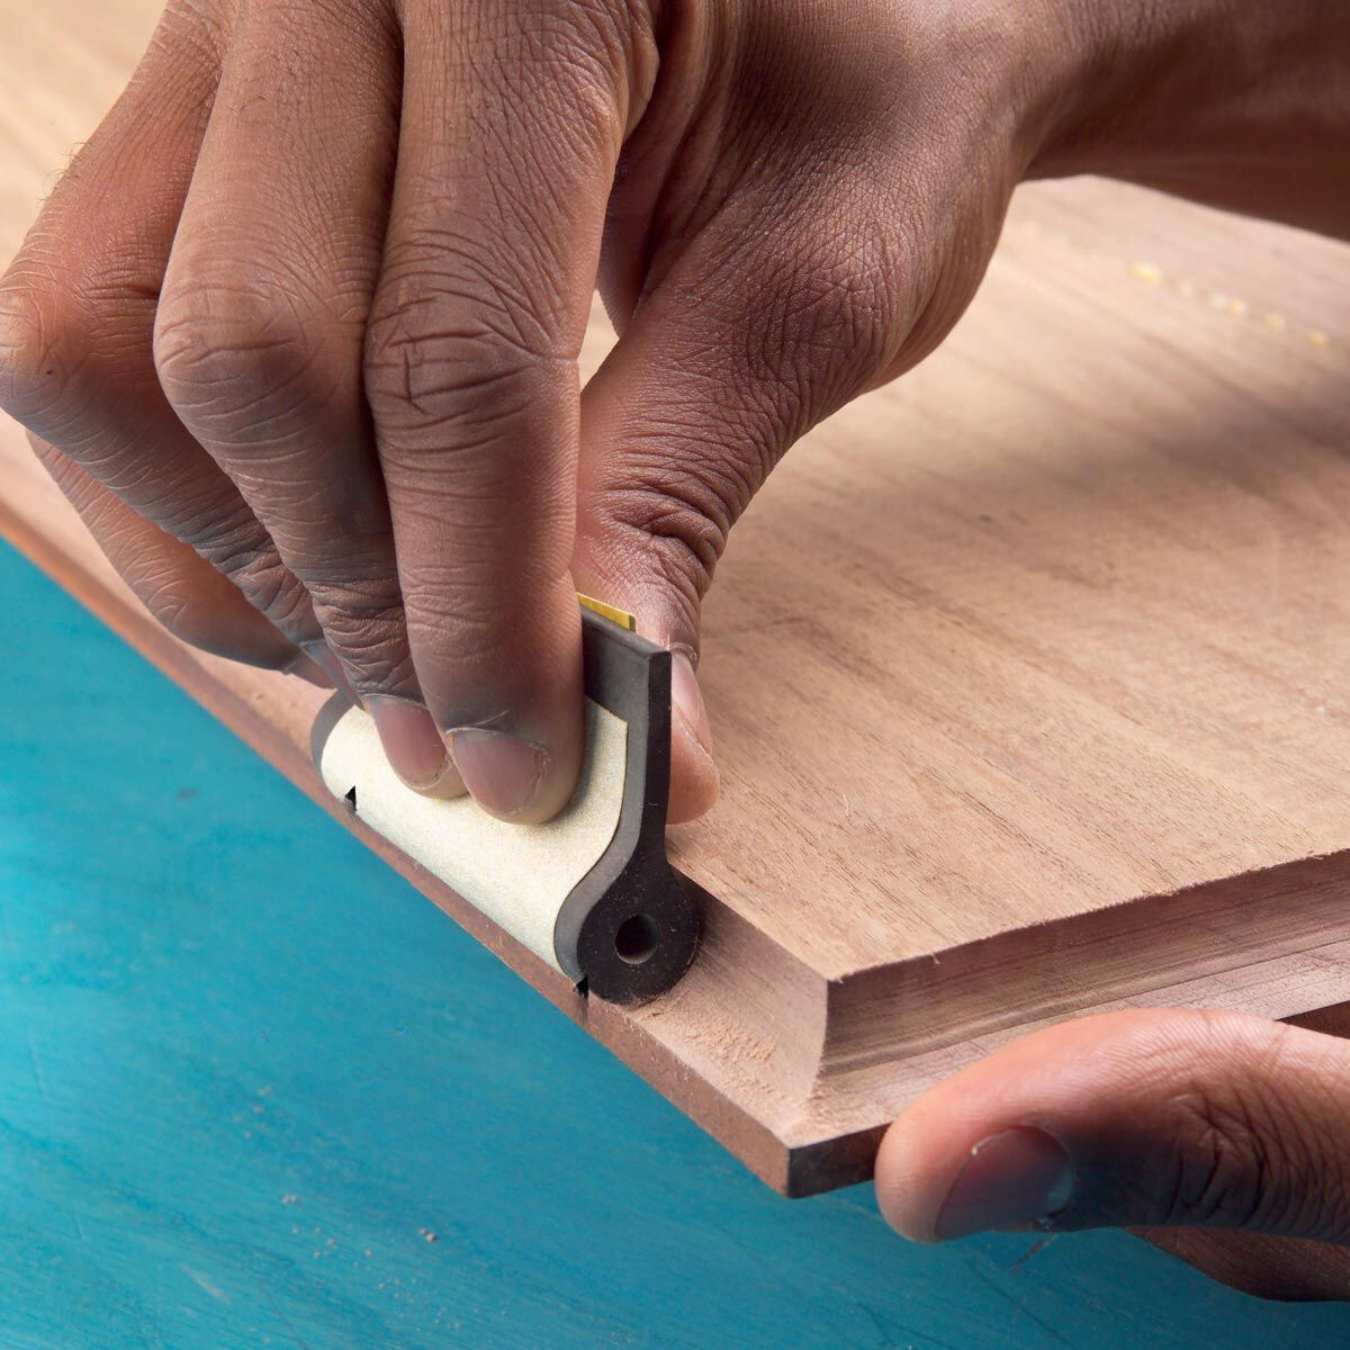
- Lightly Sand (Optional): While the main purpose of this guide is to avoid sanding, you may still choose to lightly sand the dresser to promote better paint adhesion. Use a fine-grit sandpaper to roughen up the surface slightly.
- Clean the Surface: Before priming, it’s crucial to clean the dresser thoroughly. Use a mild detergent or a mixture of water and vinegar to remove any dirt, grease, or grime. Wipe it down with a lint-free cloth to ensure a clean surface for painting.
By properly preparing the dresser, you will create a smooth and clean canvas for the paint to adhere to. This step is essential for achieving a professional and long-lasting finish.
Once the dresser is fully prepared, you’re ready to move on to the next step: priming the surface.
Clean the Surface
Before applying any primer or paint, it’s important to thoroughly clean the surface of the dresser. This will ensure that the paint adheres properly and provides a smooth and durable finish. Follow these steps to clean the surface effectively:
- Remove Dust and Debris: Use a soft brush or a cloth to remove any dust or loose debris from the dresser. Pay special attention to crevices and corners where dirt can accumulate.
- Prepare a Cleaning Solution: Mix a small amount of mild detergent with warm water or create a mixture of equal parts water and vinegar. This will act as your cleaning solution.
- Dampen a Lint-Free Cloth: Dip a lint-free cloth into the cleaning solution and wring out any excess liquid. The cloth should be damp, not soaking wet.
- Wipe the Surface: Gently wipe the entire surface of the dresser, including the sides, top, and drawers, with the damp cloth. Make sure to remove any fingerprints, stains, or residues.
- Rinse with Clean Water: Once you have wiped down the dresser, rinse the cloth with clean water and wring out any excess. Use the damp cloth to wipe away any soap residue or cleaning solution from the surface.
- Dry Thoroughly: Allow the dresser to air dry completely before proceeding to the next step. This will ensure that there is no moisture left on the surface, which can affect the adhesion of the primer and paint.
By properly cleaning the surface of the dresser, you will remove any dirt, grime, or oils that can hinder the paint’s ability to adhere. This will result in a smoother and more durable finish. Remember to always work in a well-ventilated area and follow any safety precautions mentioned on the cleaning products you are using.
With the surface clean and dry, you’re now ready to proceed to the next step: priming the dresser.
Prime the Dresser
Priming is a crucial step when painting a dresser, as it helps the paint adhere better to the surface and ensures a smooth and even finish. Follow these steps to prime the dresser effectively:
- Select the Right Primer: Choose a primer that is suitable for the material of your dresser and the type of paint you will be using. Look for a primer specifically designed for use on furniture.
- Prepare the Primer: If your primer requires mixing, follow the manufacturer’s instructions to prepare it. Ensure that the primer is well-mixed and free from clumps.
- Apply the Primer: Use a brush or a roller to apply a thin, even coat of primer to the entire surface of the dresser, including the sides, top, and drawers. Work in long, smooth strokes, following the grain of the wood.
- Allow the Primer to Dry: Check the manufacturer’s instructions for the recommended drying time for the primer. Typically, it will take a few hours for the primer to dry completely.
- Inspect the Surface: Once the primer is dry, inspect the surface for any uneven areas or spots that may need additional priming. If necessary, apply a second coat of primer to these areas and allow it to dry.
- Lightly Sand (Optional): If you notice any imperfections or roughness on the primed surface, you can lightly sand it with fine-grit sandpaper to smoothen it out. Remember to wipe away any dust before proceeding to the next step.
Priming the dresser will create a solid base for the paint and help achieve a professional-looking finish. It also helps to prevent the wood from absorbing too much paint, reducing the number of coats you’ll need. Remember to work in a well-ventilated area and follow any safety precautions mentioned on the primer label.
With the dresser properly primed, you’re now ready to move on to the next step: choosing your painting method.
Read more: How To Paint Wood Furniture Without Sanding
Choose Your Painting Method
When it comes to painting a dresser, you have a few different methods to choose from, depending on your preference and the desired final look. Here are three painting methods commonly used for dressers:
- Brush Painting: Brush painting is the traditional method of applying paint using a brush. It offers more control and precision, allowing you to reach corners and edges easily. Use high-quality brushes and apply the paint in long, even strokes, following the grain of the wood. This method is ideal if you want a more textured or hand-painted look.
- Roller Painting: Using a paint roller provides fast and efficient coverage, especially for larger surfaces of the dresser. Rollers are great for achieving a smooth and even finish. Pour the paint into a paint tray, load the roller evenly, and apply the paint in a “W” or “N” motion. This method is best suited for dressers with flat surfaces.
- Spray Painting: Spray painting allows for a smooth and flawless finish, similar to a professional factory finish. This method requires more preparation and caution, as you’ll need to protect the surrounding area and ensure proper ventilation. Spray paints come in various colors and finishes and are a great option if you want a sleek and modern look.
Consider the size and shape of your dresser, as well as the finish you want to achieve, when choosing your painting method. It’s also important to follow the manufacturer’s instructions for proper application and drying times.
Whichever method you choose, make sure to work in a well-ventilated area and follow any safety precautions mentioned on the paint labels. Now that you’ve decided on your painting method, let’s move on to applying the paint!
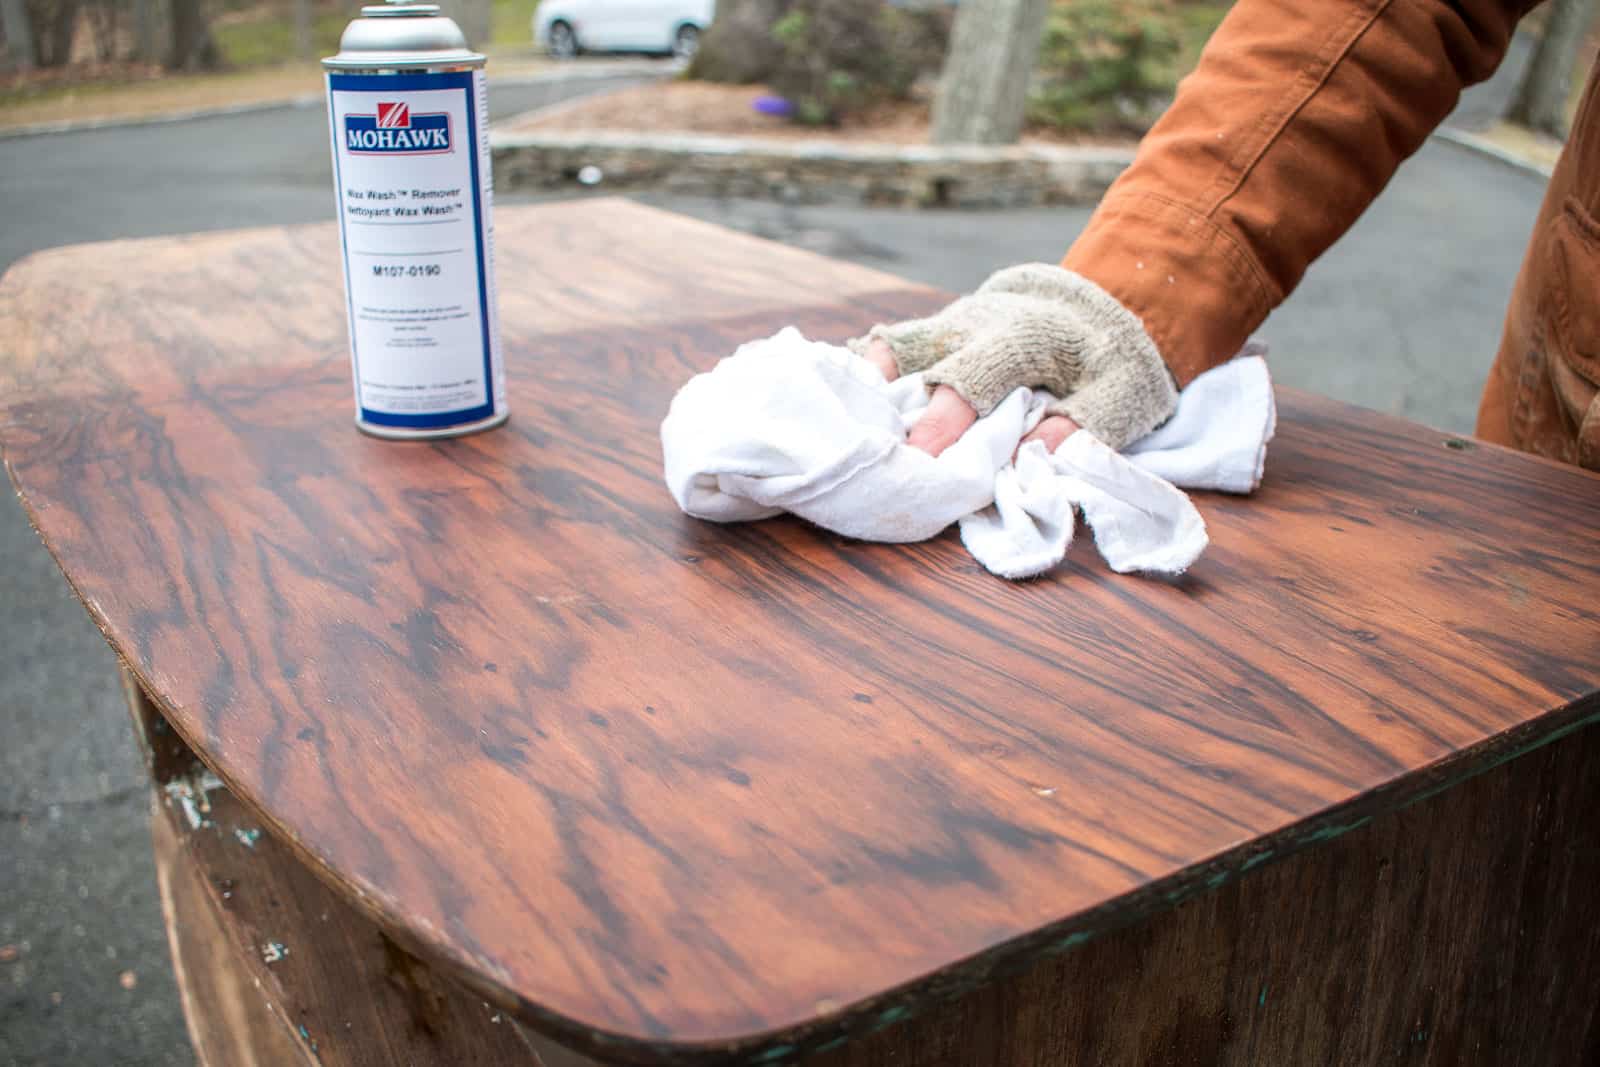
Use a liquid deglosser to remove the glossy finish on the dresser before painting. This will allow the new paint to adhere without the need for sanding.
Apply the Paint
Now comes the exciting part – applying the paint to your dresser! Whether you’re using a brush, roller, or spray, follow these steps for successful paint application:
- Stir the Paint: Before you begin, give the paint a good stir to ensure it is well-mixed and consistent in color.
- Start with the Edges: Begin by painting the edges of the dresser, such as the sides and front edges of the drawers. Use a brush or a small roller to reach these tight areas.
- Work in Sections: Divide the larger surfaces of the dresser into manageable sections. Apply the paint in smooth, even strokes, following the grain of the wood. Avoid applying too much paint at once to prevent drips or uneven coverage.
- Overlap Strokes: To achieve a seamless finish, slightly overlap each stroke with the previous one. This will help ensure that there are no visible brush marks or roller lines in the final result.
- Pay Attention to Details: Take your time when painting intricate details, such as decorative molding or carved patterns. Use a smaller brush or a foam brush to carefully paint these areas with precision.
- Allow the First Coat to Dry: Check the paint can for the recommended drying time. It will typically take a few hours for the first coat to dry completely. Avoid touching the painted surface during this time.
Depending on the color and coverage you desire, you may need to apply multiple coats of paint. Allow each coat to dry fully before applying the next. Remember to lightly sand between coats if needed, and wipe away any dust before proceeding.
Once you have achieved the desired coverage and finish, move on to the next step: letting the paint dry completely before applying a second coat, if necessary.
Let it Dry
After applying the paint to your dresser, it’s crucial to let it dry properly. Proper drying time ensures that the paint sets and adheres to the surface, resulting in a beautiful and long-lasting finish. Here are some important points to keep in mind:
- Follow Manufacturer’s Instructions: Check the paint can for the recommended drying time. It can vary depending on factors such as humidity and temperature. Generally, latex or acrylic paint takes about 1-2 hours to dry to the touch, but it may take 24 hours or more to fully cure.
- Provide Adequate Ventilation: Ensure that the area where you’re drying the dresser is well-ventilated. Open windows or use fans to promote airflow, which can help speed up the drying process.
- Avoid Touching the Surface: During the drying period, avoid touching or placing objects on the painted surface, as it may leave imprints or smudge the paint. Be patient and allow it to dry undisturbed.
- Check for Dryness: To test if the paint is dry, lightly touch an inconspicuous area with the back of your hand. If it feels cool or wet, it’s not fully dry yet. Wait until it feels dry to the touch before moving on to the next step.
- Allow Sufficient Curing Time: Although the paint may be dry to the touch, it’s essential to give it enough time to fully cure and harden. This can take several days to a few weeks, depending on the paint type and conditions. Avoid any heavy use or placing objects on the dresser until it is fully cured.
Proper drying and curing time will ensure that your painted dresser will have a durable and beautiful finish that can stand up to everyday use. Be sure to follow these guidelines and exercise patience during the drying process to achieve the best results.
Once the paint is fully dry and cured, you can move on to the next step: applying a second coat, if necessary.
Apply a Second Coat (If Necessary)
After the first coat of paint has dried, it’s important to assess whether a second coat is necessary. While some paints provide sufficient coverage with just one coat, others may require an additional layer for a more polished and even finish. Here are some points to consider when deciding whether to apply a second coat:
- Check for Even Coverage: Take a close look at the painted surface to see if there are any patches or uneven areas. If you notice any spots where the underlying color is still visible or where the paint appears thin, it’s a good indication that a second coat is needed for complete coverage.
- Assess the Desired Color Opacity: Evaluate the color intensity and opacity. If you’re satisfied with the current color and it matches your expectations, you may not need a second coat. However, if you prefer a deeper, richer color, applying another layer can help enhance the shade.
- Consider the Lighting: Take into account the lighting conditions in the room where the dresser will be placed. Different lighting can affect how the paint color appears. If you want to achieve a more consistent and vibrant color, a second coat can help achieve this.
- Evaluate the Overall Finish: Assess the finish of the first coat of paint. If you’re happy with the level of sheen and smoothness, a second coat may not be necessary. However, if you notice any unevenness, brush marks, or imperfections, applying another layer can help create a flawless finish.
If you determine that a second coat is needed, follow the same steps you did for the first coat. Apply the paint using your chosen method, whether it’s brushing, rolling, or spraying. Ensure that the first coat is fully dry before applying the second coat, and be sure to follow the recommended drying times provided by the paint manufacturer.
By applying a second coat, if necessary, you’ll achieve a more complete and professional-looking finish on your painted dresser. Once the second coat is applied and fully dry, you can move on to the final step: applying a top coat for added protection and durability.
Apply a Top Coat
Applying a top coat to your painted dresser is an optional but highly recommended step. A top coat adds an extra layer of protection to the paint, enhancing its durability and longevity. It also gives the dresser a smooth and polished finish. Here’s how to apply a top coat:
- Select the Right Top Coat: Choose a top coat that is compatible with the type of paint you used on your dresser. There are various options available, including polyurethane, varnish, or wax. Consider the level of sheen you desire and the level of protection needed.
- Prepare the Top Coat: If your top coat requires mixing, follow the manufacturer’s instructions to prepare it. Ensure that it is well-mixed and free from any clumps or impurities.
- Apply the Top Coat: Using a brush or a clean cloth, apply the top coat in thin and even layers to the entire surface of the dresser, including the sides, top, and drawers. Work in long, smooth strokes, following the grain of the wood. Make sure to cover all areas for uniform protection.
- Allow the Top Coat to Dry: Check the drying time specified by the top coat manufacturer. It typically takes a few hours for the top coat to dry to the touch, but it may take longer for it to fully cure and provide optimal protection.
- Apply Additional Coats (if desired): Depending on the level of protection and sheen you desire, you may choose to apply additional coats of the top coat. Allow each layer to dry completely before applying the next.
Applying a top coat not only adds a layer of protection but also enhances the appearance of the painted surface. The top coat helps seal the paint, making it more resistant to scratches, spills, and everyday wear and tear. It also adds a subtle sheen or matte finish, depending on the type of top coat you choose. Take your time and apply the top coat carefully to ensure a smooth and flawless finish.
Once the top coat is dry and cured, you can proceed to the final step: reassembling the dresser and enjoying your beautifully painted piece of furniture.
Reassemble the Dresser
After the paint and top coat have dried and cured, it’s time to reassemble your dresser and bring it back to its full glory. Here are the steps to follow when reassembling the dresser:
- Check the Drawers: Ensure that each drawer is clean and free from dust or debris. Give them a quick wipe if necessary.
- Attach Hardware: Reattach the knobs, handles, or other hardware to the drawers. Make sure they are securely fastened, using screws or any accompanying hardware.
- Insert Drawers: Carefully slide each drawer back into its respective slot. Make sure they fit smoothly and align correctly with the dresser frame.
- Test the Operation: Open and close each drawer to ensure they glide smoothly and function properly. Make any necessary adjustments if needed.
- Inspect the Surface: Give the painted surface of the dresser a final inspection. Look for any touch-ups or imperfections that may require attention. Use a small brush or a Q-tip to fix any minor issues.
With the dresser fully reassembled, take a step back and admire your work. Your newly painted dresser is now ready to be showcased in your home and add a fresh touch to your decor.
Remember to follow any additional care instructions provided by the paint and top coat manufacturers to maintain the longevity and beauty of your painted dresser. Avoid placing hot or wet objects directly on the surface, and use coasters or table mats to protect it from any potential damage.
By following these steps, you have successfully transformed your dresser into a personalized and stylish piece of furniture, without the need for sanding. Enjoy the satisfaction of your DIY project and the renewed life your dresser brings to your space.
Thank you for reading our guide on how to paint a dresser without sanding. We hope you found it helpful and inspiring. Happy painting!
Conclusion
Painting a dresser without sanding can be a rewarding and cost-effective way to breathe new life into an old or worn-out piece of furniture. By following the steps outlined in this guide, you can achieve a professional and stylish finish without the hassle of sanding. Here’s a quick recap of the key points discussed:
– Gather all the necessary supplies and protect your workspace.
– Prepare the dresser by removing drawers, repairing any damages, and protecting surfaces.
– Clean the surface thoroughly to remove dirt and grease.
– Prime the dresser using a high-quality primer suitable for your specific needs.
– Choose your preferred painting method, such as brushing, rolling, or spraying.
– Apply the paint in thin, even coats, allowing each coat to dry fully.
– Consider adding a second coat for complete coverage and a more vibrant color, if needed.
– Apply a top coat to enhance durability and provide added protection.
– Reassemble the dresser, ensuring all drawers and hardware are secure and functioning properly.
– Step back, admire your work, and enjoy your newly painted dresser for years to come!
Remember to take your time during each step, follow the manufacturer’s instructions for the paint and products you are using, and work in a well-ventilated area. Practice proper safety precautions and protect your surrounding surfaces to prevent any unwanted paint spills or stains.
With a little patience and creativity, you can transform your dresser into a unique and eye-catching piece that perfectly suits your style and home decor. So, don’t be afraid to unleash your creativity and embark on this painting adventure.
We hope this guide has given you the confidence and inspiration to tackle your dresser painting project without the need for sanding. Enjoy the process and the satisfaction of transforming an old piece of furniture into something beautiful and personalized. Happy painting!
Frequently Asked Questions about How To Paint Dresser Without Sanding
Was this page helpful?
At Storables.com, we guarantee accurate and reliable information. Our content, validated by Expert Board Contributors, is crafted following stringent Editorial Policies. We're committed to providing you with well-researched, expert-backed insights for all your informational needs.


0 thoughts on “How To Paint Dresser Without Sanding”