
Furniture
How To Paint A Dresser Black
Modified: January 9, 2024
Learn how to transform your furniture by painting a dresser black. Discover step-by-step instructions and helpful tips for a stylish makeover.
(Many of the links in this article redirect to a specific reviewed product. Your purchase of these products through affiliate links helps to generate commission for Storables.com, at no extra cost. Learn more)
Introduction
Welcome to the world of furniture makeovers! If you’ve been contemplating giving your old dresser a fresh, modern look, painting it black might be just the transformation it needs. Black is a versatile and timeless color that can add a touch of elegance and sophistication to any space. Whether you’re looking to create a sleek and contemporary atmosphere or add a bold statement piece to your room, painting a dresser black is a great way to achieve the desired effect.
In this article, we’ll guide you through the step-by-step process of painting a dresser black. From gathering the necessary supplies to sealing the paint, you’ll learn everything you need to know to successfully complete this project. So let’s roll up our sleeves, put on our creative hats, and get ready to give your old dresser a brand new look!
Before we dive into the painting process, it’s important to note that painting furniture is not only about aesthetics but also about preservation. By painting your dresser, you can protect it from wear and tear, as well as revive its appearance. Plus, painting your furniture allows you to customize it to match your personal style and the overall theme of your space.
Now, let’s get into the details of how to transform your dresser into a stunning black beauty! But first, let’s gather all the necessary supplies to ensure a smooth and successful painting process.
Key Takeaways:
- Transforming an old dresser with black paint adds elegance and sophistication to any space, while also protecting and reviving the furniture’s appearance.
- Proper preparation, including cleaning, sanding, priming, and sealing, is essential for achieving a durable and professional-looking black finish on a dresser.
Read more: How To Paint A Dresser With Chalk Paint
Step 1: Gather the necessary supplies
Before you begin painting your dresser black, it’s important to gather all the necessary supplies to ensure a seamless and efficient process. Here’s a list of the items you’ll need:
- Painter’s tape: This will be used to protect any areas of the dresser that you don’t want to be painted, such as drawer pulls or decorative elements.
- Sandpaper: A medium-grit sandpaper will be essential for prepping the surface of the dresser. It will help remove any existing finishes or rough patches, ensuring the paint adheres properly.
- Primer: Applying a coat of primer is crucial for achieving a smooth and long-lasting finish. Look for a primer specifically designed for use on furniture.
- Black paint: Choose a high-quality paint suitable for the material of your dresser. Acrylic or latex paint in a matte or satin finish is recommended for achieving the classic black look.
- Paintbrushes: Have a few different sizes and types of brushes on hand for different areas and details of the dresser. A larger brush will be useful for larger surfaces, while smaller brushes will be handy for finer details.
- Drop cloth or plastic sheet: This will protect your workspace from any paint spills or drips.
- Clean cloth or sponge: Use this to clean the surface of the dresser before painting, removing any dirt, dust, or grime.
- Optional: Second coat of paint: Depending on the coverage and desired finish, you may want to apply a second coat of black paint. Make sure you have enough paint on hand for this step.
- Sealer: While not essential, applying a clear sealer can not only provide extra protection but also enhance the durability and longevity of the paint finish. Choose a sealer suitable for the type of paint you’ve used.
Now that you have all the necessary supplies, you’re ready to move on to the next step: preparing your dresser for painting. Let’s get started!
Step 2: Prepare the dresser
Before you can start painting, it’s crucial to properly prepare the surface of your dresser. Follow these steps to ensure the best possible results:
- Remove any hardware: Take off all the drawer pulls, handles, or knobs from your dresser. This will make it easier to paint and ensure that you don’t accidentally paint over them. Keep them in a safe place so you don’t lose them.
- Clean the surface: Use a clean cloth or sponge to wipe down the entire surface of the dresser. Remove any dust, dirt, or grime that could hinder the paint from adhering properly.
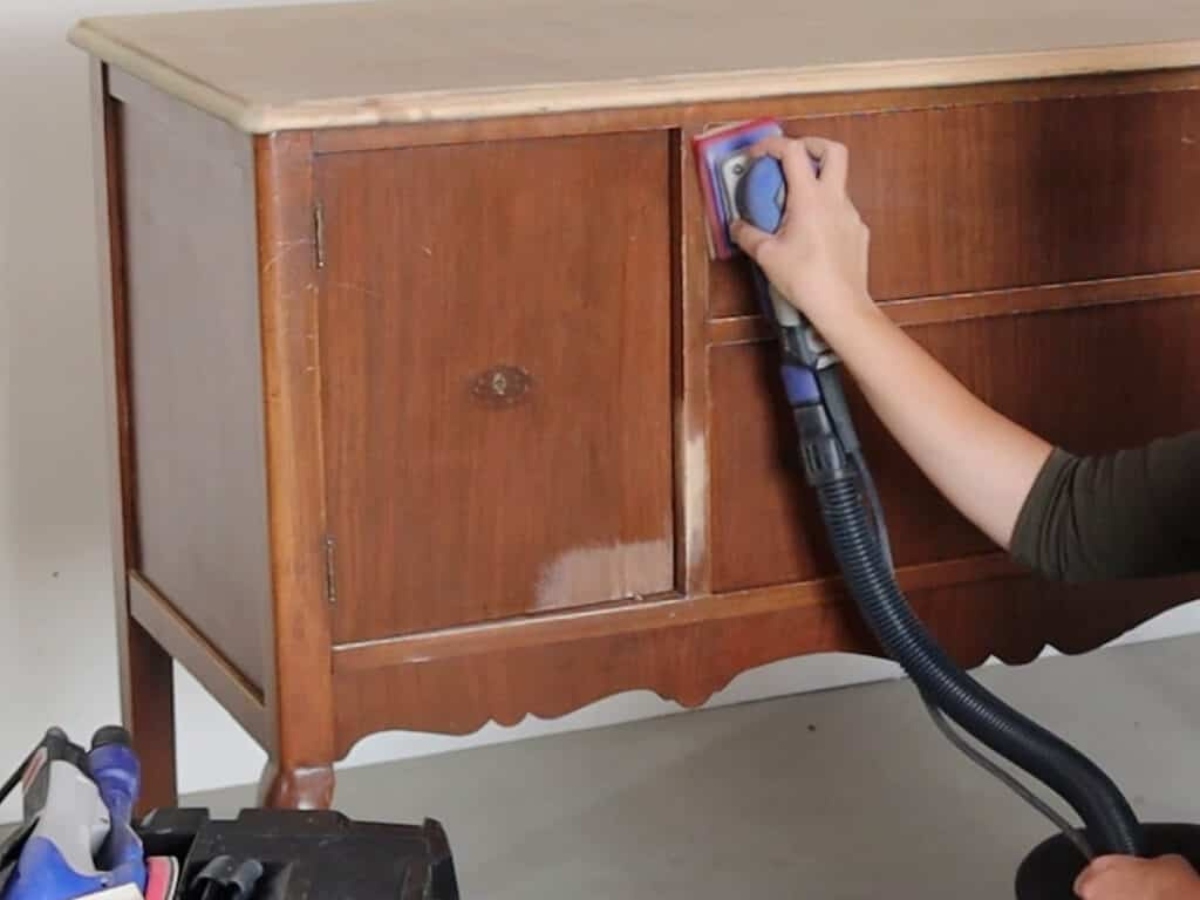
- Sand the dresser: Take a medium-grit sandpaper and lightly sand the entire surface of the dresser. This step is important in removing any existing finishes, rough patches, or imperfections on the wood. Sanding will create a smooth surface for the primer and paint to adhere to.
- Wipe off the dust: After sanding, use a clean cloth or tack cloth to wipe away any dust created from sanding. This will ensure a clean and debris-free surface for the next steps.
- Protect surrounding areas: Use painter’s tape to protect any areas of the dresser that you don’t want to be painted, such as the insides of drawers or decorative elements. This will give your finished piece a polished and professional look.
Once you’ve completed these steps, your dresser will be prepped and ready for the next stages of the painting process. By properly preparing the surface, you’ll ensure better paint adhesion and a more durable finish. Now, let’s move on to the next step: applying the primer!
Step 3: Prime the dresser
Applying a primer is a crucial step in the process of painting your dresser black. Primer serves several purposes, including creating a uniform base, improving paint adhesion, and blocking out any stains or discolorations on the surface. Here’s how to prime your dresser:
- Choose the right primer: Select a primer that is suitable for the material of your dresser. If your dresser is made of wood, opt for a wood primer. If it’s made of laminate or a glossy surface, choose a primer specifically designed for such surfaces.
- Stir the primer: Open the can of primer and give it a good stir with a stirring stick. This will ensure that any settled pigments are evenly distributed throughout the product.
- Apply the primer: Use a paintbrush or a foam roller to apply an even coat of primer over the entire surface of the dresser. Make sure to apply the primer in the direction of the wood grain for a smooth finish. If using a foam roller, go over the surface with a brush afterwards to smooth out any bubbles or brush strokes.
- Follow the manufacturer’s instructions: Different primers may have specific instructions regarding drying time and the number of coats needed. Always refer to the manufacturer’s guidelines for the best results.
- Allow the primer to dry: Once you’ve applied the primer, allow it to dry completely before moving on to the next step. This typically takes a few hours, but it’s best to check the drying time specified on the primer’s label.
- Sand the surface (optional): If you notice any imperfections or rough patches on the primed surface, lightly sand it with a fine-grit sandpaper. This will create a smoother and more even surface for the paint.
Priming your dresser is an important step that helps the black paint adhere better, provides a consistent base, and increases the durability of the finish. It also ensures that any previous stains or discolorations are concealed. Once the primer is dry and the surface is smooth, you’re ready to move on to the next step: applying the black paint!
Step 4: Apply the black paint
Now comes the exciting part – applying the black paint to your dresser. This step will transform your dresser into a bold and stylish piece that will breathe new life into your space. Follow these steps to achieve a smooth and even application:
- Choose the right paint: Select a high-quality black paint in the finish of your choice, such as matte or satin. Consider the type of dresser material and the desired look you want to achieve when choosing the paint. Acrylic or latex paint is recommended for its durability and easy application.
- Stir the paint: Open the can of paint and give it a thorough stir with a stirring stick. This will ensure that any settled pigments are mixed well and that the color is evenly distributed throughout the paint.
- Start from the top: Begin by painting the top surface of the dresser, working your way down. Use long, smooth brushstrokes to achieve an even and consistent finish. Remember to paint in the direction of the wood grain for a professional look.
- Paint the sides and edges: Once you’ve painted the top surface, move on to the sides and edges of the dresser. Take your time to ensure even coverage and smooth brushstrokes.
- Work in sections: If your dresser has drawers, paint one section at a time, starting from the edges and working towards the center. This will help you maintain a consistent coat of paint and avoid any noticeable brush lines.
- Use thin coats: It’s better to apply multiple thin coats of paint rather than one thick coat. This will prevent drips and ensure better adhesion. Allow each coat to dry completely before applying the next one.
- Watch for drips and brushstrokes: While painting, keep an eye out for any drips or visible brushstrokes. Smooth them out immediately with a clean brush or sponge for a flawless finish.
Remember to work in a well-ventilated area and take breaks as needed to avoid fatigue. Painting a dresser can be a time-consuming process, but the end result will be well worth it. Once you’ve applied the black paint and achieved the desired coverage, it’s time to move on to the next step: letting the dresser dry.
When painting a dresser black, be sure to properly sand and prime the surface before applying the black paint. This will ensure a smooth and even finish.
Read more: How To Paint A Veneer Dresser
Step 5: Let the dresser dry
After you’ve applied the black paint to your dresser, it’s important to allow it to dry thoroughly. This step is crucial for achieving a smooth and professional finish, as well as preventing any damage or smudging. Follow these tips to ensure proper drying:
- Check the drying time: Refer to the paint manufacturer’s instructions to determine the recommended drying time. This can vary depending on factors such as humidity, temperature, and the type of paint used.
- Create a well-ventilated area: Ensure that the room has good air circulation to help speed up the drying process. Open windows or use fans to promote airflow.
- Avoid touching the surface: After painting, refrain from touching the surface of the dresser until it’s completely dry. Touching it too soon can leave fingerprints or smudges on the finish.
- Patience is key: Although it can be tempting to move on to the next step, it’s essential to be patient and allow the paint to dry fully. Rushing this step can compromise the final result.
- Keep pets and children away: To prevent any accidents or damage to the freshly painted surface, it’s best to keep pets and children away from the drying dresser until it’s completely dry.
- Consider the ambient conditions: If the room is particularly humid or cold, it may take longer for the paint to dry. In such cases, using a dehumidifier or heater can help speed up the drying process.
Remember that the drying time can vary depending on the number of coats applied and the environmental conditions. It’s always better to be safe than sorry, so allow ample time for the dresser to completely dry before moving on to the next steps. Once the paint is dry to the touch and feels solid, you can proceed with the optional step of applying a second coat of paint, if desired.
Step 6: Apply a second coat (optional)
Applying a second coat of black paint to your dresser is an optional but often recommended step. It can help enhance the color richness, improve coverage, and provide a more polished and professional finish. If you decide to proceed with a second coat, follow these steps:
- Assess the coverage: Take a look at the first coat of paint on your dresser. If the coverage is not fully opaque or if you can still see any streaks or imperfections, applying a second coat will help achieve a more even and solid finish.
- Ensure proper drying: Before applying the second coat, make sure the first coat is fully dry. Follow the drying guidelines provided by the paint manufacturer to ensure sufficient drying time.
- Repeat the painting process: Start by stirring the black paint thoroughly. Then, apply the second coat using the same techniques and brushstrokes as the first coat. Ensure even coverage and smooth brushwork.
- Pay attention to troubled areas: During the second coat, focus on areas that may have received less coverage or where brush lines might be more noticeable. Take your time to blend in the paint and achieve a seamless finish.
- Allow for proper drying time: Once the second coat is applied, allow ample time for drying. Keep in mind that adding an additional coat may extend the overall drying time of the paint.
The decision to apply a second coat will depend on your personal preference and the desired level of coverage. If you’re satisfied with the appearance and coverage of the first coat, you can skip this step and proceed to sealing the paint in the next step. However, if you’re striving for a solid black finish, a second coat can make a significant difference in the overall look of your dresser.
After applying the second coat, take a moment to admire your hard work! The black paint should now be applied evenly, providing the desired coverage and depth. Next, it’s time to move on to the important step of sealing the paint to protect the finish and enhance its longevity.
Step 7: Seal the paint
Sealing the paint on your black dresser is an essential step to protect the finish and ensure its longevity. The sealer acts as a protective barrier, guarding against scratches, stains, and fading. Follow these steps to effectively seal the paint:
- Choose the right sealer: Select a sealant that is compatible with the type of paint you used. Look for a clear polyurethane or polycrylic sealant, specifically designed for furniture. You can choose between matte, satin, or glossy finishes, depending on the level of shine you desire.
- Prepare the sealer: Open the sealer and stir it gently with a stirring stick to ensure an even consistency. Avoid shaking it vigorously to prevent the formation of bubbles.
- Apply the sealer: Use a clean brush or foam brush to apply a thin and even coat of sealer to the entire surface of the dresser. Work in long, smooth strokes and follow the wood grain. Take care to avoid drips or pooling of the sealer.
- Allow drying time: Refer to the instructions on the sealer’s packaging to determine the recommended drying time between coats. Typically, it takes a few hours for the sealer to dry, but this can vary based on the product and environmental conditions.
- Sand and reapply (optional): If you notice any imperfections, bubbles, or brush marks after the first coat of sealer dries, lightly sand the surface with fine-grit sandpaper. Wipe away any dust, then apply a second coat of sealer using the same method.
- Repeat the process if necessary: Depending on your desired level of protection, you may choose to apply additional coats of sealer. Follow the recommended drying time between each coat and continue to sand lightly as needed.
- Allow for curing time: Once you’ve finished applying the desired number of sealer coats, allow the dresser to cure fully. This typically takes a few days, but it’s important to check the product’s instructions for specific curing time recommendations.
Sealing the paint on your black dresser not only enhances its appearance but also protects it from everyday wear and tear. The sealer creates a durable, waterproof barrier that guards against moisture and potential damage. Once the sealer is dry and cured, you can proceed to the final step: reassembling your beautifully painted black dresser!
Step 8: Reassemble the dresser
Now that you’ve completed all the necessary painting and sealing steps, it’s time to put your dresser back together and admire the final result. Follow these steps to reassemble your transformed black dresser:
- Ensure the paint is fully dry: Before reassembling the dresser, double-check that the paint and sealer are completely dry and cured. This will prevent any smudging or damage to the finish during the reassembly process.
- Reattach the hardware: Take the drawer pulls, handles, or knobs that you removed earlier and align them with their respective holes on the dresser. Secure them in place using screws or other appropriate fasteners. Take your time to ensure they are straight and properly tightened.
- Inspect and clean: Before placing the drawers back into the dresser, inspect them for any dust or debris that may have accumulated during the painting process. Wipe them clean with a damp cloth or sponge, ensuring they are free from any dirt or residue.
- Slide the drawers back in: Slowly and carefully slide each drawer back into its designated spot in the dresser. Pay attention to their alignment and ensure they glide smoothly.
- Test the functionality: Open and close each drawer to ensure that they operate correctly and without any issues. Make any necessary adjustments or fixes to ensure smooth functionality.
- Arrange and style: With your dresser reassembled, take the time to arrange and style it to your preference. Consider adding decorative items, such as plants, picture frames, or a decorative tray, to enhance the overall look of the piece.
- Enjoy your newly transformed dresser: Stand back and admire your beautiful black dresser. Appreciate the effort and care you put into transforming it into a stunning piece that adds style and functionality to your space.
Congratulations! You have successfully painted and reassembled your dresser into a sleek black masterpiece. With proper maintenance and care, your newly transformed piece of furniture will continue to bring joy and style to your home for years to come.
Remember, painting furniture is a creative and rewarding process. Don’t be afraid to experiment with different colors and finishes to create unique and personalized pieces that reflect your style and taste. Happy painting!
Read more: How To Paint A Wooden Dresser
Conclusion
Transforming your old dresser into a sleek black masterpiece is a rewarding project that can breathe new life into your furniture and elevate the style of your space. By following the step-by-step process outlined in this article, you have learned how to successfully paint a dresser black and achieve a professional-looking finish.
From gathering the necessary supplies to reassembling the dresser, each step is crucial in ensuring a smooth and seamless transformation. Preparing the dresser by cleaning and sanding the surface, applying a primer, and then layering on the black paint are important steps to achieve a durable and stylish result.
While each step requires attention to detail and patience, the end result is well worth the effort. The black paint adds a touch of elegance, sophistication, and versatility to your dresser, allowing it to blend seamlessly with any room decor.
Remember to choose high-quality paint and primer suitable for your dresser material, use smooth brushstrokes, and allow sufficient drying and curing time. Applying multiple coats of paint and sealing the finish with a protective sealer will ensure a long-lasting and beautiful transformation.
By reassembling the dresser with care and attention to detail, you can enjoy a functional and stunning piece of furniture that enhances the overall aesthetic of your living space.
Don’t be afraid to unleash your creativity by experimenting with different colors, finishes, or decorative elements. Painting furniture allows you to give your pieces a personal touch and make them unique to your style and preferences.
Now, armed with your newfound knowledge and skills, you can confidently embark on painting other furniture pieces or even take on more ambitious DIY projects.
So, grab your paintbrushes, gather your supplies, and let your creativity flow as you transform your old dresser into a stunning black centerpiece that will make a statement in your home.
Frequently Asked Questions about How To Paint A Dresser Black
Was this page helpful?
At Storables.com, we guarantee accurate and reliable information. Our content, validated by Expert Board Contributors, is crafted following stringent Editorial Policies. We're committed to providing you with well-researched, expert-backed insights for all your informational needs.


0 thoughts on “How To Paint A Dresser Black”