Home>Renovation & DIY>Home Renovation Guides>How To Redo Backsplash In The Kitchen
Home Renovation Guides
How To Redo Backsplash In The Kitchen
Modified: February 18, 2024
Learn how to redo your kitchen backsplash with our comprehensive home renovation guide. Get expert tips and ideas for a stunning kitchen transformation. Start your project today!
(Many of the links in this article redirect to a specific reviewed product. Your purchase of these products through affiliate links helps to generate commission for Storables.com, at no extra cost. Learn more)
Introduction
Redoing the backsplash in your kitchen can breathe new life into the heart of your home. Whether you're looking to update the style, enhance the functionality, or simply inject a fresh burst of personality into your kitchen space, revamping the backsplash is a fantastic way to achieve these goals. A well-designed and expertly installed backsplash not only serves as a protective barrier against splatters and spills but also acts as a focal point, adding visual interest and charm to the kitchen.
As you embark on this home renovation journey, it's important to approach the project with careful planning and attention to detail. By following a systematic approach and utilizing the right materials and tools, you can transform your kitchen's backsplash into a stunning feature that complements your overall design aesthetic. Whether you're a seasoned DIY enthusiast or a first-time home renovator, this comprehensive guide will walk you through the step-by-step process of redoing your kitchen backsplash, empowering you to achieve professional-quality results with confidence.
From gathering the necessary materials and tools to preparing the surface for the new installation, choosing the perfect backsplash material, measuring and cutting with precision, and executing the installation and finishing touches, each step plays a crucial role in the overall success of your project. By understanding and executing each phase effectively, you'll be well on your way to creating a visually captivating and functional backsplash that elevates the ambiance of your kitchen.
So, roll up your sleeves, unleash your creativity, and get ready to embark on a rewarding home renovation journey. With the right guidance and a can-do attitude, you'll soon be marveling at the stunning transformation of your kitchen space, all thanks to the power of a beautifully redone backsplash.
Key Takeaways:
- Revamping your kitchen backsplash can breathe new life into your home. Careful planning, precise measurements, and meticulous installation are key to achieving a stunning and durable result.
- Choosing the right backsplash material is crucial. Consider your design vision, practical needs, and existing kitchen elements to create a cohesive and visually appealing space.
Read more: How To Redo Fireplace
Step 1: Gather Materials and Tools
Before diving into the exciting process of redoing your kitchen backsplash, it's essential to gather all the necessary materials and tools. This step sets the foundation for a smooth and efficient renovation experience, ensuring that you have everything you need at your fingertips. Here's a comprehensive list to guide you through this crucial preparation phase:
Materials:
- Backsplash Material: Whether you opt for classic ceramic tiles, sleek glass mosaic, rustic stone, or trendy peel-and-stick options, choose a material that aligns with your design vision and practical requirements.
- Grout: Select a high-quality grout in a color that complements your chosen backsplash material. Consider both sanded and unsanded options based on the tile type and spacing.
- Adhesive: Invest in a reliable adhesive or mortar that is suitable for the chosen backsplash material and the surface it will be applied to.
- Sealer: Depending on the material, you may need a sealant to protect the backsplash from moisture and stains.
- Backer Board: If your existing surface is not suitable for direct installation, acquire a backer board to create a stable and even base for the new backsplash.
Tools:
- Measuring Tape: Accurate measurements are crucial for a precise and professional-looking installation.
- Tile Cutter or Wet Saw: Depending on the material, you'll need a tile cutter or wet saw to achieve clean and accurate cuts.
- Notched Trowel: This tool is essential for spreading adhesive evenly on the surface.
- Grout Float: To apply and pack the grout into the spaces between tiles.
- Level: Ensures that your installation is straight and aligned.
- Sponge and Bucket: For cleaning excess grout and adhesive during and after installation.
- Safety Gear: Don't forget gloves, safety goggles, and a dust mask to protect yourself during cutting and installation.
By ensuring that you have all the required materials and tools on hand, you'll be well-prepared to tackle the subsequent steps with confidence and efficiency. This thoughtful preparation sets the stage for a successful and satisfying kitchen backsplash renovation, allowing you to focus on the creative and transformative aspects of the project without unnecessary interruptions or delays.
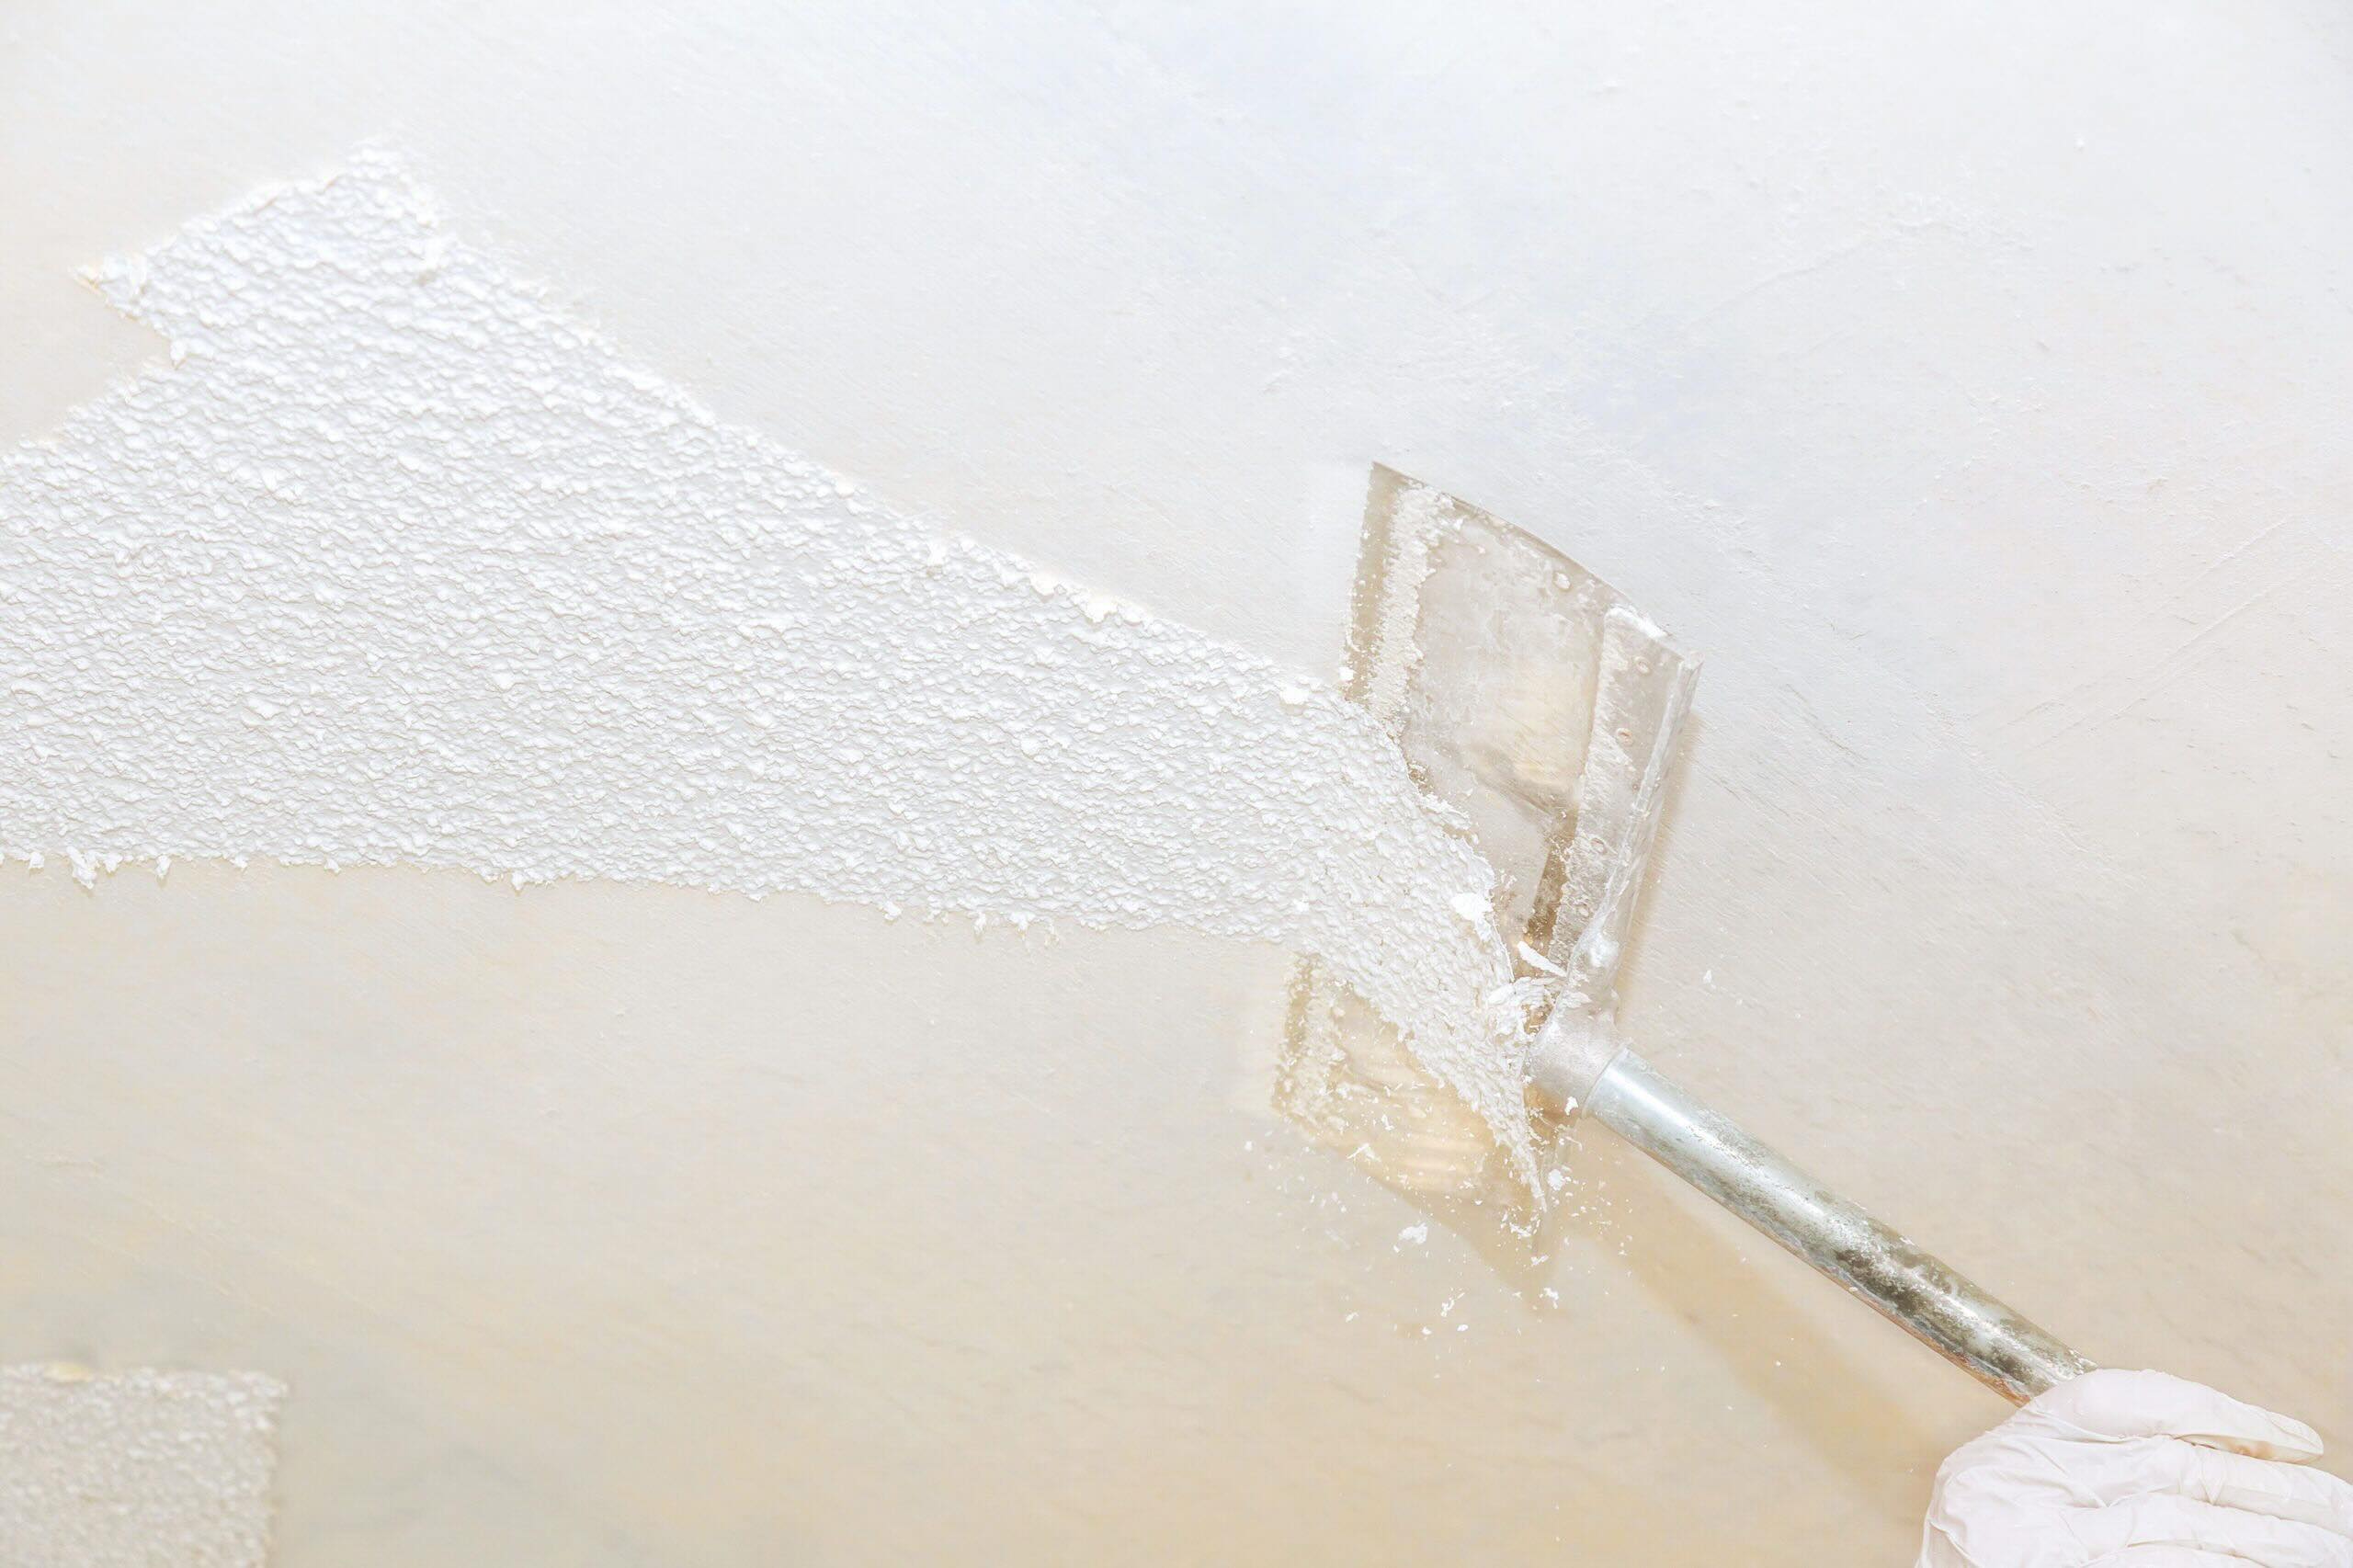
Step 2: Prepare the Surface
Before diving into the exciting process of installing your new kitchen backsplash, it's crucial to ensure that the surface is properly prepared to facilitate a seamless and long-lasting installation. This preparatory phase lays the groundwork for a professional-looking result and is essential for the overall success of your renovation project.
Assess the Existing Surface
Begin by thoroughly examining the current surface where the new backsplash will be installed. Whether it's drywall, existing tile, or another material, it's important to check for any signs of damage, such as cracks, uneven areas, or moisture issues. Addressing these issues at the outset will prevent future complications and ensure a stable foundation for the new backsplash.
Clean and Prime
Next, thoroughly clean the surface to remove any grease, dirt, or residue that could hinder the adhesion of the new backsplash material. Use a gentle cleanser and ensure that the surface is completely dry before proceeding. Once clean, apply a high-quality primer to promote strong adhesion and create a uniform surface for the new installation. The primer also helps to prevent moisture from compromising the integrity of the backsplash over time.
Level and Smooth
If the existing surface is uneven or rough, consider using a leveling compound or skim coat to create a smooth and level base for the new backsplash. This step is particularly important when transitioning from a different backsplash material or when dealing with imperfections that could affect the final appearance of the new installation.
Protect Surrounding Areas
Before applying any primer or leveling compound, take the necessary precautions to protect the surrounding areas of the kitchen. Cover countertops, appliances, and cabinets with durable protective materials to prevent any accidental damage during the surface preparation phase.
Read more: How To Redo A Front Porch
Final Inspection
Once the surface preparation is complete, take a final moment to inspect the area for any overlooked issues. Ensure that the surface is clean, dry, level, and primed, ready to receive the new backsplash material. This meticulous attention to detail during the preparation phase sets the stage for a smooth and successful installation, allowing you to proceed with confidence and precision.
By dedicating time and effort to properly prepare the surface, you are laying the groundwork for a visually stunning and durable kitchen backsplash that will enhance the overall aesthetic and functionality of your space. This crucial step ensures that your new backsplash will not only look beautiful upon installation but will also stand the test of time, bringing joy and practicality to your kitchen for years to come.
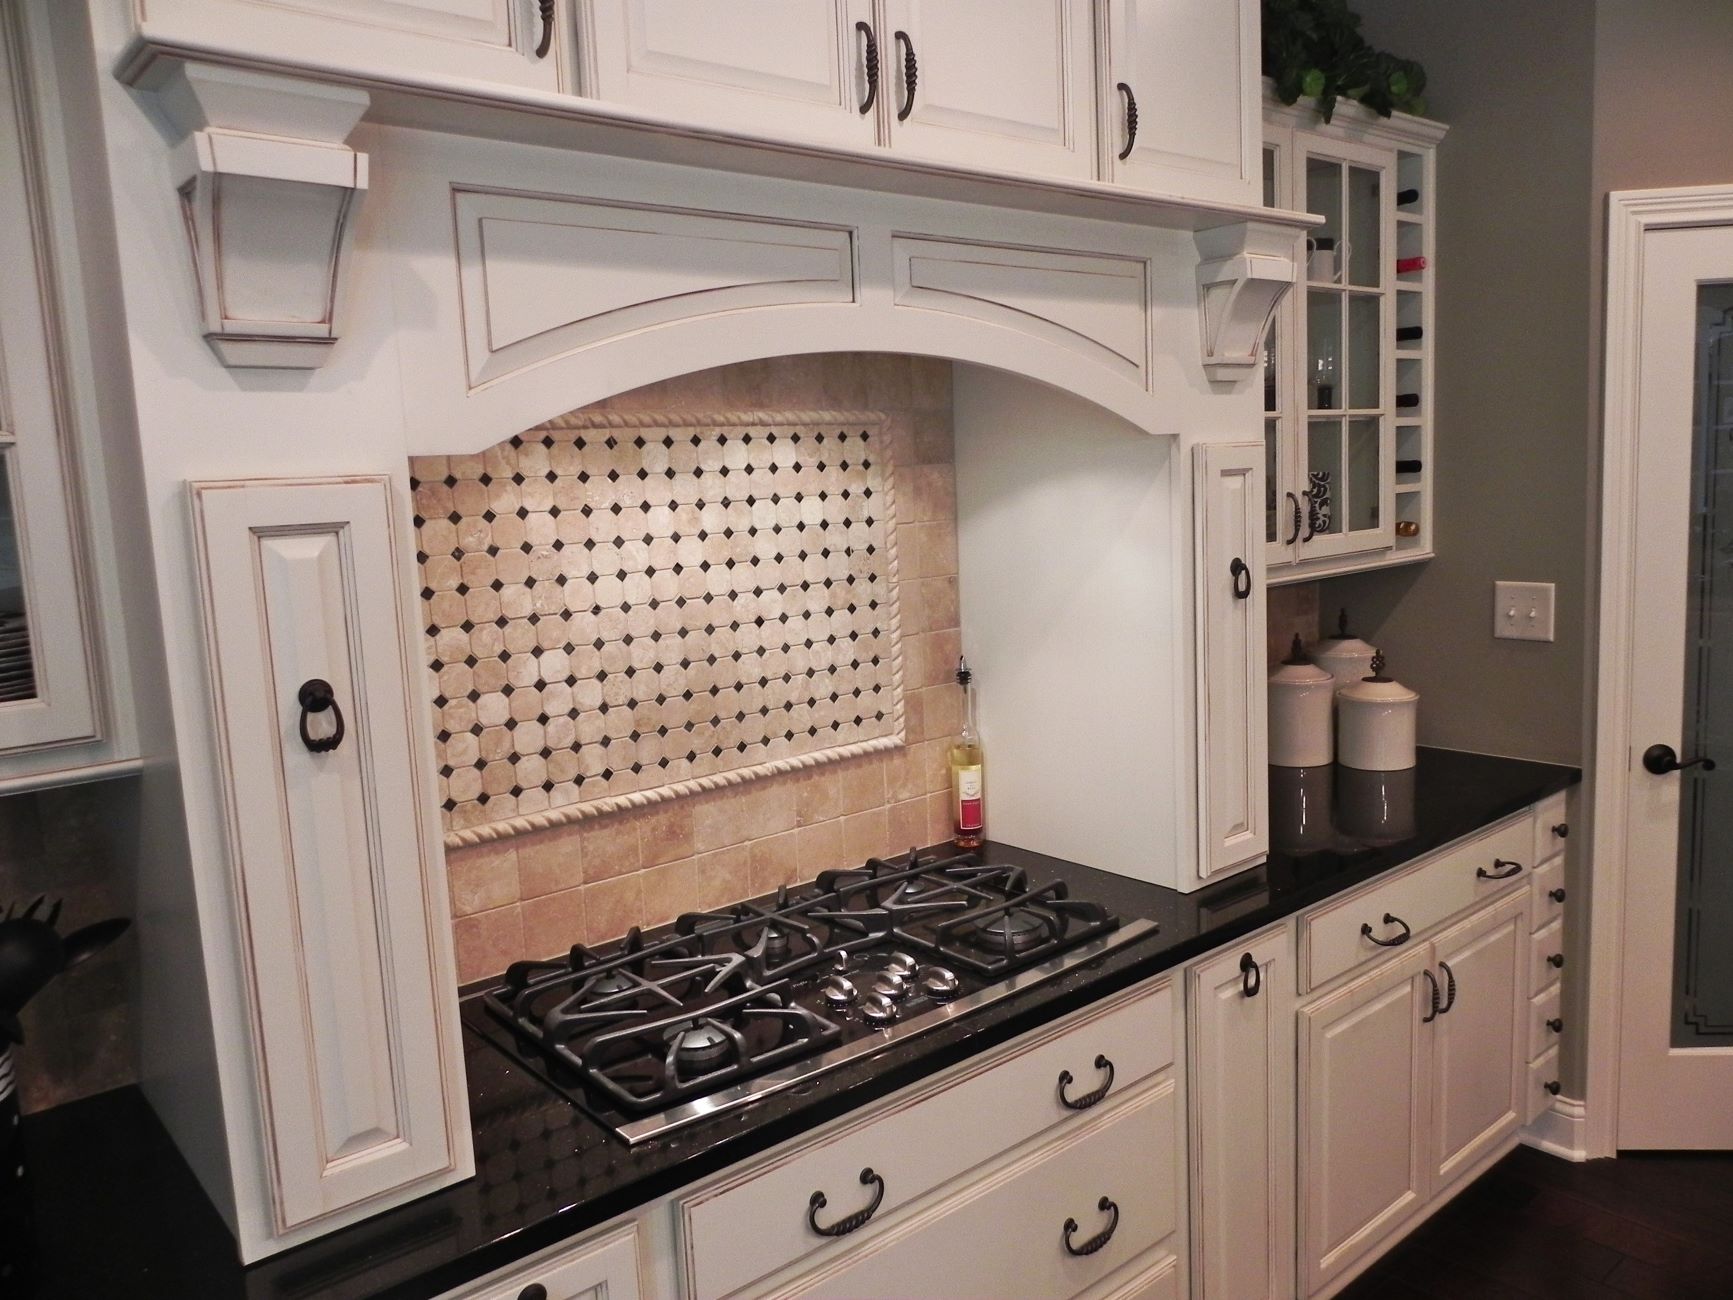
Step 3: Choose the New Backsplash Material
Selecting the right material for your new kitchen backsplash is a pivotal decision that significantly influences the overall aesthetic, functionality, and maintenance of the space. With a myriad of options available, ranging from timeless classics to innovative modern solutions, the process of choosing the perfect backsplash material presents an exciting opportunity to infuse your personal style and practical preferences into the heart of your kitchen.
Consider Your Design Vision
Begin by envisioning the desired look and feel of your kitchen. Are you aiming for a sleek and contemporary ambiance, a rustic and cozy atmosphere, or a vibrant and eclectic space? The chosen backsplash material should harmonize with your design vision, complementing the existing elements in the kitchen while adding a distinctive touch that reflects your personality.
Practicality and Maintenance
Evaluate the practical aspects of each material. Consider factors such as ease of cleaning, resistance to stains and moisture, and durability in high-traffic areas. For example, ceramic and porcelain tiles offer easy maintenance and excellent durability, making them ideal for busy kitchens, while natural stone requires periodic sealing but exudes timeless elegance.
Read more: How To Redo A Driveway
Cohesion with Countertops and Cabinets
Take into account the existing countertops and cabinetry in your kitchen. The new backsplash material should create a cohesive and harmonious visual flow with these elements. Whether it's a striking contrast to make a bold statement or a seamless blend for a cohesive look, the material choice should enhance the overall aesthetic of the kitchen.
Explore Diverse Options
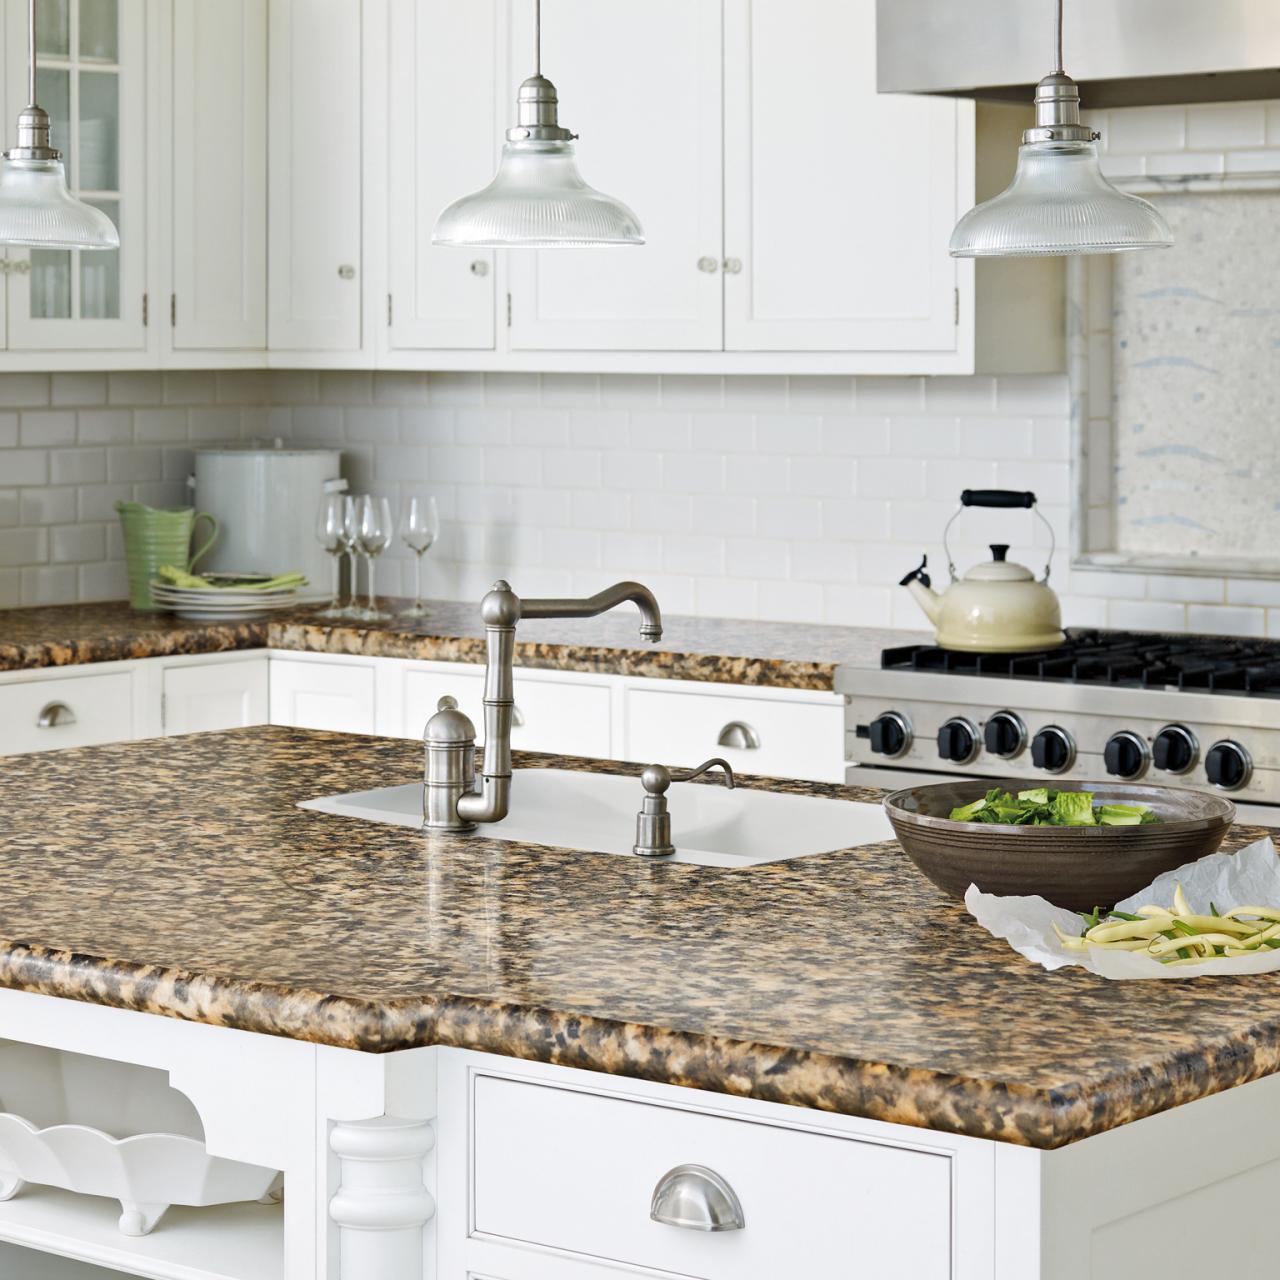
Explore the diverse range of backsplash materials available, including ceramic and porcelain tiles, glass mosaic, subway tiles, stainless steel, natural stone such as marble or travertine, and even innovative peel-and-stick options. Each material brings its own unique characteristics, allowing you to tailor the backsplash to your specific preferences and functional requirements.
Sample and Visualize
If possible, obtain samples of your shortlisted materials to see how they interact with the lighting and colors in your kitchen. Visualizing the potential impact of each material in your specific space can provide invaluable insights and guide you towards the perfect choice for your new backsplash.
By carefully considering your design vision, practical needs, existing kitchen elements, and the diverse array of materials available, you can confidently select a backsplash material that not only elevates the visual appeal of your kitchen but also enhances its functionality and charm. This thoughtful decision-making process sets the stage for a transformative and personalized kitchen backsplash that embodies your unique style and enhances the heart of your home.
Step 4: Measure and Cut the New Backsplash Material
Accurate measurements and precise cuts are essential for a successful installation of your new kitchen backsplash. This step requires meticulous attention to detail and a methodical approach to ensure that the chosen material fits seamlessly into your space, creating a polished and professional look. Here's a detailed guide to navigating the process of measuring and cutting the new backsplash material with confidence and precision.
Read more: How To Redo Basement
Gather the Necessary Tools
Before commencing the measuring and cutting process, gather the essential tools required for this phase. A reliable measuring tape, a pencil or marker for marking the material, and the appropriate cutting tool based on the chosen backsplash material are indispensable. For instance, ceramic and porcelain tiles may necessitate a tile cutter, while glass mosaic or natural stone might require a wet saw for clean and accurate cuts.
Take Accurate Measurements
Begin by measuring the area where the new backsplash will be installed. Measure the height and width of the space, accounting for any outlets, switches, or other obstacles that require precise cuts in the material. It's crucial to measure multiple times to ensure accuracy, as even the slightest discrepancy can lead to misaligned or ill-fitting pieces during installation.
Mark and Plan the Cuts
Once the measurements are confirmed, transfer them onto the new backsplash material. Use a pencil or marker to mark the cutting lines, clearly indicating where the material needs to be trimmed to fit the designated space. If the design involves intricate patterns or specific tile layouts, plan the cuts accordingly to maintain a cohesive and visually appealing arrangement.
Execute the Cuts with Care
With the material marked for cutting, proceed to execute the cuts with care and precision. If using a tile cutter or wet saw, follow the manufacturer's instructions and take your time to ensure clean and accurate cuts. For irregular shapes or intricate designs, consider using appropriate tools such as nippers or a hole saw to achieve the desired shapes and dimensions.
Read more: How To Redo A Bathroom Floor
Test the Fit and Make Adjustments
After cutting the material, carefully test the fit in the designated space. Ensure that the pieces align seamlessly and make any necessary adjustments to fine-tune the cuts for a perfect fit. Pay close attention to corners, edges, and any areas requiring intricate cuts to achieve a cohesive and professional-looking result.
By meticulously measuring and cutting the new backsplash material, you are laying the groundwork for a seamless and visually striking installation. This phase demands patience, precision, and a keen eye for detail, ultimately contributing to the overall success of your kitchen backsplash renovation. With careful planning and execution, you'll soon be ready to proceed to the next phase of installing the new backsplash, bringing you one step closer to witnessing the stunning transformation of your kitchen space.
Step 5: Install the New Backsplash
With the meticulously measured and cut new backsplash material at the ready, it's time to embark on the exciting phase of installing the transformative element that will breathe new life into your kitchen. This pivotal step requires a methodical approach, attention to detail, and a focus on achieving a seamless and visually captivating result. Here's a comprehensive guide to navigating the installation process with confidence and precision.
Lay Out the Design
Before applying adhesive, take the opportunity to lay out the new backsplash material in the designated space. This step allows you to visualize the final arrangement, ensuring that the pieces fit seamlessly and any patterns or designs align harmoniously. By arranging the material without adhesive, you can make any necessary adjustments to achieve the desired aesthetic and ensure a cohesive look.
Apply the Adhesive
Once satisfied with the layout, begin applying the appropriate adhesive to the prepared surface. Use a notched trowel to spread the adhesive evenly, ensuring full coverage and a secure bond with the new backsplash material. Follow the manufacturer's guidelines for the specific adhesive being used, taking care to work in manageable sections to prevent the adhesive from drying out before the material is applied.
Read more: How To Redo A Garden Bed
Install the Material
Carefully place the new backsplash material onto the adhesive, following the planned layout. Press each piece firmly into place, ensuring that they are level and aligned with precision. Use tile spacers if necessary to maintain consistent spacing between the pieces, contributing to a polished and professional-looking installation. Pay particular attention to corners and edges, ensuring that they are neatly and securely positioned.
Make Necessary Adjustments
As you progress with the installation, be prepared to make any necessary adjustments to individual pieces. Whether it's fine-tuning the alignment, trimming pieces to fit around obstacles, or ensuring a uniform grout joint width, meticulous attention to detail during the installation phase is crucial for achieving a flawless and visually appealing result.
Allow for Setting Time
Once the new backsplash material is installed, allow sufficient time for the adhesive to set and cure as per the manufacturer's recommendations. This setting period is essential for ensuring a strong and durable bond between the material and the surface, setting the stage for the subsequent grouting phase.
By methodically navigating the installation process, you are one step closer to witnessing the stunning transformation of your kitchen space. The careful application of adhesive, precise installation of the new backsplash material, and meticulous attention to detail during this phase contribute to the overall success of your renovation project, bringing you closer to enjoying a revitalized and visually captivating kitchen.
Step 6: Grout and Seal the Backsplash
With the new backsplash material securely in place, the final phase of the installation process involves grouting and sealing, essential steps that not only enhance the visual appeal of the backsplash but also contribute to its longevity and durability. This meticulous phase requires attention to detail and a methodical approach to achieve a polished and professional finish that elevates the overall aesthetic of your kitchen.
Read more: How To Redo A Coffee Table
Prepare the Grout
Begin by selecting a high-quality grout that complements the chosen backsplash material and aligns with your design vision. Whether it's sanded or unsanded grout, ensure that the color enhances the overall look of the backsplash while providing the necessary strength and resilience. Follow the manufacturer's instructions for mixing the grout to achieve the ideal consistency for application.
Apply the Grout
Using a grout float, apply the prepared grout to the spaces between the installed backsplash material. Work the grout into the joints at a 45-degree angle, ensuring thorough coverage and a uniform appearance. Take care to fill the joints completely, leaving no gaps or air pockets that could compromise the integrity of the installation. Work in manageable sections to prevent the grout from drying out before it can be properly smoothed and finished.
Clean Excess Grout
Once the grout is applied, use a damp sponge to carefully clean the excess grout from the surface of the backsplash material. Rinse the sponge frequently and avoid applying excessive pressure to prevent dislodging the grout from the joints. This meticulous cleaning process is crucial for achieving clean lines and a polished look, enhancing the overall visual impact of the backsplash.
Seal the Grout
After allowing the grout to set for the recommended time, apply a high-quality grout sealer to protect the joints from moisture, stains, and discoloration. The sealer creates a barrier that enhances the durability of the grout, ensuring that it remains resilient and easy to maintain over time. Follow the manufacturer's guidelines for the application and drying process to achieve optimal results.
Read more: How To Redo A Front Porch
Final Inspection
Once the grout and sealer have been applied and allowed to set, take a moment to inspect the backsplash carefully. Ensure that the grout lines are uniform, the surface is clean and polished, and the overall appearance aligns with your design vision. This final inspection allows you to address any minor touch-ups or adjustments before fully admiring the completed backsplash installation.
By meticulously grouting and sealing the backsplash, you are adding the finishing touches that elevate the visual appeal and durability of the installation. This phase contributes to the overall success of your kitchen renovation, ensuring that your new backsplash not only looks stunning but also withstands the rigors of daily use, bringing enduring beauty and practicality to your kitchen space.
Conclusion
As you reach the culmination of your kitchen backsplash renovation journey, it's time to revel in the remarkable transformation that has taken place within the heart of your home. The process of redoing your kitchen backsplash has been a testament to your creativity, attention to detail, and unwavering commitment to enhancing the aesthetic and functionality of your space. With each carefully executed step, from gathering materials and preparing the surface to selecting, measuring, and installing the new backsplash material, you have embarked on a journey that has not only revitalized your kitchen but also empowered you with newfound confidence in your home renovation endeavors.
The decision to embark on this project was driven by a desire to infuse your kitchen with a fresh burst of personality, elevate its visual appeal, and create a space that resonates with your unique style and practical needs. Through thoughtful consideration of materials, meticulous preparation, and precise execution, you have succeeded in bringing your vision to life, culminating in a stunning and functional backsplash that serves as a captivating focal point within your kitchen.
As you stand back and admire the completed installation, take pride in the dedication and effort you have invested in this project. The new backsplash not only enhances the ambiance of your kitchen but also serves as a testament to your ability to transform a space through creativity and hands-on craftsmanship. The seamless integration of the new backsplash material, the precision of the cuts, the meticulous application of grout, and the final touch of sealing have collectively contributed to a visually striking and enduring addition to your home.
Beyond the tangible results, this renovation journey has been a testament to your ability to embrace the rewarding challenges of home improvement, to learn new skills, and to derive immense satisfaction from the tangible fruits of your labor. The newly redone backsplash stands as a symbol of your dedication to creating a living space that reflects your personality and meets the practical demands of your daily life.
As you move forward, may the experience gained from this project continue to inspire and embolden you in your future home renovation endeavors. Whether it's a small-scale update or a larger transformation, the knowledge and confidence acquired through this process will undoubtedly serve as valuable assets, empowering you to continue shaping your living spaces with creativity, precision, and a deep sense of personal fulfillment.
With the completion of your kitchen backsplash renovation, you have not only enhanced the beauty and functionality of your home but also embarked on a journey of self-discovery and accomplishment. As you savor the fruits of your labor, may this experience serve as a source of inspiration and motivation for future creative endeavors, both within your home and beyond.
Frequently Asked Questions about How To Redo Backsplash In The Kitchen
Was this page helpful?
At Storables.com, we guarantee accurate and reliable information. Our content, validated by Expert Board Contributors, is crafted following stringent Editorial Policies. We're committed to providing you with well-researched, expert-backed insights for all your informational needs.


0 thoughts on “How To Redo Backsplash In The Kitchen”