Home>Furniture>Outdoor Furniture>How To Build A Patio On A Slope
Outdoor Furniture
How To Build A Patio On A Slope
Modified: May 6, 2024
Learn how to build a stunning patio on a slope with our step-by-step guide. Create the perfect outdoor oasis with the best outdoor furniture for your sloping backyard.
(Many of the links in this article redirect to a specific reviewed product. Your purchase of these products through affiliate links helps to generate commission for Storables.com, at no extra cost. Learn more)
Introduction
Building a patio on a slope can be a challenging task, but with proper planning and execution, it is definitely achievable. A sloped terrain adds a unique charm to your outdoor space, providing opportunities for stunning views and creative landscaping designs. Whether you want to create a cozy spot for relaxing or an entertaining area for hosting gatherings, a patio on a slope can transform your outdoor space into a functional and visually appealing retreat.
In this article, we will guide you through the step-by-step process of building a patio on a slope. From assessing the slope to adding finishing touches, we will cover everything you need to know to successfully complete this project. So let’s dive in and discover how to turn your sloped yard into a stunning patio that you can enjoy all year round.
Key Takeaways:
- Building a patio on a slope requires assessing the slope, planning the design, and clearing the area. It’s important to build a retaining wall and prepare a solid foundation for the patio stones.
- Securing the patio with a stabilizing agent and adding finishing touches like furniture, lighting, plants, and shade creates a cozy and inviting outdoor space. Proper planning and execution can turn a sloped yard into a stunning and functional patio.
Read more: How Much Slope On A Concrete Patio
Step 1: Assess the Slope
The first step in building a patio on a slope is to assess the slope of your yard. This will help you understand how steep the slope is and determine the best approach for constructing your patio. Here’s how to assess the slope:
- Start by measuring the slope: Use a measuring tape or a level tool to determine the gradient of the slope. Measure the vertical distance between two points and the horizontal distance between them. Divide the vertical distance by the horizontal distance to calculate the slope’s gradient. This will help you understand how steep the slope is and how it will impact your patio design.
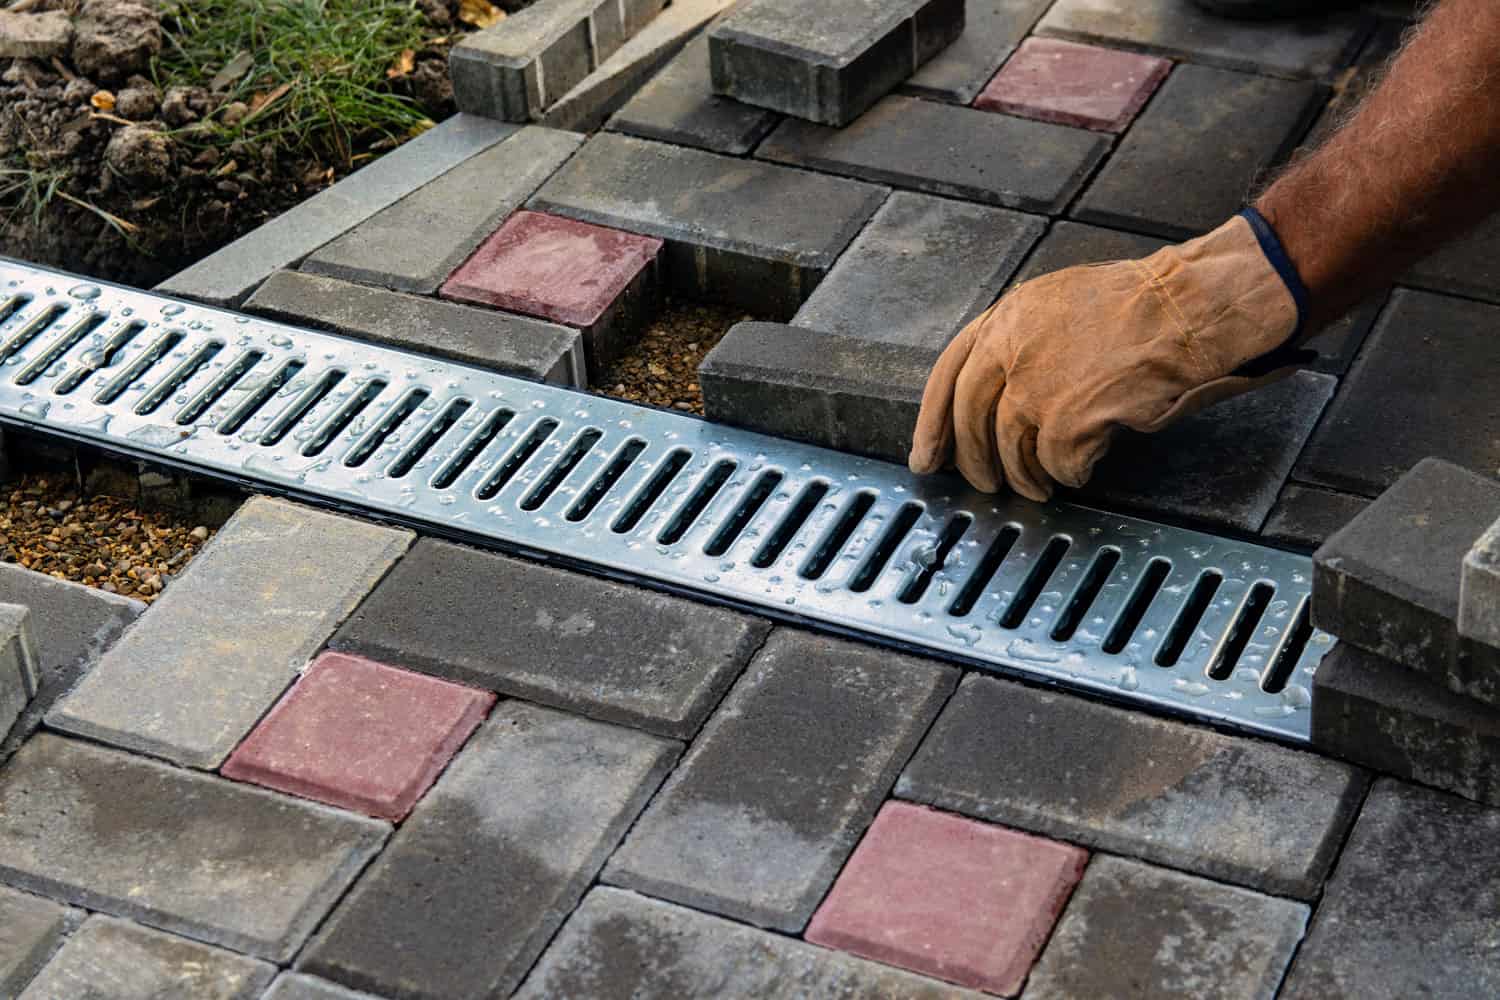
- Evaluate the drainage: Take note of how water drains on the slope. If water tends to accumulate in certain areas, it is essential to address proper drainage during the patio construction process. Consider adding drainage channels or French drains to prevent water from pooling on the surface of your patio.
- Assess the soil stability: Examine the soil to ensure it is stable enough to support a patio. Loose or sandy soil may require additional reinforcement, such as retaining walls or stabilization techniques, to ensure the patio’s longevity and prevent soil erosion.
By assessing the slope, drainage, and soil stability, you can identify any potential challenges or requirements for your patio construction project. Understanding the characteristics of your slope will inform your decision-making process for the design and construction phases.
Step 2: Plan the Design
Once you have assessed the slope of your yard, it’s time to plan the design of your patio. This step is crucial as it sets the foundation for the entire project and determines the overall aesthetics and functionality of your outdoor space. Here’s how to plan the design of your patio on a slope:
- Consider the layout: Take into account the shape and size of your sloped yard when designing your patio. You may need to incorporate terraces or tiered areas to accommodate the slope. This will not only add visual interest but also provide different levels for seating or landscaping purposes.
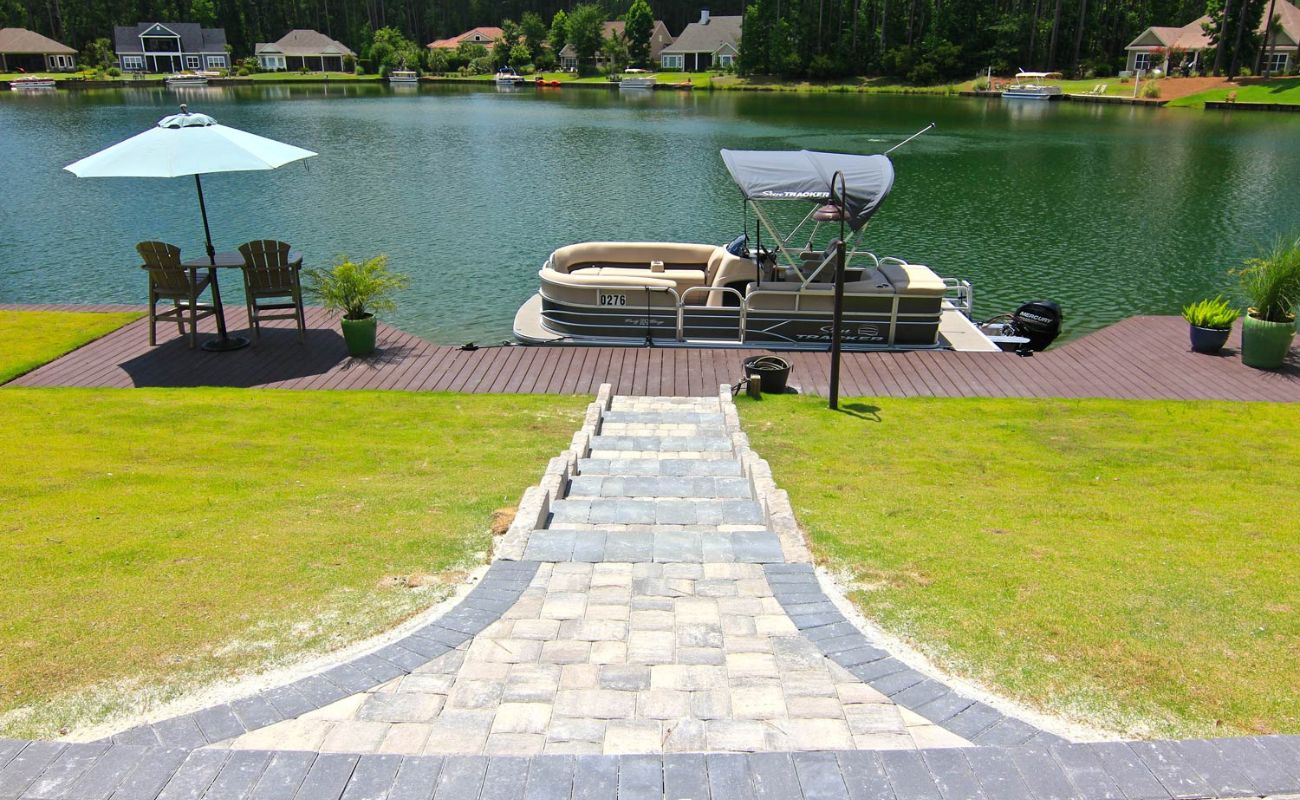
- Think about accessibility: Ensure that your patio is easily accessible from different areas of your yard or house. Consider adding steps or pathways to facilitate movement on the slope and make your patio accessible for everyone.
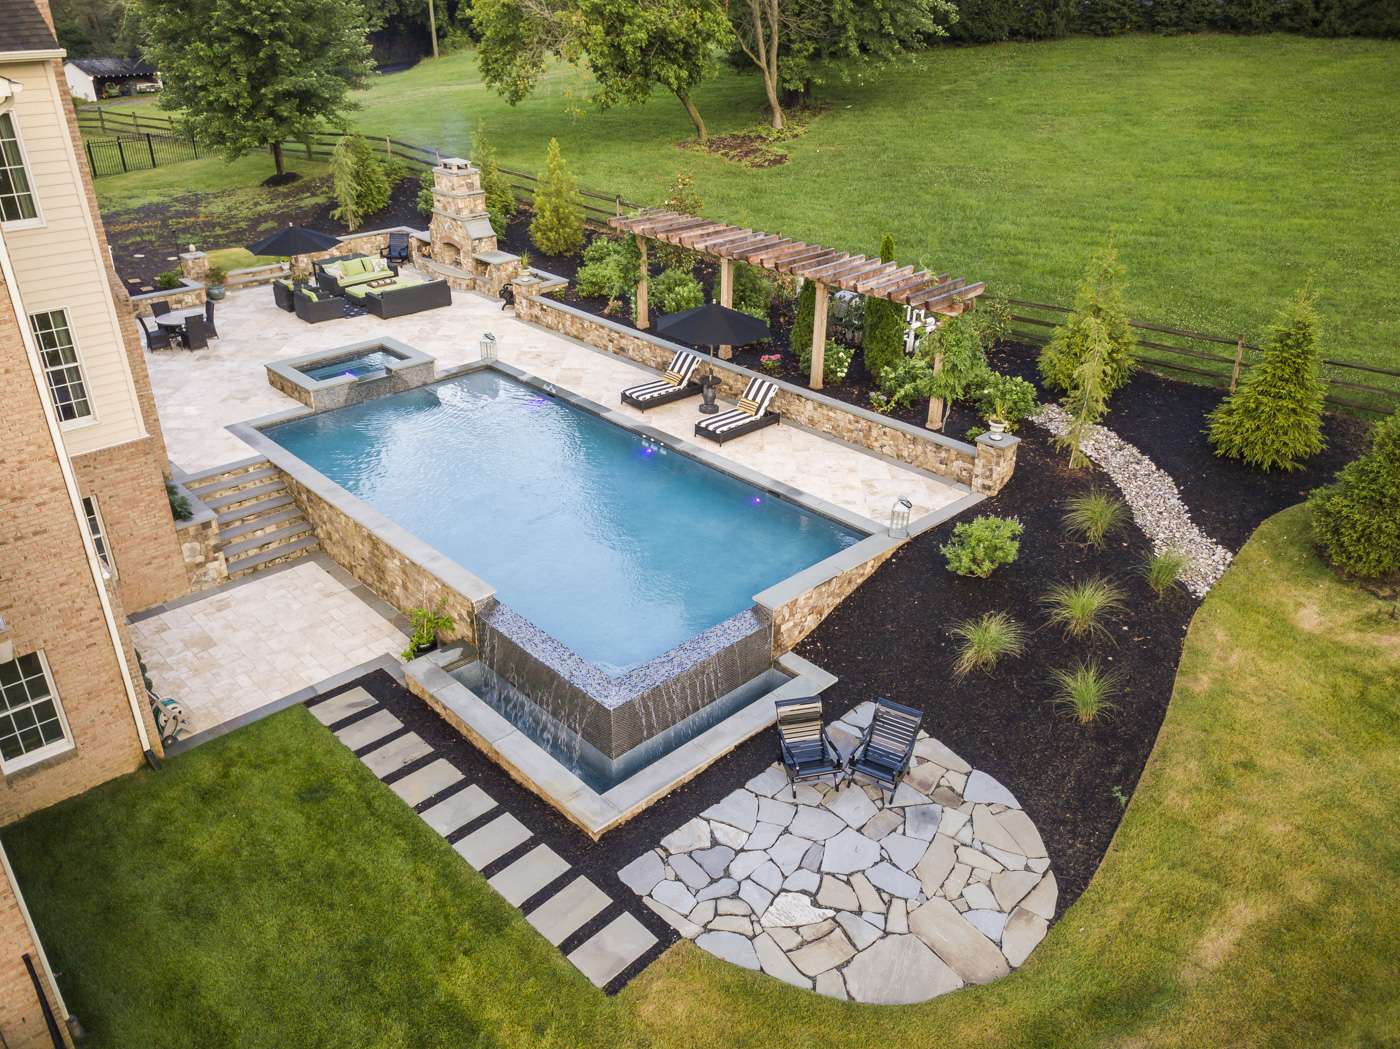
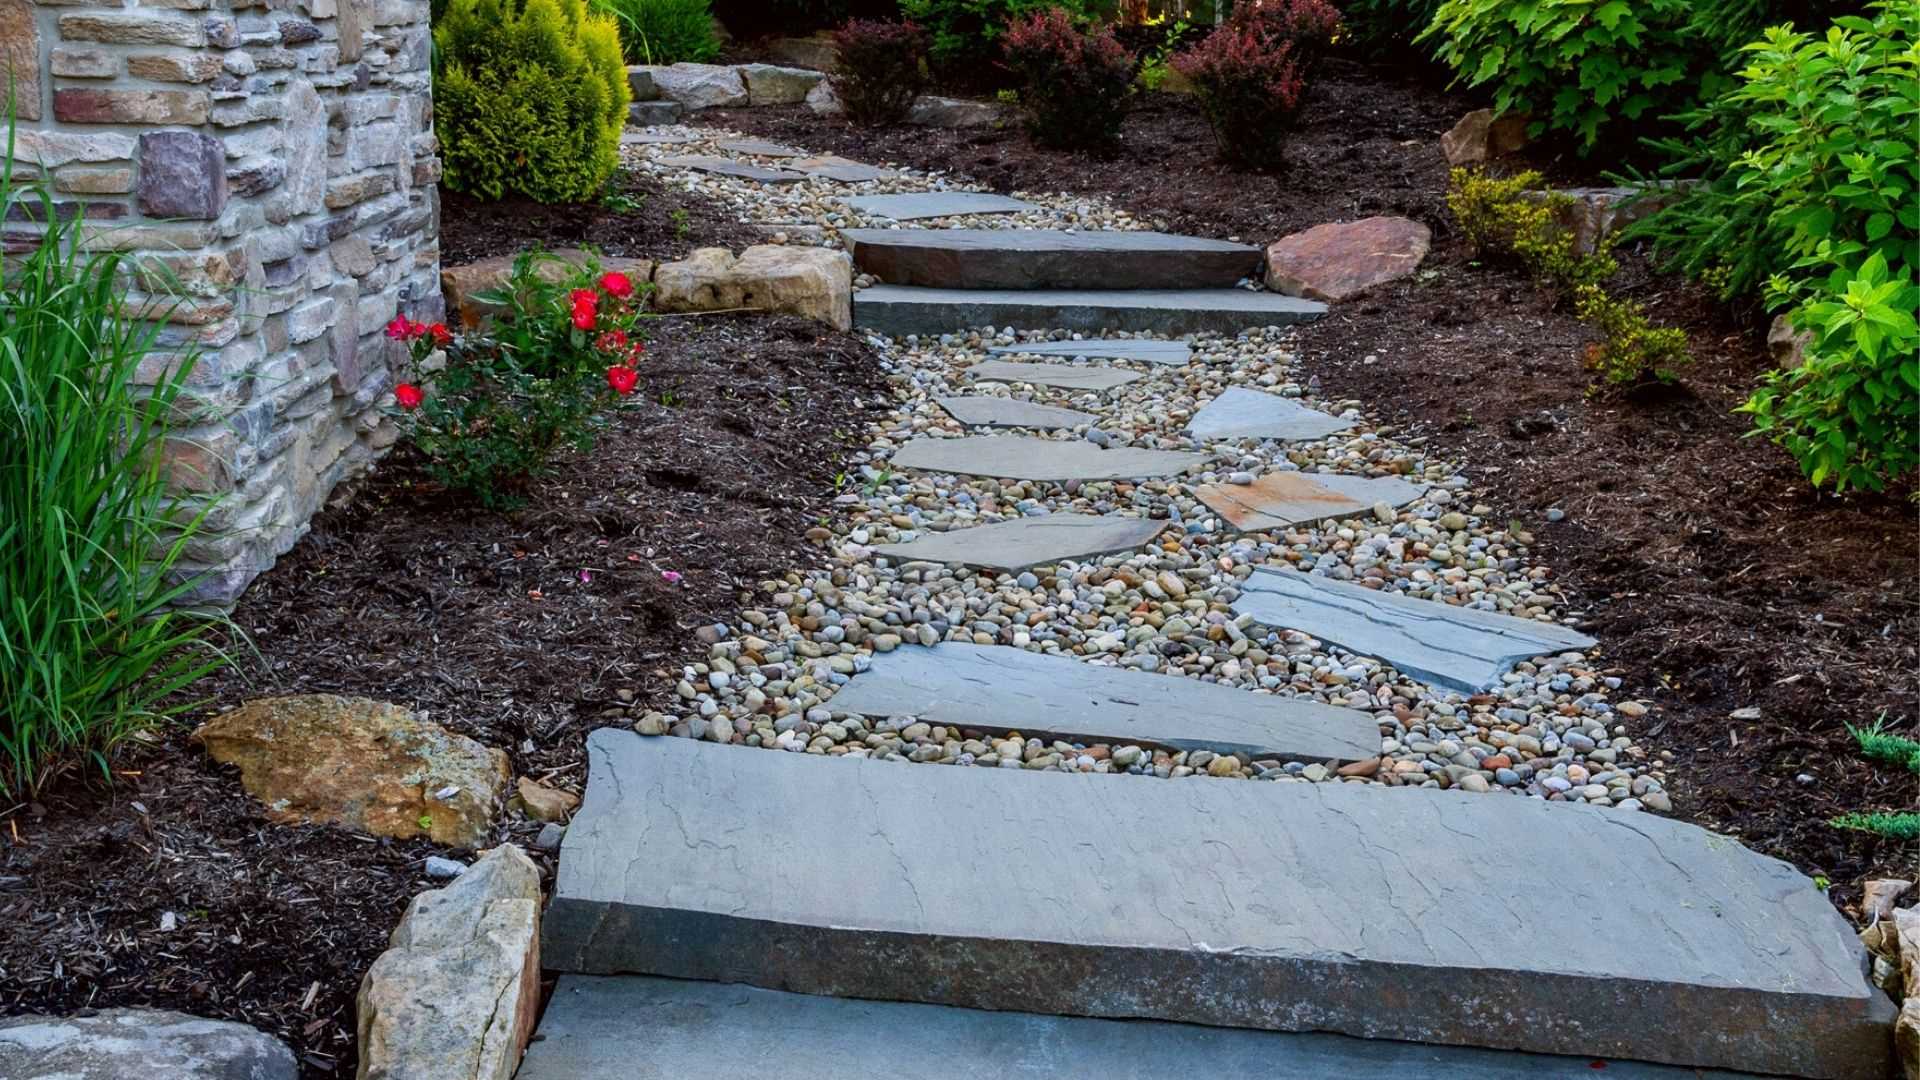
- Select the material: Choose the type of material you want to use for your patio surface. There are various options available, including concrete, pavers, natural stone, and wood. Consider factors such as durability, maintenance requirements, and aesthetic appeal when selecting the material.
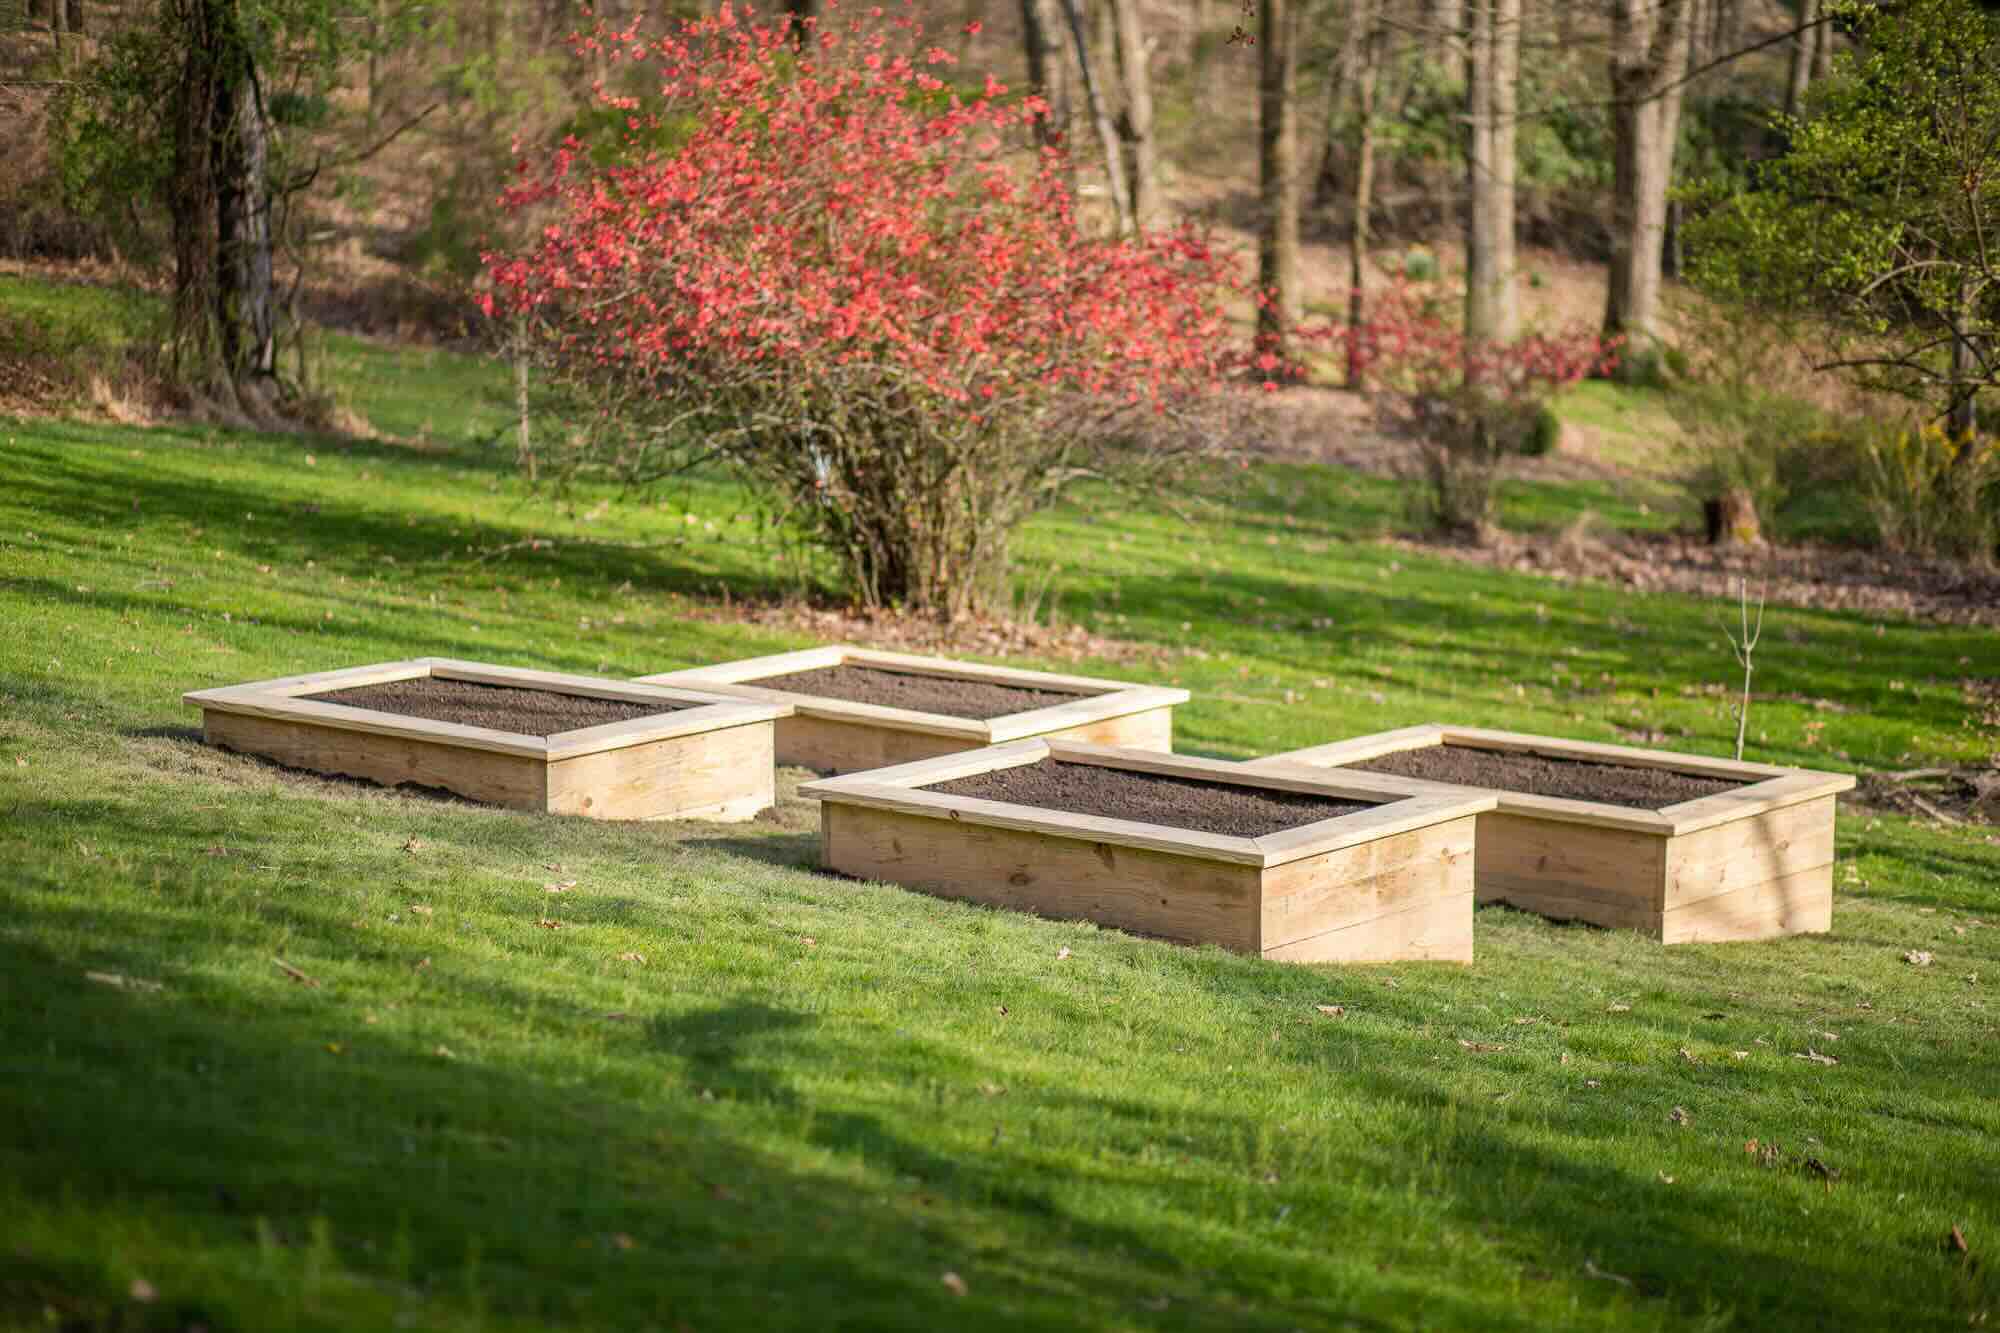
- Enhance with landscaping: Incorporate landscaping elements such as flower beds, shrubs, or trees to enhance the beauty of your patio. Choose plants that can thrive on a sloped terrain and complement the overall design of your outdoor space.
- Consider drainage: Factor in proper drainage solutions when planning your patio design. Ensure that water flows away from the patio surface to prevent water damage and ensure the longevity of your patio.
Planning the design of your patio on a slope requires careful consideration of various factors. Take your time to sketch out your ideas, consider different possibilities, and consult with professionals if needed. A well-planned design will ensure a functional and aesthetically pleasing patio that seamlessly integrates with your sloped yard.
Step 3: Clear the Area
Once you have planned the design of your patio, it’s time to clear the area where it will be constructed. Clearing the area is an important step to create a clean and level surface for your patio. Here’s how to clear the area:
- Remove any existing vegetation: Start by removing any grass, weeds, or plants in the designated patio area. Use a shovel or a gardening tool to dig out the roots and ensure that the area is free from vegetation. This will prevent future growth that could disrupt the patio structure.
- Clear any debris: Check for any rocks, sticks, or debris on the ground and remove them. Clearing the area of debris will create a smooth and safe foundation for your patio. Dispose of the debris properly to keep the work area clean and organized.
- Level the ground: Use a level tool or a long board to check if the ground is level. If you notice any uneven areas, use a shovel to fill in low spots or remove excess soil from high spots. Creating a level surface is essential for proper patio installation and ensures a stable foundation.
- Compact the soil: Once the ground is cleared and leveled, use a hand tamper or a plate compactor to compact the soil. This will increase the stability of the ground and prevent future sinking or shifting of your patio.
Clearing the area is a vital step in the patio construction process. It creates a blank canvas for building your patio and ensures that the area is properly prepared for the next steps, such as building a retaining wall and preparing the foundation. Take your time to clear the area thoroughly, as it will contribute to the overall longevity and stability of your patio.
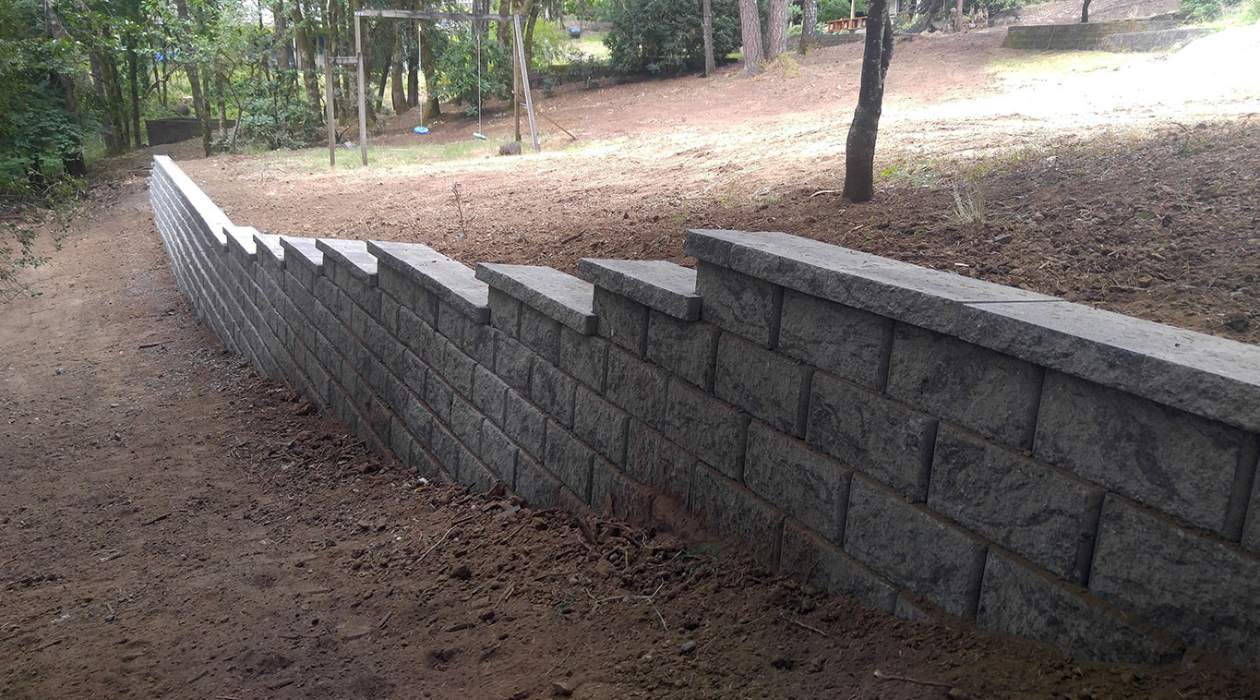
Step 4: Build a Retaining Wall
When building a patio on a slope, a retaining wall is often necessary to provide structural support and prevent soil erosion. The retaining wall helps to level the area and create a stable foundation for your patio. Here’s how to build a retaining wall:
- Mark the layout: Use stakes and string to mark the layout of the retaining wall. This will serve as a guide and help you visualize the shape and size of the wall.
- Excavate the area: Dig a trench along the marked layout of the retaining wall. The depth and width of the trench will depend on the size and height of the wall. Make sure to remove any excess soil and debris from the trench.
- Install the first row: Lay the first row of retaining wall blocks or stones in the trench. Make sure they are level by using a level tool and a rubber mallet to adjust as needed. Backfill the area behind the first row with gravel or drainage material to promote proper drainage.
- Continue building the wall: Gradually build additional rows of retaining wall blocks or stones, making sure each row is level and secure. Use construction adhesive or mortar to bond the blocks together for added stability.
- Add reinforcement: For taller retaining walls, it may be necessary to add reinforcement to strengthen the structure. This can be done by inserting geogrid or metal tiebacks into the wall at specific intervals. Follow the manufacturer’s instructions for proper installation.
- Finish the top: Once the retaining wall is built to the desired height, finish the top with cap blocks or coping stones. This will provide a clean and polished appearance.
Building a retaining wall is a crucial step in creating a patio on a slope. It not only provides stability and support but also adds visual appeal to your outdoor space. Ensure that the retaining wall is properly constructed and meets any local building codes or regulations. A well-built retaining wall will ensure the longevity and integrity of your patio.
Consider using retaining walls to create level areas for your patio on a slope. This will help prevent erosion and provide a stable foundation for your patio.
Read more: How To Build A Walkway On A Slope
Step 5: Prepare the Foundation
After building the retaining wall, it’s time to prepare the foundation for your patio. A solid and well-prepared foundation is essential for the stability and durability of your patio. Here’s how to prepare the foundation:
- Install a weed barrier: Before laying the foundation, it’s helpful to install a weed barrier to prevent weed growth and maintain a clean and level surface. Lay the weed barrier over the excavated area, ensuring it covers the entire patio space.
- Add a layer of gravel: Begin by adding a layer of gravel to the patio space. This layer acts as a base and helps with drainage. Spread the gravel evenly and use a rake or shovel to level it out. The thickness of the gravel layer will depend on the slope and specific requirements of your patio.
- Compact the gravel: Use a plate compactor or a hand tamper to compact the gravel layer. This will help to create a solid and stable foundation. Ensure that the gravel is firmly packed and level throughout the patio area.
- Add a layer of sand: Once the gravel is compacted, add a layer of sand on top. The sand layer provides a smooth surface for laying the patio stones and allows for minor adjustments during the installation process. Spread the sand evenly and use a screed or a long board to level it out.
- Compact the sand: Similar to the gravel layer, compact the sand using a plate compactor or a hand tamper. This will ensure a firm and even surface for laying the patio stones. Continue compacting until the sand is properly leveled.
Preparing the foundation is a critical step that determines the overall stability and longevity of your patio. Take your time to properly install the weed barrier, gravel, and sand layers. A well-prepared foundation will create a solid base for the patio stones and ensure that your patio remains intact for years to come.
Step 6: Lay the Patio Stones
With the foundation prepared, it’s time to lay the patio stones and bring your outdoor space to life. The placement of the stones requires precision and attention to detail to ensure a level and visually appealing patio. Here’s how to lay the patio stones:
- Start from a corner: Begin by placing the first patio stone in a corner of the patio area. Make sure it is snug against the retaining wall and aligned with your desired layout.
- Continue with the pattern: Lay the patio stones according to your chosen pattern or design. Leave a small gap, usually about 1/8 inch, between each stone for jointing material. Use a level tool to ensure each stone is level and adjust as necessary.
- Cut stones if needed: If you encounter areas where the stones need to be smaller or fit in irregular spaces, use a wet saw or a chisel and hammer to cut the stones to the desired shape or size.
- Fill the gaps: Once all the stones are in place, fill the gaps between the stones with jointing sand or polymeric sand. Use a broom or a brush to sweep the sand into the joints, ensuring it fills the spaces completely.
- Compact the stones: After filling the gaps, lightly compact the patio stones using a plate compactor. This helps to settle the stones into the sand and stabilize the patio surface.
Laying the patio stones is a meticulous process that requires patience and precision. Take your time to ensure each stone is placed correctly and the gaps are filled adequately. A well-laid patio surface will enhance the overall aesthetics of your outdoor space and provide a solid foundation for your patio.
Step 7: Secure the Patio
Securing the patio is an important step to ensure its stability and longevity. Properly securing the patio will prevent shifting or movement of the stones and keep them in place. Here’s how to secure the patio:
- Apply a stabilizing agent: To enhance the stability of the patio, consider applying a stabilizing agent, such as a polymeric sand or a jointing compound. These products harden when activated with water, creating a solid bond between the patio stones.
- Follow the manufacturer’s instructions: Read and follow the instructions provided by the manufacturer of the stabilizing agent. Different products may have specific application methods or curing times. Make sure to apply the stabilizing agent evenly and thoroughly across the entire patio surface.
- Use a broom to remove excess material: After applying the stabilizing agent, use a broom to sweep off any excess material from the patio surface. This will prevent hardening or buildup in unwanted areas and ensure a clean and polished finish.
- Water the surface: Lightly spray the patio surface with water to activate the stabilizing agent. This will initiate the hardening process and reinforce the bond between the stones.
- Allow time to cure: Give the stabilizing agent sufficient time to cure and harden before using the patio. Follow the curing instructions provided by the manufacturer, as it can vary depending on the product and climate conditions.
Securing the patio is essential to prevent any movement or shifting of the stones. The stabilizing agent provides an extra layer of strength and durability, ensuring that your patio stands the test of time. Follow the manufacturer’s instructions carefully for the best results.
Step 8: Add Finishing Touches
Now that your patio is secure and ready for use, it’s time to add the finishing touches that will transform it into a beautiful and inviting outdoor space. Here are some ideas for adding those final touches:
- Patio furniture: Select the appropriate patio furniture that suits your style and needs. Whether you prefer a dining set for al fresco meals, comfortable lounge chairs for relaxation, or a combination of both, choose furniture that complements the overall design and creates a comfortable seating area.
- Outdoor lighting: Install outdoor lighting to enhance the ambiance and functionality of your patio. Consider options such as string lights, lanterns, or pathway lights. Not only will they provide illumination for evening gatherings, but they will also add a warm and inviting glow to your outdoor space.
- Accessorize with plants: Add greenery and color to your patio by incorporating potted plants, hanging baskets, or even a small garden bed. Choose plants that thrive in your local climate and consider their sunlight and watering requirements. Plants will brighten up your patio and create a natural and refreshing atmosphere.
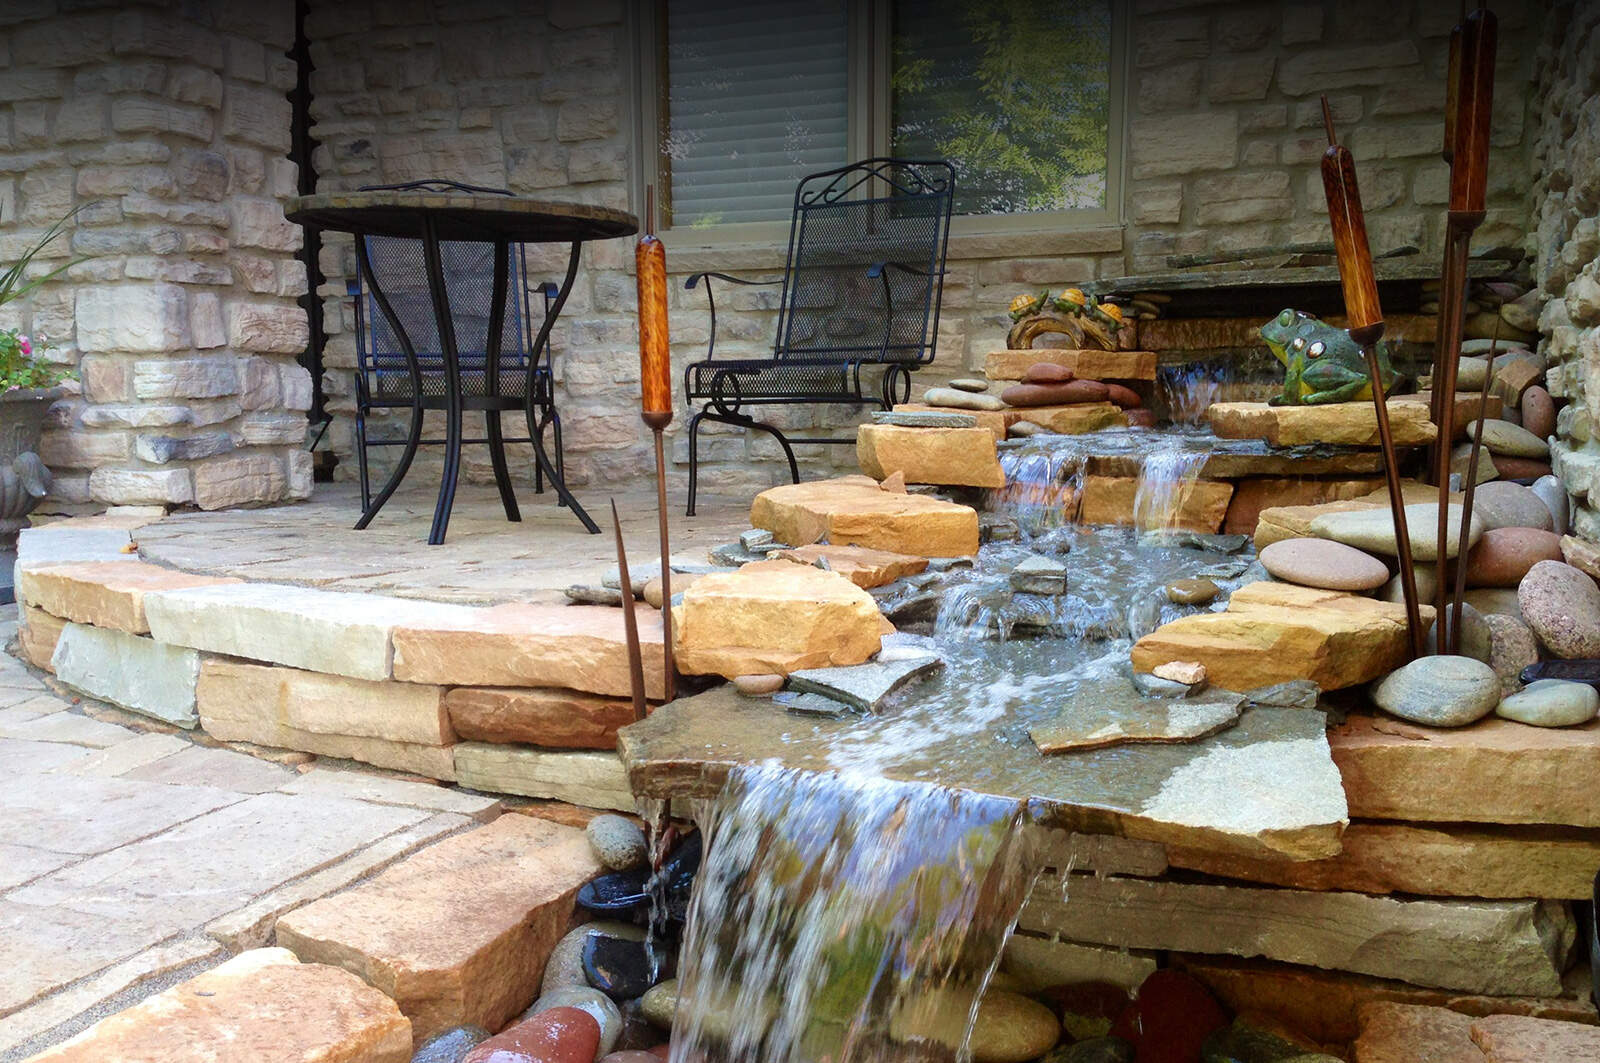
- Add shade: If your patio is exposed to direct sunlight, consider adding shade elements like an umbrella, pergola, or retractable awning. These additions will provide relief from the sun’s rays and create a comfortable outdoor retreat.
- Outdoor decor: Personalize your patio with outdoor decor that reflects your style and personality. Consider adding items like decorative pillows, outdoor rugs, artwork, or even a fire pit. These elements will add character and make your patio feel like an extension of your indoor living space.
Adding the finishing touches to your patio will help create a cozy and inviting outdoor oasis. Take your time to choose accessories and decor items that align with your personal taste and preferences. These final touches will elevate your patio from a simple outdoor space to a stunning and functional area where you can relax and entertain.
Read more: How To Slope A Paver Patio
Conclusion
Building a patio on a slope may seem like a daunting task, but with careful planning and execution, it can be a rewarding project that transforms your outdoor space. By following the step-by-step process outlined in this guide, you can create a beautiful and functional patio that seamlessly integrates with the natural contours of your yard.
Start by assessing the slope of your yard, understanding its characteristics, drainage patterns, and soil stability. This will provide valuable information for designing and constructing your patio. Plan the layout and select the appropriate materials that suit your style and preferences. Clear the area and build a retaining wall if necessary to level the space and provide structural support.
Preparing a solid foundation is crucial, as it ensures the stability and durability of your patio. Lay the patio stones carefully, paying attention to the pattern and ensuring they are level and secure. Finally, secure the patio by applying a stabilizing agent and add the finishing touches that help create a welcoming and comfortable outdoor space.
Remember to take your time, seek professional advice when needed, and ensure compliance with local building codes or regulations. A well-built patio on a slope will not only enhance the beauty of your outdoor area but also provide a functional space where you can relax, entertain, and create lasting memories.
Now that you are equipped with the knowledge and guidance, it’s time to embark on your patio construction journey. Enjoy the process and embrace the transformation of your sloped yard into a stunning patio that you can enjoy for years to come.
Now that you've mastered building a patio on a slope, why not enhance your outdoor space even further? For those looking to define their garden beautifully, our guide on unique garden fence ideas offers countless ways to integrate style and privacy. And if you're eager to make your deck the heart of outdoor gatherings, our insights on vibrant deck decor will transform your space into a cozy haven for relaxation and entertainment. Both articles are packed with practical tips to elevate your outdoor areas effortlessly.
Frequently Asked Questions about How To Build A Patio On A Slope
Was this page helpful?
At Storables.com, we guarantee accurate and reliable information. Our content, validated by Expert Board Contributors, is crafted following stringent Editorial Policies. We're committed to providing you with well-researched, expert-backed insights for all your informational needs.


0 thoughts on “How To Build A Patio On A Slope”