Home>Furniture>Outdoor Furniture>How To Make A Macrame Fruit Hammock

Outdoor Furniture
How To Make A Macrame Fruit Hammock
Modified: March 16, 2024
Learn how to make a stylish and functional outdoor fruit hammock with our step-by-step tutorial. Perfect for organizing and displaying your fresh produce.
(Many of the links in this article redirect to a specific reviewed product. Your purchase of these products through affiliate links helps to generate commission for Storables.com, at no extra cost. Learn more)
Introduction
Welcome to the world of macrame, where creativity and functionality come together to create beautiful and practical pieces. If you’re looking to add a touch of bohemian charm to your home decor, then learning how to make a macrame fruit hammock is the perfect project for you.
A macrame fruit hammock not only serves as a stylish storage solution but also adds a unique and artistic element to your space. It’s a fun and rewarding craft that allows you to showcase your creativity while bringing a touch of nature indoors. Whether you have a small kitchen or a spacious dining room, a macrame fruit hammock will make a statement and become a conversation piece.
In this step-by-step guide, we will walk you through the process of creating your own macrame fruit hammock. We’ll cover everything from choosing the right rope to adding the finishing touches. So grab your supplies, put on some relaxing music, and let’s get started on this exciting macrame adventure!
Key Takeaways:
- Create a bohemian macrame fruit hammock to add charm and functionality to your space. Choose the right rope, master macrame knots, and add optional fringes for a personalized touch.
- Enjoy the creative and rewarding process of making a macrame fruit hammock. Showcase your skills, experiment with different patterns, and care for your handmade piece to bring beauty and usefulness to your home.
Read more: How To Make A Macrame Hammock
Materials Needed
Before we dive into the macrame fruit hammock project, let’s gather all the necessary materials:
- Macrame rope: Choose a sturdy and durable rope that is suitable for holding the weight of the fruit. Cotton cord or nylon rope are popular choices.
- Scissors: You’ll need a sharp pair of scissors to cut the rope.
- Wooden dowel or metal ring: This will serve as the anchor point for your fruit hammock. You can choose a wooden dowel or a metal ring depending on your preference.
- Measuring tape: To ensure accurate measurements for the length of the rope.
- Optional: Beads or decorative accents: If you want to add some flair to your hammock, consider incorporating beads or other decorative accents into the design.
Once you have gathered all the necessary materials, set them out on a clean workspace. Having everything ready and within reach will make the process smoother and more enjoyable.
Step 1: Choosing the Right Rope
The first step in creating your macrame fruit hammock is choosing the right rope. The rope you select should be strong and durable enough to hold the weight of the fruit, while also providing the desired aesthetic appeal. Here are some factors to consider when choosing your rope:
- Material: Macrame ropes are commonly made from cotton, nylon, or jute. Cotton cords are soft and pliable, making them easy to work with. Nylon ropes are extremely durable and can withstand heavier loads. Jute ropes have a natural, rustic look that adds character to the hammock.
- Thickness: The thickness of the rope determines the overall look and strength of the hammock. Thicker ropes create a more substantial and sturdy hammock, while thinner ropes give a more delicate and intricate appearance.
- Color: Ropes come in a wide range of colors, allowing you to match your macrame fruit hammock to your existing decor. Natural, neutral tones like beige or white are popular choices for a timeless and versatile look.
Once you’ve considered these factors, head to your local craft store or search online for macrame ropes that fit your preferences. Remember to buy slightly more rope than you think you’ll need to account for any mistakes or variations in the pattern.
Now that you have chosen the perfect rope, you’re ready to move on to the next step: measuring and cutting the rope.
Step 2: Measuring and Cutting the Rope
Now that you have your chosen rope, it’s time to measure and cut it to the proper length for your macrame fruit hammock. Follow these steps to ensure accurate measurements:
- Measure the hanging area: Determine where you plan to hang your fruit hammock and measure the distance between the anchor points. This will help you determine how long your ropes need to be.
- Add extra length: Add a few extra feet to the measurement from step one to account for knots and fringes. This will ensure that your hammock has enough room to hold your fruits without being too tight.
- Cut the ropes: Use your scissors to cut multiple lengths of rope according to your measurements. Remember to cut an equal number of ropes to maintain symmetry in your hammock.
Once you have cut all the ropes, you’re ready to move on to the next step: preparing the base.
Note: If you plan to incorporate beads or decorative accents into your macrame fruit hammock, consider cutting the rope lengths slightly longer to accommodate the additional elements.
Step 3: Preparing the Base
Now that you have your cut ropes, it’s time to prepare the base for your macrame fruit hammock. The base will provide a stable foundation for the hanging ropes to be attached to. Follow these steps to prepare the base:
- Choose your anchor point: Determine where you want to hang your fruit hammock. This could be a wooden dowel, a metal ring, or even a sturdy tree branch.
- Attach the ropes: Take one of your cut ropes and fold it in half, creating a loop at the top. Place the loop over the anchor point and pull the loose ends of the rope through the loop, creating a basic lark’s head knot. Repeat this process with the remaining ropes, evenly spacing them around the anchor point.
- Ensure even distribution: Adjust the ropes as necessary to ensure they are evenly spaced around the anchor point. This will create a balanced and visually appealing base for your fruit hammock.
With the base prepared, you’re now ready to move on to the next step: starting the macrame knots.
Note: If you’re using a wooden dowel as your anchor point, you can create a more polished look by sanding and staining or painting the dowel before attaching the ropes.
When making a macrame fruit hammock, be sure to use strong and durable rope or cord to ensure it can hold the weight of the fruit. Additionally, make sure to securely knot each section to prevent any slipping or unraveling.
Read more: How To Make A Macrame Cat Hammock
Step 4: Starting the Macrame Knots
With the base of your macrame fruit hammock prepared, it’s time to start creating the intricate knots that will form the body of the hammock. Follow these steps to begin the macrame knots:
- Divide the ropes: Divide the ropes into pairs, making sure each pair consists of one rope from each adjacent pair. This will ensure that the final pattern is balanced and symmetrical.
- Create the square knot: Take one pair of ropes and form a loop with the left rope over the right rope. Then, pass the right rope over and through the loop, bringing it to the left side. Repeat this process with the same pair of ropes, but this time start with the right rope over the left rope. This completes one square knot. Repeat this step with each pair of ropes, working your way around the base.
- Continue with the second row: Once you have completed the first row of square knots, you will start the second row. This time, pair up the adjacent ropes from the previous row. Repeat the square knot process for each pair of adjacent ropes, creating a second row of knots.
- Repeat until desired length: Continue alternating between rows and pairing up adjacent ropes, creating square knots until you reach the desired length for your fruit hammock. This will depend on the size of your fruits and the space you have available.
As you progress through the knots, periodically check the tension to ensure that the hammock is even and balanced. Adjust the knots as needed to achieve a consistent and pleasing appearance.
With the macrame knots in place, it’s time to move on to the next step: creating the hammock pattern.
Step 5: Creating the Hammock Pattern
Now that the base of your macrame fruit hammock is complete, it’s time to create the pattern that will form the hammock itself. Follow these steps to create the hammock pattern:
- Separate the ropes: Separate the pairs of ropes that were used to create the square knots. You should have an equal number of individual ropes hanging down.
- Create the alternating knot pattern: Take one rope from each adjacent pair and tie them together using a simple gathering knot. Repeat this process with the remaining individual ropes, tying them together in pairs. This will create an alternating pattern of knots and spaces.
- Repeat until desired length: Continue tying the ropes together in pairs, alternating between knots and spaces, until you reach the desired length for your fruit hammock. The spaces created by the gathering knots will serve as the holders for your fruits.
As you create the hammock pattern, feel free to experiment with different knot variations and spacing to achieve a look that matches your style and preferences. The beauty of macrame is in its versatility, so don’t be afraid to let your creativity shine through.
Keep in mind the weight of the fruits you plan to hang in the hammock. Ensure that the knots are secure and can safely hold the desired amount of weight. You may want to reinforce any weaker areas with additional knots for added support.
With the hammock pattern complete, you’re almost finished! The next step is optional but can add a touch of elegance to your macrame fruit hammock – adding fringes.
Step 6: Adding Fringes (Optional)
If you want to add a decorative touch to your macrame fruit hammock, you can choose to add fringes along the bottom edge. This step is optional, but it can create a beautiful and eye-catching detail. Follow these steps to add fringes to your hammock:
- Cut fringe ropes: Cut additional lengths of rope, slightly longer than the desired length of the fringes. The number of fringe ropes you cut will depend on how dense you want the fringes to be. Typically, a spacing of one rope per knot looks visually appealing.
- Create the fringes: Take one fringe rope and fold it in half. Insert the folded end through the space between two adjacent knots, forming a loop. Pull the loose ends of the fringe rope through this loop and tighten it to secure the fringe in place. Repeat this process with the remaining fringe ropes, evenly spacing them along the bottom edge.
- Trim the fringes: Once all the fringes are attached, trim them to your desired length. You can opt for even, straight-edged fringes, or you can get creative and trim them into various lengths or angles for a more unique look.
Adding fringes to your macrame fruit hammock adds movement and flair to the overall design. It enhances the bohemian feel and complements the natural, organic aesthetic of the macrame knots.
With the optional fringes added, you’re ready for the final step: finishing touches.
Step 7: Finishing Touches
Congratulations on reaching the final step of creating your macrame fruit hammock! In this step, we will add a few finishing touches to complete your project.
- Trim excess rope: Take a moment to inspect your hammock and trim any excess rope that may be hanging below the fringes or along the edges. This will give your hammock a clean and polished look.
- Enhance the aesthetic: If desired, you can further enhance the aesthetic of your fruit hammock by adding decorative beads or accents to the ropes. Thread beads onto individual ropes or attach small charms or shells for a personal touch.
- Hanging your hammock: Decide on the ideal location to hang your macrame fruit hammock. Choose a spot that provides enough space for the hammock to hang freely and showcase its beauty. Use a sturdy hook or hanging mechanism suitable for the weight of the fruits you plan to store.
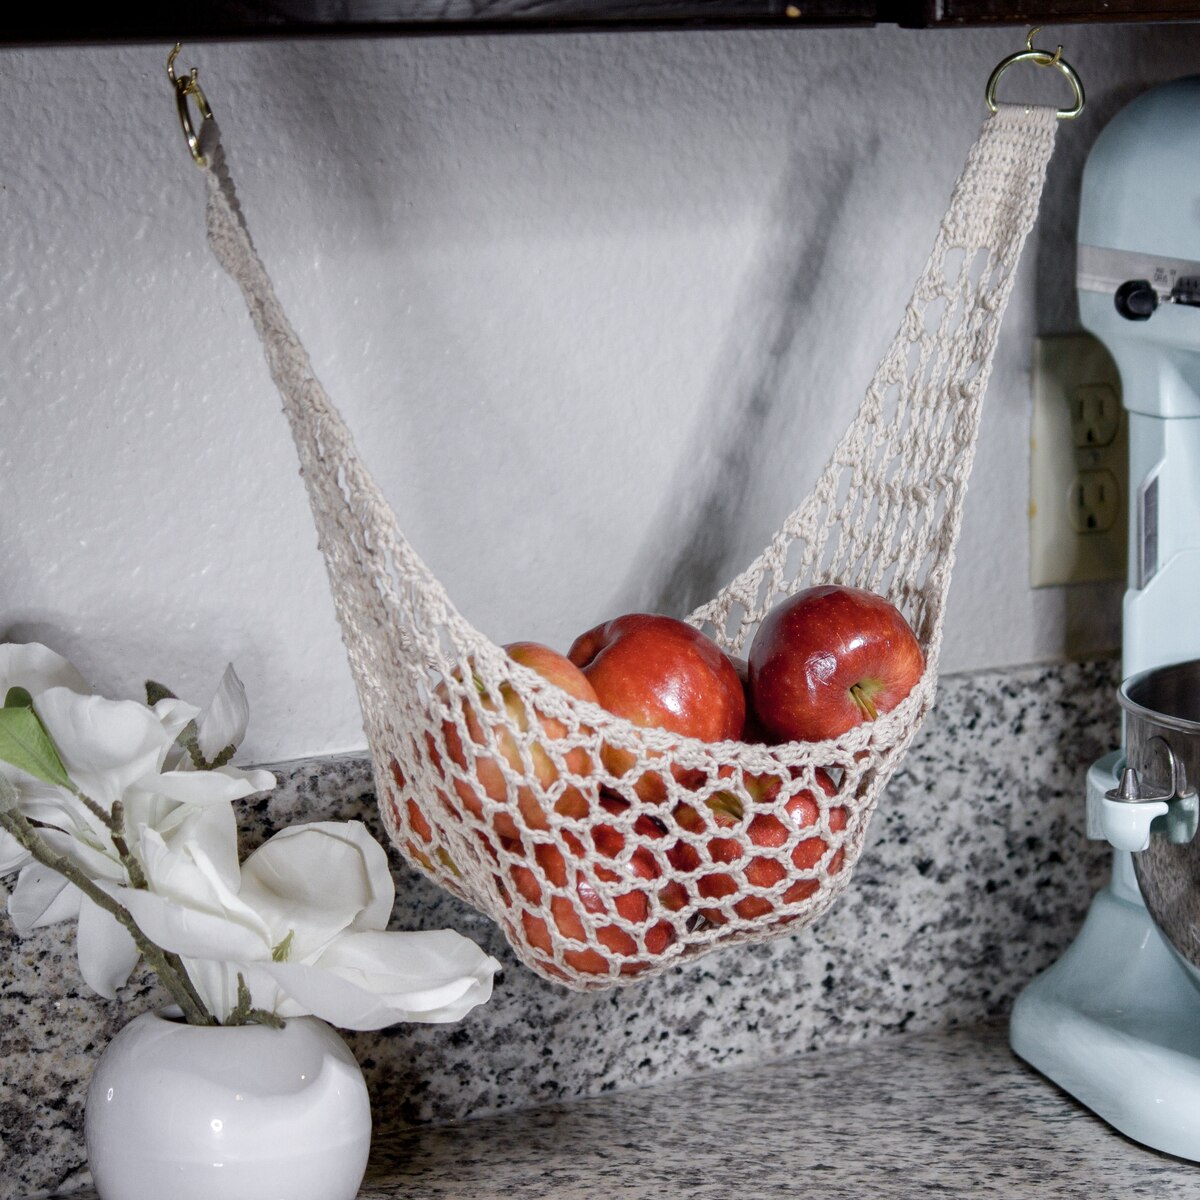
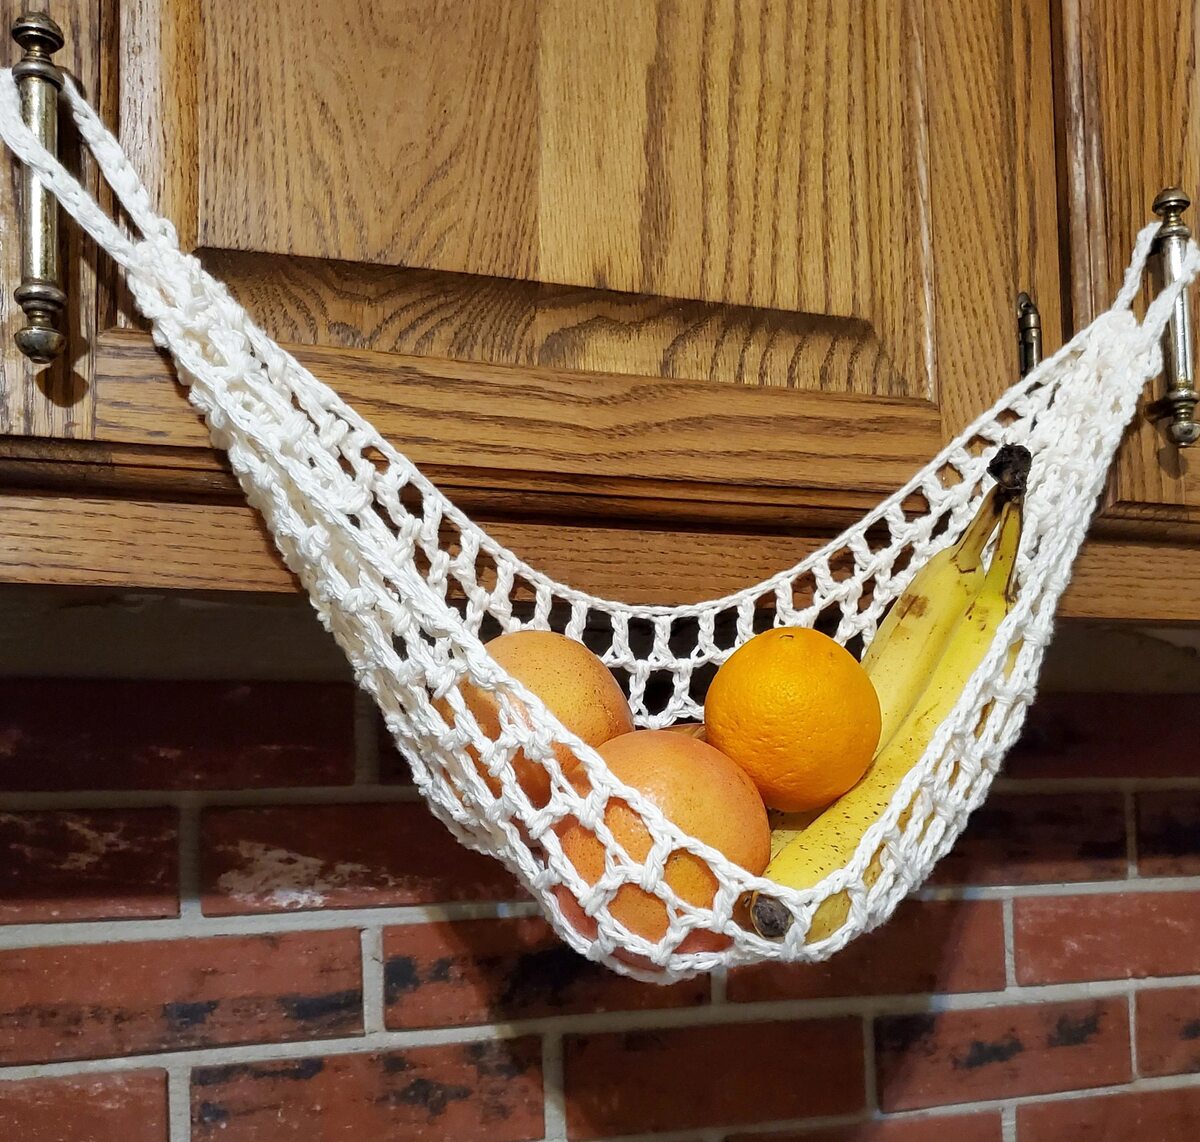
- Fill your hammock: Once your fruit hammock is securely in place, carefully arrange and hang your favorite fruits within the spaces created by the macrame knots. Experiment with different fruits and colors to create an enticing and visually appealing display.
Take a step back and admire your handiwork. Your macrame fruit hammock is not only a functional storage solution but also a gorgeous piece of art that adds charm and personality to your space.
Remember to periodically check the ropes and knots for any signs of wear or looseness. With proper care and maintenance, your macrame fruit hammock will continue to bring beauty and usefulness to your home for years to come.
We hope you enjoyed this macrame project and that it inspired you to explore more creative endeavors. Happy crafting!
Read more: How To Macrame A Hammock Chair
Conclusion
Congratulations on completing your macrame fruit hammock! By following the step-by-step guide, you’ve created a beautiful and functional piece of art that adds a touch of bohemian charm to your home or outdoor space.
Throughout this project, you’ve learned the importance of selecting the right rope and measuring accurately. You’ve mastered various macrame knots and incorporated your own creative flair with optional fringes and decorative accents. The result is a unique and personalized fruit hammock that showcases your skills and style.
Not only does your macrame fruit hammock provide a stylish storage solution for your favorite fruits, but it also adds a whimsical and artistic element to your decor. Display it in your kitchen, dining area, or even on a patio or porch, and watch as it becomes a conversation starter and focal point.
As you continue your macrame journey, don’t be afraid to experiment with different patterns, knot variations, and materials. Macrame offers endless possibilities for creativity and self-expression. Expand your skills and try making other macrame projects such as plant hangers, wall hangings, or even macrame jewelry.
Remember to care for your macrame fruit hammock by periodically checking the ropes and knots for any signs of wear or looseness. Keep it clean and dust-free to maintain its beauty and longevity.
We hope this guide has inspired and empowered you to explore the world of macrame and start new craft projects. It’s a versatile and rewarding art form that allows you to unleash your creativity and bring a touch of handmade beauty into your life.
Now, hang your macrame fruit hammock proudly, appreciate your craftsmanship, and enjoy the delightful sight of your fresh fruits gracefully suspended in a piece of art you’ve created with your own hands.
Happy macrame crafting!
If you loved getting creative with your macrame fruit hammock, why not try your hand at more DIY projects? Our guide on elegant Easter crafts offers plenty of inspiration to spruce up your holiday decor. Looking for ways to tidy up the kitchen? Don't miss our insights on effective kitchen storage solutions that'll make cooking a breeze. And for those who admire unconventional styles, our list of boho decor ideas will surely spark your imagination for a more vibrant living space.
Frequently Asked Questions about How To Make A Macrame Fruit Hammock
Was this page helpful?
At Storables.com, we guarantee accurate and reliable information. Our content, validated by Expert Board Contributors, is crafted following stringent Editorial Policies. We're committed to providing you with well-researched, expert-backed insights for all your informational needs.



0 thoughts on “How To Make A Macrame Fruit Hammock”