Home>Garden Essentials>How To Plant Small Seeds

Garden Essentials
How To Plant Small Seeds
Modified: August 27, 2024
Learn the best techniques for planting small garden seeds and maximize your garden's potential. Discover expert tips for successful seed planting.
(Many of the links in this article redirect to a specific reviewed product. Your purchase of these products through affiliate links helps to generate commission for Storables.com, at no extra cost. Learn more)
Introduction
Gardening is a wonderful and fulfilling hobby that allows you to bring nature into your own backyard. Whether you have a small balcony, a spacious yard, or even just a windowsill, you can create a beautiful garden oasis. One of the most exciting aspects of gardening is sowing and nurturing small seeds, watching them grow into vibrant plants.
In this article, we will guide you through the process of planting small seeds to ensure successful germination and healthy growth. We will cover everything from preparing the soil to transplanting the seedlings. So, roll up your sleeves, grab your gardening tools, and let’s dive into the fascinating world of planting small seeds!
Key Takeaways:
- Prepare the soil by clearing, loosening, amending, and leveling it for healthy small seed growth. Good soil sets the stage for successful gardening adventures!
- Plant small seeds with care, providing proper moisture, light, and labeling. Watch them grow, and enjoy the therapeutic benefits of nurturing your garden.
Read more: How To Germinate A Plant
Step 1: Prepare the Soil
Before you start planting your small seeds, it’s crucial to prepare the soil properly. Good soil preparation sets the foundation for healthy plant growth and ensures that your seeds have the best possible environment to germinate and thrive.
Here are some steps you can follow to prepare the soil:
- Clear the area: Start by removing any weeds, rocks, or debris from the planting area. This will help prevent competition for nutrients and create an optimal environment for your small seeds.
- Loosen the soil: Loosen the top layer of soil using a garden fork or a tiller. This will improve drainage and allow the roots of your plants to penetrate the soil easily.
- Amend the soil: Depending on the type of plants you will be growing, you may need to amend the soil with organic matter or fertilizers. This will provide essential nutrients for the seeds to grow. Consult a local gardening center or conduct a soil test to determine the specific amendments needed for your plants.
- Level the soil: Use a rake to level the soil surface. This will help ensure even seed placement and prevent water from pooling in certain areas.
By taking the time to properly prepare the soil, you create an optimal environment for your small seeds to thrive. Now that the soil is ready, it’s time to move on to the next step: creating seed pots.
Step 2: Create Seed Pots
Creating seed pots is a crucial step in planting small seeds. By providing a suitable and controlled environment for your seeds, you enhance their chances of germination and initial growth. There are several options to choose from when it comes to seed pots:
- Paper pots: You can create biodegradable seed pots using newspaper or recycled paper. There are special tools available to help you roll the paper into small pots. These pots can be planted directly into the ground as the paper decomposes.
- Peat pots: Peat pots are made from compressed peat moss and are also biodegradable. They can be easily planted into the ground without disturbing the roots, as the pots will decompose and mix with the soil.
- Cell trays: Cell trays consist of individual compartments that hold one seed each. They are typically made of plastic or biodegradable materials. These trays provide good drainage and allow for easy transplanting.
- Eggshell seed pots: Empty eggshells can be used as seed pots. Simply fill each half with potting soil, plant the seeds, and place them in an egg carton for stability. The eggshells will provide nutrients to the seedlings as they decompose.
Regardless of the type of seed pots you choose, make sure they have drainage holes to prevent waterlogging. Fill the pots with a well-draining potting mix that is suitable for small seed germination. Moisten the soil with water before moving on to the next step: planting the seeds.
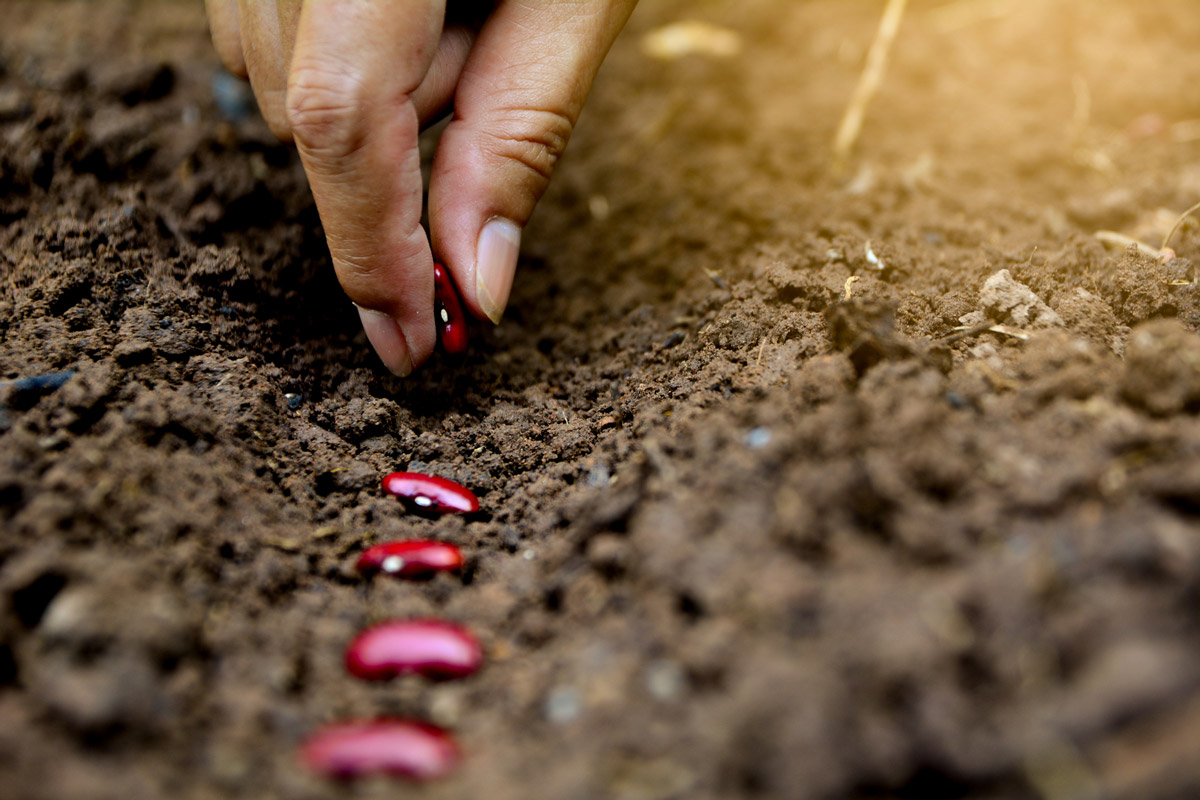
Step 3: Planting the Seeds
Now that you have prepared the soil and created your seed pots, it’s time to plant the small seeds. Proper planting techniques are essential to ensure successful germination and healthy growth of your plants.
Here are some guidelines for planting small seeds:
- Read the seed packet: Each type of seed may have specific instructions for planting depth and spacing. Carefully read the information provided on the seed packet to ensure proper planting.
- Sow the seeds: Using your fingertips or a small tool, make small indentations in the soil of your seed pots. Place one or two seeds in each indentation, following the recommended spacing mentioned on the seed packet. Cover the seeds gently with a thin layer of soil.
- Label the pots: It’s important to keep track of the different seeds you have planted. Use plant markers or labels to identify the plant variety and the date of planting. This will help you monitor their progress and care for them accordingly.
- Maintain consistent moisture: After planting the seeds, water the pots gently to ensure the soil is evenly moist. Avoid overwatering, as excessive moisture can lead to fungal diseases. Keep the soil consistently moist but not waterlogged throughout the germination period.
- Provide proper light: Place the seed pots in an area where they can receive adequate sunlight or use artificial lighting if needed. Most small seeds require light for germination, but there are exceptions, so make sure to check the specific requirements for the seeds you are planting.
Remember to follow the specific requirements for your seeds, as different plant varieties may have unique needs. With proper planting techniques, you are one step closer to seeing your small seeds emerge into thriving seedlings.
When planting small seeds, use a fine seed starting mix and gently press the seeds into the soil. Keep the soil consistently moist and provide adequate light for germination. Cover the seeds lightly with a thin layer of soil to help retain moisture.
Step 4: Watering and Care
Proper watering and care are crucial for the healthy growth of your small seedlings. Consistent moisture, appropriate nutrition, and regular monitoring will help your seedlings thrive and reach their full potential.
Here are some tips for watering and caring for your small seedlings:
- Watering: Pay attention to the moisture levels of the soil and water your seedlings regularly. Avoid allowing the soil to dry out completely or become waterlogged. A good way to check soil moisture is by inserting your finger about an inch into the soil. If it feels dry, it’s time to water.
- Bottom watering: To prevent disturbing the delicate seedlings, consider bottom watering. Place the seed pots in a shallow tray filled with water and allow the soil to absorb moisture from the bottom. Once the soil surface feels moist, remove the pots from the tray.
- Provide adequate light: Ensure that your seedlings receive sufficient light for healthy growth. Depending on the plant variety, they may require 12-16 hours of light per day. Position them near a south-facing window or use artificial grow lights to supplement natural sunlight.
- Thin out seedlings: If you have planted multiple seeds in the same pot and they all germinate, it’s important to thin them out. This involves removing the weaker seedlings, allowing the remaining ones to have space to grow and access sufficient resources.
- Fertilize as needed: As your seedlings grow, they may benefit from gentle fertilization. Use a diluted liquid fertilizer or a slow-release granular fertilizer, following the instructions on the package. Remember to use a fertilizer specifically formulated for seedlings to avoid overfeeding or burning them.
By providing the right amount of water, light, and nutrients, you are setting your small seedlings up for success. Regularly monitor their growth, and make adjustments to their care routine as needed. Soon, it will be time to transplant your healthy seedlings into their final growing location.
Read more: How To Plant Seed
Step 5: Transplanting Seedlings
Transplanting seedlings is a crucial step in their growth journey. It involves moving them from their seed pots to a larger container or directly into the ground. This process allows the seedlings to have more space for their roots to spread and access more nutrients for healthy development.
Here are the steps for transplanting seedlings:
- Choose the right timing: Transplant your seedlings when they have grown several sets of true leaves and are strong enough to handle the stress of transplanting. This typically occurs when they are 4-6 inches tall.
- Prepare the new container or planting area: If you are transplanting into a larger container, ensure that it has proper drainage and fill it with a potting mix suitable for the specific plant. If transplanting into the ground, prepare the soil by removing any weeds and loosening it to allow root penetration.
- Moisten the soil: Water the seedlings and the new planting area before transplanting. This will help minimize root disturbance and promote smooth transition.
- Carefully remove the seedlings: Gently loosen the soil around the seedlings in their seed pots. Hold the seedlings by their leaves, avoiding pulling or damaging the fragile stems. Lift them out, along with their root ball, and place them into the new container or ground.
- Plant at the proper depth: Make a hole in the new planting area or container that is deep enough to accommodate the seedling’s root ball. Place the seedling into the hole and backfill with soil, gently firming it around the base. Ensure that the seedling is planted at the same depth it was in the seed pot.
- Water thoroughly: After transplanting, water the seedlings well to settle the soil and provide hydration. Monitoring soil moisture in the following days and watering as needed is essential for the newly transplanted seedlings to establish themselves.
Transplanting can be a delicate process, so handle the seedlings with care to minimize stress and damage. With the right technique and proper aftercare, your small seedlings will continue to grow and thrive in their new container or garden bed.
Step 6: Monitoring and Maintenance
As your small seedlings grow and mature, it’s important to monitor their progress and provide proper maintenance. Regular observation and care will help ensure that your plants stay healthy and produce a bountiful harvest or display of vibrant blooms. Here are some tips for monitoring and maintaining your seedlings:
- Monitor growth: Keep a close eye on the growth of your seedlings. Look out for any signs of nutrient deficiencies, pests, or diseases. Early detection allows for prompt intervention and increases the chances of saving your plants.
- Protect from pests: Inspect your plants regularly for signs of pests like aphids, caterpillars, or slugs. If pests are detected, take appropriate measures to control them. This may involve handpicking, applying organic pest control methods, or using natural predators.
- Provide support: As your plants grow taller and start to develop stems, they may require support to prevent them from toppling over. Use stakes, trellises, or cages to provide the necessary support and keep the plants upright.
- Prune when necessary: Pruning can help improve airflow and promote healthy growth. Remove any dead, damaged, or diseased leaves and branches. Also, consider thinning out crowded areas to allow for better sunlight penetration.
- Stay on top of watering: Regularly monitor the moisture levels of the soil and water your plants as needed. Be mindful of weather conditions, as hot and dry periods may require more frequent watering, while cooler and rainy periods may require less watering.
- Feed with fertilizers: As your plants continue to grow, they may benefit from additional nutrients. Apply a balanced fertilizer according to the specific needs of your plants. Follow the instructions on the fertilizer package for proper dosage and frequency.
- Harvest or enjoy: Once your plants have reached maturity, it’s time to reap the rewards of your hard work. Harvest your vegetables, fruits, or herbs at their peak ripeness. Admire the beautiful blooms of your flowers or enjoy the fresh foliage in your garden.
By being attentive to the needs of your plants and providing proper monitoring and maintenance, you will maximize their growth potential and the overall success of your garden. Remember to enjoy the process and take pride in the beautiful results that your small seeds have brought forth.
Conclusion
Planting small seeds is a rewarding and fulfilling experience that allows you to witness the miracle of life as tiny seeds transform into thriving plants. By following the steps outlined in this guide, you can ensure successful germination and growth of your seedlings.
From preparing the soil and creating seed pots to planting the seeds, watering, transplanting, and providing ongoing care, each step plays a vital role in the development of your plants. Monitoring their growth, protecting against pests, providing support, and maintaining proper watering and fertilization are essential for their overall health and vitality.
Remember, gardening is a continuous learning process. Each seed you plant is an opportunity to gain more knowledge and improve your skills. Don’t be disheartened by challenges or setbacks, as they are opportunities for growth and discovery.
So, whether you’re planting vegetables, herbs, or beautiful flowers, enjoy the journey of nurturing your small seeds into flourishing plants. Embrace the therapeutic benefits of gardening, connect with nature, and revel in the joy of watching your garden thrive.
Now, it’s time to grab your gardening tools, put on your gloves, and venture into the world of planting small seeds. Happy gardening!
Frequently Asked Questions about How To Plant Small Seeds
Was this page helpful?
At Storables.com, we guarantee accurate and reliable information. Our content, validated by Expert Board Contributors, is crafted following stringent Editorial Policies. We're committed to providing you with well-researched, expert-backed insights for all your informational needs.


0 thoughts on “How To Plant Small Seeds”