Home>Gardening & Outdoor>Outdoor Structures>How To Install Rolled Roofing On A Shed
Outdoor Structures
How To Install Rolled Roofing On A Shed
Modified: February 17, 2024
Learn how to install rolled roofing on your shed with our step-by-step guide. Protect your outdoor structures with this easy DIY solution.
(Many of the links in this article redirect to a specific reviewed product. Your purchase of these products through affiliate links helps to generate commission for Storables.com, at no extra cost. Learn more)
Introduction
So, you've got a sturdy shed in your backyard, a reliable storage space for your gardening tools, outdoor equipment, and perhaps even a cozy retreat for your hobbies. Now, picture this: the sun is shining, the birds are chirping, and a gentle breeze rustles the leaves. It's the perfect day to enhance the longevity and appeal of your shed by installing rolled roofing.
Rolled roofing is a cost-effective and practical solution for small structures like sheds, providing protection against the elements and a sleek, uniform appearance. Whether you're a seasoned DIY enthusiast or a novice looking to delve into the world of outdoor structures, this guide will walk you through the process of installing rolled roofing on your shed. With a handful of tools, a bit of elbow grease, and the guidance offered here, you'll be well-equipped to take on this gratifying project and give your shed a well-deserved upgrade.
In the following sections, we'll delve into the materials and tools needed for the job, the step-by-step process of preparing the shed and installing the rolled roofing, and the finishing touches that will ensure a durable and visually appealing result. By the end of this guide, you'll have the knowledge and confidence to tackle this project and elevate the functionality and aesthetic charm of your outdoor space. So, let's roll up our sleeves and get started!
Key Takeaways:
- Installing rolled roofing on a shed involves preparing the surface, laying the underlayment, rolling out the roofing material, and securing it with precision to create a durable and visually appealing outdoor structure.
- Adding finishing touches such as sealing seams, installing ridge caps, and potential painting enhances the shed’s functionality and personalized aesthetic appeal, creating a welcoming and enduring outdoor space.
Read more: How To Install Roll Roofing
Materials and Tools Needed
Before embarking on the installation of rolled roofing on your shed, it’s essential to gather the necessary materials and tools. Here’s a comprehensive list to ensure you’re well-prepared for the task at hand:
Materials:
- Rolled roofing material
- Underlayment (felt or synthetic)
- Nails (galvanized or roofing nails)
- Roofing cement
- Drip edge
- Roofing adhesive
- Roofing nails
- Wood primer
- Paint (optional, for aesthetic purposes)
Tools:
- Measuring tape
- Chalk line
- Hammer
- Utility knife
- Roofing nails
- Roofing nail gun (optional, but highly recommended for efficiency)
- Roofing spade or shovel
- Roofing brush
- Paintbrushes (if painting the shed)
- Ladder or scaffolding
- Safety goggles
- Work gloves
- Dust mask
Ensuring that you have all the required materials and tools readily available will streamline the installation process and minimize interruptions. Additionally, it’s crucial to prioritize safety throughout the project. Investing in high-quality safety gear and adhering to best practices for working at heights will contribute to a smooth and secure installation.
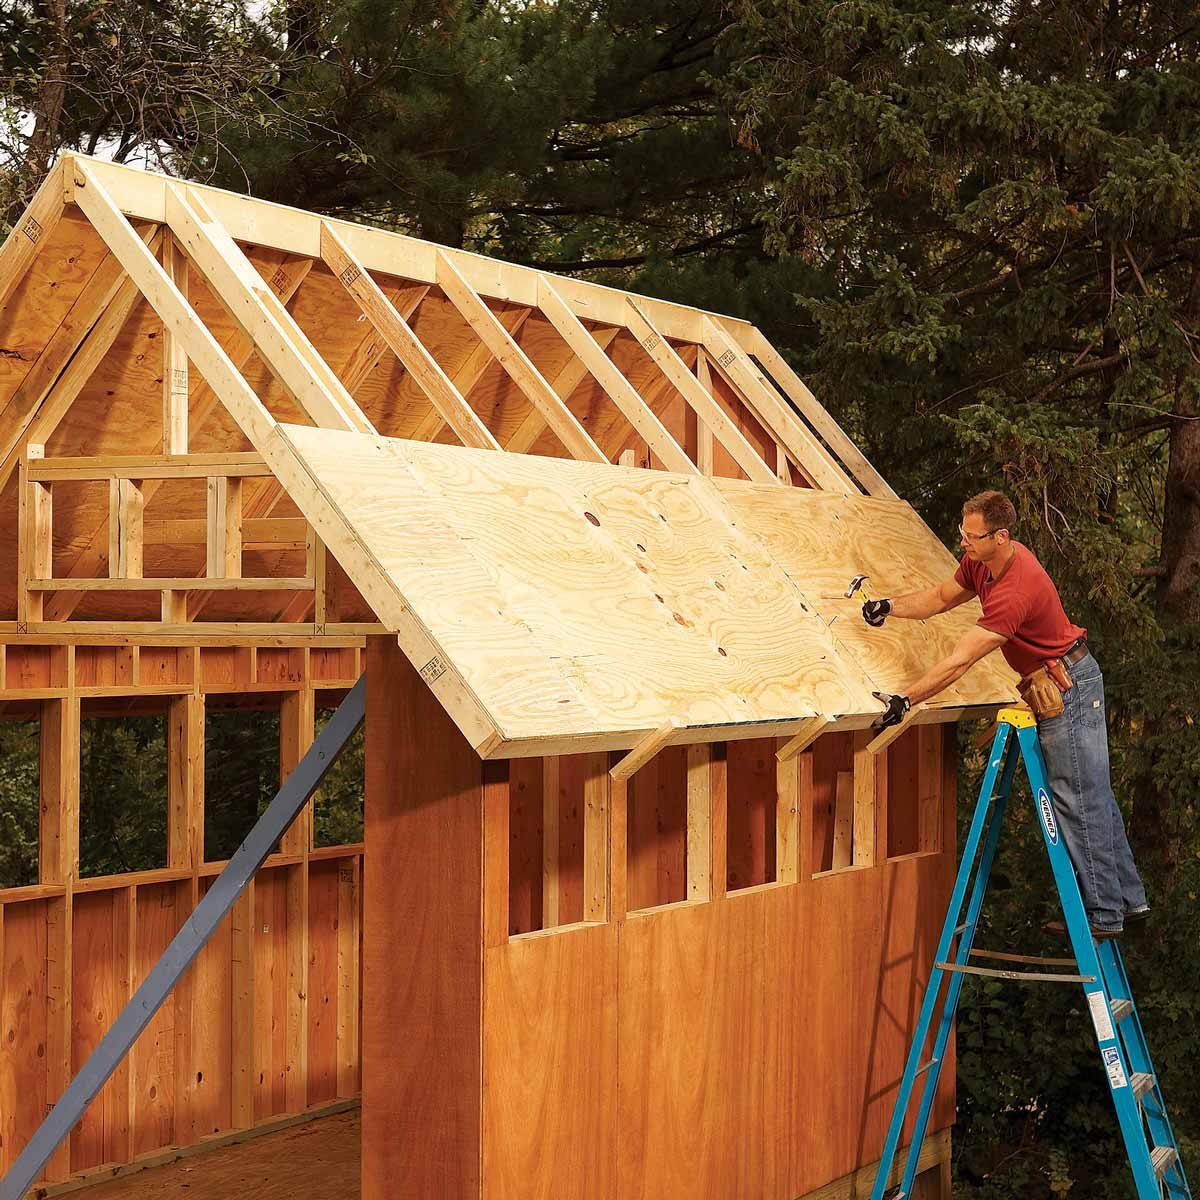
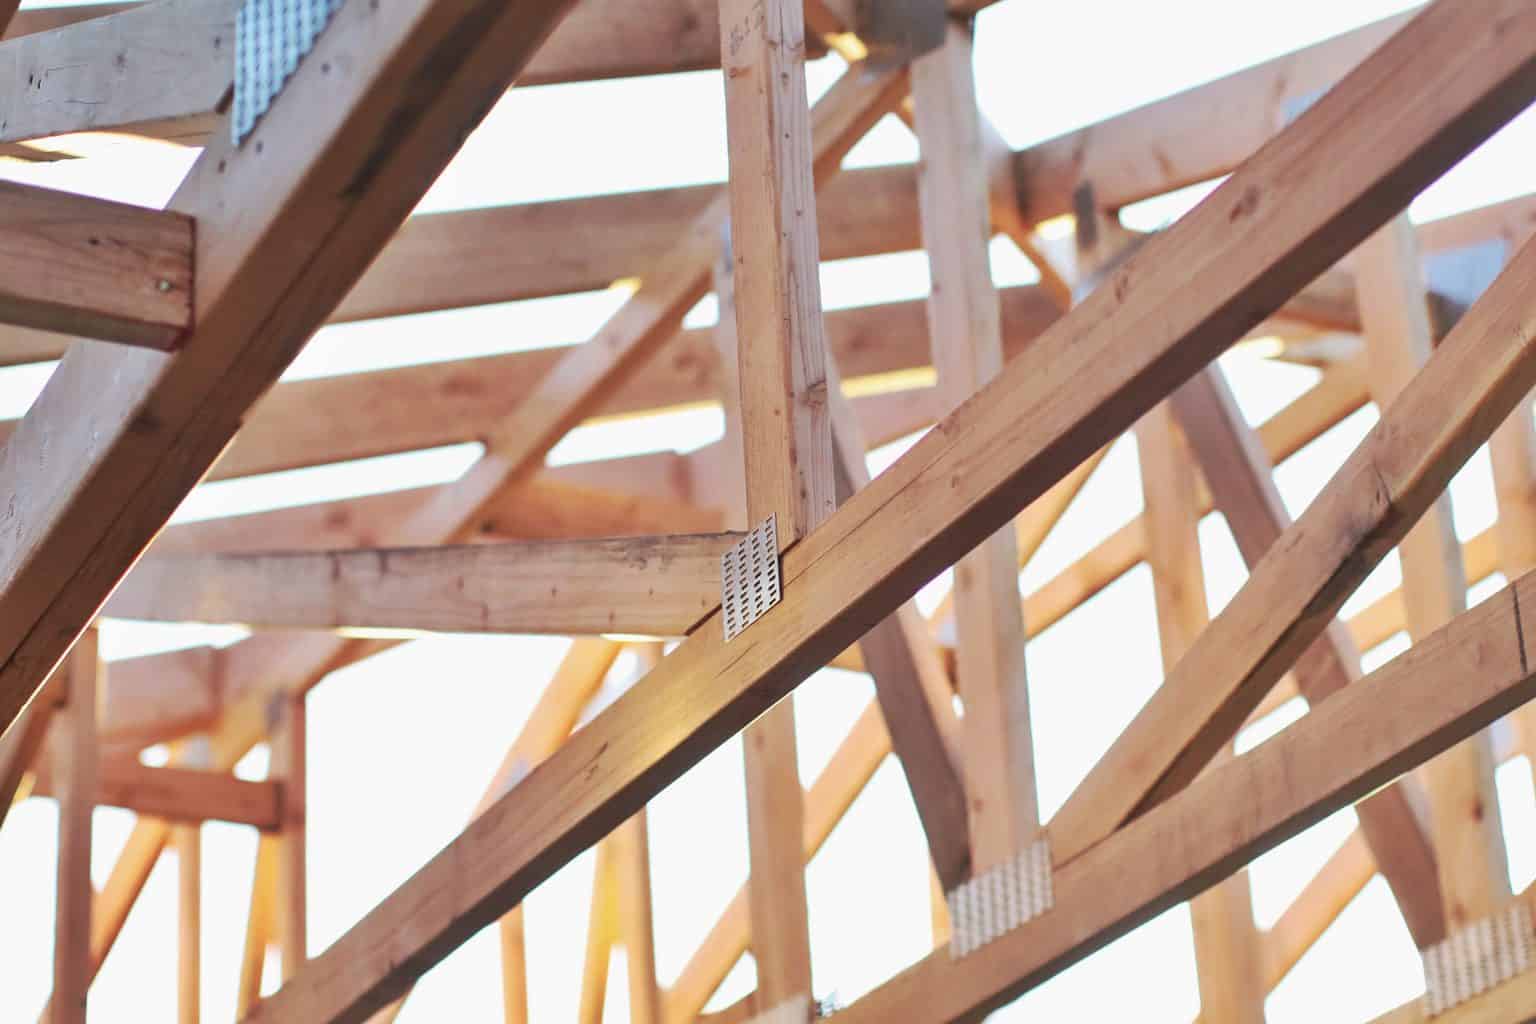
Preparing the Shed
Before diving into the installation of rolled roofing, it’s imperative to prepare the shed to ensure a smooth and successful process. Here’s a step-by-step guide to preparing the shed for the roofing installation:
1. Clear the Area: Begin by removing any debris, dirt, or loose materials from the roof of the shed. Use a broom or a roofing brush to sweep the surface clean, ensuring that it’s free of any obstructions that could interfere with the roofing material’s adhesion.
2. Inspect and Repair: Thoroughly inspect the shed’s roof for any signs of damage, such as cracks, rot, or protruding nails. Address any issues by repairing the damaged areas and replacing any deteriorated sections of the roof. This step is crucial for ensuring a solid foundation for the rolled roofing.
3. Install Drip Edge: Next, install a drip edge along the eaves of the shed’s roof. The drip edge will help channel water away from the shed, preventing moisture-related issues and enhancing the longevity of the roofing system.
4. Apply Primer (Optional): If you plan to paint the shed, this is the ideal time to apply a wood primer to the roof surface. The primer will promote better adhesion of the paint and contribute to a more polished final appearance.
5. Cut Underlayment: Measure and cut the underlayment material (felt or synthetic) to fit the dimensions of the shed’s roof. The underlayment serves as an additional layer of protection against moisture and helps create a smooth surface for the rolled roofing.
6. Secure Underlayment: Using roofing nails, secure the underlayment to the roof, ensuring that it lies flat and taut across the entire surface. Pay close attention to the edges and overlaps to prevent any potential water infiltration.
By meticulously preparing the shed for the installation of rolled roofing, you’ll establish a solid foundation for the subsequent steps. This preparatory phase sets the stage for a seamless and durable roofing system that will safeguard your shed for years to come.
Read more: How To Install A Shed Roof
Installing the Underlayment
With the shed properly prepared, the next crucial step in the installation process is laying down the underlayment. This essential layer provides an additional barrier against moisture and contributes to the overall resilience of the roofing system. Here’s a detailed guide on how to install the underlayment:
1. Start at the Bottom: Begin at the bottom edge of the roof and roll out the underlayment horizontally, ensuring that it overhangs the eaves slightly. This overhang will help direct water away from the shed, preventing potential water damage.
2. Secure the Underlayment: Use roofing nails to secure the underlayment in place, placing them at regular intervals along the edges and across the surface. This will prevent the underlayment from shifting or lifting during the installation of the rolled roofing.
3. Overlap Seams: When laying subsequent rows of underlayment, overlap the seams by a few inches to create a watertight barrier. This overlapping technique ensures that water cannot penetrate the underlayment, safeguarding the shed from potential leaks.
4. Trim Excess Underlayment: Once the underlayment is fully secured and in place, trim any excess material along the edges of the roof using a utility knife. This will create a neat and uniform appearance, preparing the surface for the rolled roofing installation.
5. Inspect for Wrinkles and Bubbles: Thoroughly inspect the underlayment for any wrinkles, bubbles, or irregularities. Smooth out any imperfections to ensure that the underlayment lies flat and uniform across the entire roof surface.
By meticulously installing the underlayment, you’re fortifying the shed’s roof with an additional layer of protection against the elements. This foundational step sets the stage for the seamless application of the rolled roofing, ensuring a durable and resilient roofing system for your shed.
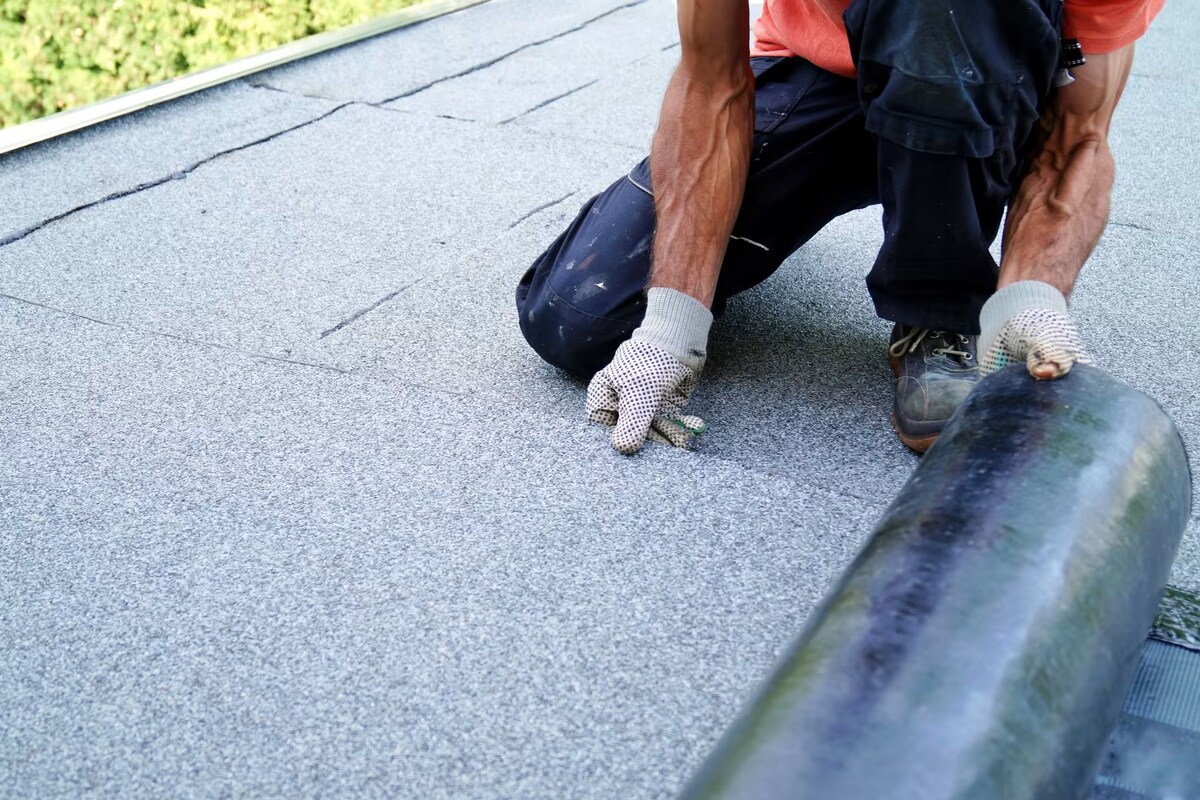
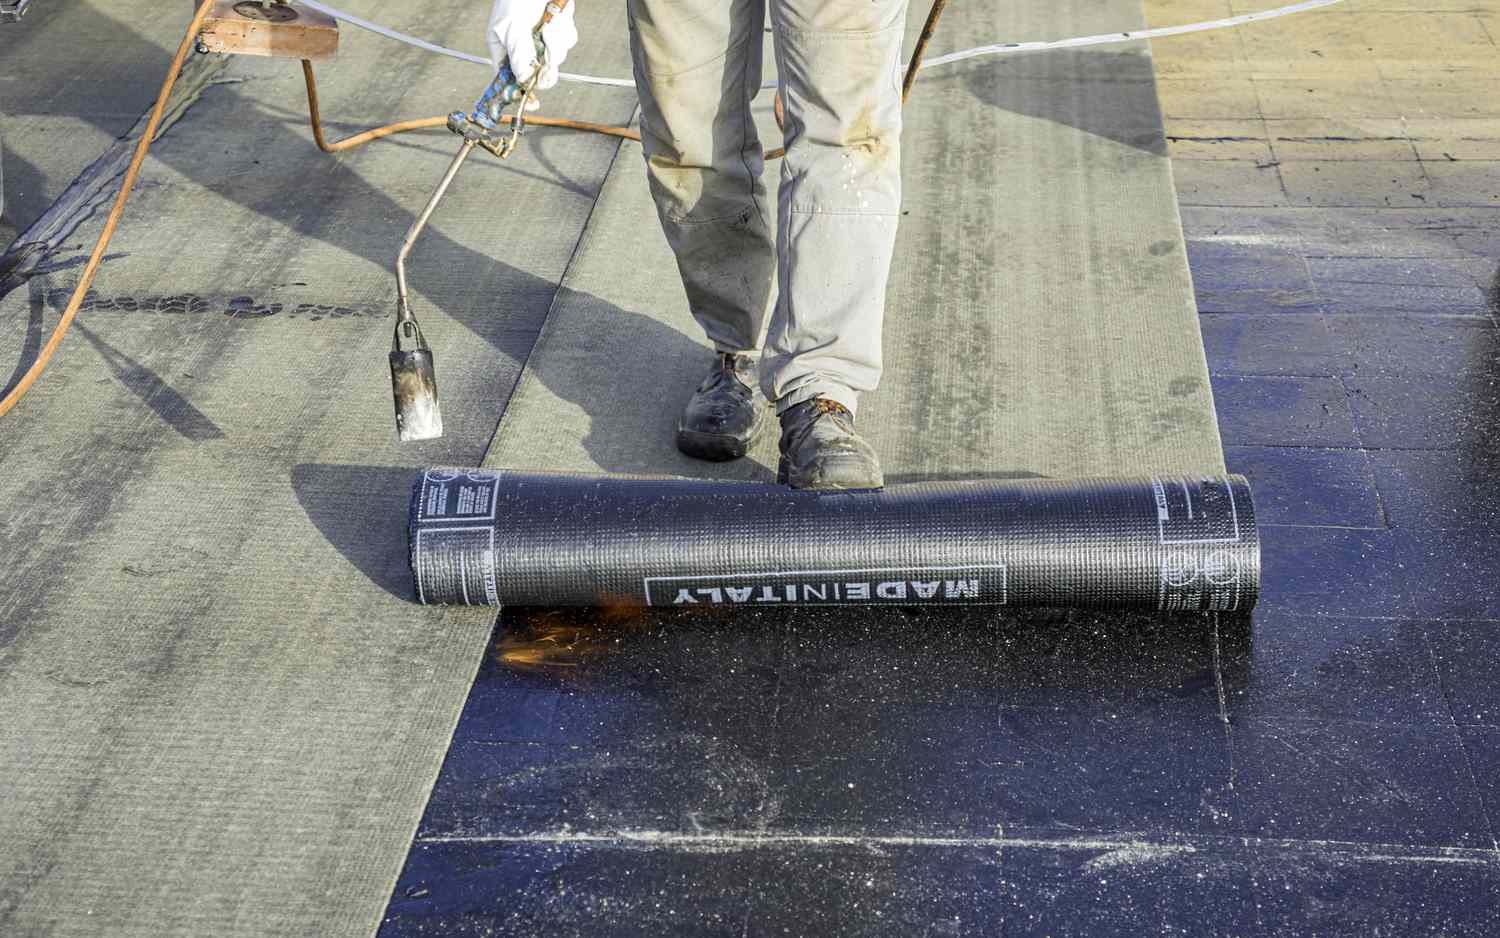
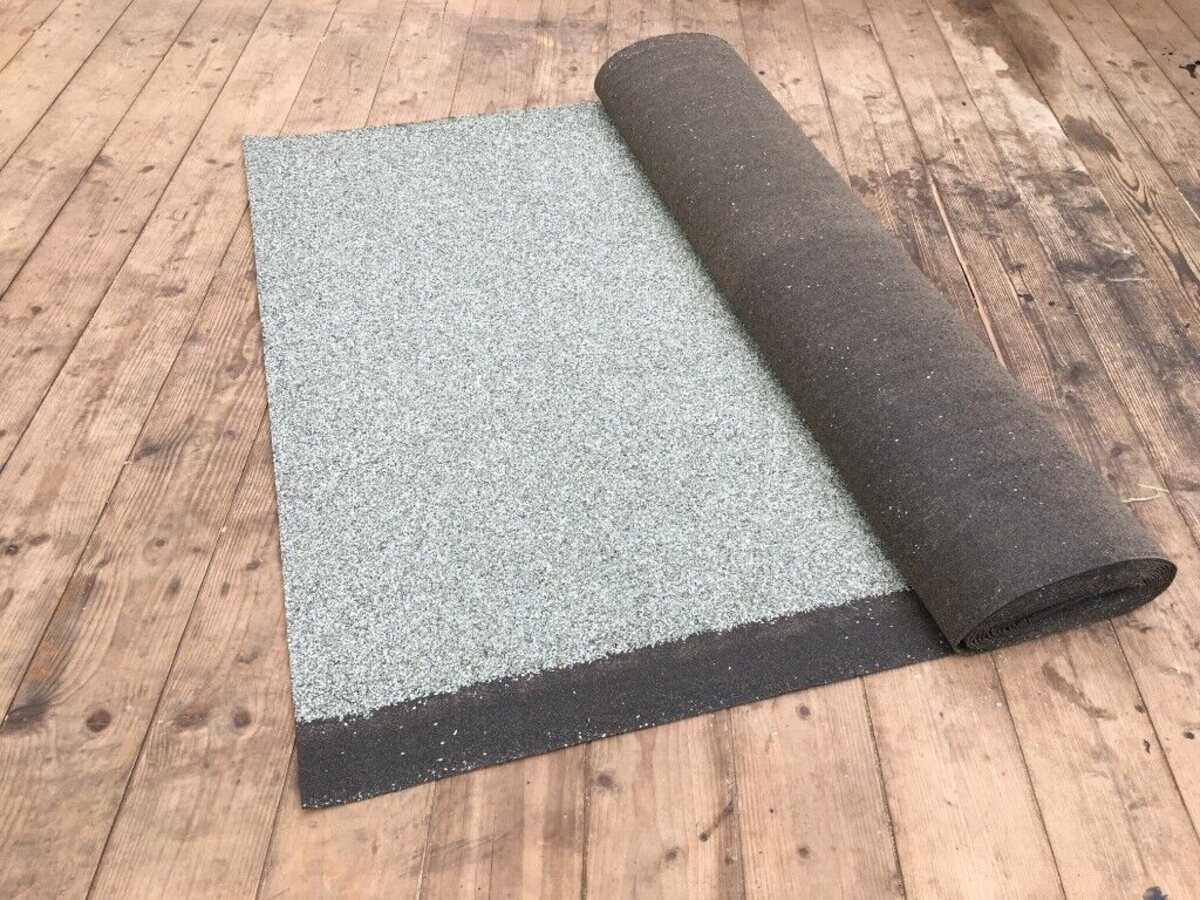
Rolling Out the Roofing
With the underlayment securely in place, it’s time to embark on the exciting phase of rolling out the roofing material onto the shed. This transformative step will not only enhance the shed’s protection against the elements but also elevate its aesthetic appeal. Here’s a comprehensive guide on how to roll out the roofing:
1. Measure and Cut: Begin by measuring the dimensions of the shed’s roof and cutting the rolled roofing material to the appropriate size. Use a measuring tape and a chalk line to ensure precise measurements, allowing for a slight overhang at the edges for optimal coverage.
2. Position the Roofing: Carefully position the first piece of roofing material at the bottom edge of the shed’s roof, ensuring that it aligns with the eaves and overlaps the underlayment. This initial placement sets the stage for the seamless application of the remaining roofing material.
3. Unroll and Smooth: Gradually unroll the roofing material across the roof surface, smoothing out any wrinkles or creases as you progress. A steady and methodical approach will contribute to a uniform and professional-looking result.
4. Overlap Seams: When transitioning to the next piece of roofing material, overlap the seams according to the manufacturer’s guidelines. This overlapping technique ensures a watertight seal and reinforces the shed’s defense against rain, wind, and other environmental factors.
5. Trim Excess Material: Once the roofing material is fully in place, trim any excess material along the edges of the roof using a utility knife. This meticulous trimming process will create clean and precise edges, contributing to a polished and tailored appearance.
6. Adhere the Roofing: Depending on the type of rolled roofing material, use roofing cement or adhesive as recommended by the manufacturer to secure the roofing in place. Pay special attention to the edges and seams, ensuring a secure and durable bond.
By methodically rolling out the roofing material, you’re not only fortifying the shed with enhanced weather resistance but also enhancing its visual allure. This transformative phase brings you one step closer to a resilient and aesthetically pleasing roofing system for your cherished outdoor structure.
Make sure the shed roof is clean and dry before starting. Use roofing cement to seal any seams or joints. Overlap the rolled roofing by 4-6 inches and secure with nails or adhesive. Trim any excess material for a clean finish.
Securing the Roofing
With the roofing material seamlessly rolled out, the next critical step in the installation process is securing the roofing to ensure its stability and resilience against the elements. Properly securing the roofing material is essential for safeguarding your shed and prolonging the lifespan of the roofing system. Here’s a comprehensive guide on how to secure the roofing:
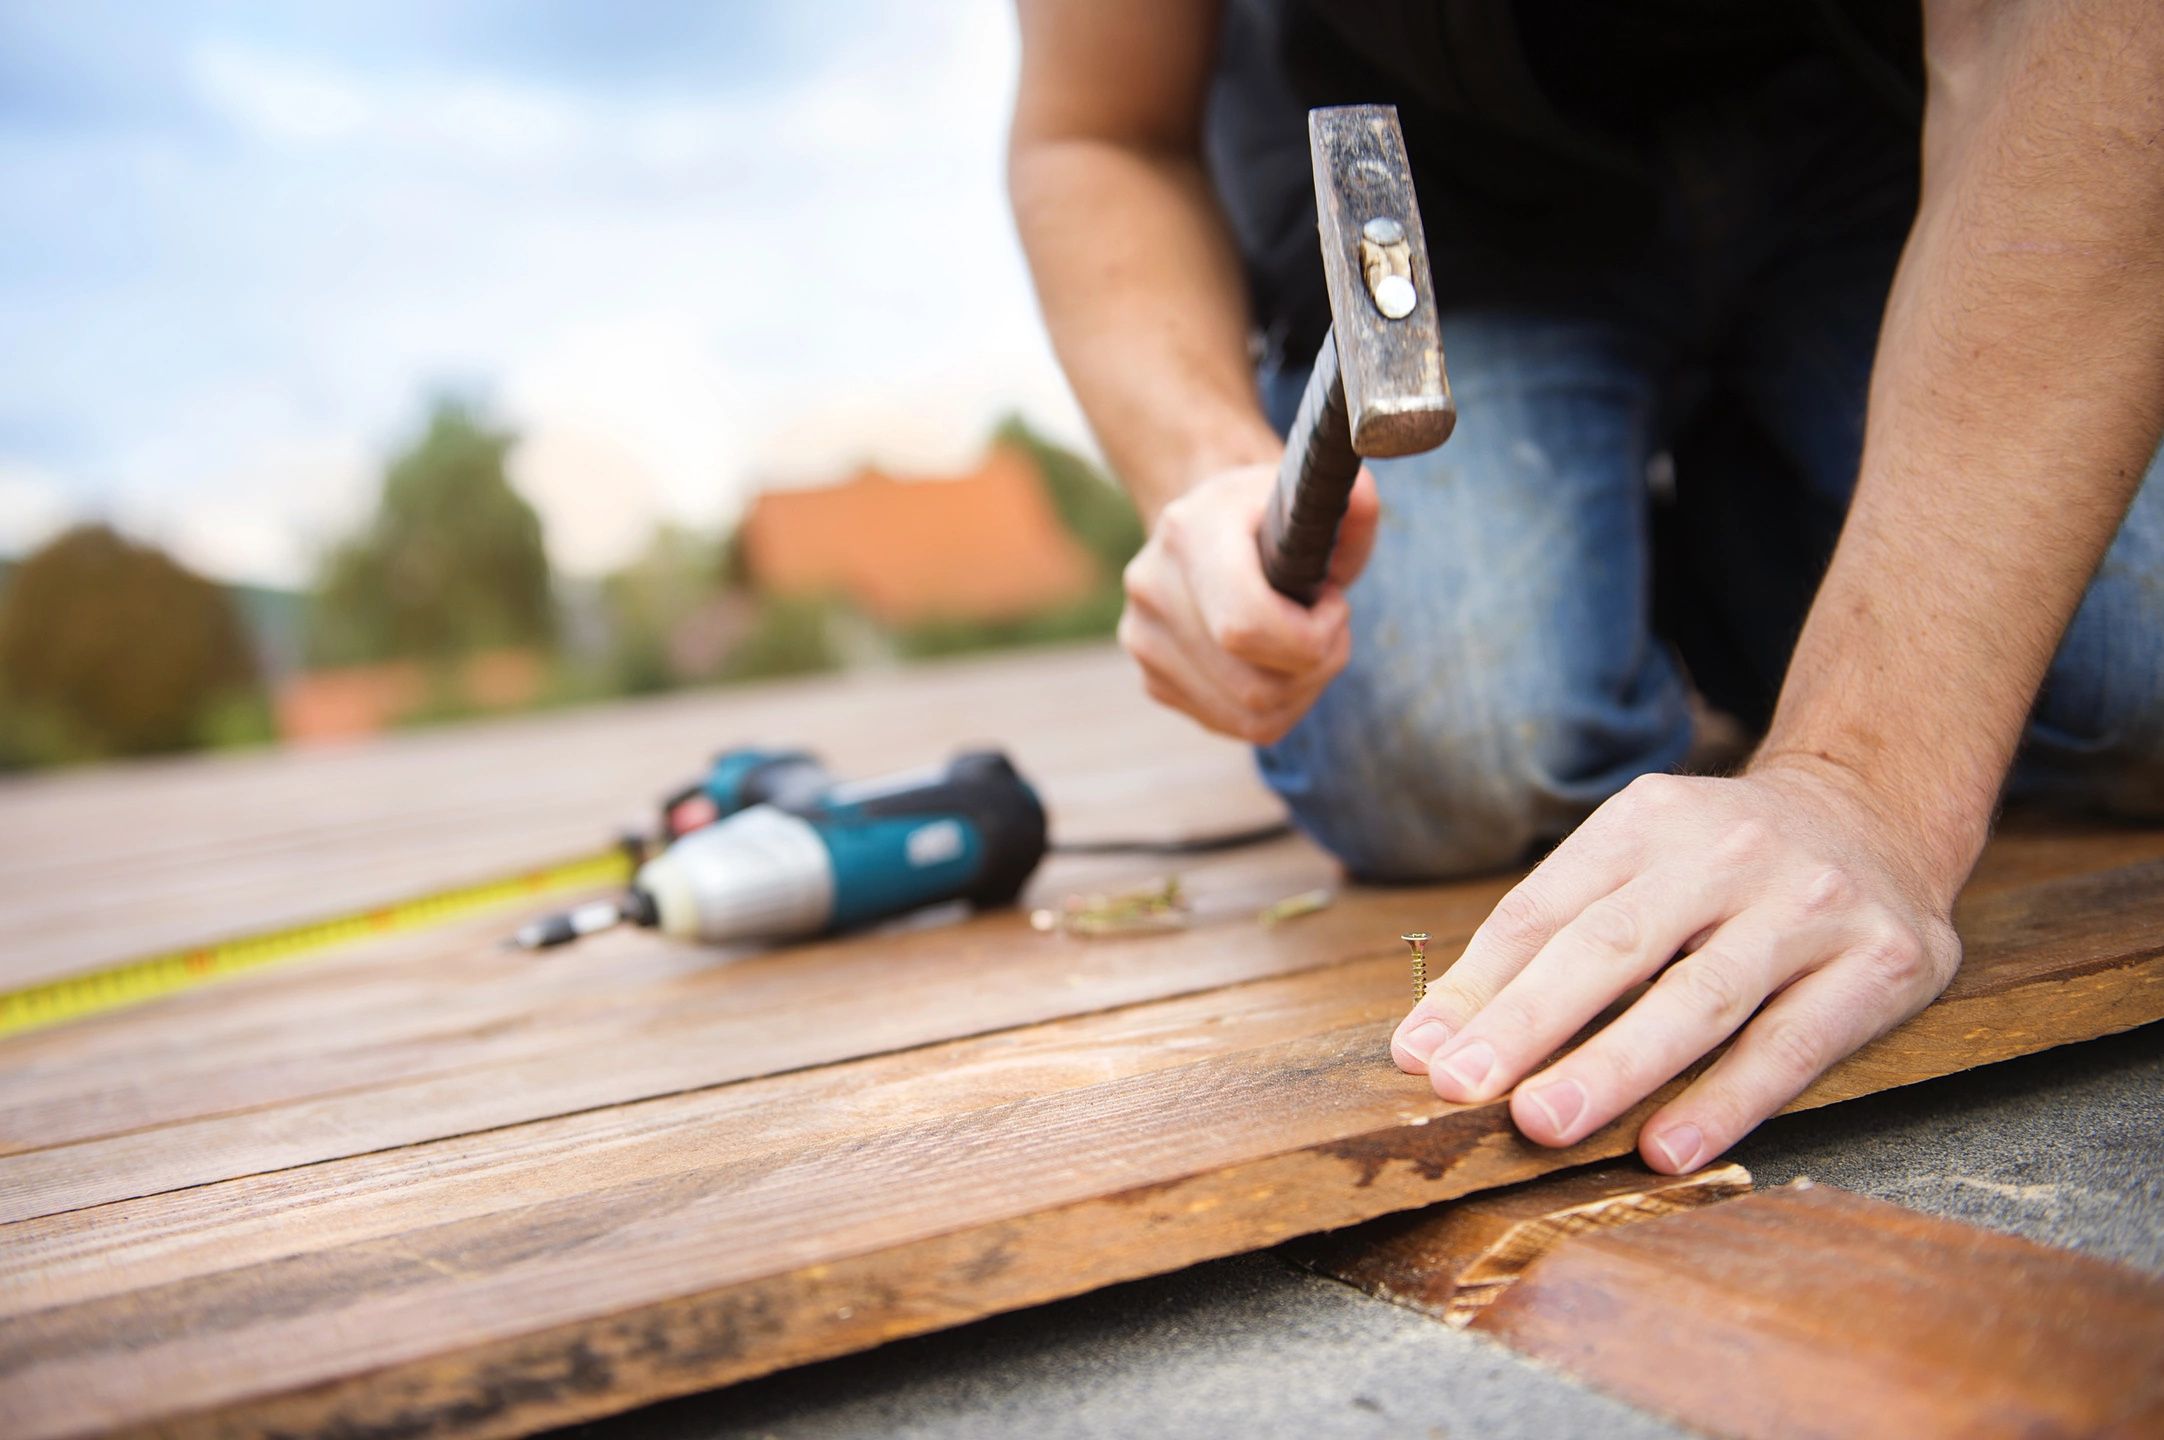
1. Nail Placement: Using galvanized or roofing nails, secure the roofing material at regular intervals along the edges and across the surface. The precise nail placement will anchor the roofing in place, preventing it from shifting or lifting, especially during inclement weather.
2. Nail Spacing: Adhere to the manufacturer’s recommendations for nail spacing, ensuring that the roofing material is adequately fastened without creating unnecessary stress points. This balanced approach will contribute to the roofing’s overall structural integrity.
3. Consider Wind Uplift: If you reside in an area prone to strong winds, consider implementing additional measures to mitigate wind uplift. This may involve using specialized roofing adhesives or installing mechanical fasteners to reinforce the roofing’s resistance to uplift forces.
4. Seal Edges and Seams: Apply roofing cement or adhesive along the edges and seams of the roofing material to create a watertight seal. This additional step fortifies the shed’s defense against water infiltration, enhancing the overall weatherproofing of the roofing system.
5. Inspect and Reinforce: Thoroughly inspect the secured roofing for any loose areas or potential weak points. Reinforce any areas that may require additional fastening or sealing, ensuring that the roofing remains steadfast and resilient under varying environmental conditions.
6. Trim Excess Material: Once the roofing material is securely in place, trim any excess material along the edges of the roof using a utility knife. This final trimming step will refine the appearance of the roofing, creating a clean and professional finish.
By diligently securing the roofing material, you’re fortifying your shed with a robust and resilient roofing system that will withstand the tests of time and weather. This meticulous approach ensures that your outdoor structure is well-protected, allowing you to enjoy peace of mind and the enduring charm of your enhanced shed.
Finishing Touches
As the installation of the rolled roofing nears completion, it’s time to add the finishing touches that will elevate the functionality, durability, and visual appeal of your shed’s new roofing system. These final steps will not only enhance the shed’s protection against the elements but also contribute to its overall aesthetic charm. Here’s a comprehensive guide on the finishing touches for your shed’s rolled roofing:
1. Apply Roofing Cement: Seal any exposed nail heads and seams with roofing cement to reinforce the shed’s defense against water infiltration. This additional layer of protection enhances the weatherproofing of the roofing system, ensuring long-term durability.
2. Install Ridge Cap: If your shed features a peaked roof, consider installing a ridge cap to cover the peak and create a seamless, watertight finish. The ridge cap not only enhances the shed’s weather resistance but also adds a polished and professional touch to the roofing system.
3. Paint (Optional): If you desire to further enhance the shed’s aesthetic appeal, consider applying a fresh coat of paint to the exterior. Choose a high-quality exterior paint that complements the roofing material, adding a pop of color and protecting the shed from the elements.
4. Clear Surrounding Area: Once the roofing installation is complete, ensure that the surrounding area is free of debris and construction materials. A tidy and well-maintained environment enhances the overall visual impact of the shed and ensures a safe and welcoming outdoor space.
5. Inspection and Maintenance: Conduct a thorough inspection of the completed roofing system, checking for any potential issues or areas that may require further attention. Establish a maintenance routine to keep the roofing in optimal condition, extending its longevity and preserving the shed’s integrity.
By attending to these finishing touches, you’re not only enhancing the functionality and resilience of your shed’s roofing system but also infusing it with a touch of personalized style and care. These final steps mark the culmination of your efforts, resulting in a strengthened and visually appealing outdoor structure that will serve you well for years to come.
Read more: How To Install Corrugated Roof On A Shed
Conclusion
Congratulations! By embarking on the journey of installing rolled roofing on your shed, you’ve not only fortified its protection against the elements but also imbued it with a renewed sense of durability and charm. This comprehensive guide has equipped you with the knowledge and confidence to undertake this gratifying project, transforming your shed into a resilient and visually appealing outdoor space.
Throughout the installation process, you’ve meticulously prepared the shed, laid down the underlayment, rolled out the roofing material, and secured it with precision. These foundational steps have culminated in a robust roofing system that will safeguard your shed for years to come, weathering the seasons with resilience and grace.
As you added the finishing touches, such as sealing seams, installing ridge caps, and potentially applying a fresh coat of paint, you’ve not only enhanced the shed’s functionality but also personalized its aesthetic appeal. Your attention to detail and commitment to quality have resulted in a shed that stands as a testament to your dedication to creating a welcoming and enduring outdoor space.
Remember, the completion of the roofing installation is not the end, but rather the beginning of a new chapter in the life of your shed. Regular maintenance and periodic inspections will ensure that the roofing system remains in optimal condition, preserving the shed’s integrity and charm for years to come.
As you gaze upon your newly enhanced shed, take pride in the knowledge that your efforts have not only elevated its functionality but also added a touch of character to your outdoor oasis. Whether it’s the gentle pitter-patter of rain or the warm glow of the sun, your shed now stands as a steadfast shelter, a reliable guardian of your cherished belongings, and a serene retreat amidst the beauty of the outdoors.
So, as you bask in the satisfaction of a job well done, may your shed continue to serve you faithfully, standing as a testament to the enduring spirit of craftsmanship and the joy of transforming a humble space into a cherished haven.
Frequently Asked Questions about How To Install Rolled Roofing On A Shed
Was this page helpful?
At Storables.com, we guarantee accurate and reliable information. Our content, validated by Expert Board Contributors, is crafted following stringent Editorial Policies. We're committed to providing you with well-researched, expert-backed insights for all your informational needs.


0 thoughts on “How To Install Rolled Roofing On A Shed”