Home>Home Maintenance>How To Cut A Hole For A Dryer Vent
Home Maintenance
How To Cut A Hole For A Dryer Vent
Modified: October 28, 2024
Learn the step-by-step process of cutting a hole for a dryer vent as part of your home maintenance routine. Ensure proper airflow and maximize efficiency.
(Many of the links in this article redirect to a specific reviewed product. Your purchase of these products through affiliate links helps to generate commission for Storables.com, at no extra cost. Learn more)
Introduction
Installing a dryer vent is an essential step when it comes to properly ventilating your home and preventing potential fire hazards. A dryer vent allows hot air and moisture to escape from your dryer, reducing the risk of mold growth and improving the efficiency of your machine. One crucial aspect of this installation process is cutting a hole for the dryer vent. In this article, we will guide you through the steps to cut a hole for a dryer vent, ensuring a safe and effective installation.
Before we dive into the details, it’s important to prioritize safety throughout this process. Make sure to turn off your dryer and unplug it before starting any work. Additionally, wear protective goggles and gloves to protect yourself from potential debris and sharp edges. Now let’s gather the necessary tools and materials to get started.
Key Takeaways:
- Safety First!
Before cutting a hole for a dryer vent, always prioritize safety. Turn off and unplug the dryer, wear protective gear, and check for hidden utilities to prevent accidents and ensure a smooth installation process. - Measure, Cut, and Secure
To cut a hole for a dryer vent, carefully measure and mark the location, prepare the area, make precise cuts, and secure the vent pipe. Following these steps will result in a well-ventilated and efficient system.
Read more: What Size Hole For A Dryer Vent
Safety Precautions
When it comes to any home maintenance project, safety should always be the top priority. Before you begin cutting a hole for a dryer vent, take note of the following safety precautions:
- Turn off and unplug the dryer: Before starting any work, make sure the dryer is turned off and unplugged from the power source. This will prevent any accidents or electrocutions.
- Wear protective gear: It’s crucial to protect your eyes, hands, and skin from potential debris and sharp edges. Wear safety goggles and gloves throughout the installation process.
- Check for hidden utilities: Before cutting into any walls, floors, or ceilings, ensure there are no hidden electrical wires, plumbing pipes, or gas lines in the area. Use a stud finder or consult professionals if needed.
- Use the proper tools: Make use of the right tools for the job, such as a jigsaw or reciprocating saw, to ensure clean and accurate cuts.
- Work in a well-ventilated area: When cutting the hole, ensure that the area is well-ventilated to minimize exposure to dust and debris. Open windows or use exhaust fans if necessary.
- Work at a comfortable height: If you need to use a ladder or step stool during the process, ensure it is stable and secure before climbing on it.
- Be mindful of surrounding surfaces: Take precautions to protect walls, floors, and countertops from scratches or damage during the cutting process.
- Read and follow manufacturer’s instructions: Always refer to the specific instructions provided with your dryer vent kit for the most accurate and relevant guidance for your installation.
By adhering to these safety measures, you can minimize the risk of accidents and ensure a smooth and secure installation process for your dryer vent.
Tools and Materials Needed
Before you begin cutting a hole for a dryer vent, gather the necessary tools and materials to ensure a smooth installation process. Here’s a list of what you’ll need:
- Jigsaw or reciprocating saw: This tool will help you cut through the wall or ceiling to create the hole for the vent.
- Tape measure: Measure the dimensions of the vent pipe and determine the appropriate size of the hole to be cut.
- Marker or pencil: Use it to mark the exact location and dimensions of the hole on the wall or ceiling.
- Drill and drill bits: These will be handy for creating pilot holes and allowing for easier cutting with the jigsaw.
- Safety goggles and gloves: Protect your eyes and hands from debris and sharp edges during the cutting process.
- Drywall saw: In case you encounter any obstacles such as studs or electrical wires, a drywall saw will allow you to make precise cuts.
- Dryer vent kit: This usually includes the vent pipe, clamps, and connectors needed for the installation.
- Caulk gun and silicone caulk: After the hole is cut and the vent is installed, caulk will help seal any gaps around the vent pipe for a secure fit.
- Screwdriver: You may need it to secure the vent pipe or any other components of the dryer vent system.
- Vacuum or broom: Clean up any debris or dust generated during the installation to ensure a tidy and safe work area.
Having these tools and materials prepared beforehand will make the cutting process more efficient and help you achieve professional-looking results. With everything ready, let’s move on to the steps involved in cutting the hole for a dryer vent.
Step 1: Marking the Location
The first step in cutting a hole for a dryer vent is marking the exact location where the hole will be made. Follow these simple steps:
- Consult the dryer vent installation instructions: Review the manufacturer’s instructions that came with your dryer vent kit to determine the recommended location for the vent. Typically, this is positioned on an exterior wall or on a ceiling in the case of a ventless dryer.
- Measure and mark the location: Use a tape measure to find the appropriate spot for the hole. Take into consideration the dimensions of the vent pipe and allow for sufficient spacing around it. Mark the center of the hole using a marker or pencil.
- Check for obstructions: Before proceeding, ensure there are no obstacles such as electrical wires, plumbing pipes, or structural elements behind the wall or in the ceiling. Use a stud finder or consult a professional if you are unsure.
- Double-check the markings: Once you have marked the location, carefully double-check to ensure the measurements and position are accurate. Adjust if necessary before moving on to the next step.
By following these steps and being diligent in your measurements and markings, you will ensure that the hole is placed correctly for the dryer vent installation. This will save you time and effort in later stages of the process. Now that you have marked the location, let’s move on to preparing the area for cutting.
Step 2: Preparing the Area
Once you have marked the location for the dryer vent hole, it’s time to prepare the area before cutting. Follow these steps to ensure a smooth and efficient process:
- Clean the area: Remove any furniture, decorations, or obstructions from around the marked location. This will provide you with a clear and unobstructed workspace.
- Protect the surrounding surfaces: Cover nearby surfaces, such as walls and floors, with a drop cloth or plastic sheeting. This will protect them from dust, debris, and potential damage during the cutting process.
- Create a pilot hole: Using a drill and an appropriate-sized drill bit, create a pilot hole in the center of the marked location. This will serve as a starting point for the jigsaw or reciprocating saw.
- Secure the area: If you are cutting a hole in a wall, make sure to secure the area by attaching a piece of scrap wood or a backing board behind the cutting location. This will prevent the drywall from cracking or crumbling during the cutting process.
- Prioritize ventilation: Ensure proper ventilation in the area by opening windows or using fans. This will help remove any dust or airborne particles generated during the cutting process.
By following these steps to prepare the area, you will create an ideal workspace for cutting the hole. Taking the time to clean, protect, and secure the area will ensure a tidy and safe environment for the next stage of the installation. Now that the area is ready, let’s move on to cutting the hole for the dryer vent.
When cutting a hole for a dryer vent, make sure to measure and mark the location carefully. Use a jigsaw or hole saw to create the opening, and then secure the vent in place to prevent any air leaks.
Read more: How To Cut A Dryer Vent Pipe
Step 3: Cutting the Hole
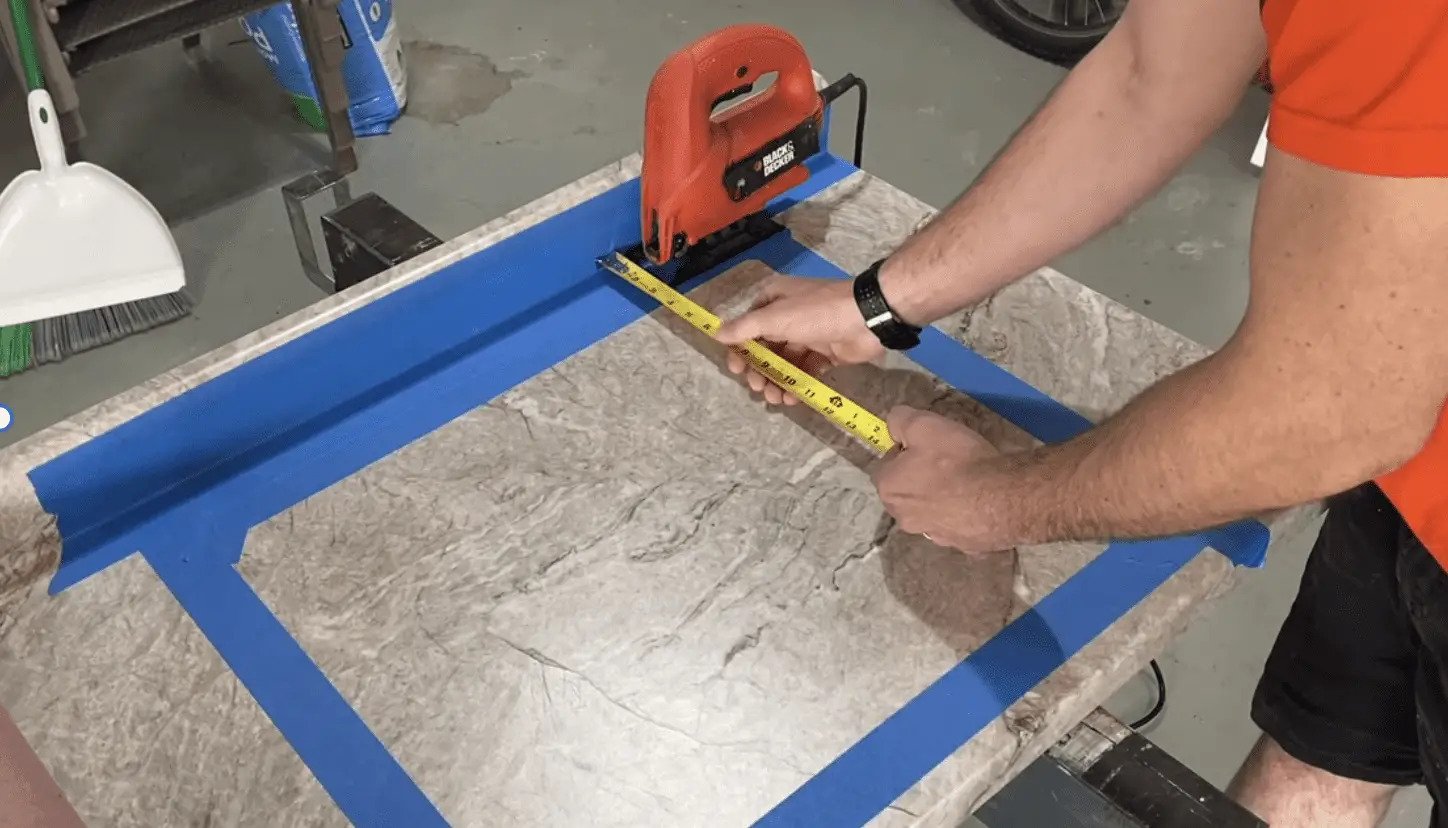
With the area prepared, it’s time to move on to the crucial step of cutting the hole for the dryer vent. Follow these steps to ensure proper and accurate cutting:
- Choose the cutting tool: Depending on the material of the wall or ceiling, choose either a jigsaw or a reciprocating saw. Ensure that the blade is appropriate for cutting through the material of the surface.
- Start at the pilot hole: Align the saw blade with the pilot hole created in Step 2. Start cutting along the marked lines, following a steady and controlled motion. Take care to stay within the marked boundaries.
- Follow the shape of the vent pipe: Depending on the shape of your dryer vent pipe, cut a hole that matches its dimensions. If the vent is round, trace and cut a circular hole. For rectangular or square vents, cut a hole that matches the width and height of the vent.
- Work in sections if needed: If you encounter any obstacles, such as electrical wires or plumbing pipes, carefully cut around them or use a drywall saw to make precise adjustments. Take your time to ensure a clean and accurate cut.
- Remove the cut section: Once the hole is fully cut, carefully remove the cut section of wall or ceiling. Be cautious not to damage the surrounding area or create any loose debris.
- Inspect the hole: After the cut is complete, inspect the hole to ensure it matches the size and shape required for your dryer vent. Make any necessary adjustments or clean up any rough edges using sandpaper or a utility knife.
By following these steps and taking your time to make precise cuts, you’ll create a well-fitted hole for your dryer vent. Now that the hole is cut, it’s time to move on to installing the dryer vent in the next step of the process.
Step 4: Installing the Dryer Vent
With the hole cut, it’s time to move on to installing the dryer vent. Follow these steps to ensure a secure and effective installation:
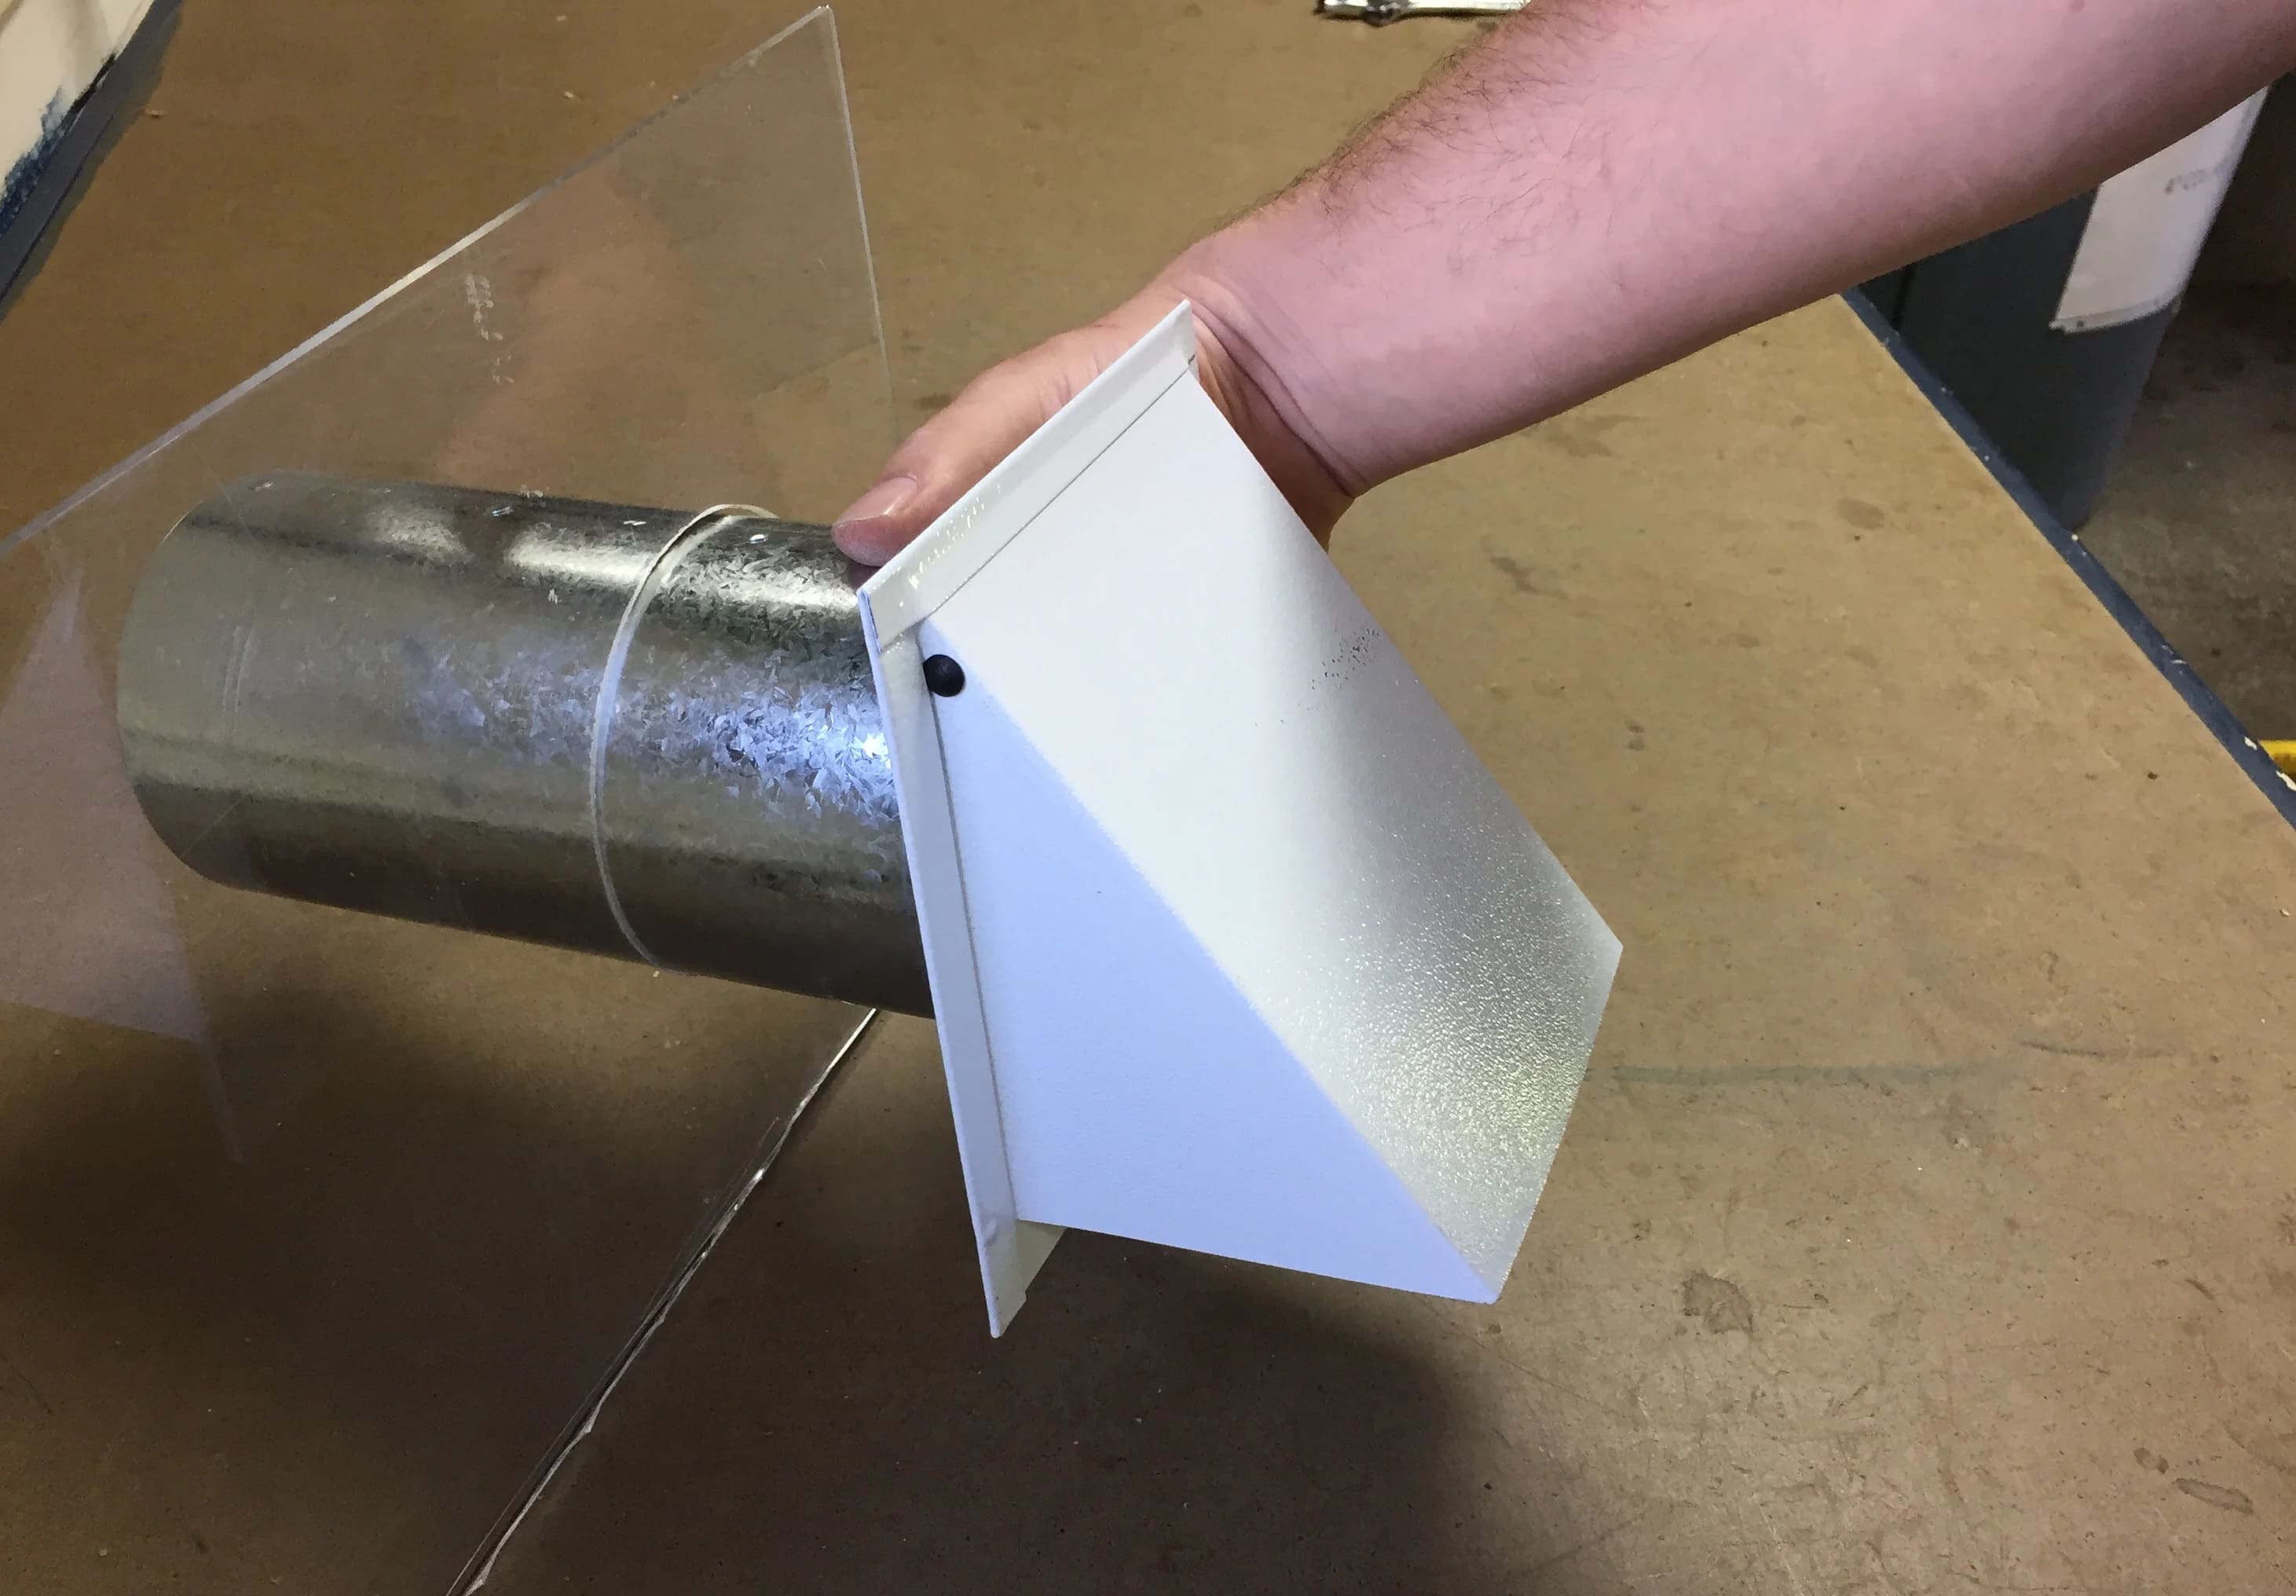
- Assemble the dryer vent components: Gather the components of your dryer vent kit, including the vent pipe, clamps, and connectors. Follow the manufacturer’s instructions to assemble the components as required.
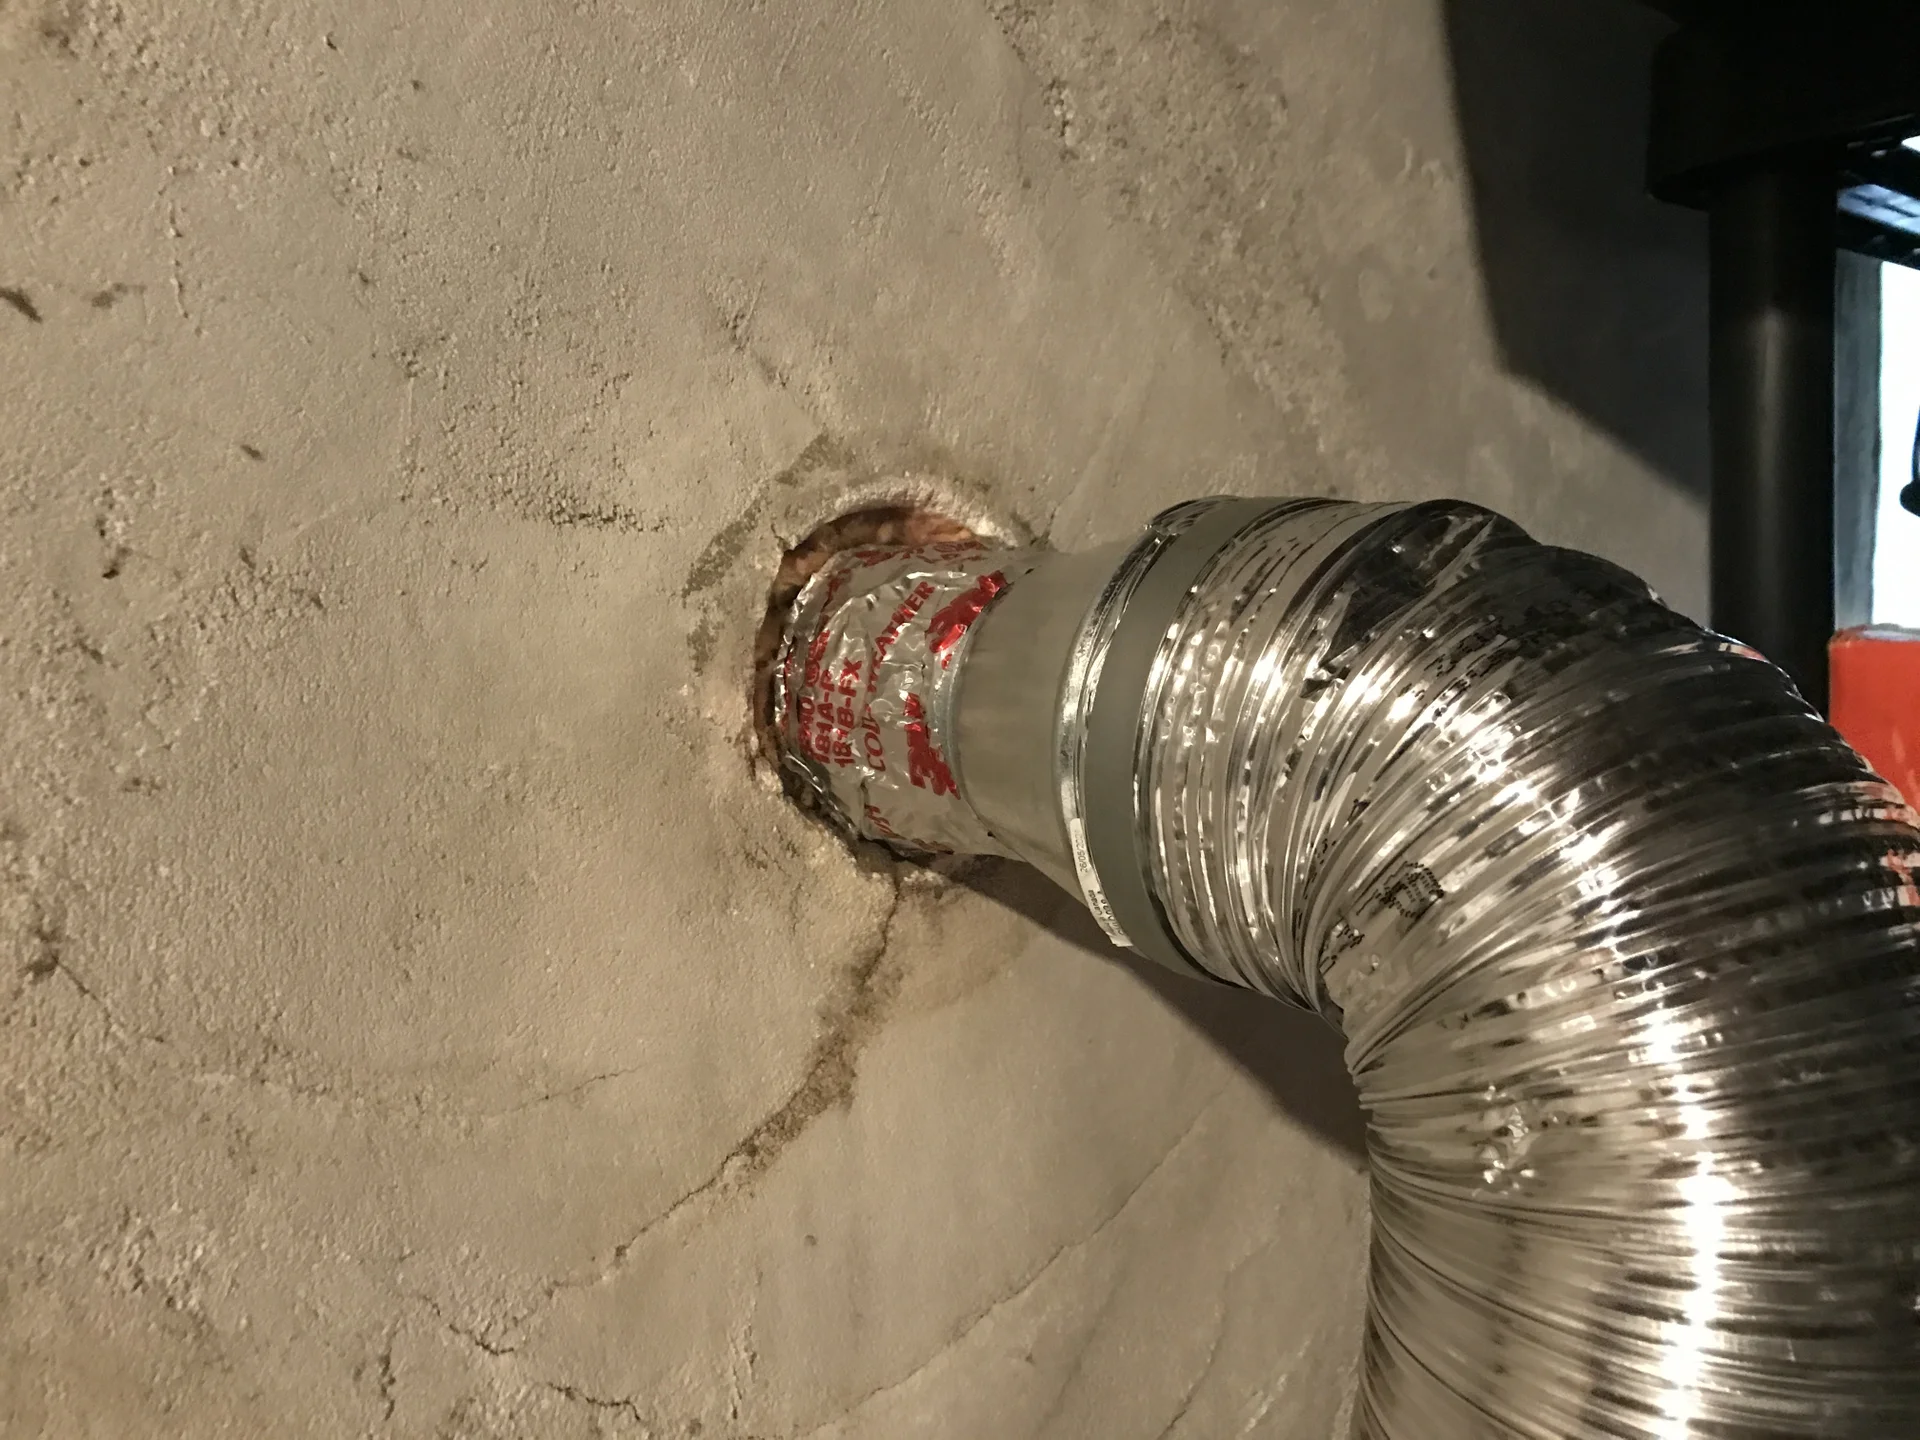
- Position the vent pipe: Insert one end of the vent pipe into the newly cut hole from the outside of the wall or ceiling. Ensure that it fits securely and extends a few inches into the interior space to allow for easy connection to the dryer.
- Align the vent pipe: Adjust the position of the vent pipe from the interior side to ensure it is straight and centered within the hole. This will prevent any obstructions or gaps that could affect proper airflow.
- Secure the vent pipe: Use clamps or fasteners provided in your dryer vent kit to secure the vent pipe in place. Tighten them firmly but avoid over-tightening, as this can damage the pipe or create gaps.
- Apply silicone caulk: To create a tight seal and prevent any air leaks, apply a bead of silicone caulk around the outer edge of the vent pipe where it meets the wall or ceiling. Smooth out the caulk for a clean finish.
- Double-check the installation: Once the vent is installed, visually inspect it to ensure it is properly aligned, secure, and sealed. Make any adjustments or re-tighten clamps if necessary.
By following these steps, you will ensure a secure and properly installed dryer vent. A well-installed vent will effectively vent hot air and moisture from your dryer, preventing potential damage and improving its overall efficiency. With the vent installed, let’s move on to the next step of securing the vent pipe.
Step 5: Securing the Vent Pipe
Once the dryer vent is installed, it’s important to ensure that the vent pipe is securely fastened in place. This will prevent any movement or dislodging of the pipe, ensuring optimal ventilation and safety. Follow these steps to secure the vent pipe:
- Inspect the vent pipe: Double-check the alignment and positioning of the vent pipe to ensure it is straight and properly fitted within the hole.
- Use support brackets: Depending on the length and stability of the vent pipe, install support brackets at strategic points along the pipe’s length. These brackets will provide additional support and prevent sagging or shifting.
- Attach the brackets: Use screws or other appropriate fasteners to attach the support brackets to the wall or ceiling. Ensure they are firmly secured and provide adequate support for the vent pipe.
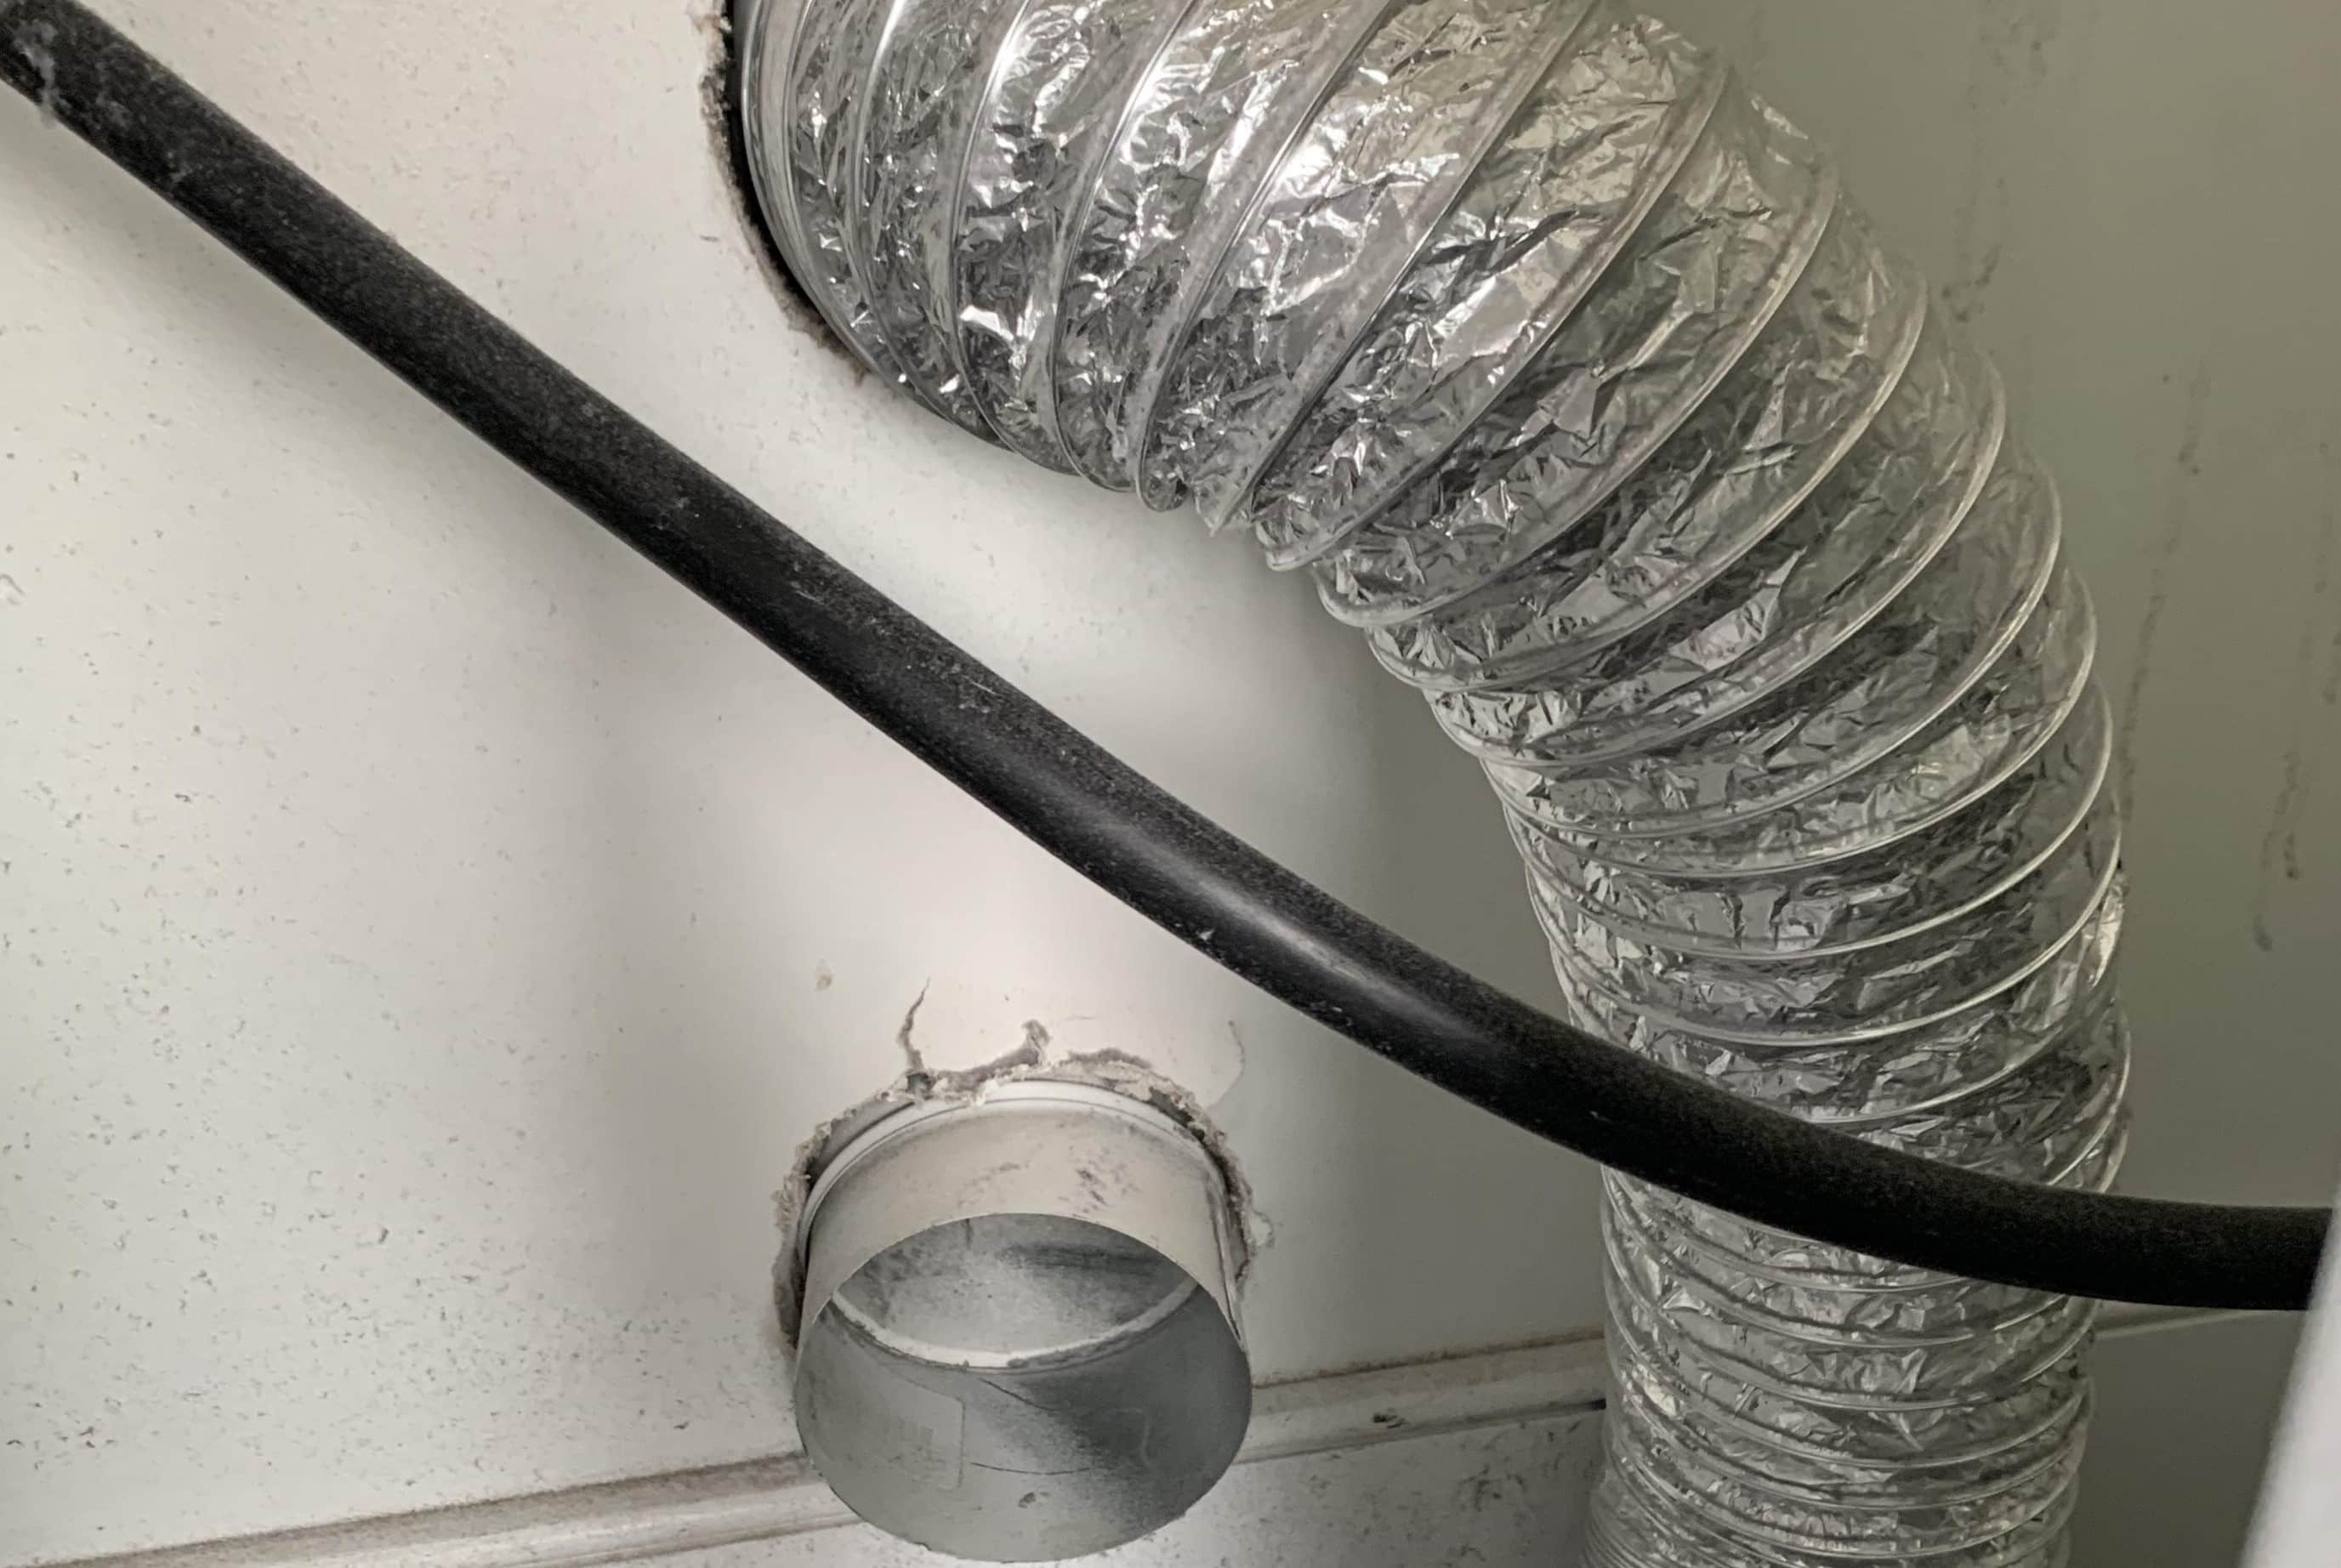
- Ensure proper airflow: Make sure there are no obstructions or bends in the vent pipe that could restrict or impede airflow. Straighten out any kinks or reposition any sections that may block the smooth flow of air.
- Check connections: Verify that all connections between sections of the vent pipe and connectors are securely fastened. Use clamps or appropriate fasteners as necessary to ensure a tight and reliable connection.
- Test for stability: Gently shake or wiggle the vent pipe to confirm that it is firmly secured and does not move or disconnect from the wall or ceiling.
By taking these steps to secure the vent pipe, you can ensure a long-lasting and reliable installation. A well-secured vent pipe will effectively channel hot air and moisture away from your dryer, reducing the risk of damage and improving its overall performance. With the vent pipe secured, let’s move on to the final step of testing and finalizing the installation.
Step 6: Testing and Finalizing the Installation
After completing the installation of the dryer vent and securing the vent pipe, it’s important to test the system and make any final adjustments. This step ensures that the installation is functioning properly and ready for regular use. Follow these steps to test and finalize the installation:
- Reconnect the dryer: Plug in your dryer and ensure it is properly connected to the vent pipe. Take note of any loose connections or abnormalities that may need adjustment.
- Turn on the dryer: Start the dryer and allow it to run for a few minutes. Pay attention to the airflow and check for any signs of leaks, such as air escaping from loose connections or gaps in the vent pipe.
- Inspect the vent from outside: Go outside your home and visually inspect the vent opening while the dryer is running. Look for signs of proper airflow, such as the flaps on the vent opening opening and closing freely.
- Test for heat: Check the temperature of the air being vented. It should feel warm but not excessively hot. If the air is too hot, it may indicate a blockage or a restriction in the vent pipe.
- Make necessary adjustments: If you notice any issues during the testing process, such as weak airflow or excessive heat, it may be necessary to make adjustments. Check for any obstructions in the vent pipe and ensure all connections are secure.
- Finalize the installation: Once you are satisfied with the performance and functionality of the dryer vent, finalize the installation. Seal any remaining gaps or openings around the vent pipe using silicone caulk. This will further prevent air leaks and ensure a tight and secure fit.
By following these steps to test and finalize the installation, you can be confident that your dryer vent is functioning correctly and safely. Regularly inspect the vent and clean it as needed to maintain optimal performance and prevent any potential hazards. Congratulations! You have successfully cut a hole for a dryer vent and completed the installation process.
Read more: How To Cut Sink Hole In Granite
Conclusion
Properly cutting a hole for a dryer vent is a crucial step in ensuring the effective and safe operation of your dryer. By following the steps outlined in this guide, you’ll be able to successfully complete the installation process. From marking the location and preparing the area to cutting the hole and securing the vent pipe, each step plays a vital role in creating a well-ventilated and efficient system.
Throughout the process, it’s important to prioritize safety by wearing protective gear and carefully following the manufacturer’s instructions. Taking the time to measure accurately, make precise cuts, and check for obstructions will result in a clean and professional installation.
Remember, after cutting the hole and installing the dryer vent, don’t forget to test the system and make any necessary adjustments. Ensuring proper airflow, securing connections, and finalizing the installation will contribute to the optimal functioning of your dryer and reduce the risk of fire hazards.
Maintaining your dryer vent is equally important. Regularly inspect and clean the vent to prevent lint buildup and blockages, which can compromise airflow and efficiency. Additionally, monitor the vent for any signs of damage or wear and replace any worn-out components as needed.
By following these guidelines and staying vigilant with maintenance, you can enjoy the benefits of a well-vented dryer that operates efficiently, reduces energy consumption, and promotes the safety of your home.
Remember, if you ever feel unsure or uncomfortable with any step of the installation process, it’s always a good idea to consult a professional to ensure a proper and safe installation. Stay informed and proactive, and enjoy the convenience and peace of mind that a properly installed dryer vent brings to your home.
Frequently Asked Questions about How To Cut A Hole For A Dryer Vent
Was this page helpful?
At Storables.com, we guarantee accurate and reliable information. Our content, validated by Expert Board Contributors, is crafted following stringent Editorial Policies. We're committed to providing you with well-researched, expert-backed insights for all your informational needs.