Home>Renovation & DIY>Home Renovation Guides>How To Make A Penny Backsplash
Home Renovation Guides
How To Make A Penny Backsplash
Modified: October 18, 2024
Learn how to create a stunning penny backsplash for your home renovation project with our comprehensive guide. Get expert tips and step-by-step instructions.
(Many of the links in this article redirect to a specific reviewed product. Your purchase of these products through affiliate links helps to generate commission for Storables.com, at no extra cost. Learn more)
Introduction
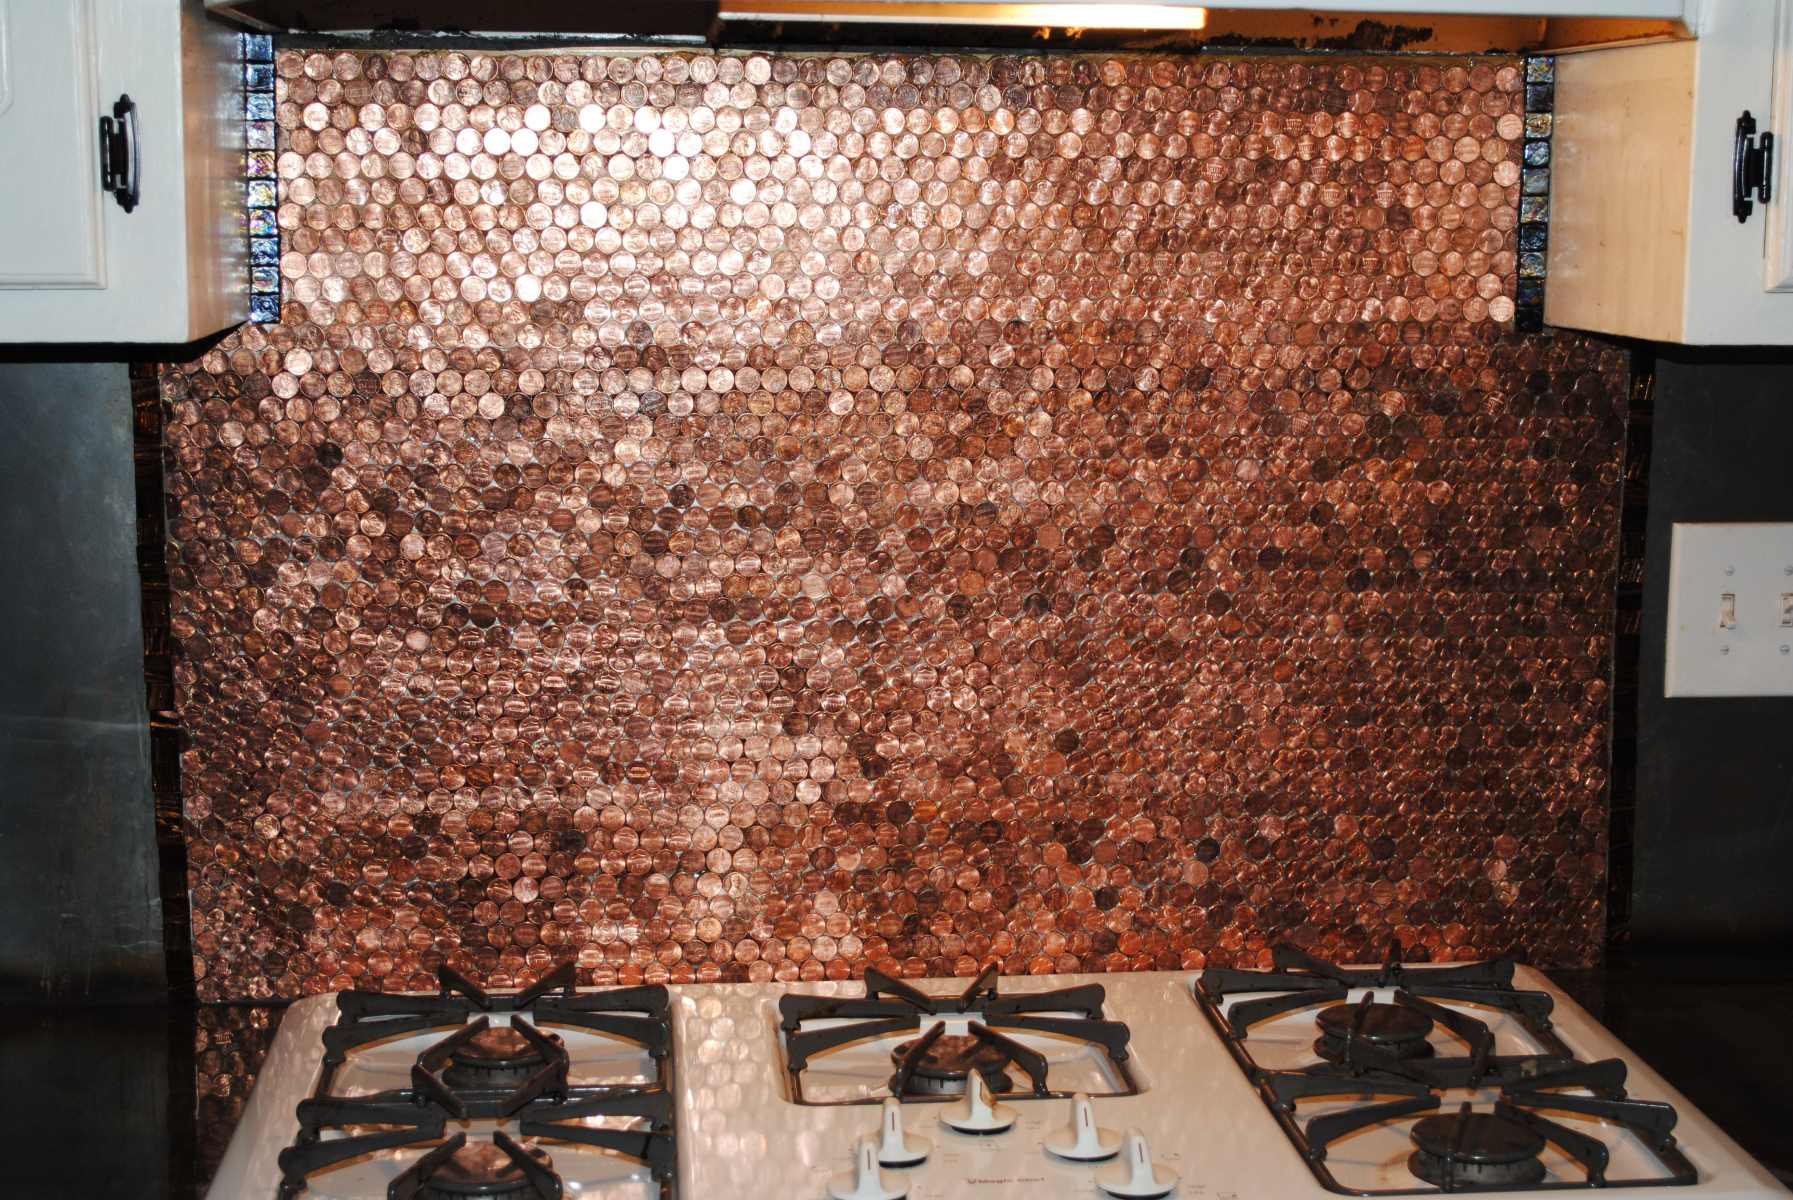
Are you looking to add a unique and eye-catching touch to your kitchen or bathroom? Consider creating a stunning penny backsplash! This innovative and budget-friendly home renovation project can transform a mundane space into a conversation starter. By repurposing pennies, you can infuse your backsplash with character, charm, and a touch of history. Not only does this project offer an opportunity for creativity, but it also provides a sustainable and cost-effective way to revamp your living space.
In this comprehensive guide, we will walk you through the step-by-step process of creating a captivating penny backsplash. From gathering the necessary materials to the final touches of sealing and maintenance, you will gain valuable insights and practical tips to ensure a successful and visually striking outcome. Whether you're a seasoned DIY enthusiast or a novice looking to embark on your first home improvement project, this guide will equip you with the knowledge and confidence to tackle the creation of a penny backsplash with ease.
Get ready to embark on a journey that combines craftsmanship, creativity, and a touch of whimsy as we delve into the art of making a penny backsplash. Let's dive into the materials needed to bring this unique project to life!
Key Takeaways:
- Transform your kitchen or bathroom with a captivating penny backsplash, infusing character and charm into your living space using repurposed pennies and creative designs.
- By meticulously preparing, installing, and sealing your penny backsplash, you can create a stunning and enduring feature in your home, sparking admiration and curiosity from all who encounter it.
Read more: How To Make Penny Rugs
Materials Needed
To embark on the exciting endeavor of creating a stunning penny backsplash, you'll need to gather a variety of materials to ensure a seamless and successful project. Here's a comprehensive list of the essential items required for this innovative home renovation:
-
Pennies: The star of the show! You'll need a substantial quantity of pennies to cover the designated backsplash area. Consider sourcing pennies from various years to add a unique and eclectic touch to your design.
-
Adhesive: Opt for a strong adhesive that is suitable for both metal and your chosen backsplash surface. Epoxy or construction adhesive are popular choices for securing the pennies in place.
-
Grout: Select a high-quality grout that complements the color of your pennies and enhances the overall aesthetic of the backsplash. Ensure that the grout is suitable for metal applications.
-
Primer: If your backsplash surface is not metal, it's crucial to apply a metal primer to ensure proper adhesion of the pennies.
-
Sealant: Once the pennies are in place, a durable sealant is essential to protect the backsplash from moisture, stains, and general wear and tear. Choose a sealant that is compatible with metal and grout.
-
Sponge and Cloth: These basic cleaning tools will come in handy during the grouting and sealing processes, ensuring a neat and polished finish.
-
Protective Gear: Prioritize safety by equipping yourself with gloves, goggles, and a mask to safeguard against potential fumes and protect your skin during the application of adhesive, grout, and sealant.
-
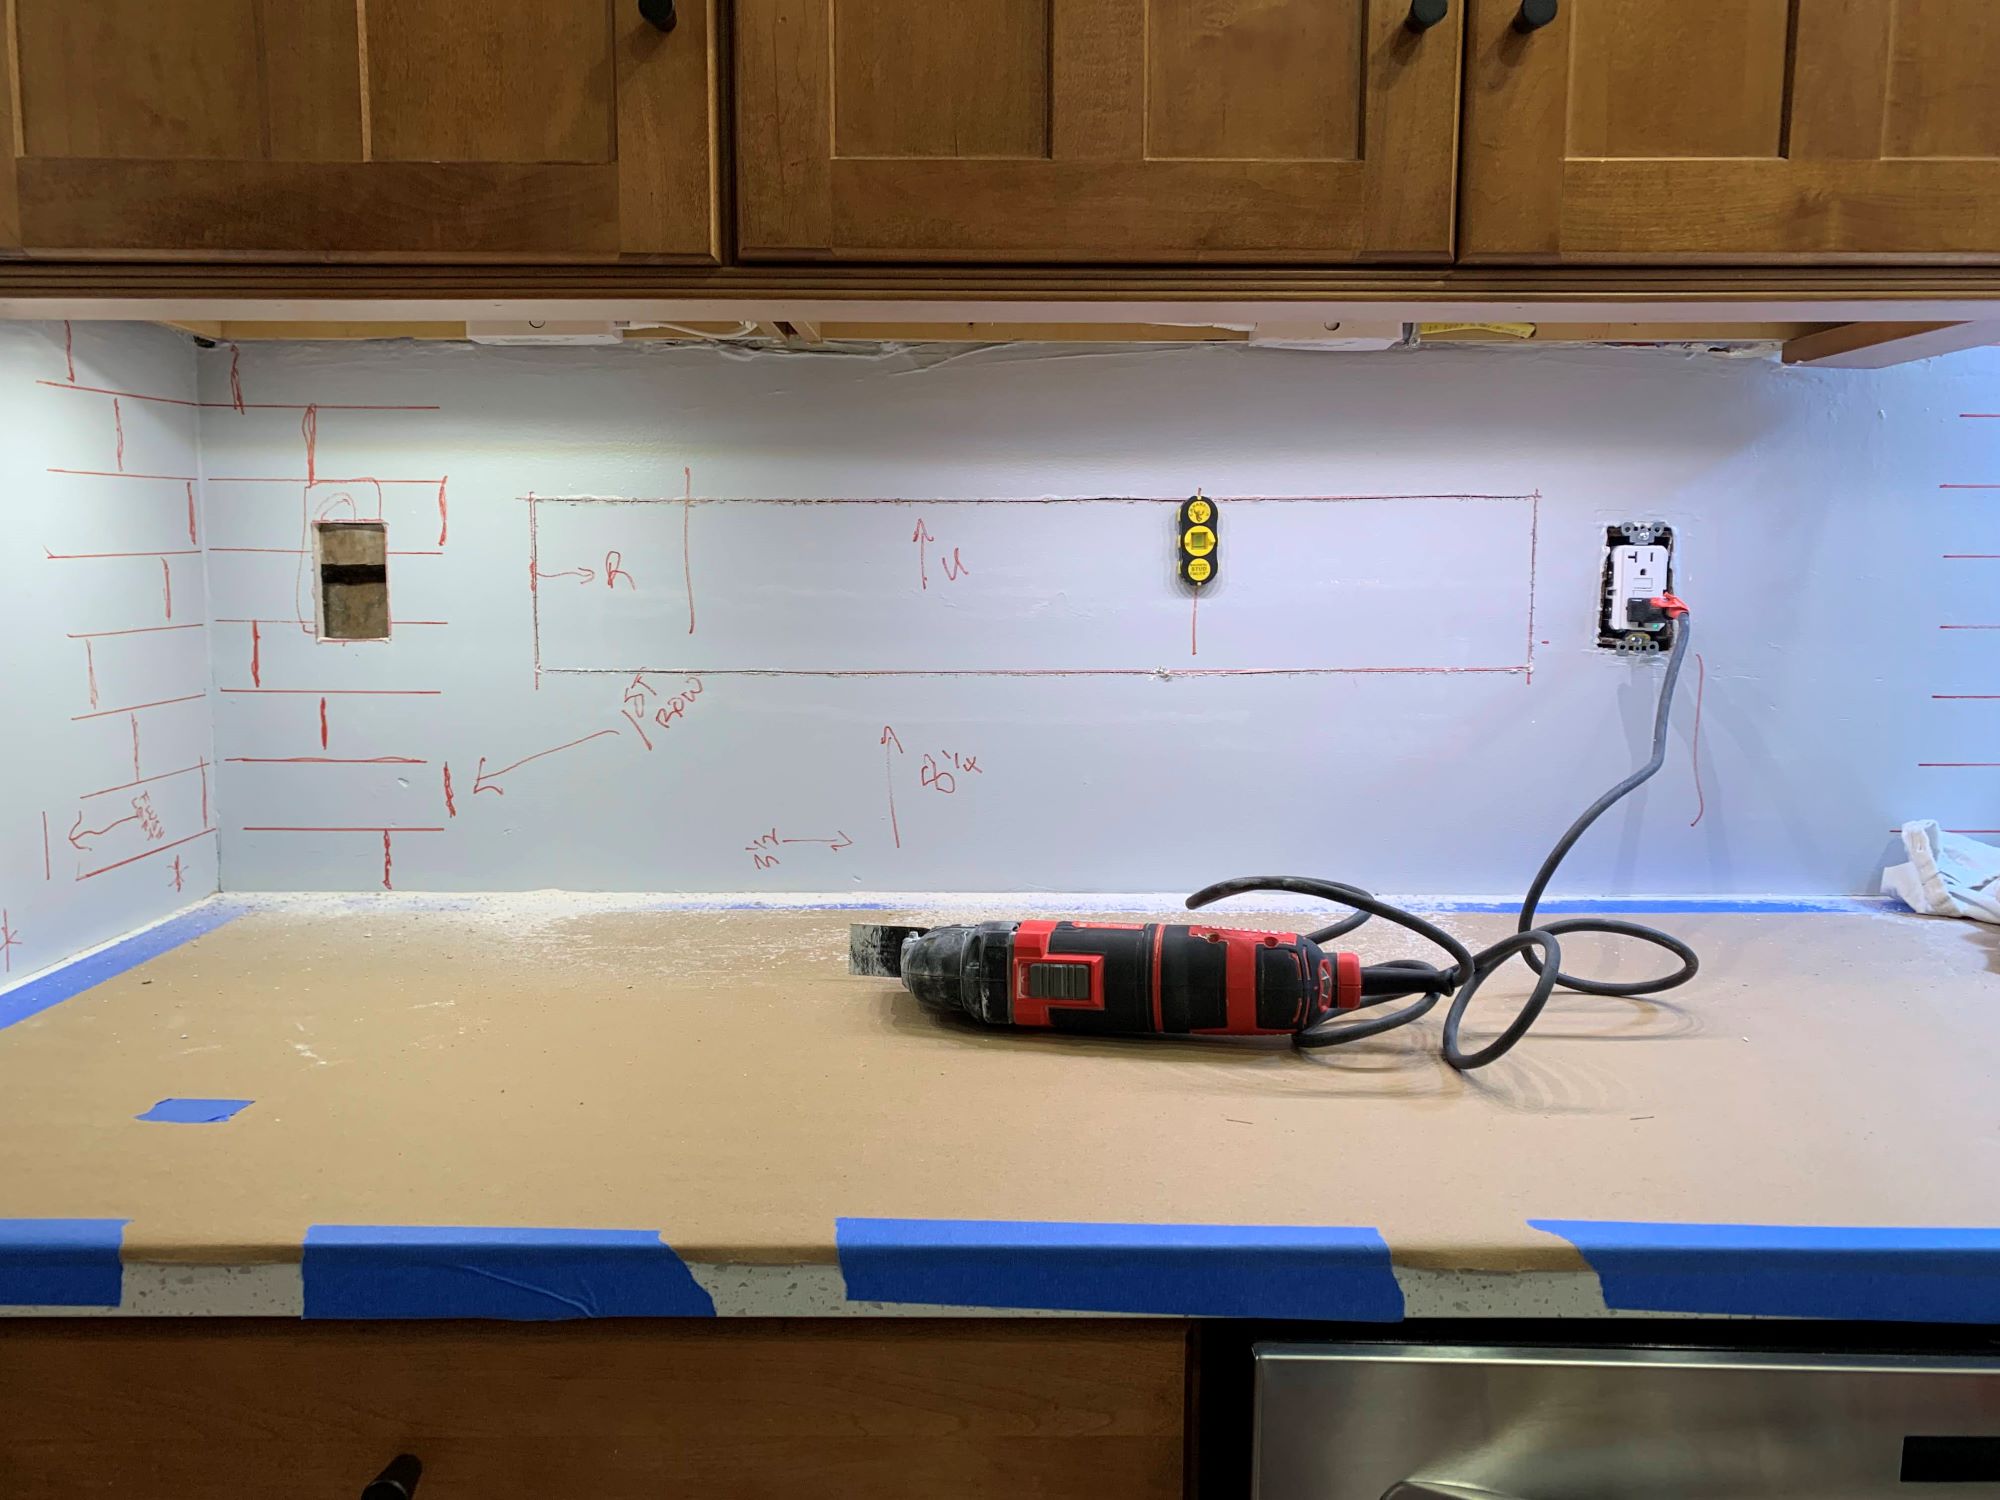
Measuring Tools: Accurate measurements are crucial for a precise and visually appealing backsplash. Have a measuring tape and a level on hand to ensure the pennies are aligned and evenly spaced.
-
Applicator Tools: Depending on the chosen adhesive and grout, gather the appropriate tools for application, such as a trowel, putty knife, or grout float.
-
Cleaning Solution: Prepare a mild cleaning solution to remove any adhesive, grout, or sealant residue from the pennies and surrounding surfaces.
By assembling these essential materials, you'll be well-prepared to embark on the exciting journey of creating a captivating penny backsplash. With the necessary items at your disposal, you can proceed to the next phase of preparing the pennies for installation.
Preparing the Pennies
Before diving into the installation process, it's essential to prepare the pennies to ensure a seamless and visually appealing outcome. This crucial step involves cleaning, organizing, and potentially altering the pennies to enhance their aesthetic impact and facilitate secure adhesion to the backsplash surface.
Cleaning the Pennies
Begin by sorting through the pennies to remove any heavily tarnished or damaged coins. Once you have a selection of pennies in good condition, it's time to give them a thorough cleaning. Create a simple cleaning solution by combining equal parts of white vinegar and salt in a bowl. Submerge the pennies in the solution and allow them to soak for a few minutes. After soaking, gently scrub each penny with a soft-bristled brush to remove dirt, grime, and tarnish. Rinse the pennies with water and pat them dry with a clean cloth. This cleaning process will restore the pennies' luster and prepare them for the next steps.
Organizing the Pennies
With the pennies cleaned and dried, take the opportunity to organize them based on their minting year or condition. This step allows for a deliberate and visually appealing arrangement of the pennies, adding a personalized touch to your backsplash. Consider creating patterns or incorporating specific years to infuse the design with a unique narrative or aesthetic theme.
Read more: How To Make A Backsplash
Altering the Pennies (Optional)
For those seeking to add an extra dimension to their penny backsplash, consider altering a select number of pennies to introduce visual interest. One popular method is to create a patina effect on certain pennies by exposing them to a solution of vinegar and salt for a controlled period. This process can result in a weathered and distinctive appearance, adding depth and character to the overall design. Experiment with different alteration techniques to achieve a customized and visually dynamic collection of pennies.
By meticulously preparing the pennies through cleaning, organizing, and optional alterations, you set the stage for a captivating and personalized penny backsplash. With the pennies primed and ready, you can proceed to the exciting phase of installing the backsplash, where your creativity and craftsmanship will truly shine.
Installing the Backsplash
With the meticulously prepared pennies at your disposal, it's time to embark on the exhilarating process of installing the penny backsplash. This phase requires precision, patience, and a keen eye for detail to ensure a seamless and visually striking outcome. Follow these step-by-step instructions to bring your penny backsplash vision to life:
-
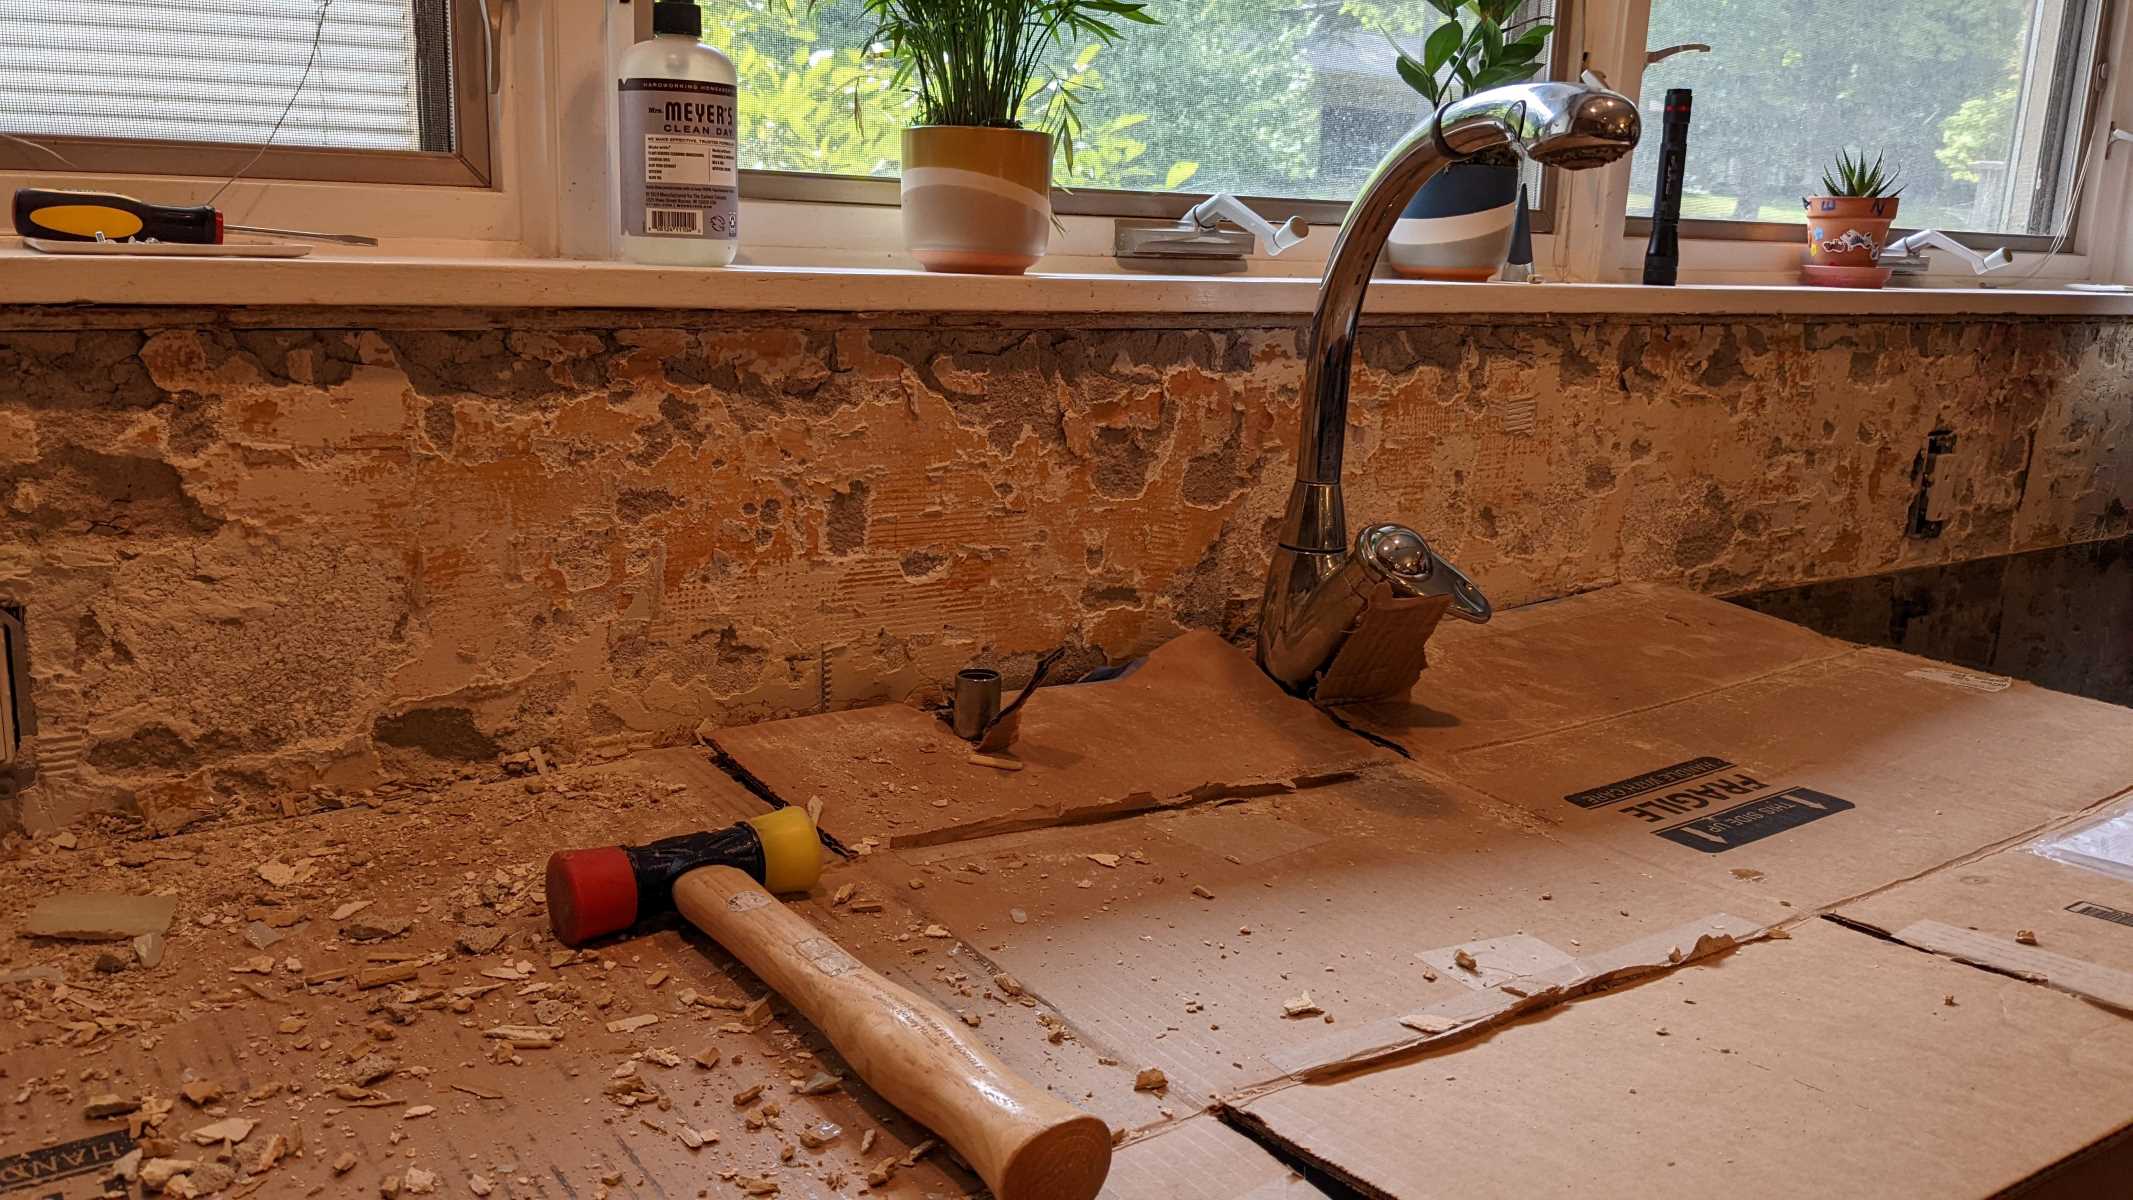
Surface Preparation: Begin by ensuring that the designated backsplash area is clean, dry, and free of any debris or grease. If the surface is not metal, apply a metal primer according to the manufacturer's instructions to facilitate proper adhesion of the pennies.
-
Adhesive Application: Using a high-quality adhesive suitable for metal, apply a generous amount to the back of each penny using a small brush or applicator. Carefully press each penny onto the prepared backsplash surface, ensuring even spacing and alignment. This meticulous process may take time, but the end result will be well worth the effort.
-
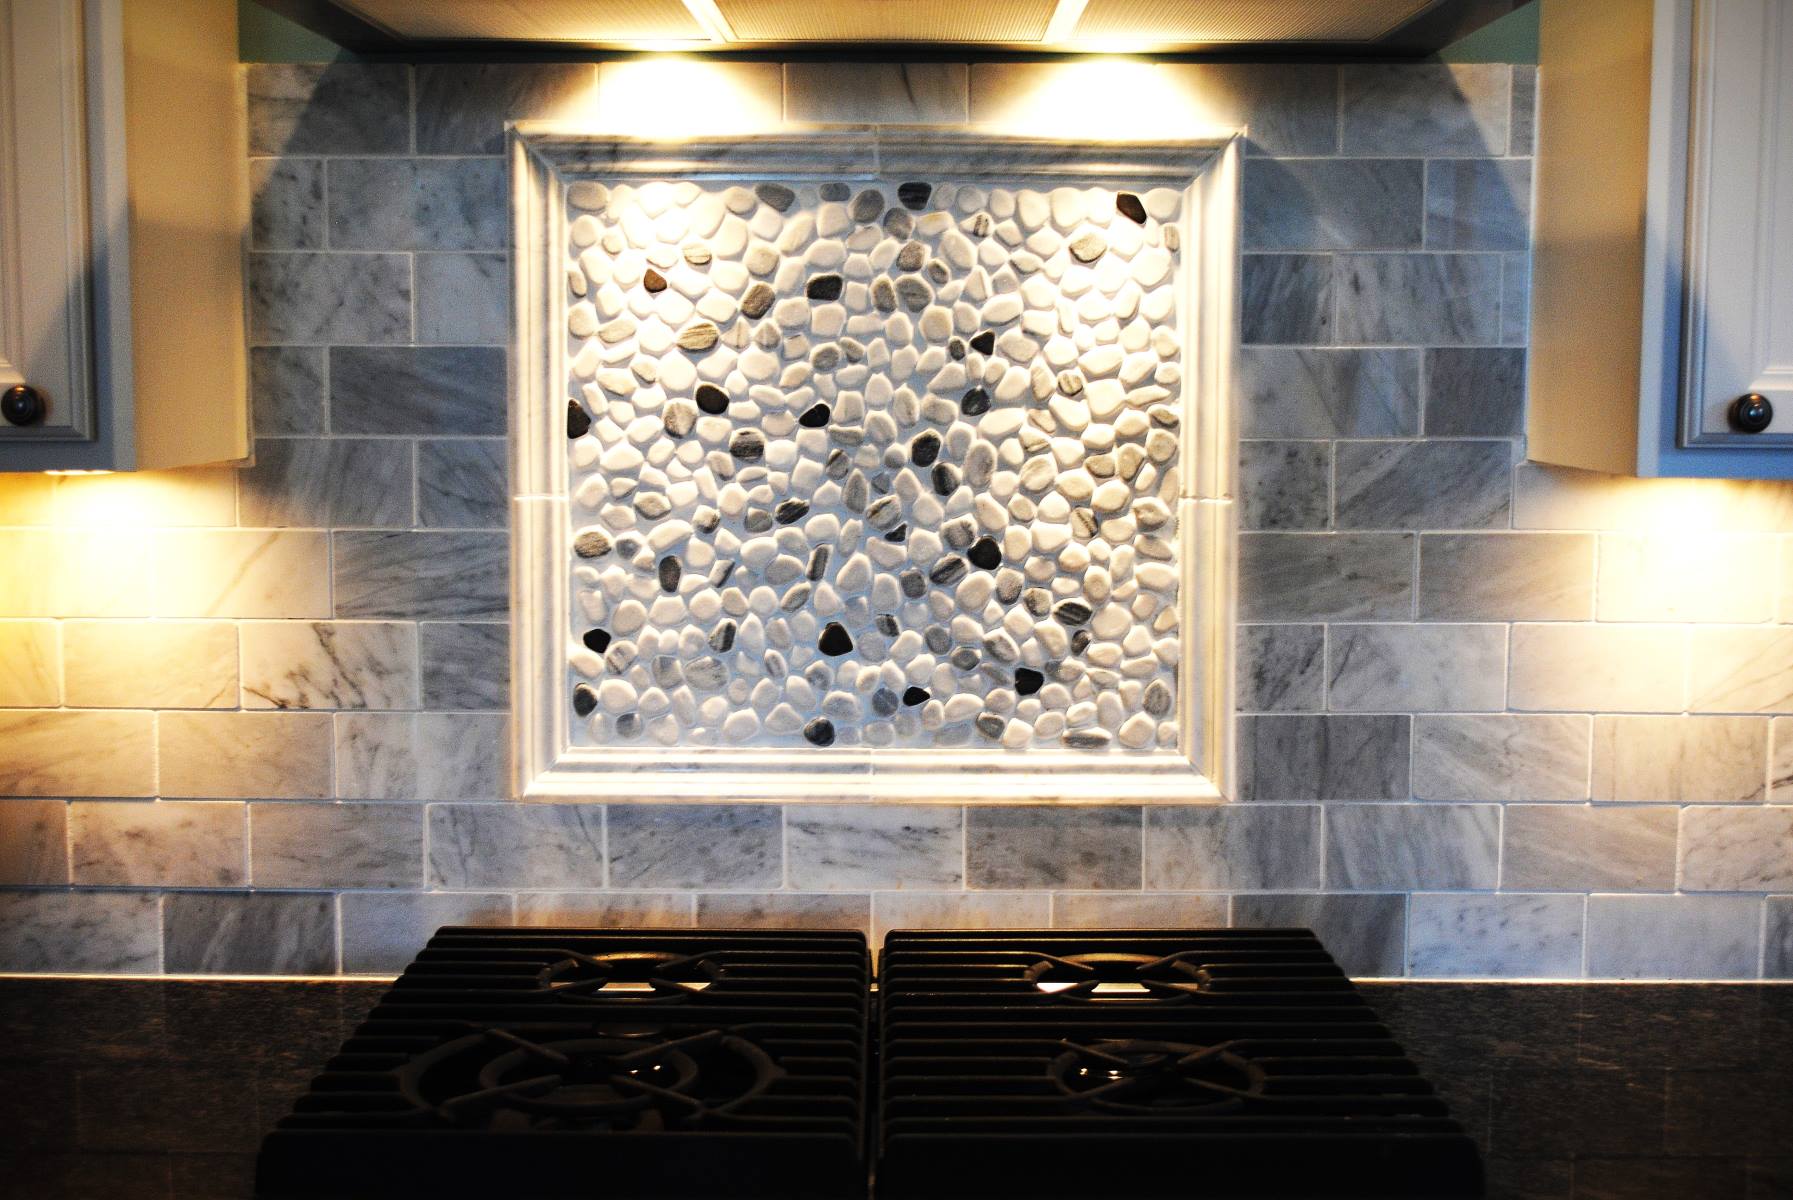
Creating Patterns and Designs: As you progress with the installation, consider incorporating patterns or designs using the organized and altered pennies. Whether arranging them by minting year, creating a gradient effect, or integrating altered pennies strategically, this is the stage to infuse your personal touch and creativity into the backsplash.
-
Filling the Gaps: Once all the pennies are securely in place, it's time to fill the gaps between them with grout. Using a grout float or putty knife, carefully apply the grout, ensuring that it fills the spaces completely. Wipe off any excess grout from the surface of the pennies using a damp sponge, taking care not to dislodge the coins.
-
Allowing for Cure Time: After grouting, allow the backsplash to cure for the recommended time as per the grout manufacturer's instructions. This crucial step ensures that the grout sets properly, providing stability and durability to the entire installation.
-
Sealing the Backsplash: Once the grout has fully cured, apply a suitable sealant to the entire backsplash surface, including the pennies and grout. This protective layer will safeguard the backsplash from moisture, stains, and everyday wear, ensuring its longevity and visual appeal.
By meticulously following these steps, you will witness the transformation of a simple collection of pennies into a captivating and personalized penny backsplash. The installation process not only showcases your craftsmanship but also infuses your living space with character and charm. With the penny backsplash now in place, the final step involves regular maintenance and care to preserve its beauty and allure for years to come.
Sealing the Backsplash
Sealing the penny backsplash is a critical step that not only enhances its visual appeal but also ensures its longevity and durability. By applying a high-quality sealant, you provide a protective barrier that guards against moisture, stains, and general wear and tear, preserving the beauty and integrity of the backsplash for years to come.
Before proceeding with the sealing process, ensure that the grout has fully cured according to the manufacturer's recommended timeline. This step is crucial, as sealing the backsplash prematurely can compromise the effectiveness of the sealant and impact its ability to provide long-term protection.
Once the grout has properly cured, carefully inspect the entire backsplash to ensure that it is clean and free of any residual grout, adhesive, or debris. Use a damp cloth or sponge to gently wipe the surface, removing any lingering particles and ensuring a pristine foundation for the sealant application.
Select a sealant specifically designed for use on metal and grout surfaces. It's essential to choose a product that offers both waterproofing and stain-resistant properties to effectively safeguard the pennies and grout from potential damage. Apply the sealant evenly across the entire backsplash, using a clean, lint-free cloth or applicator to ensure thorough coverage.
As you apply the sealant, pay special attention to the areas where the pennies and grout meet, ensuring that these junctions are adequately sealed to prevent moisture infiltration. Take care to avoid excess pooling of the sealant, as this can lead to uneven drying and potential aesthetic imperfections.
Allow the sealant to dry completely according to the manufacturer's instructions. This drying period is crucial for the sealant to form a robust protective layer that shields the backsplash from environmental elements and daily use. Once dry, perform a thorough inspection to confirm that the entire surface has been effectively sealed, addressing any missed spots or inconsistencies as needed.
With the sealing process complete, stand back and admire the transformation of a humble collection of pennies into a stunning and resilient backsplash. The sealant not only enhances the visual allure of the pennies but also fortifies the entire installation, ensuring that your penny backsplash remains a focal point of beauty and creativity in your living space.
By diligently sealing the penny backsplash, you have taken a proactive step in preserving its charm and functionality, allowing it to withstand the test of time and daily use. With the backsplash now sealed, you can revel in the satisfaction of a successful and visually captivating home renovation project.
Maintenance and Care
Maintaining the allure and longevity of your penny backsplash involves implementing simple yet effective care practices. By incorporating regular maintenance into your cleaning routine and exercising caution during daily use, you can ensure that your stunning backsplash remains a focal point of beauty in your living space.
Read more: How To Make Mosaic Backsplash
Routine Cleaning
Regular cleaning is essential to preserve the luster and appeal of your penny backsplash. Use a mild cleaning solution and a soft cloth to gently wipe the surface, removing any dust, splatters, or residue. Avoid harsh abrasives or acidic cleaners, as these can potentially damage the pennies and grout. Additionally, take care to avoid vigorous scrubbing, as it may dislodge the pennies or compromise the grout.
Preventative Measures
To safeguard the backsplash from potential damage, exercise caution when cooking or performing tasks near the area. Use splatter guards while cooking to minimize the risk of food or grease reaching the backsplash. When cleaning surrounding surfaces, take care to avoid excessive moisture or cleaning solutions coming into contact with the pennies and grout. By being mindful of these preventive measures, you can proactively protect the integrity of your penny backsplash.
Periodic Inspection
Regularly inspect the backsplash for any signs of wear, loose pennies, or grout deterioration. Address any issues promptly to prevent further damage and maintain the visual appeal of the installation. If you notice any loose pennies, carefully reapply adhesive and secure them back in place. For minor grout issues, consider applying a small amount of touch-up grout to maintain a seamless and polished appearance.
Protective Measures
Consider using a gentle, non-abrasive wax or polish specifically formulated for metal surfaces to further protect and enhance the pennies' sheen. Apply the wax or polish sparingly, following the manufacturer's instructions, and buff the pennies to achieve a radiant finish. This protective measure can help shield the pennies from tarnishing and maintain their captivating appearance over time.
By integrating these maintenance and care practices into your regular home care routine, you can ensure that your penny backsplash remains a stunning and enduring feature in your living space. With a proactive approach to maintenance and a commitment to preserving its beauty, your penny backsplash will continue to captivate and inspire for years to come.
Read more: How To Install Penny Floor
Conclusion
In conclusion, the creation of a penny backsplash is not only a testament to creativity and craftsmanship but also a transformative journey that infuses character and charm into your living space. By repurposing humble pennies, you have the opportunity to craft a visually captivating backsplash that serves as a unique focal point, sparking conversations and admiration from all who encounter it.
Throughout this comprehensive guide, we have explored the step-by-step process of bringing a penny backsplash to life, from gathering the essential materials to the meticulous installation and sealing processes. The journey began with the meticulous preparation of the pennies, including cleaning, organizing, and optional alterations, setting the stage for a personalized and visually dynamic design.
The installation phase allowed for the expression of creativity and attention to detail, as each penny found its place in the carefully orchestrated mosaic. The application of grout and the subsequent sealing process not only secured the pennies in place but also provided essential protection, ensuring the longevity and resilience of the backsplash.
As the penny backsplash now graces your kitchen or bathroom, it serves as a testament to your dedication and ingenuity. Its allure and visual impact are a testament to the transformative power of DIY home renovation projects. The personalized patterns, the luster of the pennies, and the durability of the sealant collectively contribute to a stunning and enduring addition to your living space.
With a commitment to regular maintenance and care, your penny backsplash will continue to captivate and inspire, serving as a testament to your creativity and attention to detail. As it becomes a cherished feature of your home, it will undoubtedly spark admiration and curiosity, inviting others to appreciate the artistry and innovation behind its creation.
In the end, the journey of creating a penny backsplash transcends the realm of home renovation; it embodies the spirit of transformation, resourcefulness, and individuality. It stands as a testament to the beauty that can be derived from everyday objects and the limitless potential for creativity within the realm of DIY projects. As you revel in the beauty of your penny backsplash, may it serve as a reminder of the joy and fulfillment found in bringing imaginative visions to life.
Frequently Asked Questions about How To Make A Penny Backsplash
Was this page helpful?
At Storables.com, we guarantee accurate and reliable information. Our content, validated by Expert Board Contributors, is crafted following stringent Editorial Policies. We're committed to providing you with well-researched, expert-backed insights for all your informational needs.


0 thoughts on “How To Make A Penny Backsplash”