Home>Renovation & DIY>Home Renovation Guides>How To Make Mosaic Backsplash

Home Renovation Guides
How To Make Mosaic Backsplash
Modified: October 19, 2024
Learn how to make a stunning mosaic backsplash with our comprehensive home renovation guide. Get expert tips and step-by-step instructions for a successful DIY project.
(Many of the links in this article redirect to a specific reviewed product. Your purchase of these products through affiliate links helps to generate commission for Storables.com, at no extra cost. Learn more)
Introduction
Are you looking to add a touch of elegance and personality to your kitchen or bathroom? A mosaic backsplash could be the perfect solution. Mosaic backsplashes are not only functional, protecting your walls from splashes and spills, but they also serve as a stunning focal point, adding character and style to your space.
Creating a mosaic backsplash is a rewarding and creative home improvement project that allows you to express your unique style. Whether you prefer a sleek and modern look or a more traditional and intricate design, the possibilities are endless when it comes to mosaic backsplashes.
In this comprehensive guide, we will walk you through the step-by-step process of creating a beautiful mosaic backsplash. From choosing the right materials to sealing the finished product, you will gain valuable insights and practical tips to help you achieve professional-looking results.
By the end of this guide, you will have the knowledge and confidence to embark on this exciting DIY project. So, roll up your sleeves, unleash your creativity, and let's dive into the world of mosaic backsplashes!
Key Takeaways:
- Designing a mosaic backsplash allows you to express your unique style and infuse your personal touch into your kitchen or bathroom. Seek inspiration, choose a color palette, and experiment with patterns to create a stunning focal point.
- Properly preparing the surface and meticulously placing and grouting the tiles are crucial for a visually striking and durable mosaic backsplash. Attention to detail and precision ensure a professional outcome that enhances the beauty of your space.
Choosing the Right Materials
Selecting the right materials is crucial for the success of your mosaic backsplash project. Here's a detailed look at the essential components you'll need:
1. Tiles
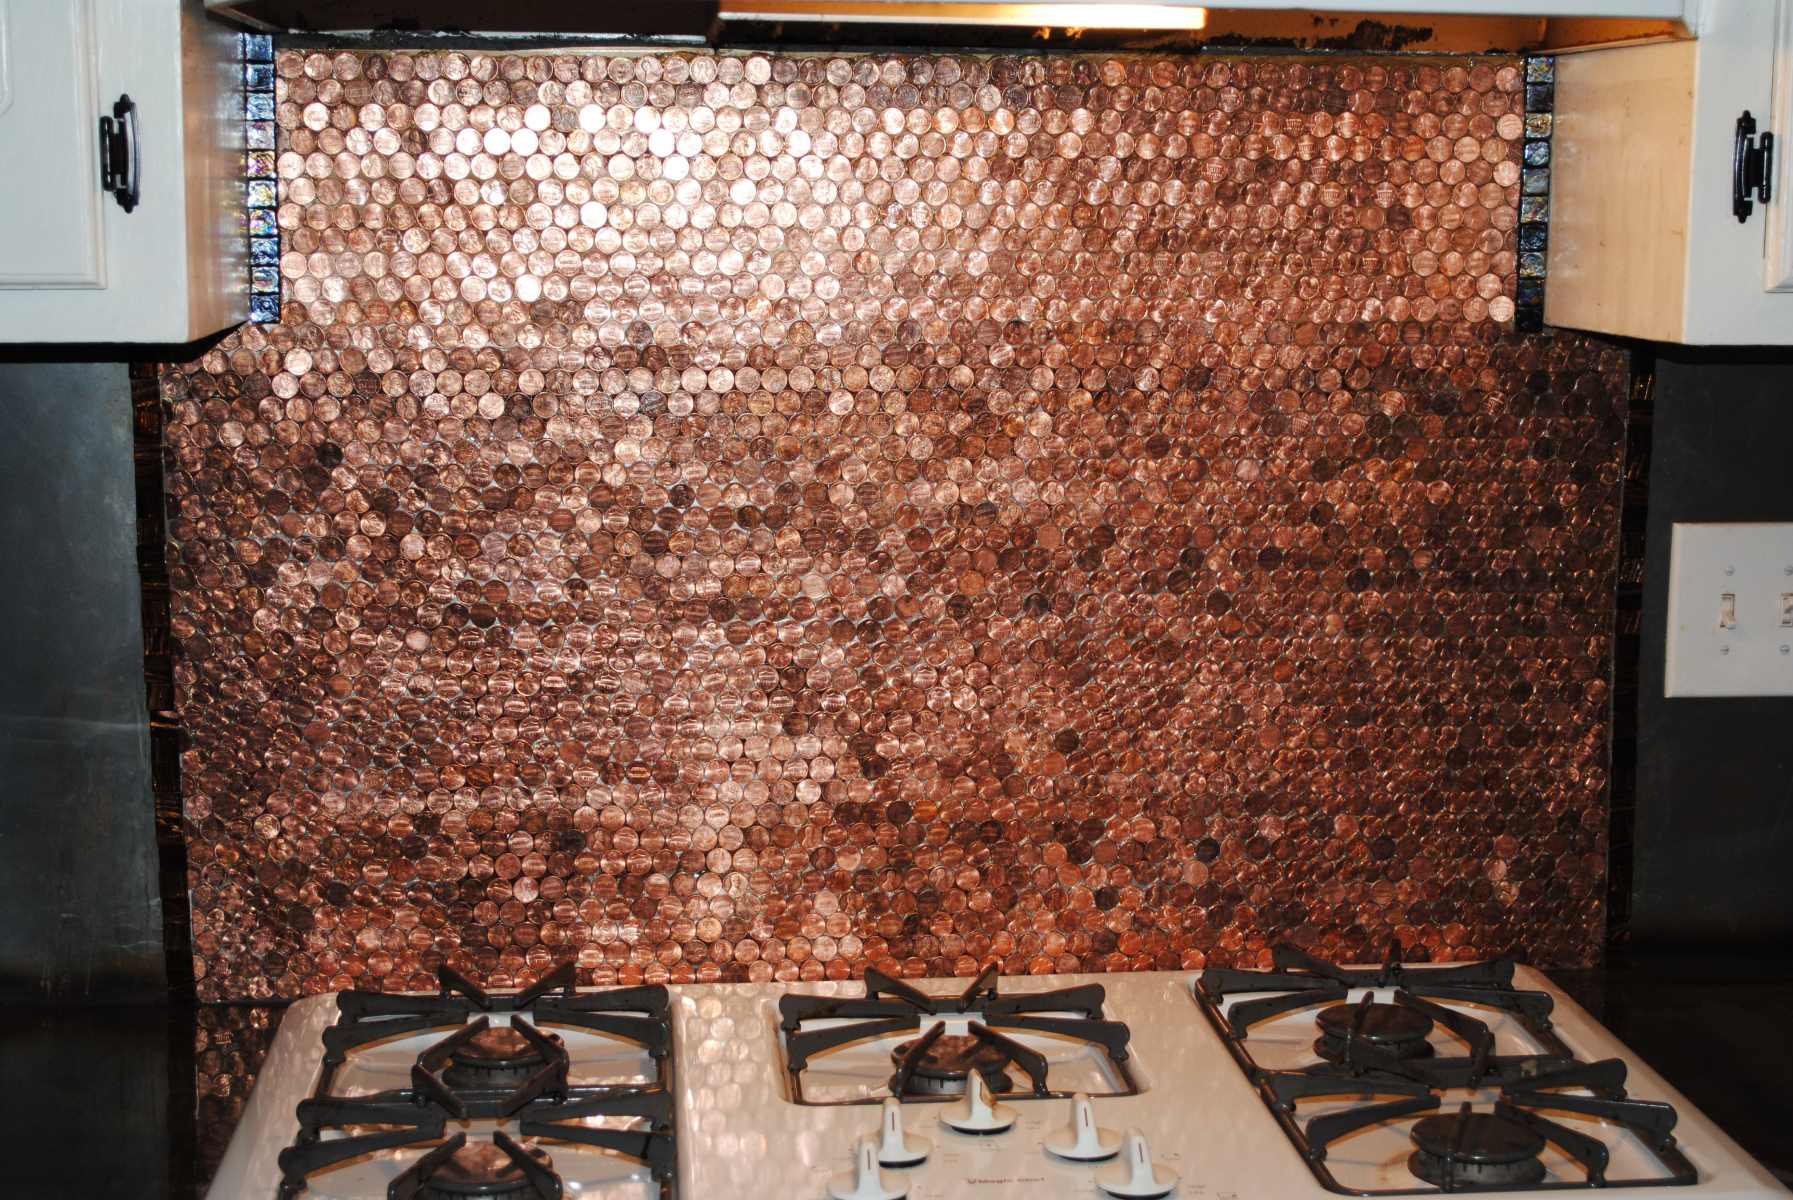
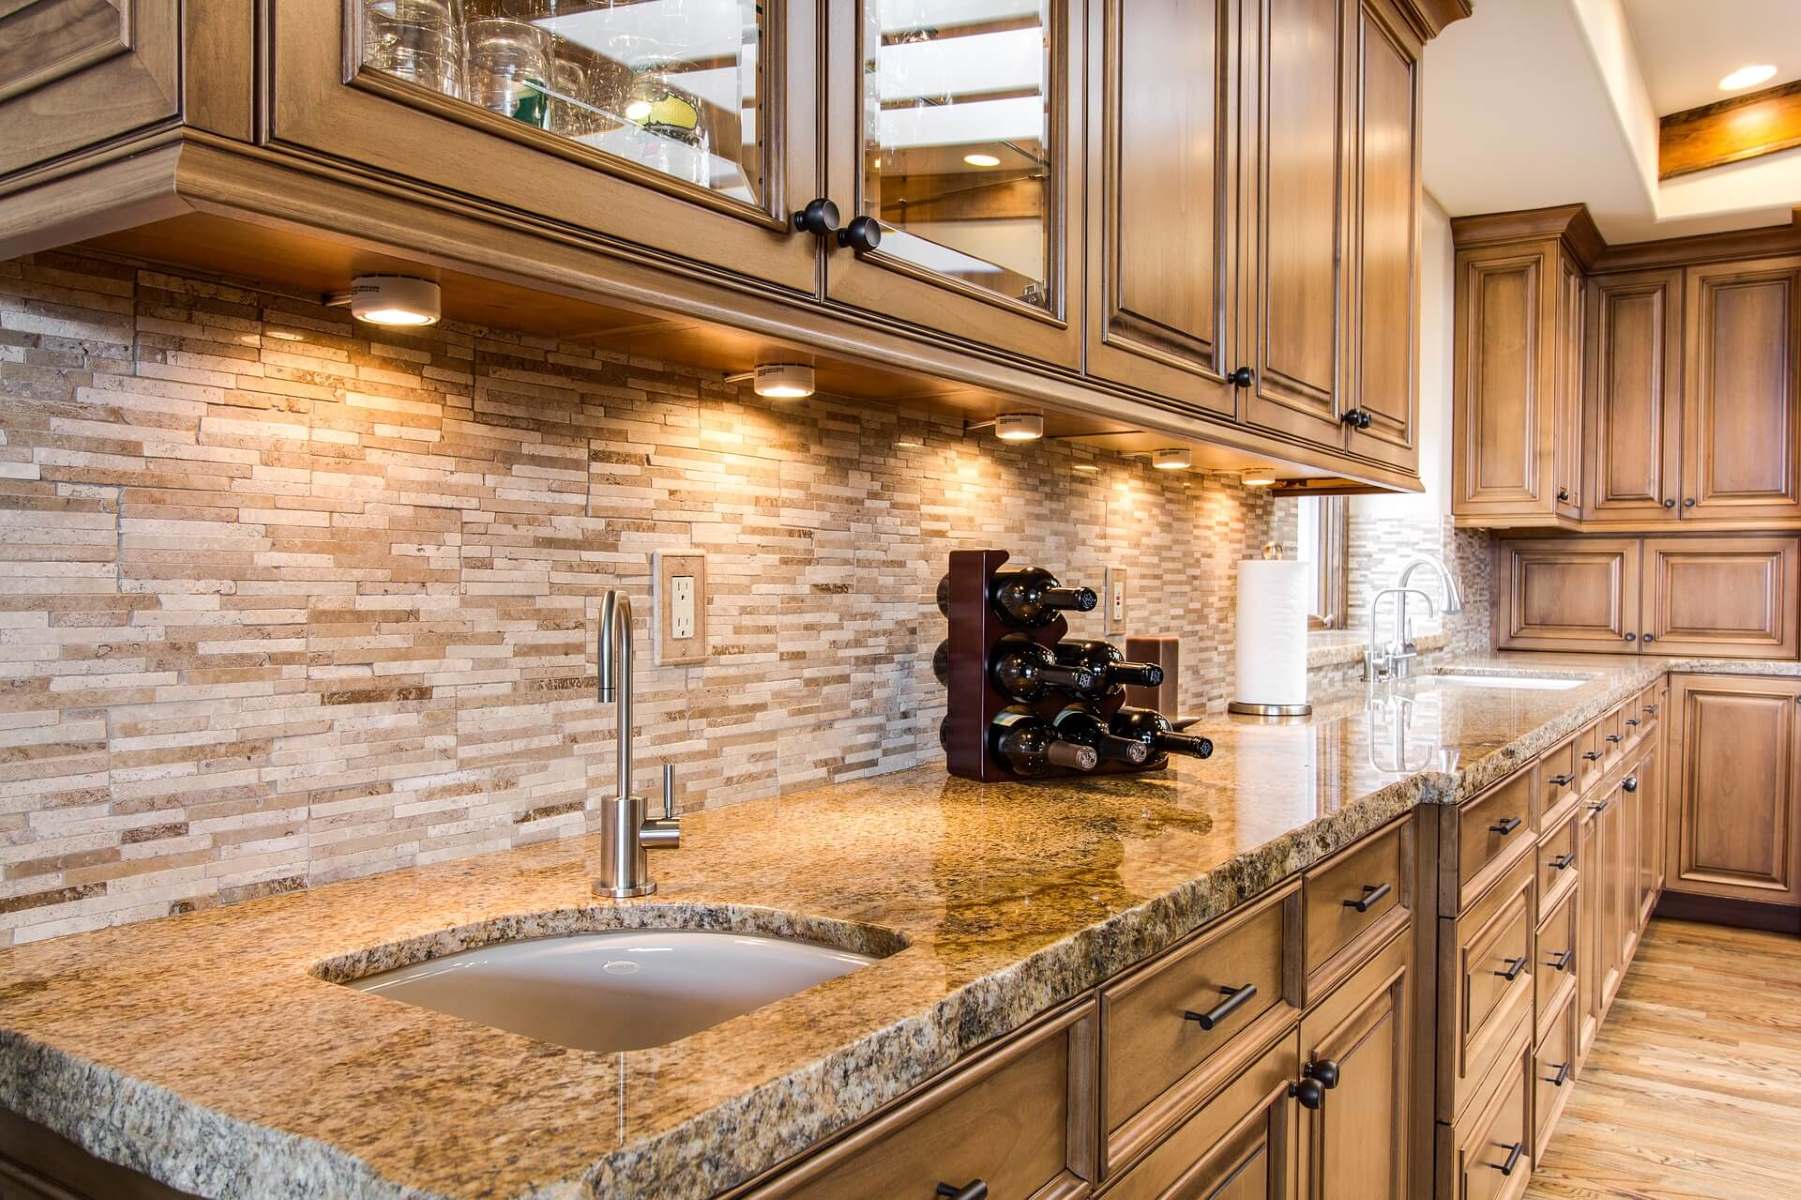
The first step in creating a mosaic backsplash is choosing the tiles. You have a wide array of options, including ceramic, glass, porcelain, and natural stone. Consider the color scheme and overall aesthetic of your space when selecting the tiles. For a modern look, sleek glass tiles may be the perfect choice, while natural stone tiles can add a rustic charm to your kitchen or bathroom.
2. Adhesive
Choosing the correct adhesive is vital for ensuring that your mosaic tiles adhere securely to the wall. Opt for a high-quality, waterproof adhesive that is suitable for the type of tiles you've selected. For example, glass tiles may require a different adhesive compared to natural stone tiles.
3. Grout
Grout not only fills the gaps between the tiles but also plays a significant role in the overall appearance of your mosaic backsplash. Consider the color of the grout and how it complements the tiles. You can choose a grout color that blends in seamlessly with the tiles for a cohesive look, or opt for a contrasting color to make a bold statement.
Read more: How To Make Outdoor Mosaic
4. Tools
Gather the necessary tools for the installation process, including a notched trowel for applying adhesive, tile spacers to ensure even spacing between tiles, a tile cutter for precise cuts, and a grout float for applying the grout.
5. Sealant
Once the tiles are in place and the grout has cured, it's essential to protect your mosaic backsplash with a high-quality sealant. The sealant will safeguard the tiles and grout from moisture and stains, ensuring that your backsplash remains beautiful and functional for years to come.
By carefully selecting the right materials, you'll set the foundation for a stunning and durable mosaic backsplash that enhances the visual appeal of your kitchen or bathroom. Now that you've gathered the necessary materials, it's time to move on to the next step in the process: designing your mosaic backsplash.
Designing Your Mosaic Backsplash
Designing your mosaic backsplash is where your creativity truly comes to life. This is your opportunity to infuse your personal style and vision into the project, transforming your kitchen or bathroom into a space that reflects your unique taste. Here's how to approach the design process:
1. Inspiration
Begin by seeking inspiration from various sources such as interior design magazines, online platforms like Pinterest, or even by observing architectural elements in your surroundings. Pay attention to color schemes, patterns, and textures that resonate with you. This initial exploration will help you refine your design preferences and narrow down the aesthetic direction for your mosaic backsplash.
Read more: How To Make A Mosaic Walkway
2. Color Palette
Selecting a color palette is a pivotal aspect of the design process. Consider the existing color scheme of your kitchen or bathroom, and aim to complement or contrast it with your mosaic backsplash. Whether you opt for a monochromatic scheme for a sleek and modern look, or a vibrant blend of hues for a more eclectic vibe, the color palette sets the tone for the entire design.
3. Pattern and Layout
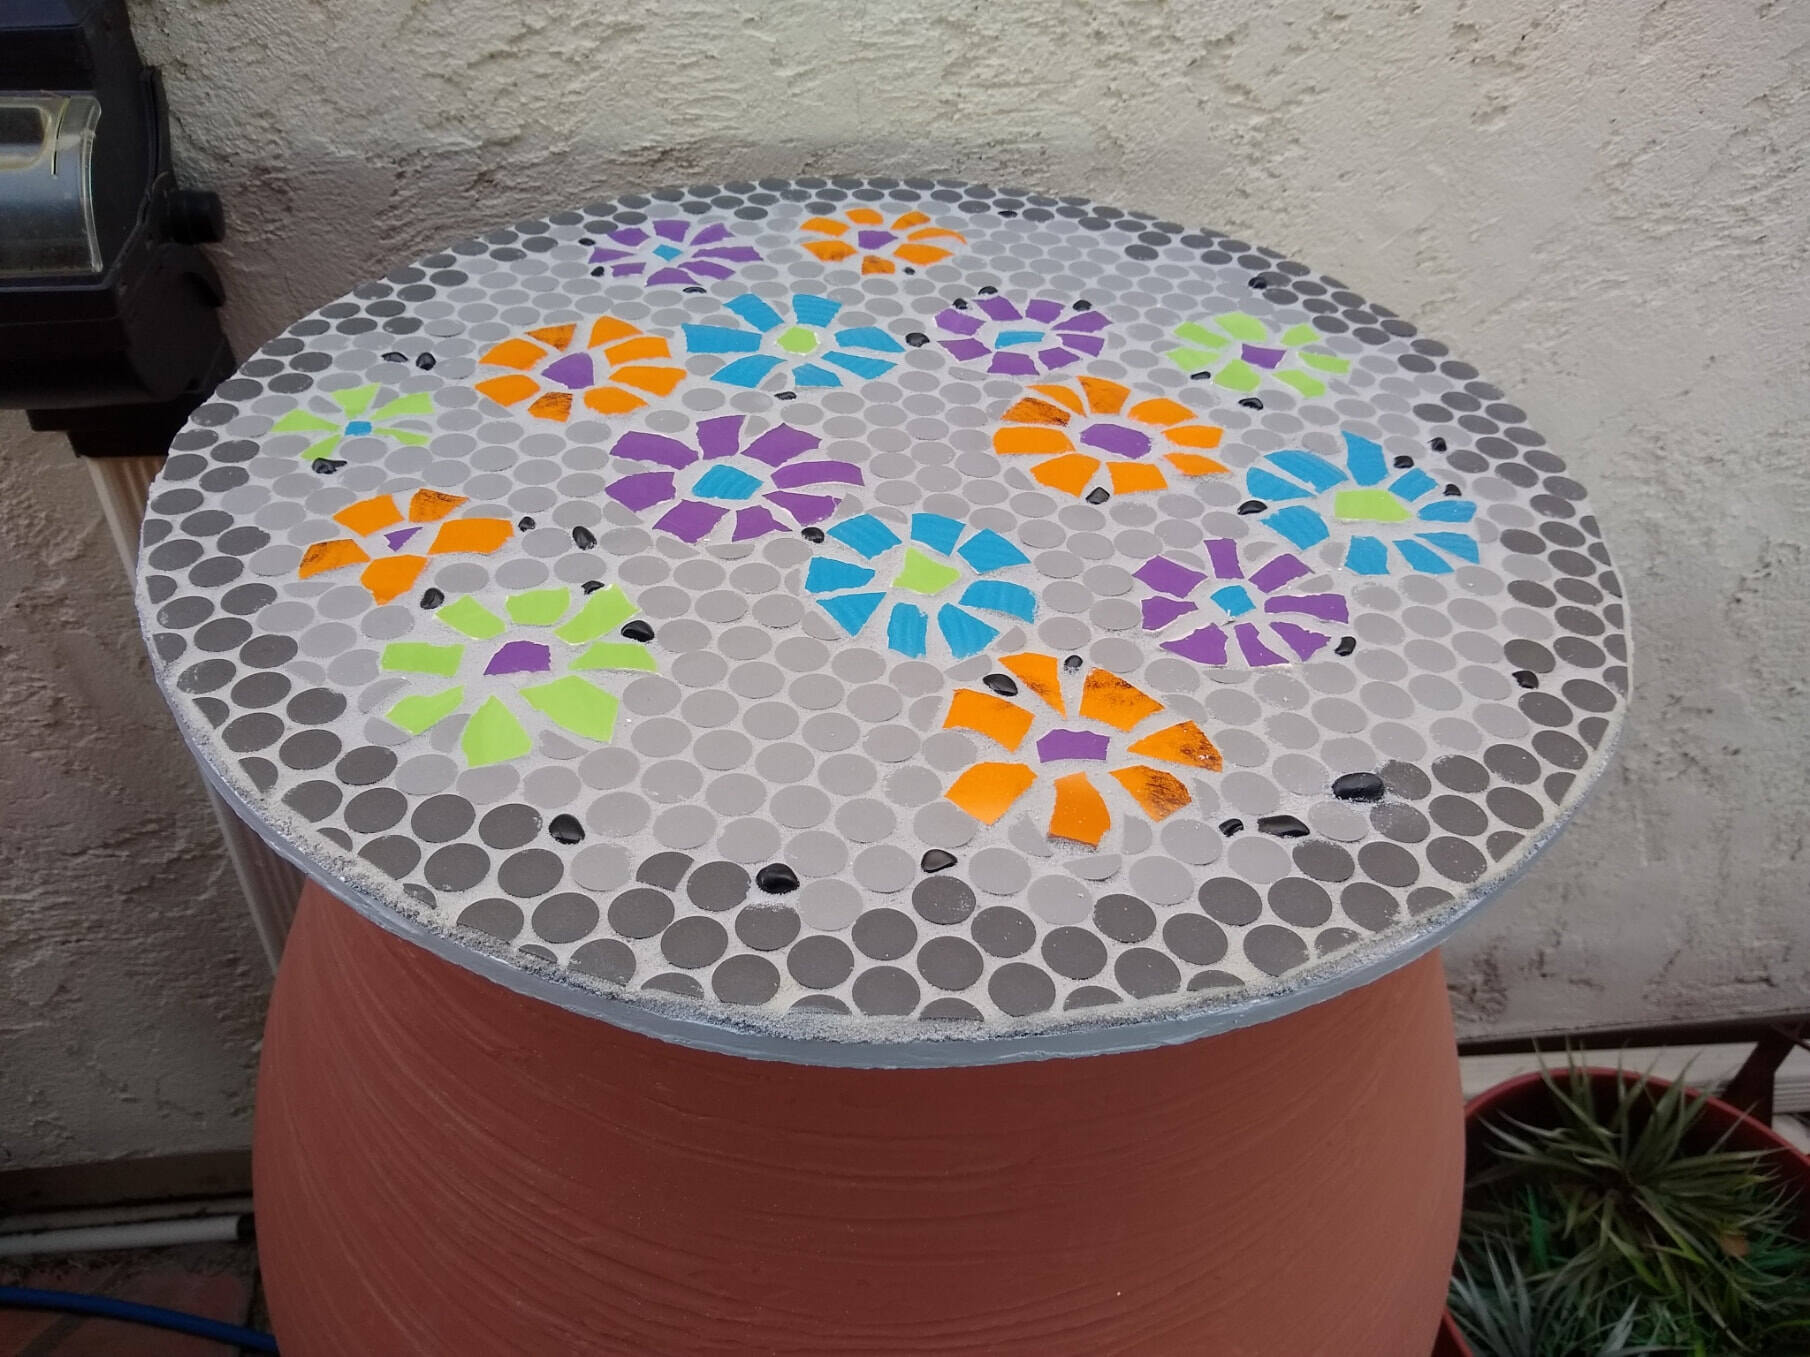
Experiment with different patterns and layouts to determine the visual impact you want to achieve. From classic subway patterns to intricate geometric designs, the layout of your mosaic tiles can significantly influence the overall aesthetic of the backsplash. Visualize how the chosen pattern will interact with the surrounding elements in your space, and ensure that it harmonizes with the overall design scheme.
4. Personal Touch
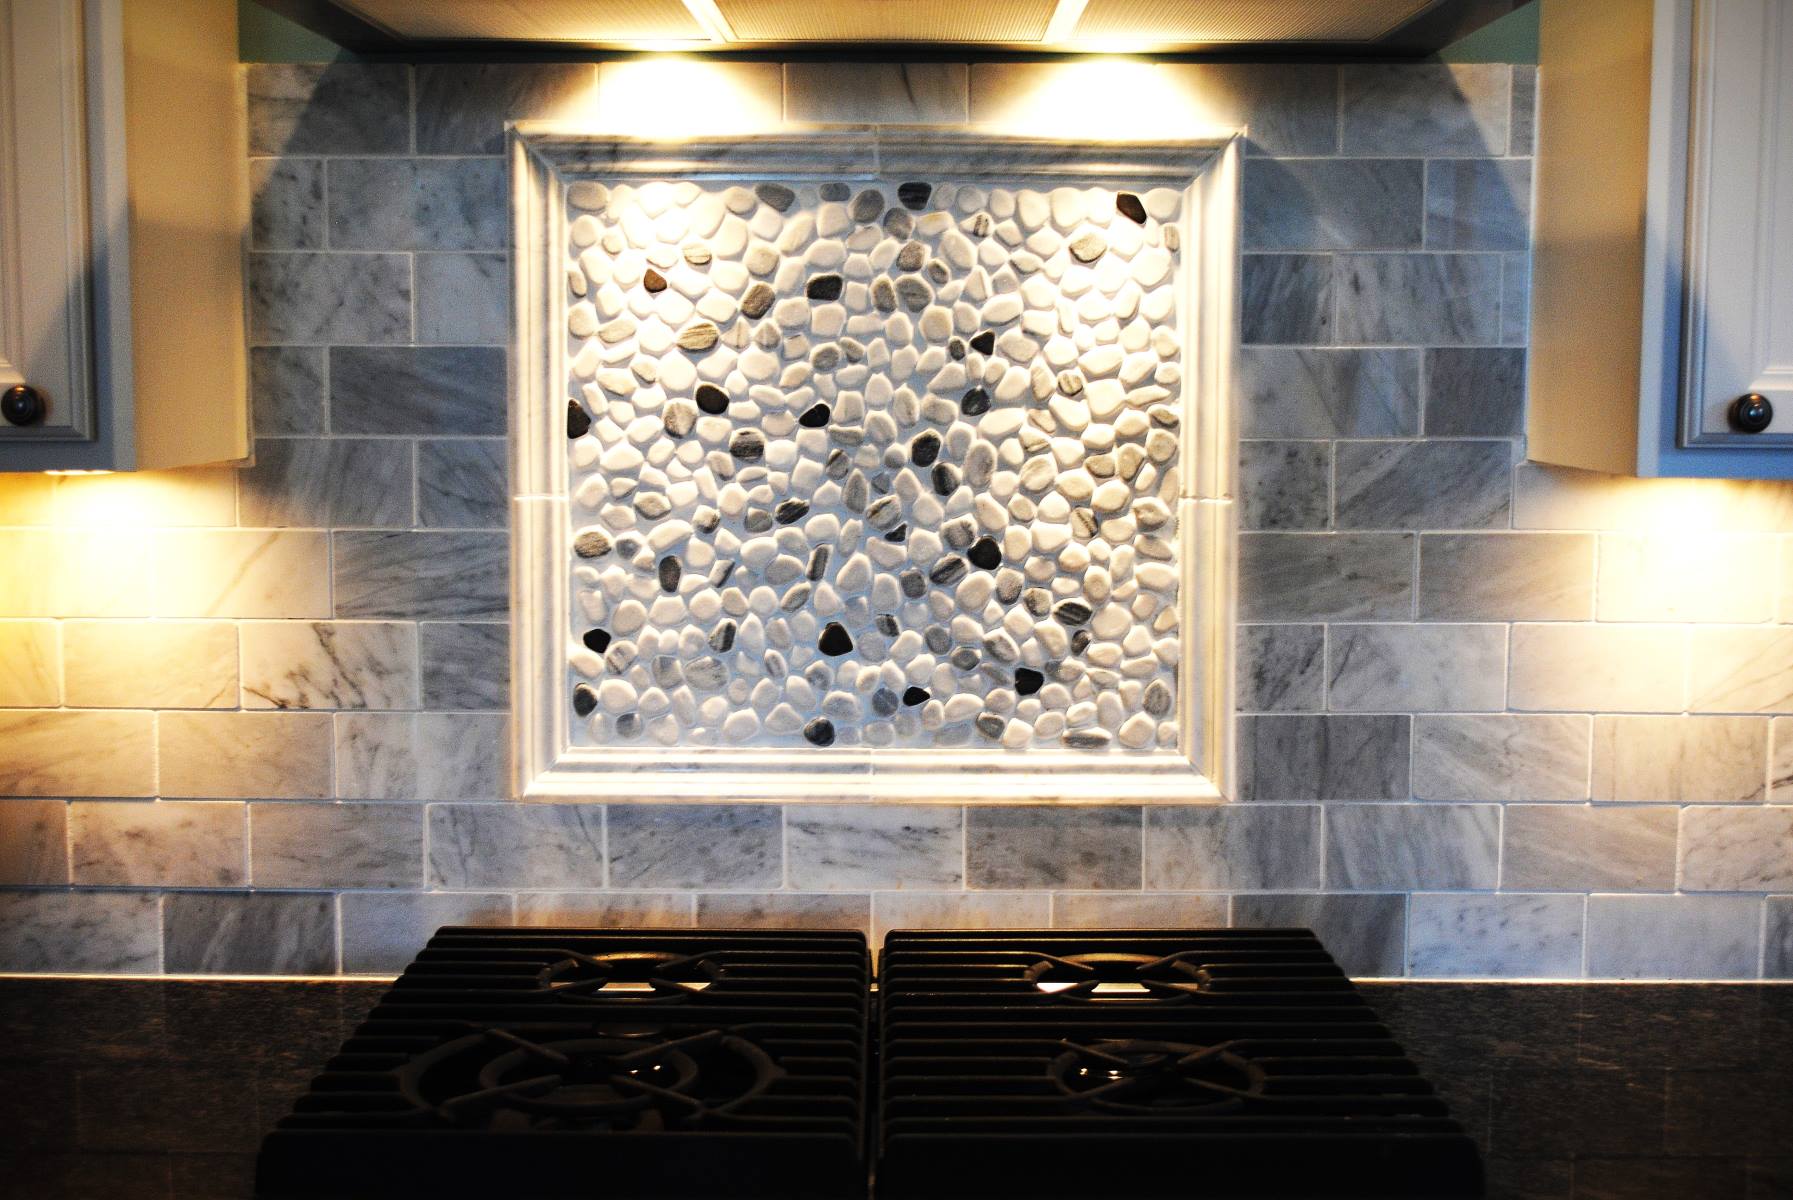
Infuse your mosaic backsplash with a personal touch by incorporating custom elements or unique tile accents. Consider adding a focal point such as a mosaic mural or integrating specialty tiles that hold sentimental value. This personalization elevates the design, making it a reflection of your individuality and creating a conversation piece within your home.
5. Mock-Up and Visualization
Before committing to the final design, create a mock-up or utilize digital visualization tools to preview how the mosaic backsplash will look in your space. This step allows you to assess the cohesion of the design with the existing elements and make any necessary adjustments before the installation process begins.
By approaching the design phase with thoughtful consideration and creativity, you can ensure that your mosaic backsplash becomes a captivating and harmonious addition to your kitchen or bathroom. With the design finalized, you're now ready to move on to the next crucial step: preparing the surface for the installation of your mosaic tiles.
Read more: How To Make A Backsplash
Preparing the Surface
Before embarking on the installation of your mosaic backsplash, it is essential to prepare the surface to ensure a smooth and durable application. Proper surface preparation is crucial for the long-term integrity of the installation. Here's a detailed guide on how to prepare the surface for your mosaic backsplash:
-
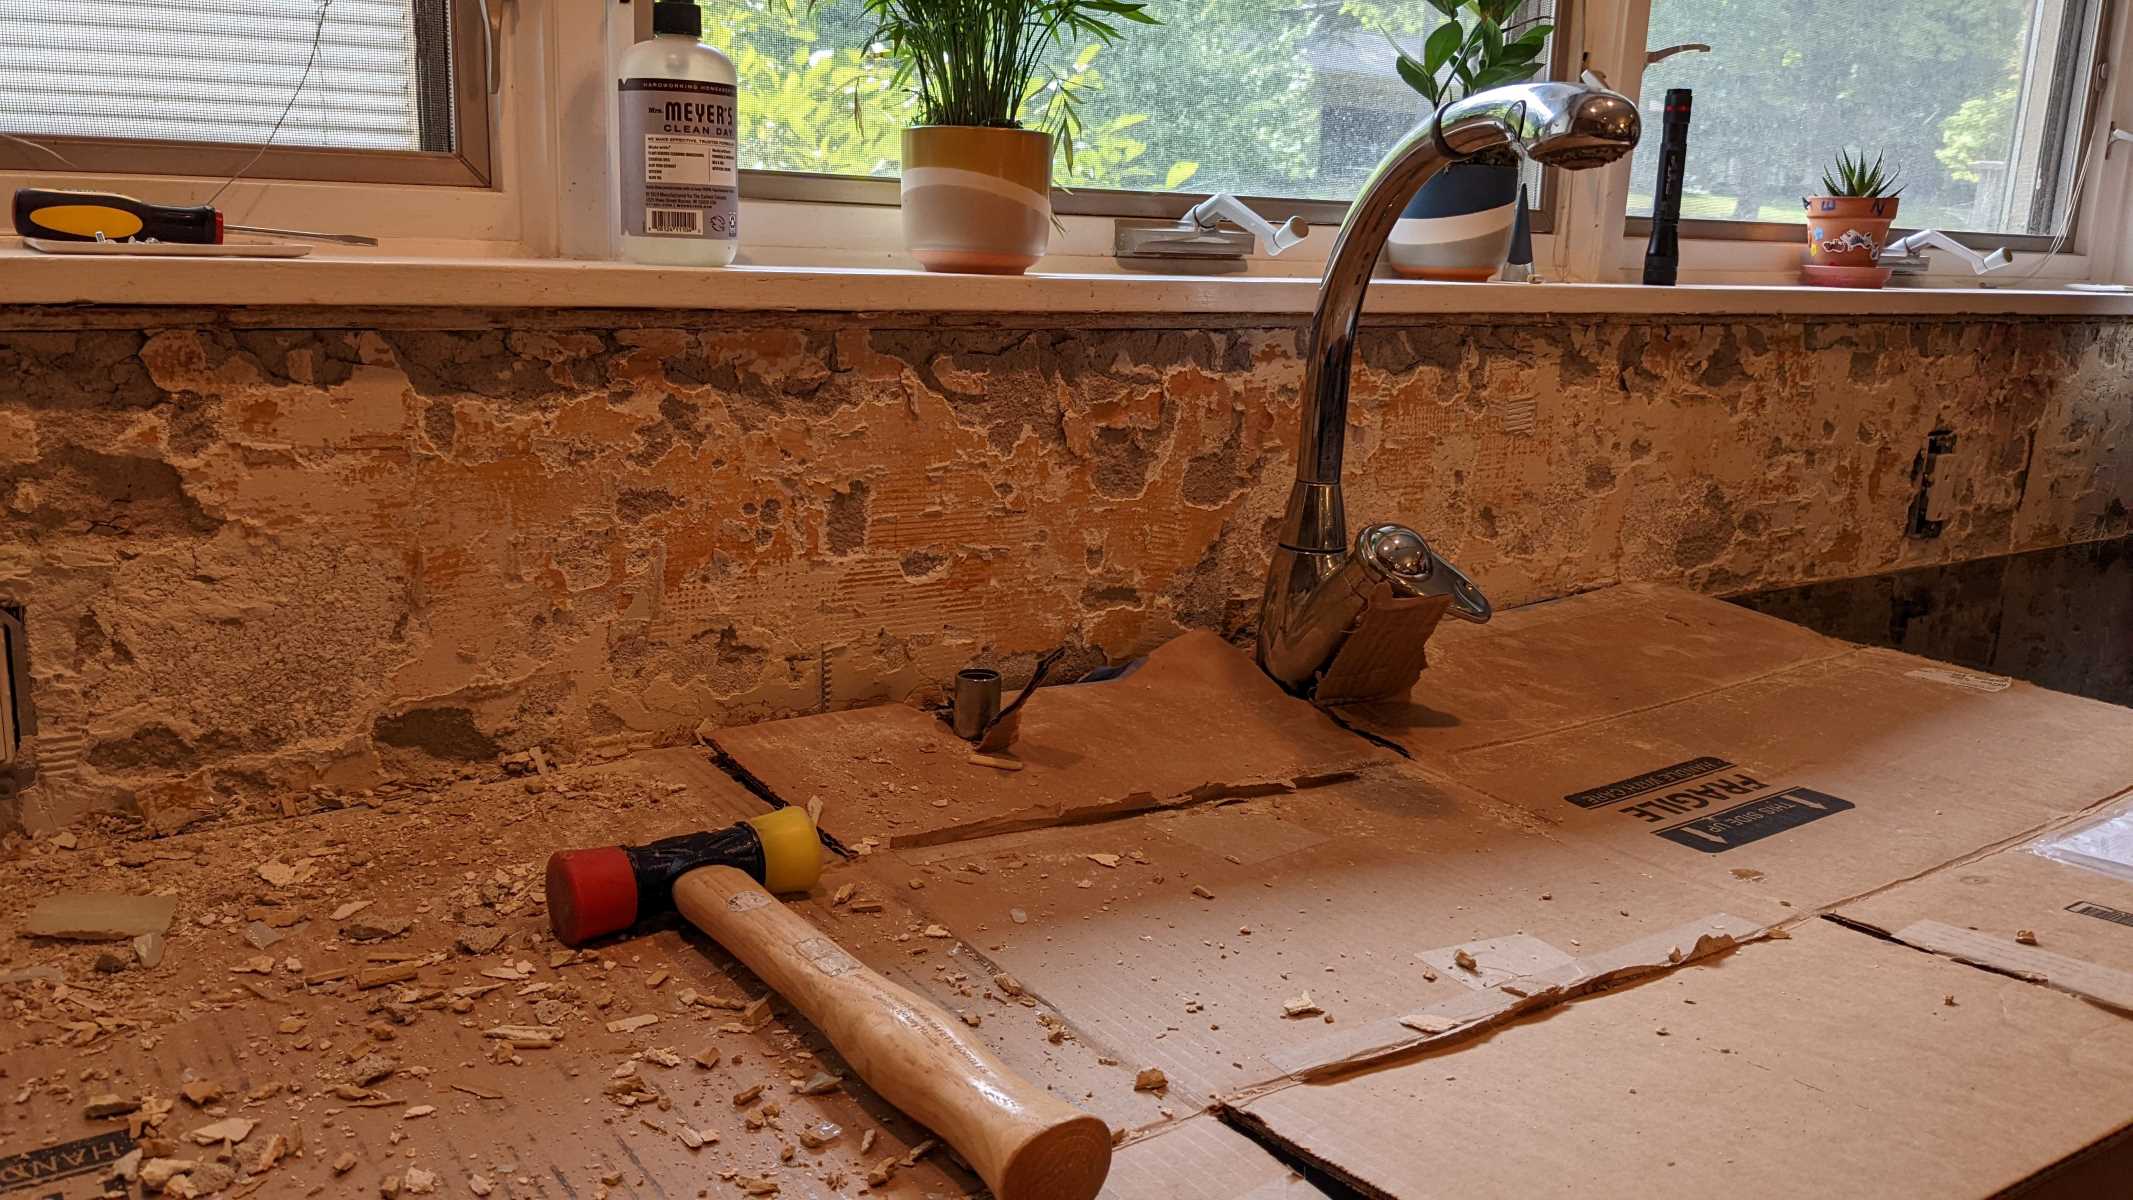
Clean the Wall: Start by thoroughly cleaning the wall where the backsplash will be installed. Remove any grease, dirt, or residue using a mild detergent and water solution. Ensure that the wall is completely clean and free from any substances that could hinder the adhesion of the tiles.
-
Inspect for Damage: Carefully inspect the wall for any signs of damage, such as cracks, uneven surfaces, or loose paint. Address any structural issues by repairing cracks and smoothing out uneven areas. If the wall has existing paint that is peeling or flaking, it may be necessary to remove the old paint to create a stable surface for the mosaic tiles.
-
Sand the Surface: If the wall has a glossy or uneven finish, lightly sand the surface to create a rough texture that promotes better adhesion. Use fine-grit sandpaper to gently roughen the wall, ensuring that the entire area where the tiles will be installed is uniformly textured.
-
Protect Adjacent Surfaces: Take measures to protect adjacent surfaces, such as countertops and cabinets, from debris and potential damage during the installation process. Cover these areas with a protective material, such as a drop cloth or painter's tape, to safeguard them from dust and adhesive.
-
Apply Primer (If Necessary): Depending on the type of wall surface, it may be beneficial to apply a primer before installing the mosaic tiles. A primer helps to create a uniform surface, improves adhesion, and enhances the durability of the installation. Follow the manufacturer's instructions for the specific primer being used.
-
Allow the Surface to Dry: After completing the preparation steps, allow the wall surface to dry completely before proceeding with the installation. Adequate drying time is essential to ensure that the adhesive bonds effectively to the wall, promoting a secure and long-lasting mosaic backsplash.
By meticulously preparing the surface, you set the stage for a successful installation of your mosaic backsplash. The attention to detail during this phase contributes to the overall quality and longevity of the finished project. With the surface properly prepared, you are now ready to move on to the exciting phase of applying the adhesive and bringing your mosaic backsplash design to life.
Applying the Adhesive
Once the surface is meticulously prepared, the next critical step in creating a stunning mosaic backsplash is applying the adhesive. The adhesive serves as the foundation that secures the mosaic tiles to the wall, ensuring a strong and durable bond. Here's a detailed guide on the process of applying the adhesive for your mosaic backsplash installation:
-
Selecting the Right Adhesive: Choose a high-quality adhesive that is specifically formulated for the type of tiles you are using. For example, if you have opted for glass tiles, ensure that the adhesive is suitable for bonding glass to the wall surface. It's essential to follow the manufacturer's recommendations to guarantee optimal adhesion and longevity of the installation.
-
Mixing the Adhesive: If you are using a pre-mixed adhesive, thoroughly stir it to achieve a uniform consistency. In the case of powdered adhesive, carefully follow the instructions to achieve the correct ratio of water to powder, ensuring a smooth and lump-free mixture. Consistency is key, as it directly impacts the adhesive's ability to securely hold the tiles in place.
-
Applying the Adhesive: Use a notched trowel to apply the adhesive to the prepared wall surface. Hold the trowel at a 45-degree angle and spread the adhesive evenly, creating ridges in the adhesive with the notched edge. This technique, known as "back-buttering," ensures consistent coverage and promotes strong adhesion between the tiles and the wall.
-
Working in Sections: To prevent the adhesive from drying out before the tiles are placed, work in small sections at a time. This approach allows you to focus on one area, ensuring that the adhesive remains workable as you position the tiles. It's important to maintain a steady pace to avoid the adhesive setting prematurely.
-
Adhering the Tiles: Carefully press each mosaic tile into the adhesive, ensuring that it is firmly set in place. Use tile spacers to maintain even spacing between the tiles, creating a uniform and professional-looking installation. Pay close attention to the alignment and positioning of the tiles, as this will impact the overall visual appeal of the backsplash.
-
Cleaning Excess Adhesive: As you progress, periodically check for any excess adhesive that may seep through the gaps between the tiles. Use a damp sponge or cloth to gently remove any adhesive that has surfaced, ensuring that the grout lines remain clean and free from obstructions.
By following these meticulous steps, you can ensure that the adhesive application process sets the stage for a successful and visually striking mosaic backsplash. With the tiles securely in place, the next phase involves grouting the tiles to further enhance the aesthetic and durability of your mosaic backsplash.
Placing the Tiles
With the adhesive meticulously applied and the surface meticulously prepared, it's time to embark on the exciting phase of placing the tiles for your mosaic backsplash. This pivotal step requires precision, attention to detail, and a keen eye for design to ensure a visually stunning and durable installation. Here's a comprehensive guide on the process of placing the tiles for your mosaic backsplash:
-
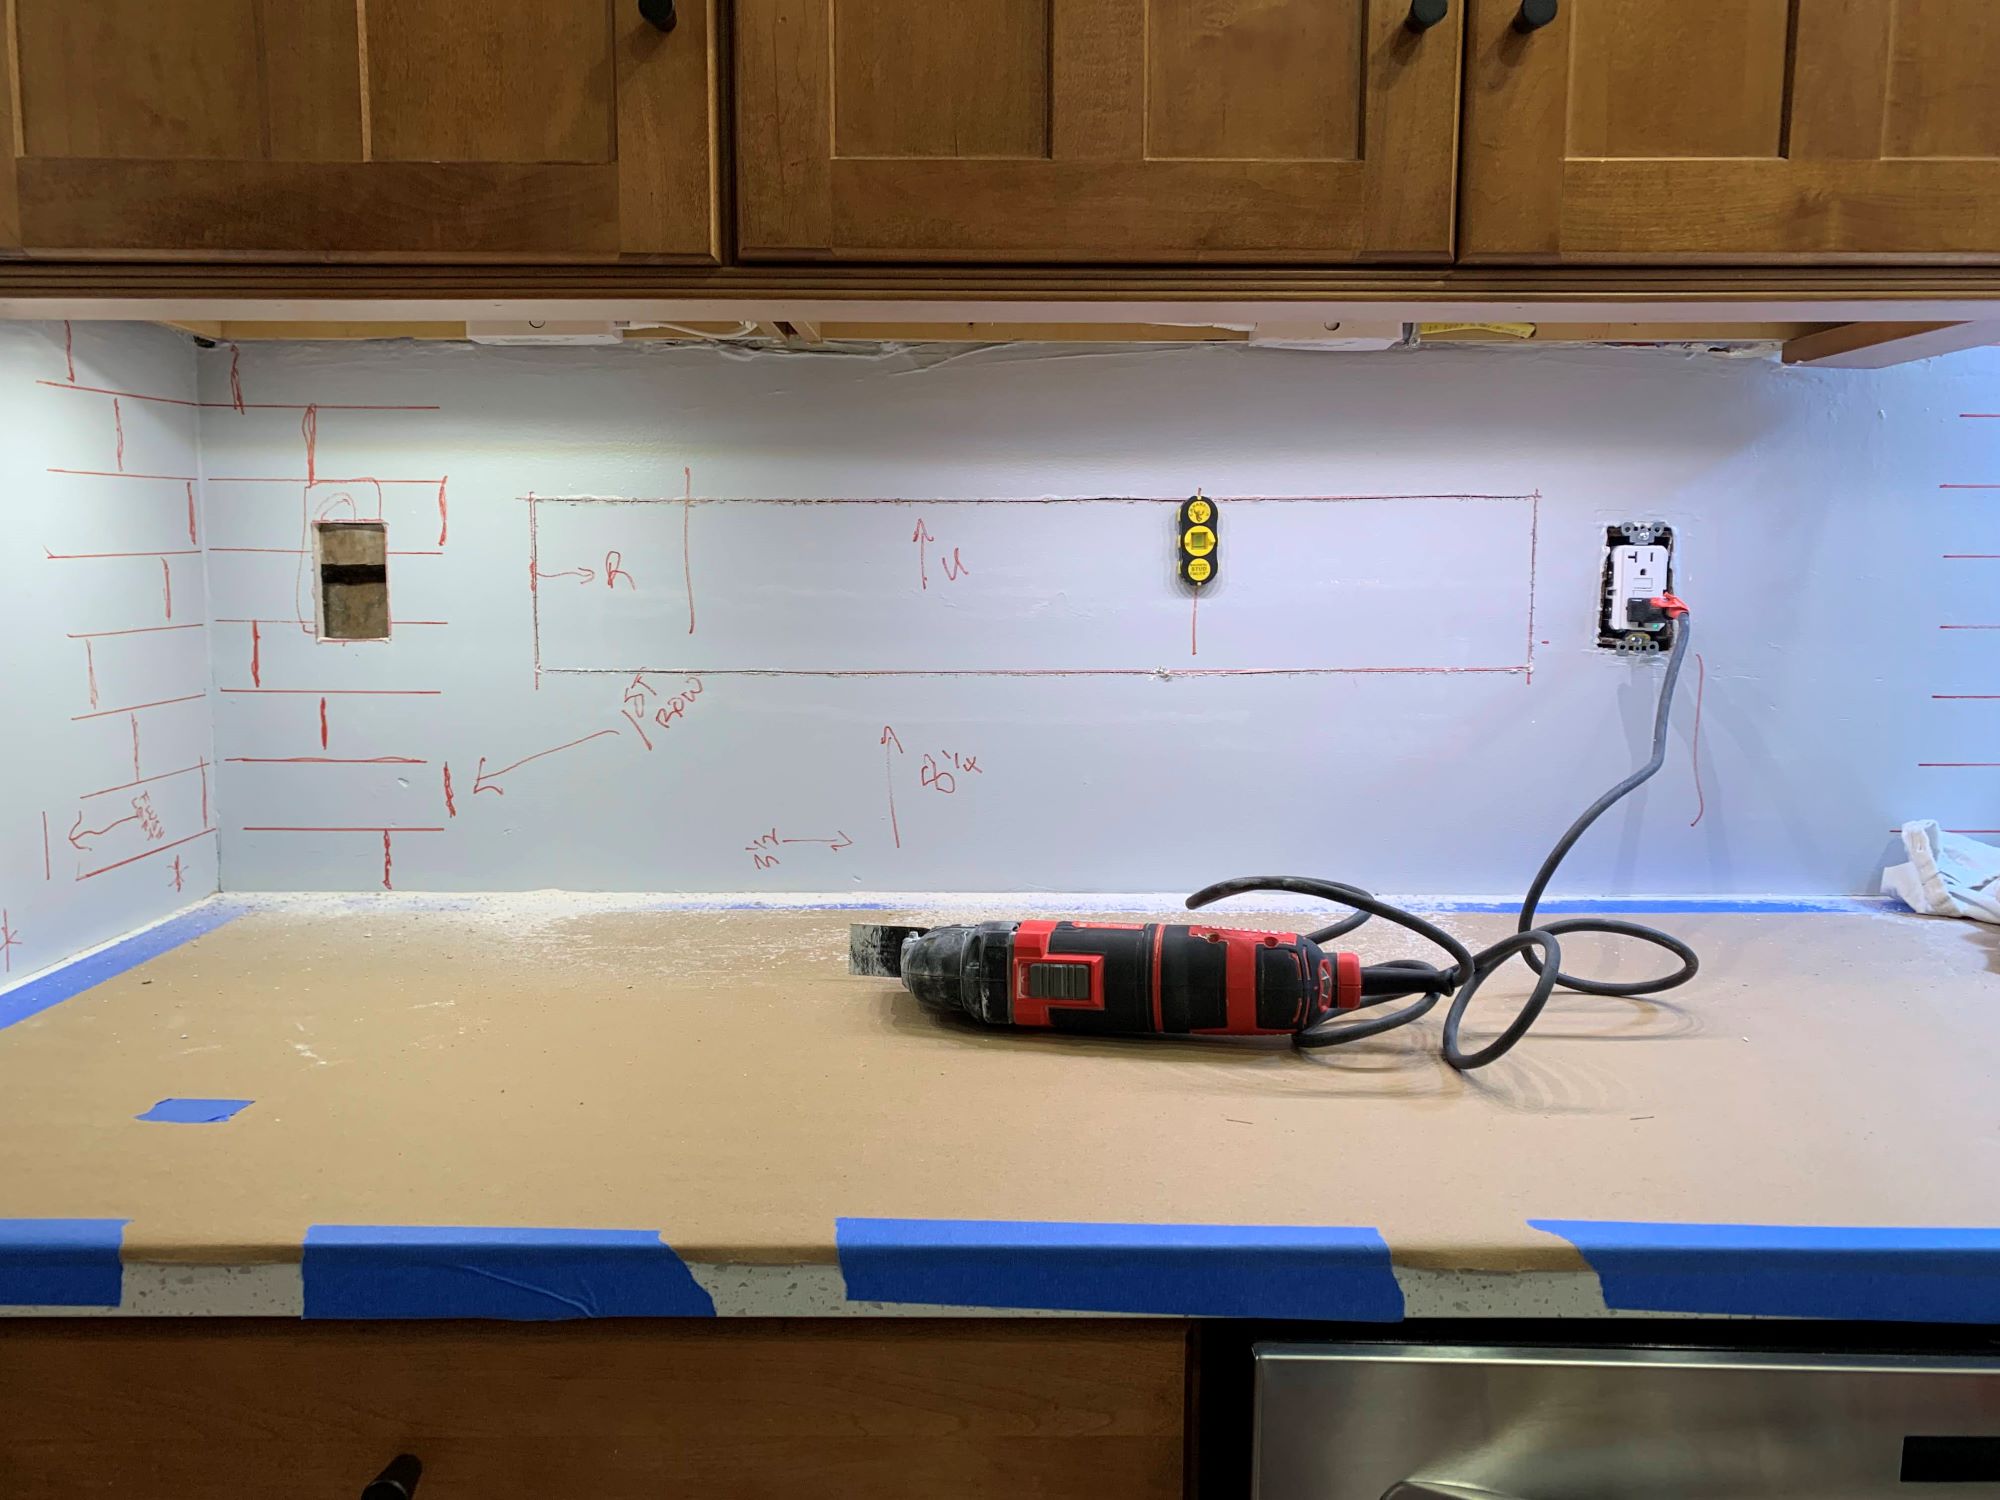
Starting Point: Begin by identifying the starting point for placing the tiles. This is typically the bottom center of the backsplash area. Establishing a precise starting point serves as the foundation for maintaining symmetry and achieving a balanced layout. Use a level and a pencil to mark a straight and level guideline from the starting point, providing a visual reference for the tile placement.
-
Positioning the Tiles: Carefully position the mosaic tiles along the marked guideline, adhering to the predetermined design and layout. As you place each tile, ensure that it aligns with the surrounding tiles and maintains consistent spacing. The use of tile spacers is instrumental in achieving uniform gaps between the tiles, contributing to a polished and professional finish.
-
Adjusting Tile Placement: Throughout the placement process, periodically step back and assess the alignment and overall visual impact of the tiles. Make any necessary adjustments to ensure that the pattern, spacing, and positioning of the tiles align with the intended design. This iterative approach allows for real-time refinements, ensuring a cohesive and visually appealing mosaic backsplash.
-
Custom Cuts and Trims: Inevitably, you may encounter areas where custom cuts and trims are required to accommodate corners, outlets, or other architectural features. Utilize a tile cutter or nippers to precisely trim the tiles, ensuring a seamless fit within the designated space. Attention to detail during this phase contributes to a polished and professional outcome.
-
Maintaining Consistency: As you progress with placing the tiles, maintain consistency in the application of adhesive and the alignment of the tiles. Consistent pressure and precision in tile placement are essential for achieving a level and uniform surface, free from irregularities or discrepancies.
-
Visual Inspection: Once all the tiles are in place, conduct a thorough visual inspection of the entire backsplash area. Verify the alignment, spacing, and overall aesthetic coherence of the mosaic tiles. This critical assessment allows for any final adjustments before proceeding to the next phase of the installation process.
By meticulously following these steps and exercising precision and attention to detail, you can ensure that the placement of the tiles results in a visually striking and professionally executed mosaic backsplash. With the tiles securely positioned, the subsequent phase involves grouting the tiles to further enhance the aesthetic and durability of your stunning mosaic backsplash.
Grouting the Tiles
Grouting the tiles is a pivotal step in the installation of a mosaic backsplash, as it not only enhances the visual appeal of the tiles but also contributes to the overall durability and longevity of the installation. The grout serves to fill the gaps between the tiles, providing structural support and preventing moisture from seeping behind the tiles. Here's a comprehensive guide on the process of grouting the tiles for your mosaic backsplash:
1. Selecting the Grout
Choose a high-quality grout that complements the color and style of your mosaic tiles. Consider whether you want the grout to seamlessly blend in with the tiles for a cohesive look or if you prefer a contrasting grout color to make a bold statement. Additionally, ensure that the grout is suitable for the size and spacing of your tiles, as well as the specific conditions of the installation area, such as moisture levels in a kitchen or bathroom.
2. Mixing the Grout
Follow the manufacturer's instructions to mix the grout to the appropriate consistency. Use a clean bucket and a mixing paddle to achieve a smooth and lump-free grout mixture. It's essential to mix the grout thoroughly to ensure uniform color and texture, as this directly impacts the final appearance of the grouted surface.
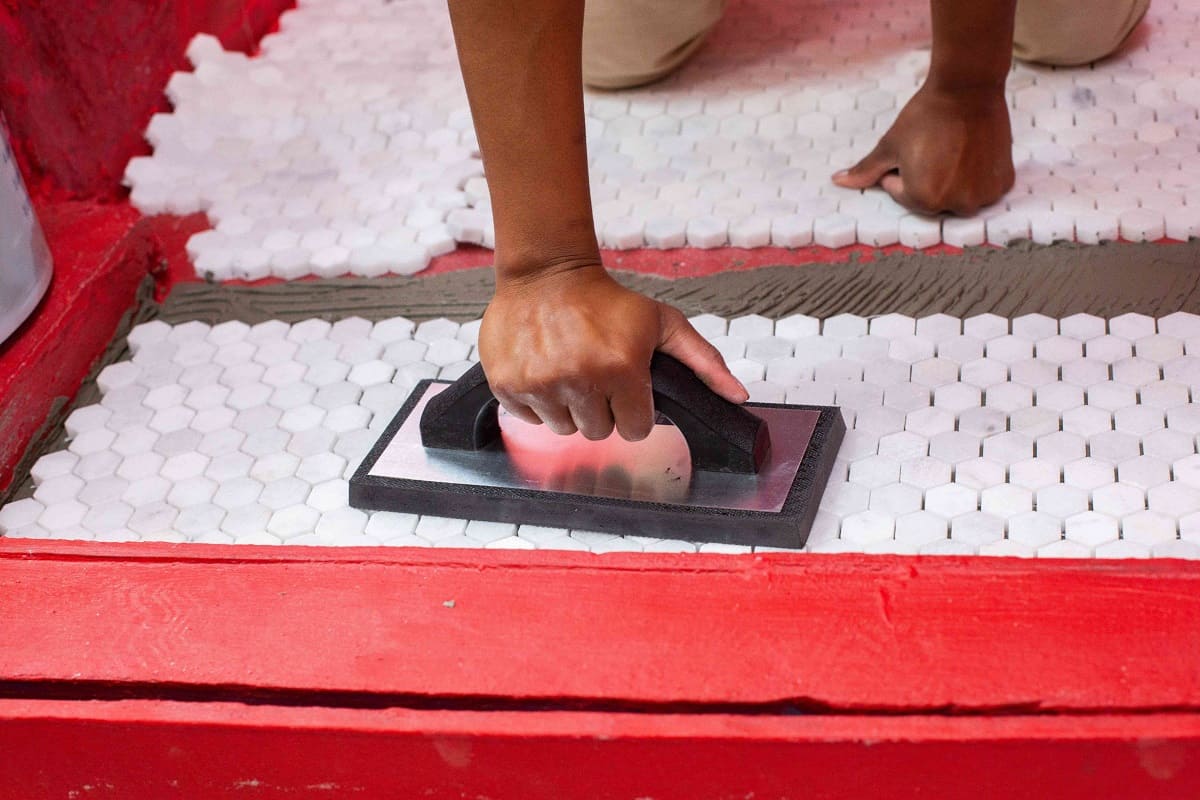
3. Applying the Grout
Using a rubber grout float, apply the mixed grout to the tiled surface at a 45-degree angle, ensuring that the grout fills the spaces between the tiles. Work in small sections at a time to prevent the grout from drying out before it can be properly worked into the gaps. Hold the grout float at a slight angle and use firm, sweeping motions to pack the grout into the joints, ensuring complete coverage and eliminating air pockets.
4. Cleaning Excess Grout
After applying the grout to a section of the backsplash, use a damp sponge to gently remove excess grout from the tile surfaces. Hold the sponge at a 45-degree angle and make diagonal passes across the tiles to avoid dislodging the grout from the joints. Rinse the sponge frequently and continue the cleaning process until the tiles are free from grout residue and the grout lines are uniformly filled and smooth.
Read more: How To Make A Mini Mosaic Quilt
5. Final Cleaning and Curing
Once the grout has been applied and excess grout has been cleaned from the tiles, allow the grout to cure according to the manufacturer's recommendations. After the initial curing period, perform a final cleaning of the tiled surface to remove any remaining haze or residue from the grout. A clean, dry cloth can be used to buff the tiles to a lustrous finish, revealing the full beauty of the mosaic backsplash.
By meticulously following these steps and exercising precision and attention to detail, you can ensure that the grouting process results in a visually striking and professionally executed mosaic backsplash. With the grout seamlessly integrated between the tiles, the final phase involves sealing the mosaic backsplash to protect and preserve its beauty for years to come.
Sealing the Mosaic Backsplash
Sealing the mosaic backsplash is the final crucial step in the installation process, serving as a protective barrier that safeguards the tiles and grout from moisture, stains, and everyday wear and tear. The sealant not only enhances the longevity of the backsplash but also preserves its visual appeal, ensuring that your meticulously crafted mosaic remains a stunning focal point in your kitchen or bathroom for years to come.
1. Selecting the Sealant
Choosing the right sealant is paramount to the overall performance and durability of your mosaic backsplash. Opt for a high-quality penetrating or impregnating sealer that is specifically formulated for the type of tiles and grout you have installed. Consider factors such as the porosity of the tiles and grout, as well as the level of protection required for the installation area. Additionally, ensure that the selected sealant is suitable for the specific conditions of your kitchen or bathroom, such as exposure to water and cooking splatters.
2. Preparing the Surface
Before applying the sealant, ensure that the tiled surface is clean, dry, and free from any residual grout haze or debris. Thoroughly inspect the grout lines and tiles to verify that they are in pristine condition and ready to be sealed. If necessary, use a gentle cleaning solution and a soft brush to remove any lingering grout residue or dirt from the surface. Allow the backsplash to dry completely before proceeding with the sealing process.
Read more: How To Make A Mosaic Patio Table Top
3. Applying the Sealant
Using a clean, lint-free cloth or a specialized applicator, apply the sealant evenly across the entire surface of the mosaic backsplash. Work in small sections, ensuring that the sealant penetrates the tiles and grout, effectively forming a protective barrier. Pay particular attention to the grout lines, as they are more susceptible to staining and moisture penetration. Allow the initial coat of sealant to absorb into the surface for the specified duration as per the manufacturer's instructions.
4. Buffing and Polishing
After the initial application and absorption of the sealant, gently buff the tiled surface with a dry, clean cloth to remove any excess sealant and achieve a lustrous finish. This buffing process not only enhances the visual appeal of the tiles but also ensures that the sealant is uniformly distributed, providing comprehensive protection to the entire backsplash.
5. Additional Coats (If Necessary)
Depending on the type of sealant and the porosity of the tiles and grout, it may be recommended to apply multiple coats of sealant for enhanced protection. Follow the manufacturer's guidelines regarding the number of coats and the interval between applications. Additional coats of sealant further reinforce the resilience of the mosaic backsplash, fortifying it against potential damage and preserving its pristine appearance.
By meticulously sealing your mosaic backsplash, you not only fortify its resilience against daily use and exposure but also uphold its aesthetic allure. The sealant acts as a shield, ensuring that your meticulously designed and installed mosaic backsplash remains a captivating and enduring feature in your home, adding charm and sophistication to your kitchen or bathroom.
Frequently Asked Questions about How To Make Mosaic Backsplash
Was this page helpful?
At Storables.com, we guarantee accurate and reliable information. Our content, validated by Expert Board Contributors, is crafted following stringent Editorial Policies. We're committed to providing you with well-researched, expert-backed insights for all your informational needs.


0 thoughts on “How To Make Mosaic Backsplash”