Home>Technology>Home Entertainment Systems>How To Hook Up Chromebook To Projector
Home Entertainment Systems
How To Hook Up Chromebook To Projector
Modified: August 23, 2024
Learn how to easily connect your Chromebook to a projector for a seamless home entertainment experience. Follow these simple steps to set up your home entertainment system.
(Many of the links in this article redirect to a specific reviewed product. Your purchase of these products through affiliate links helps to generate commission for Storables.com, at no extra cost. Learn more)
Introduction
Welcome to the world of multimedia connectivity! In this guide, we'll delve into the seamless process of connecting your Chromebook to a projector. Whether you're preparing for an important presentation, a movie night with friends, or a classroom lesson, the ability to project your Chromebook's screen onto a larger display offers endless possibilities for entertainment and productivity.
As technology continues to evolve, the need for flexible and efficient connectivity solutions becomes increasingly important. With the rise of Chromebooks as versatile computing devices and projectors as essential tools for sharing content, knowing how to bridge the gap between these two devices is invaluable.
By following the steps outlined in this guide, you'll gain the confidence and skills needed to effortlessly connect your Chromebook to a projector, unlocking a world of visual possibilities. Whether you're a student, educator, professional, or entertainment enthusiast, this knowledge will empower you to make the most of your Chromebook's capabilities in any setting.
So, let's embark on this journey together as we explore the simple yet impactful process of connecting your Chromebook to a projector. Get ready to elevate your viewing experience, captivate your audience, and unleash the full potential of your Chromebook's display—because the big screen awaits!
Key Takeaways:
- Easily connect your Chromebook to a projector by checking ports, using the right cable, adjusting display settings, and troubleshooting common issues for a seamless and visually captivating experience.
- Empower yourself to share presentations, stream multimedia content, and engage in collaborative work with confidence, as you unlock the full potential of your Chromebook’s display on the big screen.
Read more: How To Hook Up Nintendo Switch To Projector
Step 1: Check the ports on your Chromebook and projector
Before diving into the connection process, it’s crucial to familiarize yourself with the available ports on both your Chromebook and the projector. This initial step sets the stage for a smooth and successful connection, ensuring that you have the necessary hardware compatibility.
Firstly, let’s examine your Chromebook. Most modern Chromebooks are equipped with a selection of ports, typically including USB-C, USB-A, HDMI, and a headphone jack. Take a moment to locate these ports on your Chromebook, as the specific ports available may vary depending on the model.
Next, turn your attention to the projector. Projectors commonly feature multiple input ports, with HDMI and VGA being the most prevalent options. Some projectors also support wireless connectivity through technologies like Bluetooth or Wi-Fi. Identify the input ports on the projector, ensuring that they align with the output ports on your Chromebook.
Once you’ve identified the ports on both devices, take note of the available cables and adapters in your possession. If your Chromebook and projector utilize different port types, such as USB-C on the Chromebook and HDMI on the projector, you may need to acquire the appropriate adapter or cable to establish a physical connection between the two devices.
By verifying the port configurations on your Chromebook and projector and assessing the compatibility of the available cables and adapters, you’ll lay a solid foundation for the subsequent steps. This proactive approach minimizes the risk of encountering connectivity issues during the setup process, ensuring a seamless transition to the next phase of connecting your Chromebook to the projector.
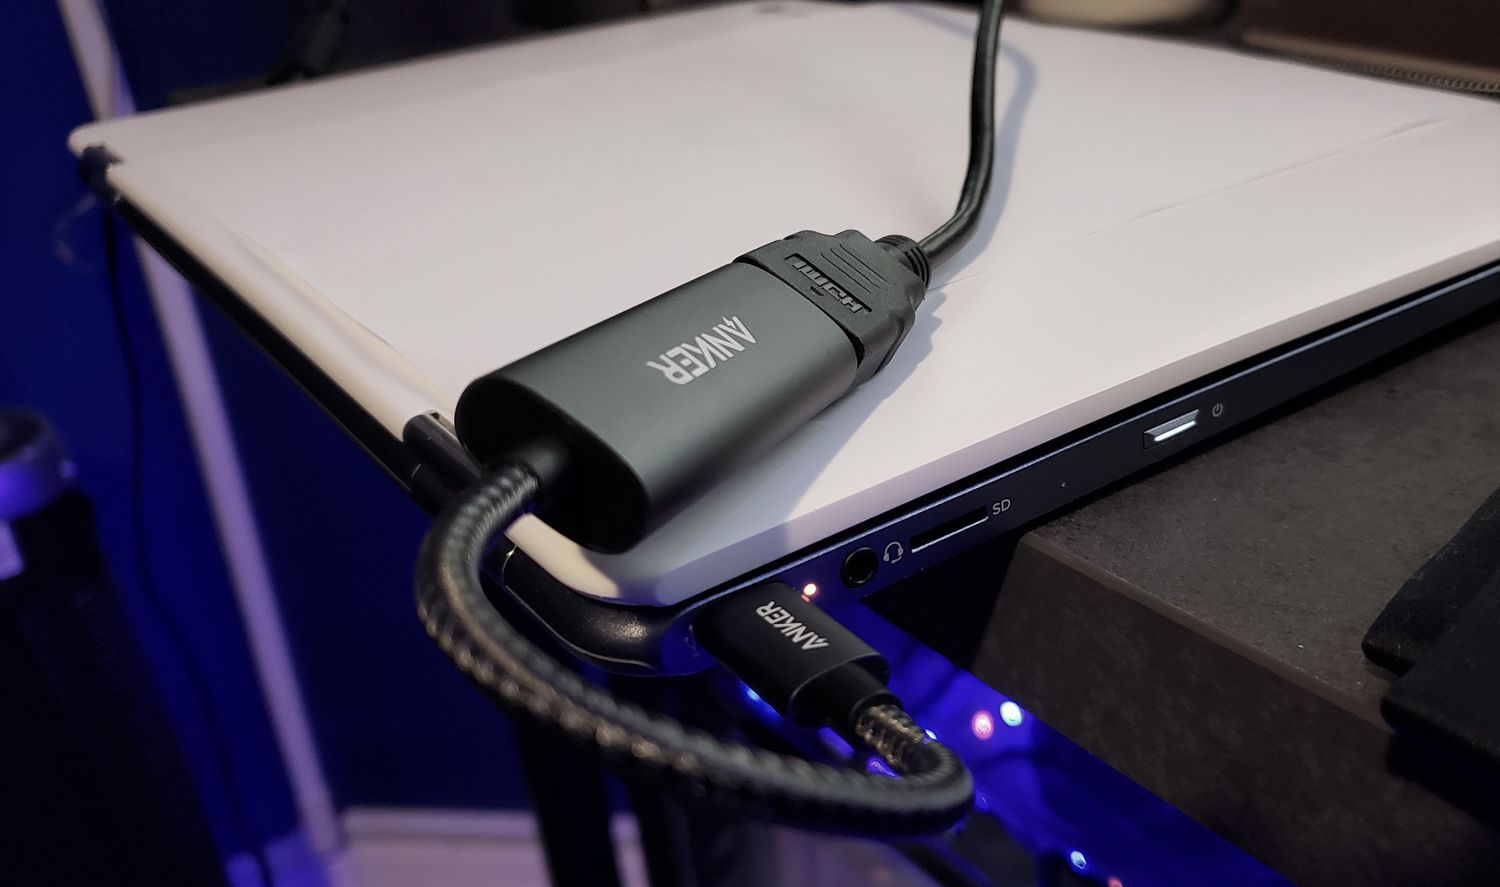
Step 2: Connect the Chromebook to the projector using a cable
With a clear understanding of the available ports and necessary adapters, you’re now ready to establish a physical connection between your Chromebook and the projector. This step involves utilizing the appropriate cable or adapter to bridge the gap between the two devices, enabling the seamless transmission of audio and visual content from your Chromebook to the projector.
Begin by selecting the cable or adapter that best matches the port configurations of your Chromebook and the input ports on the projector. For instance, if your Chromebook features a USB-C port and the projector supports HDMI input, you’ll need a USB-C to HDMI adapter or cable to facilitate the connection.
Once you’ve identified the suitable cable or adapter, proceed to connect one end to the output port on your Chromebook and the other end to the input port on the projector. Ensure a secure and snug connection to minimize the risk of signal interruptions or disconnections during operation.
Upon establishing the physical connection, power on the projector and your Chromebook. Depending on the specific model of your projector, you may need to select the corresponding input source using the projector’s remote control or on-screen menu. This step ensures that the projector recognizes the incoming signal from your Chromebook and prepares to display its contents.
As the connection is established, you’ll witness the magic of your Chromebook’s screen coming to life on the larger canvas provided by the projector. Whether you’re sharing a presentation, streaming multimedia content, or engaging in collaborative work, the combined power of your Chromebook and the projector opens up a world of visual possibilities.
By following these steps, you’ve successfully bridged the gap between your Chromebook and the projector, setting the stage for an immersive and impactful viewing experience. With the physical connection in place, it’s time to fine-tune the display settings on your Chromebook to ensure optimal visual output on the projector’s screen.
Step 3: Adjust the display settings on your Chromebook
Now that the physical connection between your Chromebook and the projector is established, it’s essential to optimize the display settings on your Chromebook to ensure a seamless and visually stunning projection. By fine-tuning the display settings, you can maximize the clarity, resolution, and overall visual impact of the content being projected onto the larger screen.
Begin by accessing the display settings on your Chromebook. Depending on the model and operating system version, you can typically access these settings by clicking on the system tray in the bottom-right corner of the screen, selecting the “Settings” gear icon, and navigating to the “Device” or “Displays” section.
Within the display settings, you’ll encounter a range of options to customize the output to the projector. Start by adjusting the resolution to match the optimal settings supported by the projector. Selecting the appropriate resolution ensures that the projected content appears crisp and clear, enhancing the overall viewing experience for you and your audience.
Furthermore, explore the display orientation settings to accommodate the projection setup. Depending on the positioning of the projector and the desired projection surface, you may need to rotate the display orientation to landscape or portrait mode for optimal alignment with the projector’s screen.
Take advantage of additional settings such as screen mirroring or extended display mode to tailor the projection setup to your specific needs. Screen mirroring replicates the content displayed on your Chromebook’s screen onto the projector, providing a straightforward way to share presentations, videos, and more. On the other hand, extended display mode expands your workspace across both the Chromebook’s screen and the projected display, offering enhanced multitasking capabilities.
Once you’ve fine-tuned the display settings to your satisfaction, save the changes and exit the display settings menu. Your Chromebook is now primed to deliver an exceptional visual experience, seamlessly projecting its content onto the larger canvas provided by the projector.
By customizing the display settings on your Chromebook, you’ve unlocked the full potential of the projection setup, ensuring that your content shines with unparalleled clarity and impact. With the display settings optimized, it’s time to prepare the projector for displaying the content from your Chromebook.
Step 4: Set up the projector for display
With your Chromebook primed to deliver stunning visuals, it’s time to ensure that the projector is configured to showcase the content from your Chromebook with optimal clarity and impact. Setting up the projector for display involves fine-tuning its settings and positioning to create an immersive and captivating viewing experience.
Before proceeding, ensure that the projector is securely positioned and aligned with the desired projection surface. Whether you’re using a projector screen, a blank wall, or another suitable surface, the positioning of the projector plays a pivotal role in delivering a seamless and visually engaging presentation.
Once the projector is in position, power it on and allow it to go through its startup sequence. Depending on the model of your projector, you may need to access its on-screen menu or settings using the remote control or built-in controls to configure the display settings.
Within the projector’s settings, locate the display mode or input source options. Select the input source that corresponds to the port into which your Chromebook is connected. For example, if your Chromebook is connected via HDMI, ensure that the projector is set to receive input from the HDMI port.
Explore additional settings such as keystone correction, aspect ratio, and image enhancement features to fine-tune the projected display. Keystone correction helps rectify any distortion caused by the angle of the projector relative to the projection surface, ensuring that the projected image appears geometrically accurate and undistorted.
Adjust the aspect ratio settings to match the native aspect ratio of the content being projected, whether it’s standard widescreen (16:9) for videos and presentations or traditional 4:3 for certain applications. This optimization ensures that the projected content maintains its intended proportions and visual fidelity.
Depending on the ambient lighting conditions, you may need to adjust the projector’s brightness, contrast, and color settings to achieve an optimal balance for the projected display. Fine-tuning these settings enhances the clarity and vibrancy of the projected content, elevating the overall viewing experience for your audience.
With the projector’s settings configured to perfection, you’re now poised to witness the seamless projection of your Chromebook’s content onto the larger canvas provided by the projector. The stage is set for a visually captivating experience, showcasing your presentations, videos, and multimedia content with stunning clarity and impact.
By setting up the projector for display, you’ve ensured that the visual output aligns with your expectations, creating an immersive and captivating environment for sharing content from your Chromebook. With the projector and Chromebook seamlessly synchronized, it’s time to address any common issues that may arise during the setup process.
Read more: How To Hook Up A Doorbell
Step 5: Troubleshooting common issues
While connecting your Chromebook to a projector is a straightforward process, it’s not uncommon to encounter minor hiccups or technical challenges along the way. By familiarizing yourself with common issues and their solutions, you can navigate potential roadblocks with confidence, ensuring a seamless and uninterrupted projection experience.
Issue 1: No signal detected on the projector
If the projector fails to detect a signal from your Chromebook, double-check the physical connection between the two devices. Ensure that the cable or adapter is securely plugged into both the Chromebook and the projector, minimizing the risk of loose connections causing signal disruptions. Additionally, verify that the projector is set to receive input from the correct source, such as the HDMI or VGA port to which your Chromebook is connected.
Issue 2: Distorted or misaligned projection
Should you encounter distorted or misaligned projection, consider adjusting the projector’s keystone correction settings to rectify any image distortion caused by the angle of the projector relative to the projection surface. Additionally, ensure that the projector is positioned at an optimal distance and angle from the projection surface to achieve a well-aligned and visually accurate display.
Issue 3: Inconsistent display output
If the display output from your Chromebook appears inconsistent or flickers intermittently, inspect the cable or adapter for any signs of damage or wear. Swapping out the cable or adapter with a known working alternative can help isolate potential hardware issues. Additionally, verify that the input port on the projector is functioning correctly by testing it with another compatible device.
Read more: How To Hook Up An Electric Fence
Issue 4: Audio not transmitting to the projector
If you encounter challenges with audio output to the projector, ensure that the audio settings on your Chromebook are configured to route sound through the connected HDMI or audio output port. Access the sound settings on your Chromebook and verify that the correct output device is selected, enabling the seamless transmission of audio alongside the visual content to the projector.
Issue 5: Unsupported resolution or aspect ratio
In the event of an unsupported resolution or aspect ratio, revisit the display settings on your Chromebook and adjust the resolution to match the optimal settings supported by the projector. Additionally, explore the projector’s aspect ratio settings to ensure that the projected content maintains its intended proportions and visual fidelity, aligning with the native aspect ratio of the content being displayed.
By familiarizing yourself with these common issues and their corresponding troubleshooting steps, you’re well-equipped to address any technical challenges that may arise during the setup and operation of your Chromebook and projector. With a proactive approach to resolving potential issues, you can ensure a seamless and visually captivating projection experience, allowing your content to shine with unparalleled clarity and impact.
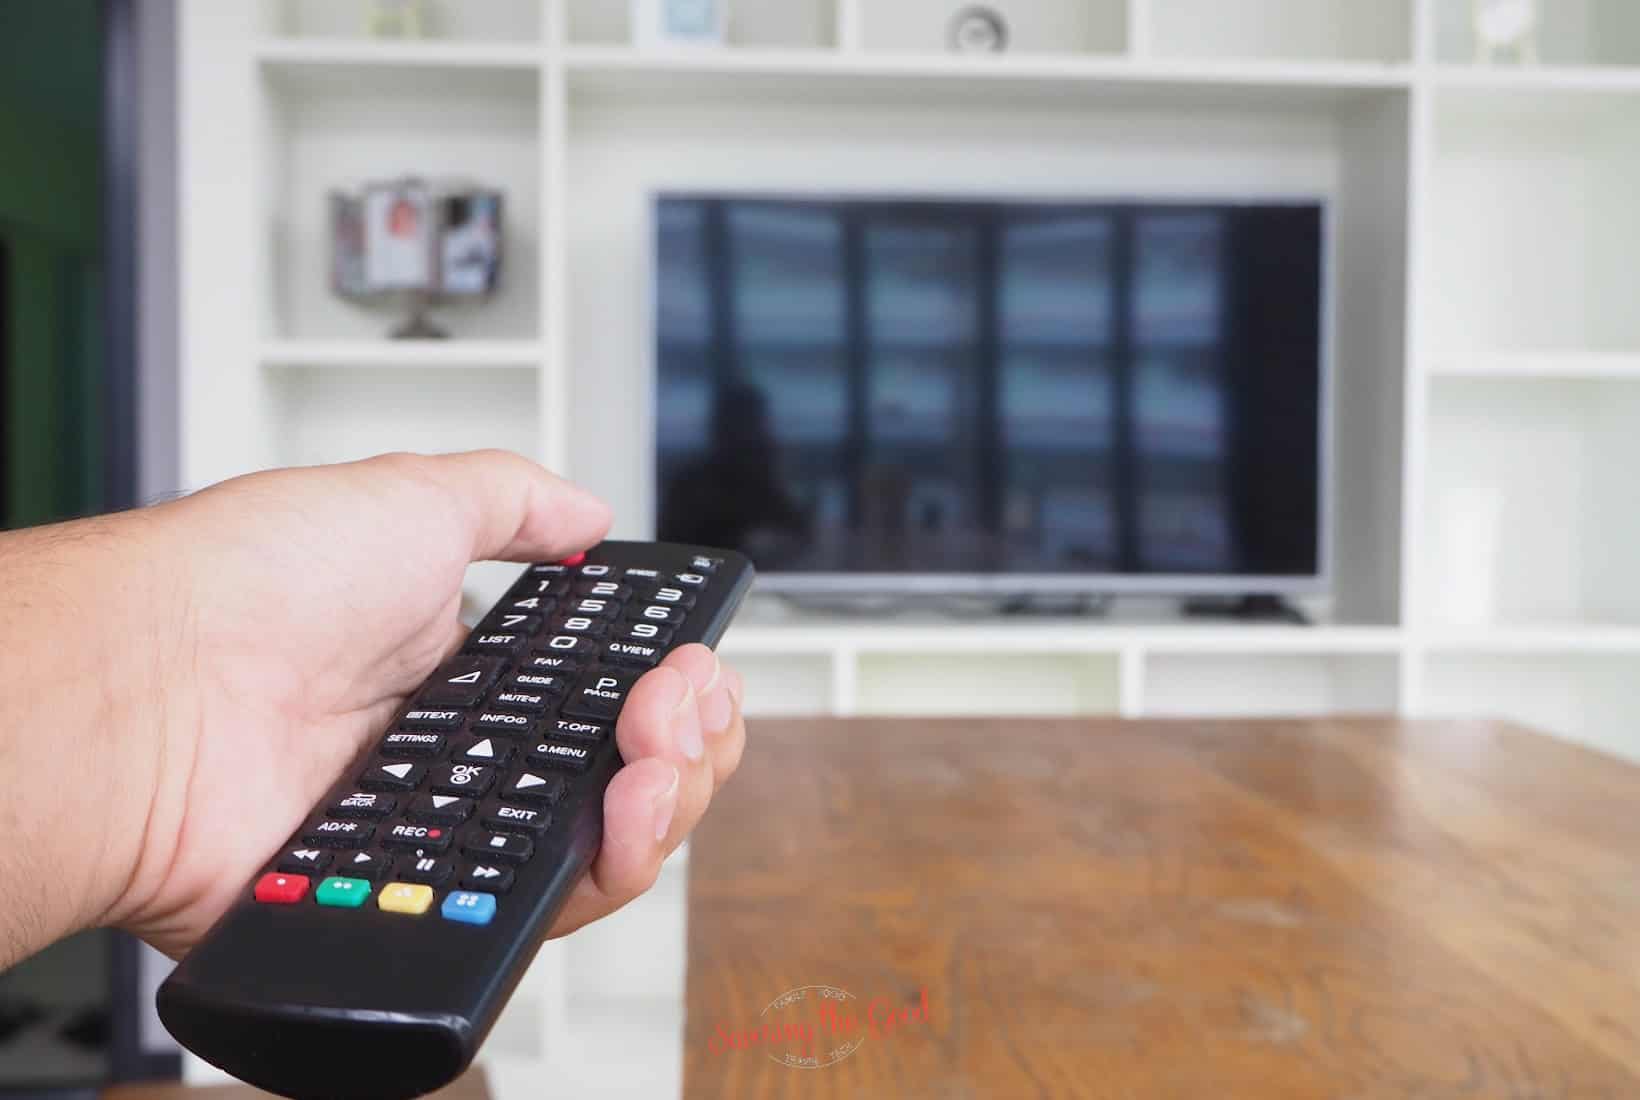
Make sure your Chromebook and projector are both turned off before connecting them. Use an HDMI cable to connect the Chromebook to the projector. Turn on the projector first, then the Chromebook. Select the correct input on the projector to see your Chromebook screen.
Conclusion
Congratulations! You’ve successfully navigated the process of connecting your Chromebook to a projector, unlocking a world of visual possibilities and seamless connectivity. By following the steps outlined in this guide, you’ve gained the skills and confidence needed to harness the full potential of your Chromebook’s display in conjunction with a projector, whether for presentations, entertainment, or collaborative work.
As technology continues to evolve, the ability to seamlessly connect devices and share content across larger displays becomes increasingly valuable. With your newfound expertise in connecting a Chromebook to a projector, you’re well-positioned to captivate audiences, elevate your presentations, and immerse yourself in a visually stunning viewing experience.
From checking the ports on your Chromebook and projector to troubleshooting common issues, you’ve embarked on a journey that empowers you to overcome technical challenges and maximize the impact of your visual content. Whether you’re a student, educator, professional, or entertainment enthusiast, the ability to effortlessly connect and project from your Chromebook opens up a world of possibilities for creativity, collaboration, and engagement.
As you continue to explore the boundless capabilities of your Chromebook and projector, remember that the seamless connection between these devices serves as a gateway to enhanced productivity, immersive entertainment, and impactful storytelling. Embrace the power of visual communication and seamless connectivity, and let your content shine on the big screen with unparalleled clarity and impact.
Thank you for embarking on this journey to connect your Chromebook to a projector. With your newfound knowledge and skills, you’re poised to make a lasting impression and unlock the full potential of your visual presentations and entertainment experiences. Get ready to captivate, collaborate, and create with the seamless fusion of your Chromebook and projector—because the big screen awaits!
Frequently Asked Questions about How To Hook Up Chromebook To Projector
Was this page helpful?
At Storables.com, we guarantee accurate and reliable information. Our content, validated by Expert Board Contributors, is crafted following stringent Editorial Policies. We're committed to providing you with well-researched, expert-backed insights for all your informational needs.


0 thoughts on “How To Hook Up Chromebook To Projector”