Home>Home Appliances>Laundry Appliances>How To Hook Up A Washing Machine
Laundry Appliances
How To Hook Up A Washing Machine
Modified: August 27, 2024
Learn how to properly hook up a washing machine with our comprehensive guide. Get expert tips and advice on laundry appliances installation.
(Many of the links in this article redirect to a specific reviewed product. Your purchase of these products through affiliate links helps to generate commission for Storables.com, at no extra cost. Learn more)
Introduction
Hooking up a washing machine may seem like a daunting task, especially for those new to the world of laundry appliances. However, with the right guidance and a bit of know-how, you can successfully install your washing machine and have it up and running in no time. Whether you're moving into a new home or replacing an old unit, understanding the process of connecting a washing machine is essential for ensuring its proper functionality.
In this comprehensive guide, we will walk you through the step-by-step process of hooking up a washing machine, covering everything from finding the ideal location to connecting the water supply, installing the drain hose, plugging in the power, and testing the machine. By following these instructions, you can confidently set up your washing machine and enjoy the convenience of having clean, fresh laundry at your fingertips.
Before diving into the installation process, it's important to gather the necessary tools and materials to ensure a smooth and efficient setup. Additionally, understanding the layout of your space and identifying the ideal location for your washing machine are crucial steps in the installation process. With the right approach and attention to detail, you can successfully hook up your washing machine and elevate your laundry experience.
So, roll up your sleeves and get ready to embark on this rewarding journey of setting up your washing machine. With the right guidance and a can-do attitude, you'll be well on your way to enjoying the convenience and efficiency of a properly installed washing machine. Let's dive in and explore the essential steps for hooking up a washing machine, empowering you to take charge of your laundry routine with confidence and ease.
Key Takeaways:
- Setting up a washing machine requires gathering tools and materials like hoses and a power cord. Finding the right location, connecting the water supply, and testing the machine are crucial for a successful installation.
- Properly installing the drain hose and plugging in the power are essential steps in hooking up a washing machine. Thoroughly testing the machine ensures it functions correctly for hassle-free laundry routines.
Read more: How To Hook Up A Washer Drain Hose
Necessary Tools and Materials
Before embarking on the installation of your washing machine, it's crucial to gather the essential tools and materials to ensure a seamless setup process. Having the right equipment at your disposal will not only streamline the installation but also minimize potential setbacks along the way. Here's a comprehensive list of the necessary tools and materials you'll need for hooking up your washing machine:
Tools:
- Adjustable Wrench: This versatile tool will come in handy for securing the hose connections and ensuring a snug fit without damaging the components.
- Screwdriver: A Phillips or flat-head screwdriver will be essential for removing any transit bolts, securing the machine's feet, or accessing internal components during the installation process.
- Level: Ensuring that your washing machine is perfectly level is crucial for its stability and optimal performance. A simple bubble level will help you achieve this with precision.
- Tape Measure: Having a tape measure on hand will enable you to accurately assess the space where the washing machine will be installed, ensuring a proper fit and clearance from surrounding surfaces.
- Utility Knife: You may need a utility knife to trim the drain hose or make precise cuts during the installation process.
Materials:
- Inlet Hoses: Depending on your specific setup, you may require new inlet hoses to connect the washing machine to the water supply. It's advisable to opt for high-quality, braided stainless steel hoses for durability and reliability.
- Y-Splitter and Hose: If you have a single water supply valve but need to connect both hot and cold water hoses, a Y-splitter and an additional hose will be necessary to facilitate this setup.
- Drain Hose: Ensure you have a suitable drain hose that is compatible with your washing machine and allows for proper drainage without kinking or leaking.
- Power Cord: If your washing machine does not come with a built-in power cord, you'll need to acquire a compatible cord that meets the electrical requirements of your machine and household outlet.
- Washer Feet Pads: These adhesive pads can be placed under the washing machine's feet to minimize vibrations and protect the flooring surface.
By having these tools and materials at your disposal, you'll be well-equipped to tackle the installation of your washing machine with confidence and efficiency. With careful preparation and attention to detail, you can ensure a successful setup that sets the stage for hassle-free laundry routines in the future.
Finding the Right Location
Selecting the ideal location for your washing machine is a crucial step in the installation process. The chosen spot should not only accommodate the physical dimensions of the machine but also consider factors such as plumbing connections, electrical outlets, and the surrounding environment. Here's a detailed exploration of the key considerations when finding the right location for your washing machine:
Read more: How To Hook Up Pressure Washer
Space and Accessibility
Begin by identifying a space that provides ample room for the washing machine to operate effectively. Ensure that there is sufficient clearance around the machine for loading and unloading laundry, as well as for performing routine maintenance tasks. Additionally, consider the accessibility of the location, aiming for a spot that allows easy maneuverability and does not obstruct other appliances or household fixtures.
Plumbing and Drainage
Proximity to plumbing connections is a critical factor when determining the location of your washing machine. Ideally, the chosen spot should be within reach of hot and cold water supply lines, allowing for convenient connection to the machine's inlet valves. Moreover, the location should facilitate the installation of a drain hose, enabling proper drainage without kinks or obstructions. Ensuring that the washing machine is positioned near existing plumbing connections minimizes the need for extensive modifications and simplifies the installation process.
Electrical Outlet
Verify that the chosen location is in close proximity to a grounded electrical outlet that meets the voltage and amperage requirements of the washing machine. It's essential to have a dedicated outlet to power the machine, ensuring safe and reliable operation. Avoid using extension cords or sharing the outlet with other high-powered appliances to prevent electrical issues and potential hazards.
Flooring and Level Surface
Consider the flooring surface where the washing machine will be placed. Opt for a level and sturdy surface, such as a tiled or concrete floor, to provide stability and minimize vibrations during the machine's operation. If the flooring is uneven, use a leveling tool to adjust the machine's feet and ensure that it sits firmly and securely in place. Additionally, consider using adhesive pads under the machine's feet to dampen vibrations and protect the flooring surface from potential damage.
By carefully evaluating these factors and selecting a location that addresses the aforementioned considerations, you can set the stage for a successful installation of your washing machine. Taking the time to find the right location ensures that your machine operates optimally and seamlessly integrates into your laundry space.
Read more: How To Hook Up A Doorbell
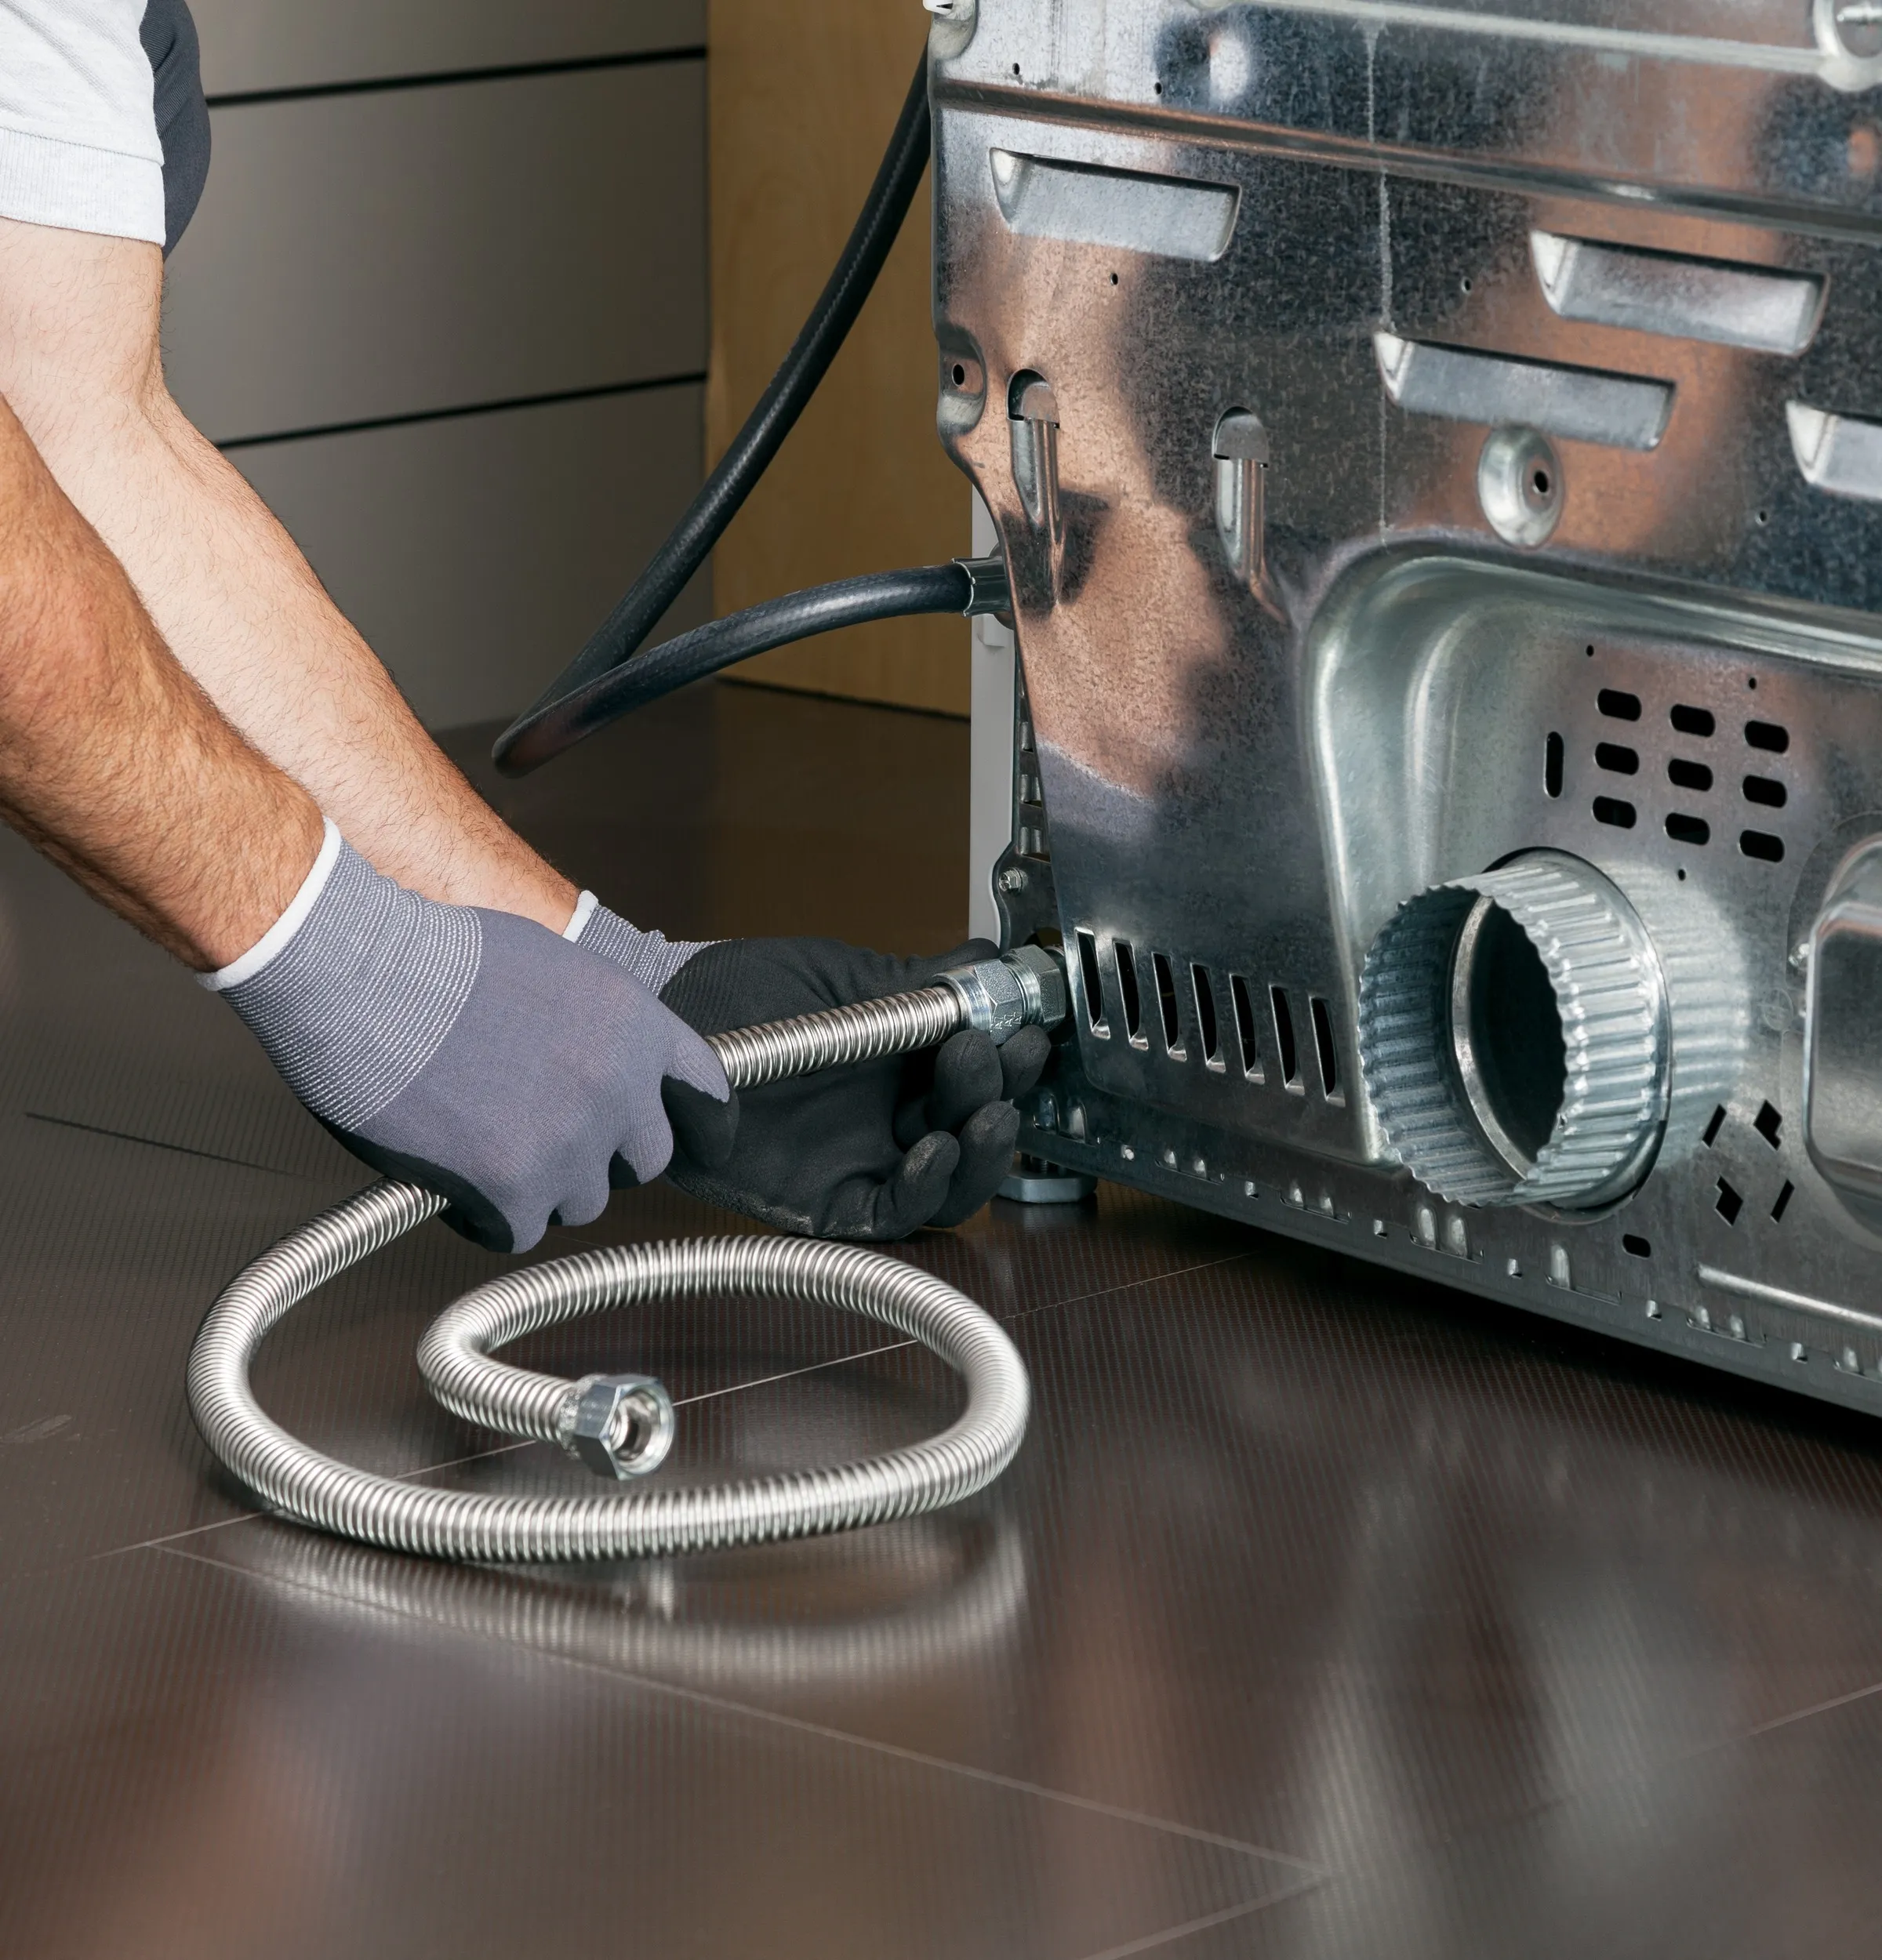
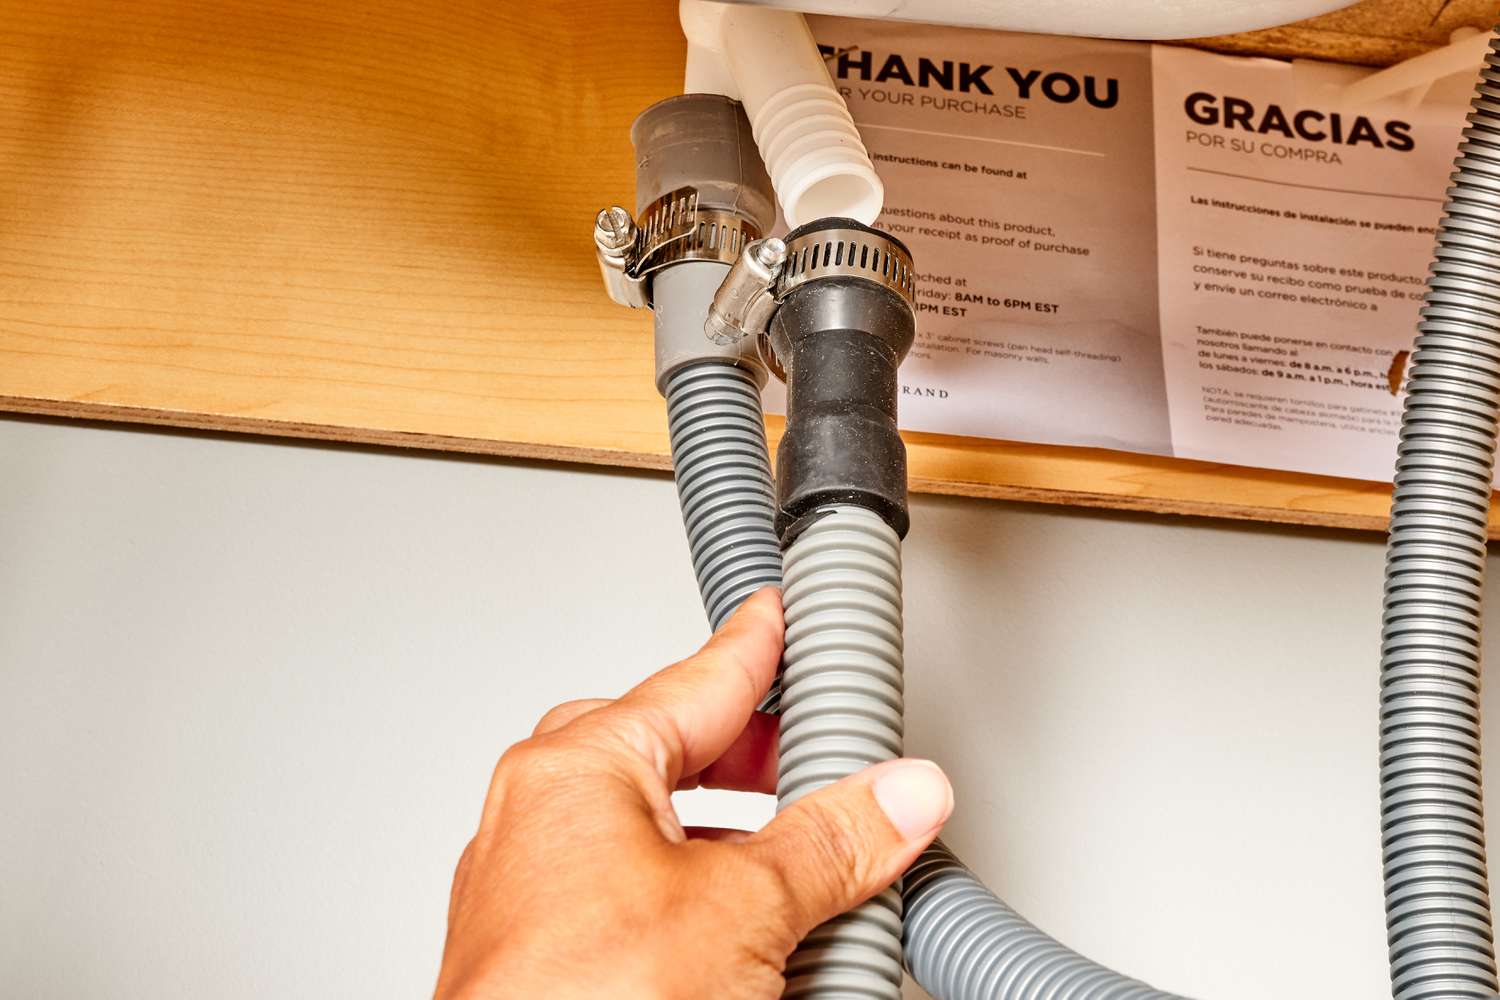
Connecting the Water Supply
Properly connecting the water supply to your washing machine is a critical step in the installation process, ensuring that the machine receives the necessary hot and cold water for efficient laundering. Here's a detailed guide on how to seamlessly connect the water supply to your washing machine:
1. Turn Off the Water Supply:
Before initiating the connection process, it's essential to turn off the main water supply to prevent any potential leaks or water flow during the installation. Locate the shut-off valve for the hot and cold water lines and ensure that they are securely closed.
2. Position the Washing Machine:
Carefully position the washing machine in close proximity to the water supply lines, allowing for easy access to the inlet valve connections at the rear of the machine. Ensure that the machine is level and stable, adjusting its feet if necessary to achieve a balanced position.
3. Attach the Inlet Hoses:
Connect the designated hot and cold water inlet hoses to the corresponding valves at the back of the washing machine. Typically, the hot water hose is marked with a red indicator, while the cold water hose is marked with a blue indicator for easy identification. Use an adjustable wrench to tighten the hose connections securely, ensuring a leak-free seal without over-tightening.
Read more: How To Hook Up An Electric Fence
4. Verify the Connections:
Once the inlet hoses are attached, double-check the connections to confirm that they are properly secured and free of any kinks or twists. Ensure that the hoses are not excessively stretched or bent, as this can impede water flow and lead to operational issues.
5. Turn On the Water Supply:
With the inlet hoses securely connected, carefully turn on the main water supply valves for both hot and cold water lines. Slowly open the valves to allow water to flow into the washing machine's inlet valves, verifying that there are no leaks at the hose connections.
6. Test for Leaks:
After turning on the water supply, closely inspect the hose connections and the area around the inlet valves for any signs of leakage. Run a brief water fill cycle on the washing machine to ensure that water flows through the inlet hoses without any issues, addressing any leaks or irregularities promptly.
By following these steps, you can confidently connect the water supply to your washing machine, setting the stage for smooth and reliable operation. Properly establishing the water connections ensures that your washing machine receives the essential water supply for effective laundering, allowing you to enjoy the convenience of clean and fresh laundry with every cycle.
Installing the Drain Hose
Proper installation of the drain hose is essential for ensuring effective water drainage from your washing machine. Follow these detailed steps to seamlessly install the drain hose:
-
Locate the Drain Outlet: Identify the designated drain outlet near the installation location of the washing machine. This outlet is typically located near the floor and is connected to the household's drainage system.
-
Position the Drain Hose: Carefully position the washing machine so that the end of the drain hose reaches the drain outlet without any kinks or obstructions. Ensure that the hose is not stretched excessively to prevent strain on the connection points.
-
Secure the Hose: Once the hose is positioned correctly, secure it to the drain outlet using a hose clamp or a similar fastening device. This ensures that the hose remains in place during the machine's operation and prevents it from dislodging or causing leaks.
-
Create an Air Gap (Optional): If local plumbing codes or guidelines recommend it, create an air gap between the end of the drain hose and the drain outlet. This prevents backflow and ensures proper drainage without the risk of siphoning water back into the machine.
-
Inspect for Leaks: After securing the drain hose, carefully inspect the connections for any signs of leakage. Run a brief drainage cycle on the washing machine to verify that water flows through the hose and into the drain outlet without any issues.
-
Adjust as Needed: If you notice any leaks or irregularities during the drainage cycle, reposition the hose and tighten the connections as needed. It's essential to address any issues promptly to prevent water damage and ensure efficient drainage.
By following these steps, you can effectively install the drain hose for your washing machine, facilitating proper water drainage and preventing potential leaks or drainage issues. A securely installed drain hose ensures that water from each laundry cycle is efficiently and effectively removed from the machine, contributing to a seamless and hassle-free laundry experience.
Read more: How To Hook Up A Ceiling Fan
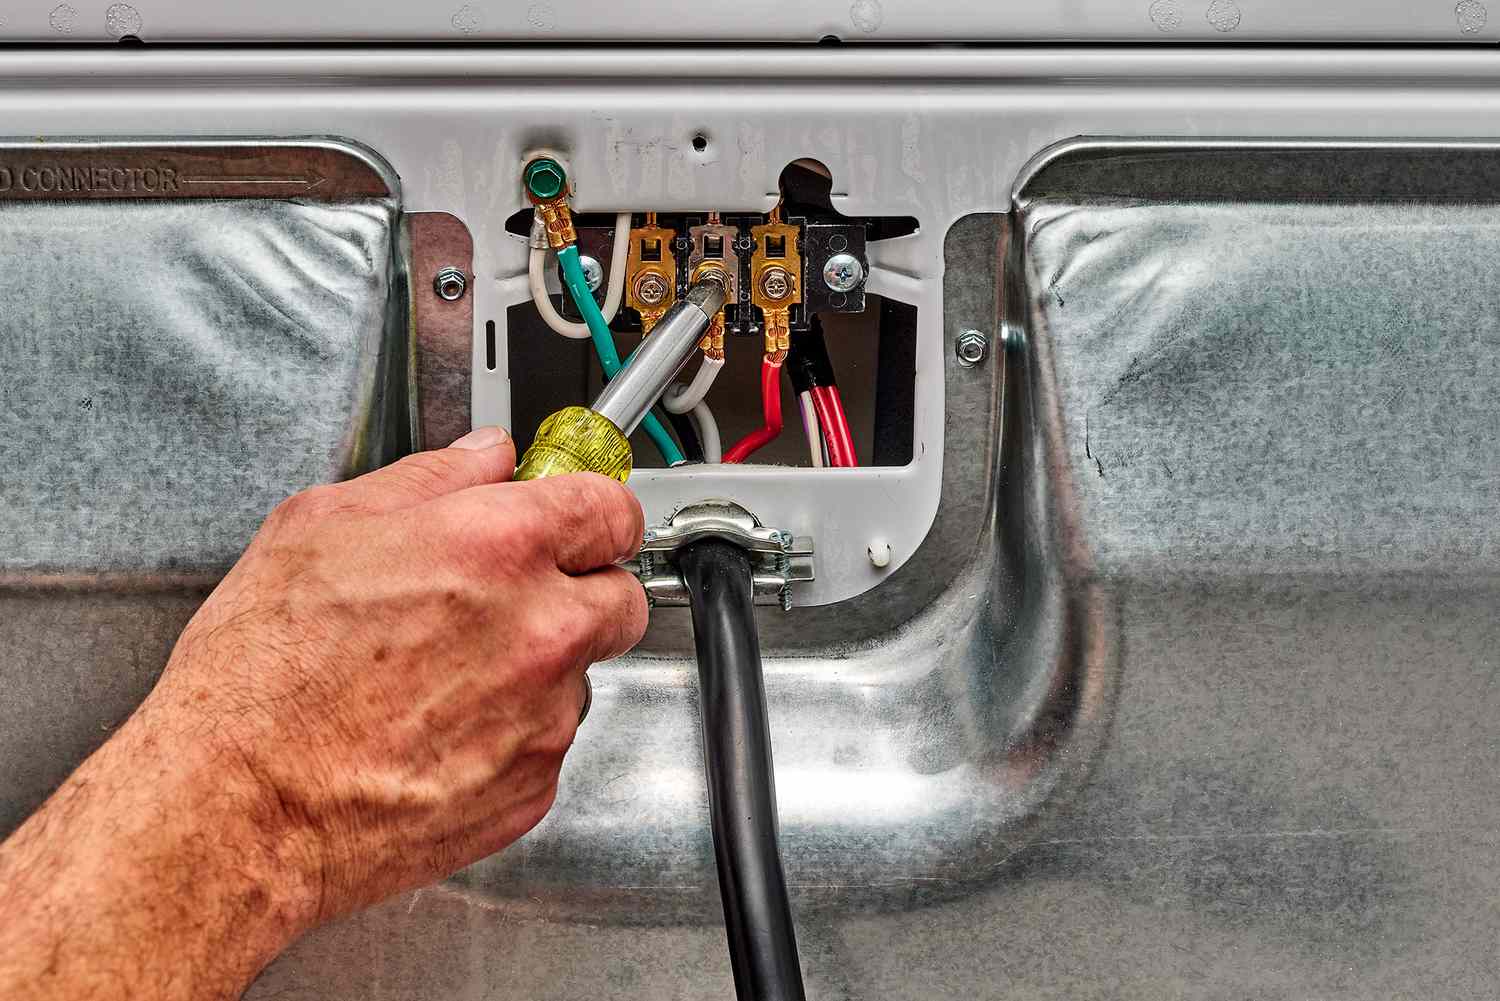
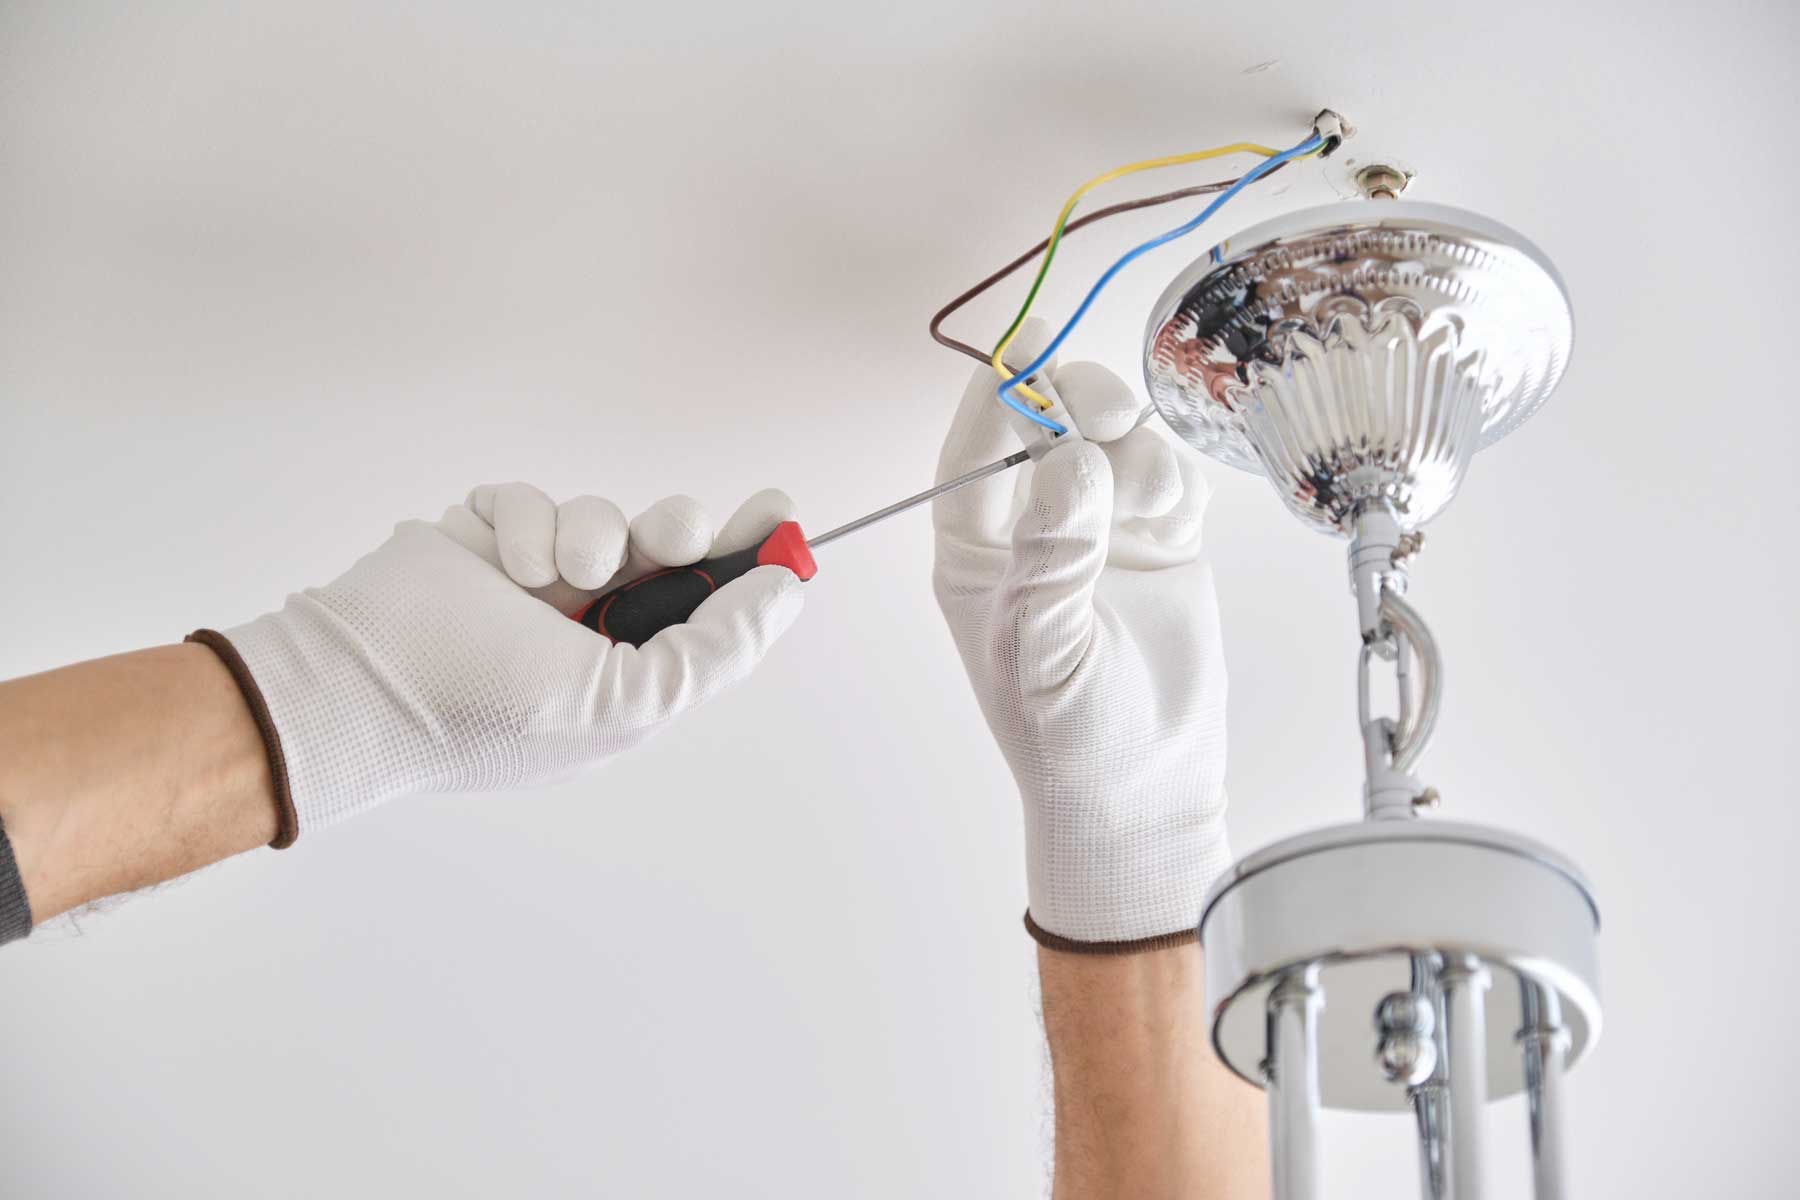
Plugging in the Power
When it comes to hooking up a washing machine, ensuring a safe and reliable power connection is paramount for its proper functionality. Here's a detailed guide on how to seamlessly plug in the power for your washing machine:
-
Verify Electrical Compatibility: Before proceeding with the power connection, it's crucial to verify that the washing machine's electrical requirements align with the household power supply. Check the machine's specifications to determine the voltage, amperage, and plug type it requires. Additionally, ensure that the household electrical outlet meets these specifications to prevent any electrical issues or damage to the machine.
-
Unpack the Power Cord: If the washing machine comes with a detachable power cord, carefully unpack it from the packaging. Inspect the cord for any signs of damage or wear, ensuring that it is in optimal condition for safe usage. If the machine does not include a power cord, you will need to acquire a compatible one that meets the manufacturer's specifications.
-
Position the Washing Machine: Place the washing machine in close proximity to the electrical outlet, allowing for easy access to the power connection at the rear of the machine. Ensure that the machine is level and stable, adjusting its feet if necessary to achieve a balanced position.
-
Connect the Power Cord: Insert the plug of the power cord into the dedicated electrical outlet, ensuring a secure and snug fit. It's essential to push the plug in fully to establish a reliable connection and prevent any potential power interruptions during operation.
-
Secure the Cord: Once the power cord is plugged in, secure any excess length of the cord to prevent tripping hazards or entanglement. Utilize cable ties or cord clips to neatly organize and secure the cord, keeping it away from moving parts of the washing machine to avoid interference during operation.
-
Verify the Connection: Double-check the power cord connection to ensure that it is firmly seated in the electrical outlet. Avoid using extension cords or adapters, as they can compromise the safety and performance of the washing machine. If the power cord is not long enough to reach the outlet without stretching, consider relocating the machine or installing a dedicated outlet closer to the installation location.
By following these steps, you can confidently plug in the power for your washing machine, setting the stage for safe and efficient operation. A secure and reliable power connection ensures that the machine receives the necessary electrical supply for its various functions, allowing you to enjoy the convenience of hassle-free laundry routines without any power-related concerns.
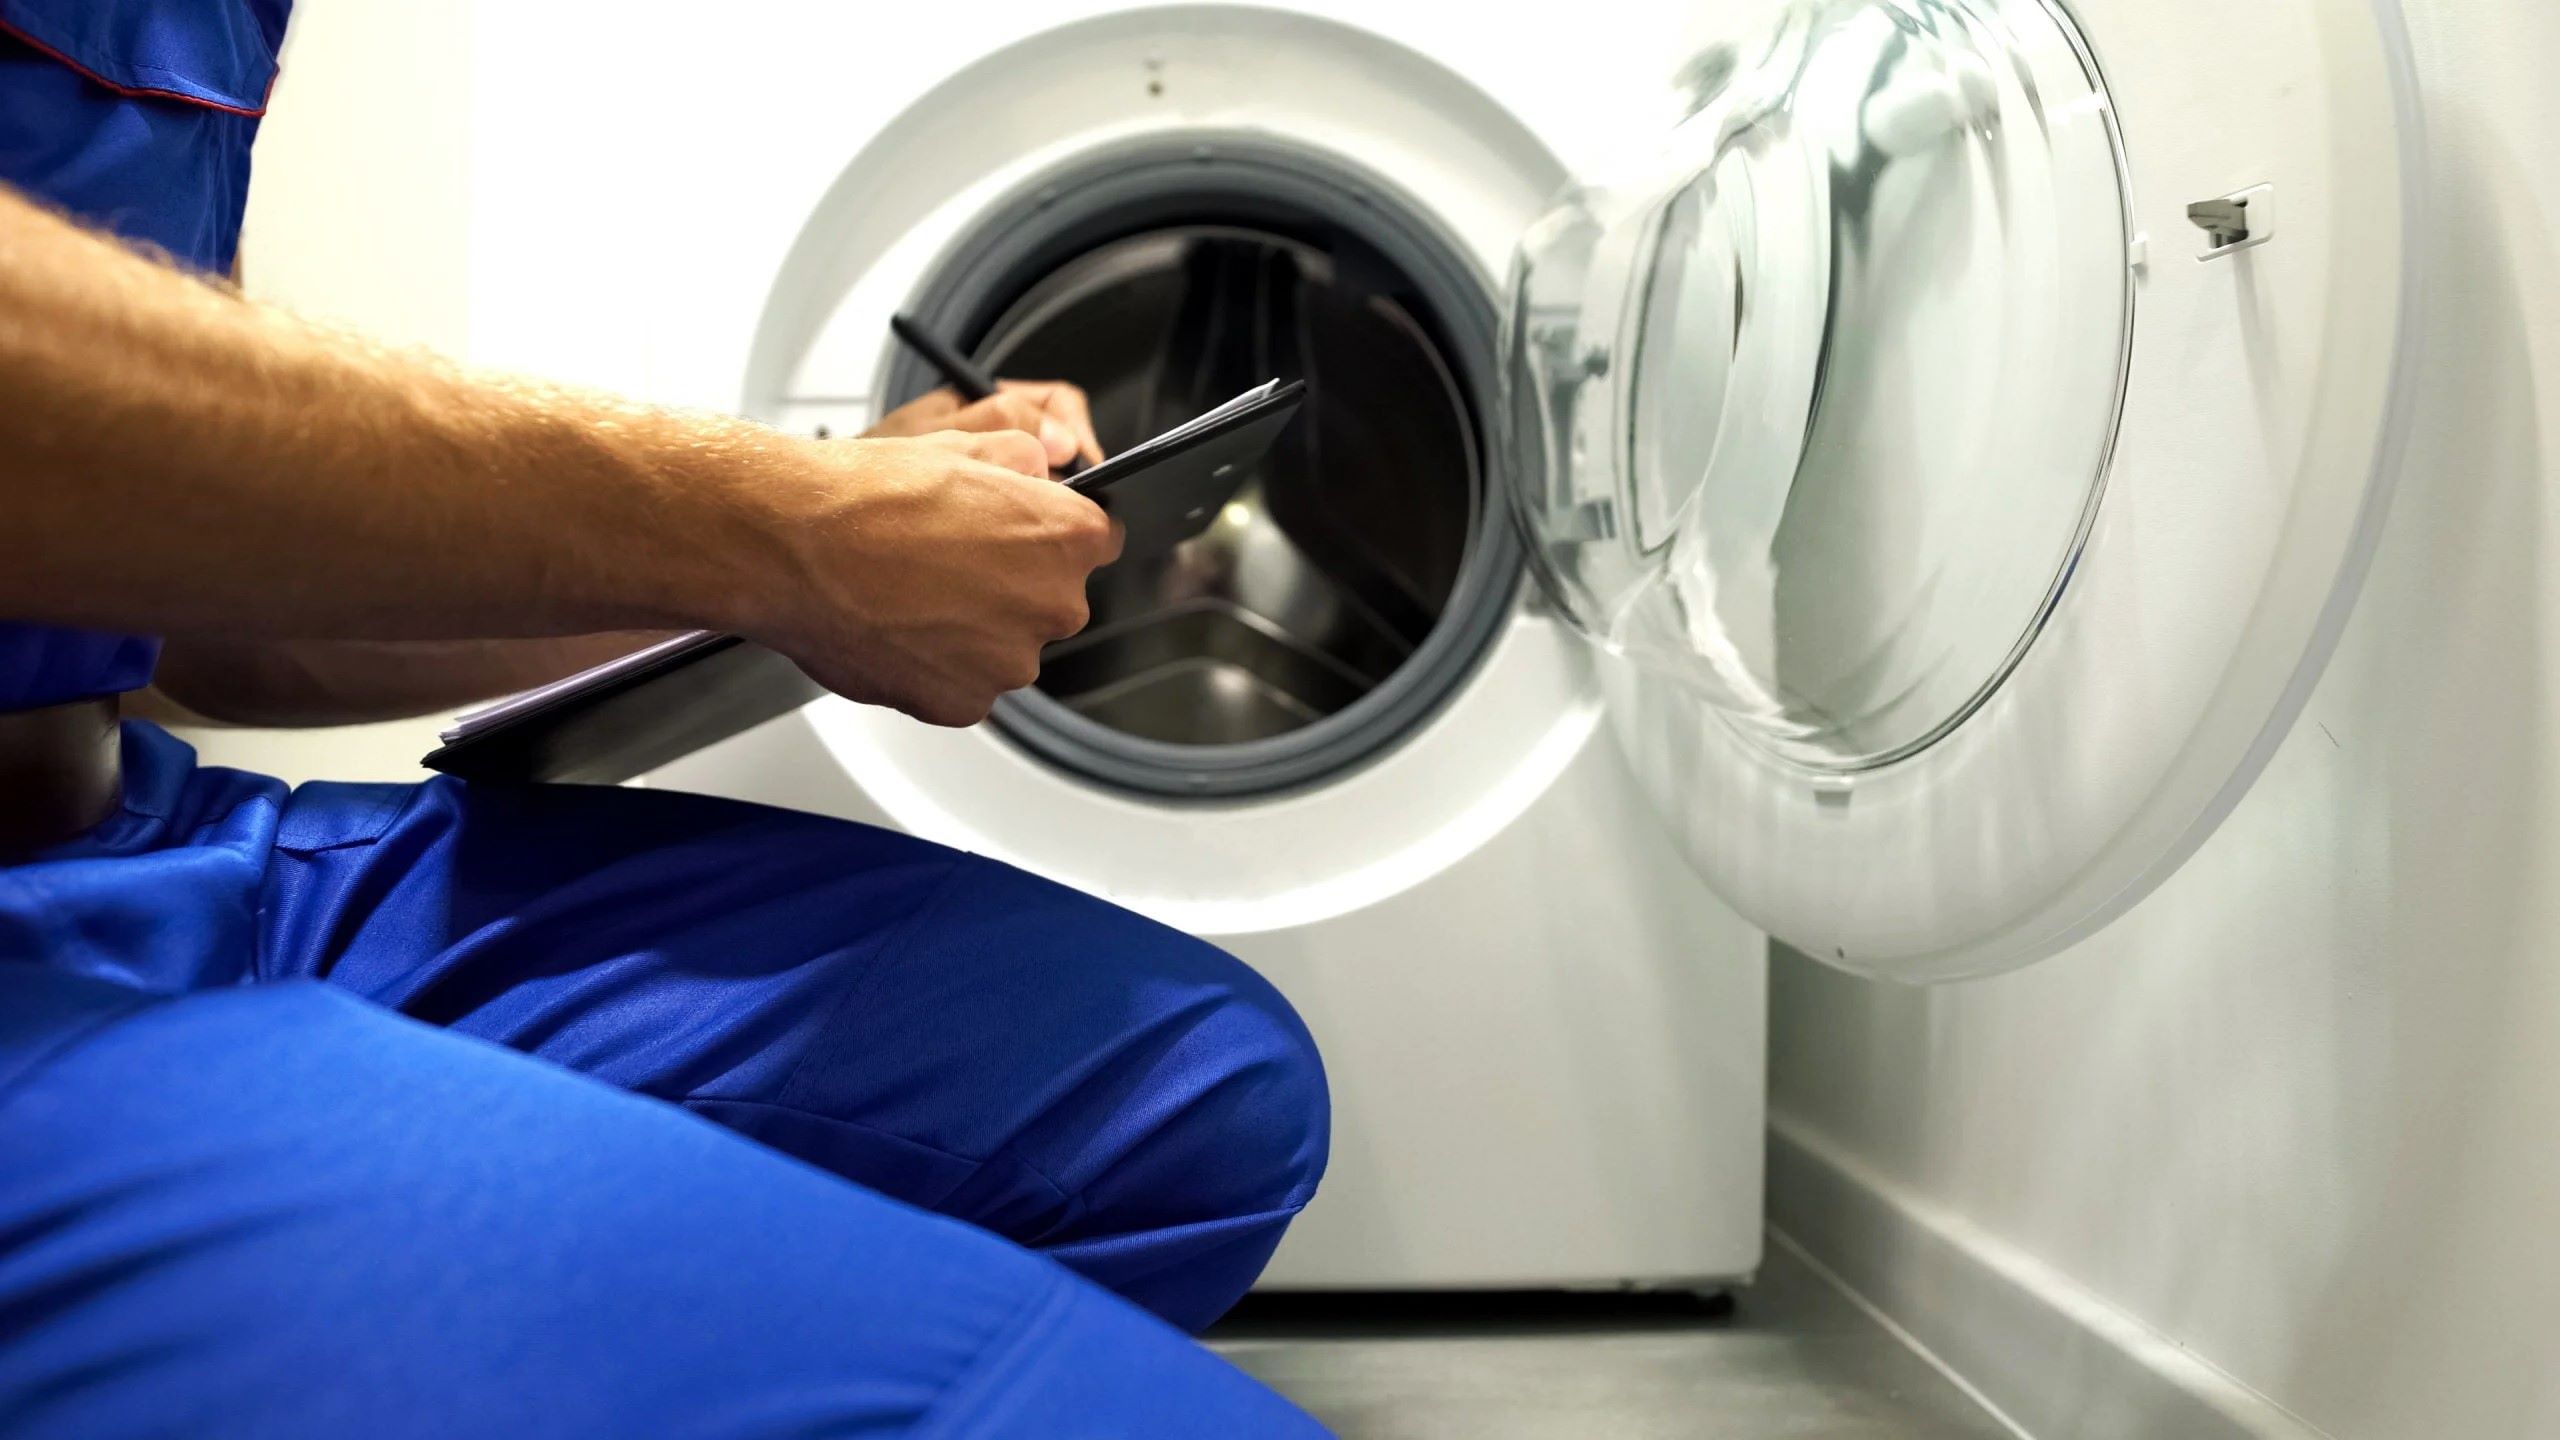
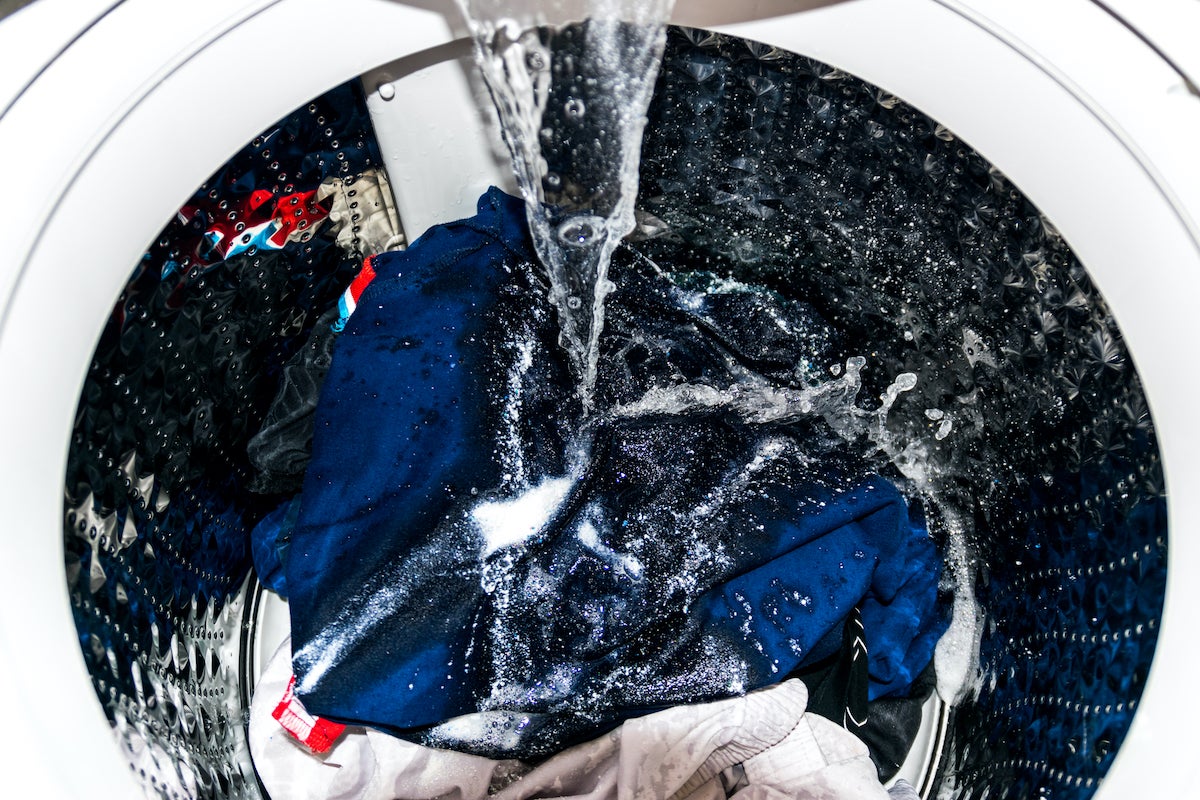
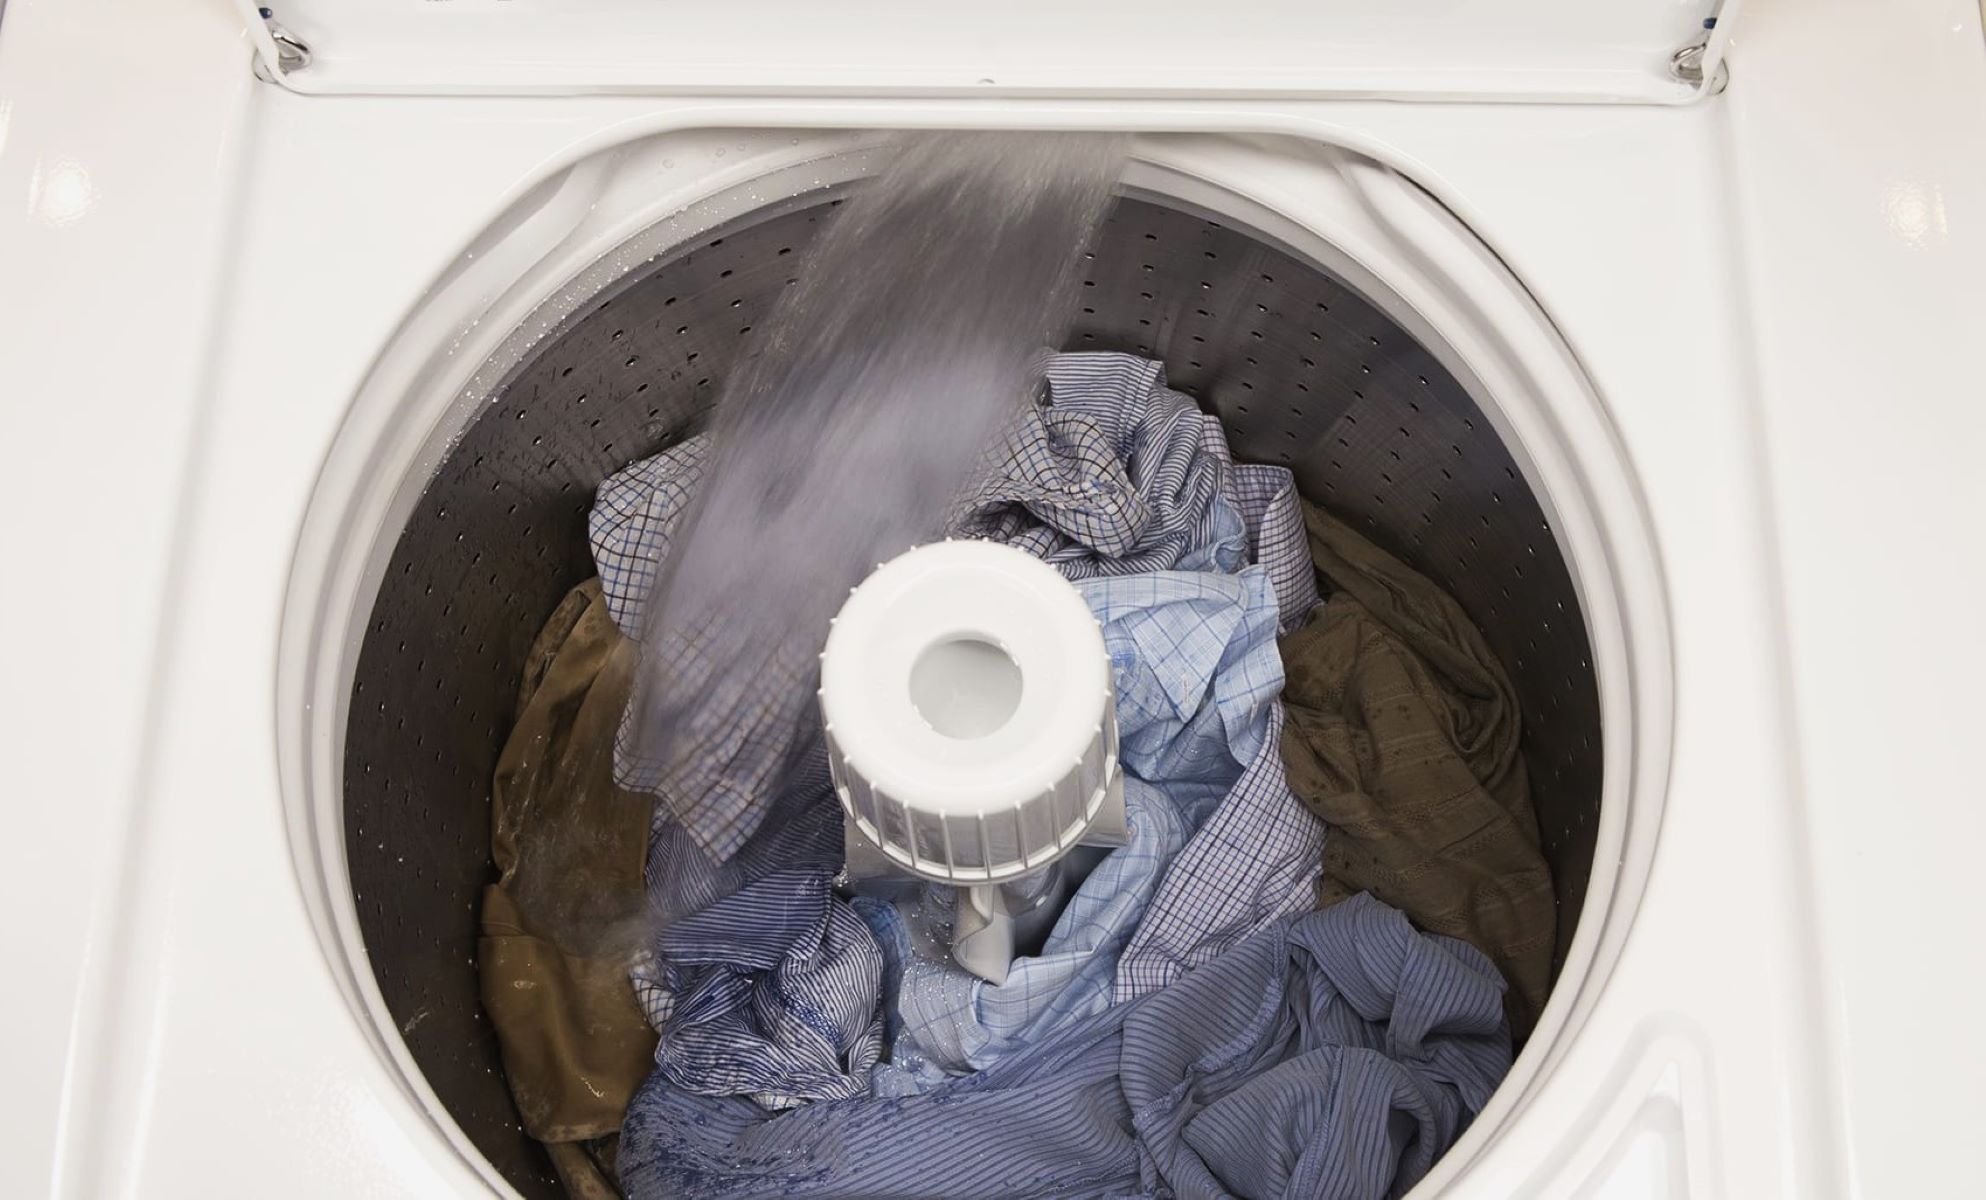
Testing the Machine
Once the washing machine is successfully installed, it's crucial to conduct thorough testing to ensure that all components are functioning as intended. This pivotal step allows you to verify the machine's operational capabilities and address any potential issues before incorporating it into your regular laundry routine.
Initial Power-Up
Begin by plugging in the washing machine and ensuring that the power cord is securely connected to the electrical outlet. Once the machine is powered up, take a moment to familiarize yourself with the control panel and settings. Verify that the display, buttons, and selector dials are responsive and functioning correctly.
Water Fill and Drainage
Initiate a test cycle to observe the water fill and drainage processes. As the machine begins the fill cycle, closely monitor the inlet hoses for any signs of leakage or irregular water flow. Once the tub is filled, listen for any unusual noises that may indicate issues with the water inlet valve or water level sensor.
Subsequently, allow the machine to progress through the drainage phase. Observe the drain hose and the drain outlet for proper water discharge without leaks or blockages. Additionally, ensure that the drainage process is efficient and does not result in any residual water accumulation within the machine or the surrounding area.
Read more: How To Hook Up A Keg In A Kegerator
Spin and Agitation
During the test cycle, pay close attention to the spin and agitation functions of the washing machine. Observe the drum's movement to confirm that it rotates smoothly without excessive vibrations or unusual noises. Additionally, verify that the agitator, if applicable, operates seamlessly to facilitate thorough cleaning of the laundry load.
Temperature Control
If your washing machine offers temperature control settings, test the functionality by selecting different temperature combinations for the wash cycle. Verify that the machine accurately dispenses hot and cold water as per the selected settings, ensuring that the temperature sensors and water mixing mechanisms are operating effectively.
Final Rinse and Drain
As the test cycle nears completion, focus on the final rinse and drainage stages. Confirm that the machine adequately dispenses clean water for the final rinse, effectively removing detergent residues from the laundry load. Subsequently, observe the drainage process to ensure that the machine expels the rinse water without any issues, leaving the laundry adequately rinsed and ready for drying.
Observing Error Codes
In the event that the washing machine is equipped with a digital display and error code system, intentionally trigger a simulated fault condition to observe the machine's response. This allows you to familiarize yourself with the error code indications and understand the troubleshooting process in case of future malfunctions.
By meticulously testing the washing machine across its various functions and operational aspects, you can gain confidence in its performance and identify any potential concerns that require attention. Addressing any issues promptly ensures that your washing machine operates optimally, setting the stage for efficient and reliable laundry routines.
Frequently Asked Questions about How To Hook Up A Washing Machine
Was this page helpful?
At Storables.com, we guarantee accurate and reliable information. Our content, validated by Expert Board Contributors, is crafted following stringent Editorial Policies. We're committed to providing you with well-researched, expert-backed insights for all your informational needs.
0 thoughts on “How To Hook Up A Washing Machine”