Articles
How To Hook Up Plumbing For Dishwasher
Modified: August 28, 2024
Learn how to hook up plumbing for your dishwasher with our informative articles. Find step-by-step instructions and expert tips to ensure a seamless installation process.
(Many of the links in this article redirect to a specific reviewed product. Your purchase of these products through affiliate links helps to generate commission for Storables.com, at no extra cost. Learn more)
Introduction
Installing a dishwasher in your kitchen can greatly simplify the process of cleaning up after meals. Not only does it save you time and effort, but it also provides a more efficient and hygienic way of washing your dishes. However, before you can start enjoying the convenience of a dishwasher, you need to know how to hook up the plumbing properly.
In this article, we will guide you through the process of connecting the plumbing for a dishwasher. Whether you’re replacing an old dishwasher or installing a new one for the first time, this step-by-step guide will ensure that your dishwasher is properly hooked up and ready to use.
Before diving into the installation, it’s important to gather the necessary tools and materials to complete the job. You will need:
- Adjustable wrench
- Pliers
- Teflon tape
- Pipe cutter (if necessary)
- Drain hose and clamps (included with the dishwasher)
- Water supply line (included with the dishwasher)
Once you have these tools and materials ready, you’re one step closer to having your dishwasher up and running.
Key Takeaways:
- Simplify the process of installing a dishwasher by gathering the necessary tools and materials, determining the ideal location, and preparing the plumbing connections for a hassle-free and efficient setup.
- Ensure a leak-free and properly functioning dishwasher by meticulously checking for leaks, testing the appliance, and conducting regular maintenance to enjoy the convenience and efficiency of this modern kitchen essential.
Read more: How To Hook Up A Doorbell
Necessary Tools and Materials
Before you begin installing the plumbing for your dishwasher, it’s important to gather all the necessary tools and materials. Here’s a list of what you’ll need:
- Adjustable wrench: This tool will come in handy for tightening and loosening nuts and bolts during the installation process.
- Pliers: Pliers are useful for gripping and holding onto various parts and components.
- Teflon tape: Teflon tape is used to create a watertight seal on threaded connections, preventing leaks.
- Pipe cutter (if necessary): Depending on your existing plumbing setup, you may need to cut a section of pipe to make way for the dishwasher.
- Drain hose and clamps: These are typically included with the dishwasher and are used to connect the dishwasher’s drain to the sink’s plumbing system.
- Water supply line: Also included with the dishwasher, the water supply line connects the dishwasher to the hot water source.
Having these tools and materials on hand before you start the installation will ensure a smooth and efficient process.
It’s also worth noting that if you’re replacing an existing dishwasher, you may not need to purchase all of these items. Check the manual or consult with a professional to determine what specific tools and materials you’ll need for your particular installation.
Now that you’re equipped with the necessary tools and materials, let’s move on to the step-by-step process of hooking up the plumbing for your dishwasher.
Step 1: Determine the Location for the Dishwasher
The first step in hooking up the plumbing for your dishwasher is to determine the location where you will install it. Ideally, the dishwasher should be near the sink for easier access to the water and drain connections.
Before deciding on the location, consider the following factors:
- Space: Ensure that you have enough space to accommodate the dishwasher. Measure the height, width, and depth of the dishwasher and compare it to the available space in your kitchen.
- Proximity to the sink: The dishwasher should be located close to the sink to minimize the length of the water supply and drainage hoses.
- Access to electrical outlets: Dishwashers require a dedicated electrical circuit, so make sure there is an electrical outlet nearby. If not, you may need to hire an electrician to install one.
Once you have decided on the ideal location, clear out any obstacles and ensure that the area is clean and level. This will make the installation process much smoother.
Keep in mind that if you’re replacing an existing dishwasher, the new one can usually be installed in the same location as the old one. However, if you’re installing a dishwasher for the first time, you may need to make some adjustments to your kitchen cabinets or countertops to create enough space.
With the location determined, it’s time to move on to the next step: preparing the plumbing connections.
Step 2: Prepare the Plumbing Connections
After determining the location for your dishwasher, the next step is to prepare the plumbing connections. This involves making sure that the necessary water supply and drainage connections are in place.
Here’s what you need to do:
- Shut off the water supply: Before making any plumbing connections, it’s important to shut off the water supply to the kitchen. Locate the shut-off valve under the sink and turn it clockwise to close it. This will prevent any water from flowing while you work on the plumbing.
- Prepare the drain connection: If there’s an existing dishwasher drain connection, remove the knockout plug from the designated sink drainpipe. This plug typically has a small perforated circle that can be knocked out using a screwdriver and a hammer.
- Make room for the air gap (if required): Some local plumbing codes may require you to install an air gap between the dishwasher and the sink drain to prevent backflow of contaminated water. If required, install the air gap on the sink deck or countertop, following the manufacturer’s instructions.
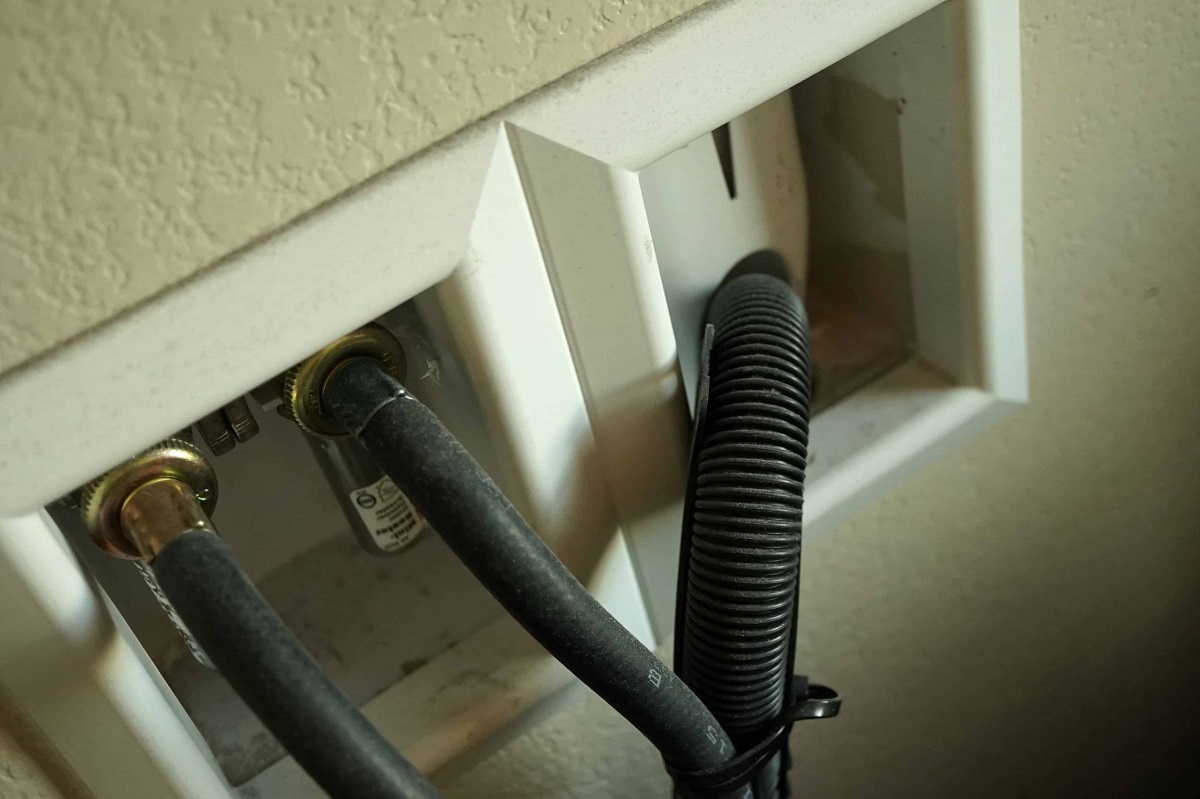
- Install a high loop in the drain hose: To prevent wastewater from flowing backward into the dishwasher, create a high loop in the dishwasher drain hose. This means that you need to attach the drain hose to the underside of the countertop or sink cabinet and then connect it to the sink drain or garbage disposal unit. Ensure that there is a minimum vertical distance of 20 inches between the bottom of the dishwasher and the high loop.
Once you have prepared the plumbing connections, you’re ready to move on to the next step: installing the drainage hose.
When hooking up the plumbing for a dishwasher, make sure to connect the hot water supply line to the dishwasher’s inlet valve and the drain hose to the sink’s drain or garbage disposal. Use a high loop in the drain hose to prevent backflow.
Step 3: Install the Drainage Hose
With the plumbing connections prepared, it’s time to install the drainage hose for your dishwasher. The drainage hose is responsible for carrying wastewater from the dishwasher to the sink’s plumbing system or the garbage disposal unit, depending on your setup.
Follow these steps to install the drainage hose:
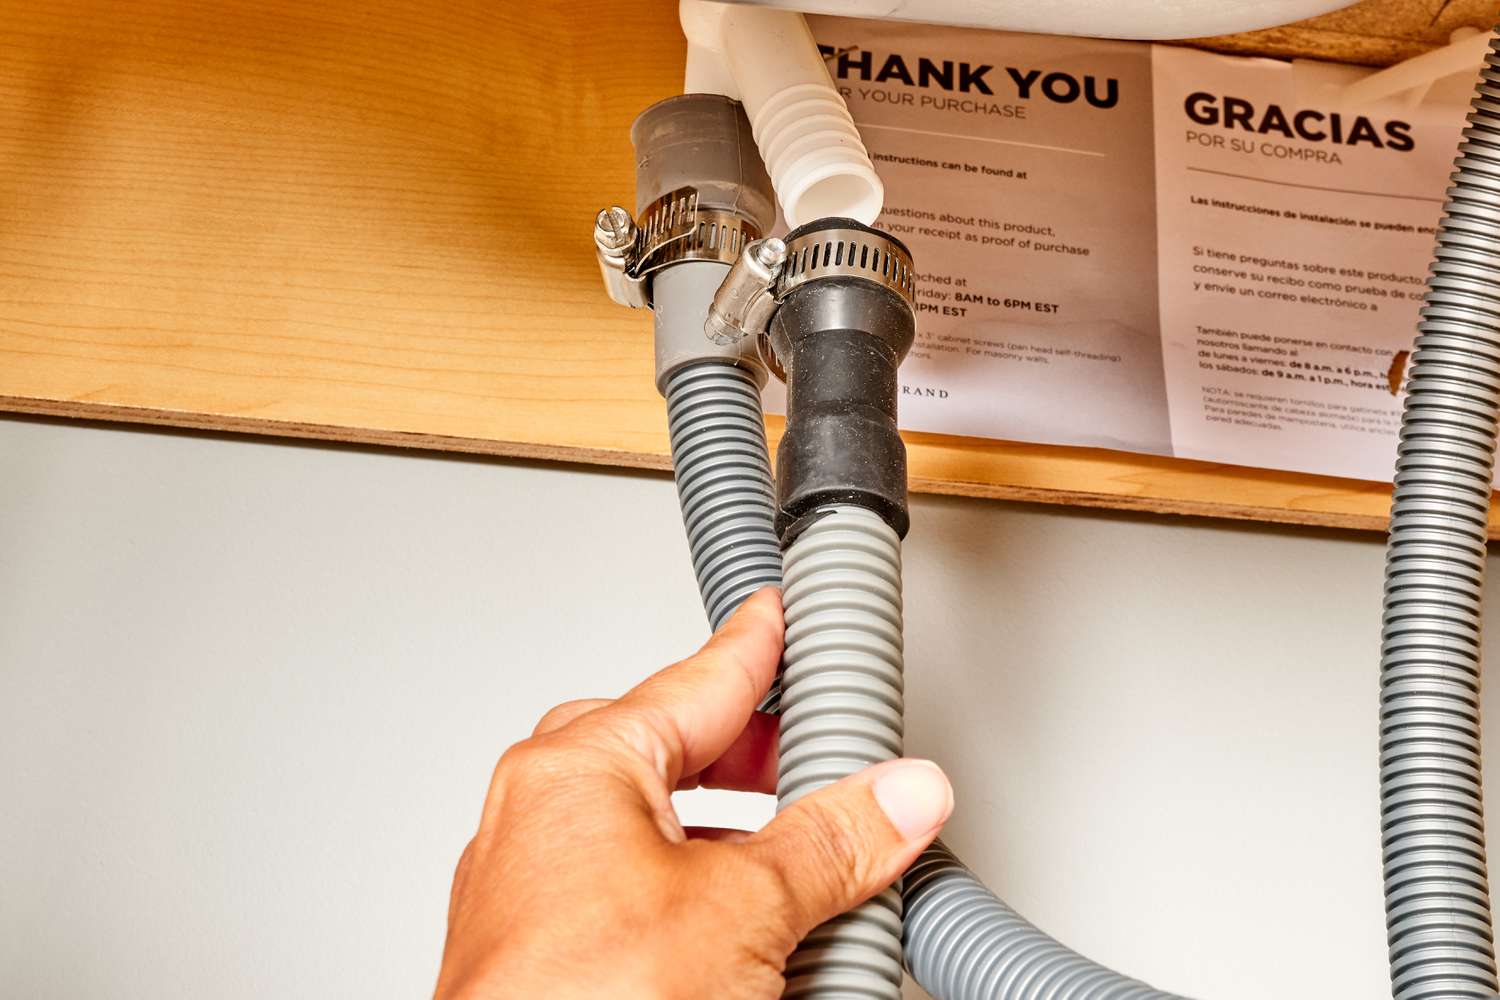
- Connect the hose to the dishwasher: Locate the drain outlet on the back of the dishwasher and securely attach one end of the drainage hose to it. Use a hose clamp to ensure a tight and leak-free connection.
- Route the hose to the sink drain or garbage disposal: Depending on your kitchen’s plumbing configuration, determine the best route for the drainage hose. Ideally, it should be routed through a hole in the sink cabinet or along the back of the cabinet to avoid any kinks or obstructions. Make sure to leave some slack in the hose for ease of installation and movement.
- Secure the hose in place: Use zip ties or clamps to secure the drainage hose at regular intervals along its route. This will prevent it from sagging or getting in the way of other components.
- Connect the hose to the sink drain or garbage disposal: Depending on your setup, connect the other end of the drainage hose to either the sink drain or the garbage disposal unit. Ensure a secure connection using a hose clamp.
Once the drainage hose is securely installed, you can move on to the next step: connecting the water supply line.
It’s worth noting that you should refer to the dishwasher’s manufacturer instructions for any specific guidelines on installing the drainage hose. Different dishwasher models may have variations in their installation requirements.
Read more: How To Hook Up An Electric Fence
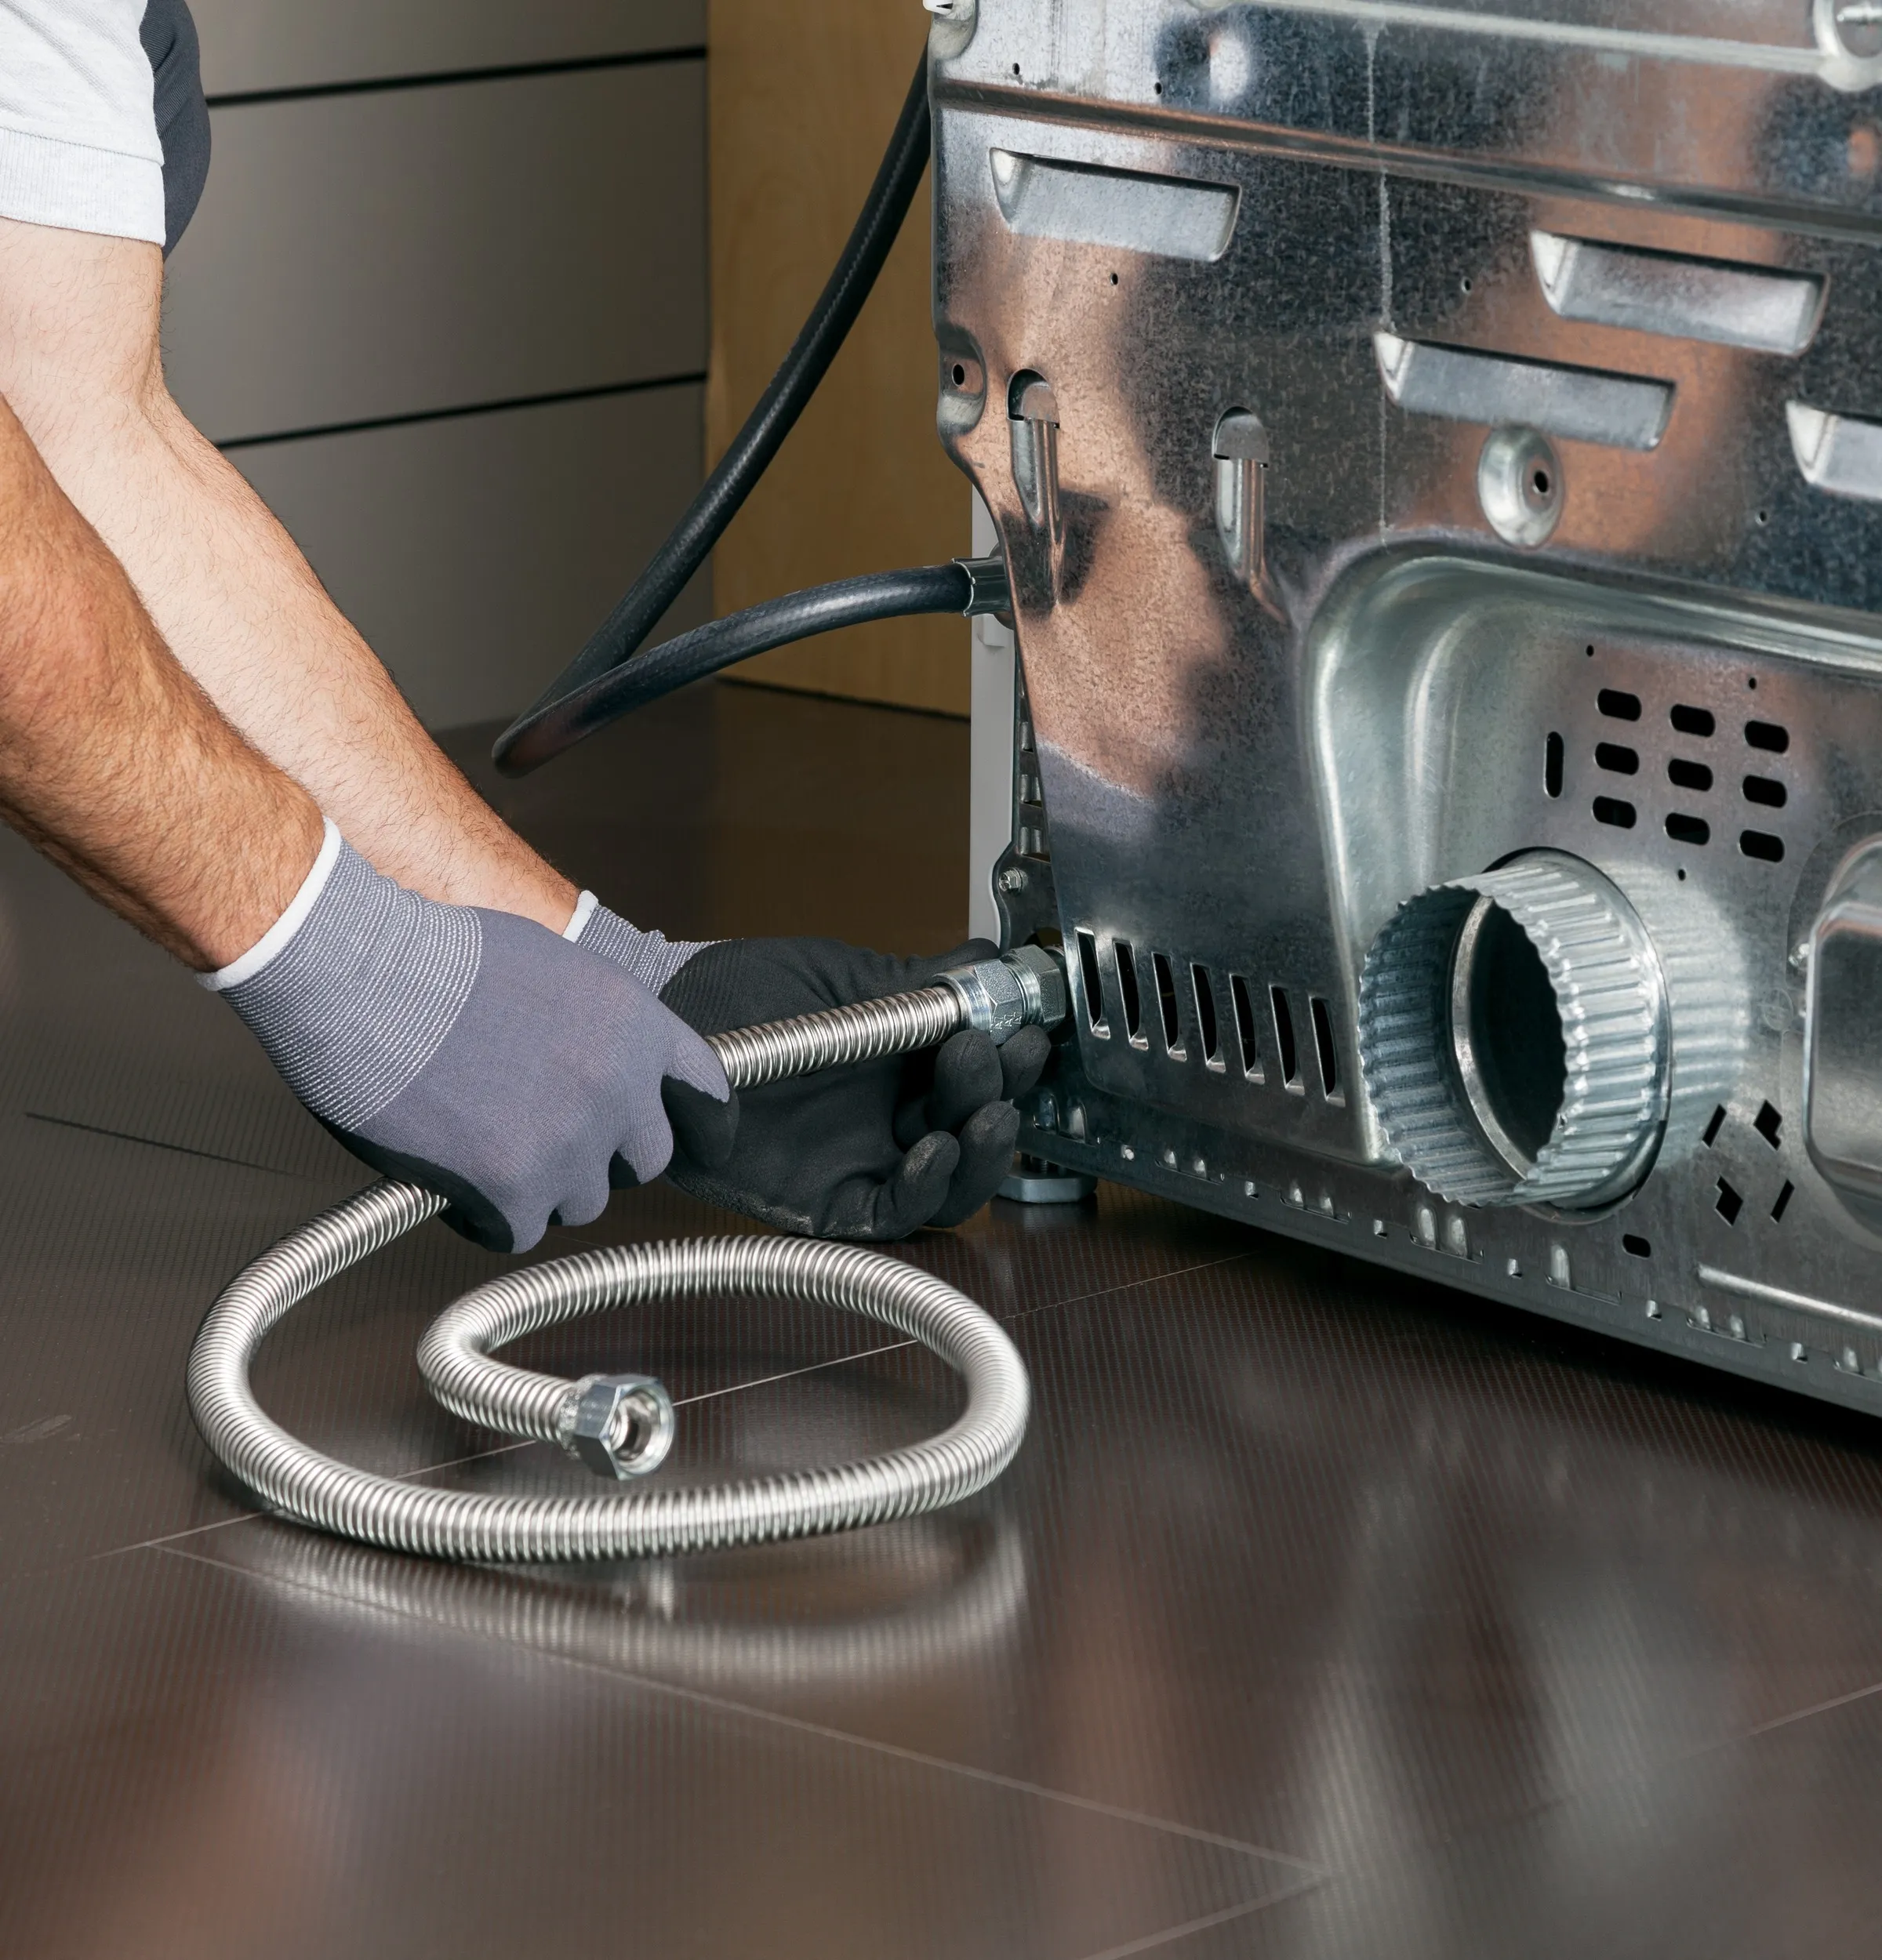
Step 4: Connect the Water Supply Line
Now that the drainage hose is installed, it’s time to connect the water supply line for your dishwasher. The water supply line is responsible for delivering hot water to the dishwasher, allowing it to properly clean your dishes.
Follow these steps to connect the water supply line:
- Locate the water supply valve: Look under your sink for the water supply valve. This valve controls the flow of water to the kitchen faucet and should have a lever or knob. Turn the valve clockwise to shut off the water supply.
- Attach the water supply line to the valve: Connect one end of the water supply line to the shut-off valve under the sink. Use an adjustable wrench to tighten the connection, ensuring a secure fit.
- Route the water supply line to the dishwasher: Determine the best route to run the water supply line from the shut-off valve to the location of your dishwasher. Avoid any sharp bends or kinks in the line that could restrict water flow.
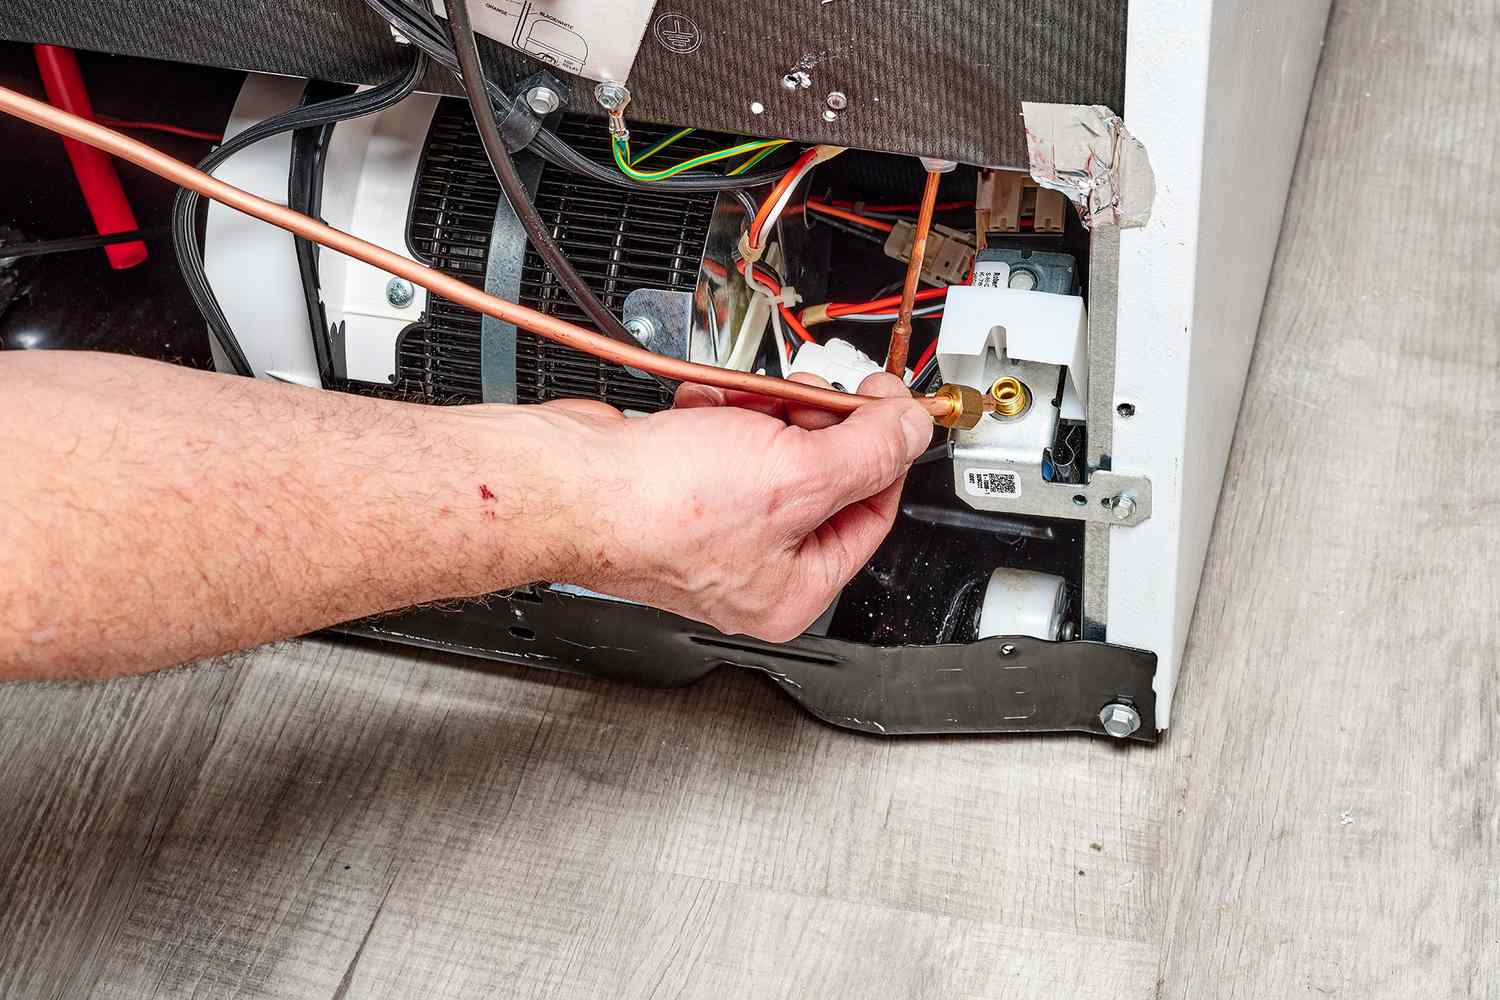
- Connect the water supply line to the dishwasher: Once you’ve routed the water supply line, securely attach the other end to the water inlet on the bottom of the dishwasher. Again, use an adjustable wrench to tighten the connection.
- Turn on the water supply: With the water supply line connected, double-check all the connections to ensure they are tight and secure. Once confirmed, turn on the water supply valve to allow water to flow into the dishwasher.
After connecting the water supply line, it’s essential to check for any leaks. Keep an eye on the connections for the first few minutes as water fills the dishwasher. If you notice any leaks, tighten the connections or replace any faulty components.
Now that the water supply line is connected, you’re almost ready to use your dishwasher. But before that, you’ll need to perform a final step: checking for leaks and testing the dishwasher.
Please note that specific dishwasher models may have variations in their water supply line connections. Always refer to the manufacturer’s instructions for any unique installation requirements or guidelines.
Step 5: Check for Leaks and Test the Dishwasher
After completing the installation of the plumbing connections for your dishwasher, it’s crucial to perform a thorough check for leaks before testing the appliance. This step ensures that everything is properly connected and functioning as expected.
Follow these steps to check for leaks and test your dishwasher:
- Inspect all connections: Carefully examine all the plumbing connections, including the drainage hose and water supply line, for any signs of water leaks. Check for drips, moisture, or pooling water around the connections.
- Tighten any loose connections: If you notice any loose connections or minor leaks, use an adjustable wrench or pliers to tighten them. Ensure the connections are secure, but be cautious not to overtighten and damage the components.
- Run a test cycle: Once you’re satisfied with the connections, it’s time to test your dishwasher. Close the dishwasher door and select a short test cycle. Allow the dishwasher to fill with water, go through the wash cycle, and drain out the water. Observe the entire process to ensure there are no leaks or unusual sounds.
- Monitor the drainage system: Pay close attention to the drainage system during the test cycle. Watch for any backups or slow drainage from the sink or garbage disposal. This could indicate an issue with the drainage hose or the air gap (if installed).
- Check for proper functioning: After the test cycle is complete, open the dishwasher door and inspect the dishes for cleanliness. Ensure that the dishwasher has properly cleaned and rinsed the dishes. If you notice any issues, such as leftover food particles or spots on the dishes, refer to the dishwasher’s manual or consult a professional.
Regularly inspect the dishwasher’s plumbing connections and perform routine maintenance to prevent leaks and ensure the continued proper functioning of your dishwasher.
By following these steps and conducting a thorough check, you can confidently confirm that your dishwasher is ready to use. Enjoy the convenience and efficiency of your newly installed appliance!
Please note that specific dishwasher models may have unique testing procedures and maintenance recommendations. Always refer to the manufacturer’s instructions for any specific guidelines or troubleshooting steps.
Conclusion
Installing the plumbing for a dishwasher may seem like a daunting task, but with the right tools, materials, and guidance, it can be a straightforward and rewarding project. By following the step-by-step instructions outlined in this article, you can confidently hook up the plumbing for your dishwasher and enjoy the convenience it brings to your daily life.
Remember to start by determining the location for the dishwasher, taking into consideration space, proximity to the sink, and access to electrical outlets. Next, prepare the plumbing connections by shutting off the water supply, making necessary adjustments for the drain, and creating a high loop in the drainage hose.
Once the preparations are complete, proceed with installing the drainage hose and connecting the water supply line. Take your time to ensure proper connections and use the appropriate tools to tighten them securely.
After the installation, it’s essential to check for any leaks by inspecting all the connections and making any necessary adjustments. Finally, run a test cycle on the dishwasher to verify that it’s functioning correctly and cleaning the dishes effectively.
Regular maintenance and inspection of the dishwasher’s plumbing connections are essential to prevent leaks and ensure its proper functioning. Stay vigilant for any signs of leaks, drips, or unusual noises, and address them promptly to avoid any further issues.
With the plumbing for your dishwasher properly hooked up, you can now enjoy the convenience and efficiency of this modern kitchen appliance. Say goodbye to the hassle of handwashing dishes and embrace the time-saving benefits of your newly installed dishwasher!
Always refer to the manufacturer’s instructions for any specific guidelines or troubleshooting steps for your particular dishwasher model. If you’re uncertain about any aspect of the installation, consider consulting a professional plumber for assistance.
Now that you've got the basics of setting up your dishwasher’s plumbing, why stop there? Mastering the entire installation process ensures your kitchen appliances run smoothly without any hiccups. Dive into our detailed guide on how to install an air gap for a dishwasher. This additional step helps prevent any potential contamination of your clean water supply, proving crucial for a hygienic kitchen environment. Make sure your dishwasher isn't just installed, but perfectly optimized for everyday use.
Frequently Asked Questions about How To Hook Up Plumbing For Dishwasher
Was this page helpful?
At Storables.com, we guarantee accurate and reliable information. Our content, validated by Expert Board Contributors, is crafted following stringent Editorial Policies. We're committed to providing you with well-researched, expert-backed insights for all your informational needs.
0 thoughts on “How To Hook Up Plumbing For Dishwasher”