Articles
How To Build A Good Neighbor Fence
Modified: October 20, 2024
Learn how to build a good neighbor fence with informative articles. Get expert tips, step-by-step guides, and design ideas for a beautiful and functional fence.
(Many of the links in this article redirect to a specific reviewed product. Your purchase of these products through affiliate links helps to generate commission for Storables.com, at no extra cost. Learn more)
Introduction
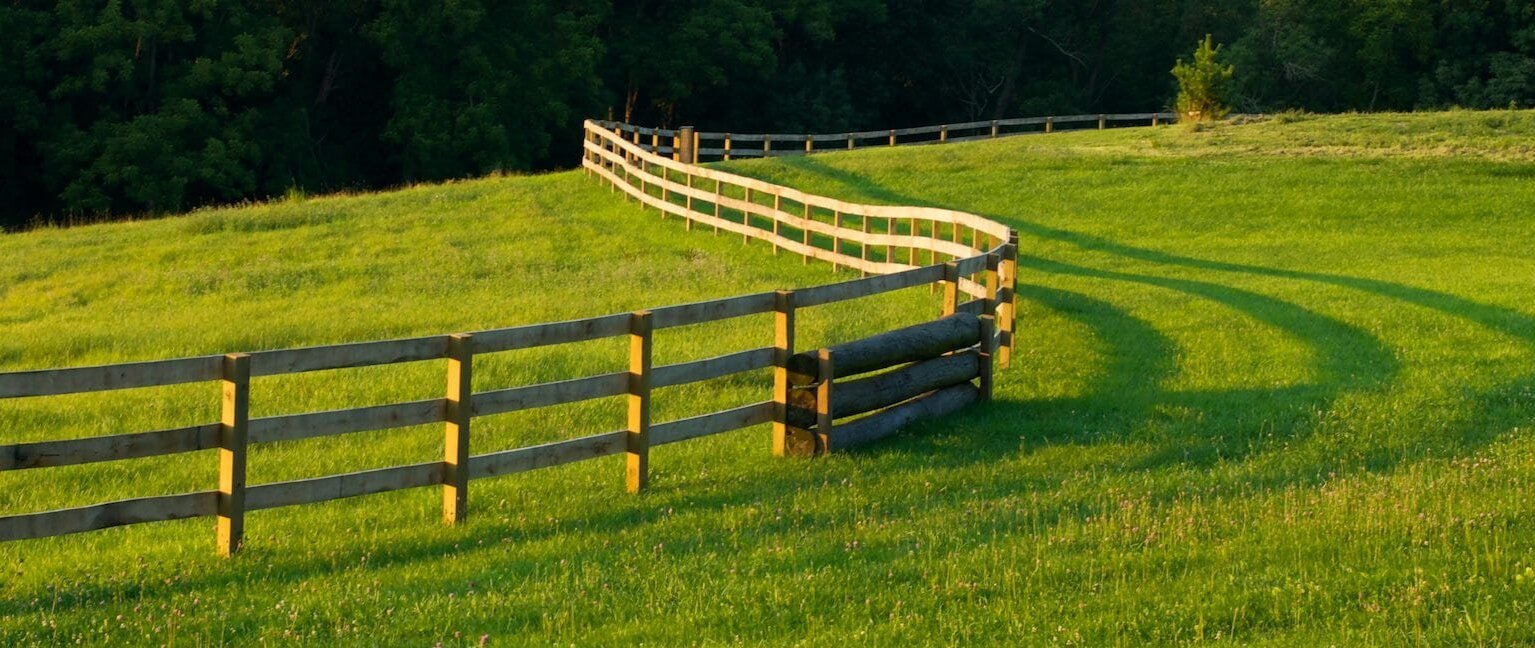
Building a good neighbor fence is a great way to enhance privacy, security, and the overall appeal of your property. Unlike a traditional fence, a good neighbor fence is designed to be equally attractive on both sides, ensuring that both you and your neighbors are satisfied with the final result.
In this article, we will guide you through the process of building a good neighbor fence step by step. From assessing your needs and understanding local regulations to choosing the right materials and maintaining the fence in the long run, we will cover all the essential aspects of this project.
Before diving into the details, it’s important to emphasize the importance of open communication with your neighbors throughout the process. This will help you address any concerns and ensure that everyone is on the same page when it comes to the design and placement of the fence.
So, without further ado, let’s get started on the journey of creating a good neighbor fence that enhances both your property and your relationship with your neighbors.
Key Takeaways:
- Building a good neighbor fence involves assessing needs, understanding local regulations, and communicating with neighbors. Choosing the right materials, determining fence height, and adding finishing touches are crucial for a successful and harmonious outcome.
- Proper site preparation, digging fence post holes, and installing fence panels require precision and attention to detail. Regular maintenance and timely repairs are essential for the longevity and continued functionality of the fence.
Read more: Who Pays For Fence Between Neighbors
Assessing Your Needs
Before embarking on the construction of a good neighbor fence, it’s crucial to assess your needs and determine the specific goals you want to achieve with the fence. Take some time to consider the primary reasons for installing the fence and what you hope to achieve with it.
One of the main reasons for building a good neighbor fence is to enhance privacy. Evaluate how much privacy you desire, taking into account factors such as proximity to neighbors, height of neighboring structures, and the landscape of your property.
In addition to privacy, you may also want to consider security as a factor in the design of your fence. Determine how much security you need, whether it’s to keep pets or children contained, or to deter potential intruders.
Another aspect to consider is aesthetics. A good neighbor fence is meant to be visually appealing from both sides, so think about how you want the fence to complement your property’s overall design and aesthetics.
Budget is also an important consideration. Determine how much you are willing to invest in building the fence, taking into account the cost of materials, labor, and any additional features or customization you may want to include.
Lastly, consider the long-term maintenance requirements. Think about the level of maintenance you are willing to commit to and choose materials and designs that align with your maintenance preferences.
By carefully assessing your needs, you will be able to make informed decisions throughout the fence-building process. This will ensure that the final result perfectly meets your expectations and serves its purpose effectively.
Understanding Local Regulations
Before proceeding with the construction of your good neighbor fence, it is crucial to familiarize yourself with the local regulations and zoning requirements in your area. These regulations vary from place to place and may dictate specific guidelines for the height, material, and placement of the fence.
Contact your local municipality or building department to obtain information about any permits or approvals that might be required before you begin construction. They will be able to provide you with the necessary guidelines and regulations to ensure that your fence complies with the local rules.
Common regulations that you may need to consider include:
- Height restrictions: Many areas have specific height restrictions for fences, especially those that are visible from the street. It’s important to adhere to these requirements to avoid any potential issues or fines.
- Boundary setbacks: Understanding how far your fence should be set back from your property lines is crucial to avoid encroaching on your neighbor’s property. Failure to comply with setbacks may lead to legal disputes or even the removal of the fence.
- Material restrictions: Some areas have restrictions on the materials that can be used for fence construction. This typically ensures that the fence aligns with the overall aesthetic of the neighborhood and is not deemed as an eyesore.
- Design guidelines: In certain neighborhoods or historic districts, there may be design guidelines that dictate the style and appearance of the fence. Ensure that your design complies with these guidelines to maintain the overall character of the area.
By understanding and following these regulations, you can avoid potential conflicts with your neighbors and local authorities. It is always better to be aware of the rules beforehand rather than facing complications and having to make changes after construction has begun.
Remember, understanding and adhering to local regulations not only ensures a smooth process for building the fence but also contributes to the harmony and beauty of your neighborhood.
Communicating with Your Neighbors
When building a good neighbor fence, open communication with your neighbors is essential to ensure a mutually beneficial outcome. By involving them in the decision-making process and addressing any concerns they may have, you can prevent unnecessary conflicts and maintain positive relationships.
Here are some steps to effectively communicate with your neighbors:
- Initiate a conversation: Start by approaching your neighbors to discuss your plans for building a fence. This can be done in person or through a friendly note or letter. Explain your reasons for wanting a fence and listen to any concerns or suggestions they may have.
- Show them your design: Share your fence design with your neighbors, either through drawings or photographs. This will give them a visual representation of what the fence will look like and allow them to provide feedback or raise any concerns they may have.
- Address concerns and find solutions: If your neighbors express concerns about the fence, take the time to listen and understand their perspective. Try to find common ground and work together to find solutions that satisfy the needs and preferences of both parties.
- Discuss cost-sharing options: In some cases, neighbors may be willing to contribute financially to the fence construction, especially if it benefits both properties. Discuss the possibility of cost-sharing, including materials and labor, and come to an agreement that works for everyone involved.
- Establish property boundaries: If there is any confusion about property boundaries, it’s important to clarify them before starting construction. Hire a professional surveyor if needed to accurately determine the boundary lines and avoid any disputes in the future.
- Maintain ongoing communication: Throughout the construction process, keep your neighbors updated on the timeline and progress. Address any potential disruptions, such as noise or temporary inconvenience, and ensure that lines of communication remain open for the duration of the project.
Remember, building a good neighbor fence is not just about your needs and preferences. It’s about considering the impact on your neighbors and finding ways to accommodate their concerns. By engaging in open and respectful communication, you can build a fence that enhances both your property and your relationship with your neighbors.
Choosing the Right Materials
Selecting the right materials for your good neighbor fence is essential for its durability, aesthetics, and maintenance requirements. There is a wide range of materials available, each with its own advantages and considerations. Here are some popular options to consider:
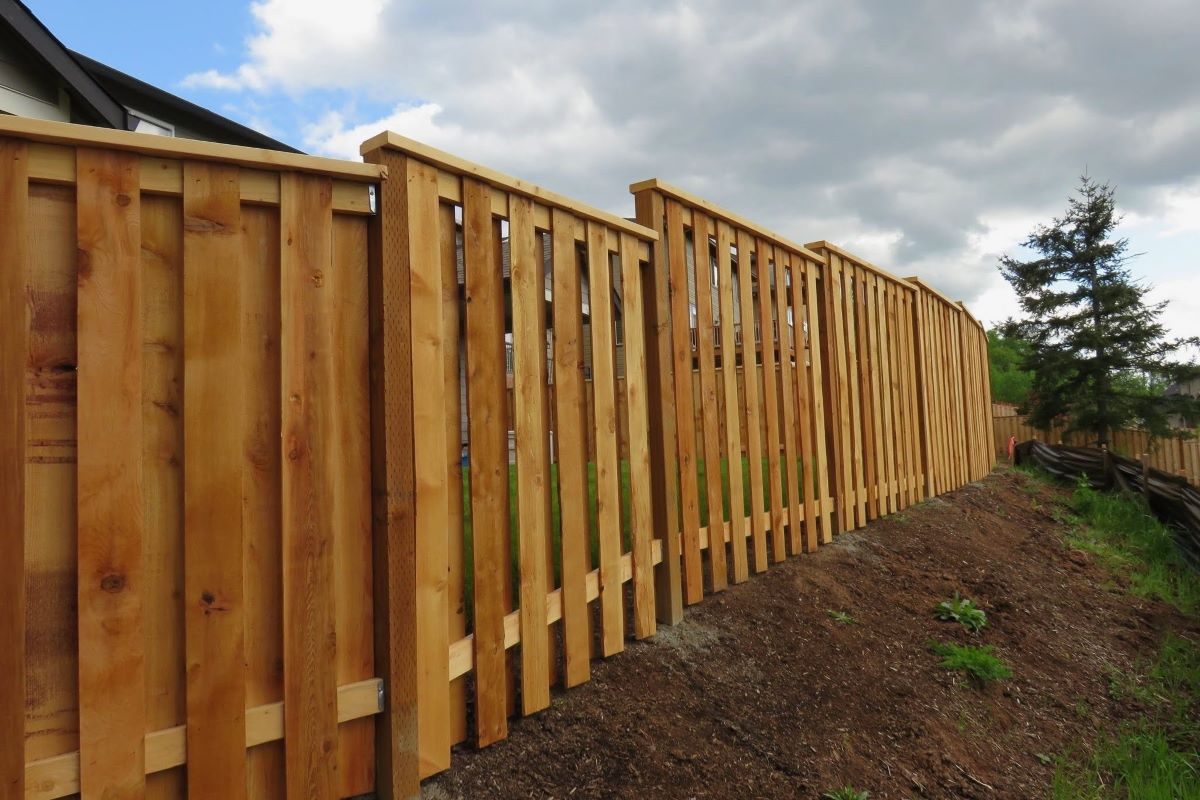
- Wood: Wood is a classic and versatile choice for fencing. It offers a natural and warm aesthetic and can be customized with different stains or paints. Cedar and redwood are popular choices due to their natural resistance to decay and insects. However, wood fences require regular maintenance such as painting or staining to prolong their lifespan.
- Vinyl: Vinyl is a low-maintenance option that provides a clean and modern look. It is resistant to rot, insects, and fading, making it a popular choice for those who prefer a hassle-free fence. Vinyl fences come in various styles and colors, allowing for customization to match your desired aesthetic.
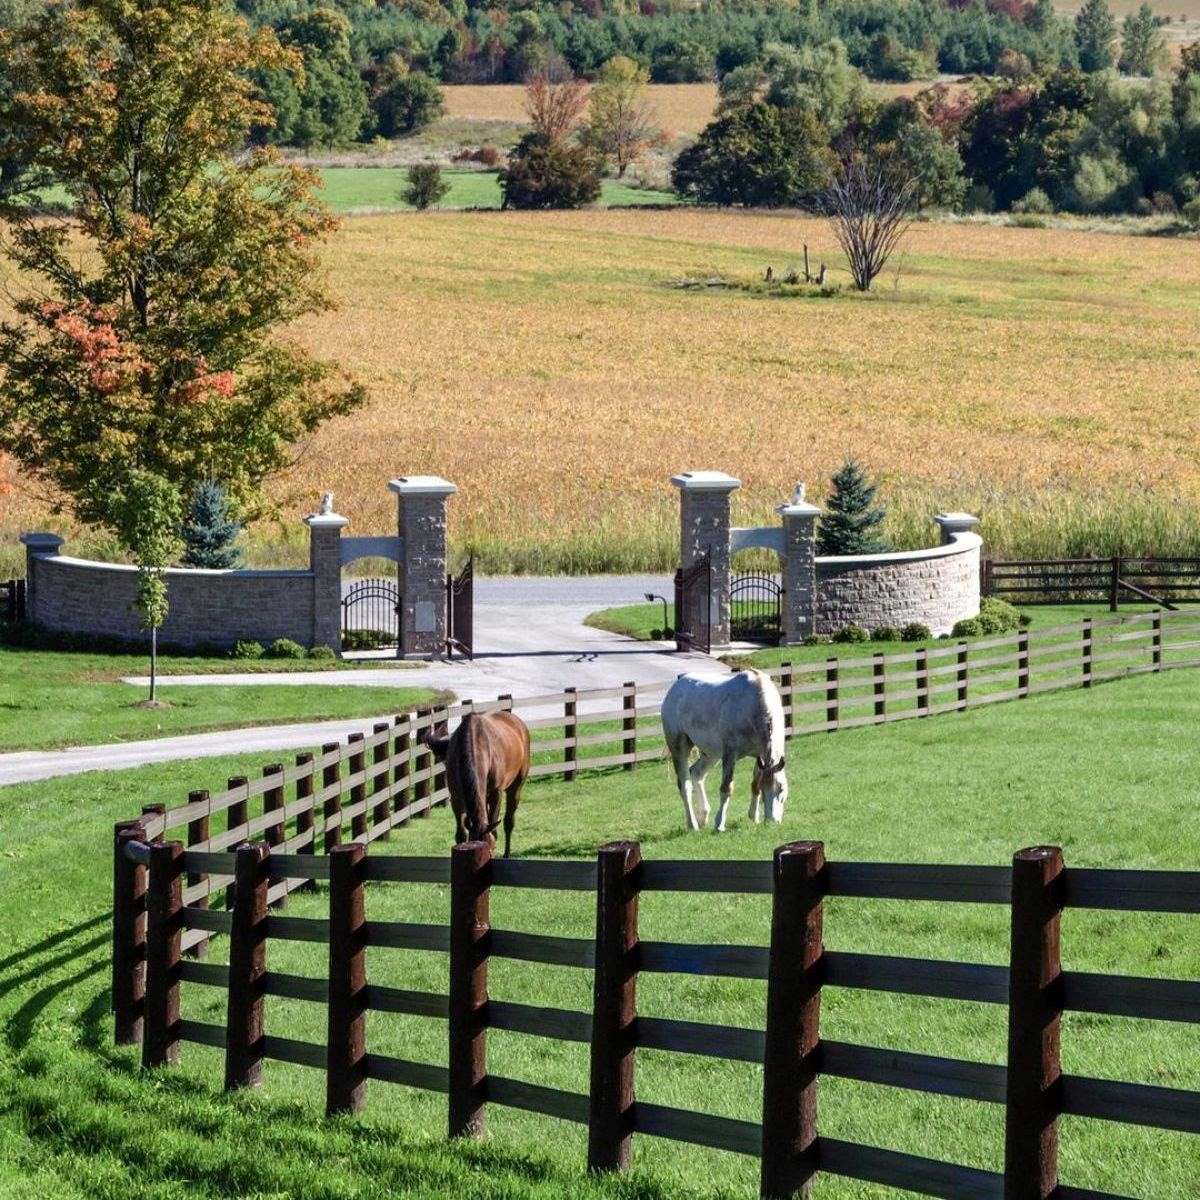
- Metal: Metal fences, such as aluminum or wrought iron, can be both stylish and sturdy. They offer excellent security and are durable in various weather conditions. Metal fences, however, may require more maintenance in terms of repainting or rust prevention over time.
- Composite: Composite fencing is a blend of wood fibers and recycled plastic, offering the natural look of wood with the durability and low-maintenance aspects of plastic. They are resistant to rot, pests, and fading. Composite fences are available in various colors and styles.
- Chain Link: Chain link fences are affordable, durable, and offer good visibility. They are often used for utility purposes or to enclose large areas. While they may not provide as much privacy as other options, they can be enhanced with privacy slats or decorative elements.
When choosing the right material, consider factors such as your desired level of privacy, maintenance requirements, budget, and the overall style of your property. It’s also important to check with local regulations to ensure the chosen material complies with any specific guidelines or restrictions.
Additionally, select high-quality materials to ensure that your fence stands the test of time. Consider factors such as the thickness of the materials, the strength of the fasteners, and the overall craftsmanship when making your decision.
Take the time to research and compare different materials, consult with experts if needed, and weigh the pros and cons of each option. By choosing the right materials for your good neighbor fence, you will create a long-lasting and visually appealing barrier that meets your needs and enhances the overall aesthetics of your property.
Read more: How To Find A Neighbor’s Outdoor Cameras
Determining the Fence Height
Determining the height of your good neighbor fence is an important decision, as it plays a crucial role in providing privacy, security, and defining your property boundaries. The appropriate fence height will depend on several factors, including local regulations, the purpose of the fence, and your specific needs and preferences.
Local regulations: Check with your local municipal or building department regarding height restrictions for fences in your area. Some locations may have specific guidelines on maximum fence height, especially for fences that are visible from the street. Adhering to these regulations is important to avoid any potential issues or conflicts.
Purpose of the fence: Consider the primary purpose of your good neighbor fence. If your main goal is to enhance privacy, a taller fence may be necessary. If security or keeping pets contained is a priority, a fence of sufficient height will be important. Understanding your specific needs will guide you in determining the appropriate fence height.
Neighbor consideration: It’s crucial to consider both your needs and your neighbor’s needs when determining the fence height. If your neighbors desire privacy as well, a taller fence may be beneficial for both parties. However, always communicate with your neighbors to ensure that the fence height is agreeable to everyone involved.
Visual impact: Keep in mind the visual impact of the fence on your property and the surrounding area. A fence that is too tall can overpower the landscape and may not align with the aesthetics of the neighborhood. Striking a balance between height and visual appeal is important for a harmonious and attractive result.
Once you have taken these factors into consideration, measure the specific areas where you want to install the fence. Use a measuring tape or laser level to determine the desired height accurately.
Remember that the height of the fence may need to be adjusted or varied along its length. For example, you may want a taller fence at the back of your property for increased privacy, while a lower fence at the front may provide a more open and welcoming appearance.
By carefully considering local regulations, your needs, and those of your neighbors, as well as the visual impact, you can determine the appropriate height for your good neighbor fence. This will create a functional and aesthetically pleasing barrier that meets your specific requirements.
Designing the Fence
Designing your good neighbor fence is an exciting and creative process that allows you to reflect your personal style while considering the needs and preferences of your neighbors. A well-designed fence not only enhances privacy and security but also adds beauty and character to your property. Here are some key factors to consider when designing your fence:
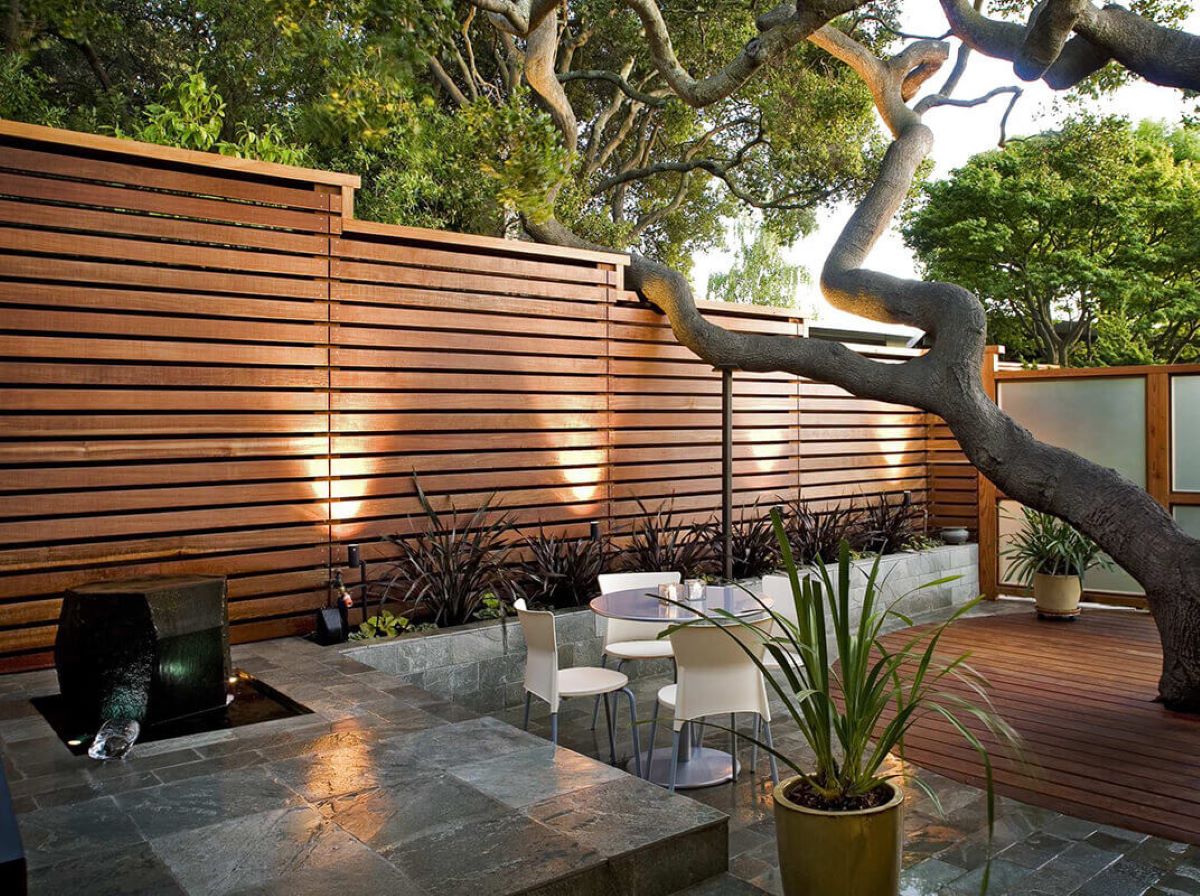
- Fence Style: Choose a fence style that matches the architectural style of your home and complements the overall aesthetic of your property. Popular fence styles include picket fences, privacy fences, lattice fences, and modern horizontal fences. Look for inspiration in home design magazines, online resources, or consult with a professional for guidance.
- Material Combinations: Consider combining different materials to create visual interest and unique design elements. For example, mixing wood with metal accents or incorporating stone pillars can add an attractive focal point to your fence.
- Decorative Elements: Enhance the visual appeal of your fence by adding decorative elements such as finials, lattice work, or ornamental gates. These details can make your fence stand out while adding a touch of elegance and charm.
- Color Choices: Selecting the right color for your fence is essential in creating a cohesive look. You can choose to stain or paint a wooden fence to match your home’s exterior or opt for a natural finish that highlights the beauty of the wood. For other materials like vinyl or metal, choose colors that complement the surrounding environment.
- Gates and Pathways: Plan the location and design of gates and pathways in your fence. Consider the size and number of gates needed for easy access, as well as the design of pathways that integrate with your landscaping. Make sure gates are built with proper hardware and locks for security purposes.
- Landscaping Integration: Think about how your fence will interact with your landscaped areas. Consider planting shrubs, flowers, or climbing vines along the fence line to soften its appearance and create a harmonious blend with the surrounding environment.
- Lighting and Security: If desired, incorporate lighting along the fence to enhance its nighttime visibility and add an extra layer of security. Solar-powered lights or low-voltage LED fixtures can highlight the fence’s features while providing safety and functionality.
As you design your fence, it’s important to take into consideration any specific guidelines or restrictions set by local regulations or homeowners’ associations. Ensure that your design complies with height, setback, and appearance regulations to avoid any potential issues or delays.
Take the time to sketch out your ideas, gather inspiration, and consult with professionals if needed. By carefully considering the style, materials, colors, and other design elements, you can create a visually stunning fence that not only meets your needs but also adds value and charm to your property.
When building a good neighbor fence, make sure to communicate with your neighbor throughout the process to ensure both parties are satisfied with the design and cost.
Preparing the Site
Preparing the site for your good neighbor fence is a critical step that sets the foundation for a successful and sturdy installation. Proper site preparation ensures that the area is level, free from obstacles, and ready for construction. Here are the steps to follow:
- Mark the property boundaries: Before you start any construction, it is essential to mark the exact boundaries of your property. Use property survey plans or consult with a professional surveyor to accurately determine the property lines. This will ensure that your fence is installed within your own property and not encroaching on neighboring properties.
- Clear the area: Remove any existing vegetation, debris, or obstacles that may interfere with the fence installation. Clear the site of rocks, tree roots, or any other objects that could hinder the digging of fence post holes or affect the stability of the fence.
- Take accurate measurements: Measure the length and height of the fence line to ensure accurate materials estimation and proper positioning of the fence posts. Use measuring tapes, laser levels, or other tools to achieve precise measurements.
- Obtain necessary permits: Check with your local municipality or building department to determine if any permits are required for fence installation. Apply for permits if necessary and ensure that you have all the documentation and approvals before proceeding.
- Notify utility companies: Before digging any holes for the fence posts, notify the relevant utility companies to mark the location of underground utilities like water, gas, or electrical lines. This helps prevent accidental damage and ensures safety during the installation process.
- Locate property corners: Locate the corners of your property to ensure that the fence is installed accurately along the property lines. Use property markers or consult with a surveyor if needed to identify the exact corners.
- Consider drainage: Assess the site’s drainage patterns and make any necessary adjustments to prevent water buildup or erosion near the fence. This may involve grading the area or installing appropriate drainage systems.
- Check for potential grading or slope issues: Evaluate the terrain of the site to identify any significant slopes or grading issues. Determine if retaining walls or additional measures are needed to ensure the fence is level and properly supported.
By thoroughly preparing the site, you will minimize potential problems during the fence installation process and ensure a solid and stable structure. Remember to take safety precautions and use proper tools and equipment when clearing the site and performing any necessary excavations.
Proper site preparation sets the stage for a smooth and efficient fence installation, ultimately leading to a high-quality and long-lasting end result.
Digging the Fence Posts
Digging the fence posts is a crucial step in building your good neighbor fence. The strength and stability of your fence depend on the proper installation of the posts. Here’s a step-by-step guide to help you dig the fence posts:
- Measure and mark the post locations: Use the measurements from your fence design to mark the exact locations for the fence posts along the fence line. Ensure the spacing between posts is consistent to maintain the structural integrity of the fence.
- Gather the necessary tools and materials: Prepare the tools and materials required for digging the fence post holes. This may include a post hole digger, an auger, a shovel, a level, and concrete for setting the posts.
- Check for underground utilities again: Before digging, double-check with utility companies to ensure that there are no underground utilities near the designated post locations. This is crucial for safety purposes.
- Start digging the holes: Begin digging the holes for the fence posts. The depth and width of the holes depend on the type of soil, local regulations, and the height of the fence. As a general guideline, the holes should be approximately one-third to one-half the length of the fence post and about 10-12 inches in diameter.
- Ensure proper spacing and alignment: Use a level and string line to ensure that the holes are aligned and the posts will be properly spaced. This will help maintain a straight and even fence.
- Remove any obstructions: Clear any rocks, roots, or debris from the holes to ensure that the posts will fit properly and have a solid foundation.
- Set the fence posts: Insert the fence posts into the holes, making sure they are level and plumb. Use a level to ensure that the posts are straight vertically and horizontally. Fill the hole with concrete or compacted soil as per local regulations and personal preference. Allow the concrete to cure before continuing with the fence installation.
- Support the posts if needed: For taller fences or areas with high wind conditions, additional support may be necessary. This can be achieved by bracing the posts or installing post anchors during the initial post setting process.
It’s important to take your time when digging the fence post holes, ensuring that they are deep enough and properly aligned. This will provide a solid foundation for your fence and help to prevent sagging or leaning in the future.
Note that specific guidelines and requirements for digging fence post holes may vary based on local regulations and the specific needs of your fencing project. It’s advisable to consult with professionals or local experts if you have any concerns or if your project requires special considerations.
Following these steps will help you dig the fence post holes accurately and set the stage for a sturdy and reliable good neighbor fence.
Installing the Fence Panels
Now that you have completed the process of digging the fence post holes, it’s time to install the fence panels. This step brings your good neighbor fence to life and creates the privacy and security you desire. Here’s a step-by-step guide to help you install the fence panels:
- Measure and cut the fence panels: Measure the exact length needed for each fence panel, taking into account any slopes or changes in elevation along the fence line. Use a saw or other appropriate tools to cut the panels to the required size.
- Attach the panels to the posts: Secure the fence panels to the posts using the appropriate fasteners. Depending on the type of fence material and design, common fastening methods include nails, screws, brackets, or clips. Follow the manufacturer’s instructions for the specific type of fence panels you are using.
- Ensure proper alignment: Ensure that the fence panels are aligned properly from post to post. Use a level or string line to make sure the panels are straight and level horizontally. This will help maintain the overall integrity and appearance of the fence.
- Attach the panels to each other: If using multiple panels, secure them together using the provided connectors or fasteners. This will ensure that the panels are connected firmly and create a seamless and continuous look.
- Make adjustments for slopes: If there are any slopes along the fence line, make necessary adjustments to accommodate them. This may involve trimming or cutting the panels to fit the slope or using wedges to level the panels.
- Check for gaps or unevenness: After attaching the fence panels, inspect them for any gaps or unevenness. Make any necessary adjustments to ensure that the panels are properly aligned and provide the desired level of privacy and security.
- Secure the panels to the posts: Once the panels are properly aligned and attached, secure them to the posts using additional fasteners or brackets as needed. This will provide extra stability and prevent the panels from shifting or coming loose over time.
- Apply finishing touches: Consider adding decorative elements or trim to enhance the appearance and functionality of the fence. This could include adding caps to the posts, installing post skirts, or attaching decorative lattice or trellis panels.
It is important to carefully follow the manufacturer’s instructions for your specific fence panels and materials. Different fence types and materials may have unique installation requirements. Take your time to ensure that each panel is securely and properly installed, paying attention to detail for a neat and professional-looking result.
Regularly inspect the fence panels after installation to check for any signs of damage or adjustments needed. This will help maintain the integrity of your fence and ensure its longevity.
By following these steps, you will successfully install the fence panels and bring your good neighbor fence to completion, creating a secure and visually appealing boundary for your property.
Adding Finishing Touches
With the installation of the fence panels complete, it’s time to add the finishing touches to your good neighbor fence. These final touches will not only enhance the overall aesthetic appeal but also provide any necessary functionality and ensure the longevity of your fence. Here are some finishing touches you can consider:
- Applying a protective finish: Depending on the material of your fence panels, applying a protective finish can help prolong their lifespan and maintain their appearance. Consider staining, painting, or applying a sealant to the fence panels to protect against moisture, UV rays, and other weathering elements. Follow the manufacturer’s recommendations for the appropriate finish.
- Adding post caps: Installing decorative post caps on top of each fence post not only adds a visually appealing element but also protects the exposed end grain of the wood from moisture and degradation. Post caps come in various styles and materials, allowing you to choose the one that best suits your overall fence design.
- Installing a gate: If your fence design includes an entry point, installing a gate is essential. Choose a gate that matches the style and height of your fence. Ensure that the gate is properly aligned, securely attached, and equipped with appropriate hinges and a latch mechanism for ease of use and security.
- Adding climbing plants or vines: If you desire a more natural and green look for your fence, consider planting climbing plants or vines along its length. This can soften the appearance of the fence and create a beautiful and vibrant backdrop. Choose plants that are suitable for your climate and that will not damage the fence.
- Ensuring proper drainage: Make sure that water can drain away from the base of your fence to prevent damage from standing water or excessive moisture. Adjust the grading or consider installing French drains or gravel-filled trenches if necessary.
- Installing lighting: If desired, install outdoor lighting fixtures along the fence to provide both functionality and ambience. Consider solar-powered lights, low-voltage LED lights, or motion sensor lights to enhance visibility and security during the evening hours.
- Maintaining the fence: Regularly inspect your fence for any signs of damage, such as loose fasteners, rotting wood, or rusted metal. Make any necessary repairs promptly to maintain the fence’s strength and appearance. Additionally, perform routine maintenance tasks like cleaning and repainting as needed.
Remember to consult any local regulations or homeowners’ association guidelines before adding finishing touches to your fence. Some areas may have specific requirements or restrictions regarding the types of finishes, colors, or additional features allowed.
By adding these finishing touches, you can elevate the look and functionality of your good neighbor fence. These details will not only make your fence stand out but also enhance the overall appeal of your property.
Maintaining and Repairing the Fence
To ensure the longevity and continued functionality of your good neighbor fence, regular maintenance and timely repairs are essential. Proper care and attention will help preserve the appearance, structural integrity, and value of your fence over time. Here’s a guide to maintaining and repairing your fence:
- Inspect the fence regularly: Conduct regular visual inspections of your fence, checking for any signs of damage, wear, or deterioration. Look for loose or missing fasteners, rotted wood, rusted metal, cracks, or any other issues that may compromise the fence’s stability.
- Address repairs promptly: If you notice any damage or issues during your inspections, make repairs promptly to prevent them from worsening. Replace broken or decayed materials, tighten loose fasteners, or adjust misaligned elements as needed.
- Clean the fence: Regularly clean your fence to remove dirt, debris, and any organic substances that may accumulate over time. This can be done with a gentle soap and water solution, a pressure washer (with caution to avoid damage), or specialized fence cleaning products. Regular cleaning helps maintain the appearance of the fence and prevents buildup that can lead to damage or discoloration.
- Control vegetation: Trim and maintain any vegetation, like climbing plants or trees, that may come into contact with your fence. This helps prevent excessive moisture buildup, reduces the risk of damage from overgrowth, and minimizes the risk of pests or insects infesting the fence materials.
- Apply protective finishes: Depending on the type of fence material, periodically apply protective finishes such as stains, paints, or sealants to preserve the appearance and protect against weathering. Follow the manufacturer’s instructions for the appropriate application and maintenance of these finishes.
- Address pest infestations: Inspect your fence for signs of pests like termites, ants, or beetles. If you notice any infestations, take appropriate measures to eradicate the pests and prevent further damage to your fence. Consult with professionals if needed.
- Reinforce weak areas: Over time, certain areas of your fence may become weakened or vulnerable to damage. Reinforce these areas by adding extra support, replacing damaged sections, or installing additional braces or hardware as needed.
- Protect against moisture: Moisture is one of the biggest enemies of fences, especially wooden ones. Ensure proper drainage around the fence, maintain a gap between the bottom of the fence and the ground to prevent water absorption, and consider applying waterproofing treatments to wooden components.
- Consult with professionals: If you are unsure about any maintenance or repair tasks, or if your fence requires specialized care, it is recommended to consult with professionals who have expertise in fence maintenance and repair. They can provide guidance, perform necessary repairs, or offer advice on proper maintenance techniques.
By following these maintenance and repair guidelines, you can extend the lifespan of your good neighbor fence and keep it in excellent condition. Regular care and timely repairs will help maintain the visual appeal and ensure that your fence continues to provide privacy, security, and beauty for years to come.
Conclusion
Building a good neighbor fence is a rewarding project that enhances privacy, security, and the overall aesthetics of your property. By following the steps outlined in this article, you can successfully plan, construct, and maintain a fence that not only meets your needs but also fosters positive relationships with your neighbors.
Assessing your specific needs and understanding local regulations are crucial initial steps in the process. Clear communication with your neighbors throughout the project ensures that everyone is on the same page and helps address any concerns or considerations that may arise. Choosing the right materials and determining the appropriate fence height are key factors that contribute to the durability, stability, and visual appeal of your fence.
Designing the fence involves selecting a style, incorporating decorative elements, and considering the integration with your landscape. Proper site preparation, including marking property boundaries and clearing any obstacles, sets the foundation for successful construction.
Digging the fence post holes and installing the fence panels require precision and attention to detail. Taking care to align the panels, secure them properly, and make any necessary adjustments ensures a straight and level fence. Adding finishing touches such as protective finishes, post caps, gates, and lighting enhances the appearance and functionality of the fence.
Maintaining and repairing the fence on a regular basis is essential for its longevity. Inspecting, cleaning, and addressing repairs promptly help to prevent further damage and keep the fence in optimal condition. Proper care, including controlling vegetation and protecting against moisture, ensures that your fence stands the test of time.
In conclusion, building a good neighbor fence is a comprehensive process that requires careful assessment, planning, and execution. By following the steps and guidelines outlined in this article, you can create a beautiful and functional fence that provides privacy, security, and enhances the overall value of your property. Remember, regular maintenance and open communication with your neighbors are key to a successful and harmonious outcome.
Now that you've mastered the art of constructing a good neighbor fence, take your outdoor enhancements to the next level. Dive into our diverse collection of garden fence designs, perfect for any style or security needs. From quaint picket borders to robust privacy screens, our guide offers versatile solutions that promise to elevate your garden's aesthetics and functionality.
Frequently Asked Questions about How To Build A Good Neighbor Fence
Was this page helpful?
At Storables.com, we guarantee accurate and reliable information. Our content, validated by Expert Board Contributors, is crafted following stringent Editorial Policies. We're committed to providing you with well-researched, expert-backed insights for all your informational needs.


0 thoughts on “How To Build A Good Neighbor Fence”