Articles
How To Build Board On Board Fence
Modified: October 20, 2024
Learn the step-by-step process of building a board-on-board fence in our informative articles. Get expert tips and advice for a durable and attractive fence installation.
(Many of the links in this article redirect to a specific reviewed product. Your purchase of these products through affiliate links helps to generate commission for Storables.com, at no extra cost. Learn more)
Introduction
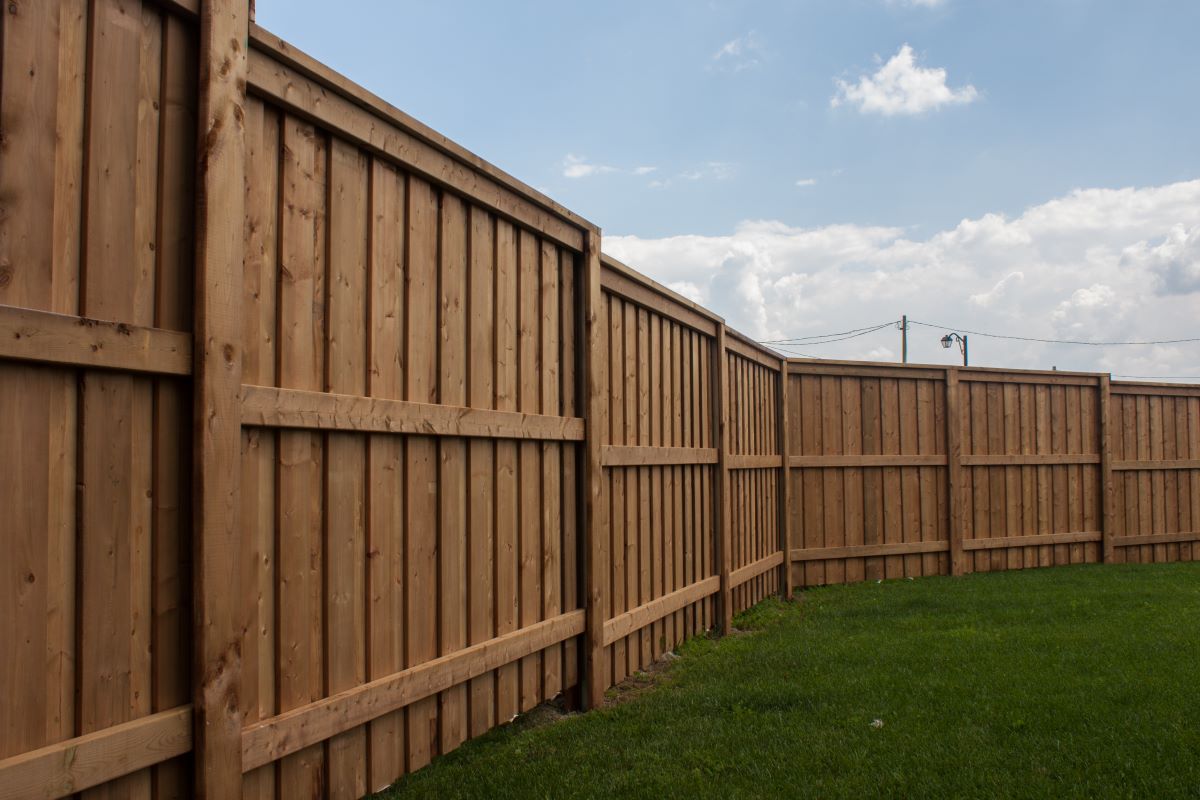
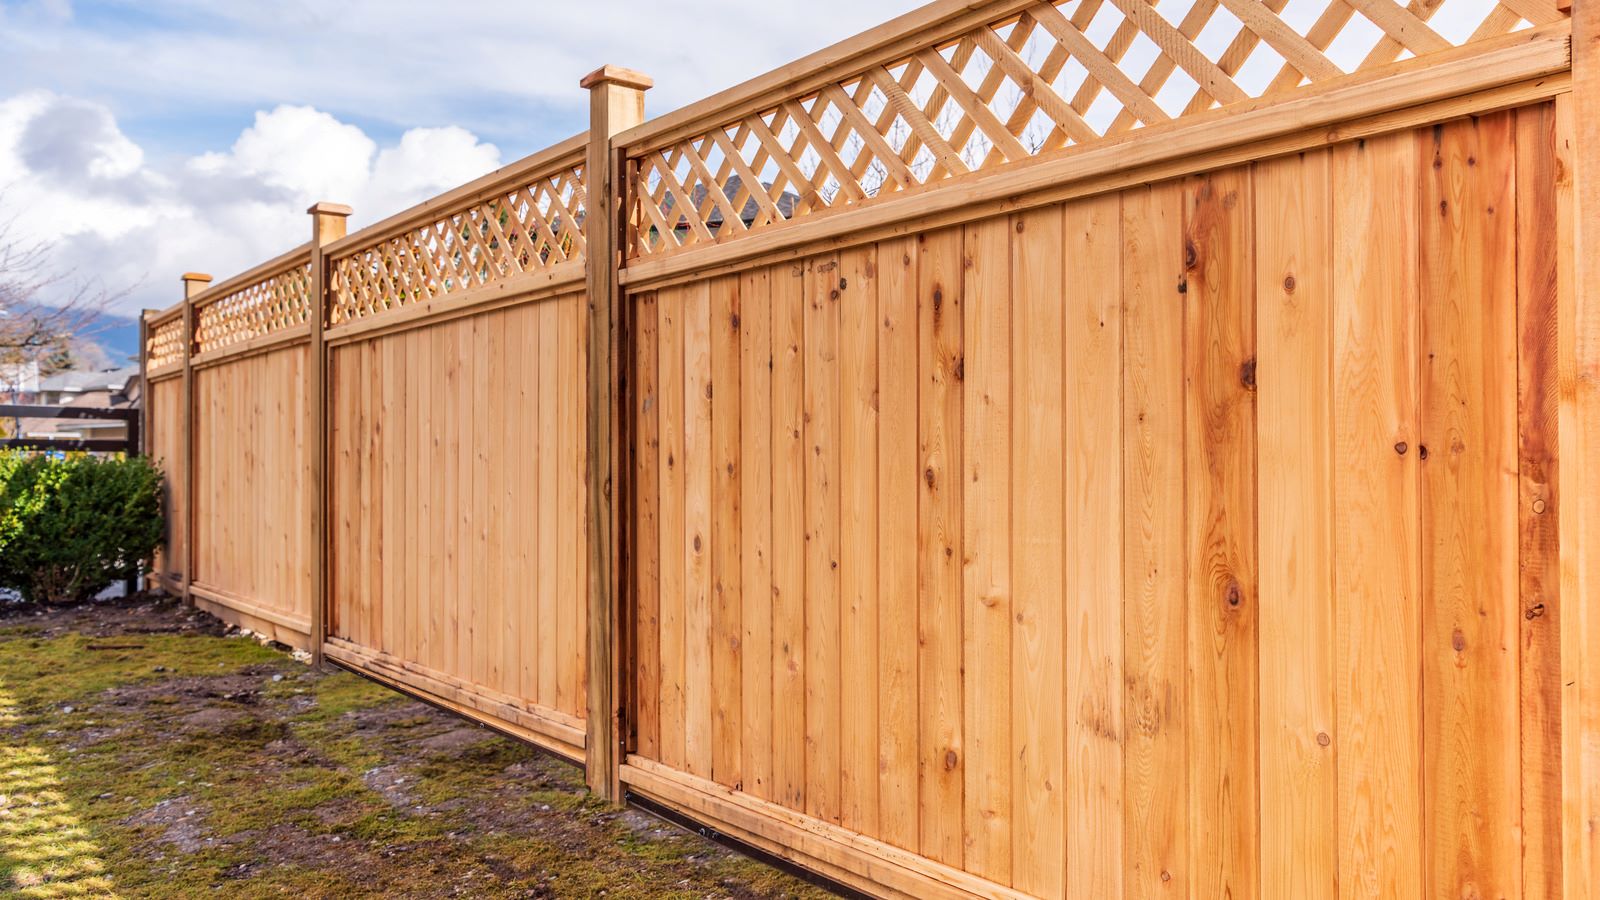
Building a board on board fence is an excellent choice for homeowners who value both privacy and aesthetics. This type of fence offers a visually appealing design that not only enhances the security of your property but also adds a touch of elegance to your outdoor space. Whether you want to create a secluded backyard oasis or provide a boundary for your garden, a board on board fence is the perfect solution.
In this comprehensive guide, we will walk you through the step-by-step process of building a board on board fence. From preparing the area to adding finishing touches, you will learn all the necessary techniques and tips to successfully complete this project. So, grab your tools and materials, and let’s get started!
Key Takeaways:
- Building a board on board fence offers enhanced privacy, added security, and aesthetic appeal, making it a rewarding DIY project for homeowners seeking a beautiful and functional outdoor space.
- With careful preparation, precise construction, and attention to detail, a board on board fence can provide years of durability, low maintenance, and customizable design options to suit any homeowner’s preferences.
Read more: What Is Board On Board Fence
Benefits of a Board on Board Fence
When it comes to choosing a fence for your property, a board on board fence offers numerous advantages. Let’s take a closer look at some of the key benefits:
- Enhanced Privacy: One of the main reasons homeowners opt for a board on board fence is its ability to provide exceptional privacy. The overlapping design of the fence boards ensures there are no gaps, creating a solid barrier that shields your outdoor space from prying eyes.
- Added Security: A board on board fence not only offers privacy but also enhances the security of your property. The solid construction and sturdy materials make it difficult for intruders to gain unauthorized access, giving you peace of mind.
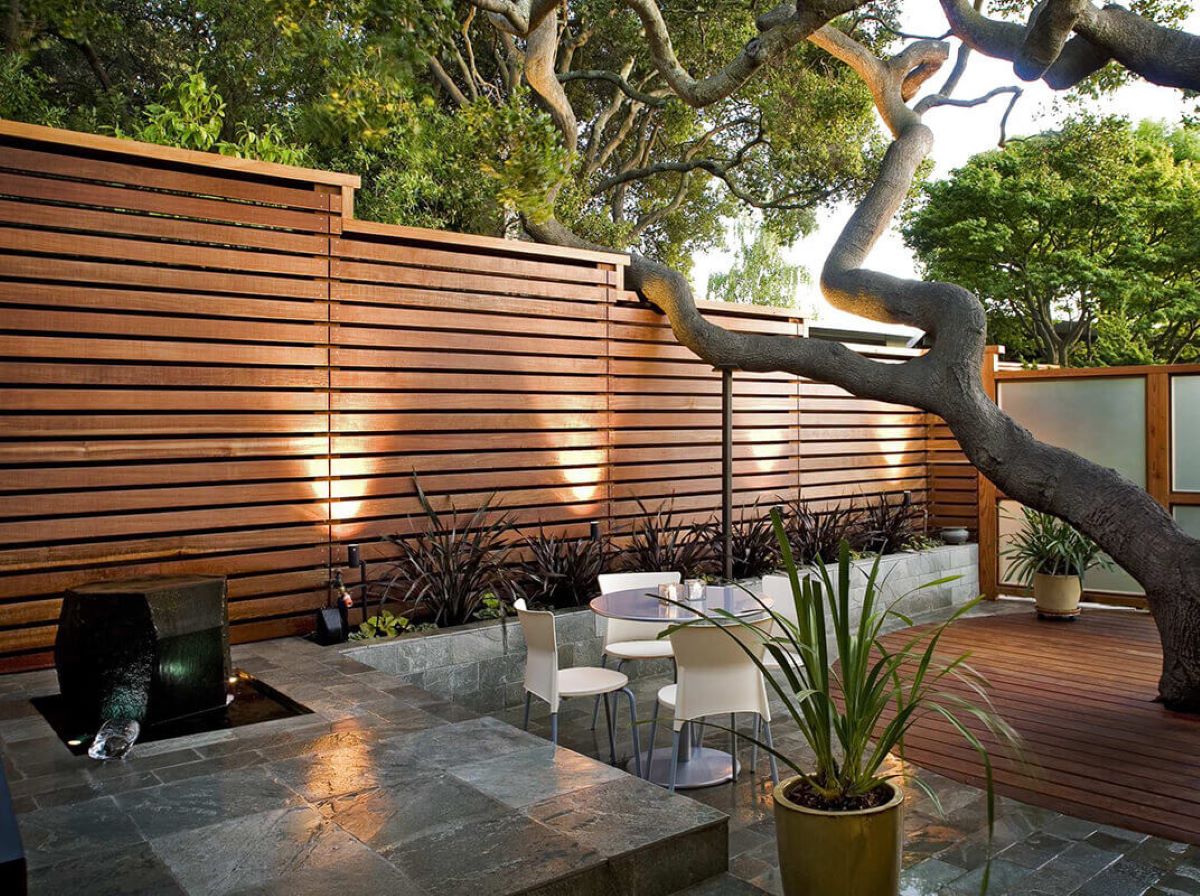
- Aesthetic Appeal: If you’re looking to enhance the visual appeal of your outdoor space, a board on board fence is an excellent choice. The overlapping boards create a beautiful, seamless pattern that adds elegance and charm to your property.
- Sound Reduction: If you live in a noisy neighborhood or near a busy street, a board on board fence can help reduce external noise. The dense construction of the fence significantly dampens sound, creating a quieter and more peaceful environment within your property.
- Durability: Board on board fences are built to last. The use of high-quality materials, such as cedar or pressure-treated lumber, ensures that your fence can withstand the elements and remain sturdy for years to come.
- Customizability: With a board on board fence, you have the flexibility to customize the design according to your preferences. You can choose the height, spacing between boards, and even add decorative elements to make your fence truly unique.
- Low Maintenance: Unlike some other types of fences, a board on board fence requires minimal maintenance. A simple periodic cleaning and inspection are usually sufficient to keep your fence looking great.
Now that we’ve explored the benefits of a board on board fence, let’s move on to the tools and materials you’ll need to get started.
Tools and Materials Needed
Before you begin building your board on board fence, it’s important to gather all the necessary tools and materials. Having everything on hand will help streamline the construction process and ensure a smooth project completion. Here’s a list of the essential tools and materials you’ll need:
Tools:
- Measuring tape
- Level
- String or chalk line
- Post hole digger
- Shovel
- Wheelbarrow (for mixing concrete)
- Hammer
- Circular saw or miter saw
- Drill with screwdriver bit
- Carpenter’s square
- Nail gun or hammer and nails
- Safety glasses
- Gloves
Materials:
- Pressure-treated fence posts (4×4 or 6×6)
- Pressure-treated bottom rails
- Pressure-treated fence boards
- Top rails
- Fence caps
- Concrete mix
- Gravel
- Screws or nails
- Gates (if desired)
It’s important to note that the quantity of materials needed will depend on the length and height of your fence. Measure your desired fence perimeter and consult with a local home improvement store or fencing supplier to ensure you purchase an adequate amount of materials.
Once you have all the tools and materials ready, it’s time to move on to the first step of building your board on board fence: preparing the area.
Read more: How To Build A Wattle Fence
Step 1: Preparing the Area
Before you can start building your board on board fence, it’s essential to prepare the area where the fence will be installed. Follow these steps to ensure a smooth and successful preparation process:
- Check for Underground Utilities: Before digging any holes, contact your local utility companies to locate and mark any underground utilities such as gas, water, or electric lines. This step is crucial to prevent accidental damage and ensure your safety.
- Mark the Fence Line: Use a measuring tape, string, or chalk line to mark the desired fence line. Make sure the line is straight and accurately represents the boundary of your fence. Double-check the alignment and adjust as needed.
- Clear the Area: Remove any obstacles or debris along the fence line. Trim back overhanging branches or shrubs that could interfere with the installation of the fence. Clearing the area will make the construction process easier and ensure a clean and professional-looking fence.
- Prepare the Post Holes: Using a post hole digger, dig holes at regular intervals along the fence line where the fence posts will be installed. The depth and diameter of the holes will depend on the height and size of your fence. As a general rule, the depth of the hole should be approximately one-third the height of the fence above the ground.
- Add Gravel and Concrete: Pour a few inches of gravel into the bottom of each post hole to provide drainage and prevent water accumulation. Place the fence posts in the holes, making sure they are plumb and level. Mix concrete according to the manufacturer’s instructions and pour it into the holes around the posts. Use a level to ensure the posts remain straight and aligned during the curing process.
- Let the Concrete Cure: Allow the concrete to cure completely before proceeding to the next step. This typically takes around 24 to 48 hours, but it’s best to consult the instructions provided with the concrete mix for specific curing times.
By properly preparing the area, you lay the foundation for a strong and stable board on board fence. Once the concrete has cured, you can move on to the next step: setting the posts.
Step 2: Setting the Posts
Now that you have prepared the area and the concrete has cured, it’s time to set the fence posts. Follow these steps to ensure the posts are securely positioned:
- Measure and Mark: Use a measuring tape to determine the height at which you want to install the fence boards. Mark this height on all the fence posts using a pencil or marker. This will ensure that the boards are consistently aligned.
- Attach the Bottom Rails: Measure the distance between the posts horizontally at the bottom and mark the locations for the bottom rails. Use a level to draw a straight line across each post at the marked height. Attach the bottom rails to the posts using screws or nails.
- Install the Fence Boards: Starting at one end of the fence, position the first fence board vertically against the bottom rail. Use a level to ensure the board is straight and plumb. Secure the board to the rail with screws or nails.
- Overlap the Next Board: Place the next fence board next to the first one, overlapping it slightly. The amount of overlap can vary depending on your preference, but a common overlap is around 1-2 inches. Make sure the board is level and plumb before securing it to the rail.
- Continue Adding Boards: Repeat the process of overlapping and securing the fence boards until you reach the end of the fence. Make sure to check each board’s level and plumbness as you go along.
- Trim the Excess: Once all the fence boards are in place, measure the excess length at the end of the fence and use a circular saw or miter saw to cut it off. This will ensure a clean and uniform finish.
Setting the posts correctly is crucial for the stability and durability of your board on board fence. Taking the time to measure, mark, and secure the posts will ensure that your fence stands strong for years to come. With the posts set, it’s time to move on to the next step: installing the bottom rails.
Step 3: Installing the Bottom Rails
With the fence posts set, it’s time to install the bottom rails of your board on board fence. The bottom rails provide stability and support for the fence boards. Follow these steps to properly install the bottom rails:
- Measure and Cut the Rails: Using a measuring tape, measure the distance between the fence posts horizontally at the bottom. Cut the bottom rails to the measured length using a circular saw or miter saw.
- Position the Rails: Place the bottom rails at the marked locations on the fence posts. Make sure they are level and aligned with each other. If needed, use a carpenter’s square to check for 90-degree angles.
- Secure the Rails: Using screws or nails, attach the bottom rails to the fence posts. Make sure to drive the fasteners through the rail and into the post to ensure a secure connection. Repeat this step for each bottom rail.
- Check for Level and Plumb: After securing the bottom rails, use a level to check that they are level horizontally and plumb vertically. Adjust as necessary by loosening the fasteners and repositioning the rails.
By properly installing the bottom rails, you provide a strong and stable foundation for your board on board fence. Once the bottom rails are in place, it’s time to move on to the next step: adding the fence boards.
When building a board on board fence, make sure to use high-quality, pressure-treated lumber to ensure durability and longevity. Additionally, be sure to space the boards evenly and use a level to ensure a straight and professional-looking finish.
Step 4: Adding the Fence Boards
Now that you have the bottom rails installed, it’s time to add the fence boards to complete the board on board fence. Follow these steps to ensure the fence boards are properly installed:
- Measure and Cut the Fence Boards: Measure the distance between the bottom rail and the top of the fence where the next board will be placed. Cut the fence boards to the measured length using a circular saw or miter saw.
- Position the First Fence Board: Start at one end of the fence and position the first fence board vertically against the bottom rail. Make sure the board is level and plumb. You can use spacers to ensure consistent spacing between the fence boards.
- Secure the Fence Board: Use screws or nails to secure the first fence board to the top rail. Drive the fasteners through the board and into the rail, making sure they are evenly spaced. Repeat this process for each fence board, ensuring they are tightly secured to the rail.
- Overlap the Next Board: Place the next fence board next to the first one, overlapping it slightly. The amount of overlap can vary depending on your preference, but a common overlap is around 1-2 inches. Make sure the board is level and plumb before securing it to the rail.
- Continue Adding Boards: Repeat the process of overlapping and securing the fence boards until you reach the end of the fence. Make sure to check each board’s level and plumbness as you go along.
- Trim the Excess: Once all the fence boards are in place, measure the excess length at the end of the fence and use a circular saw or miter saw to cut it off. This will ensure a clean and uniform finish.
Adding the fence boards is a critical step in completing your board on board fence. Take your time to ensure each board is level, aligned, and tightly secured to the top rail. With the fence boards installed, it’s time to move on to the next step: building the top rail and cap.
Read more: How To Build A Brick Fence
Step 5: Building the Top Rail and Cap
Building the top rail and cap adds the finishing touches to your board on board fence, providing a polished and elegant look. Follow these steps to build the top rail and cap:
- Measure and Cut the Top Rail: Measure the length of the fence and cut the top rail to match using a circular saw or miter saw. The top rail should align with the top of the fence boards.
- Position the Top Rail: Place the top rail over the fence boards, ensuring it is parallel to the bottom rail and level. Adjust the position if needed to achieve a uniform appearance.
- Secure the Top Rail: Use screws or nails to secure the top rail to the fence posts. Drive the fasteners through the top rail and into the posts, distributing them evenly along the length of the rail.
- Install the Fence Cap: If desired, you can add a fence cap for added protection and visual appeal. A fence cap is typically a 2×4 or 2×6 piece of pressure-treated lumber placed on top of the fence. Align the cap with the top rail and secure it using screws or nails.
Building the top rail and adding a fence cap provides the perfect finishing touches to your board on board fence. It not only enhances the aesthetic appeal but also provides extra protection against weather elements. With the top rail and cap in place, it’s time to move on to the final step: applying finishing touches.
Step 6: Applying Finishing Touches
Now that you have completed the main construction of your board on board fence, it’s time to apply the finishing touches to ensure a polished and refined look. Follow these steps to add those final touches:
- Check for Loose Fasteners: Inspect the entire fence and check for any loose screws or nails. Secure any fasteners that may have become loose during the construction process to ensure the stability of the fence.
- Trim Excess Material: Take a close look at the entire fence and trim any excess material or uneven edges using a saw or trimmer. This step will give your fence a clean and professional appearance.
- Apply Stain or Paint: If desired, consider applying a stain or paint to your board on board fence. This will not only enhance the aesthetics but also provide an extra layer of protection against the elements. Follow the manufacturer’s instructions for proper application and drying times.
- Double-check Alignment: Go along the entire fence and double-check the alignment and levelness of the boards, rails, and caps. Make any necessary adjustments to ensure a visually pleasing and straight fence.
- Clean Up: Remove any construction debris or tools from the work area and clean up any excess dirt or dust around the fence. This final step will give your fence a clean and well-maintained look.
Applying these finishing touches will add the final touches of beauty and refinement to your board on board fence. Take your time during this step to ensure that everything is in place and looking its best. Once you have completed these finishing touches, your board on board fence is ready to enjoy for years to come.
Congratulations on successfully building your board on board fence!
Conclusion
Building a board on board fence is a rewarding DIY project that not only enhances the privacy and security of your property but also adds a touch of elegance to your outdoor space. Throughout this comprehensive guide, we have walked you through the step-by-step process of building a board on board fence.
We started by discussing the benefits of a board on board fence, including enhanced privacy, added security, aesthetic appeal, sound reduction, durability, customizability, and low maintenance. We then outlined the tools and materials needed to successfully complete the project, ensuring you have everything on hand before starting.
We then delved into each step of the construction process, including preparing the area, setting the posts, installing the bottom rails, adding the fence boards, building the top rail and cap, and applying finishing touches. Each step was carefully explained, providing clear instructions to help you along the way.
Remember, while building a board on board fence can be a challenging task, it is achievable with the right tools, materials, and guidance. Take your time throughout the process, ensuring accuracy and attention to detail. This will result in a sturdy, visually appealing, and long-lasting fence that will enhance the beauty and functionality of your outdoor space.
We hope this guide has been helpful in your journey to build a board on board fence. Now, armed with the knowledge and understanding of the construction process, you are ready to embark on your DIY project. Enjoy the satisfaction of creating a beautiful and functional fence that will bring privacy and charm to your property year after year.
After mastering the art of constructing a board-on-board fence, why not expand your skills with other creative endeavors? If crafting with wood sparks your interest, our guide on woodworking offers insightful tips and exciting projects to fuel your passion. Or, if you're eager to tackle more hands-on activities outside, check out our collection of outdoor projects, perfect for enhancing your space and honing your DIY skills.
Frequently Asked Questions about How To Build Board On Board Fence
Was this page helpful?
At Storables.com, we guarantee accurate and reliable information. Our content, validated by Expert Board Contributors, is crafted following stringent Editorial Policies. We're committed to providing you with well-researched, expert-backed insights for all your informational needs.


0 thoughts on “How To Build Board On Board Fence”