Articles
How To Install A Kitchen Sink Drain
Modified: August 16, 2024
Learn how to install a kitchen sink drain with our detailed step-by-step articles. Follow our guide to ensure a hassle-free installation process.
(Many of the links in this article redirect to a specific reviewed product. Your purchase of these products through affiliate links helps to generate commission for Storables.com, at no extra cost. Learn more)
Introduction
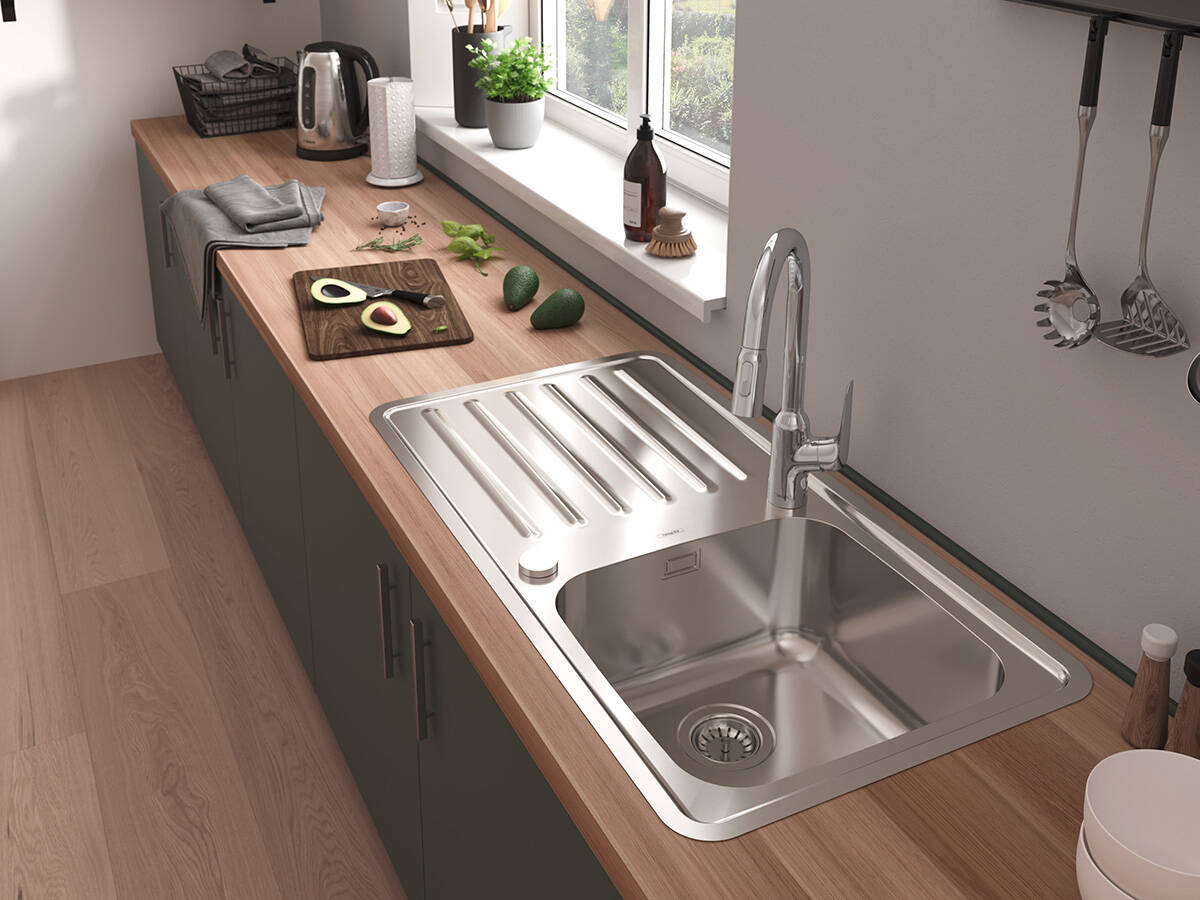
Installing a new kitchen sink can be an exciting home improvement project, giving your kitchen a fresh and updated look. However, the process of installing a kitchen sink drain may seem daunting if you’re not familiar with plumbing tasks. But fear not! With the right tools and a little guidance, you can easily install a kitchen sink drain yourself.
In this article, we will take you through a step-by-step guide on how to install a kitchen sink drain. From gathering the necessary tools and materials to testing and ensuring proper functioning, we’ve got you covered. So, put on your DIY hat and let’s get started!
Key Takeaways:
- DIY Kitchen Sink Drain Installation
With the right tools and step-by-step guidance, anyone can successfully install a new kitchen sink drain, enhancing the functionality and aesthetic appeal of their kitchen. - Importance of Proper Testing
Thoroughly testing the newly installed kitchen sink drain ensures proper functioning, improves efficiency, and identifies potential issues before they become bigger problems.
Read more: How To Take Sink Drain Out
Step 1: Gather Necessary Tools and Materials
Before you begin the installation process, it’s important to gather all the necessary tools and materials. Having everything at hand will make the process smoother and more efficient. Here’s a list of items you’ll need:
- Adjustable wrench
- Plumbers putty
- Sink drain kit
- Teflon tape
- Hacksaw or pipe cutter
- Screwdriver
- Bucket or towel
- Measuring tape
Make sure to check the instructions of your specific Sink drain kit, as it may require additional tools or materials. Once you have everything ready, you can move on to the next step.
Step 2: Prepare the Workspace
Before you start working on installing the kitchen sink drain, it’s important to prepare your workspace. This will ensure a clean and organized environment, making the installation process more efficient. Here are a few steps to follow:
- Clear the area: Remove any items from under the sink and clear the surrounding area. This will give you more space to work and prevent any accidents.
- Turn off the water supply: Locate the shut-off valves under the sink and turn off the water supply. It’s essential to do this to avoid any water flow during the installation process.
- Place a bucket or towel: Position a bucket or a towel under the sink to catch any water that might still be in the pipes. This will prevent water damage and keep your workspace clean.
- Prepare tools and materials: Arrange all the tools and materials you gathered in Step 1 within easy reach. This will save you time and effort when you need to access them during the installation.
By preparing your workspace before starting the installation, you’ll have a well-organized area to work in and reduce the chances of any mishaps occurring.
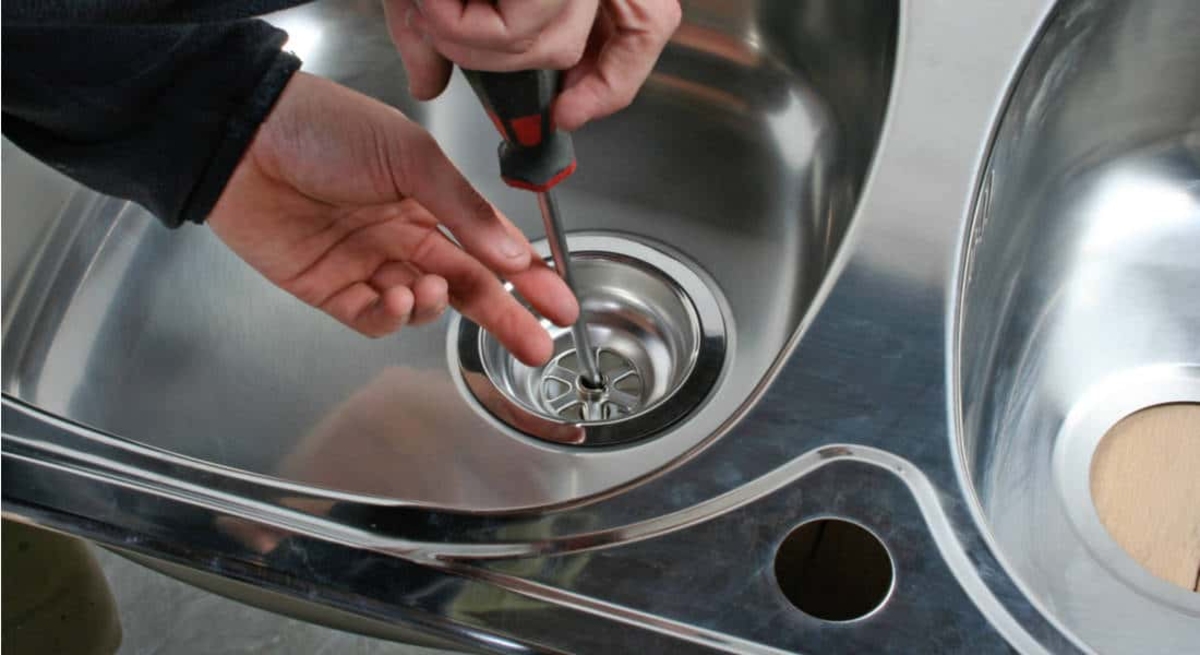
Step 3: Remove Old Sink Drain
With your workspace prepared, it’s time to remove the old sink drain. This step is necessary if you’re replacing an existing kitchen sink or if you need to replace a faulty drain. Here’s how you can remove the old sink drain:
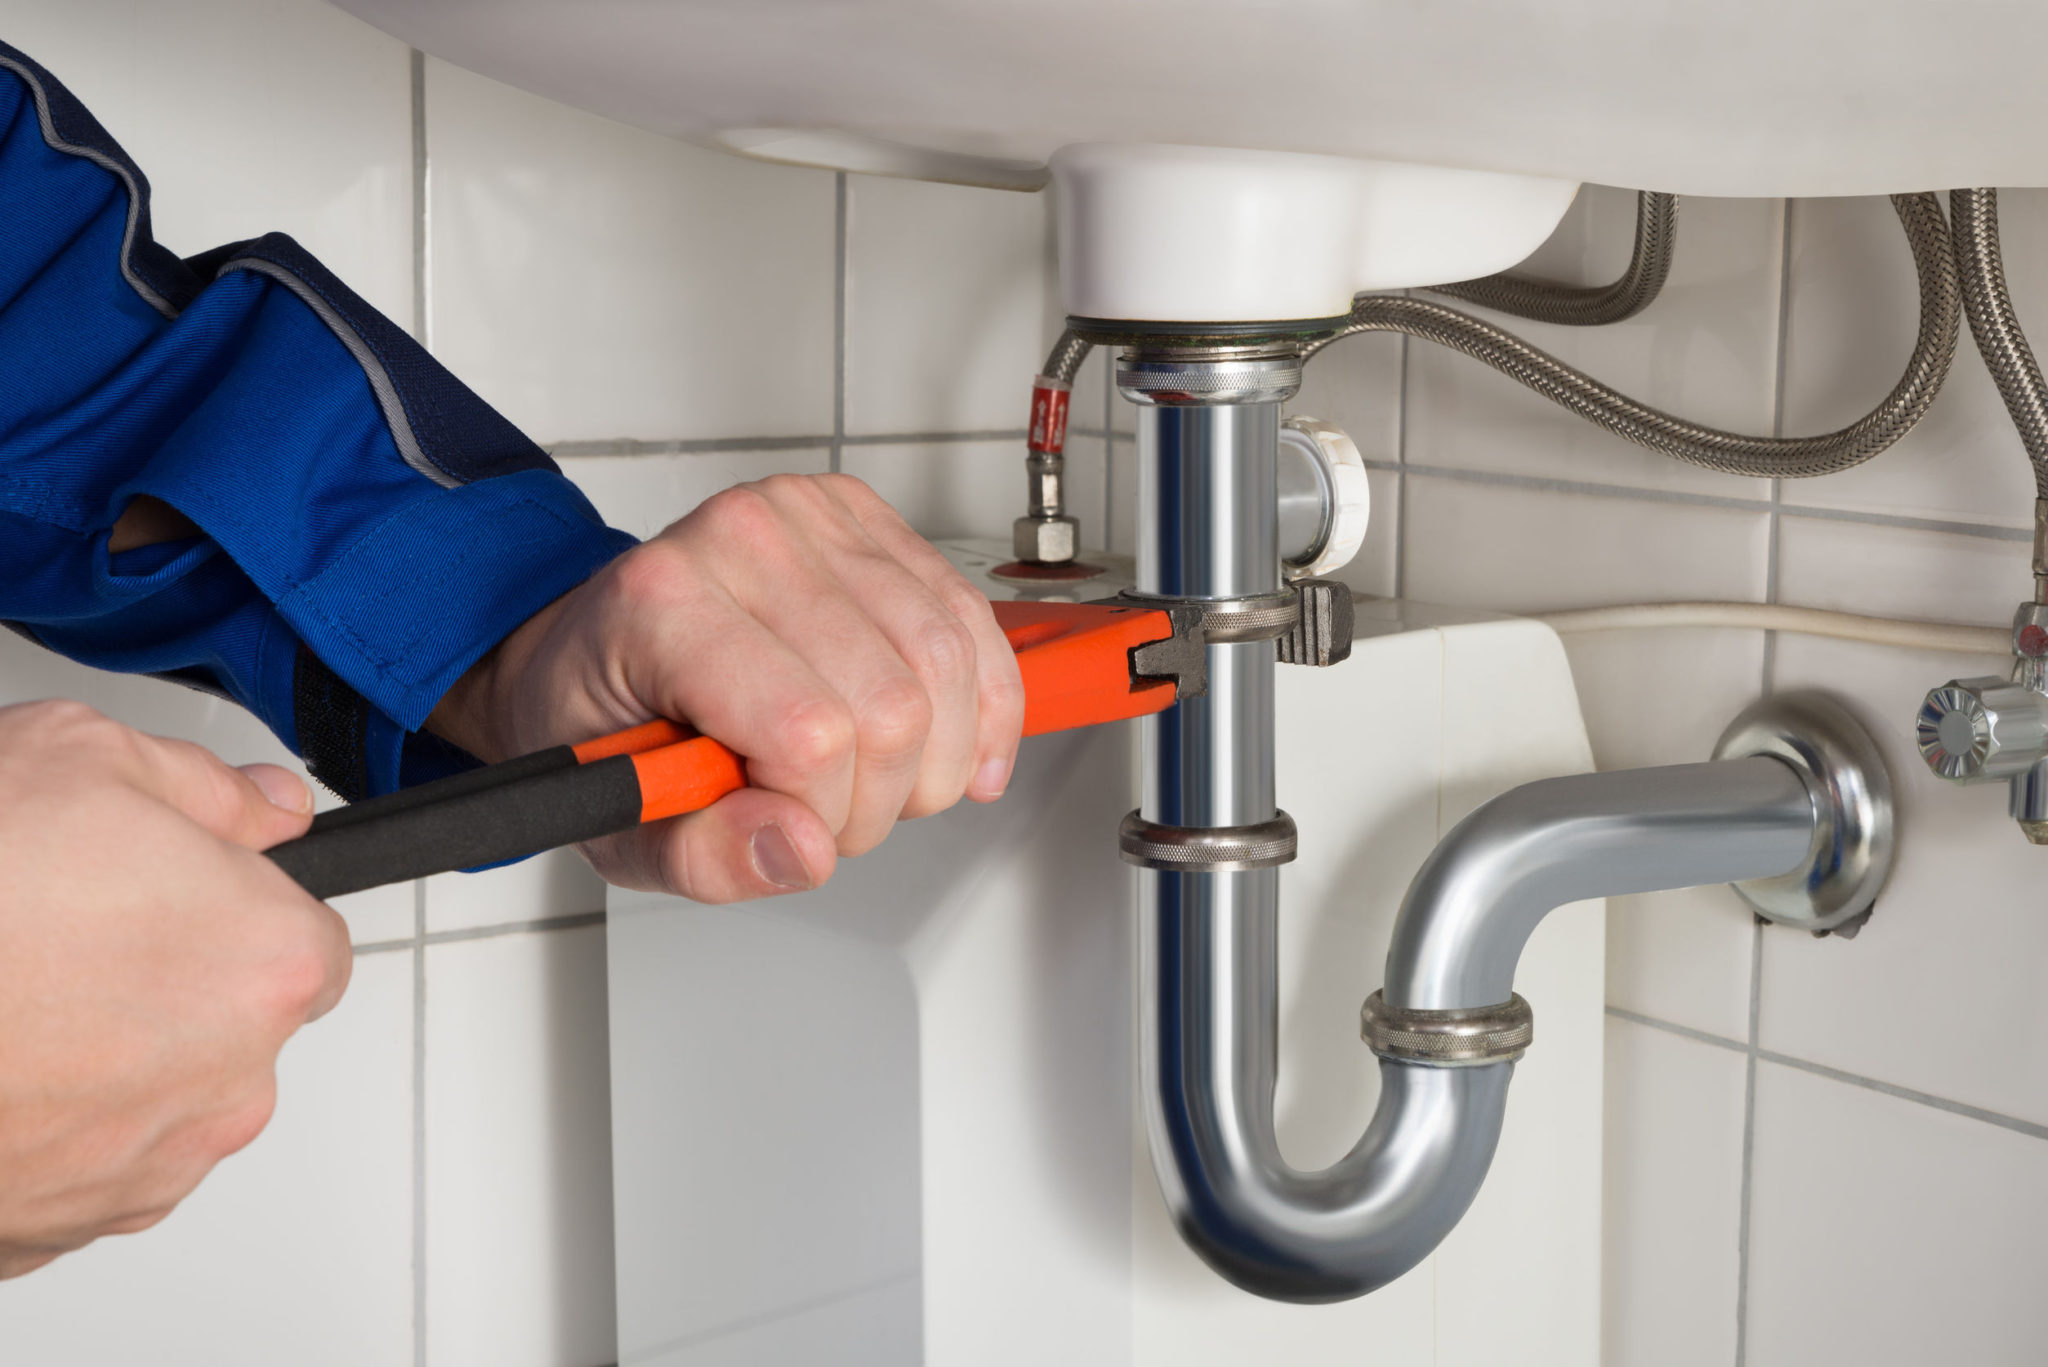
- Loosen the slip nut: Locate the slip nut that connects the P-trap to the tailpiece of the old sink drain. Use an adjustable wrench to loosen and remove the slip nut.
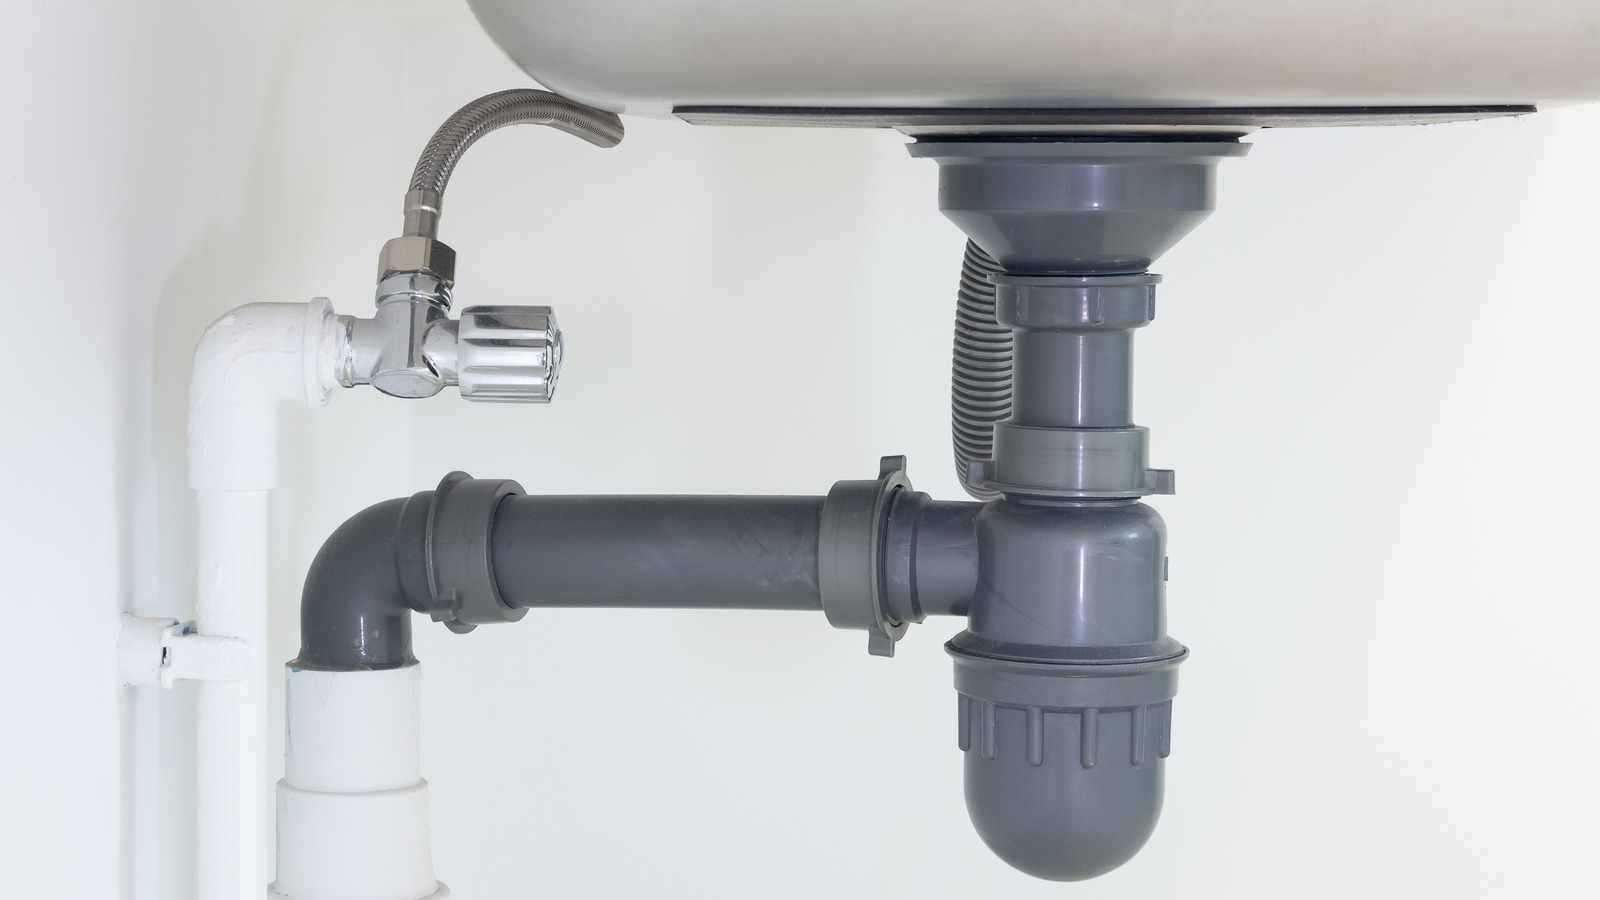
- Remove the P-trap: Once the slip nut is off, carefully remove the P-trap. This is the curved section of the drain pipe that connects the sink drain to the main sewer line. Have a bucket or towel ready to catch any residual water that may drain out.
- Detach the tailpiece: With the P-trap removed, detach the tailpiece from the old sink drain. The tailpiece is the vertical pipe that extends down from the sink drain opening. Use a wrench or screwdriver, depending on the type of connection, to disconnect it.
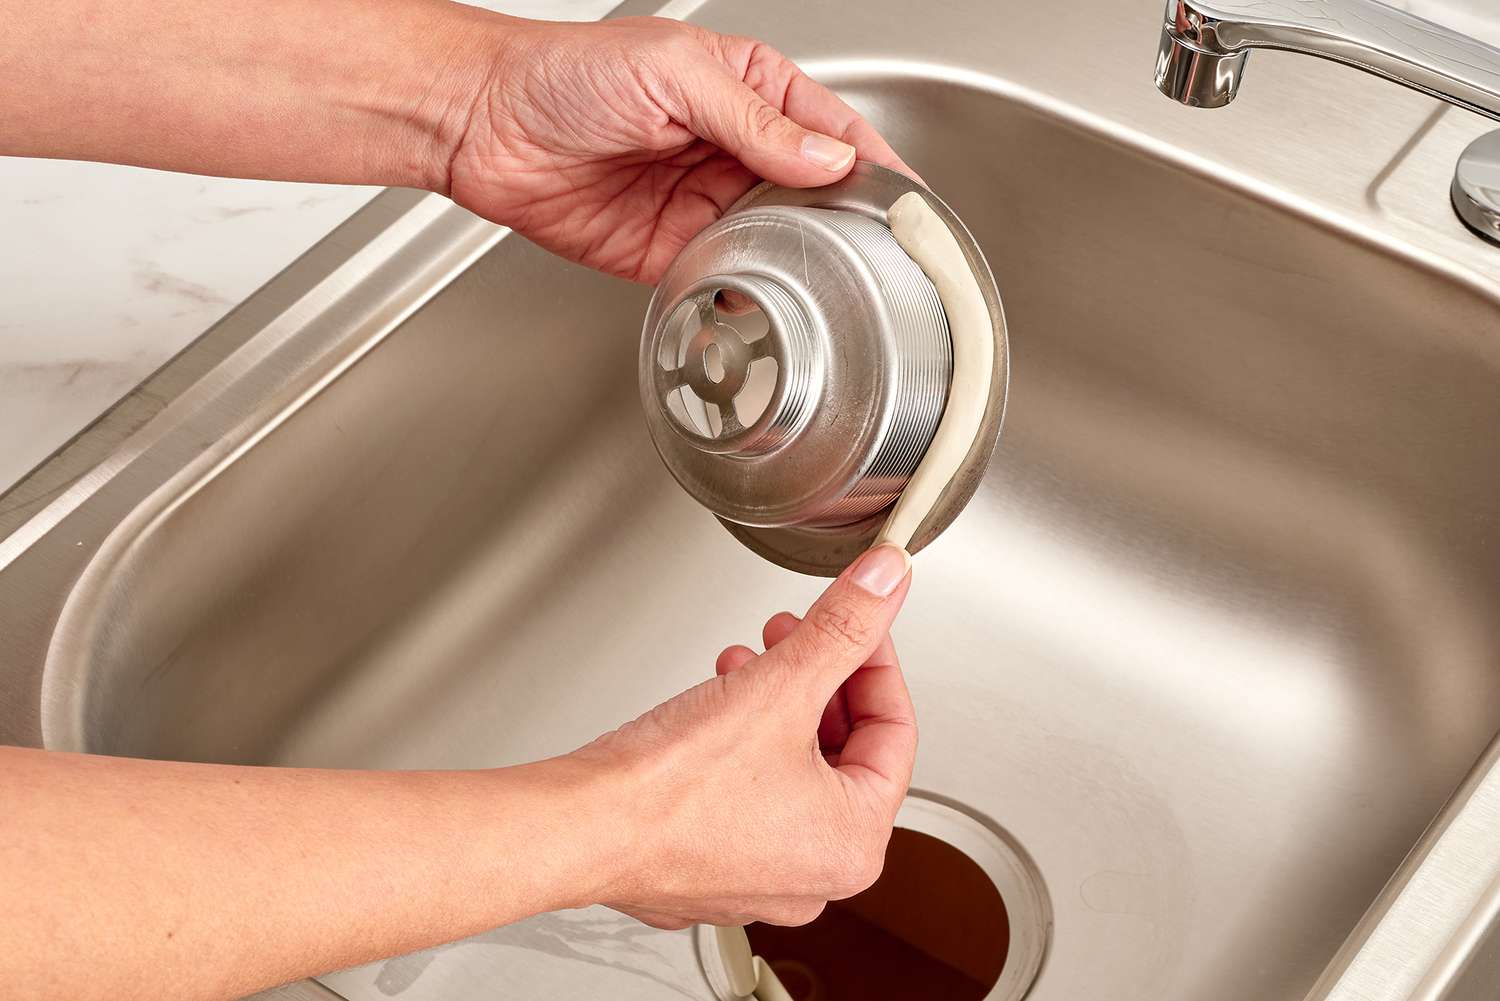
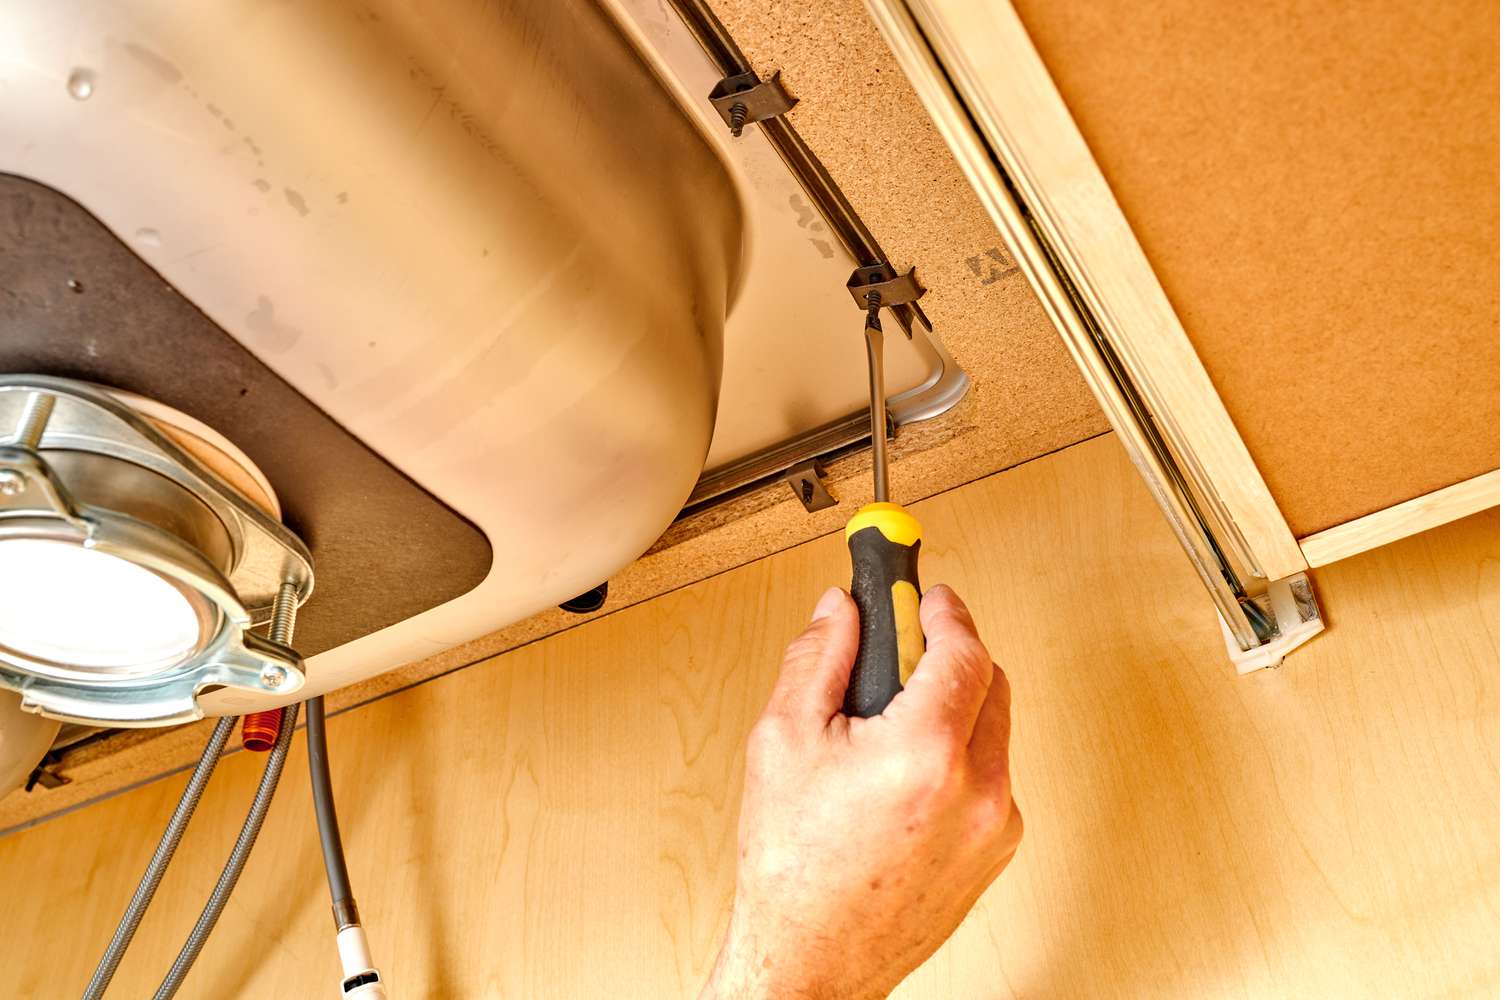
- Remove the old flange: The flange is the circular rim that sits on top of the sink and holds the drain in place. To remove it, unscrew any retaining screws and gently pry the flange off the sink surface with a screwdriver or putty knife.
Once you’ve completed these steps, you should have successfully removed the old sink drain. Take this opportunity to clean the area and ensure there are no obstructions or debris left behind.
Step 4: Clean the Area
Now that the old sink drain has been removed, it’s important to thoroughly clean the area before installing the new drain. A clean workspace will ensure a proper and secure fit for the new components. Follow these steps to clean the area:
- Remove any debris: Use a cloth or sponge to wipe away any residue or debris that may have accumulated around the sink drain hole and the surrounding area. This will provide a clean surface for the new drain components.
- Apply cleaners or solvents: If there are any stubborn stains or buildup, you can apply a mild cleaner or solvent suitable for the material of your sink. Follow the manufacturer’s instructions and use a soft cloth or scrub brush to gently clean the surface.
- Check for leaks: While cleaning, inspect the area for any signs of existing leaks or water damage. If you notice any, it’s essential to address them before proceeding with the installation.
- Dry the surface: After cleaning, make sure to thoroughly dry the area with a clean towel or cloth. Moisture can affect the installation process and lead to issues down the line.
By taking the time to clean the area, you create a clean and optimal surface for installing the new sink drain. This step will contribute to the overall functionality and longevity of your kitchen sink.
When installing a kitchen sink drain, make sure to use plumber’s putty or silicone sealant to create a watertight seal between the drain and the sink. This will prevent leaks and ensure proper drainage.
Read more: How To Clean A Drain And A Kitchen Sink
Step 5: Install the New Sink Drain
Now that the area is clean and prepped, it’s time to install the new sink drain. Follow these steps to ensure a proper installation:
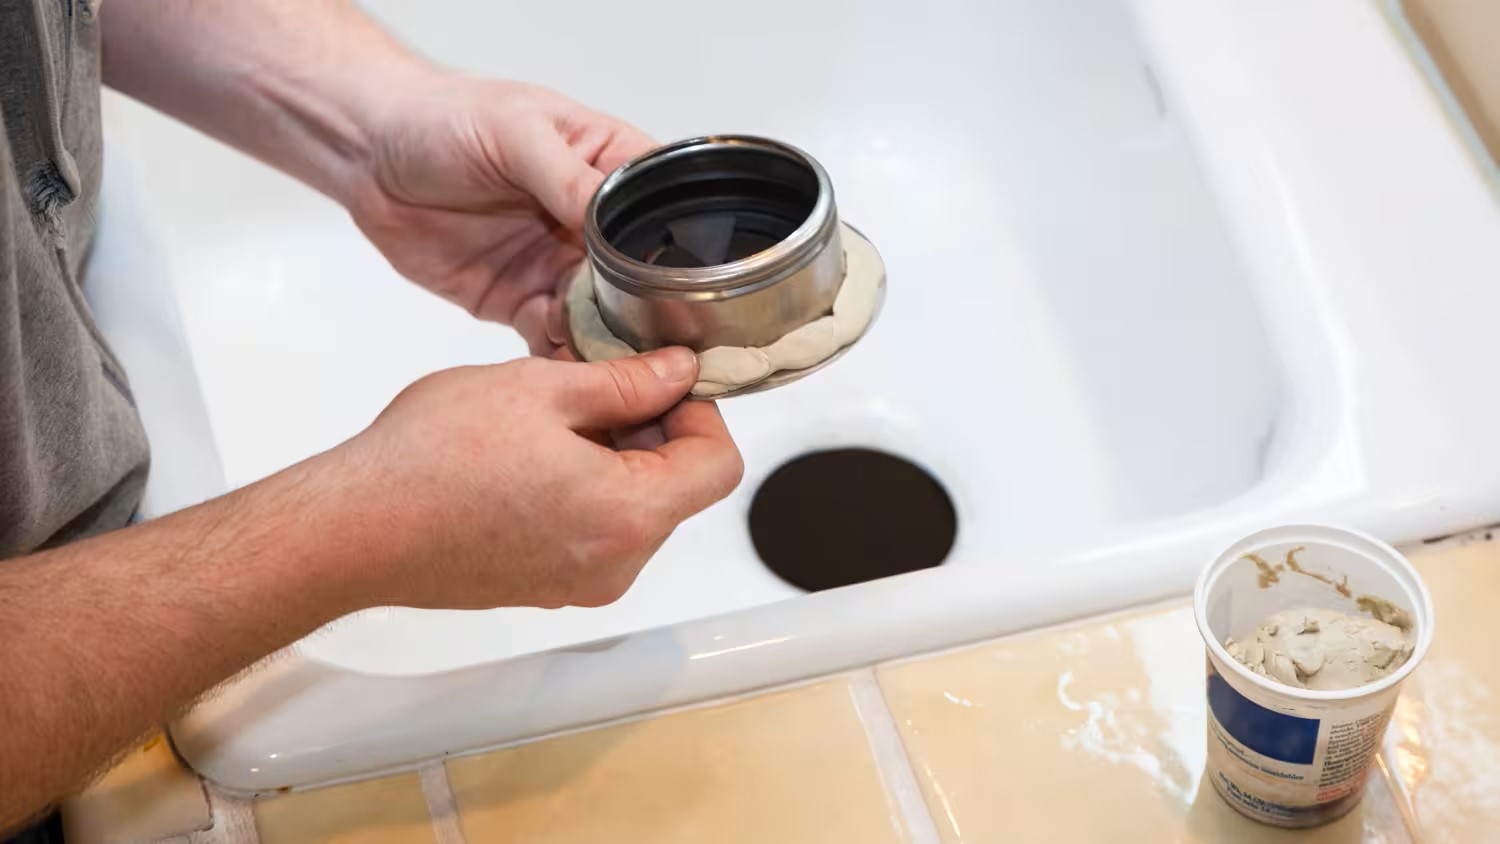
- Apply plumbers putty: Roll a small amount of plumbers putty between your hands to form a rope-like shape. Place it around the underside of the new sink drain flange. This putty will create a watertight seal between the flange and the sink surface.
- Insert the flange: Insert the flange into the sink drain hole and press it firmly against the sink surface. Make sure it is centered and sits flush with the sink.
- Secure the flange: From under the sink, place the rubber gasket and outer metal ring onto the threaded portion of the flange. Hand-tighten the retaining nut until the flange is firmly secured in place. Use a pair of pliers to give it an extra quarter turn to ensure a snug fit.
- Remove excess plumbers putty: Wipe away any excess putty that may have squeezed out from under the flange. Use a damp cloth or sponge to clean the area around the flange, leaving a neat and tidy finish.
- Attach the tailpiece: Connect the tailpiece to the underside of the sink drain flange. Depending on the type of sink and drain kit you have, this may involve screwing the tailpiece onto the flange or using a slip nut and washer to secure it in place. Follow the manufacturer’s instructions for your specific drain kit.
- Tighten connections: Using an adjustable wrench or pliers, ensure all connections are tight and leak-free. Take care not to over-tighten, as it can damage the components.
By following these steps, you’ll successfully install the new sink drain and create a proper seal between the sink and the drain components. This will help prevent any water leaks and ensure the smooth operation of your kitchen sink.
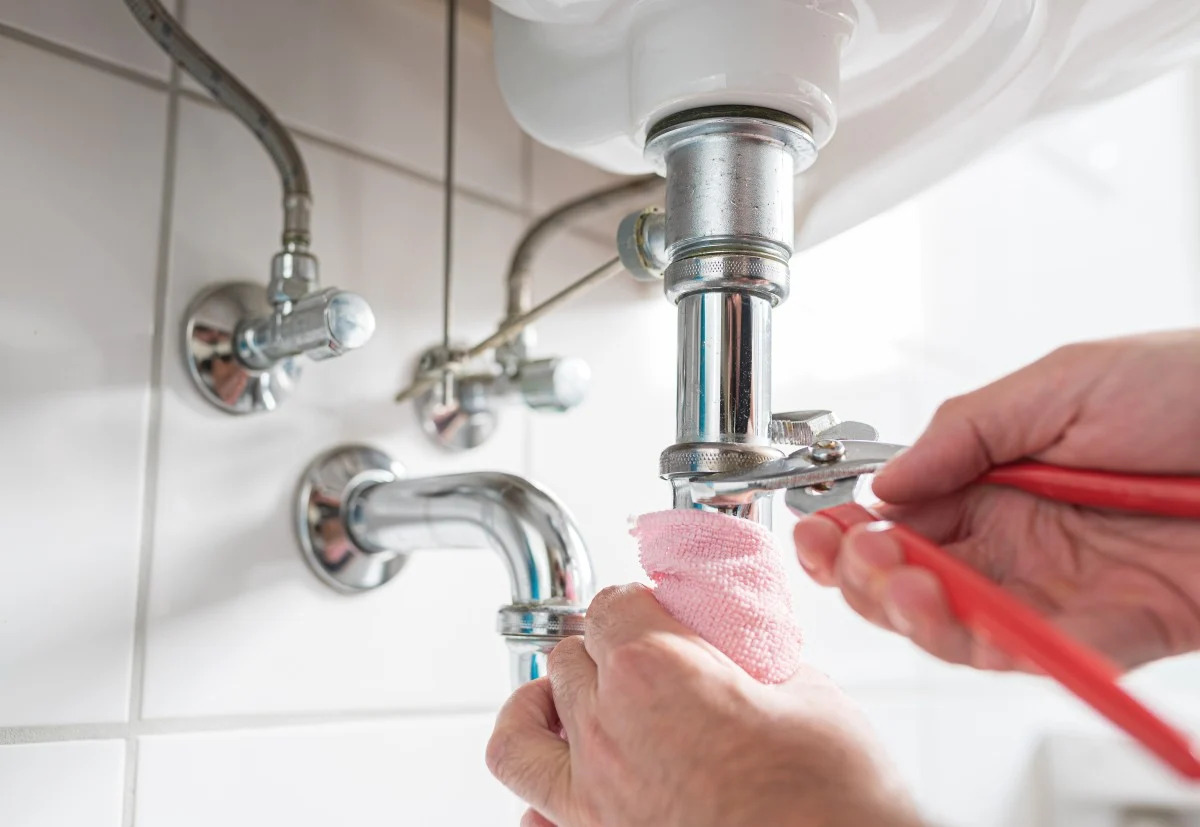
Step 6: Connect the Drain Pipe
With the sink drain installed, it’s time to connect the drain pipe to complete the installation. Follow these steps to properly connect the drain pipe:
- Measure and cut the drain pipe: Measure the distance between the tailpiece of the sink drain and the main sewer line or garbage disposal. Use a hacksaw or pipe cutter to trim the drain pipe to the appropriate length. Take care to make clean, straight cuts.
- Attach the drain pipe to the tailpiece: Slide the slip nut and compression washer onto the end of the drain pipe. Insert the end of the drain pipe into the slip joint on the tailpiece. Push it in as far as it will go, making sure it’s snug and secure.
- Tighten the slip nut: Position the slip nut over the joint between the drain pipe and the tailpiece. Hand-tighten the slip nut by turning it clockwise. Use pliers to give it an additional half-turn to ensure a tight connection. Avoid over-tightening, as it can cause damage or leaks.
- Connect the other end of the drain pipe: If you have a garbage disposal, you’ll need to connect the other end of the drain pipe to it. Follow the manufacturer’s instructions for your specific garbage disposal model, as the connection method may vary.
- Ensure proper alignment: Check that all the connections are properly aligned. The drain pipe should be straight and securely attached to the tailpiece and garbage disposal. Make any necessary adjustments to ensure a proper fit.
By following these steps, you’ll successfully connect the drain pipe and complete the installation of your kitchen sink drain. This will allow water to flow smoothly from the sink to the main sewer line or garbage disposal without any leaks or issues.
Step 7: Test and Ensure Proper Functioning
After connecting the drain pipe, it’s important to test the newly installed kitchen sink drain and ensure that it is functioning properly. By following these steps, you can verify that everything is working as intended:
- Turn on the water supply: Locate the shut-off valves under the sink and turn on the water supply. Check for any leaks around the connections. If you spot any leaks, tighten the affected connections until the leaks stop.
- Check for proper drainage: Fill the sink with water and then release the stopper or drain plug. Observe the water flow and make sure it is draining smoothly and efficiently. If the water drains slowly, there may be a blockage in the drain pipe that needs to be addressed.
- Inspect for leaks: After the water has completely drained, inspect the area around the sink drain and connections for any signs of leakage. If you notice any leaks, tighten the affected connections or replace faulty components as necessary.
- Perform additional tests: If you have a garbage disposal, turn it on and run some water to ensure the disposal is working properly. Listen for any unusual noises or vibrations and inspect for any leaks.
- Repeat the process: If you identify any issues during the testing phase, repeat the necessary steps to address the problem. This may involve resealing connections, adjusting pipe alignment, or replacing faulty components.
By thoroughly testing the kitchen sink drain, you can identify and resolve any potential issues before they become a bigger problem. Ensuring proper functioning will improve the efficiency and reliability of your kitchen sink.
Step 8: Final Touches and Cleanup
Now that you have tested and ensured the proper functioning of your kitchen sink drain, it’s time to add the final touches and clean up the area. Here are the last steps to complete the installation:
- Tighten all connections: Take a moment to double-check all the connections and tighten them if needed. This includes the slip nuts, compression washers, and any other fittings. Ensure that everything is securely in place.
- Trim excess pipe length: If you have any excess length of the drain pipe sticking out, use a hacksaw or pipe cutter to trim it accordingly. Make sure to create clean and straight cuts.
- Clean up any debris: Remove any tools, materials, or debris from the workspace. Use a damp cloth or sponge to wipe down the surrounding area, leaving it clean and free of any residue.
- Dispose of old materials: Properly dispose of the old sink drain, packaging materials, and any other waste generated during the installation process. Follow your local waste disposal guidelines.
- Inspect the area: Once everything is clean and tidy, give the area one final inspection. Check for any visible leaks, ensure that all connections are secure, and confirm that the sink drain is functioning as expected.
By completing these final touches and cleaning up, you’ll have successfully installed and finished the kitchen sink drain installation. Your sink will be ready for use, and you can enjoy the convenience and functionality of a properly functioning drain.
Conclusion
Installing a kitchen sink drain may seem like a challenging task, but with the right tools, materials, and step-by-step guidance, it can be accomplished by anyone. By following the steps outlined in this article, you can successfully install a new kitchen sink drain and enjoy the benefits of a properly functioning sink.
From gathering the necessary tools and preparing your workspace to removing the old sink drain, cleaning the area, and installing the new drain, each step plays a crucial role in ensuring a successful installation. Additionally, testing the drain and checking for leaks are essential steps to guarantee proper functioning and reliability.
Through the process, remember to exercise caution and be mindful of the connections, alignments, and tightening of fittings. Taking the time to clean up the workspace and properly dispose of old materials will leave you with a clean and organized area to enjoy your new sink.
Always refer to the specific instructions provided with your sink drain kit, as different models and manufacturers may have slight variations in the installation process. If you encounter any difficulties or have concerns about the installation, it is advisable to consult a professional plumber.
By following these steps and paying attention to the details, you’ll have a properly installed kitchen sink drain that enhances the functionality and aesthetic appeal of your kitchen. So, roll up your sleeves, gather your tools, and embark on this DIY project to enjoy the satisfaction of a job well done.
Frequently Asked Questions about How To Install A Kitchen Sink Drain
Was this page helpful?
At Storables.com, we guarantee accurate and reliable information. Our content, validated by Expert Board Contributors, is crafted following stringent Editorial Policies. We're committed to providing you with well-researched, expert-backed insights for all your informational needs.


0 thoughts on “How To Install A Kitchen Sink Drain”