Articles
How To Make Water Pump Without Electricity
Modified: May 6, 2024
Learn how to make a water pump without electricity in this informative article. Find step-by-step instructions and innovative ideas to harness natural power sources for pumping water.
(Many of the links in this article redirect to a specific reviewed product. Your purchase of these products through affiliate links helps to generate commission for Storables.com, at no extra cost. Learn more)
Introduction
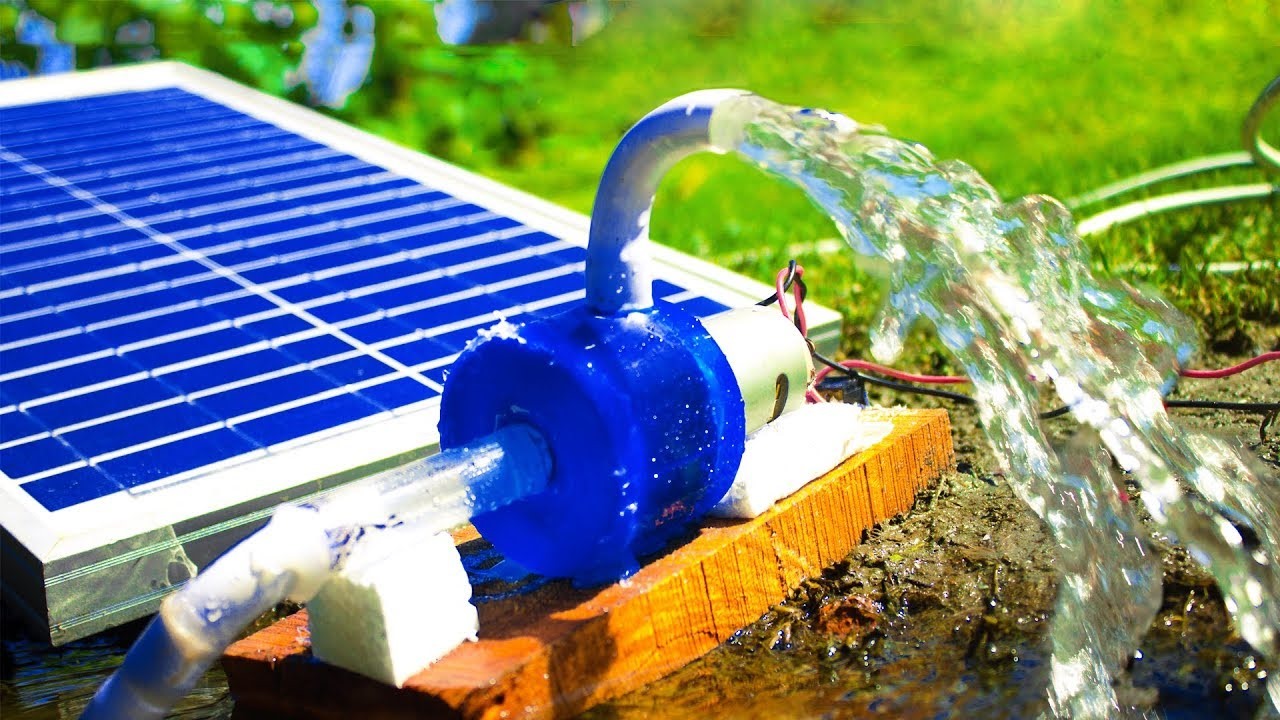
Welcome to the world of DIY projects! In this article, we will guide you through the process of making a water pump without electricity. Whether you find yourself in a remote area with limited access to modern amenities or simply want to explore alternative methods of pumping water, this DIY project is perfect for you. By utilizing a few simple materials and following some basic steps, you can create your very own water pump that operates solely on human power.
Water is an essential resource that we rely on every day for drinking, agriculture, and household needs. Unfortunately, many people around the world still lack access to clean and reliable water sources. This DIY water pump provides a sustainable solution, allowing individuals to pump water from wells, rivers, or other sources without the need for electricity.
Not only is this project practical, but it also offers a great learning experience. You will gain a better understanding of how water pumps work and the mechanics behind them. Additionally, you will have the satisfaction of knowing that you can rely on your own ingenuity and resourcefulness to solve problems and meet basic needs.
Before we dive into the project, let’s take a look at the materials you will need.
Key Takeaways:
- Create a sustainable water pumping solution with a DIY water pump that operates without electricity. Gain practical skills and a deeper understanding of water mechanics while promoting self-sufficiency and resourcefulness.
- By harnessing human ingenuity, you can build a reliable water pump using simple materials. Enjoy the benefits of a cost-effective, eco-friendly tool for various applications, from gardening to accessing water in remote areas.
Read more: How To Make Water Pump Quieter
Materials Needed
Before you get started, gather the following materials:
- PVC pipe: You will need a length of PVC pipe to serve as the main body of the water pump. The size of the pipe will depend on your specific needs and the volume of water you want to pump.
- Valve: A valve is necessary to control the flow of water in your pump. You will need a valve that fits the size of your PVC pipe.
- Cylinder or piston: This component is responsible for creating the suction and pressure needed to pump the water. It can be made from PVC or any other suitable material.
- Handles: You will need handles that can be attached to the pump mechanism for easy operation.
- Sealant: To ensure a watertight connection between the different components of the pump, you will need a sealant such as PVC glue or silicone adhesive.
- Teflon tape: This tape will help create a tight seal between threaded connections, preventing any water leaks.
- Tubing or hose: Depending on the source of water you will be pumping from, you may need tubing or a hose to connect to the suction pipe of the pump.
- Support base: You will need a sturdy base to support the water pump. This can be made from wood, metal, or any other suitable material.
Make sure to have all the materials on hand before you begin the project. This will ensure a smooth and uninterrupted workflow.
Now that you have gathered all the necessary materials, let’s move on to the step-by-step process of building the water pump.
Step 1: Gather the necessary equipment
Before you start assembling the water pump, it’s important to have all the required equipment and tools readily available. This will help streamline the construction process and ensure that you have everything you need at hand.
Here’s a list of the equipment you’ll need:
- PVC pipe cutter: This tool will be essential for cutting the PVC pipe to the desired lengths. Make sure you have a high-quality PVC pipe cutter that is suitable for the size of the pipe you are using.
- Measuring tape: Accurate measurements are crucial when assembling the water pump. Have a measuring tape or ruler on hand to ensure precise cuts and fittings.
- Sandpaper: Smooth out the edges of the PVC pipe and other components using sandpaper. This will help create a snug fit and prevent any leaks.
- Marker or pencil: Use a marker or pencil to mark the measurements and cutting points on the PVC pipe. This will ensure accurate and clean cuts.
- Screwdriver: Depending on the type of screws or fasteners you are using, have a screwdriver or appropriate tool available to tighten them securely.
- Wrench or pliers: A wrench or pliers may be needed to tighten any threaded connections or fittings. This will ensure a secure and leak-free assembly.
- Safety equipment: It’s always important to prioritize safety during any DIY project. Wear safety goggles, gloves, and a dust mask when cutting and sanding the PVC pipe to protect yourself from any potential hazards.
Having all the necessary equipment within easy reach will save you time and minimize any potential disruptions during the construction process. Take a moment to gather these items before moving on to the next step.
Step 2: Prepare the base for the water pump
The base of the water pump serves as its foundation and support. It is important to have a sturdy and stable base to ensure the pump functions properly and safely. Follow these steps to prepare the base:
- Select a suitable material: Choose a material for the base that is durable, weather-resistant, and able to bear the weight of the water pump. Common options include wood, metal, or concrete. Ensure the material is thick enough to provide stability.
- Determine the size and shape: Measure the dimensions of the water pump and determine the size and shape of the base accordingly. It should be wide enough to accommodate the pump mechanism and offer sufficient stability.
- Cut or shape the base: Use a saw or appropriate tools to cut the base material to the desired size and shape. Smooth out any rough edges or surfaces using sandpaper.
- Create holes or slots: Depending on the design of your water pump, you may need to drill holes or cut slots in the base. These will be used to attach the pump mechanism securely.
- Paint or finish the base (optional): If desired, you can paint or finish the base material to protect it from the elements or enhance its appearance. Choose a paint or finish that is suitable for the chosen base material.
Once you have prepared the base, ensure it is placed on a level surface. This will help maintain the stability and functionality of the water pump.
In the next step, we will move on to assembling the pump mechanism itself.
Step 3: Assemble the pump mechanism
Now that you have prepared the base, it’s time to assemble the pump mechanism. This is the heart of the water pump, responsible for creating the necessary suction and pressure to draw and push the water. Follow these steps to assemble the pump mechanism:
- Take your PVC pipe and cut it to the desired length for the main body of the pump. This will depend on your specific needs and the volume of water you want to pump.
- Attach the valve to one end of the PVC pipe. Make sure it is tightly secured to prevent any water leakage. The valve will control the flow of water through the pump.
- Create a piston or cylinder using another section of PVC pipe. This component will create the suction and pressure needed for pumping. The size of the piston should match the size of the main body of the pump.
- Apply sealant, such as PVC glue or silicone adhesive, to secure the piston in place within the PVC pipe. This will prevent any water from leaking through the connection.
- Allow the sealant to dry completely according to the instructions provided.
- Attach handles to the pump mechanism. These handles will provide leverage and make it easier to operate the water pump.
- Double-check all the connections and ensure they are secure. Tighten any threaded fittings using a wrench or pliers if necessary.
With the pump mechanism assembled, you are now ready to move on to the next step – creating the suction pipe.
You can make a simple water pump without electricity using a hand pump or a manual lever pump. These can be easily constructed using basic materials such as PVC pipes, valves, and a pump handle.
Read more: How To Make A Homemade Water Pump
Step 4: Create the suction pipe
The suction pipe is a crucial component of the water pump, as it allows water to be drawn into the pump mechanism. Follow these steps to create the suction pipe:
- Measure the distance from the water source to the pump mechanism. This will determine the length of the suction pipe.
- Choose a suitable material for the suction pipe. It can be PVC, flexible tubing, or any other durable and waterproof material.
- Cut the suction pipe to the desired length using a PVC cutter or appropriate tools.
- If using PVC pipe, sand down any rough edges to create a smooth surface.
- Attach one end of the suction pipe to the valve on the main body of the pump. Ensure a secure and watertight connection using sealant or Teflon tape.
- Position the other end of the suction pipe in the water source, such as a well or reservoir. Make sure it is fully submerged to allow for efficient water intake.
- Secure the suction pipe in place, if needed, using clamps, straps, or other appropriate fasteners.
Creating a proper suction pipe is essential for the efficient operation of the water pump. Take your time to ensure a secure and watertight connection between the suction pipe and the pump mechanism.
Next, we will move on to connecting the handles, which will make operating the water pump easier.
Step 5: Connect the handles
Attaching handles to the water pump mechanism will provide leverage and make it easier to operate. Follow these steps to connect the handles:
- Choose handles that are comfortable to grip and sturdy enough to withstand repeated use.
- Position the handles on the sides of the pump mechanism, ensuring they are evenly spaced and symmetrical.
- Mark the locations where the handles will be attached using a marker or pencil.
- Drill holes or create slots at the marked locations, depending on the type of handles you are using.
- Insert the handles into the holes or slots and secure them using screws, nuts, or bolts.
- Tighten the screws, nuts, or bolts securely to ensure the handles are firmly attached to the pump mechanism.
- Test the handles by operating the pump mechanism. Ensure they provide a comfortable grip and allow for smooth movement.
- If needed, make additional adjustments to the handle placement or attachment to optimize the pump’s ergonomics.
Connecting handles to your water pump will greatly enhance its usability and make it more efficient to operate. Ensure they are securely attached for a reliable pumping experience.
With the handles connected, we are almost ready to test the water pump. In the next step, we will conduct a final check and perform a test run to ensure everything is working correctly.
Step 6: Test the water pump
Now that you have assembled the water pump, it’s time to test its functionality and ensure it is working properly. Follow these steps to test the water pump:
- Position the pump on a stable surface, ensuring that it is level and secure.
- Fill the suction pipe with water. You can do this by pouring water into the pipe or submerging it in the water source.
- Using the handles, start moving the pump mechanism up and down in a steady and rhythmic manner.
- Observe the flow of water through the pump. You should see water being drawn into the pump through the suction pipe and being expelled through the valve.
- Check for any leaks or irregularities in the pump’s operation. If you notice any leaks, tighten the connections or reapply sealant as needed.
- Continue operating the pump for a few minutes to ensure its consistency and reliability.
- Once you are satisfied with the pump’s performance, you can proceed to use it for your desired application.
Testing the water pump is crucial to ensure its efficiency and functionality. By carefully following these steps and conducting a thorough test, you can have confidence in the reliability of your DIY water pump.
Congratulations! You have successfully made a water pump without the need for electricity. This project showcases the power of human ingenuity and resourcefulness in solving everyday problems.
Remember to regularly maintain and clean your water pump to keep it in optimal working condition. With proper care, your DIY water pump can provide a reliable and sustainable water pumping solution for years to come.
Now go ahead and enjoy the benefits of your homemade water pump! Whether it’s for watering your garden, irrigating crops, or accessing water in remote areas, your DIY water pump will prove to be a valuable and eco-friendly tool.
Happy pumping!
Conclusion
Congratulations on completing your DIY water pump without the need for electricity! This project has empowered you to create a sustainable solution for pumping water, whether you are in a remote location or simply want to explore alternative methods.
Throughout this project, you have learned about the importance of water and the challenges many people face in accessing clean and reliable water sources. By creating your own water pump, you have not only gained a practical tool but also developed a deeper understanding of the mechanics behind pumping water.
By utilizing a few simple materials and following the step-by-step process, you have successfully assembled a pump mechanism, created a suction pipe, and connected handles for easy operation. The thorough testing ensured that your water pump is functioning efficiently and reliably.
Remember to regularly maintain and clean your water pump to keep it in optimal working condition over time. This will ensure its longevity and continued effectiveness in pumping water.
By taking on DIY projects like this, you contribute to a more sustainable lifestyle and reduce reliance on traditional methods that may consume electricity or rely on fossil fuels. You have harnessed the power of human ingenuity and resourcefulness, proving that with a little creativity, we can find innovative solutions to everyday challenges.
Now that you have your DIY water pump, you can use it for a variety of applications, such as watering your garden, irrigating crops, or accessing water in remote areas. Not only will this pump save you money on electricity costs, but it will also provide you with a sense of self-sufficiency and pride in your own handiwork.
Thank you for joining us on this DIY journey. We hope this project has inspired you to explore other innovative and sustainable solutions to fulfill your everyday needs.
Happy pumping!
Now that you've mastered building your own water pump without electricity, you might be curious about other manual solutions. Dive into our guide on the latest manual water pumps set to impress in 2024. These innovative designs offer practical solutions for every gardener and home enthusiast looking to minimize their carbon footprint while maintaining efficiency in water management. Don’t miss out on these essential tools that are both eco-friendly and highly effective!
Frequently Asked Questions about How To Make Water Pump Without Electricity
Was this page helpful?
At Storables.com, we guarantee accurate and reliable information. Our content, validated by Expert Board Contributors, is crafted following stringent Editorial Policies. We're committed to providing you with well-researched, expert-backed insights for all your informational needs.


0 thoughts on “How To Make Water Pump Without Electricity”