
Articles
How To Square Up A Quilt Before Binding
Modified: October 18, 2024
Learn the step-by-step process to square up a quilt before binding with our informative articles. Perfect your quilting skills and achieve professional-looking results.
(Many of the links in this article redirect to a specific reviewed product. Your purchase of these products through affiliate links helps to generate commission for Storables.com, at no extra cost. Learn more)
Introduction
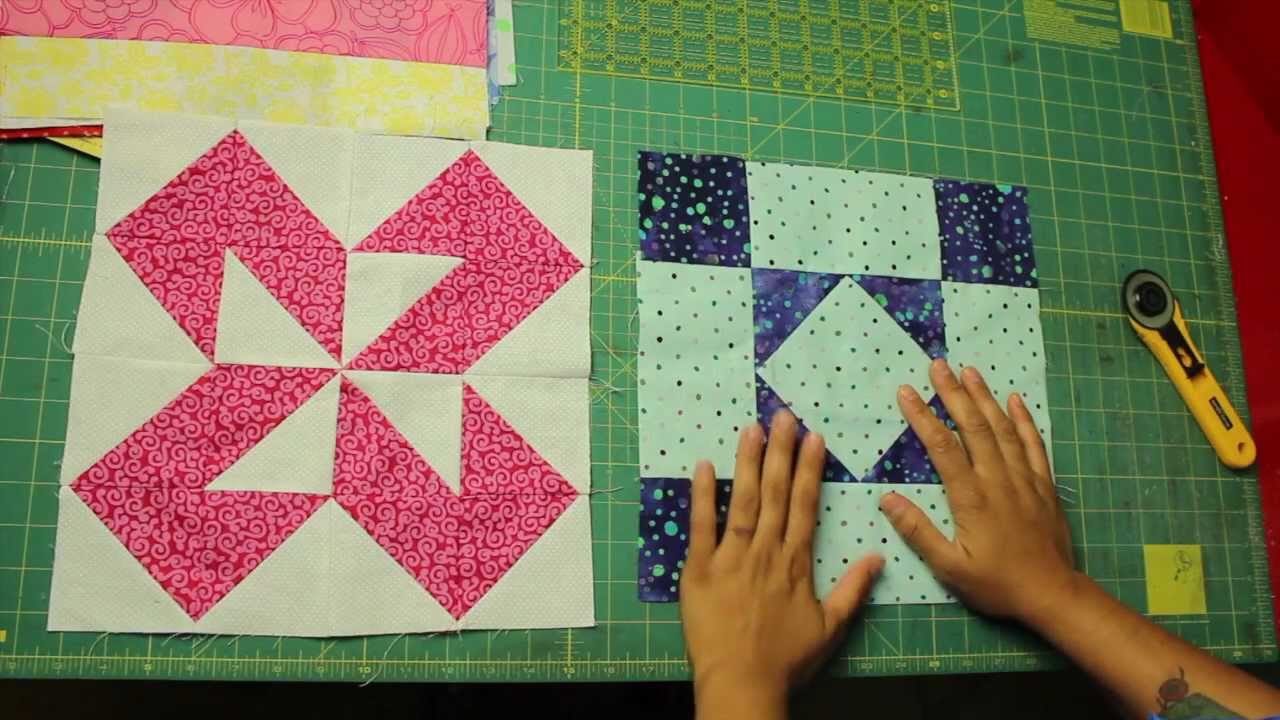
Welcome to the world of quilting, where fabric and creativity come together! Quilting is a beloved craft that involves stitching together layers of fabric to create beautiful and functional works of art. Whether you are a beginner or experienced quilter, one important step in the quilting process is squaring up the quilt before binding.
“Squaring up” refers to the process of ensuring that all sides of the quilt are straight and the corners are at right angles. This step is crucial not only for the aesthetics of the quilt but also for its functionality. A properly squared quilt will lie flat, hang straight, and have a professional-looking finish.
In this article, we will guide you through the steps of squaring up a quilt before binding, providing you with the knowledge and techniques to achieve professional results. Before we dive into the details, let’s explore why it is important to square up a quilt.
Key Takeaways:
- Squaring up a quilt before binding is crucial for achieving a professional-looking finish, ensuring straight edges, square corners, and balanced proportions. It enhances the quilt’s aesthetics, fit, and functionality.
- The process of squaring up a quilt involves meticulous measuring, marking, and trimming, along with careful attention to detail and precision. Proper tools, patience, and practice are key to achieving a beautifully squared quilt.
Read more: How To Join Ends Of Quilt Binding
Why Is It Important to Square Up a Quilt Before Binding?
Squaring up a quilt before binding is a critical step in the quilting process. While it may seem like an extra step that can be skipped, there are several important reasons why it should not be overlooked:
- Aesthetics: A quilt with uneven edges and crooked corners can look unprofessional and sloppy. By squaring up the quilt, you ensure that all sides are straight and the corners are at right angles, giving your quilt a neat and polished appearance.
- Proper fit: Squaring up a quilt ensures that it is the correct size and dimensions. If your quilt is not squared up, it may not fit properly into a quilt frame, quilt stand, or any other intended display or use. It is essential to have a square and even quilt to achieve the desired fit and functionality.
- Easy binding: Square edges make the binding process much easier and more manageable. When the quilt is squared up, it is much simpler to align and attach the binding strips evenly. This results in a cleaner and more professional finish.
- Flat and even quilting: Squaring up a quilt before binding ensures that the layers of fabric are properly aligned and tensioned. This is especially important if you have quilted your quilt using a longarm machine or a quilting frame. A squared quilt allows for even distribution of the quilting stitches, preventing puckering or bunching of fabric.
- Pattern alignment: A squared-up quilt helps maintain the integrity and alignment of any design or pattern that you have meticulously pieced together. It ensures that the pattern elements flow smoothly across the quilt top without being distorted or skewed due to uneven edges.
Overall, squaring up a quilt before binding is crucial for achieving a professional-looking quilt with straight edges, neatly mitered corners, and even tension throughout. It enhances the overall appearance, fit, and functionality of the quilt, making it a worthwhile step in your quilting journey.
Tools and Materials Needed
Before you start squaring up your quilt, gather the following tools and materials:
- Quilt: The quilt that you want to square up. It should be complete, with the quilt top, batting, and backing all properly layered and basted together.
- Ruler: A large square quilting ruler or a long ruler with a right angle. This will be used for measuring and marking the quilt edges.
- Cutting Mat: A self-healing cutting mat that is large enough to accommodate your quilt. This will protect your work surface and provide a stable cutting surface.
- Rotary Cutter: A rotary cutter with a sharp blade. This tool makes cutting through multiple layers of fabric easier and more precise.
- Cutting Ruler: A long ruler that is at least as wide as your desired quilt size. This will be used to guide your rotary cutter when trimming excess fabric.
- Pins or Clips: Pins or clips to hold the layers of the quilt together and prevent shifting while you are measuring, marking, and cutting.
- Iron: An iron and ironing board to press the quilt top after trimming. This will help to remove any wrinkles and ensure a crisp and flat quilt top.
- Optional: A sewing machine, matching thread, and a walking foot or quilting foot for attaching the binding.
Having these tools and materials readily available will make the squaring up process much smoother and more efficient. It is important to use high-quality tools that are in good condition to achieve accurate and precise results.
In the next section, we will guide you through the step-by-step process of squaring up your quilt before binding, so gather your tools and let’s get started!
Step-by-Step Guide
Now that you have your quilt and tools prepared, let’s walk through the step-by-step process of squaring up your quilt before binding:
- Prepare your work area: Clear a large, flat surface for your work area. Ensure that it is clean and free of any debris or objects that could interfere with the quilting process.
- Lay the quilt flat: Gently spread out your quilt on the work surface, making sure it is smooth and free of any wrinkles or folds. Smooth out any bumps or lumps that may have formed during the quilting process.
- Measure and mark the desired size: Using your ruler, measure and mark the desired width and length of your quilt. Take into consideration any pattern or design elements that you want to maintain by positioning your ruler accordingly.
- Trim excess fabric: With your ruler as a guide, use a rotary cutter to trim away the excess fabric along the marked lines. Take care to cut smoothly and evenly, ensuring that your cuts are straight and perpendicular to the quilt edges.
- Check for squareness: After trimming, take a minute to check that all corners are at right angles and all sides are straight. You can use your ruler or a square quilting ruler to check for squareness. Make any necessary adjustments by trimming additional fabric if needed.
- Repeat the process for all sides: Move around the quilt, repeating steps 3 to 5 for each side, until all sides are squared up. Double-check the squareness after each trimming to ensure that the quilt remains balanced and even.
- Press the quilt top: Once the quilt is squared up, use an iron to press the quilt top. Set the iron to the appropriate setting for your fabric and gently press the quilt top to remove any wrinkles or creases caused by the trimming process.
Following these steps will result in a quilt that is squared up and ready for binding. Remember to work carefully and take your time to ensure accuracy. It is better to make small adjustments along the way rather than rushing through the process and ending up with a quilt that is not properly squared.
In the next section, we will provide some additional tips and tricks to help you achieve the best results when squaring up your quilt.
Prepare Your Work Area
Before you begin the process of squaring up your quilt, it’s important to prepare your work area properly. By setting up a clean and organized space, you can ensure that you have everything you need within reach and minimize any potential distractions or accidents. Here’s how to prepare your work area:
- Clean and clear the space: Start by clearing a large, flat surface to work on. Remove any clutter, objects, or debris from the area to create a clean and unobstructed workspace. This will give you ample room to lay out your quilt and maneuver around it comfortably.
- Protect your work surface: Place a self-healing cutting mat or a protective surface on your work area. This not only provides a stable and durable surface for you to cut and trim your quilt but also protects your table or countertop from any accidental cuts or scratches.
- Keep your tools handy: Gather all the tools and materials you need for squaring up your quilt and have them within easy reach. This includes your ruler, rotary cutter, pins or clips, and any other tools you may need. Having everything organized and nearby will save you time and keep you focused on the task at hand.
- Good lighting: Ensure that your work area is well-lit. Good lighting is essential for accurately measuring, marking, and cutting your quilt. Natural light or a bright overhead light is ideal, but if necessary, you can use a desk lamp with a daylight bulb to enhance visibility.
- Maintain a comfortable working posture: Consider your physical comfort while working on your quilt. Make sure your work surface is at a height that allows you to stand or sit comfortably. Avoid hunching over or straining your back, as this can lead to discomfort or fatigue during the process.
By taking the time to prepare your work area properly, you can set yourself up for success when squaring up your quilt. A clean and organized space allows you to focus on the task and ensures that you have everything you need within reach. So, clear your space, gather your tools, and get ready to square up your quilt!
Read more: How To Make Binding On Quilt
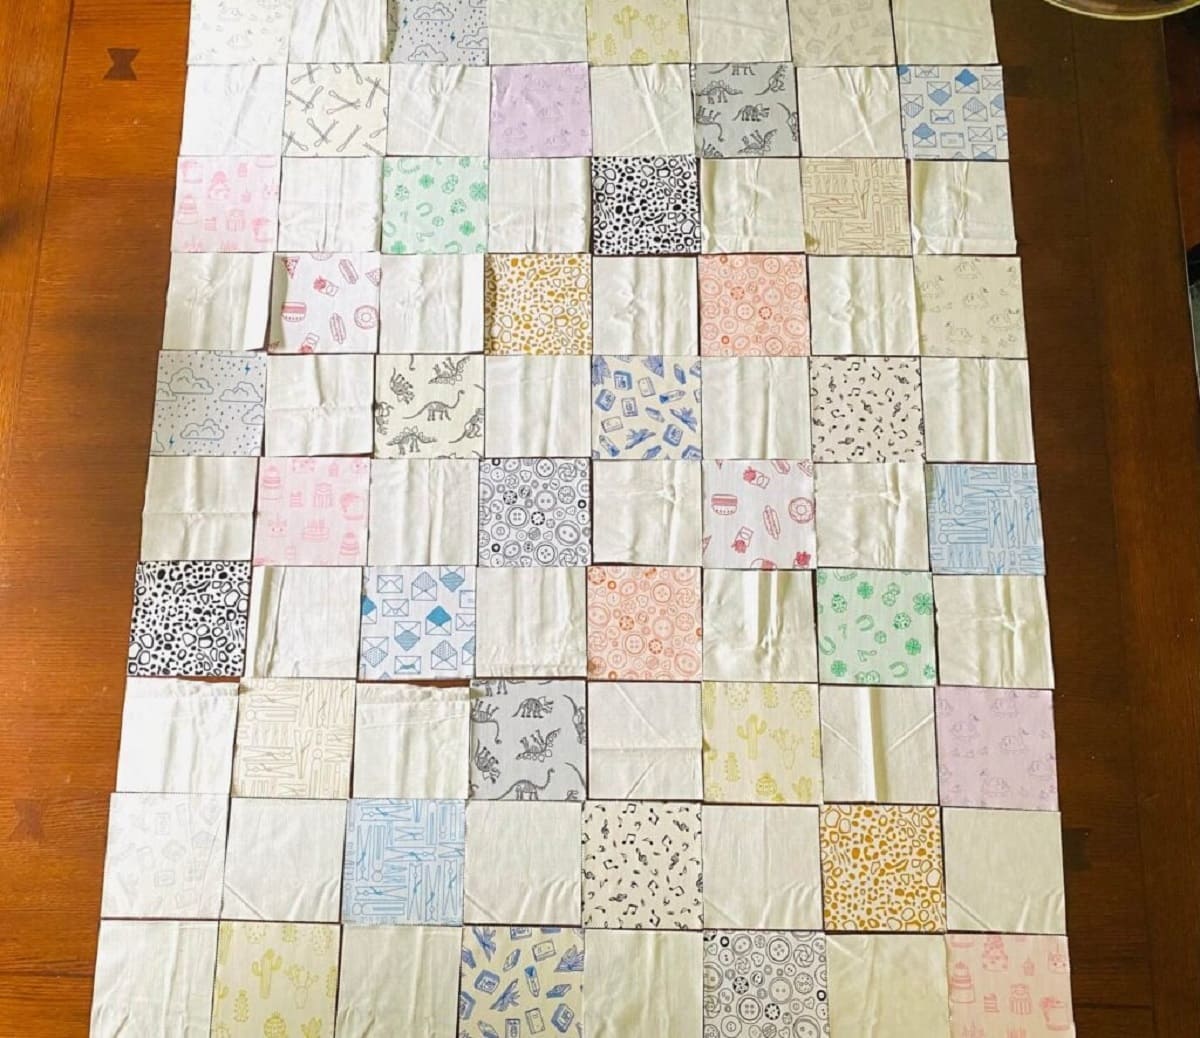
Lay the Quilt Flat
Once you have prepared your work area, it’s time to lay your quilt flat. This step is crucial for ensuring that your quilt is smooth and free from any wrinkles or folds that may interfere with the squaring up process. Follow these steps to lay your quilt flat:
- Clean surface: Make sure your work surface is clean and free from any dust, lint, or debris that could transfer onto your quilt. Wipe down the surface with a clean cloth if necessary.
- Unfold the quilt: Gently unfold your quilt and spread it out flat on your work surface. Smooth it out with your hands, starting from the center and working your way towards the edges, to remove any wrinkles or creases that may have formed during storage or handling.
- Secure the quilt: Use pins or clips to secure the quilt layers together and prevent shifting or movement. Place these pins or clips along the edges of the quilt, about 4-6 inches apart, making sure to keep them away from the areas you will be trimming later.
- Smooth out any bumps: Check for any bumps or lumps in the quilt top caused by the batting or backing. Gently smooth out these areas with your hands or a straight-edge ruler to distribute the layers evenly and create a flat surface.
- Ensure even tension: Take a moment to make sure that all layers of the quilt – the quilt top, batting, and backing – are evenly tensioned and lie flat. Adjust the layers as needed to eliminate any wrinkles or puckers that may have formed.
By laying your quilt flat at the beginning of the squaring up process, you are setting a solid foundation for accurate measuring and trimming. It allows you to work with a smooth and even surface, making it easier to achieve precise cuts and maintain the integrity of your quilt design. So take your time to lay your quilt flat properly before moving on to the next steps.
Measure and Mark the Desired Size
With your quilt laid flat and secure, it’s time to measure and mark the desired size for your squared quilt. This step ensures that you have a clear guideline for trimming away the excess fabric and achieving the desired dimensions. Follow these steps to measure and mark the desired size:
- Select your measuring tool: Choose a large square quilting ruler or a long ruler with a right angle. Ensure that the ruler is long enough to span the width and length of your quilt without any limitations.
- Decide on the size: Determine the desired width and length of your finished quilt. Take into consideration any borders or binding that you plan to add later. Measure and mark these dimensions on your ruler, either with a fabric marker or by placing small pieces of tape at the appropriate spots.
- Position the ruler: Place the ruler on your quilt, aligning it with one of the edges. Ensure that the ruler is square with the sides of the quilt, using the right angle of the ruler as a guide.
- Mark the quilt: Using a fabric marker or a removable chalk pen, mark the quilt along the edge of the ruler. Make small marks at regular intervals, or draw a continuous line, depending on your personal preference and the visibility of the marking tool.
- Repeat for other sides: Move the ruler to the next side of the quilt and repeat the marking process, aligning the ruler with the previously marked line to ensure accuracy and squareness.
- Double-check the measurements: Once you have marked all sides, double-check the measurements to ensure they are consistent and match the desired size. This step helps to avoid any discrepancies or mistakes that may arise during the trimming process.
Measuring and marking the desired size of your quilt provides a clear guideline for trimming away the excess fabric. It ensures that you have a consistent and balanced quilt with straight edges and properly squared corners. Take your time during this step to ensure accuracy, as accurate measurements form the foundation for a well-squared quilt.
Trim Excess Fabric
Now that you have measured and marked the desired size of your quilt, it’s time to trim away the excess fabric. This step is essential for achieving straight edges and a properly squared quilt. Follow these steps to trim the excess fabric:
- Prepare your cutting tools: Ensure that your rotary cutter has a sharp blade for clean and precise cuts. Also, make sure your cutting ruler is securely in place and aligned with the marked lines on your quilt.
- Start with a straight edge: Choose one of the sides of your quilt to begin trimming. Align the ruler along the marked line, ensuring that it is straight and square with the sides of the quilt.
- Trim the excess fabric: With your rotary cutter, carefully cut along the edge of the ruler, moving steadily and applying even pressure. Use smooth, continuous motion and avoid starting and stopping too frequently, as this can lead to jagged edges.
- Continue trimming: Move around the quilt, aligning the ruler with the marked lines on each side, and trim away the excess fabric. Take your time and work methodically, ensuring that all cuts are straight and parallel to the quilt edges.
- Check for balance: After trimming each side, step back and visually inspect the quilt for balance. Check that the remaining edges are straight and evenly aligned with each other. Make any necessary adjustments by trimming additional fabric if needed.
- Remove stray threads: As you trim, you may notice stray threads or loose fibers. Use a lint roller or tape to gently remove these from the fabric, ensuring a clean and professional finish.
Trimming the excess fabric is a critical step in squaring up your quilt. It removes any uneven or unnecessary fabric, ensuring that your quilt has straight edges and properly squared corners. Take your time during this process and use a steady hand to achieve precise and clean cuts. Remember that it’s better to trim conservatively and make small adjustments along the way if needed.
Once you have completed trimming the excess fabric, you’re well on your way to achieving a squared-up quilt ready for binding!
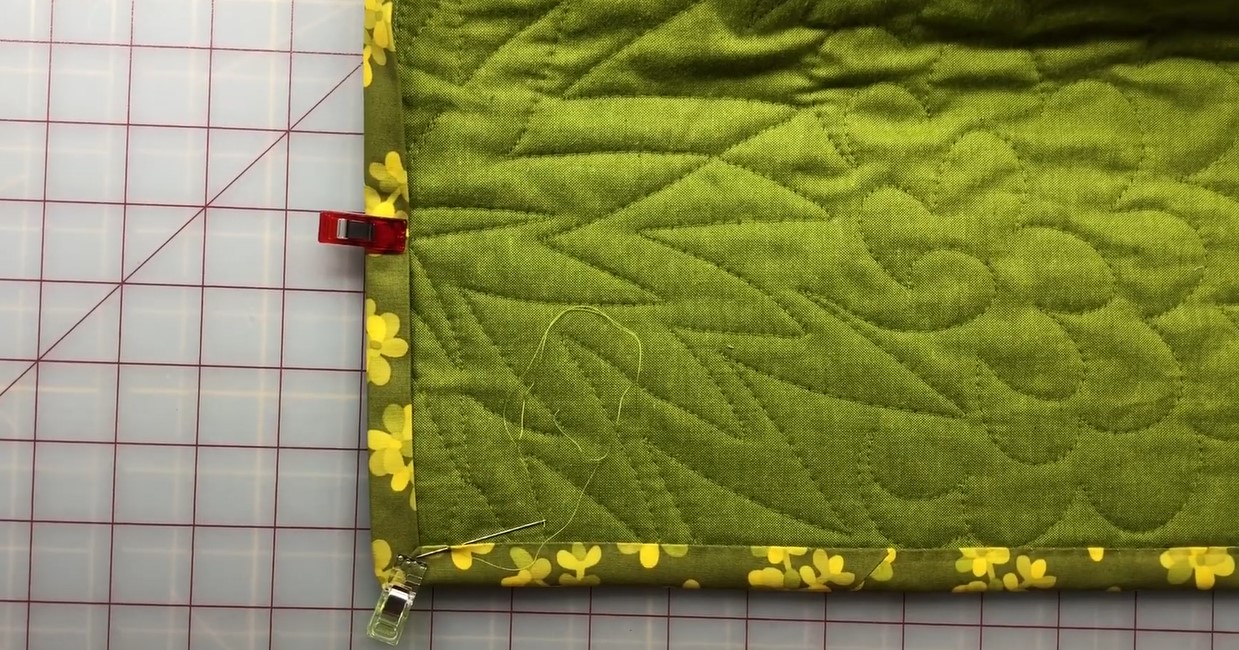
After quilting, measure the top, bottom, and middle of the quilt. Cut the binding strips to match the longest measurement. Pin and sew the binding on, easing in any excess fabric to ensure a square finish.
Check for Squareness
After trimming the excess fabric, it’s important to check for squareness to ensure that all corners are at right angles and all sides are straight. This step helps to create a well-balanced and visually appealing quilt. Follow these steps to check for squareness:
- Lay the quilt flat: Lay your trimmed quilt flat on your work surface, smoothing out any wrinkles or lumps. Ensure that the quilt is spread out evenly and the layers are aligned.
- Use a square quilting ruler: Place a square quilting ruler or a right-angle tool on one corner of the quilt, aligning it with the trimmed edges. Check that the ruler is straight along both sides, forming a right angle with the corner.
- Inspect the alignment: Look closely at the ruler and the quilt edges to check if they are aligned perfectly. Ensure that there are no gaps or overlaps between the ruler and the quilt. If the edges are aligned, it indicates that the corner is at right angles and the side is straight.
- Adjust if necessary: If you find any discrepancies in the alignment, it’s important to make adjustments. Use your ruler and rotary cutter to trim additional fabric as needed to achieve a proper right angle and straight edge.
- Repeat for all corners: Move the ruler to each corner of the quilt and repeat the alignment and inspection process. Check for squareness on all sides and corners to ensure overall balance and symmetry.
Checking for squareness is a critical step in achieving a well-squared quilt. It ensures that your quilt has straight edges and corners that are at right angles, resulting in a visually pleasing and professional-looking finished product. Take your time during this step and make any necessary adjustments to maintain squareness throughout the quilt.
By following these steps, you can ensure that your quilt is properly squared up and ready for the next stage of the quilting process – binding!
Read more: How Wide To Cut Binding For A Quilt
Repeat the Process for All Sides
Now that you have checked for squareness on one side of your quilt, it’s time to repeat the process for all remaining sides. By doing so, you ensure that your quilt is fully squared up and all sides are straight and balanced. Follow these steps to repeat the process for each side:
- Choose the next side: Start by selecting the next side of your quilt that you want to square up. It can be any side that is adjacent to the side you just squared.
- Align the ruler: Place your square quilting ruler or right-angle tool along the trimmed edge of the quilt, aligning it with the side you are working on. Make sure the ruler is straight and forms a right angle with the corner.
- Inspect for squareness: Carefully inspect the alignment between the ruler and the quilt edges. Check for any gaps or overlaps that may indicate an uneven or misaligned edge.
- Make adjustments if necessary: If you find any discrepancies in the alignment, use your ruler and rotary cutter to trim away any excess fabric. Align the ruler again and double-check for squareness.
- Repeat the process: Move around the quilt, repeating the alignment, inspection, and adjustment process for each side. Remember to take your time and ensure that each side is squared up before moving on to the next one.
By repeating the process for all sides of your quilt, you achieve a consistent and well-squared result. Checking for squareness on each side helps to maintain the balance and overall aesthetics of the quilt. Remember to be meticulous and make any necessary adjustments to ensure that all sides are aligned and squared.
Once you have completed the process for all sides, you can proceed to the next step of the quilting process with confidence, knowing that your quilt is properly squared up and ready for the final touches.
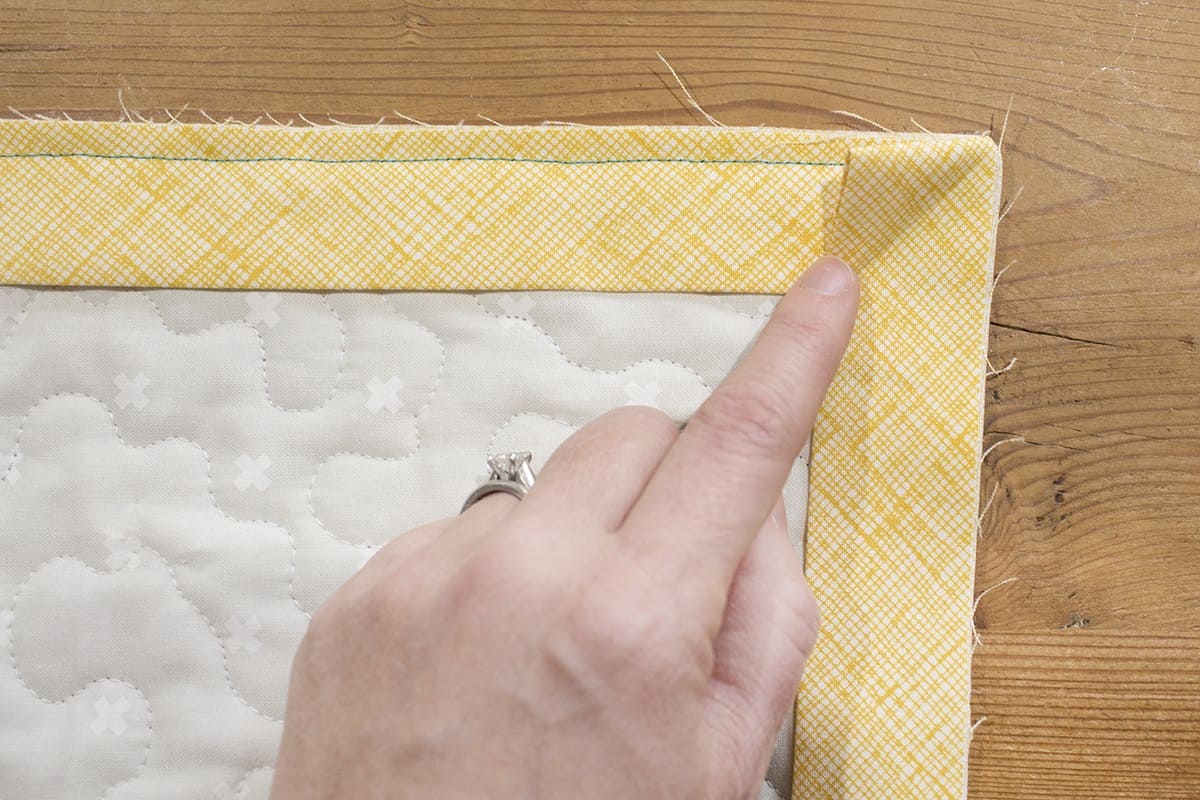
Press the Quilt Top
After squaring up your quilt, it’s important to give the quilt top a final press. Pressing the quilt top helps to remove any wrinkles, creases, or distortions that may have occurred during the trimming process. This step ensures that your quilt top is smooth and ready for the next stage of the quilting process, such as adding borders or attaching the binding. Follow these steps to press the quilt top:
- Prepare your iron and ironing board: Set up your ironing board in a clean and spacious area. Adjust the heat setting of your iron according to the fabric of your quilt top. Use a medium heat for most quilting cotton fabrics, but always refer to the fabric care instructions if you are unsure.
- Lay the quilt top on the ironing board: Carefully place your quilt top on the ironing board, ensuring it is spread out flat and free from any folds or wrinkles. Smooth out any uneven areas with your hands.
- Start ironing: Begin ironing your quilt top, starting from one corner and working your way across. Use a pressing motion rather than a sliding motion to avoid stretching the quilt top or distorting the seams. Press each section of the quilt top until it is smooth and wrinkle-free.
- Take care with seam allowances: Be cautious around the seam allowances to prevent pressing them open or distorting their shape. Instead, press the iron over them gently without applying too much pressure.
- Pay attention to borders and edges: Focus on pressing the borders and edges of the quilt top to ensure they are smooth and well-defined. You can use the edge of the ironing board or a tailor’s ham to press these areas more effectively.
- Allow the quilt top to cool: Once you have finished pressing, give the quilt top a few minutes to cool down and set before proceeding to the next step. This helps to set the fabric and retain the smooth and wrinkle-free finish.
Pressing the quilt top after squaring up not only improves its appearance but also makes the subsequent steps of the quilting process easier. It allows for better accuracy when measuring, marking, and attaching the binding. Take the time to press your quilt top carefully and enjoy the satisfaction of a beautifully prepared quilt top ready for the finishing touches.
With the quilt top pressed, you are now ready to move forward with binding your quilt and bringing it to completion.
Conclusion
Squaring up a quilt before binding is an essential step in the quilting process that ensures a polished and professional result. By following the step-by-step guide outlined in this article, you can achieve a quilt with straight edges, square corners, and balanced proportions. Taking the time to square up your quilt not only enhances its appearance but also enhances its functionality and ease of binding.
Throughout this process, it is crucial to maintain attention to detail and accuracy. Double-checking measurements, using proper tools, and making necessary adjustments will help create a well-balanced and visually appealing quilt. Remember to work at your own pace and not rush through any step, allowing for careful precision and attention to detail.
In addition to the step-by-step guide, we have also provided tips and tricks to enhance your quilting experience. From preparing your work area to pressing your quilt top, each step plays a vital role in achieving the desired results.
Once you have squared up your quilt, the next step is to move on to the exciting task of binding. You can now confidently attach the binding, knowing that your quilt has straight edges and square corners that will result in a beautifully finished product.
Whether you are a seasoned quilter or a beginner, remember that practice makes perfect. The more you square up quilts, the more comfortable and skilled you will become. So don’t be discouraged if it takes a few tries to achieve that perfect squareness. Embrace the process, enjoy the journey, and let your creativity shine through your beautifully squared-up quilts!
Happy quilting!
Additional Tips and Tricks
Here are some additional tips and tricks that can help you successfully square up your quilt before binding:
- Measure twice, cut once: Double-check your measurements before making any cuts. It’s better to be cautious and measure multiple times to ensure accuracy.
- Use a long ruler: When trimming the edges, use a long quilting ruler that spans the width of your quilt. This allows for smoother, more precise cuts.
- Consider using a square quilting ruler: A square quilting ruler is specifically designed to help check for squareness. It can be a valuable tool in maintaining right angles and ensuring accurate measurements.
- Work on a flat and stable surface: Ensure that your work surface is level and stable to avoid any distortions in your quilt. A large cutting mat or an ironing board can provide a suitable work area.
- Trim small amounts at a time: Instead of trimming large chunks of fabric at once, make smaller cuts. This allows for more control and precision, reducing the risk of over-cutting or creating uneven edges.
- Take breaks, step back, and assess: As you work on squaring up your quilt, it’s important to take breaks and step back to assess your progress. This helps you look at the quilt with fresh eyes and identify any areas that may need adjustment or refinement.
- Press seams open or to one side: Depending on your quilting preferences, press your seams open or to one side. This can help reduce bulk when trimming and ensure that your quilt top lays flat and square.
- Practice on smaller projects: If you are new to quilting or the process of squaring up a quilt, consider starting with smaller projects such as table runners or baby quilts. This allows you to practice and refine your skills before working on larger and more intricate quilts.
- Use a design wall: A design wall can help you visualize the finished quilt and check for any inconsistencies or misalignments in your design. It allows you to make adjustments before moving on to the squaring up process.
- Be patient: Squaring up a quilt requires patience and attention to detail. Take your time, enjoy the process, and remember that practice makes perfect.
By incorporating these tips and tricks into your quilting process, you can enhance your skills and increase the likelihood of achieving a perfectly squared quilt. Remember that everyone’s quilting journey is unique, so feel free to adapt these tips to suit your own preferences and style.
Happy quilting!
Read more: How To Bind A Quilt Using The Backing
Frequently Asked Questions
Here are some commonly asked questions about squaring up a quilt before binding:
Q: Why is it important to square up a quilt before binding?
A: Squaring up a quilt before binding ensures that all sides are straight, corners are at right angles, and the quilt is the desired size. Square edges make the binding process easier and result in a professional-looking finish.
Q: Can I skip the step of squaring up my quilt?
A: While you can choose to skip the step of squaring up your quilt, it is highly recommended to do so. Squaring up helps your quilt lie flat, hang straight, and have a more polished appearance. It also ensures the quilt fits properly into a frame or display.
Q: How do I know if my quilt is squared up?
A: You can check for squareness by using a square quilting ruler or a right-angle tool. Place it on the corners and edges of your quilt to see if they form right angles. A properly squared quilt will have straight edges and square corners.
Q: Should I trim before or after quilting?
A: It is generally recommended to trim your quilt after quilting and before the binding process. This ensures that any shifting or distortion during quilting is accounted for and allows for more accurate trimming.
Q: What if my quilt is too large to fit on my cutting mat?
A: If your quilt is too large for your cutting mat, you can fold the quilt carefully, keeping the edges aligned, and trim one side at a time. Make sure to unfold the quilt and flatten it after each side is trimmed to avoid any distortion.
Q: Can I square up a quilt that has already been bound?
A: While it’s possible to square up a quilt that has already been bound, it is more challenging and may affect the finished appearance. It’s best to square up the quilt before binding to achieve the desired results.
Q: Do I need special tools to square up my quilt?
A: While specific quilting rulers and tools can be helpful, they are not essential. A large square quilting ruler, a long ruler with a right angle, pins or clips, and a rotary cutter are commonly used tools for squaring up a quilt.
If you have any more questions or concerns about squaring up your quilt before binding, don’t hesitate to reach out to fellow quilters or consult quilting resources for guidance. Remember, practice and patience will lead to improved quilting skills and beautifully squared quilts.
Resources and References
If you’re looking for more information on quilting and squaring up quilts before binding, here are some helpful resources and references to explore:
- Books:
- “The Quilter’s Ultimate Visual Guide: From A to Z– Hundreds of Tips and Techniques for Successful Quiltmaking” by Ellen Pahl
- “Quilter’s Academy: Mastering Quilt Skills” by Harriet Hargrave
- “Perfect Quilts for Precut Fabrics: 64 Patterns for Fat Quarters, Charm Squares, Jelly Rolls, and Layer Cakes” by That Patchwork Place
- Websites:
- Quilting Company – www.quiltingcompany.com
- The Spruce Crafts – www.thesprucecrafts.com
- National Quilters Circle – www.nationalquilterscircle.com
- Video Tutorials:
- Missouri Star Quilt Company – YouTube Channel: www.youtube.com/user/MissouriQuiltCo
- Fons & Porter – YouTube Channel: www.youtube.com/user/FonsandPorter
- The Quilting Company – YouTube Channel: www.youtube.com/c/thequiltingcompany
These resources offer a wealth of knowledge, tips, techniques, and inspiration for quilting. Whether you prefer books, online tutorials, or videos, these references will guide you in honing your quilting skills and mastering the art of squaring up quilts before binding.
Remember to explore local quilting communities, join quilting clubs or classes, and seek advice from experienced quilters who can offer guidance and support. Learning from others’ experiences and sharing your own can greatly enhance your quilting journey.
Happy quilting!
Frequently Asked Questions about How To Square Up A Quilt Before Binding
Was this page helpful?
At Storables.com, we guarantee accurate and reliable information. Our content, validated by Expert Board Contributors, is crafted following stringent Editorial Policies. We're committed to providing you with well-researched, expert-backed insights for all your informational needs.


0 thoughts on “How To Square Up A Quilt Before Binding”