Tableware
How To Make Bottle Cap Coasters
Modified: January 4, 2024
Learn how to make unique bottle cap coasters for your tableware collection. Perfect for adding a touch of creativity to your dining experience.
(Many of the links in this article redirect to a specific reviewed product. Your purchase of these products through affiliate links helps to generate commission for Storables.com, at no extra cost. Learn more)
Introduction
Welcome to the wonderful world of bottle cap coasters! If you’re looking for a creative and unique way to repurpose your collection of bottle caps, then you’ve come to the right place. Bottle cap coasters are not only functional but also make a stylish statement in any home or bar setting.
Whether you’re a collector who has amassed a pile of bottle caps or someone who simply enjoys the art of upcycling, making your own bottle cap coasters is a fun and rewarding DIY project. Not only will you have a practical coaster to protect your surfaces, but you’ll also have a conversation piece that showcases your personal style and creativity.
In this article, we’ll guide you through the step-by-step process of creating your own bottle cap coasters. From collecting the caps to the final touches, we’ll cover everything you need to know to make a set of coasters that you can be proud of.
Before we dive into the details, let’s take a look at the materials you’ll need to get started.
Key Takeaways:
- Repurpose bottle caps into stylish and functional coasters with diverse designs, creating unique conversation pieces that reflect personal style and creativity.
- Embrace DIY creativity and sustainability by transforming ordinary bottle caps into personalized, eco-friendly coasters, adding a touch of artistry to home decor and gifting options.
Read more: How To Make Beer Bottle Cap Wall Art
Materials Needed
Before you begin making your bottle cap coasters, make sure you have the following materials:
- Bottle caps: Collect a variety of bottle caps from different beverages. Try to gather as many as possible to have a wide selection to choose from.
- Coaster base: You’ll need a sturdy base material to hold the bottle caps. Some popular options include cork, wood, or resin molds.
- Adhesive: Choose a strong adhesive that can securely hold the bottle caps in place. Epoxy resin, hot glue, or strong adhesive glue are good options.
- Protective coating: To give your coasters a durable finish, you’ll need a protective coating such as resin, varnish, or clear sealant.
- Paint and brushes (optional): If you want to add a pop of color or design to the coaster base, have some paint and brushes on hand.
- Safety gear: Remember to prioritize safety by wearing gloves, goggles, and any other necessary protective gear while working with adhesives and coatings.
Once you’ve gathered all the necessary materials, you’re ready to dive into the creation process. Let’s get started!
Step 1: Collecting Bottle Caps
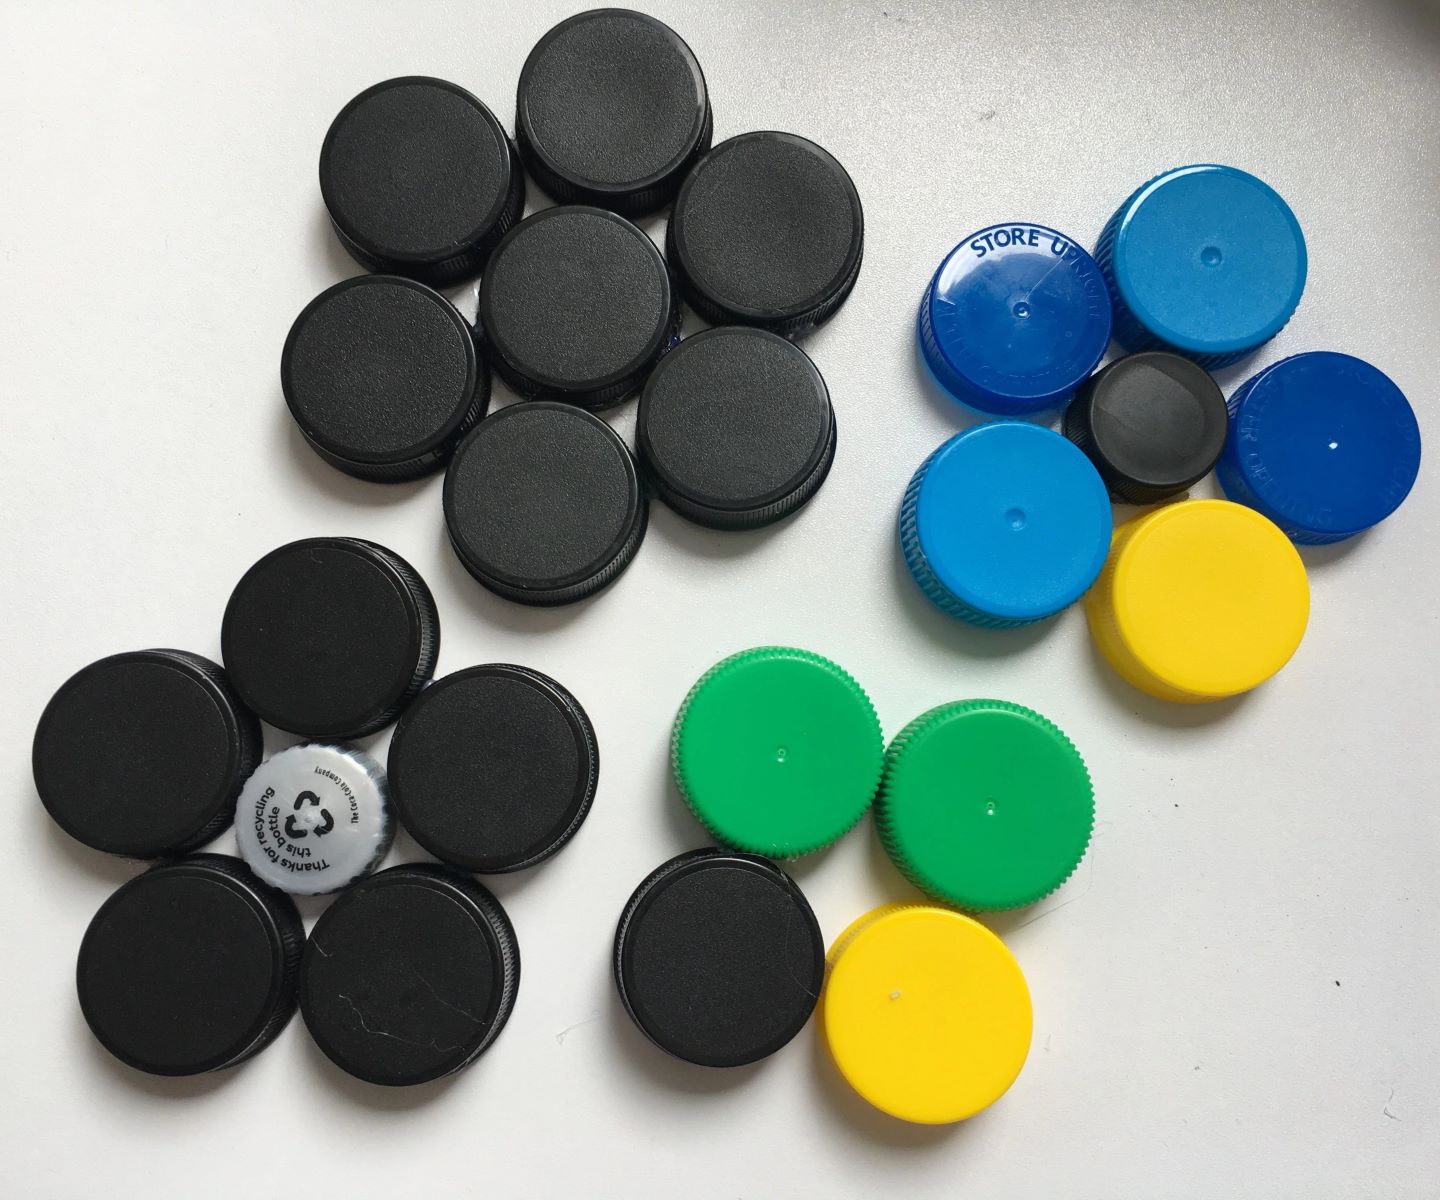
The first step in making bottle cap coasters is to collect a variety of bottle caps. Start by saving caps from different beverages such as soda, beer, juice, and other bottled drinks. You can also ask friends and family to collect caps for you, or even visit local bars or restaurants to see if they have any extras. The more diverse your collection, the more visually appealing your coasters will be.
Make sure to thoroughly clean and dry the bottle caps before using them. This will help remove any residue or odors that may be present. You can simply soak the caps in warm soapy water, scrub away any dirt, and then rinse them thoroughly. Allow them to air dry completely before moving on to the next step.
If you want to add a personalized touch to your coasters, consider collecting caps from memorable events or places you’ve visited. For example, if you visited a brewery or attended a special event, you can use those unique caps to create a set of coasters that hold sentimental value.
Keep in mind that the number of bottle caps you collect will depend on the size of your coaster base and how densely you want to arrange the caps. It’s better to have more caps than you think you’ll need, as you can always select the best ones to use.
Once you have a sufficient collection of clean and dry bottle caps, you’re ready to move on to the next step: preparing the caps for use in your coasters.
Step 2: Preparing the Caps
Before you can start arranging the bottle caps on your coaster base, it’s important to prepare them properly. This step ensures that the caps are flat and uniform, making them easier to work with and creating a smoother surface for your coasters.
To prepare the bottle caps, you have a couple of options. One method is to flatten the caps using a hammer or mallet. Place a bottle cap on a hard surface, such as a sturdy piece of wood or metal, and carefully tap the cap with the hammer until it flattens out. Be sure to apply even pressure to avoid denting or damaging the cap.
If you prefer a more uniform appearance, you can also use a hole punch to remove the center of each bottle cap. This creates a flat surface while still retaining the outer edge of the cap for a distinct look. Simply place the cap in the punch and press down firmly. Repeat this process for all the caps you plan to use.
Once you have prepared all the bottle caps, give them a quick wipe to remove any debris or metal shavings that may have accumulated. You want the caps to be clean and free from any loose particles before attaching them to the coaster base.
Preparing the bottle caps may require some time and effort, but it is a crucial step to ensure a polished and professional-looking finished product. With the caps ready, it’s time to move on to creating the base for your bottle cap coasters.
Step 3: Creating the Base
Now that your bottle caps are prepared, it’s time to create the base for your coasters. The base serves as the foundation for the bottle caps and provides stability and support.
There are several options to consider when choosing a base material for your coasters. One popular choice is cork, which is easy to work with and provides a natural and eco-friendly option. You can purchase cork sheets in various thicknesses and then cut them into square or round shapes to match the size of your coaster. Alternatively, you can recycle old cork trivets or cork tiles for a more rustic and textured look.
If you prefer a more durable and solid base, consider using wood. You can use pre-cut wooden squares or circles available at craft stores or repurpose small pieces of wood from other projects. Sand the edges and surface of the wood to ensure a smooth finish before proceeding.
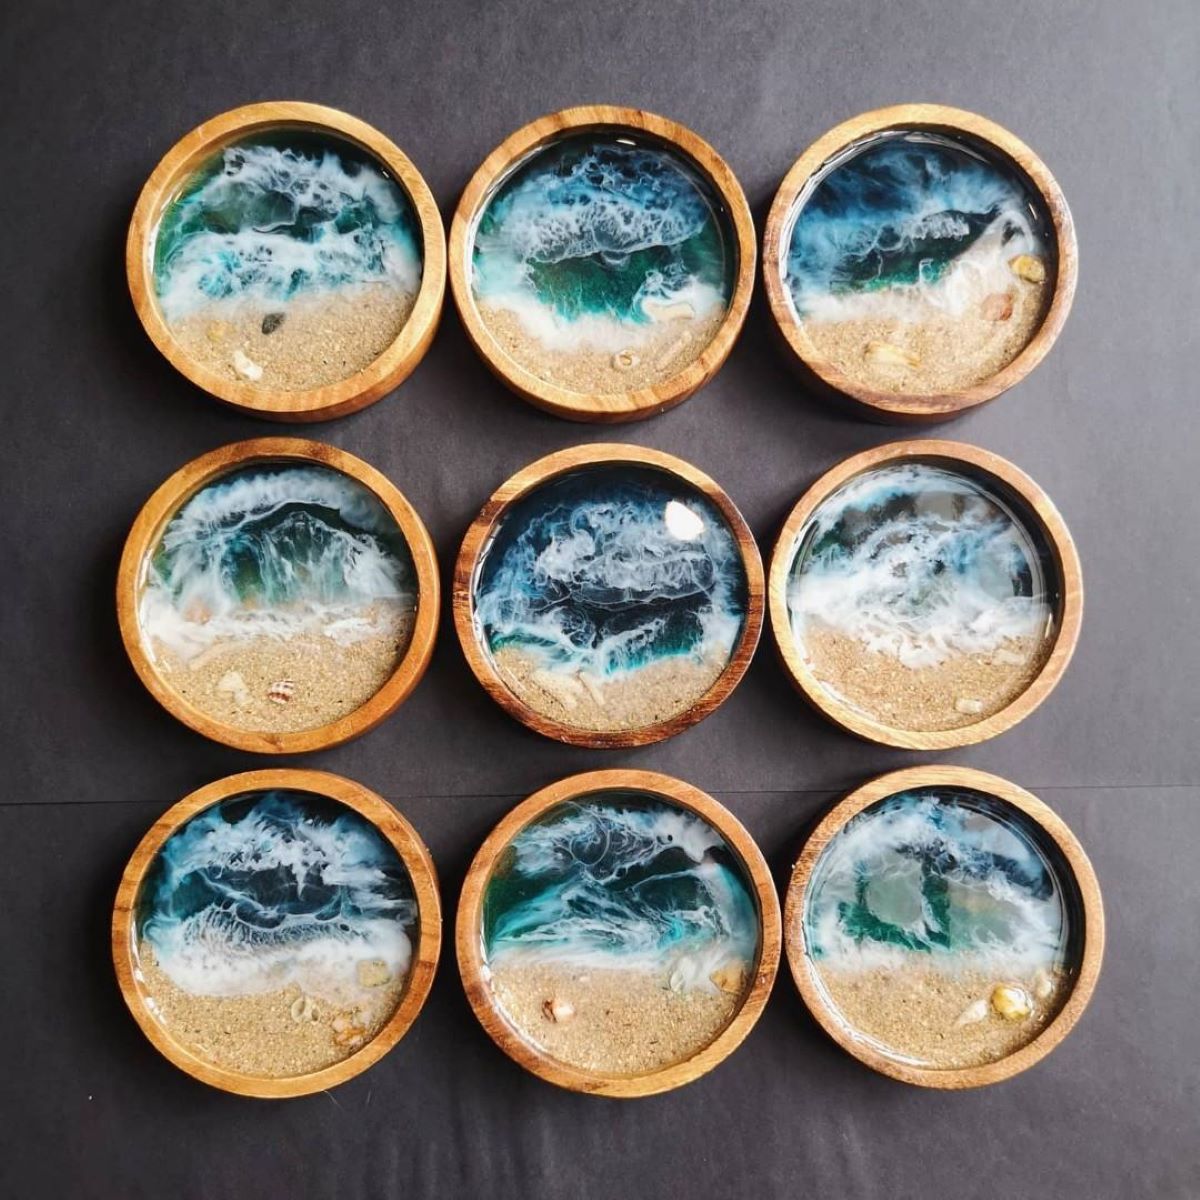
Another option is to use resin molds, which offer a sleek and modern appearance. You can find silicone molds in various shapes and sizes, such as square, round, or hexagonal. Depending on your preference, you can either pour resin directly into the molds or use them as a template to create a base using another material, such as wood or cork.
Regardless of the base material you choose, it’s essential to measure and cut the pieces to match the size of your bottle caps. The base should be slightly larger than the combined diameter of the caps to allow for easy arrangement and ensure a secure fit.
Once you have your base ready, sand or smooth any rough edges to prevent splinters or scratches. You can also paint or stain the base if you want to add a pop of color or enhance its appearance. Remember to let the paint or stain dry completely before moving on to the next step.
With your coaster base fully prepared, it’s time to start arranging the bottle caps in a pleasing design.
When making bottle cap coasters, be sure to use a strong adhesive to secure the caps in place. Epoxy resin or clear silicone adhesive are good options for a durable finish.
Read more: How To Open A Glass Bottle Cap
Step 4: Arranging the Caps
Now that you have your coaster base ready, it’s time to arrange the bottle caps in a design that suits your taste and style. The arrangement of the caps can range from random and eclectic to organized and patterned, depending on your preference.
Start by laying out the bottle caps on the base to get an idea of how they will fit together. Play around with different placements and orientations to see what looks best. You can experiment with arranging them in rows, concentric circles, or even create a mosaic-like pattern with different colors and bottle cap designs.
Once you’ve found a layout that you’re happy with, you can begin attaching the bottle caps to the base. Apply a small amount of adhesive to the back of each cap and press it firmly onto the base. Make sure to align the caps properly and leave a small gap between them to allow for expansion if using resin as a protective coating.
As you work, periodically step back and check the overall design to ensure it meets your expectations. Adjust the caps as necessary to achieve a balanced and visually pleasing arrangement.
If you want to add a personal touch or create a specific theme, you can incorporate other elements into the design. For example, you can place smaller decorative items, such as beads or charms, in between the bottle caps for added flair. Get creative and let your imagination guide you.
Once you’ve attached all the bottle caps and are satisfied with the arrangement, allow the adhesive to dry completely before moving on to the next step.
Now that the caps are securely in place, it’s time to take the necessary precautions to ensure they won’t come loose in the future.
Step 5: Securing the Caps
After arranging the bottle caps on your coaster base, it’s important to secure them properly to ensure they stay in place. This step will prevent any caps from coming loose or falling off when using the coasters.
The method you choose to secure the caps will depend on the adhesive you used in the previous step. If you used epoxy resin or a strong adhesive glue, you may not need any additional steps to secure the caps. Simply allow the adhesive to fully cure according to the instructions provided, which typically takes anywhere from 24 to 48 hours. This ensures a strong bond between the caps and the base.
However, if you used hot glue, which may not provide as strong of a bond, you can reinforce the attachment by applying a layer of clear resin over the entire surface. This additional step will provide extra strength and longevity for your coasters.
To apply the resin coating, carefully mix the resin and hardener according to the manufacturer’s instructions. Pour the mixture over the caps, spreading it evenly using a brush or a spreader tool. Make sure to cover all the caps and fill any gaps between them. Allow the resin to cure for the recommended time, typically 24 to 48 hours, to achieve a hard and glossy finish.
During the curing process, ensure the coasters are kept in a dust-free environment to avoid any particles getting trapped in the resin. You can cover them with a box or place them in a dedicated area away from any potential disturbances.
Once the resin has fully cured, your bottle cap coasters are now securely fastened and ready for use. However, adding a protective coating will provide an additional layer of durability.
Continue to the next step to learn about applying a protective coating to your bottle cap coasters.
Step 6: Applying a Protective Coating
Applying a protective coating is an essential step in ensuring the longevity and durability of your bottle cap coasters. The coating acts as a barrier, protecting the bottle caps and the base from moisture, stains, and general wear and tear.
There are several options for protective coatings, including epoxy resin, varnish, or clear sealant. Each has its own advantages and considerations, so choose the one that best suits your preferences and the materials you used for your coasters.
If you opt for epoxy resin, make sure to carefully follow the mixing instructions provided with the resin kit. Improper mixing can result in an uneven or tacky finish. Pour the mixed resin over the coasters, using a spreader tool or brush to ensure an even application. Take care to cover the entire surface, including the edges of the coaster base. Allow the resin to cure according to the manufacturer’s instructions, usually for about 24 to 48 hours.
Varnish is another popular choice for coating bottle cap coasters. Apply a thin, even layer of varnish using a brush or sponge applicator. Make sure to cover all the surfaces and edges of the coasters. Allow the varnish to dry completely before applying additional coats if desired. Follow the manufacturer’s instructions for drying times and the number of recommended coats.
If you prefer a simpler and quicker option, clear sealant sprays are available. These sprays provide a convenient and even coating. Apply the sealant in a well-ventilated area, following the instructions on the can. Allow the sealant to dry completely before handling the coasters.
Whichever coating option you choose, ensure that the coats are applied evenly and smoothly. This will help protect the coasters from moisture, stains, and scratches while enhancing their appearance.
Once the protective coating has dried, your bottle cap coasters are almost complete. The final step involves adding some finishing touches to truly make them shine.
Step 7: Final Touches and Finishing
Now that your bottle cap coasters are protected and ready for use, it’s time to add some final touches to make them even more personalized and visually appealing.
One option is to give your coasters a polished and professional look by sanding or filing the edges of the coaster base. This step helps create a smooth and finished appearance, removing any rough or uneven edges that may have occurred during the crafting process.
If you want to add a pop of color or design, you can consider painting or decorating the coaster base. Use acrylic paints, stencils, or even decoupage techniques to achieve your desired look. Just make sure to let the paint or decorations dry completely before using the coasters to prevent any smudging or damage.
For a more personalized touch, you can also add a thin layer of clear adhesive or resin over the bottle caps and embed small objects or decals that hold significance to you. These objects can include photos, stickers, or even small trinkets that reflect your interests or memories. The clear adhesive or resin will seal the objects and create a unique and eye-catching centerpiece for each coaster.
Finally, it’s time to give your coasters a final inspection. Check for any loose caps or imperfections in the design. If you come across any issues, gently remove the affected cap and reattach it using a small amount of adhesive. This will ensure that your coasters are in pristine condition and ready to use or gift to others.
With the final touches complete, your bottle cap coasters are now finished and ready to be enjoyed. Place them on a coffee table, bar top, or wherever you need a stylish and practical surface protector. They also make fantastic gifts for friends and family who appreciate unique and handmade creations.
Remember to clean the coasters gently with a soft, damp cloth when necessary. Avoid submerging them in water or using abrasive materials that could damage the protective coating.
Congratulations on successfully creating your own bottle cap coasters! Enjoy using them and basking in the satisfaction of turning ordinary bottle caps into functional and artistic pieces that reflect your personal style. Cheers!
Read more: How To Make Concrete Coasters
Conclusion
Creating your own bottle cap coasters is a fun and creative way to repurpose bottle caps and add a unique touch to your home decor. Not only are these coasters functional in protecting your surfaces, but they also serve as conversation starters and personal expressions of your style and creativity.
Throughout this article, we’ve covered the step-by-step process of making bottle cap coasters, from collecting a diverse assortment of bottle caps to securing them onto a base and applying a protective coating. Each step allows for customization and personalization, making your coasters truly one-of-a-kind.
As you embark on your bottle cap coaster-making journey, remember to have fun and let your creativity soar. Experiment with different arrangements, colors, and materials to create coasters that perfectly reflect your taste and personality.
Moreover, the process of making bottle cap coasters is not only rewarding in the end result but also provides an opportunity to engage in sustainable and eco-friendly practices by repurposing materials that would otherwise go to waste.
Whether you make these coasters for yourself or as gifts for loved ones, they are sure to be a cherished and practical addition to any home or bar setting. So gather your bottle caps, get creative, and enjoy the satisfaction of transforming ordinary caps into functional works of art.
Now it’s time to put your newfound knowledge and skills to action and craft your own set of beautiful and unique bottle cap coasters. Cheers to the joy of DIY and the endless possibilities of tableware creativity!
Frequently Asked Questions about How To Make Bottle Cap Coasters
Was this page helpful?
At Storables.com, we guarantee accurate and reliable information. Our content, validated by Expert Board Contributors, is crafted following stringent Editorial Policies. We're committed to providing you with well-researched, expert-backed insights for all your informational needs.

0 thoughts on “How To Make Bottle Cap Coasters”