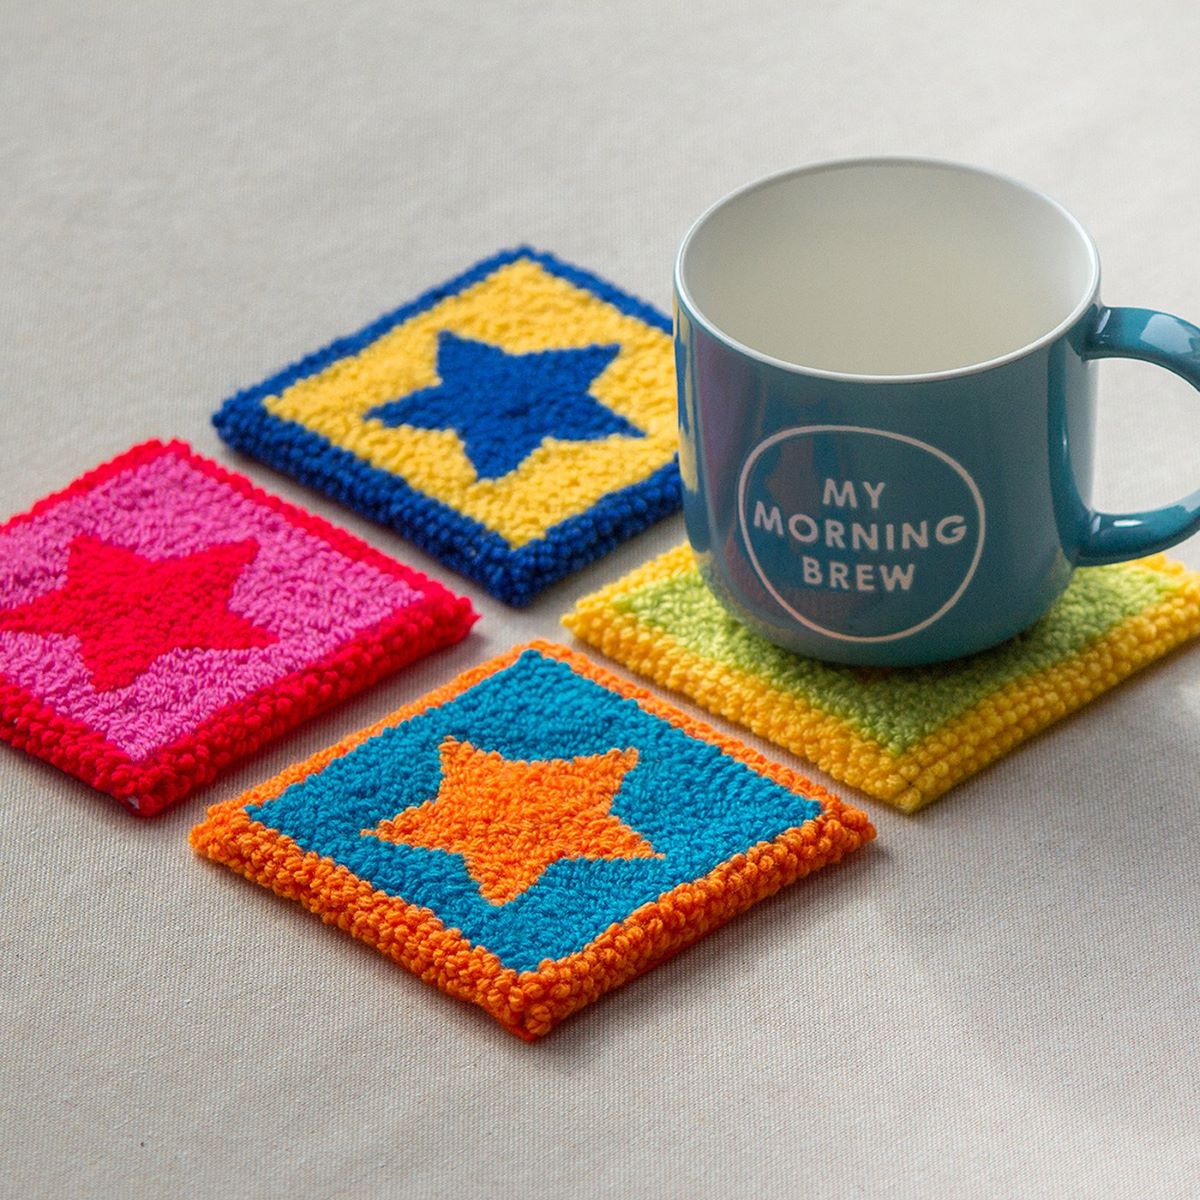
Tableware
How To Make Crochet Coasters
Modified: January 6, 2024
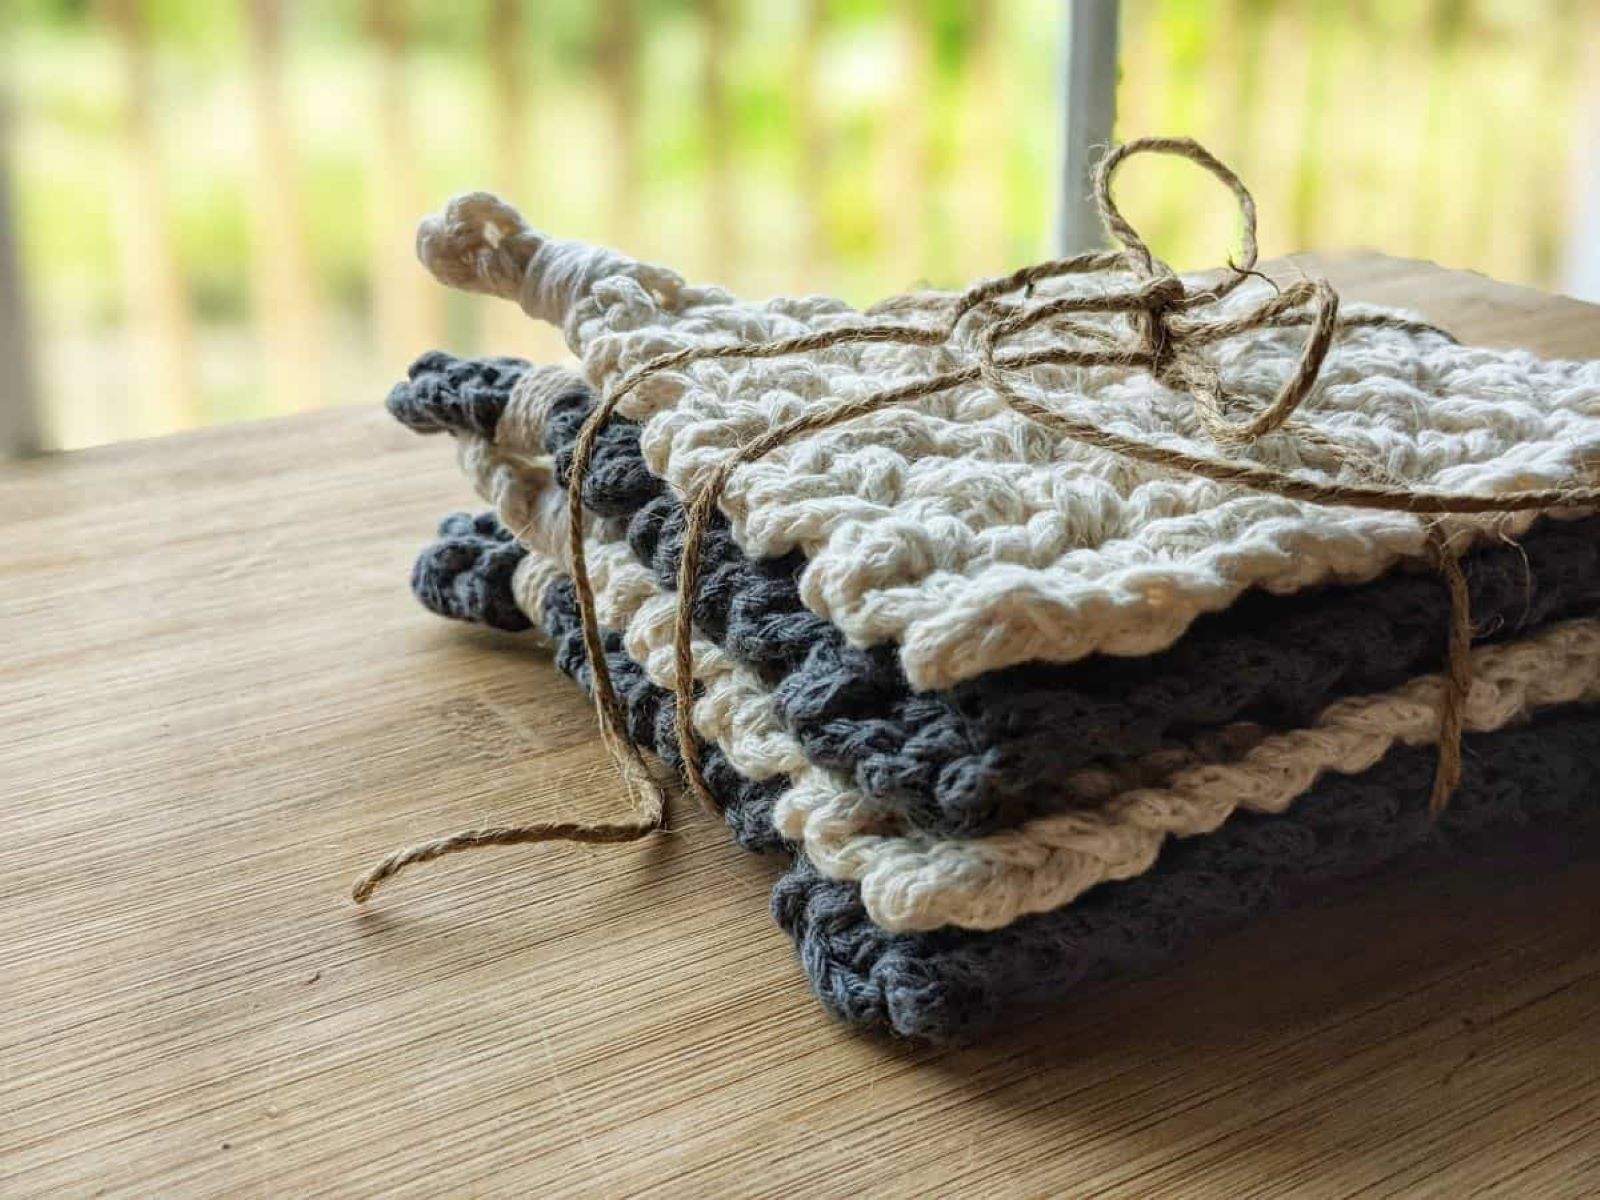
Learn how to make beautiful tableware with these crochet coasters. Perfect for adding a touch of charm to your dining experience.
(Many of the links in this article redirect to a specific reviewed product. Your purchase of these products through affiliate links helps to generate commission for Storables.com, at no extra cost. Learn more)
Introduction
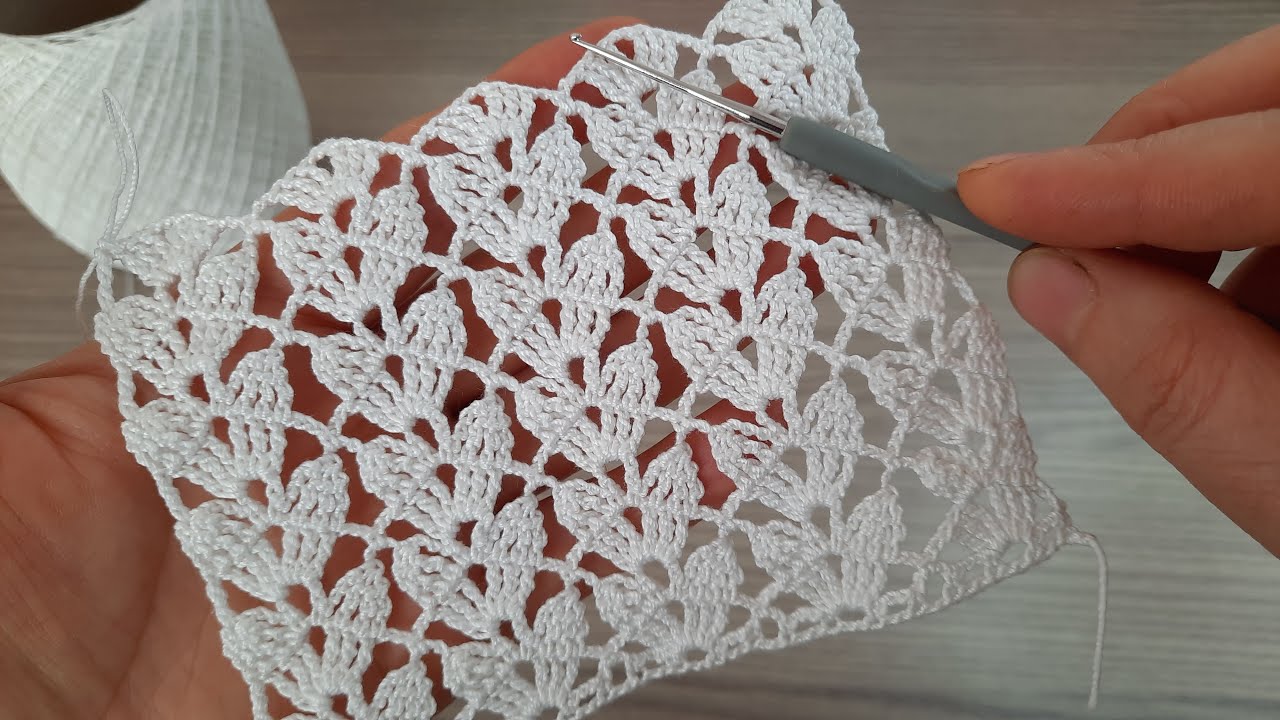
Welcome to the wonderful world of crochet! If you have ever wanted to learn a new hobby that is both practical and creative, making crochet coasters is a great place to start. Crochet coasters are not only functional, protecting your surfaces from hot or cold drinkware, but they also add a touch of handmade charm to your home.
In this step-by-step guide, you will learn how to create your own crochet coasters from scratch. Whether you are a beginner or an experienced crocheter looking for a fun and quick project, this tutorial will walk you through each stage of the process, from selecting the right yarn to finishing off your coasters.
Before we dive into the steps, let’s gather the materials you’ll need:
Materials Needed:
- Yarn of your choice
- Crochet hook (size will depend on the yarn weight)
- Scissors
- Yarn needle
Now that you have your materials ready, let’s get started on our crochet coaster journey!
Key Takeaways:
- Dive into the world of crochet coasters with confidence! From choosing yarn to finishing off, this step-by-step guide equips you with the skills to create beautiful and functional coasters for your home.
- Unleash your creativity and personalize your crochet coasters with color changes, stitch variations, and unique patterns. Share your handmade creations and inspire others with your crochet talents!
Read more: How To Crochet Cat Coasters
Materials Needed
Before we begin making crochet coasters, let’s gather all the materials that you will need for this project. Having everything ready will ensure a smooth and enjoyable crocheting experience. Here are the materials you’ll need:
- Yarn: The first item on our list is yarn. Choose a yarn that suits your personal preference and complements your home decor. There are countless options available, from cotton for a sturdy and absorbent coaster, to acrylic for a soft and colorful one. Consider the size and weight of the yarn as well, as it will determine the final dimensions and thickness of your coaster.
- Crochet Hook: To work with the yarn, you will need a crochet hook. The size of the hook will depend on the weight of the yarn you’ve chosen. Typically, a medium-sized hook such as a 4mm or 5mm (US G or H) hook works well for most yarn weights. However, always check the label of your yarn for specific hook size recommendations.
- Scissors: A good pair of scissors is essential for any crochet project. Make sure they are sharp and suitable for cutting yarn easily.
- Yarn Needle: A yarn needle, also known as a tapestry needle, is used for weaving in loose ends and sewing pieces together. It should have a large eye to accommodate the thickness of your yarn.
These four items are the basic materials you will need for crocheting coasters. However, feel free to get creative and personalize your coasters by adding embellishments such as beads or buttons. Additional materials you might consider include stitch markers to keep track of your rounds, or a ruler and blocking mats for perfecting the shape and size of your coasters.
Now that you have gathered all your materials, you are ready to dive into the wonderful world of crochet and create beautiful coasters for your home or as thoughtful gifts for loved ones.
Step 1: Choosing Yarn
When it comes to crochet, choosing the right yarn is crucial to the success of your project. The yarn you choose will determine the texture, durability, and appearance of your crochet coasters. Here are some factors to consider when selecting your yarn:
1. Fiber Content: Yarn comes in a variety of natural and synthetic fibers, each with its own characteristics. If you prefer a coaster with good absorbency, consider using cotton yarn. For a softer texture and vibrant colors, acrylic yarn is a popular choice. You can also explore other natural fibers like bamboo or linen for a unique look.
2. Weight: Yarn is categorized into different weights, ranging from super fine to super bulky. The weight of the yarn will affect the thickness and drape of your coaster. Thinner yarns, like lace or fingering weight, will result in a delicate and lightweight coaster, while thicker yarns, such as bulky or chunky weight, will create a more substantial and cozy coaster.
3. Color: Consider the color palette that matches your home decor or personal style. You can choose a single color for a minimalistic look, or experiment with different shades and create a unique color combination. Keep in mind that lighter colors may show stains more easily, while darker colors might not show intricate stitch details as prominently.
4. Availability: Take into account the availability of the yarn you choose. You want to make sure you have enough yarn to complete your coaster project. If you’re purchasing yarn online, double-check the quantity required for the pattern or estimate the amount based on the average size of a coaster.
5. Personal Preference: Ultimately, choose a yarn that you enjoy working with and that brings you joy during the crocheting process. The tactile experience of working with your chosen yarn should be as enjoyable as the end result.
Once you have considered these factors, it’s time to start exploring different yarn options. Visit local craft stores, browse online yarn shops, or even join crochet communities to discover new yarn brands and colors. Don’t be afraid to experiment and have fun with your yarn choices, as it’s all part of the creative journey of crochet coasters.
Step 2: Selecting a Crochet Hook
Choosing the right crochet hook is essential for a successful and enjoyable crochet coaster project. The crochet hook size you use will depend on the weight of the yarn you’ve chosen. Here are some factors to consider when selecting your crochet hook:
1. Hook Size: The size of the crochet hook will determine the tension and gauge of your stitches. The size is usually denoted by a letter or number on the handle of the hook. As a general guideline, smaller hooks are used with thinner yarns, while larger hooks are used with thicker yarns. Refer to the label of your chosen yarn for the recommended hook size, or consult a crochet hook size conversion chart.
2. Comfort: The comfort of the crochet hook is crucial, as you’ll be using it for extended periods. Look for a hook with a comfortable grip and smooth surface. Some hooks have ergonomic handles, which can help reduce hand fatigue and provide a more comfortable crocheting experience.
3. Material: Crochet hooks come in various materials, including aluminum, plastic, bamboo, and ergonomic options. Aluminum hooks are durable and lightweight, while plastic hooks are affordable and often have colorful handles. Bamboo hooks are lightweight and have a warm feel, and ergonomic hooks are designed to reduce strain on your hands and wrists. Try different materials to see what feels most comfortable for you.
4. Compatibility: Ensure that the crochet hook you choose is compatible with the thickness of the yarn you’ve selected. If the hook is too small or too large for the yarn, it can affect the tension and overall appearance of your coaster. The ideal hook size should allow you to achieve the recommended gauge specified in the coaster pattern, if applicable.
5. Experimentation: Don’t be afraid to experiment with different hook sizes and materials to achieve the desired texture and drape of your coaster. You may prefer to use a smaller hook to create a denser fabric or a larger hook for a more open and airy design.
As you embark on your crochet coaster journey, consider investing in a set of interchangeable crochet hooks or a variety of individual hooks. This will allow you to have different sizes readily available for future projects and ensure you are well-equipped for any crochet adventure.
Now that you have your yarn and crochet hook ready, it’s time to move on to the next step: making a slip knot.
Step 3: Making a Slip Knot
Before you can start crocheting your coaster, you will need to make a slip knot. The slip knot serves as the foundation for your stitches and allows you to easily attach the yarn to your crochet hook. Follow the steps below to create a slip knot:
1. Begin by holding the end of your yarn in your hand. Leave a tail of approximately 6 inches (15 cm) long, which will be used to weave in the loose end later.
2. Create a loop with the yarn. Cross the working end of the yarn over the tail to form a loop. The working end is the end of the yarn attached to the yarn ball or skein.
3. Insert your crochet hook through the loop. Ensure that the hook is positioned under the tail of the yarn, with the working end of the yarn over the top of the hook.
4. Pull the working end of the yarn. Gently pull the working end to tighten the loop around the hook. Be careful not to make it too tight or too loose, as you will need to slide the loop along the hook during the next steps.
5. Adjust the slip knot. Hold the tail of the yarn with one hand and the hook with the other hand. Slide the loop up or down the hook to adjust the size of the slip knot. It should be large enough to easily insert your hook into, but not too loose that it falls off.
Now that you have successfully made a slip knot, you are ready to move on to the next step: the chain stitch.
Note: The slip knot will count as the first loop on your crochet hook. Remember to follow any specific instructions provided in your coaster pattern, if you are following one.
Read more: How To Make Concrete Coasters
Step 4: Chain Stitch
The chain stitch is one of the fundamental stitches in crochet and serves as the foundation for many crochet patterns, including your coaster. Mastering the chain stitch will allow you to create a straight and even base for your coaster. Follow the steps below to learn how to make a chain stitch:
1. Hold the slip knot and crochet hook. Grip the slip knot with your non-dominant hand, while holding the crochet hook with your dominant hand. Ensure that the slip knot is secured on the hook and that the tail is facing towards you.
2. Yarn over. Yarn over by crossing the working end of the yarn over the hook from back to front. The working end should now be positioned in front of the hook.
3. Pull the yarn through the slip knot. Insert the hook into the slip knot, catching the yarn in the hook. With a gentle motion, pull the hooked yarn through the slip knot, creating a new loop on the hook. This loop represents your first chain stitch.
4. Repeat the process. Continue to yarn over and pull the yarn through the previous loop on the hook, creating additional chain stitches. To maintain an even tension, make sure to pull the yarn through the loop with a consistent amount of tension. Aim for neither too tight nor too loose stitches.
5. Count your chain stitches. Count the number of chain stitches as you work along. This will determine the width of your coaster. Follow the pattern instructions or make the desired number of chain stitches based on your desired coaster size.
Remember, the chain stitch is the starting point for your coaster, so make sure to create sufficient chain stitches to achieve the desired size. Additionally, ensure that your chain stitches are not twisted or tangled. Once you are comfortable with the chain stitch, you are ready to move on to the next step: the single crochet stitch.
When making crochet coasters, use a smaller hook size and tight tension to create a sturdy and durable finished product. This will help the coasters maintain their shape and hold up to regular use.
Step 5: Single Crochet Stitch
The single crochet stitch is a versatile and commonly used stitch in crochet. It creates a tightly woven fabric and forms the building blocks of many crochet projects, including your coaster. Follow the steps below to learn how to make a single crochet stitch:
1. Insert the hook into the next chain stitch. Starting from the second chain stitch from the hook (not counting the loop on the hook), insert your hook under the top two loops of the chain stitch. Ensure that you are inserting the hook from front to back.
2. Yarn over and pull through. With the hook inserted in the chain stitch, yarn over by crossing the working end of the yarn over the hook from back to front. Then, pull the yarn through the chain stitch. You should now have two loops on your hook.
3. Yarn over and pull through both loops. Yarn over once again, then pull the yarn through both loops on your hook. This completes one single crochet stitch. Make sure to keep an even tension as you pull the yarn through the loops.
4. Repeat the process. Continue to insert your hook into the next chain stitch, yarn over, pull through, and yarn over again to complete a single crochet stitch. Work along the entire row, creating one single crochet stitch in each chain stitch. This will create a solid and dense fabric for your coaster.
5. Turn your work. Once you have completed a row of single crochet stitches, turn your work clockwise or counterclockwise, depending on your stitching preference. This will allow you to work back across the row in the opposite direction.
Repeat the steps above for each row until you reach the desired height for your coaster. Remember to count your stitches and maintain an even tension throughout the process. The single crochet stitch is the foundation of your coaster, and mastering it will lay the groundwork for the subsequent stitches and rounds.
Now that you have learned the single crochet stitch, it’s time to move on to the next step: working in rounds to shape your coaster.
Step 6: Working in Rounds
Working in rounds is a technique used to create circular or cylindrical crochet projects, such as your coaster. Instead of working in rows back and forth, you will be continuously crocheting in a circular motion. This method allows you to build up the sides of your coaster and create a seamless finish. Follow the steps below to learn how to work in rounds:
1. Joining the round: After completing your foundation chain and the first row of single crochet stitches, it’s time to join the round. To do this, locate the first single crochet stitch you made in the row. Insert your hook into the top of that stitch, under both loops. Yarn over and pull the yarn through the stitch, creating a loop on your hook. Slip stitch into this loop to secure the round.
2. Marking the beginning of the round: Place a stitch marker or a contrasting piece of yarn in the first stitch of the round. This will help you keep track of where each round begins and ensure your coaster is symmetrical.
3. Continuing the rounds: Now that you have joined the round and marked the starting point, you will continue crocheting in a continuous spiral. Insert your hook into the next stitch, following the pattern instructions. Yarn over and pull through the stitch, creating a new single crochet stitch. Continue this process in each stitch around the previous round until you reach the marked stitch.
4. Working multiple rounds: Depending on your pattern or desired coaster size, you will crochet multiple rounds using the continuous spiral method. Each round will gradually build up the sides of the coaster. Remember to count your stitches and follow any pattern instructions for stitch increases or decreases, if applicable.
5. Joining the final round: When you have reached the desired size or completed the pattern-specified rounds, it’s time to finish off your coaster. Cut the yarn, leaving a tail of a few inches. Insert your hook into the first stitch of the final round, yarn over, and pull the yarn through both the stitch and the loop on your hook. This slip stitch will secure the final round.
Working in rounds allows you to create a gorgeous, seamless, and three-dimensional coaster. Remember to keep a consistent tension and pay attention to stitch placement as you work through each round.
Now that you have learned how to work in rounds, it’s time to explore stitch variations and techniques to add more interest to your coaster, such as increasing and decreasing stitches.
Step 7: Increasing and Decreasing Stitches
Mastering the techniques of increasing and decreasing stitches in crochet will allow you to create various shapes and contours in your coaster. These techniques are useful when you want to make your coaster wider or narrower, or create decorative patterns. Follow the steps below to learn how to increase and decrease stitches:
Increasing Stitches:
To increase stitches, you will be adding more stitches to your current round, creating a wider base for your coaster. Here’s how to do it:
1. Identify the stitch to increase: Locate the stitch where you want to make the increase. This stitch could be marked in your pattern, or you can choose the stitch yourself based on your desired placement.
2. Work the increase: Insert your hook into the stitch, yarn over, and pull through the stitch as you would for a regular single crochet stitch. Instead of moving on to the next stitch immediately, yarn over again and insert your hook into the same stitch. Yarn over and pull through, creating a second single crochet stitch in the same stitch.
3. Repeat the process: Continue working two single crochet stitches in the same stitch for the desired number of increases. Remember to count your stitches and follow any pattern instructions for the placement of increases. This will gradually create a wider diameter for your coaster.
Decreasing Stitches:
To decrease stitches, you will be combining multiple stitches into a single stitch, gradually narrowing the size of your coaster or creating decorative patterns. Here’s how to do it:
1. Identify the stitches to decrease: Determine the stitches where you want to make the decrease. This could be indicated in your pattern or chosen by you for decorative purposes.
2. Work the decrease: Insert your hook into the first stitch to be decreased, yarn over, and pull through the stitch. You should have two loops on your hook. Move on to the next stitch to be decreased, insert your hook, yarn over, and pull through that stitch as well. Now you should have three loops on your hook. Finally, yarn over and pull through all three loops, creating a single crochet decrease stitch.
3. Repeat the process: Continue working single crochet decrease stitches as instructed by your pattern or desired design. This will gradually narrow the diameter of your coaster or create unique shaping.
Remember, increasing and decreasing stitches can create a variety of shapes and patterns in your coaster. Experiment with different placements and combinations to achieve your desired result. Count your stitches regularly and refer to your pattern or design plan to ensure consistency throughout your crocheting.
Now that you have learned how to increase and decrease stitches, you can explore different stitch patterns and color changes to add even more visual interest to your coaster.
Read more: How To Make Bottle Cap Coasters
Step 8: Changing Colors
Changing colors in your crochet coaster project can add a beautiful and vibrant touch to your design. Whether you want to create stripes, color blocks, or intricate patterns, changing colors allows you to personalize your coaster and make it truly unique. Follow the steps below to learn how to change colors in your crochet coaster:
1. Prepare your yarn:
Before you begin changing colors, make sure to have your new yarn color ready. Cut the yarn of the current color, leaving a tail of a few inches to weave in later. Have the new color yarn ready, either by unwinding it from the skein or ball, or by using a separate yarn bobbin.
2. Join the new color:
To join the new color, start by making a slip knot with the new color yarn. Insert your hook into the stitch where you want to begin using the new color. Place the slip knot on your hook and pull it through the stitch, completing a single crochet stitch with the new color.
3. Carry the yarn:
If you plan to switch back to the previous color later in your pattern, you can carry the yarn along the back of your work. To do this, hold the yarn you’re not currently using along the back of the stitches. As you crochet over it, make sure to catch the carried yarn within the stitches to secure it. This will prevent loose or dangling yarn strands.
4. Weave in loose ends:
To ensure a clean finish, make sure to weave in the loose ends of both the old and new yarn colors. Use a yarn needle to thread the ends through the stitches on the back of your coaster, hiding them in the fabric. Trim any excess yarn once the ends are secured, being careful not to cut the working yarn.
5. Repeat as needed:
Follow your pattern or design plan to determine where and how often to change colors in your coaster. Repeat the steps above whenever you want to switch to a new color. Remember to carry the yarn along the back for colors you plan to use again and weave in all loose ends to maintain a neat and professional-looking finish.
By changing colors, you can create endless possibilities for your crochet coaster. Experiment with different color combinations, techniques, and patterns to make your coaster truly unique and visually appealing.
Now that you have learned how to change colors, it’s time to wrap up your crochet coaster project by finishing off your work.
Step 9: Finishing Off
Congratulations! You’re almost done with your crochet coaster project. Now it’s time to finish off your work and give your coaster a polished look. Follow the steps below to complete the final touches:
1. Cut the yarn:
Once you have reached the desired size for your coaster or completed the pattern-specified rounds, it’s time to cut the yarn. Leave a tail of a few inches to work with.
2. Secure the final stitch:
Thread the tail of the yarn through your yarn needle. Insert the needle through the final stitch, and then back through the loop on your hook. Gently pull the yarn through to secure the stitch.
3. Weave in loose ends:
To neaten up your coaster, weave in any remaining loose ends. Thread the yarn tail onto your yarn needle, and weave it through the back of your stitches, going in one direction and then reversing the direction to secure the end. Trim any excess yarn, being careful not to cut the working yarn.
4. Block your coaster:
If you desire a perfectly shaped and flat coaster, you can block it. Wet your coaster, gently squeeze out the excess water, and lay it flat on a blocking mat or a towel. Shape the coaster to your desired dimensions, making sure the edges are straight and the stitches are even. Leave it to dry completely before removing from the blocking surface.
5. Enjoy your finished coaster:
Once your coaster is dry and the ends are secured, it’s time to sit back and admire your work. Your beautifully crocheted coaster is now ready to protect your surfaces in style. Use it for hot or cold drinkware, display it as a decorative item, or gift it to someone special.
Remember, as you gain more experience in crocheting, you can experiment with different stitch patterns, techniques, and yarn choices to create even more intricate and unique coasters. Enjoy the process and have fun exploring the endless possibilities of crochet.
Now that you have completed your coaster, you can proudly showcase your crochet skills and perhaps embark on more exciting and challenging crochet projects in the future. Happy crocheting!
Conclusion
Congratulations on completing your crochet coaster! You have learned valuable skills in choosing yarn, selecting a crochet hook, making a slip knot, creating chain stitches, working in rounds, increasing and decreasing stitches, changing colors, and finishing off your work. With this knowledge, you can continue to explore the world of crochet and take on new projects with confidence.
Crocheting coasters not only allows you to create practical and functional items but also provides a creative outlet for self-expression. The possibilities are endless when it comes to designing and personalizing your coasters. From selecting vibrant colors to experimenting with different stitch patterns, you can truly make each coaster a reflection of your unique style.
As you continue your crochet journey, don’t be afraid to push your boundaries and try new techniques. Expand your skills by exploring different stitches, incorporating texture, and playing with color combinations. The more you practice, the more you will grow and develop as a crocheter.
Don’t forget to share your creations and inspire others with your talents. Whether it’s through social media, crafting forums, or your own handmade gifts, your crochet coasters can bring joy and warmth to the lives of those around you.
Remember, every stitch you make is an opportunity to pour your love and creativity into your work. Crocheting not only produces beautiful handmade pieces but also provides a sense of tranquility and accomplishment. So enjoy the process, embrace the meditative nature of crochet, and let your imagination soar.
Thank you for joining us on this crochet coaster journey. We hope this step-by-step guide has been informative and inspiring. Now, go forth and continue your crochet adventures with enthusiasm and passion. Happy crocheting!
Frequently Asked Questions about How To Make Crochet Coasters
Was this page helpful?
At Storables.com, we guarantee accurate and reliable information. Our content, validated by Expert Board Contributors, is crafted following stringent Editorial Policies. We're committed to providing you with well-researched, expert-backed insights for all your informational needs.

0 thoughts on “How To Make Crochet Coasters”