Home>Furniture>Outdoor Furniture>How To Replace Rollers On Patio Doors
Outdoor Furniture
How To Replace Rollers On Patio Doors
Modified: March 24, 2024
Learn how to replace rollers on patio doors and enjoy smooth and effortless operation of your outdoor furniture.
(Many of the links in this article redirect to a specific reviewed product. Your purchase of these products through affiliate links helps to generate commission for Storables.com, at no extra cost. Learn more)
Introduction
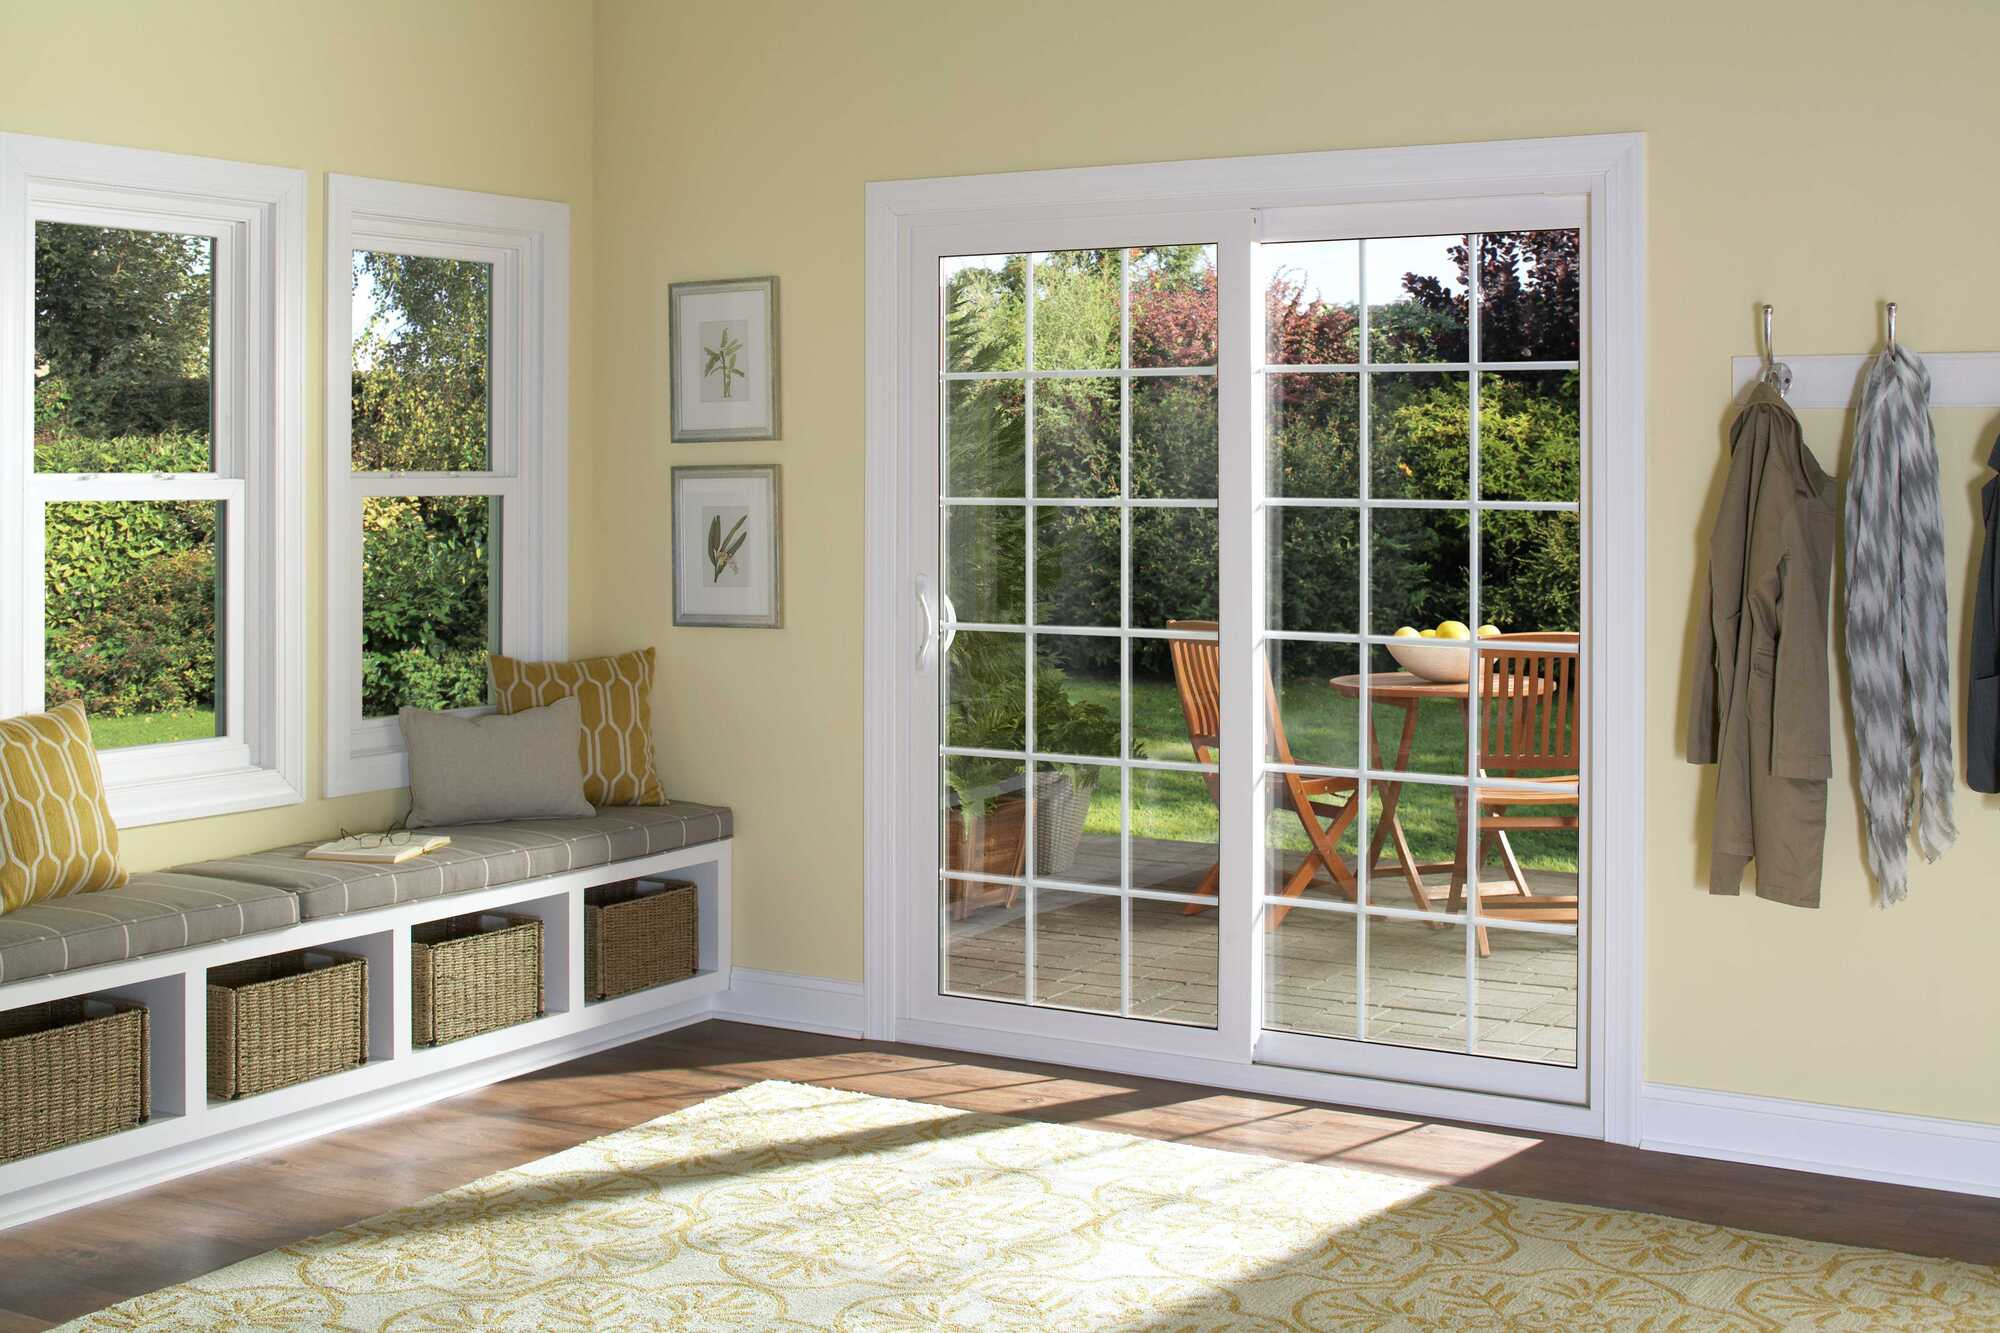
Welcome to the comprehensive guide on how to replace rollers on patio doors. Over time, the rollers on your patio doors can wear out, leading to difficulty in opening and closing the doors smoothly. Fortunately, with a few simple tools and materials, you can easily replace the old rollers and restore the functionality of your patio doors.
Having properly functioning patio doors is crucial for both convenience and security. They allow easy access to your outdoor living space while providing a barrier against the elements. By following the steps outlined in this guide, you can ensure that your patio doors glide effortlessly along their tracks.
Before getting started, it’s important to gather the necessary tools and materials:
Key Takeaways:
- Replacing patio door rollers is a simple DIY project that restores smooth door operation. With basic tools and new rollers, you can enjoy effortless access to your outdoor space.
- Cleaning and lubricating roller tracks is crucial for optimal door performance. Regular maintenance ensures seamless movement and enhances convenience.
Read more: How To Replace Patio Screen Door Rollers
Tools and Materials Needed
- Flathead screwdriver
- Phillips screwdriver
- Adjustable wrench
- Pliers
- Replacement rollers
- Silicone-based lubricant
- Clean cloth
With these tools and materials at your disposal, you will be well-prepared to tackle this DIY project and restore the smooth operation of your patio doors. Let’s dive into the step-by-step process!
Key Takeaways:
- Replacing patio door rollers is a simple DIY project that restores smooth door operation. With basic tools and new rollers, you can enjoy effortless access to your outdoor space.
- Cleaning and lubricating roller tracks is crucial for optimal door performance. Regular maintenance ensures seamless movement and enhances convenience.
Read more: How To Replace Patio Screen Door Rollers
Tools and Materials Needed
Before you begin replacing the rollers on your patio doors, there are a few essential tools and materials you’ll need to ensure a successful project. Having these items on hand will make the process smoother and more efficient. Here’s a list of what you’ll need:
- Flathead screwdriver: This tool will come in handy for removing any screws or fasteners holding the door in place.
- Phillips screwdriver: Some doors may utilize Phillips screws, so it’s important to have this type of screwdriver to remove them.
- Adjustable wrench: You may need an adjustable wrench to loosen or tighten any nuts or bolts on the door.
- Pliers: Pliers can be useful for gripping and removing stubborn parts or components.
- Replacement rollers: It’s crucial to have new rollers on hand that are specifically designed for your patio door model. Make sure to purchase the correct size and type of rollers for a proper fit.
- Silicone-based lubricant: A silicone-based lubricant will help to lubricate the new rollers, ensuring smooth operation of the door.
- Clean cloth: A clean cloth is necessary for wiping down and cleaning the roller tracks before installation of the new rollers.
By having these tools and materials readily available, you’ll be well-prepared to tackle the roller replacement project efficiently and effectively. It’s always a good idea to gather everything before you start to avoid any unnecessary delays or interruptions.
Now that you have everything you need, it’s time to move on to the step-by-step process of replacing the rollers on your patio doors. With patience and careful attention to detail, you’ll have your doors gliding smoothly in no time!
Step 1: Remove the Door from the Track
The first step in replacing the rollers on your patio doors is to remove the door from the track. This will allow you to access the rollers and replace them easily. Follow these steps to safely remove the door:
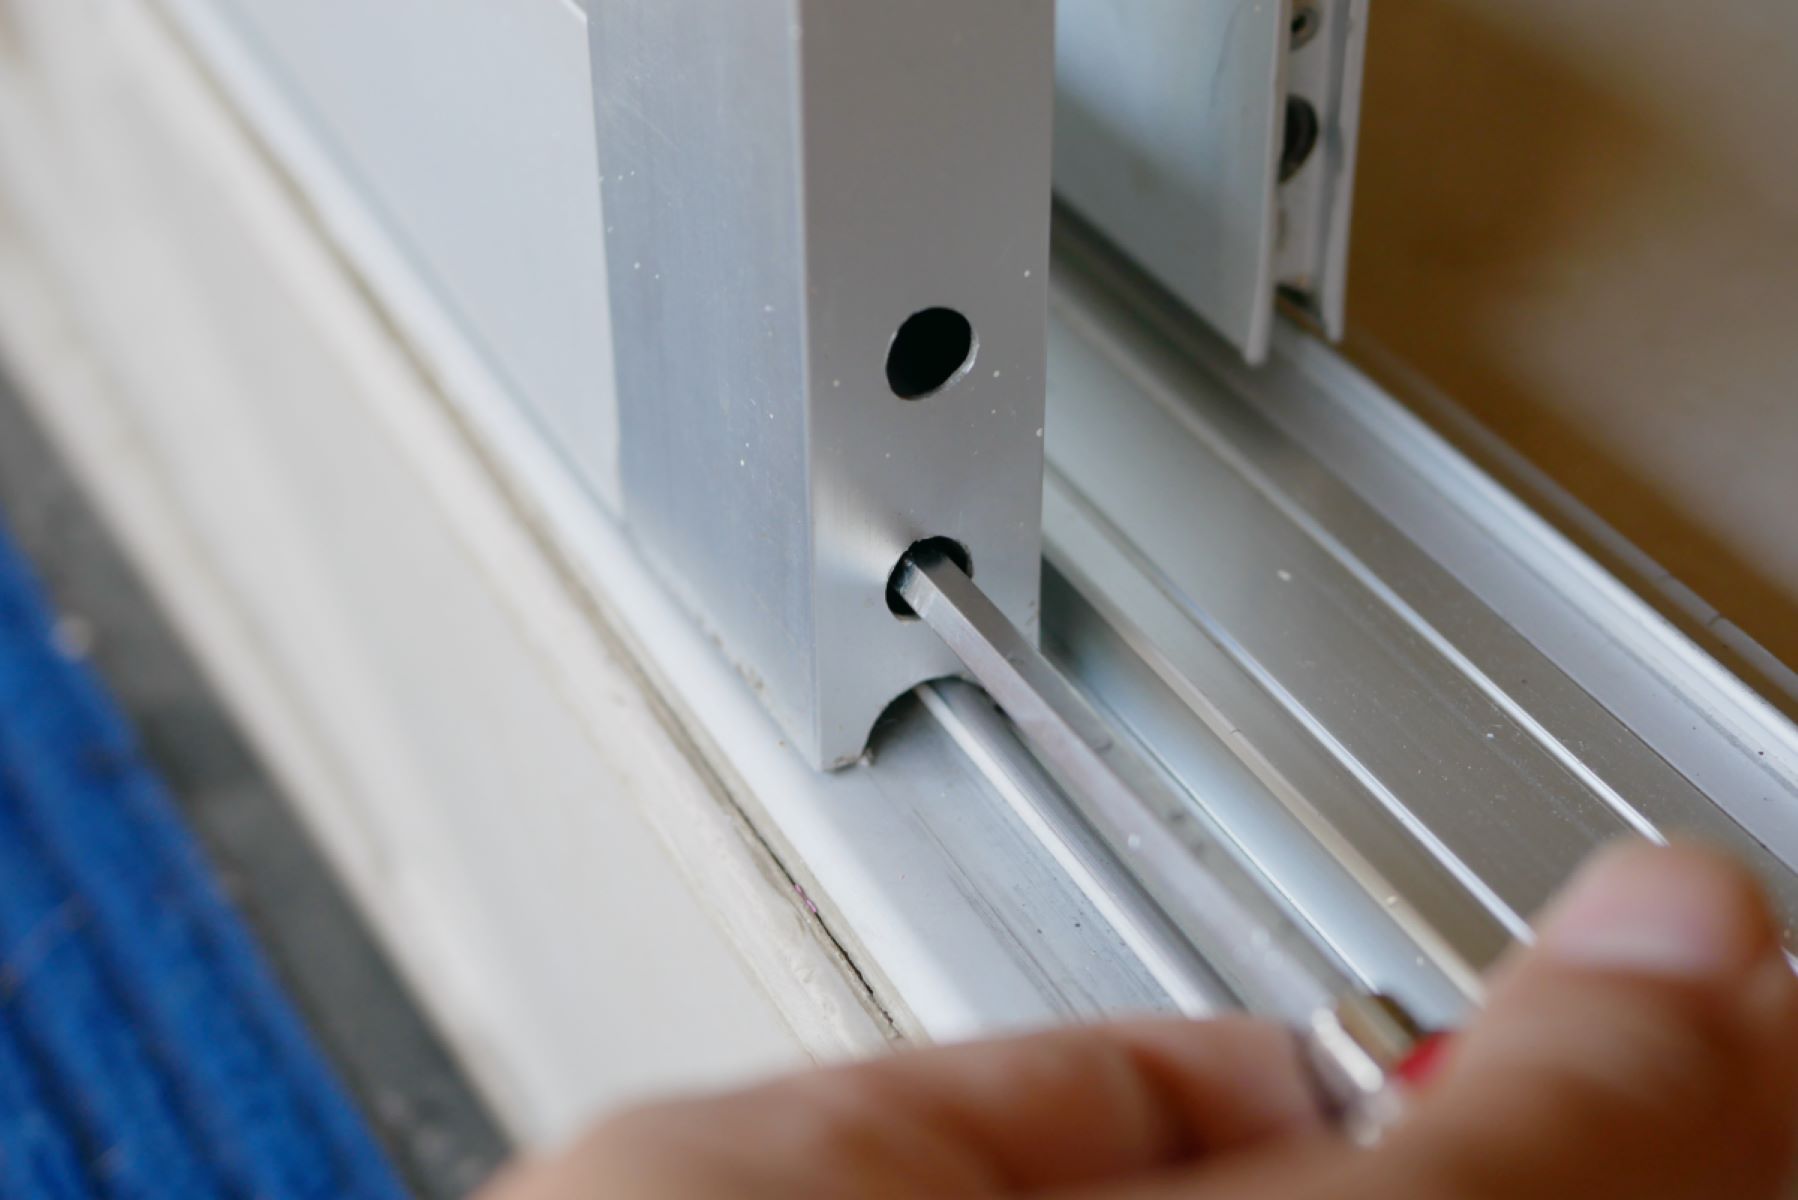
- Locate the adjustment screws: Most patio doors have adjustment screws located on the bottom or side. These screws control the height of the door and help in alignment. Use a screwdriver to adjust the screws counterclockwise to raise the door as much as possible. This will provide enough clearance to remove the door.
- Support the door: Patio doors can be heavy, so it’s important to have someone assist you during this step. Place a sturdy object, such as a wooden block, beneath the door to support its weight and prevent it from falling.
- Remove the stop molding: The stop molding is the trim that holds the door in place. Use a flathead screwdriver to carefully pry off the stop molding, starting from the bottom and working your way up. Set it aside, as it will be reused later.
- Lift the door: With the assistance of your partner, lift the door slightly from its lower track. Tilt the bottom of the door towards you while keeping the top part of the door in the track. Gently pull the bottom of the door out of the track and continue lifting until the door is free.
- Place the door in a safe location: Once the door is removed, carefully set it aside in a secure and flat area, preferably on a soft surface to prevent any damage.
With the door safely removed, you can proceed to the next step of replacing the old rollers. Keep in mind that patio doors come in various types and styles, so the exact process may vary slightly depending on your specific door model.
Now that you’ve successfully removed the door from the track, you’re ready to move on to Step 2: Remove the Old Rollers.
Step 2: Remove the Old Rollers
Now that you have removed the patio door from the track, it’s time to remove the old rollers. Follow these steps to safely and effectively remove the rollers:
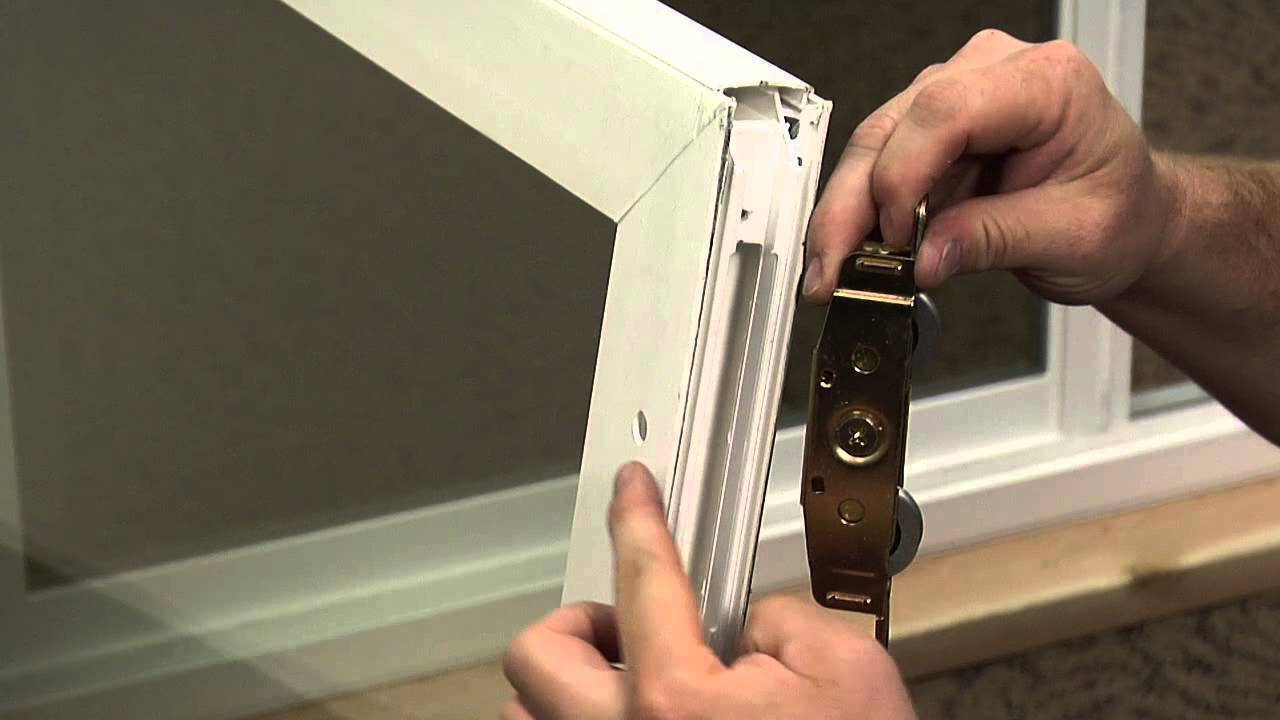
- Inspect the roller assembly: Take a close look at the roller assembly to identify how it is secured to the door. Most roller assemblies are attached with screws or bolts. Use a screwdriver or wrench to remove any fasteners holding the roller assembly in place.
- Remove the roller assembly: Once the fasteners are removed, carefully detach the roller assembly from the door. Be gentle during this step to avoid damaging any surrounding parts or components.
- Inspect the condition of the rollers: Examine the condition of the old rollers. Over time, rollers can become worn, corroded, or damaged, causing the door to operate poorly. If the rollers are in poor condition, it’s best to replace them with new ones.
- Remove the old rollers: Most rollers are held in place by a retaining clip or screw. Use pliers or a screwdriver to remove the retaining clip or screw, depending on the type of roller assembly. Once the retaining mechanism is removed, gently slide out the old rollers from the roller assembly.
- Clean the roller assembly: Use a clean cloth to wipe down the roller assembly and remove any dirt, debris, or built-up lubricant. Cleaning the roller assembly will ensure smooth operation when the new rollers are installed.
By following these steps, you can effectively remove the old rollers from your patio door. Take note of the condition of the old rollers as this will guide you in determining whether they can be reused or if it’s necessary to install new rollers. Remember, it’s always best to replace worn or damaged rollers to ensure optimal door performance.
Now that you have successfully removed the old rollers, it’s time to move on to Step 3: Clean the Roller Tracks.
When replacing rollers on patio doors, make sure to measure the existing rollers before purchasing new ones to ensure a proper fit. Clean the track thoroughly before installing the new rollers to ensure smooth operation.
Step 3: Clean the Roller Tracks
After removing the old rollers from your patio door, it’s important to clean the roller tracks to ensure smooth and seamless operation of the new rollers. Follow these steps to effectively clean the roller tracks:
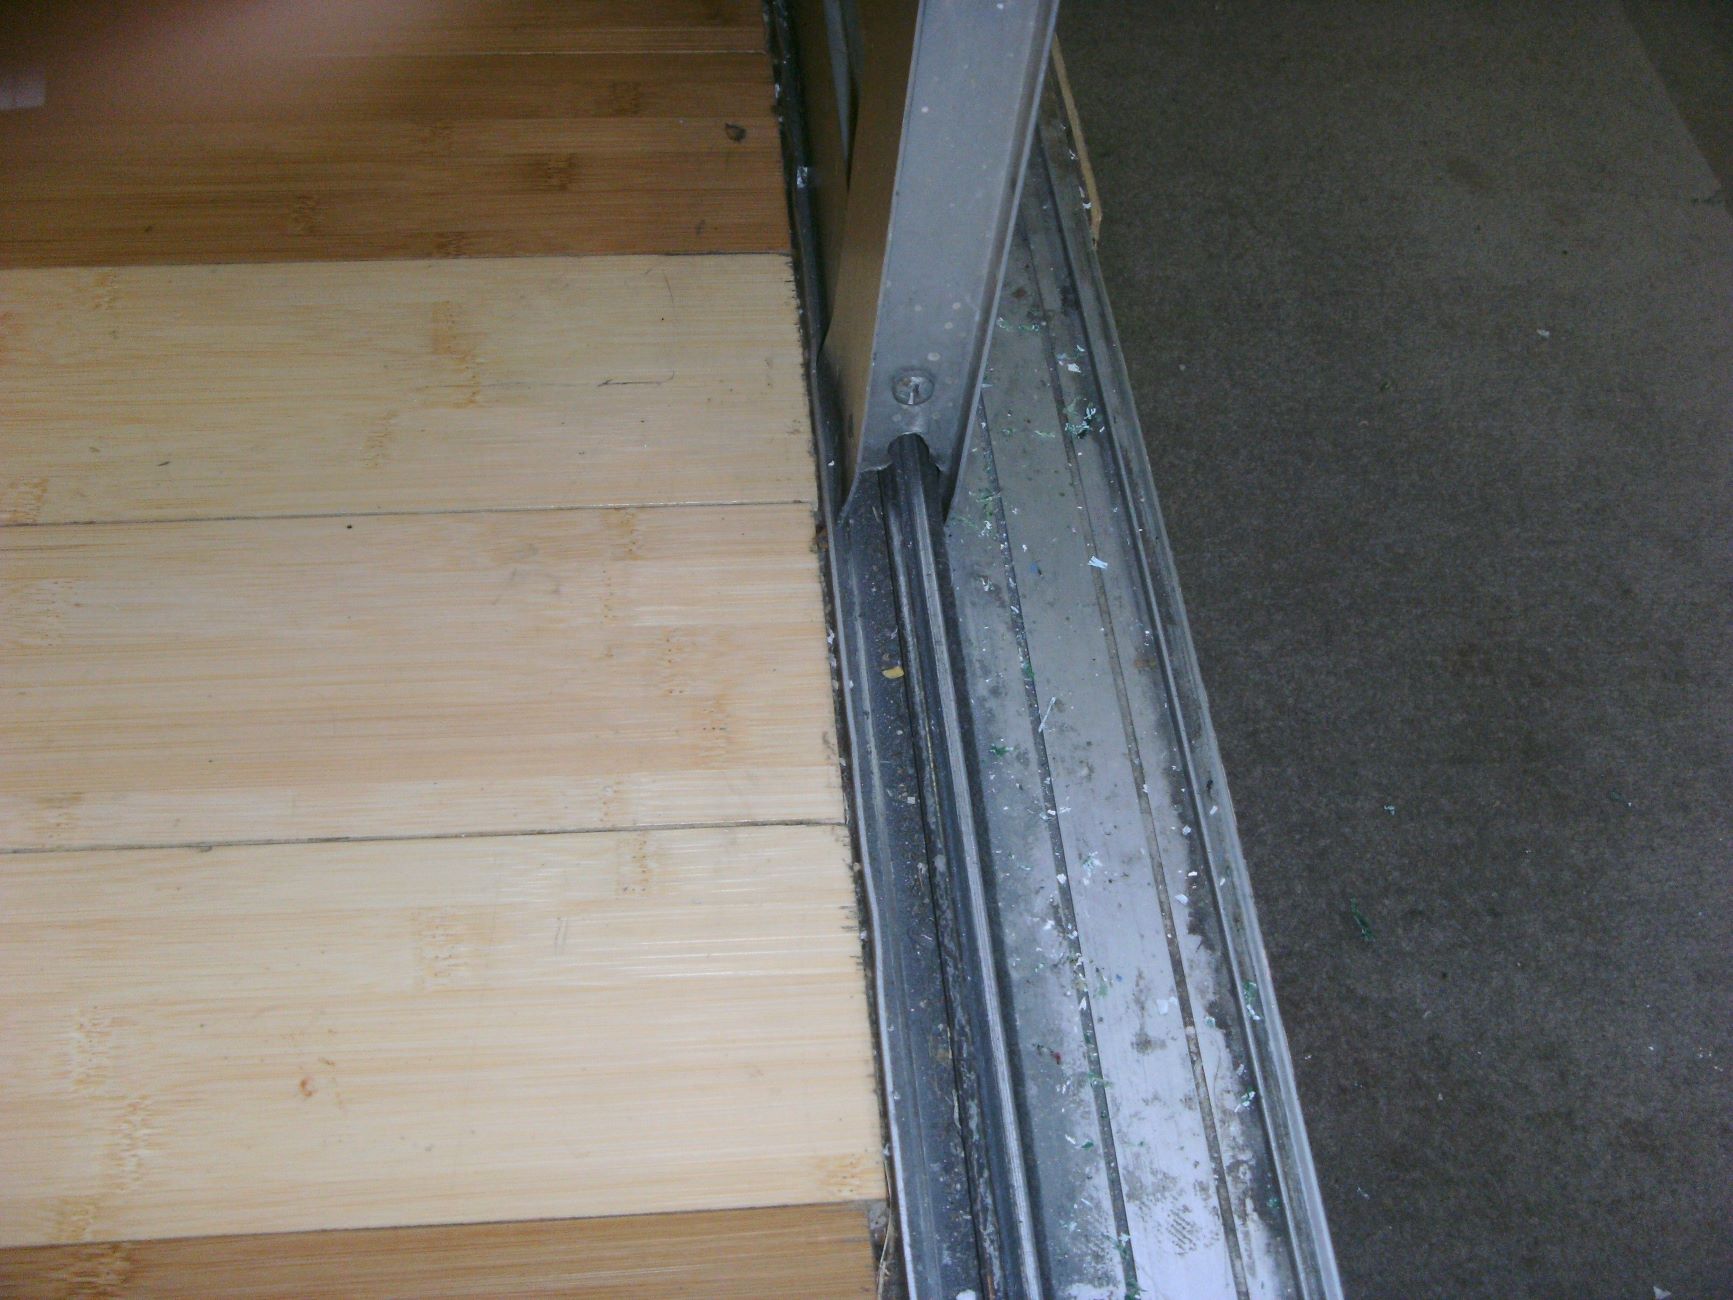
- Inspect the roller tracks: Take a close look at the roller tracks to assess their condition and identify any dirt, debris, or obstructions. Clearing the tracks of any buildup will prevent future issues and ensure the new rollers operate smoothly.
- Remove any loose debris: Use a clean cloth or a soft brush to remove any loose dirt, dust, or debris from the roller tracks. Gently wipe or brush the tracks, making sure to reach all the corners and crevices.
- Use a mild detergent solution: For more stubborn dirt or grime, mix a small amount of mild detergent with warm water. Dampen a cloth with the solution and thoroughly clean the roller tracks, paying extra attention to heavily soiled areas.
- Rinse with clean water: After cleaning the roller tracks with the detergent solution, rinse them thoroughly with clean water. This will remove any residual soap or cleaning solution.
- Dry the roller tracks: Use a dry clean cloth to wipe down the roller tracks and ensure they are completely dry. Drying the tracks will prevent rusting and allow for smooth installation of the new rollers.
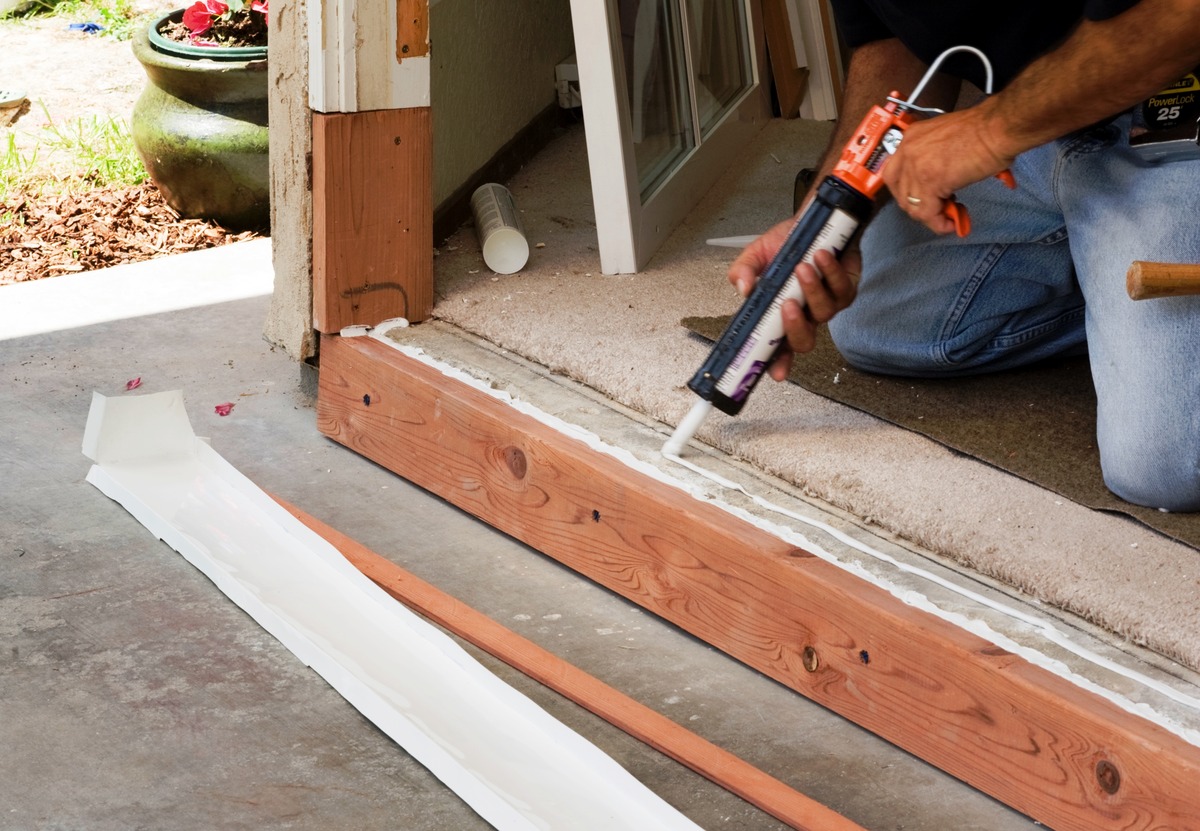
- Apply lubricant: Once the roller tracks are clean and dry, apply a small amount of silicone-based lubricant. This will help the new rollers move smoothly along the tracks.
Cleaning the roller tracks is an essential step in the roller replacement process. Removing any dirt, debris, or obstructions will ensure that the new rollers operate efficiently and correctly. Taking the time to clean and lubricate the roller tracks will improve the overall performance and longevity of your patio door.
Now that you have cleaned the roller tracks, you’re ready to move on to the next step: Step 4: Install the New Rollers.
Step 4: Install the New Rollers
With the old rollers removed and the roller tracks cleaned, it’s time to install the new rollers on your patio door. Follow these steps to properly install the new rollers:
- Prepare the new rollers: Before installation, ensure that the new rollers are the correct size and type for your patio door. Refer to the manufacturer’s instructions or consult a professional if you are unsure. Inspect the new rollers to ensure they are in good condition and free of any defects.
- Slide the new rollers into the roller assembly: Take one of the new rollers and slide it into the roller assembly. Make sure it sits securely and is aligned properly with the roller track. Repeat this step for the remaining rollers.
- Secure the new rollers: Depending on the type of roller assembly, the new rollers may be secured with a retaining clip or screw. Use pliers or a screwdriver to attach the retaining clip or screw, ensuring that the rollers are firmly held in place.
- Test the movement of the rollers: Once the new rollers are secured, test the movement of the door along the roller tracks. The door should slide smoothly and without any resistance. If there are any issues or if the door is not gliding properly, double-check the installation of the new rollers and make any necessary adjustments.
Installing new rollers is a vital step in restoring the functionality and smooth operation of your patio door. Properly aligning and securely attaching the new rollers will ensure a seamless and effortless movement of the door along the roller tracks.
Now that you have successfully installed the new rollers, it’s time to move on to the next step: Step 5: Reinstall the Door onto the Track.
Step 5: Reinstall the Door onto the Track
With the new rollers installed, it’s time to reattach the patio door onto the track. Follow these steps to securely reinstall the door:
- Position the door: Lift the door, ensuring it is properly positioned and aligned with the lower track. Tilt the bottom of the door slightly towards the track, guiding the top part of the door into the upper track.
- Lower the door: Slowly lower the door onto the lower track, making sure it sits evenly and securely. Be careful not to pinch your fingers or damage the rollers during this process.
- Adjust the rollers: Use the adjustment screws located on the bottom or side of the door to fine-tune the height and alignment. Turn the adjustment screws clockwise to lower the door or counterclockwise to raise it. This will ensure a proper fit and smooth operation of the door.
- Attach the stop molding: Retrieve the stop molding that was removed earlier and position it back onto the door frame. Gently tap it into place using a rubber mallet or a soft hammer, ensuring it is securely fastened.
- Test the door’s operation: Slide the door along the track to test its movement. It should open and close smoothly without any resistance or sticking. If there are any issues, adjust the rollers or check for any obstructions in the track.
Reinstalling the door onto the track is the final step in the roller replacement process. Take your time to properly align and adjust the door, ensuring that it moves effortlessly and securely along the track.
Now that you have successfully reinstalled the door, it’s time to move on to the final step: Step 6: Test the Door’s Operation.
Step 6: Test the Door’s Operation
Now that you have reinstalled the patio door and completed the roller replacement process, it’s time to test the door’s operation. This step is crucial to ensure that the new rollers are functioning properly and that the door moves smoothly along the track. Follow these steps to test the door:
- Open and close the door: Gently slide the door open and closed along the track. Pay close attention to the movement and make note of any resistance or sticking.
- Check for smooth operation: The door should glide effortlessly along the track without any hitches or bumps. Smooth and seamless movement is a sign that the new rollers are functioning correctly.
- Listen for any unusual sounds: As you open and close the door, listen for any unusual noises such as grinding, scraping, or squeaking. These may indicate issues with the rollers or the track.
- Make adjustments if necessary: If you encounter any issues during the testing process, such as resistance or uneven movement, it may be necessary to make further adjustments. Check for proper alignment, ensure the rollers are secure, and lubricate any necessary areas.
- Finalize adjustments: Continue making adjustments, if needed, until the door operates smoothly and efficiently. Take the time to fine-tune the height and alignment of the door using the adjustment screws.
Testing the door’s operation is crucial to ensure that the roller replacement process was successful. It allows you to identify any issues early on and make the necessary adjustments to ensure optimal functionality.
By following these steps and ensuring that your patio door opens and closes smoothly, you can enjoy a seamless transition between your indoor and outdoor living spaces, enhancing your overall convenience and comfort.
Congratulations on successfully completing the roller replacement process for your patio doors. With new, properly functioning rollers, you can now enjoy easy access to your outdoor space and a renewed sense of convenience and security.
Read more: How To Replace Rollers On Garage Door
Conclusion
Replacing the rollers on your patio doors is a straightforward process that can greatly improve the functionality and convenience of your outdoor space. By following the step-by-step guide outlined in this article, you can successfully replace the old, worn-out rollers with new ones, ensuring smooth and effortless operation of your doors.
Throughout the roller replacement process, it’s important to pay attention to detail and take the necessary precautions to avoid any damage or injury. Always gather the required tools and materials before starting, and work with a partner if needed, especially when removing and reinstalling the door.
Proper maintenance of your patio doors is essential for their longevity and smooth operation. Keep an eye on the condition of the rollers, tracks, and other components, and address any issues promptly. Regular cleaning and lubrication will help prevent buildup and ensure that the doors continue to function optimally.
Remember to choose replacement rollers that are specifically designed for your patio door model to ensure a proper fit and smooth movement. It’s also a good idea to consult the manufacturer’s instructions or seek professional help if you have any doubts or concerns about the roller replacement process.
By following the steps outlined in this guide and taking the time to properly maintain your patio doors, you can enjoy seamless access to your outdoor living space, enhanced functionality, and added convenience.
Now that you have the know-how to replace the rollers on your patio doors, it’s time to get started! By dedicating a little time and effort, you can restore the smooth operation and functionality of your patio doors, allowing for easy access and a seamless transition between your indoor and outdoor spaces.
Frequently Asked Questions about How To Replace Rollers On Patio Doors
Was this page helpful?
At Storables.com, we guarantee accurate and reliable information. Our content, validated by Expert Board Contributors, is crafted following stringent Editorial Policies. We're committed to providing you with well-researched, expert-backed insights for all your informational needs.

0 thoughts on “How To Replace Rollers On Patio Doors”