Home>Gardening & Outdoor>Outdoor Structures>How To Build A Metal Awning
Outdoor Structures
How To Build A Metal Awning
Modified: March 2, 2024
Learn how to build a durable outdoor metal awning with our expert tips and step-by-step guide. Create a stylish and functional addition to your outdoor space.
(Many of the links in this article redirect to a specific reviewed product. Your purchase of these products through affiliate links helps to generate commission for Storables.com, at no extra cost. Learn more)
Introduction
Welcome to the world of outdoor structures, where functionality meets style, and practicality intertwines with aesthetics. If you’re looking to add a touch of modern elegance and weather protection to your outdoor space, a metal awning might be the perfect addition to your home. Whether you want to create a cozy spot to enjoy your morning coffee, shield your patio furniture from the elements, or simply elevate the visual appeal of your property, a metal awning can be a versatile and durable solution.
Building a metal awning from scratch can be a rewarding project that allows you to customize the design to suit your specific needs and preferences. From choosing the right materials to mastering the construction process, this endeavor offers the opportunity to showcase your DIY skills while enhancing your outdoor living space.
In this comprehensive guide, we will walk you through the step-by-step process of building a metal awning, covering everything from planning and design to installation and maintenance. By the end, you will have the knowledge and confidence to embark on this exciting project and create a stunning metal awning that seamlessly integrates with your outdoor environment.
Key Takeaways:
- Building a metal awning involves careful planning, sturdy construction, and thoughtful finishing touches to create a stylish and functional outdoor retreat.
- Regular maintenance and care are essential to preserve the beauty and durability of your metal awning, ensuring it remains a valuable asset for years to come.
Read more: How To Build An Awning Frame
Materials and Tools Needed
Before diving into the construction of your metal awning, it’s essential to gather all the necessary materials and tools. Here’s a comprehensive list to ensure you’re well-prepared for the project:
Materials:
- Galvanized metal sheets or aluminum panels
- Pressure-treated lumber or metal tubing for the frame
- Concrete mix or anchors for secure installation
- Sealant or waterproofing material
- Rust-resistant screws and bolts
- Primer and paint for finishing (if desired)
- Optional: Decorative elements such as trim or molding
Tools:
- Tape measure and level
- Power drill with screwdriver and drill bits
- Saw for cutting lumber or metal
- Wrench or socket set
- Caulking gun for sealant application
- Ladder or scaffolding for elevated work
- Safety gear including gloves and goggles
It’s important to invest in high-quality materials to ensure the longevity and structural integrity of your metal awning. Additionally, having the right tools for the job will streamline the construction process and contribute to a professional finish.
By gathering these materials and tools, you’ll be well-equipped to embark on the exciting journey of building your own metal awning, transforming your outdoor space into a functional and visually appealing retreat.
Planning and Design
Embarking on the construction of a metal awning begins with meticulous planning and thoughtful design. This phase is crucial in ensuring that your awning not only complements the architectural style of your home but also meets your specific functional requirements.
Assess Your Needs: Start by identifying the purpose of your metal awning. Are you looking to create a shaded area for outdoor dining, a shelter for your vehicle, or a decorative element to enhance your home’s facade?
Consider the Location: Evaluate the ideal placement for your awning. Take into account the direction of sunlight, prevailing winds, and any potential obstructions. This will help determine the size and orientation of the awning to maximize its effectiveness.
Design the Structure: Whether you opt for a traditional sloped design or a more contemporary flat-roofed style, the design of your awning should harmonize with the existing architecture of your home. Additionally, consider the materials and colors that will seamlessly integrate with your outdoor space.
Check Local Regulations: Before proceeding with the construction, familiarize yourself with any local building codes or regulations that may impact the design and installation of your metal awning. This may include obtaining permits or adhering to specific structural requirements.
Create Detailed Plans: Develop detailed sketches or blueprints that outline the dimensions, materials, and structural elements of your metal awning. This will serve as a valuable reference during the construction phase and ensure that your vision is accurately realized.
By investing time in careful planning and thoughtful design, you can lay the foundation for a successful metal awning project. This preparation phase sets the stage for a smooth construction process and ultimately leads to a finished product that aligns with your vision and enhances your outdoor living space.
Read more: How To Build A Wood Awning
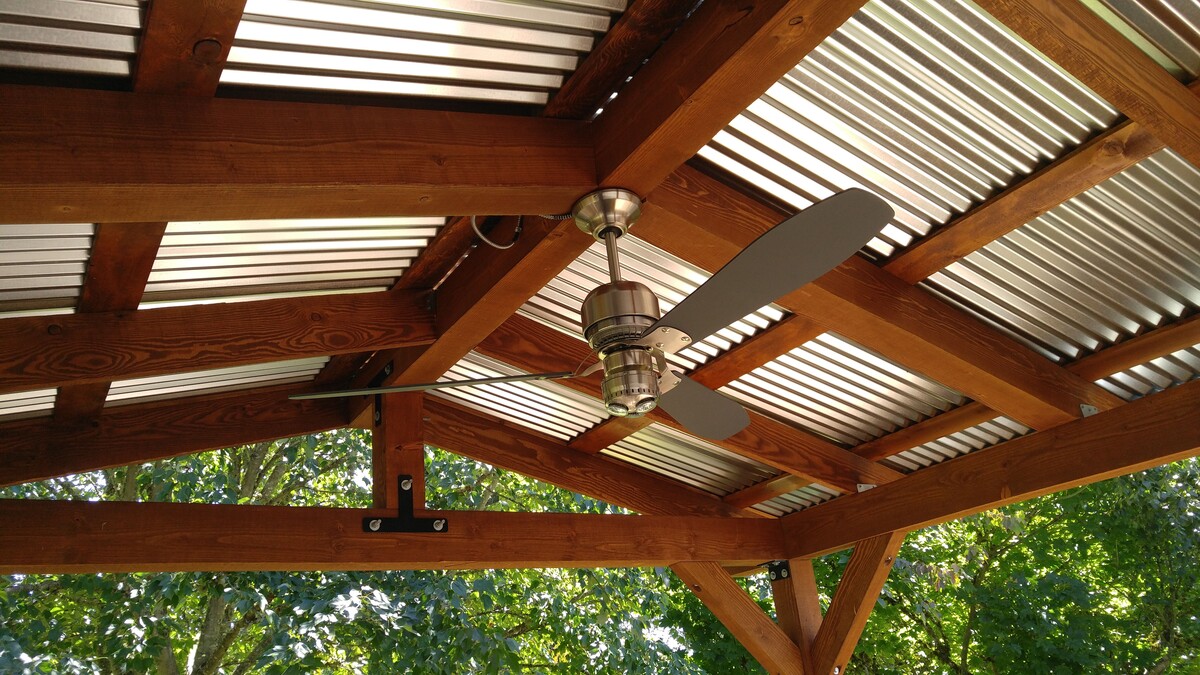
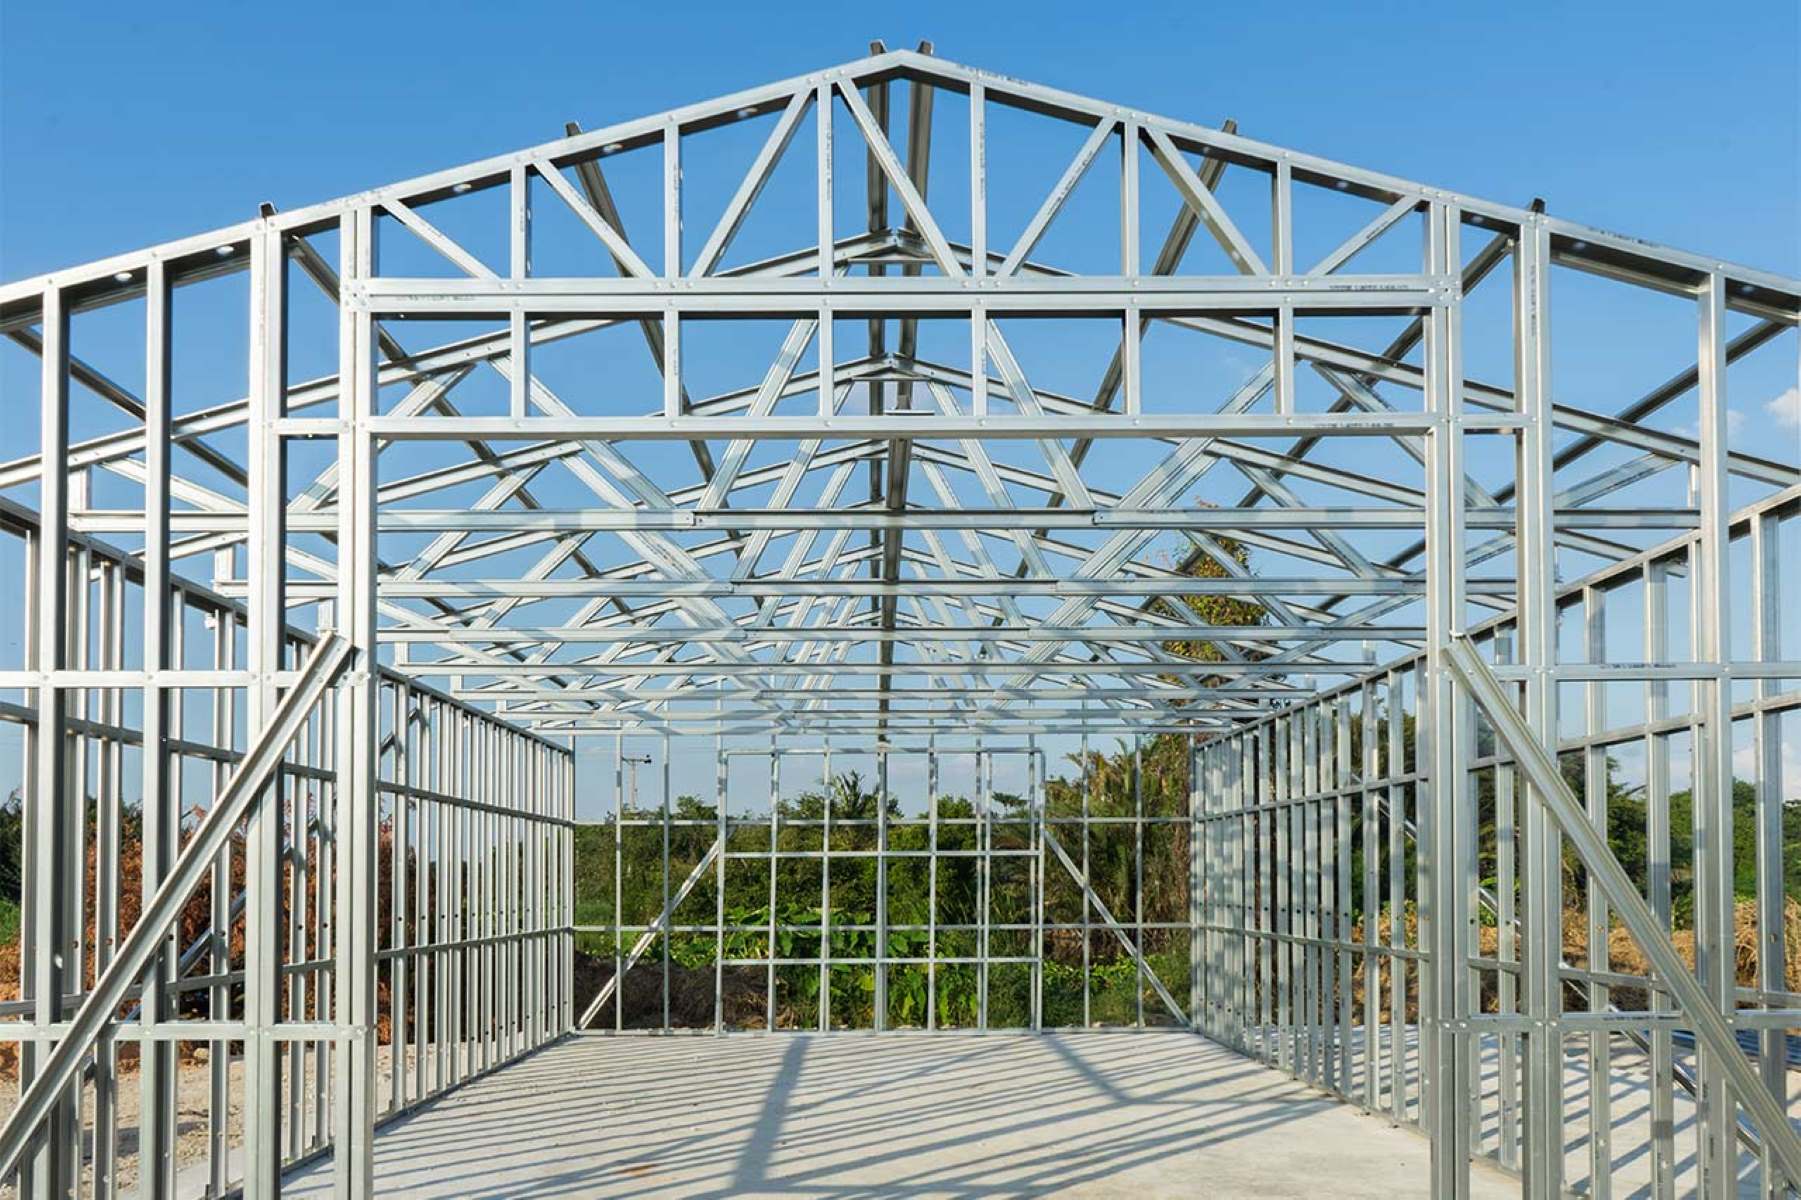
Building the Frame
With the planning and design phase complete, it’s time to bring your metal awning to life by constructing the frame. The frame serves as the backbone of the structure, providing stability and support for the metal panels that will form the roof. Here’s a step-by-step guide to building the frame for your metal awning:
1. Measure and Cut the Frame Components: Begin by measuring and cutting the pressure-treated lumber or metal tubing to the required lengths, following the dimensions outlined in your design plans. Ensure precision in your cuts to achieve a snug and secure fit during assembly.
2. Assemble the Frame Structure: Using your measurements as a guide, assemble the frame components according to the design specifications. This may involve securing the vertical supports to the horizontal beams, creating a sturdy framework that will uphold the weight of the metal panels.
3. Secure the Frame to the Installation Surface: Depending on your chosen location, secure the frame to the ground using concrete anchors or by embedding the supports in concrete footings. This step is crucial for ensuring the stability and durability of your metal awning, especially in areas prone to strong winds or inclement weather.
4. Apply Protective Coatings: If working with metal tubing, consider applying a protective coating to guard against corrosion and extend the lifespan of the frame. This could involve using rust-resistant paint or specialized coatings designed for outdoor use.
5. Ensure Structural Integrity: Before proceeding to the next phase of construction, carefully inspect the frame to confirm that it is level, securely anchored, and structurally sound. Address any inconsistencies or issues to guarantee the stability of the entire awning structure.
By meticulously constructing a robust frame, you lay the groundwork for a durable and reliable metal awning that will stand the test of time. With the frame in place, you are ready to proceed to the next stage of the construction process – attaching the metal panels to form the roof of your awning.
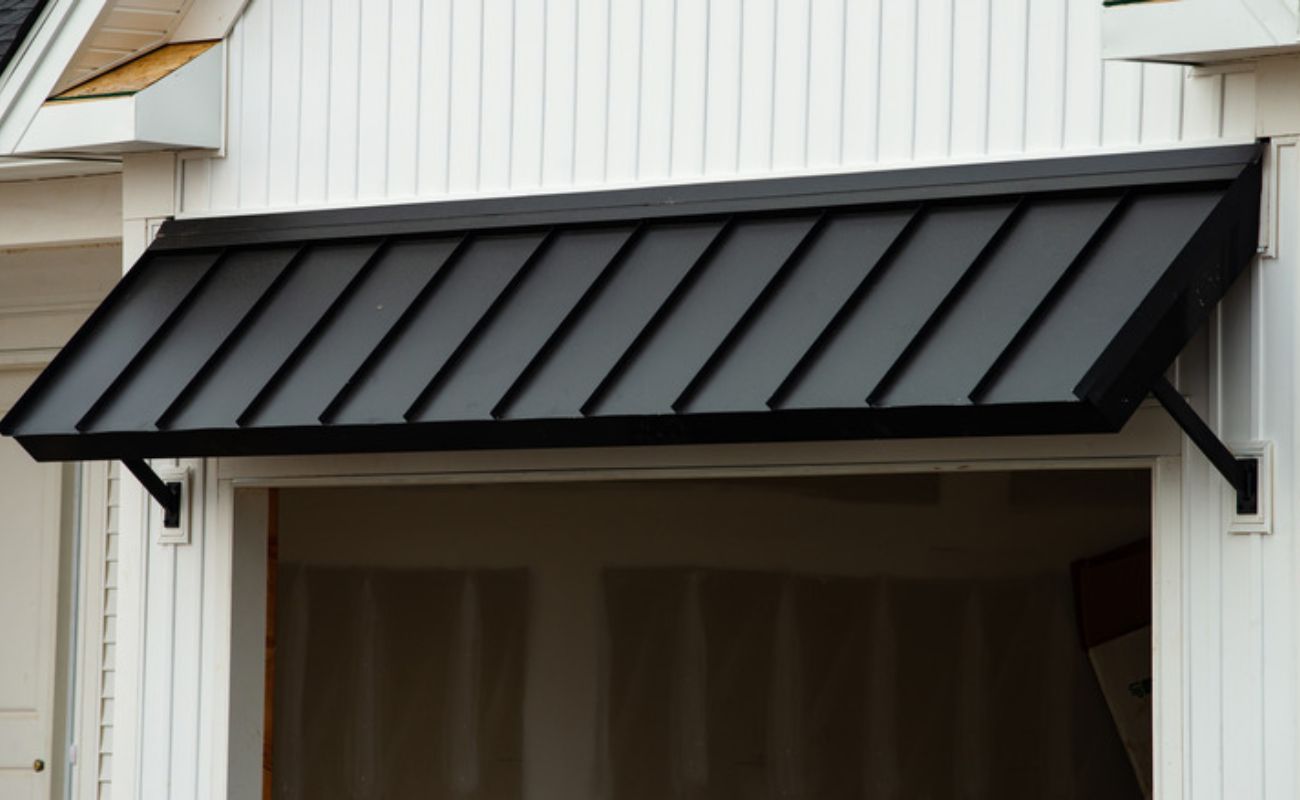
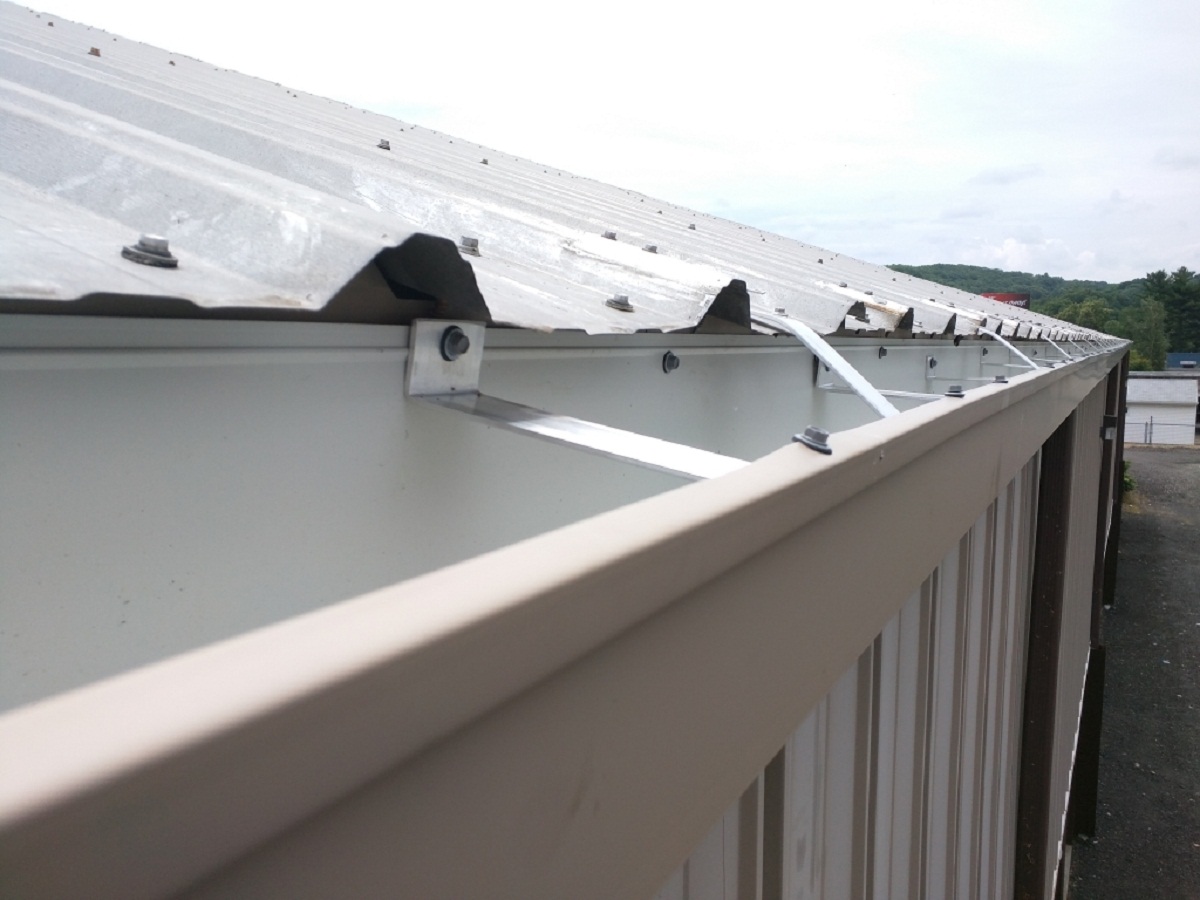
Attaching the Metal Panels
As the frame of your metal awning takes shape, the next crucial step is to attach the metal panels that will form the protective roof. This phase requires precision and attention to detail to ensure a secure and visually appealing result. Here’s a comprehensive guide to attaching the metal panels to your awning frame:
1. Select the Right Panels: Choose high-quality galvanized metal sheets or aluminum panels that are suitable for outdoor use. Consider the dimensions and coverage area required, ensuring that the panels are compatible with the size and design of your awning.
2. Positioning and Alignment: Carefully position the first metal panel on the frame, ensuring that it aligns with the edges and overhangs as per your design specifications. Use a level to confirm that the panel is perfectly horizontal, as this will set the standard for the remaining panels.
3. Secure the Panels: Utilize rust-resistant screws and bolts to secure the metal panels to the frame, ensuring a snug fit without over-tightening. Start by attaching the panels at the corners and edges, gradually working inward to maintain even alignment and prevent warping.
4. Weatherproofing and Sealant: Apply a high-quality sealant along the seams and edges of the metal panels to prevent water infiltration and enhance the weatherproofing of your awning. This step is crucial for safeguarding the underlying frame and ensuring long-term durability.
5. Overlapping and Finishing: If using multiple metal panels to cover the entire roof area, ensure that they overlap according to the manufacturer’s recommendations. This will provide additional protection against moisture and create a seamless, professional finish.
6. Aesthetic Considerations: If desired, consider adding decorative elements such as trim or molding to the edges of the metal panels, enhancing the visual appeal of your awning and creating a polished, finished look.
By methodically attaching the metal panels, you transform the frame into a functional and visually striking metal awning. The secure installation and attention to detail during this phase contribute to the overall durability and aesthetic appeal of your outdoor structure.
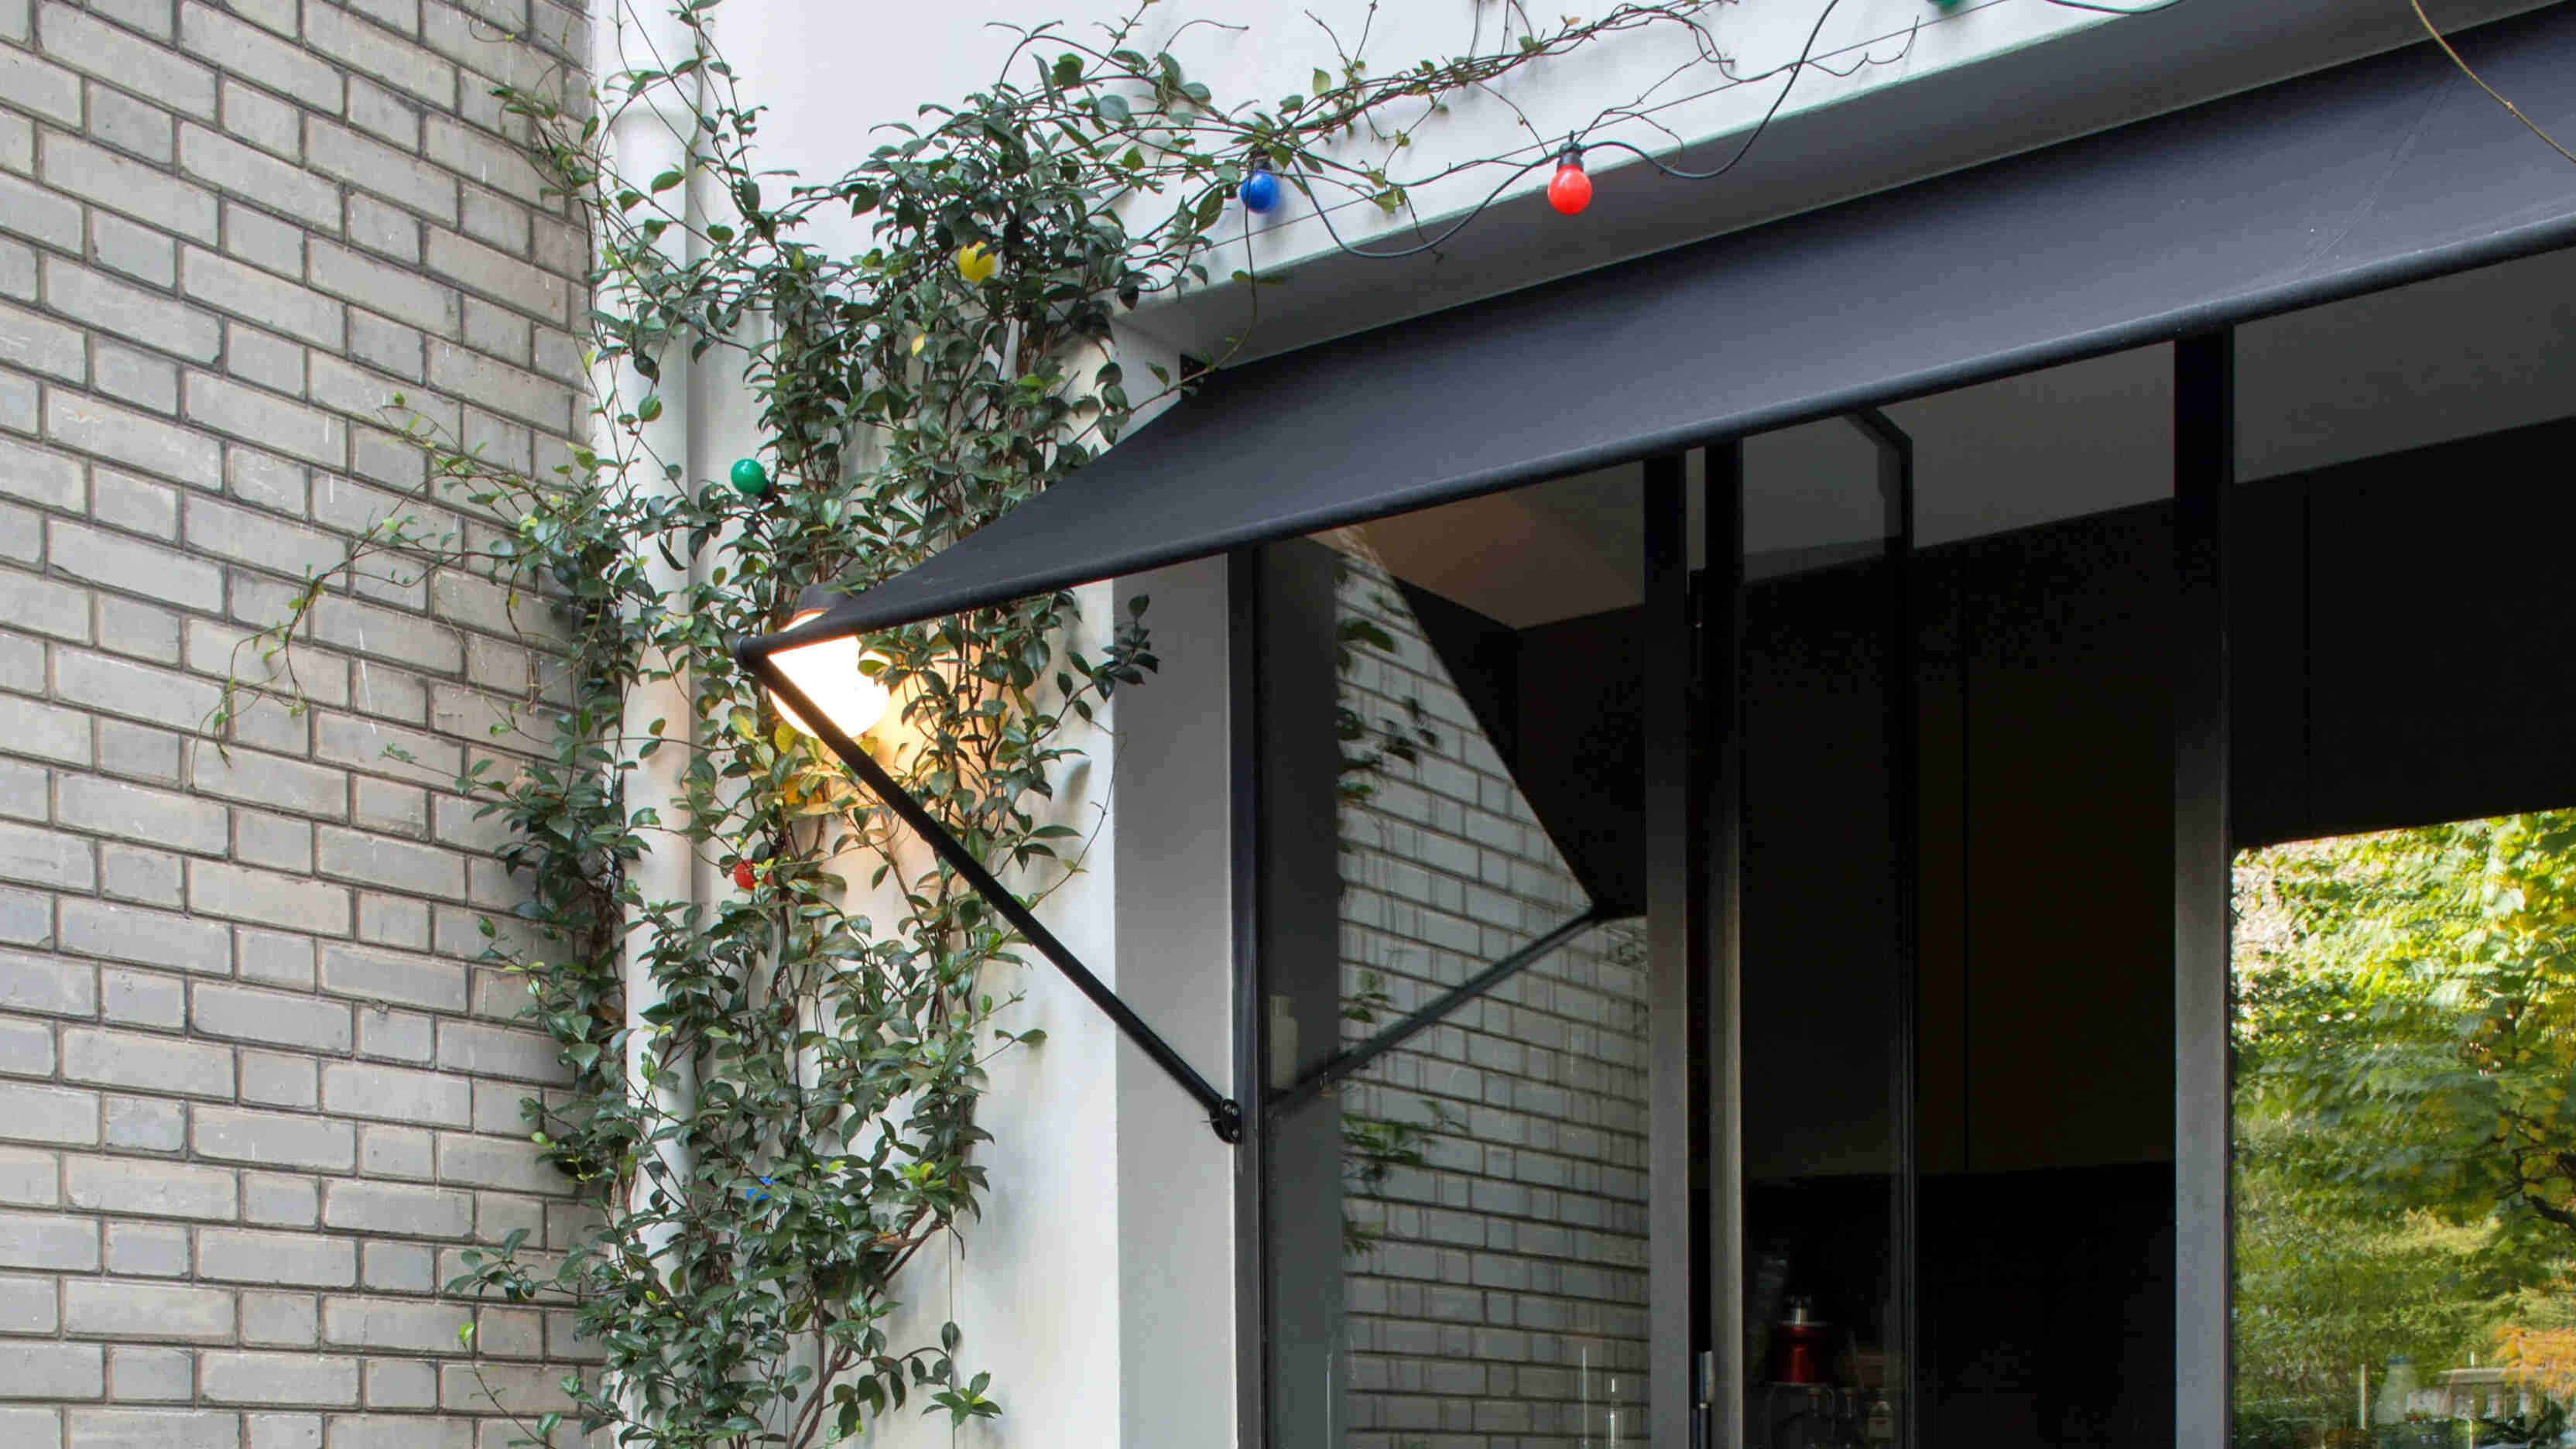
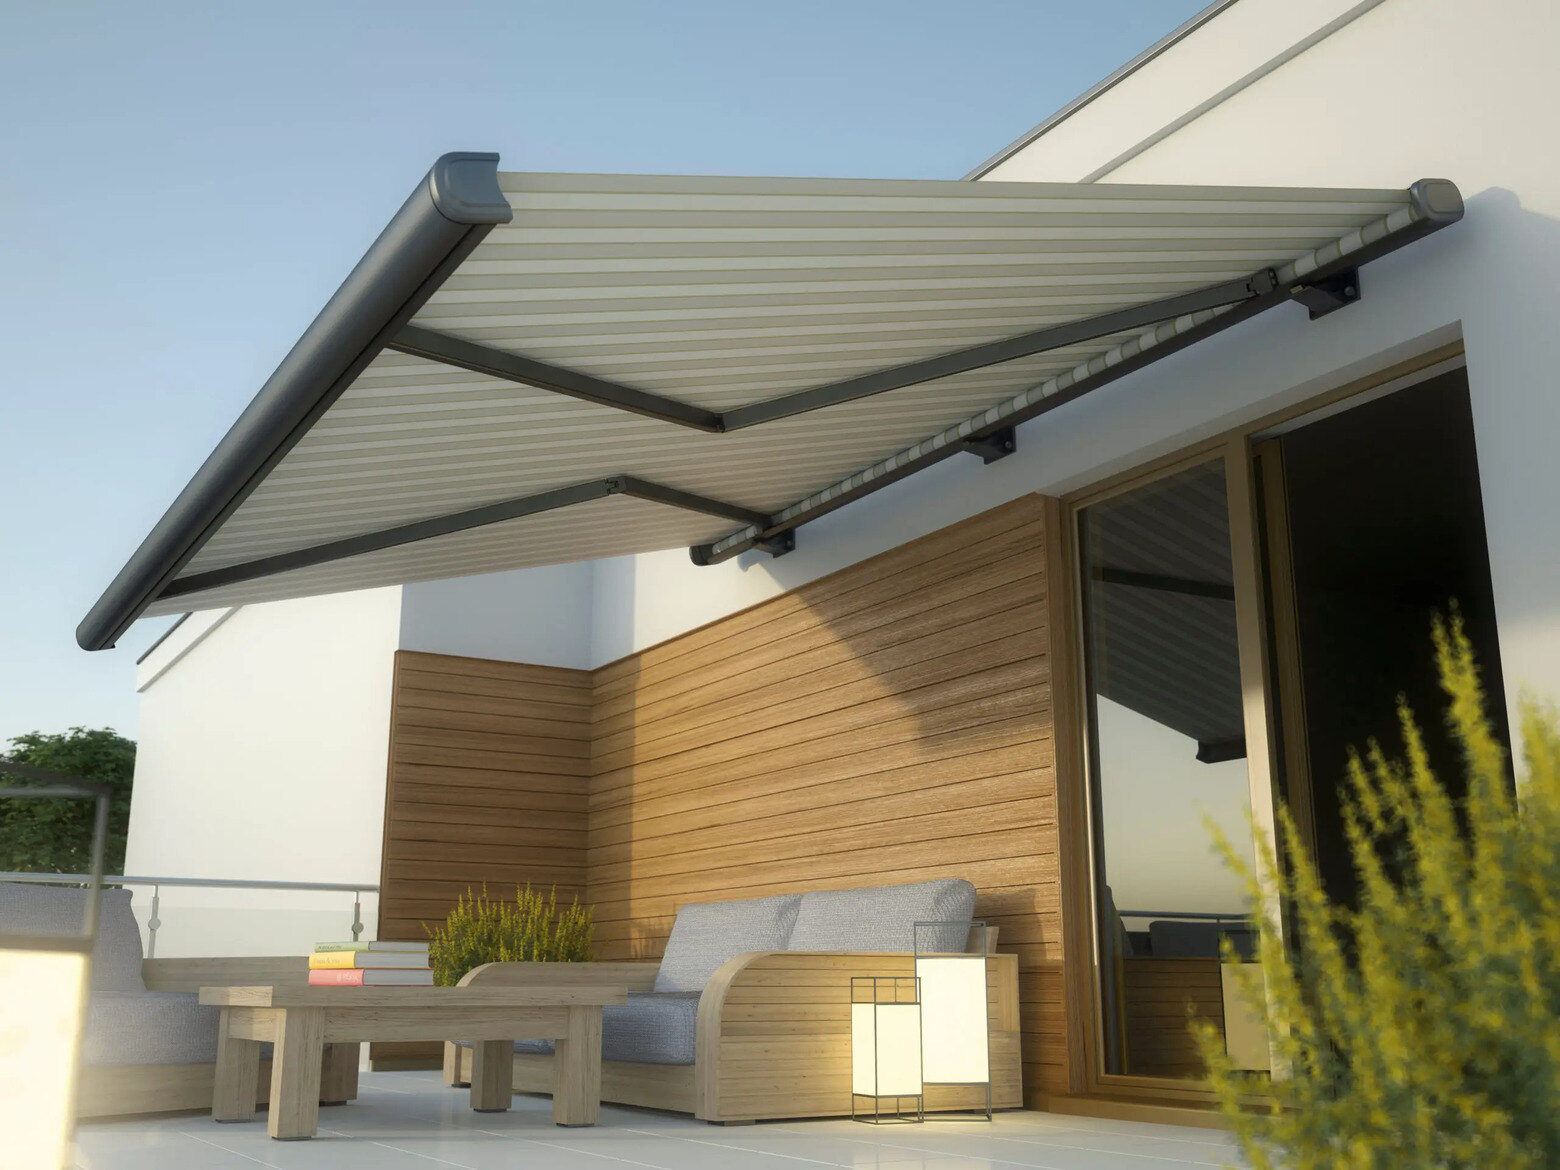
Installing the Awning
With the frame constructed and the metal panels securely attached, the final phase of bringing your metal awning to life involves the installation process. This step is pivotal in ensuring that your awning is firmly anchored and seamlessly integrated into your outdoor space. Here’s a detailed guide to installing your metal awning:
1. Positioning and Alignment: Carefully position the completed awning structure in its designated location, ensuring that it aligns with the surrounding architecture and serves its intended purpose. Take into account the orientation and angle to optimize shade and protection.
2. Secure Attachment: If your awning is designed to be freestanding, ensure that it is securely anchored to the ground using concrete footings or anchors. For wall-mounted awnings, follow manufacturer guidelines to securely attach the structure to the exterior wall, taking care to locate and secure it to the wall studs for maximum stability.
3. Confirm Stability and Leveling: Use a level to confirm that the awning is perfectly horizontal and free from any tilting or instability. This step is crucial for both the structural integrity of the awning and the visual appeal of the finished installation.
4. Test Functionality: Once the awning is installed, test its functionality by assessing its ability to provide shade and protection as intended. Open and close the awning (if applicable) to ensure smooth operation and assess its effectiveness in creating the desired outdoor environment.
5. Final Inspections and Adjustments: Conduct a thorough inspection of the installed awning, checking for any signs of instability, loose fastenings, or visual imperfections. Make any necessary adjustments to ensure that the installation is flawless and meets your expectations.
6. Optional Additions: Consider additional features such as integrated lighting, retractable mechanisms, or decorative elements to further enhance the functionality and visual appeal of your metal awning.
By meticulously installing your metal awning, you complete the transformation of your outdoor space, creating a functional and stylish addition to your home. The installation process is the final step in bringing your vision to life and enjoying the benefits of a well-constructed metal awning.
When building a metal awning, make sure to use sturdy materials such as aluminum or steel for durability. Consider the angle and pitch of the awning to ensure proper water drainage. And always follow local building codes and regulations.
Finishing Touches
As you near the completion of your metal awning project, it’s time to add the finishing touches that will elevate its visual appeal and ensure long-term durability. These final details can enhance the overall aesthetics and functionality of your awning, creating a polished and inviting outdoor space. Here are the key aspects to consider when adding the finishing touches to your metal awning:
1. Paint and Sealant: Apply a weather-resistant paint to the metal panels and frame, providing both a decorative finish and an additional layer of protection against the elements. Choose a color that complements your home’s exterior and enhances the overall visual impact of the awning. Additionally, apply a durable sealant to safeguard the metal surfaces from corrosion and prolong their lifespan.
2. Decorative Elements: Consider incorporating decorative elements such as trim, molding, or ornamental features to add character and charm to your awning. These details can transform a functional structure into a visually appealing focal point in your outdoor space, reflecting your personal style and enhancing the overall ambiance.
3. Integrated Lighting: Enhance the usability of your metal awning by integrating lighting fixtures. Strategically placed lights can extend the functionality of the space into the evening hours, creating an inviting atmosphere for outdoor gatherings and relaxation. Choose lighting options that complement the design of your awning and provide the desired illumination.
4. Maintenance Considerations: Implement a maintenance plan to ensure that your metal awning remains in optimal condition over time. This may include periodic inspections, cleaning routines, and proactive measures to address any signs of wear or damage. By staying proactive with maintenance, you can preserve the beauty and functionality of your awning for years to come.
5. Personalized Touches: Infuse your personality into the space by incorporating elements that reflect your individual taste and lifestyle. This could involve adding potted plants, outdoor furnishings, or decorative accents that create a welcoming and personalized outdoor retreat beneath your metal awning.
By attending to these finishing touches, you elevate your metal awning from a functional structure to a captivating outdoor feature that enhances the beauty and utility of your home. The attention to detail and thoughtful additions contribute to a well-rounded and inviting outdoor space that you can enjoy for years to come.
Read more: How To Build An Awning Over A Patio
Maintenance and Care
Once your metal awning is installed and adorned with the finishing touches, it’s important to establish a maintenance and care routine to preserve its integrity and prolong its lifespan. Regular upkeep will ensure that your awning remains an attractive and functional addition to your outdoor space. Here’s a comprehensive guide to maintaining and caring for your metal awning:
1. Routine Cleaning: Schedule regular cleaning sessions to remove dirt, debris, and environmental pollutants from the surface of the metal panels. Use a mild detergent and water to gently scrub the awning, paying attention to any accumulated grime or stains. Rinse thoroughly to prevent residue buildup.
2. Inspection and Repairs: Conduct periodic inspections of the awning to identify any signs of wear, corrosion, or damage. Address minor issues promptly, such as loose fastenings, chipped paint, or sealant degradation, to prevent them from escalating into more significant problems.
3. Rust Prevention: If your awning is constructed from metal, be proactive in preventing rust formation. Apply a rust-inhibiting primer and touch up any areas where the protective coating may have been compromised. This step is crucial for preserving the structural integrity of the metal components.
4. Sealant Maintenance: Monitor the condition of the sealant used to weatherproof the seams and edges of the metal panels. Reapply sealant as needed to maintain a watertight barrier and prevent moisture infiltration, particularly in areas prone to heavy rainfall or humidity.
5. Seasonal Considerations: Adjust your maintenance routine according to seasonal changes. In colder climates, ensure that snow and ice accumulation are promptly removed to prevent undue stress on the awning. In warmer climates, address issues related to sun exposure and UV protection to preserve the awning’s appearance.
6. Professional Inspections: Consider engaging a professional to conduct periodic inspections and maintenance, especially for complex or large-scale awning installations. Their expertise can identify potential issues and provide specialized care to prolong the lifespan of your metal awning.
By adhering to a proactive maintenance and care regimen, you can safeguard the structural integrity and aesthetic appeal of your metal awning, ensuring that it remains a valued and enduring feature of your outdoor space. Consistent attention to maintenance will preserve the beauty and functionality of your awning for years to come.
Conclusion
Congratulations on completing the journey of building and installing your metal awning! This transformative project has not only added a functional and stylish element to your outdoor space but has also showcased your creativity and DIY prowess. As you stand beneath the shade of your newly constructed awning, you can take pride in the craftsmanship and attention to detail that have gone into creating this valuable addition to your home.
Your metal awning stands as a testament to the seamless fusion of practicality and aesthetic appeal, providing a sheltered oasis for outdoor relaxation, entertaining, and everyday enjoyment. The careful planning, precise construction, and thoughtful finishing touches have resulted in a structure that harmonizes with your home’s architecture and enhances the overall ambiance of your outdoor environment.
As you bask in the comfort and protection offered by your metal awning, remember that regular maintenance and care will be essential in preserving its beauty and functionality for years to come. By adhering to a diligent maintenance routine and promptly addressing any issues that arise, you can ensure that your awning remains a durable and enduring asset, enriching your outdoor lifestyle.
Whether you embarked on this project to create a shaded retreat, protect your outdoor furnishings, or elevate your home’s curb appeal, your metal awning now stands as a testament to your vision and determination. As the seasons change and the years pass, your awning will continue to serve as a welcoming and versatile space, adapting to your evolving needs and enhancing the enjoyment of your outdoor living area.
So, take a moment to admire the craftsmanship and functionality of your metal awning, knowing that you have successfully brought your vision to life and added a valuable asset to your home. Embrace the opportunities for relaxation, social gatherings, and everyday moments that your awning now facilitates, and revel in the satisfaction of a project well-executed.
With your metal awning as a striking focal point in your outdoor space, you have created a haven that reflects your personal style and enhances the allure of your home. As you move forward, may your awning continue to provide shade, shelter, and a touch of elegance, enriching your outdoor experiences and creating lasting memories for years to come.
Frequently Asked Questions about How To Build A Metal Awning
Was this page helpful?
At Storables.com, we guarantee accurate and reliable information. Our content, validated by Expert Board Contributors, is crafted following stringent Editorial Policies. We're committed to providing you with well-researched, expert-backed insights for all your informational needs.


0 thoughts on “How To Build A Metal Awning”