Home>Interior Design>How To Put Up Coving For A Professional Finish

Interior Design
How To Put Up Coving For A Professional Finish
Modified: October 28, 2024
Learn how to achieve a flawless, professional finish in interior design with our step-by-step guide on how to put up coving. Enhance the look of your space with expert tips.
(Many of the links in this article redirect to a specific reviewed product. Your purchase of these products through affiliate links helps to generate commission for Storables.com, at no extra cost. Learn more)
Introduction
Welcome to this comprehensive guide on how to put up coving for a professional finish in your interior design projects. Coving, also known as crown molding or cornice, is a decorative element that adds elegance and character to any room. It is typically installed where the wall meets the ceiling, creating a seamless transition between the two surfaces.
If you are looking to enhance the aesthetics of your home or workspace, coving is a fantastic option. Not only does it add a touch of sophistication, but it also helps to hide any imperfections and gaps that may exist in the joint between the walls and the ceiling. In this article, we will walk you through the step-by-step process of installing coving to achieve a professional and polished look.
Before we dive into the details, let’s quickly go over the tools and materials you will need for this project.
Key Takeaways:
- Achieve a professional and polished coving installation by carefully selecting the right style, size, and material. Follow step-by-step instructions for precise measurements, accurate cuts, and seamless finishing touches.
- Elevate your interior space with coving that adds elegance, sophistication, and seamless transitions between walls and ceilings. From preparation to painting, create a flawless finish for a stunning transformation.
Tools and Materials Needed
Before you begin installing coving, make sure you have the following tools and materials on hand:
- Tape measure
- Pencil
- Miter saw or coping saw
- Coping saw
- Sanding block or sandpaper
- Adhesive (preferably a strong grab adhesive)
- Paint or stain (if desired)
- Paintbrush or roller
- Drop cloths or plastic sheets to protect the floor and furniture
- Safety goggles
- Dust mask
Having these tools and materials readily available will ensure that your coving installation process goes smoothly and efficiently. Now that you have everything you need, let’s move on to choosing the right coving for your project.
Choosing the Right Coving
When it comes to selecting coving for your interior design project, there are a few factors to consider. This includes the style, size, and material of the coving. Here are some tips to help you choose the right coving:
- Style: Consider the overall aesthetic of the room. Do you prefer a traditional, ornate look or a more modern and minimalist design? There are various styles of coving available, ranging from simple and sleek to intricate and decorative. Choose a style that complements the existing décor and architectural features of the space.
- Size: Measure the height of the room and the width of the wall(s) where the coving will be installed. This will help you determine the appropriate size of coving to achieve a balanced and proportionate look. Keep in mind that larger rooms with higher ceilings can accommodate larger and more elaborate coving, while smaller spaces may require smaller profiles to avoid overwhelming the room.
- Material: Coving comes in a variety of materials, including plaster, polystyrene, and polyurethane. Each material has its own unique qualities and considerations. Plaster coving is the most traditional and provides a timeless and elegant finish, but it can be more challenging to install. Polystyrene and polyurethane coving, on the other hand, are lightweight and easier to handle, making them a popular choice for DIY projects.
- Budget: Consider your budget when choosing coving. The price of coving can vary depending on the material and size. Keep in mind that investing in high-quality coving will ensure durability and a professional finish, so it may be worth spending a bit more upfront.
Take your time to browse through different options and consult with professionals if needed. Once you have chosen the coving that best suits your project, it’s time to measure and calculate the quantity of coving needed.
Measuring and Calculating the Quantity of Coving Needed
Accurate measurements are crucial when it comes to installing coving. Here is a step-by-step guide to help you measure and calculate the quantity of coving needed for your project:
- Measure the perimeter: Start by measuring the perimeter of the room. Use a tape measure and measure along the base of the wall where the coving will be installed. Take note of the total length in meters or feet.
- Consider corners: If your room has corners, measure the length of each wall segment between the corners. Add these measurements together to get the total length of coving required for the corners.
- Account for wastage: It’s important to factor in some additional length of coving to account for cuts, miters, and any potential mistakes. It is recommended to add around 10% to 15% to the total length to ensure you have enough coving to complete the installation.
- Calculate the quantity: Use the total length of coving required (including corners and wastage) to determine the quantity of coving needed. Check the packaging of the coving you have chosen to see how many meters or feet are included per pack. Divide the total length by the length per pack to get the number of packs needed.
- Round up: If your calculation results in a fraction, round up to the nearest whole number to ensure you have enough coving to complete the job. It’s always better to have a little extra than to run out in the middle of the installation.
By following these simple steps, you can accurately measure and calculate the quantity of coving needed for your project. This will help you avoid any delays or setbacks due to insufficient materials. With your measurements and calculations in hand, you’re ready to move on to preparing the surface for coving installation.
Preparing the Surface
Proper surface preparation is essential for a successful coving installation. Before you begin, follow these steps to ensure that the surface is clean, smooth, and ready for the application of coving:
- Clean the walls and ceiling: Start by removing any dirt, dust, or debris from the walls and ceiling. Use a broom or vacuum cleaner to thoroughly clean the surface. Additionally, wipe down the walls and ceiling with a damp cloth to remove any grease or residue.
- Repair any imperfections: Inspect the walls and ceiling for any cracks, holes, or uneven areas. Fill any gaps or cracks with an appropriate filler, such as joint compound or spackling paste. Allow the filler to dry completely, and then sand it smooth using a sanding block or sandpaper. This will create a flat and even surface for the coving.
- Remove old paint or wallpaper: If there is old paint or wallpaper on the walls and ceiling, it’s best to remove it before installing coving. Use a paint scraper or wallpaper steamer to strip away the old layers. Smooth out any remaining adhesive or residue with sandpaper.
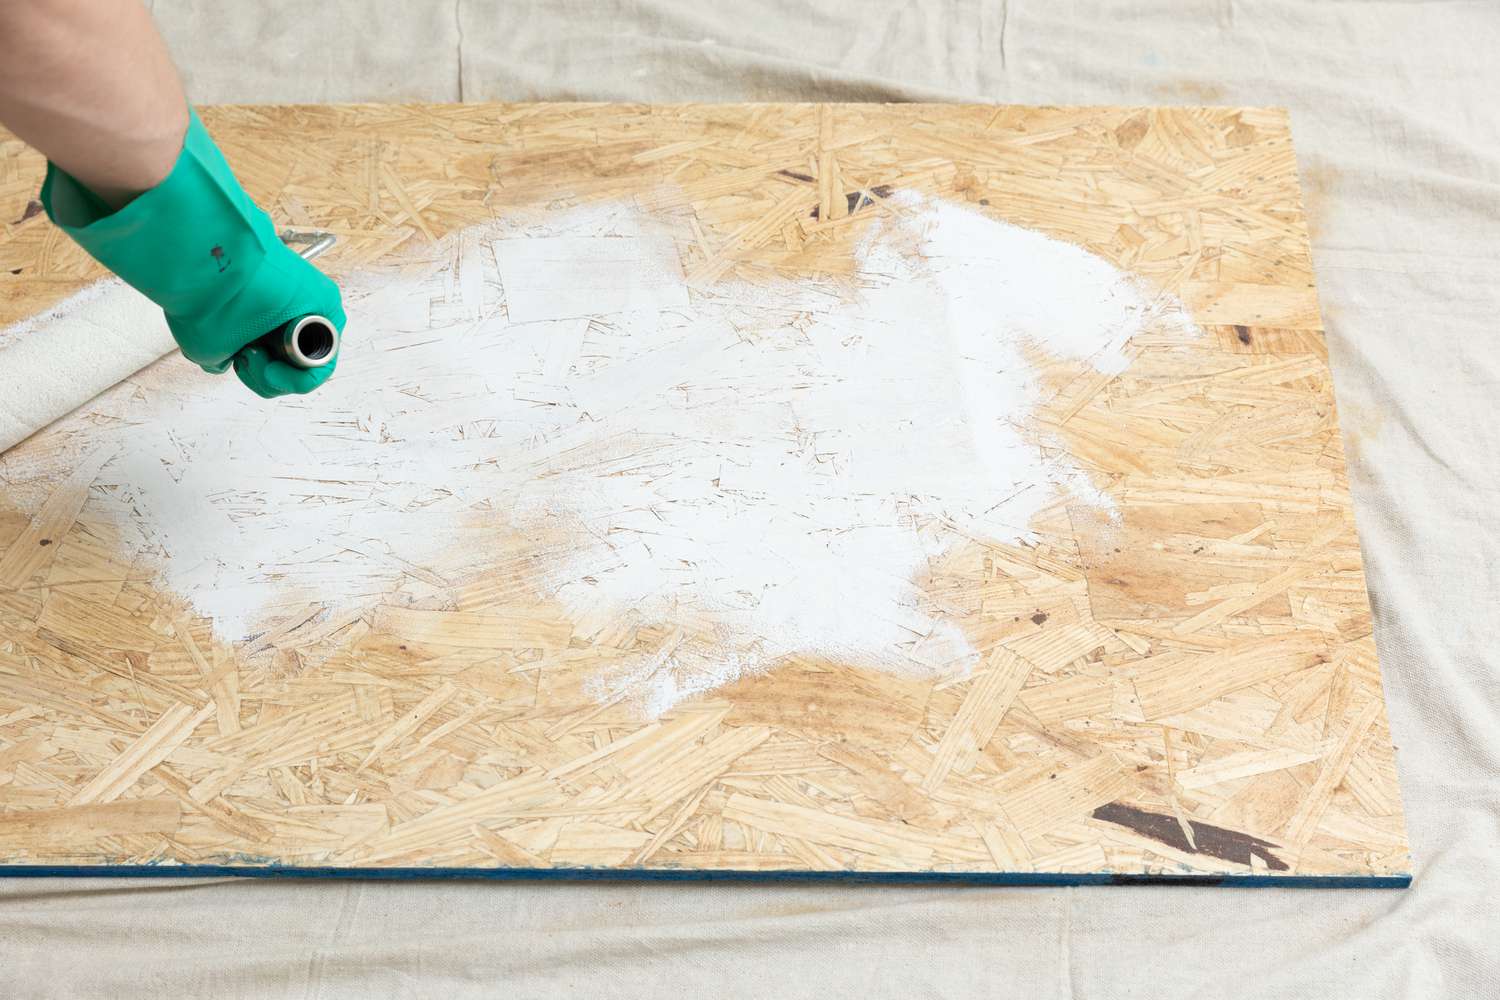
- Prime the surface: Applying a primer to the walls and ceiling will help the coving adhere properly and ensure a strong bond. Choose a primer that is suitable for the specific surface material, whether it’s plaster, drywall, or other types of wall coverings. Follow the manufacturer’s instructions for application and drying time.
By taking the time to properly prepare the surface, you will create an ideal base for the coving to adhere to. This will result in a more secure and long-lasting installation. Once the surface is prepped and primed, you’re ready to move on to the next step: cutting and joining the coving.
Cutting and Joining Coving
When it comes to installing coving, cutting and joining the pieces together correctly is crucial to achieving a seamless and professional finish. Here’s a step-by-step guide to cutting and joining coving:
- Measure and mark: Measure the length of the wall segment where the coving will be installed. Use a pencil to mark the measurements on the back of the coving. Ensure that the markings are accurate and visible.
- Cut the coving: Use a miter saw or coping saw to make precise cuts along the marked lines. For internal corners, cut the coving at a 45-degree angle, ensuring that the longest point of the cut is on the back of the coving. For external corners, cut the coving at a 45-degree angle, ensuring that the longest point of the cut is on the front of the coving.
- Check the fit: After each cut, hold the coving up to the wall to check the fit. Make any necessary adjustments or recuts if the angles aren’t perfect. It’s better to take your time and ensure a precise fit.
- Join the coving: When joining two lengths of coving, create a clean joint by cutting one end of each section at a 45-degree angle. Apply adhesive to the cut ends and press them together firmly. Use masking tape or clamps to hold the joint in place while the adhesive dries. Repeat this process for each joint.
- Coping technique: If you’re using a coping saw, you can use the coping technique for cutting internal corners. Instead of mitering the coving, cut the coving straight and then use the coping saw to remove the excess material along the profile, creating a snug fit against the adjacent piece of coving.
- Smooth the edges: Use a sanding block or sandpaper to smooth the cut edges of the coving. This will create a seamless transition between the sections and ensure a professional finish.
Remember to take your time when cutting and joining coving to ensure accuracy and precision. Double-check the fit of each piece before moving on to the next step. Once the coving is cut and joined, it’s time to apply adhesive and fit the coving into place.
When putting up coving, use a good quality adhesive and make sure to measure and cut the corners accurately for a professional finish. Sand down any rough edges before painting.
Applying Adhesive
Applying adhesive is a crucial step in the coving installation process, as it will ensure a secure and long-lasting bond between the coving and the wall or ceiling. Here are the steps to follow when applying adhesive:
- Choose the right adhesive: Select a strong grab adhesive that is specifically designed for coving installation. Read the manufacturer’s instructions and ensure that it is suitable for the material of your coving.
- Prepare the adhesive: Follow the instructions on the adhesive packaging to prepare it for application. This may involve cutting the nozzle to the desired size or using a caulking gun to dispense the adhesive.
- Apply the adhesive: Apply a generous amount of adhesive to the back of the coving, ensuring that it covers the entire length of the piece. Apply the adhesive in a zigzag motion or in a series of dots to ensure even coverage.
- Spread the adhesive: Use a small putty knife or a coving adhesive spreader to spread the adhesive evenly across the back of the coving. This will help create a strong bond and prevent any gaps or air pockets.
- Apply adhesive to the wall: Apply a thin layer of adhesive to the wall or ceiling where the coving will be installed. This will create an additional bond between the coving and the surface.
- Fit the coving: Carefully position the coving against the wall or ceiling, aligning it with the markings and ensuring a snug fit. Press the coving firmly into place, applying even pressure along the entire length.
- Secure the coving: Use masking tape or temporary support brackets to hold the coving in place while the adhesive dries. Follow the manufacturer’s instructions for the specific drying time of the adhesive.
It’s important to work quickly but carefully when applying adhesive and fitting the coving into place. The adhesive may have a limited working time, so make sure you have everything prepared beforehand. Once the adhesive has dried and the coving is securely attached, it’s time to move on to the next step: filling and sanding the joints.
Fitting the Coving into Place
Now that the adhesive has been applied, it’s time to fit the coving into its final position. Follow these steps to ensure a seamless and professional installation:
- Double-check the alignment: Before securing the coving in place, double-check the alignment and positioning. Make any necessary adjustments to ensure that the coving is straight and level.
- Press firmly: Once you are satisfied with the alignment, firmly press the coving against the wall or ceiling to ensure a secure bond. Apply even pressure along the entire length of the coving to create a strong connection.
- Remove excess adhesive: As you press the coving into place, some adhesive may squeeze out from the edges. Use a damp cloth or sponge to immediately remove any excess adhesive. This will prevent it from drying and creating an unsightly appearance.
- Smooth the joints: Pay particular attention to the joints between the coving sections. Use your fingers or a jointing tool to smooth out any visible seams or gaps. This will create a seamless and invisible transition between the pieces of coving.
- Check for gaps: Inspect the entire length of the coving for any gaps or unevenness. If you notice any gaps, apply additional adhesive and press the coving firmly into place. Use a putty knife or jointing tool to fill and smooth out any gaps or imperfections.
- Make final adjustments: After fitting the coving into place, step back and examine the overall appearance. Make any final adjustments or touch-ups as needed to ensure a flawless and professional finish.
Once you have fitted the coving into place and ensured a secure bond, it’s time to move on to the next step: filling and sanding the joints to create a seamless and smooth surface.
Filling and Sanding the Joints
To achieve a seamless and polished finish, it’s important to fill and sand the joints of the coving. This will help create a smooth surface and hide any visible seams. Follow these steps to fill and sand the joints:
- Check for gaps: Inspect the joints between the coving sections for any gaps or unevenness. Use a putty knife or jointing tool to fill any gaps with an appropriate filler, such as joint compound or filler specifically designed for coving.
- Apply the filler: Use a putty knife to apply the filler to the joints. Press the filler into the gaps and smooth it out to create an even surface. Make sure to fill the gaps completely, removing any excess filler as you go.
- Allow the filler to dry: Follow the manufacturer’s instructions to determine the drying time of the filler. Ensure that the filler is completely dry before moving on to the sanding process. This may take several hours or overnight.
- Sand the joints: Once the filler is dry, use a sanding block or sandpaper to carefully sand down the filled joints. Begin with a coarse-grit sandpaper and gradually move to a finer grit for a smooth finish. Sand in light circular motions, blending the filled areas with the surrounding coving.
- Clean the surface: After sanding, wipe down the coving with a damp cloth or sponge to remove any dust or debris. This will ensure a clean surface for further finishing, such as painting or decorating.
- Inspect and touch up: After sanding, carefully inspect the joints for any remaining imperfections. If you notice any areas that require additional filling or sanding, address them before proceeding with the final steps.
By filling and sanding the joints, you’ll achieve a seamless and professional appearance for your coving. The finished result will blend harmoniously with the surrounding walls and ceiling. Once you’re satisfied with the joints, you can proceed to the next step: painting or decorating the coving to enhance its visual appeal.
Painting or Decorating the Coving
Painting or decorating the coving is the final step in achieving a polished and finished look for your interior design project. Here’s how to paint or decorate your coving:
- Clean the surface: Before painting or decorating, make sure the coving surface is clean and free of dust or debris. Use a damp cloth or sponge to wipe down the coving and ensure a smooth and even application.
- Choose your finish: Decide whether you want to paint the coving or leave it in its natural finish. If you choose to paint, select a paint color that complements the overall color scheme of the room. If you prefer a natural finish, you can leave the coving as is or apply a clear protective coating.
- Prepare the paint: If you are painting the coving, follow the manufacturer’s instructions to prepare the paint. Stir the paint thoroughly to ensure an even consistency and pour it into a paint tray or container for easy access.
- Paint the coving: Use a small paintbrush or foam roller to apply the paint to the coving. Start from one end of the coving and work your way along the length, ensuring even coverage and smooth strokes. Apply multiple coats if necessary, allowing each coat to dry before applying the next.
- Decorate the coving: If you prefer a decorative finish, you can enhance the coving with different techniques or materials. For example, you can add wallpaper or stencils to create a patterned design, or apply metallic or textured finishes for a unique look. Follow the specific instructions for the decorative technique or material you choose.
- Allow the finish to dry: Whether you paint or decorate the coving, allow the finish to dry completely before moving any furniture or accessories back into the room. This will prevent any smudging or damage to the newly applied finish.
- Touch up if needed: After the paint or decorative finish has dried, carefully inspect the coving for any areas that may need touch-up. Fill in any gaps or imperfections with touch-up paint or the appropriate material.
By painting or decorating your coving, you can further enhance its visual appeal and seamlessly integrate it into the overall design of the room. Whether you choose to paint or decorate, the final result will add elegance and charm to your interior space.
Once you have completed the painting or decorating process, you’re almost done! The final steps involve cleaning up and adding any finishing touches.
Cleaning Up and Final Touches
As you near the completion of your coving installation, it’s time to focus on cleaning up and adding those final touches to ensure a flawless finish. Follow these steps for a thorough cleanup and to add those finishing touches:
- Cleanup the work area: Remove any drop cloths or plastic sheets used to protect the floor and furniture. Dispose of any waste materials, such as leftover adhesive tubes or packaging, in accordance with local regulations.
- Clean the coving: Use a soft cloth or a duster to gently clean the surface of the coving. Remove any dust or dirt that may have accumulated during the installation process. Pay attention to the corners and intricate designs to ensure a thorough cleaning.
- Inspect for any touch-ups: Take a closer look at the coving to check for any touch-up areas that may need additional attention. Look for any missed spots during painting or any imperfections that may have been overlooked. Touch up those areas accordingly to achieve a flawless result.
- Add decorative elements: Consider adding decorative elements to further enhance the aesthetics of the coving. This could include adding decorative corner pieces or ceiling roses, or incorporating LED lighting to highlight the coved area. These elements can elevate the overall look and create a captivating focal point in the room.
- Step back and admire your work: After completing the cleaning and final touches, take a step back and admire your beautifully installed and finished coving. Appreciate the transformation it has brought to the room, adding elegance and charm to the overall design.
Congratulations! You have successfully completed the installation, painting or decorating, and final touches of your coving. Take pride in your achievement and enjoy the beautifully transformed space that now boasts a professional and polished finish.
Remember to refer to any manufacturer’s instructions or specific product guidelines to ensure that you are following the recommended procedures for your chosen coving materials and finishes.
Lastly, if you have any additional questions or need further assistance, do not hesitate to consult with a professional or seek advice from experts in the field of interior design.
With your coving installation complete, your interior space has undergone a remarkable transformation, adding sophistication and elegance to your home or workspace.
Conclusion
Congratulations on successfully completing your coving installation with a professional finish! By following the step-by-step guide outlined in this article, you have learned how to select the right coving, measure and calculate the quantity needed, prepare the surface, cut and join the coving, apply adhesive, fit the coving into place, fill and sand the joints, and paint or decorate the coving. These skills and knowledge will enable you to enhance the aesthetics of any room and create a seamless transition between the walls and ceiling.
Coving adds a touch of elegance, character, and sophistication to any interior space. It not only enhances the visual appeal but also helps to hide imperfections and gaps in the joint between the walls and ceiling. By choosing the right coving style, size, and material, you can achieve a look that complements the existing decor and architectural features of the room.
Remember to take your time during each step of the coving installation process, ensuring precise measurements, accurate cuts, and a secure bond with the adhesive. Proper surface preparation, including cleaning, repairing, and priming, is crucial for a successful installation. Filling and sanding the joints will create a seamless and smooth surface, while painting or decorating the coving allows you to personalize the look to your taste and style.
As you complete your coving installation, don’t forget to clean up the work area and add any final touches, such as decorative elements or lighting, to further enhance the overall design. Step back and appreciate the stunning transformation you have achieved, as the coving brings a sense of grandeur and sophistication to your living or working space.
If you encounter any challenges or have specific questions throughout the coving installation process, it’s always helpful to consult with professionals or experts in interior design. Their expertise and guidance can provide valuable insights and ensure a successful outcome.
Now, go ahead and enjoy your beautifully finished coving, creating a statement piece in your room and adding a touch of elegance that will be admired by all who enter.
Frequently Asked Questions about How To Put Up Coving For A Professional Finish
Was this page helpful?
At Storables.com, we guarantee accurate and reliable information. Our content, validated by Expert Board Contributors, is crafted following stringent Editorial Policies. We're committed to providing you with well-researched, expert-backed insights for all your informational needs.


0 thoughts on “How To Put Up Coving For A Professional Finish”