
Articles
How To Install Base Cabinet
Modified: January 19, 2024
Learn how to install kitchen base cabinets with our step-by-step guide! Transform your space with stylish and functional kitchen furniture.
(Many of the links in this article redirect to a specific reviewed product. Your purchase of these products through affiliate links helps to generate commission for Storables.com, at no extra cost. Learn more)
Introduction
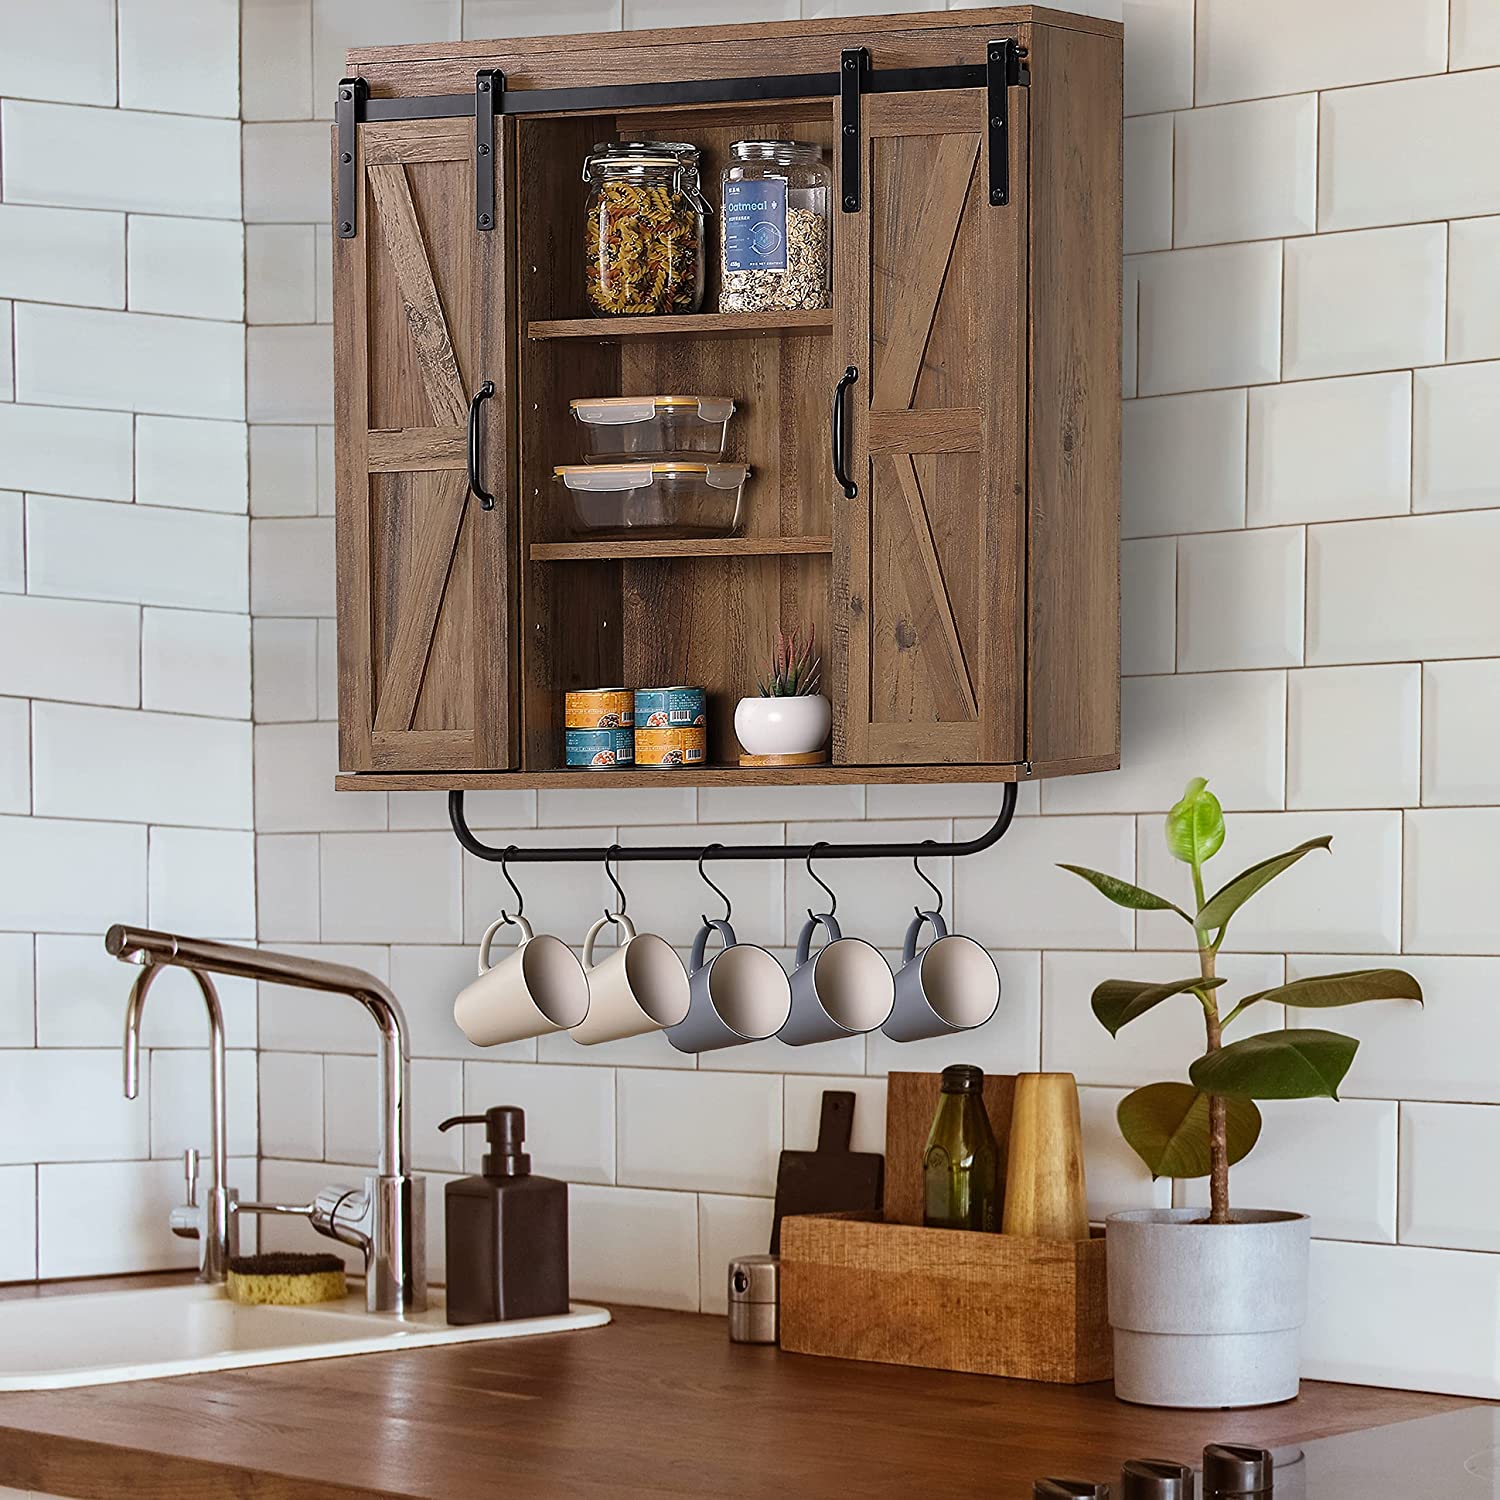
Installing base cabinets in your kitchen or any other room can be a rewarding project that not only adds functionality but also enhances the aesthetic appeal of the space. Whether you’re a seasoned DIY enthusiast or a beginner, this step-by-step guide will walk you through the process of installing base cabinets with ease.
Base cabinets serve as the foundation of your kitchen layout, providing storage space for your pots, pans, dishes, and other kitchen essentials. Proper installation is crucial to ensure stability, levelness, and alignment. Before you begin the installation process, it’s important to prepare your workspace, gather the necessary tools and materials, and measure and mark the area where the cabinets will be installed.
This guide will cover the installation of base cabinets, from assembling and securing the cabinets to adjusting and leveling them. We will also discuss the installation of cabinet doors and drawers, as well as the finishing touches that will give your cabinets a professional look.
Remember, safety should be your top priority throughout the installation process. Always wear protective gear such as goggles and gloves, and follow any manufacturer guidelines for the tools and materials you will be using.
Now, let’s get started on transforming your space by installing base cabinets!
Key Takeaways:
- Transform your space with a rewarding base cabinet installation, enhancing functionality and aesthetics while providing essential storage space for your kitchen or any room.
- Ensure a successful installation by preparing your workspace, gathering necessary tools and materials, and following each step with precision and care.
Read more: How To Build Cabinet Base
Step 1: Preparing the Workspace
Before you begin installing your base cabinets, it’s essential to prepare the workspace to ensure a smooth and efficient installation process. Follow these steps to get your workspace ready:
- Clear the area: Start by clearing out the space where your base cabinets will be installed. Remove any existing furniture, appliances, or other items that may obstruct the installation.
- Clean the walls and floor: Thoroughly clean the walls and floor where the base cabinets will be placed. Remove any dirt, dust, or grease to ensure a clean and level surface for installation.
- Check for levelness: Use a level to check the levelness of the floor and walls. If you notice any unevenness, consider using leveling compounds or shims to create a level surface for the cabinets.
- Ensure proper ventilation: If you’re working in a confined space, make sure there is proper ventilation to allow for the dissipation of fumes from adhesives or other products used during the installation.
- Protect the flooring: To prevent any damage to your flooring, consider using cardboard or drop cloths to create a protective barrier. This will also make it easier to clean up any debris or spills during the installation process.
By taking the time to prepare your workspace adequately, you’ll create a safe and organized environment for installing your base cabinets. This will make the entire installation process more efficient and help ensure the longevity and stability of your cabinets.
Step 2: Gathering the Necessary Tools and Materials
Before you begin installing your base cabinets, it’s important to have all the necessary tools and materials readily available. This will save you time and prevent any delays during the installation process. Here’s a list of the essential tools and materials you’ll need:
Tools:
- Tape measure
- Pencil or marker
- Screwdriver
- Drill
- Level
- Stud finder
- Clamps
- Adjustable wrench
- Hammer
- Safety goggles
- Gloves
Materials:
- Base cabinets
- Cabinet screws
- Wall anchors
- Shims
- Mounting brackets
- Cabinet doors and drawer fronts
- Cabinet hardware (knobs, handles, hinges)
Make sure to double-check your tools and materials list before you start the installation process. Having everything within reach will streamline the process and prevent any unnecessary interruptions. If you’re missing any items, visit your local hardware store to gather the necessary supplies.
Remember to wear safety goggles and gloves throughout the installation process to protect yourself from any potential hazards. And always follow manufacturer instructions for the tools and materials you’ll be using.
With your tools and materials in hand, you’re now ready to move on to the next step: measuring and marking the area where the base cabinets will be installed.
Step 3: Measuring and Marking
Precision is key when it comes to installing base cabinets. Before you start the actual installation, you need to accurately measure and mark the area where the cabinets will be placed. Follow these steps for precise measurements and markings:
- Start by measuring the height of the base cabinets. Measure from the floor up to the desired height, typically around 34.5 inches. Mark this measurement on the wall using a pencil or marker. Repeat this process for each cabinet location.
- Next, measure the length of the wall where the base cabinets will be installed. Use a tape measure to get accurate dimensions and note them down. This will help you determine the size and configuration of the cabinets needed.
- Consider the appliances and fixtures in the area. Measure the space required for appliances such as refrigerators, dishwashers, or ovens, and make sure to leave enough clearance for their proper operation. Mark the positions of these appliances on the wall as well.
- Use a stud finder to locate the wall studs behind the marked areas. Wall studs provide the necessary strength and support for securely attaching the cabinets.
- Once you’ve located the studs, mark their positions on the wall. This will help you align the cabinets and ensure they are securely fastened to the studs.
- With all the measurements and markings in place, take a step back and visualize the layout. Make any necessary adjustments to ensure a balanced and symmetrical arrangement.
Accurate measurements and markings are crucial for a successful base cabinet installation. Take your time during this step to ensure that everything is properly aligned and ready for the next phase. This attention to detail will result in a professional-looking and functional cabinet installation.
Now that you have completed the measuring and marking process, you’re ready to move on to the next step, which involves assembling the base cabinets.
Step 4: Assembling the Base Cabinet
With all the necessary measurements and markings in place, it’s time to start assembling your base cabinets. Follow these steps to ensure a smooth and successful assembly process:
- Unpack the base cabinet components and lay them out in the designated installation area. Check for any damage or missing parts and contact the manufacturer if necessary.
- Begin by assembling the base cabinet frame. Follow the manufacturer’s instructions and use the provided screws or connectors to secure the pieces together. Make sure all connections are tight and secure.
- Attach the back panel to the base cabinet frame. This will provide stability and support to the cabinet structure. Again, refer to the manufacturer’s instructions for the specific attachment method.
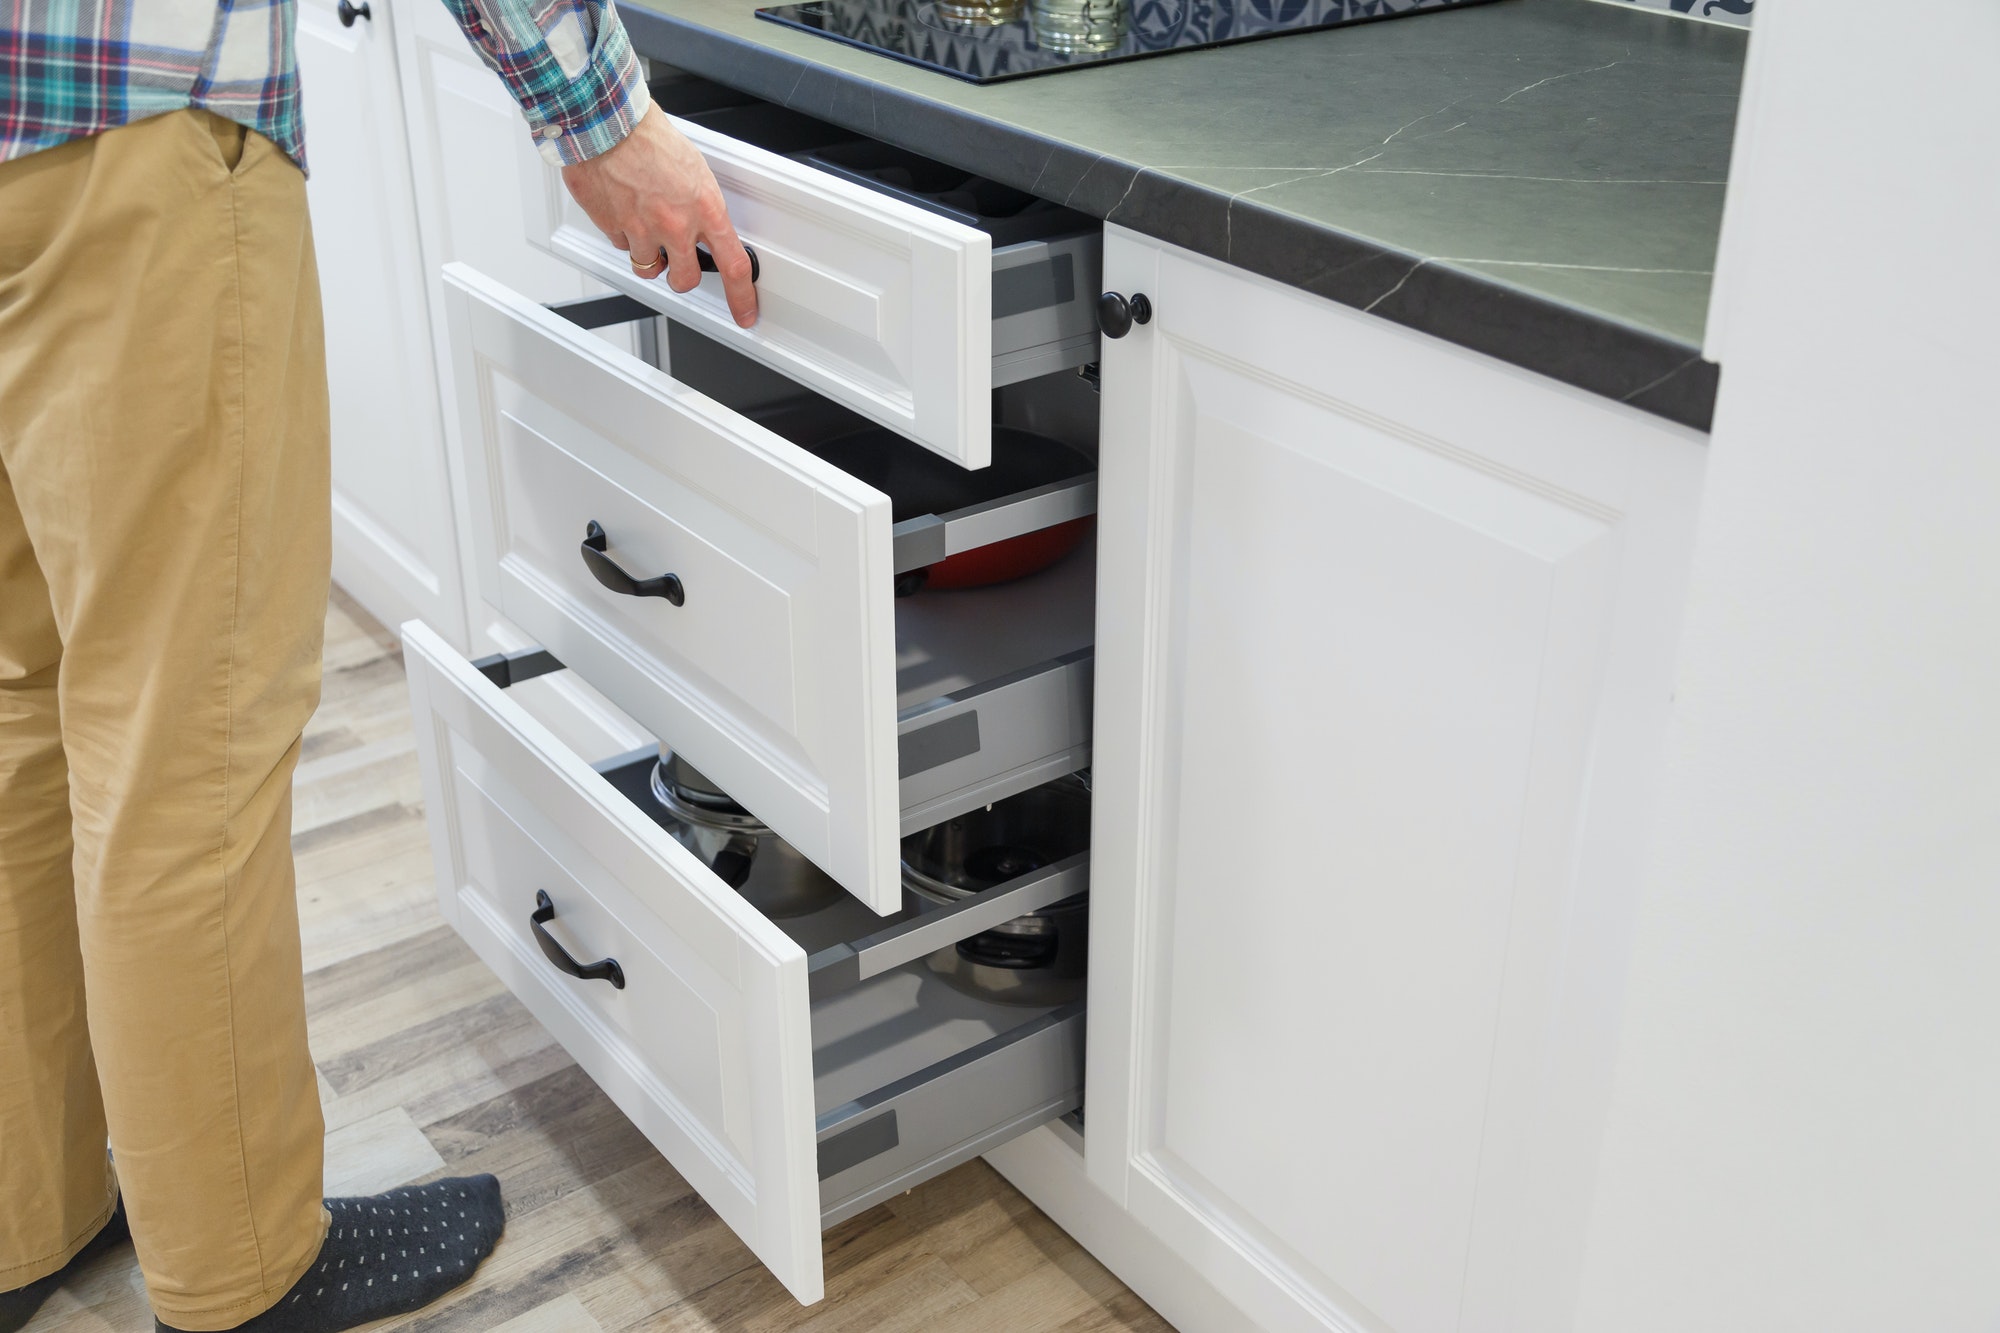
- If your base cabinet includes drawers, assemble them according to the manufacturer’s instructions. Attach the drawer slides securely to the cabinet frame and test the smoothness of the drawer movement.
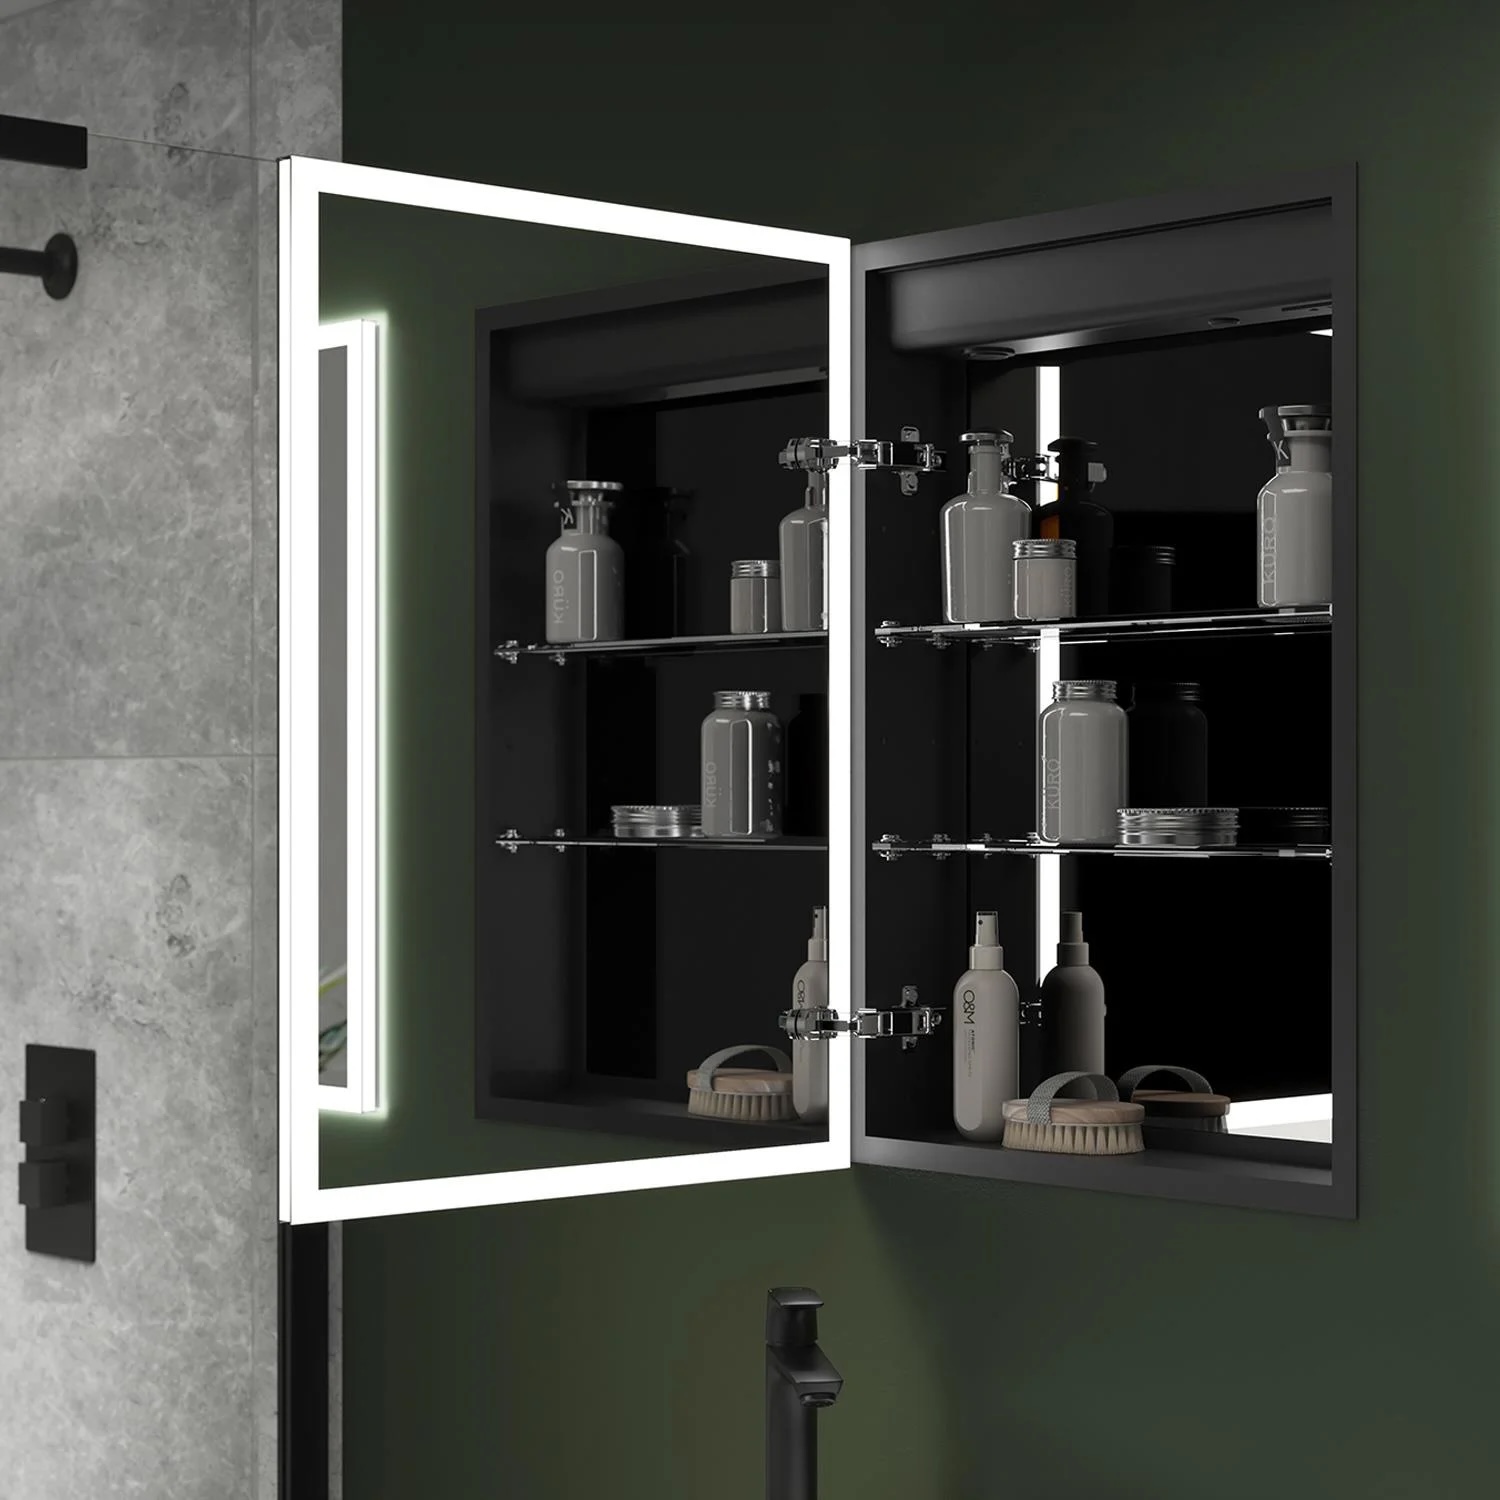
- Install any adjustable shelves or internal accessories that come with the base cabinet. This will allow you to customize the storage space according to your needs.
- Double-check that all the cabinet components are securely attached and properly aligned. Make any necessary adjustments to ensure a level and stable base cabinet structure.
Throughout the assembly process, refer to the detailed instructions provided by the manufacturer. These instructions may vary depending on the specific brand and model of the base cabinets you are installing.
Once you have successfully assembled the base cabinet, take a moment to admire your progress and ensure everything is in place. The next step will involve securely attaching the base cabinet to the wall, so make sure the cabinet is properly aligned with the marked measurements.
Now that your base cabinet is assembled, it’s time to move on to the next step: securing the base cabinet to the wall.
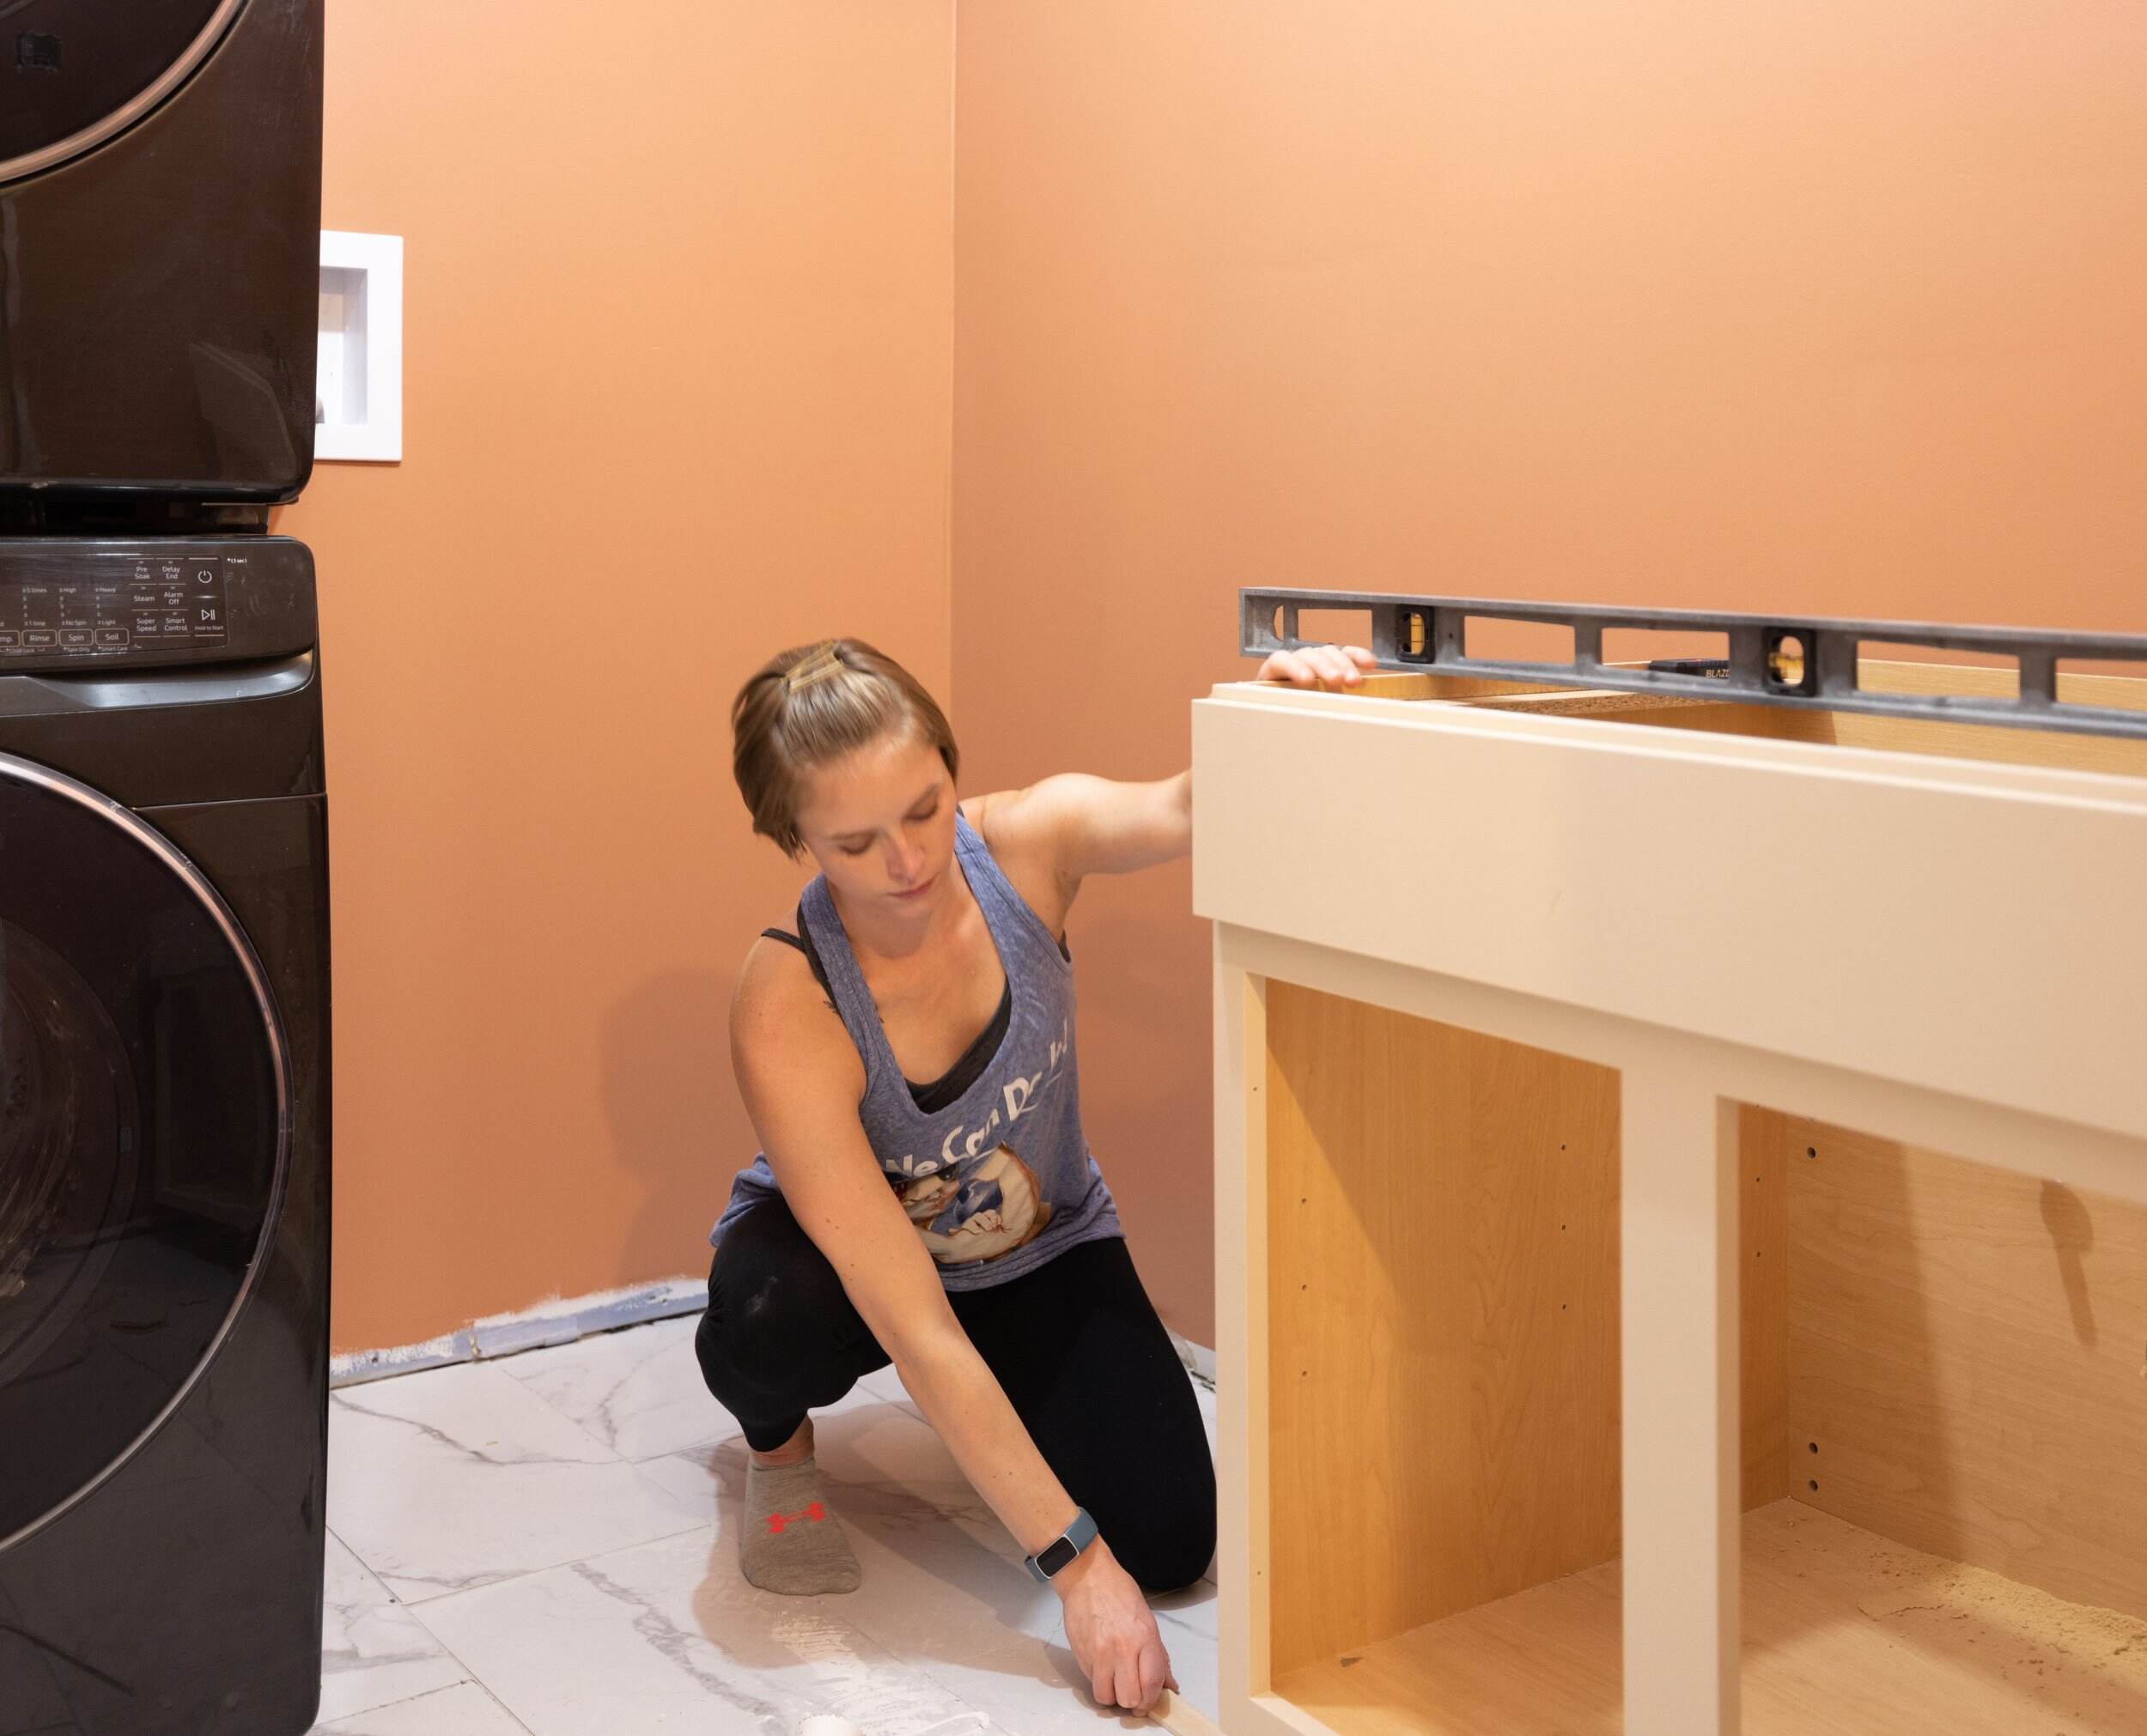
Before installing base cabinets, make sure to measure and mark the layout on the wall. Use shims to level the cabinets and secure them to the wall studs with screws. Double-check the alignment and adjust as needed.
Read more: How To Install Cabinets And Countertops
Step 5: Securing the Base Cabinet to the Wall
Now that your base cabinet is assembled, it’s time to securely attach it to the wall. Properly securing the cabinet will ensure stability and prevent any accidents or damage. Follow these steps to securely fasten the base cabinet to the wall:
- Start by locating the wall studs that you previously marked during the measuring and marking step. Use a stud finder to confirm their positions.
- Place the base cabinet against the wall, lining up the pre-drilled holes in the cabinet back with the wall studs. Make sure the cabinet is aligned with the marked measurements and level using a level tool.
- Using a drill, create pilot holes through the pre-drilled holes in the cabinet back and into the wall studs.
- Attach the base cabinet to the wall studs using cabinet screws. Insert the screws through the pilot holes and tighten them with a screwdriver or drill. Ensure that the screws are securely fastened, but be careful not to overtighten and damage the cabinet or wall.
- Repeat this process for each cabinet if you are installing multiple base cabinets.
- Once all the base cabinets are securely attached to the wall, check for any gaps or unevenness. Use shims to fill any gaps between the cabinet and the wall, if necessary, to ensure a tight and flush fit.
Securing the base cabinet to the wall is a critical step in the installation process. It provides stability and support to the cabinets, ensuring they stay securely in place. Take your time to ensure proper alignment and secure attachment, as this will impact the overall functionality and longevity of your base cabinets.
With the base cabinet securely attached to the wall, you’re ready to move on to the next step: adjusting and leveling the base cabinet for optimal use.
Step 6: Adjusting and Leveling the Base Cabinet
Now that your base cabinet is securely attached to the wall, it’s time to adjust and level it for optimal functionality and aesthetics. Follow these steps to ensure your base cabinet is properly aligned:
- Start by checking the cabinet for any unevenness or wobbling. This can be done by gently pushing on different areas of the cabinet to see if it moves or feels unstable.
- If you notice any unevenness, use shims to level the cabinet. Place shims under the base of the cabinet, near any low spots or areas that need adjustment. Gradually add or remove shims until the cabinet sits level and stable.
- Use a level tool to check both the front and sides of the cabinet for levelness. Adjust the shims as needed until the cabinet is perfectly level in all directions.
- Check the alignment of multiple cabinets if you are installing more than one. Ensure that the cabinets are flush with each other and that the gaps between cabinets are consistent.
- If needed, make adjustments to the cabinet doors and drawers to ensure they open and close smoothly. Use the adjustable hinges or drawer slides to align and level the doors and drawers.
Properly adjusting and leveling the base cabinet is essential for both the functionality and aesthetics of your kitchen or any other room. A well-aligned cabinet will provide a solid foundation for the countertops and ensure that the doors and drawers operate smoothly.
Take your time during this step to ensure everything is properly aligned and level. Small adjustments now can save you headaches down the road and result in a professional-looking installation that you can be proud of.
With the base cabinet adjusted and leveled, you’re now ready to move on to the next step: installing the cabinet doors and drawers.
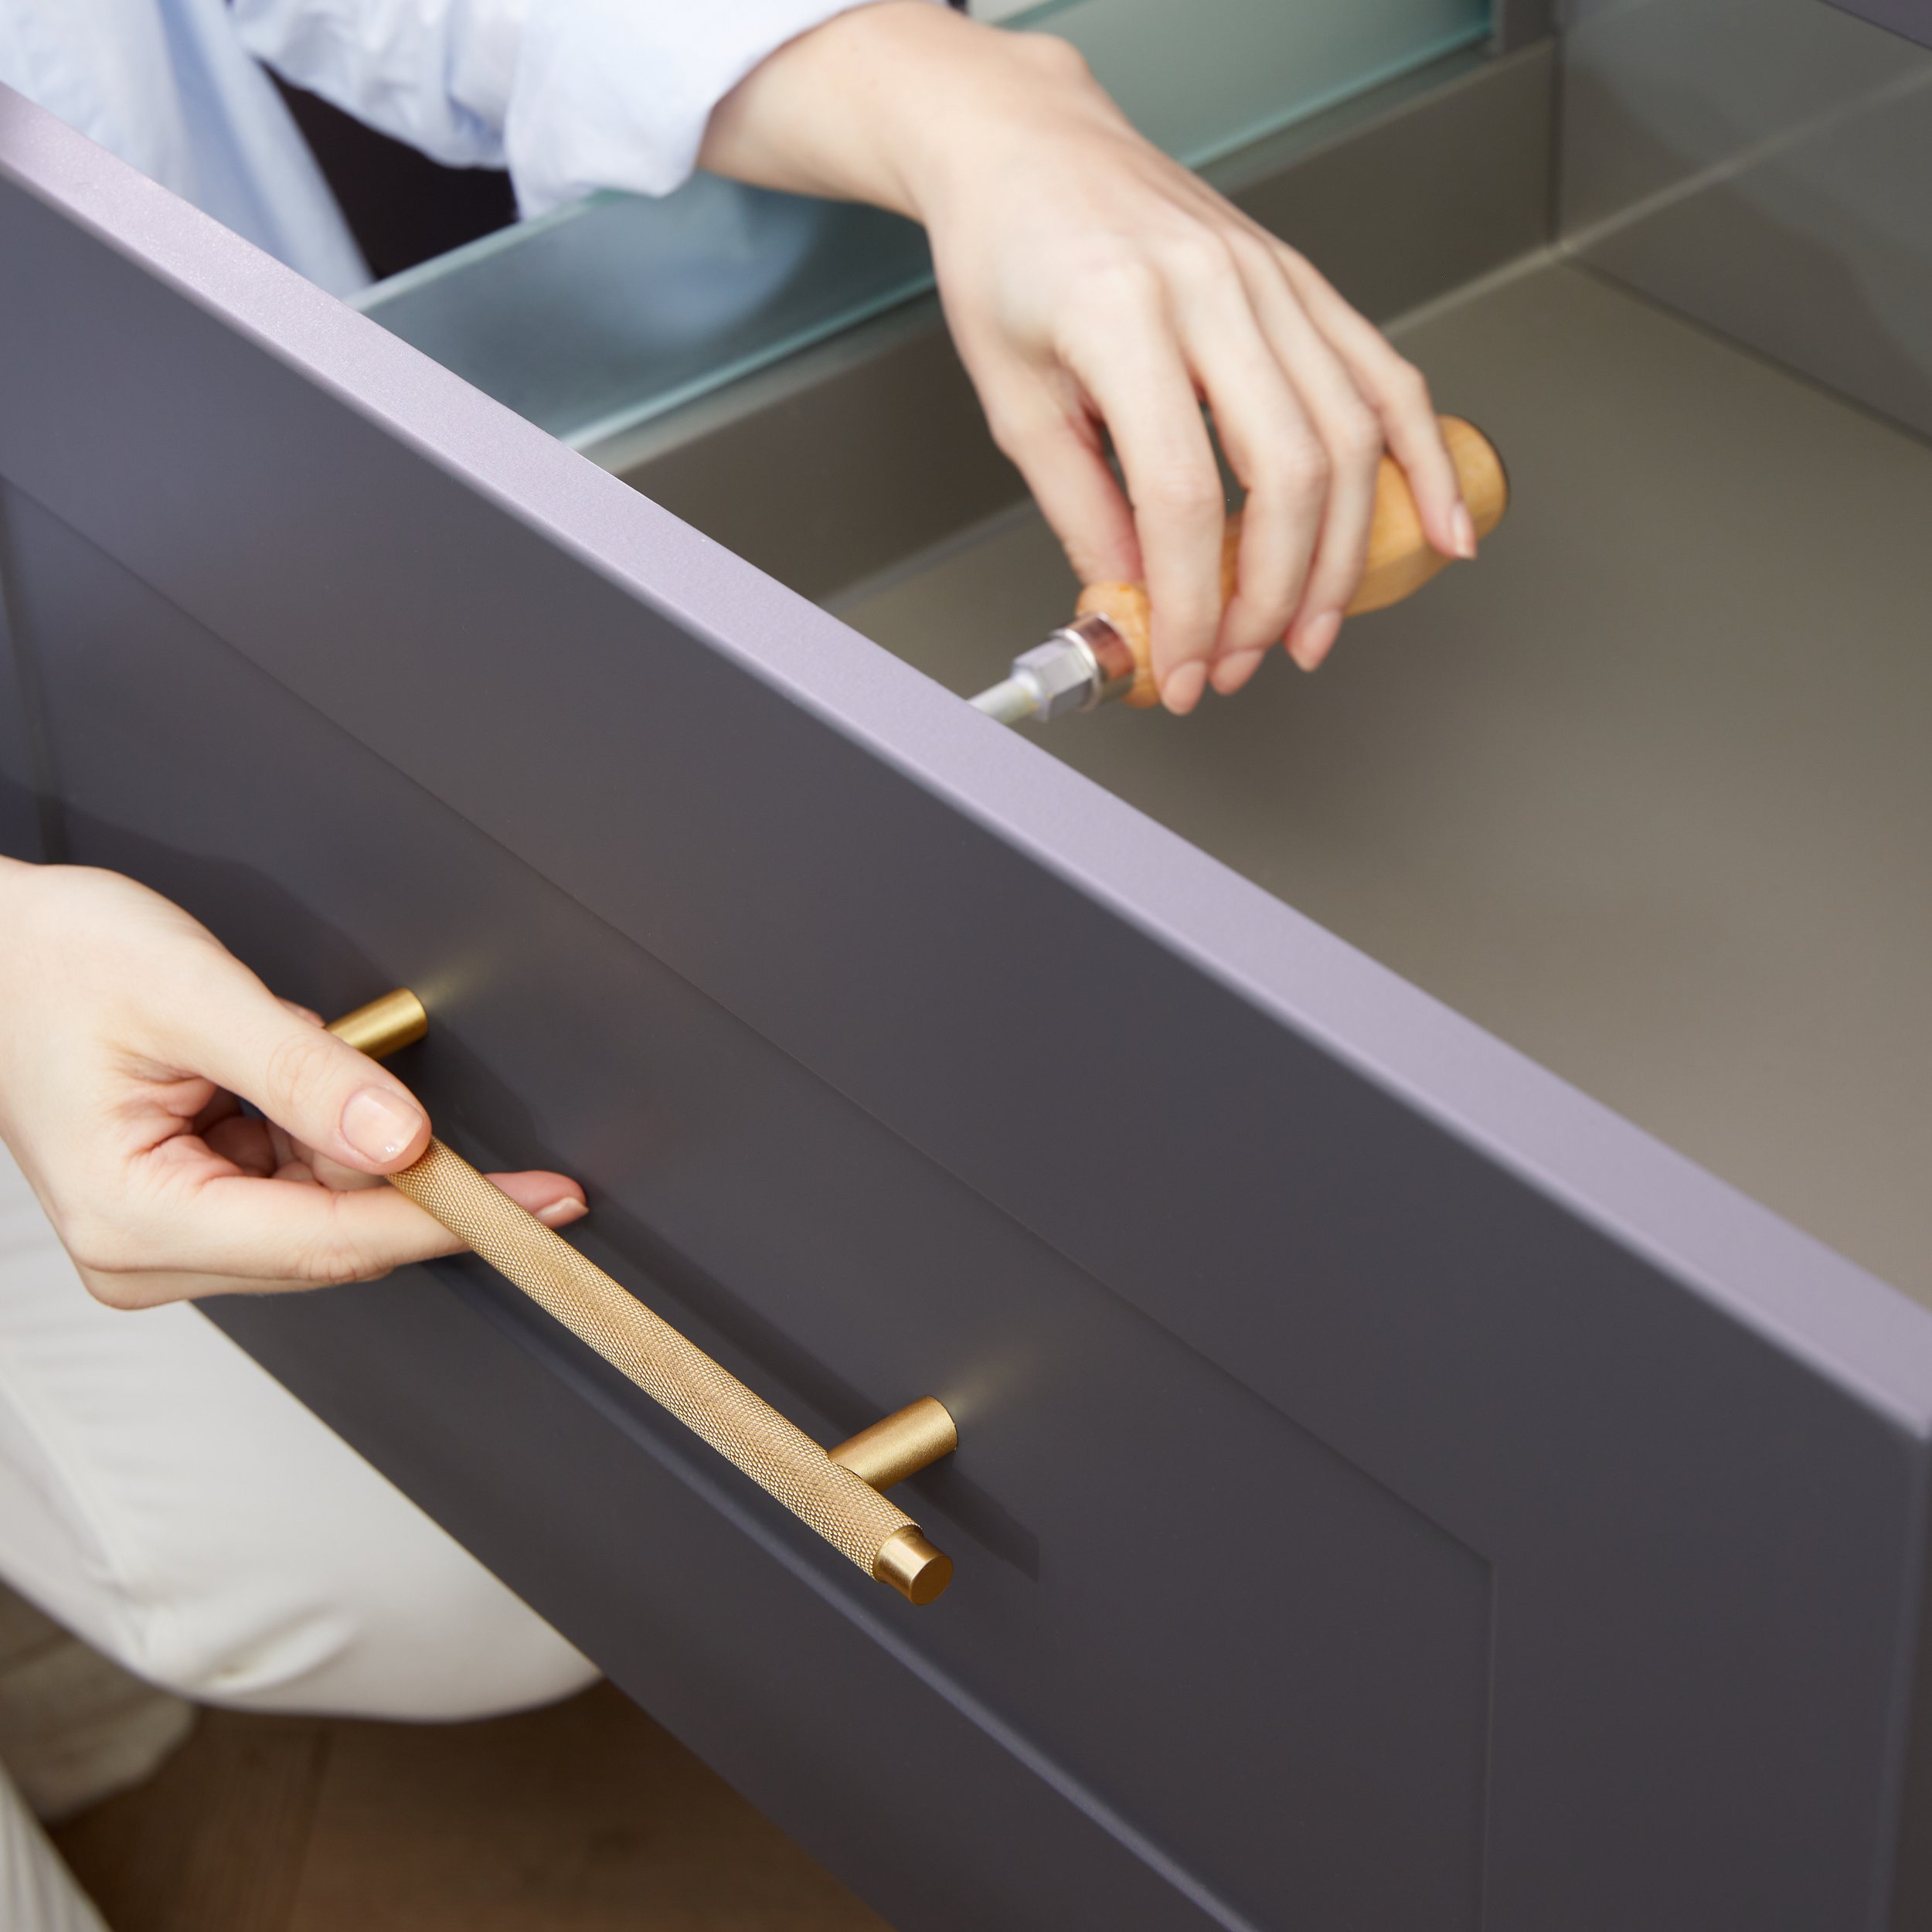
Step 7: Installing the Cabinet Doors and Drawers
Now that the base cabinet is securely attached and leveled, it’s time to install the cabinet doors and drawers. Follow these steps to ensure a smooth and successful installation:
- Start by determining the placement of the cabinet doors and drawers. Use a pencil or tape to mark their positions on the cabinet frame.
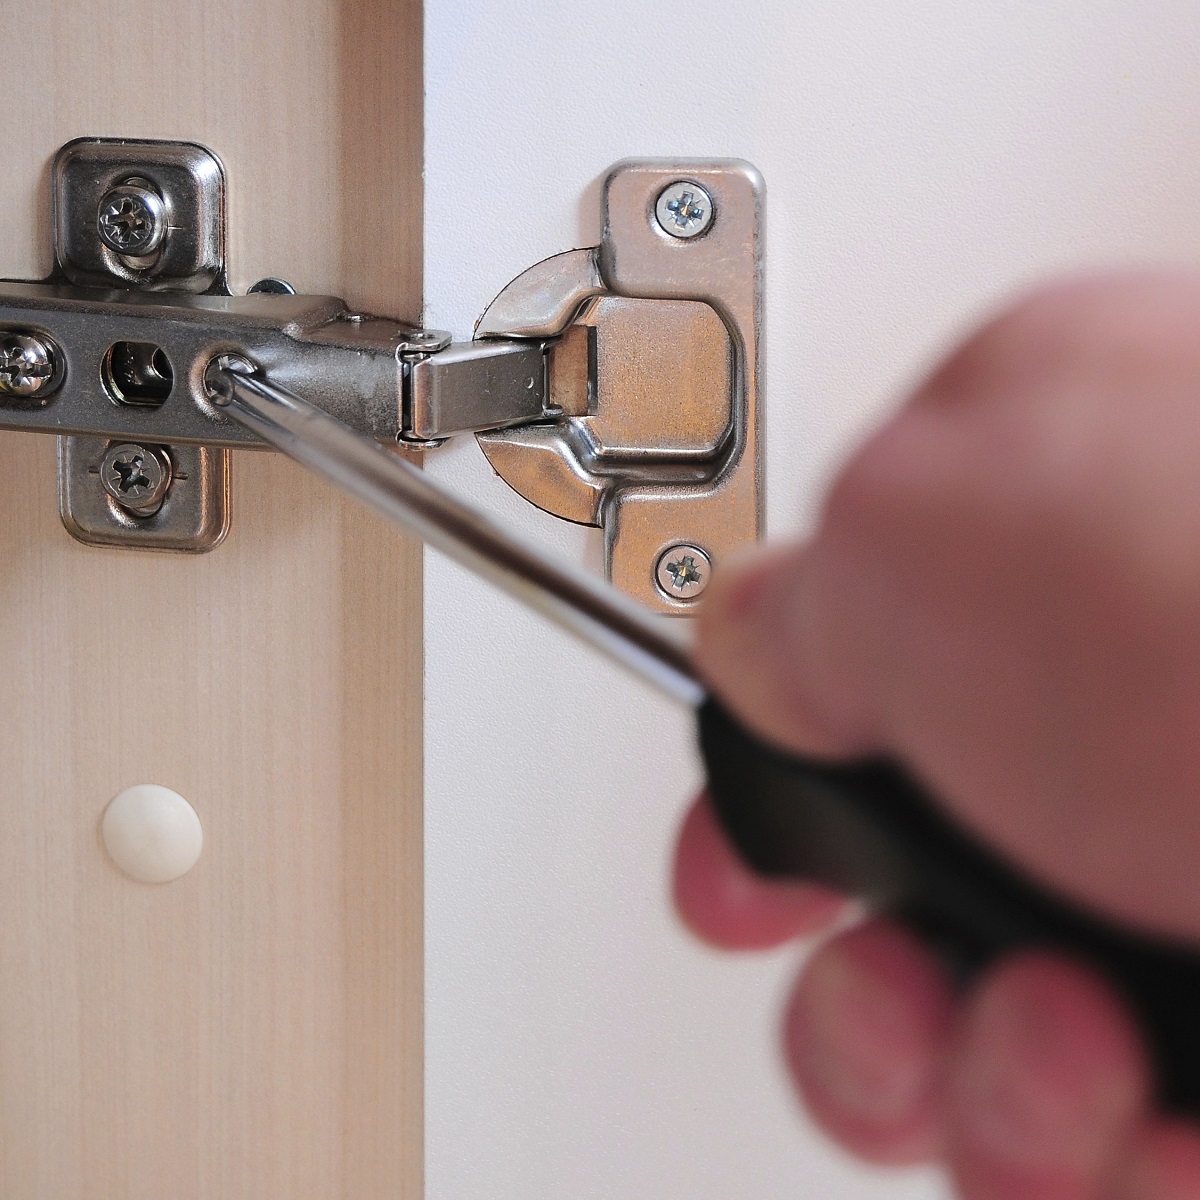
- Attach the hinges to the cabinet doors, following the manufacturer’s instructions. Make sure the hinges are aligned properly and securely fastened.
- Position the cabinet doors onto the cabinet frame, aligning the hinges with the marked positions. Secure the hinges to the cabinet frame using the provided screws.
- Check that the doors open and close smoothly. If adjustments are needed, use the available hinge adjustment mechanisms to fine-tune the fit of the doors.
- If your base cabinet includes drawers, install the drawer fronts. Align the drawer fronts with the markings on the cabinet frame and secure them using the provided screws.
- Test the smoothness of the drawer’s movement and make any necessary adjustments to ensure they open and close properly.
- Install the cabinet hardware, such as knobs or handles, on the cabinet doors and drawers. Use a screwdriver or drill to attach the hardware securely.
Proper installation of the cabinet doors and drawers is crucial for both the functionality and aesthetic appeal of your base cabinet. The doors and drawers should open and close smoothly, align properly, and complement the overall design of your space.
Take your time during this step to ensure the doors and drawers are properly aligned and installed. Don’t hesitate to make adjustments as needed to achieve the desired fit and look. Once the doors and drawers are installed, you are almost finished with your base cabinet installation.
With the doors and drawers in place, the next step is to add the finishing touches and make any final adjustments.
Step 8: Finishing Touches and Final Adjustments
Congratulations! You’re in the final stretch of installing your base cabinet. This last step involves adding the finishing touches to complete the installation. Follow these steps to ensure your base cabinet is perfect:
- Clean the cabinet surfaces and remove any dust or debris that may have accumulated during the installation process.
- Check all the cabinet doors and drawers for proper alignment and operation. Make any necessary adjustments to ensure they open and close smoothly.
- Test the functionality of any internal accessories, such as adjustable shelves or pull-out organizers. Adjust them to maximize the storage space according to your needs.
- Inspect the cabinet for any gaps or inconsistencies. Use a caulking gun or trim to seal any gaps between the cabinet and the wall for a seamless appearance.
- Ensure that all screws and fasteners are securely tightened, but be careful not to overtighten and damage the components.
- Take a step back and admire your newly installed base cabinet. Appreciate the transformation and enjoy the improved functionality and aesthetics it brings to the room.
By paying attention to the finishing touches and making any necessary final adjustments, you’ll ensure that your base cabinet installation is completed with precision and care. These small details can make a significant difference in the overall appearance and functionality of your cabinets.
Now that your base cabinet installation is complete, take the time to organize and arrange the contents of your cabinets. Enjoy the newfound storage space and the seamless integration of your base cabinets into the room’s design. Step back and admire your hard work!
Remember, if you encounter any difficulties or feel unsure about any part of the installation process, don’t hesitate to consult professional help to ensure the best results.
With the base cabinet installation successfully completed, you can now move on to other exciting tasks to complete your dream kitchen or room transformation.
Read more: How To Install Pantry Cabinet
Conclusion
Installing base cabinets is a rewarding endeavor that can transform your kitchen or any other room while providing much-needed storage space. By following the step-by-step guide outlined in this article, you have learned the essential steps to ensure a successful base cabinet installation.
We began by preparing the workspace and gathering the necessary tools and materials. Then, we moved on to measuring and marking the area to ensure precise placement of the cabinets. With the measurements in place, we assembled the base cabinet, ensuring all components were securely fastened.
Next, we secured the base cabinet to the wall and then adjusted and leveled it for optimal functionality. We proceeded to install the cabinet doors and drawers, ensuring proper alignment and smooth operation. Finally, we added the finishing touches and made any necessary final adjustments to achieve a polished and professional result.
Throughout the installation process, safety was emphasized, and attention to detail was key. By carefully following each step and taking the time to double-check measurements and alignments, you have created a solid foundation for your kitchen or room design.
Remember, every successful project starts with proper planning and preparation. Take the time to gather the necessary tools and materials, read manufacturer instructions, and consult professional help if needed.
Now that you have completed the installation of your base cabinets, take a moment to appreciate the transformation and enjoy the increased functionality and aesthetics they bring to your space. Organize and arrange your cabinets, and savor the satisfaction of a job well done.
With your newfound knowledge and skills, you can confidently tackle similar projects in the future and continue to enhance and personalize your living spaces. So go ahead and enjoy your beautifully installed base cabinets – you’ve earned it!
Frequently Asked Questions about How To Install Base Cabinet
Was this page helpful?
At Storables.com, we guarantee accurate and reliable information. Our content, validated by Expert Board Contributors, is crafted following stringent Editorial Policies. We're committed to providing you with well-researched, expert-backed insights for all your informational needs.


0 thoughts on “How To Install Base Cabinet”