Articles
How To Install A Blink Video Doorbell
Modified: August 26, 2024
Learn how to install a Blink video doorbell with this step-by-step guide. Articles providing detailed instructions and tips for a successful installation.
(Many of the links in this article redirect to a specific reviewed product. Your purchase of these products through affiliate links helps to generate commission for Storables.com, at no extra cost. Learn more)
Introduction
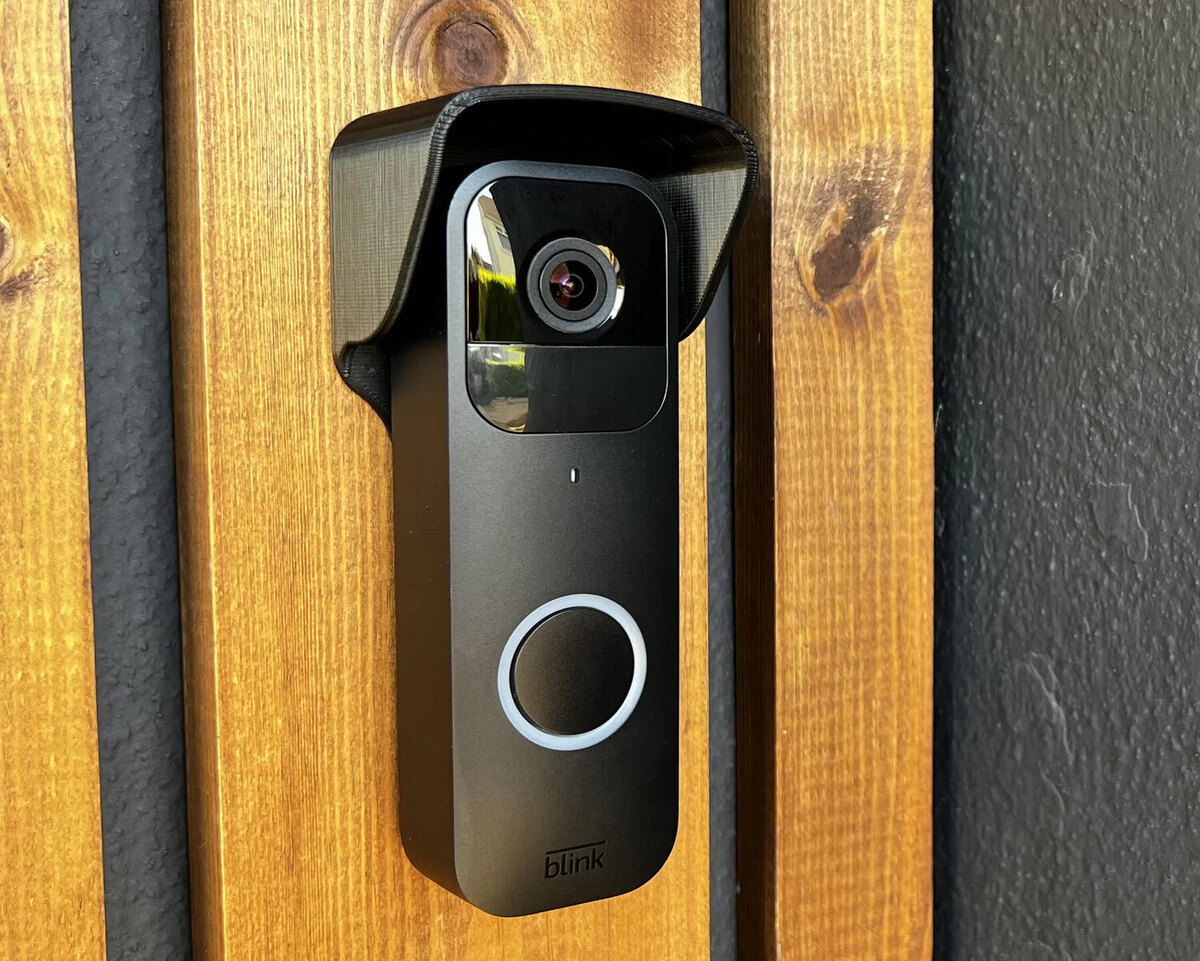
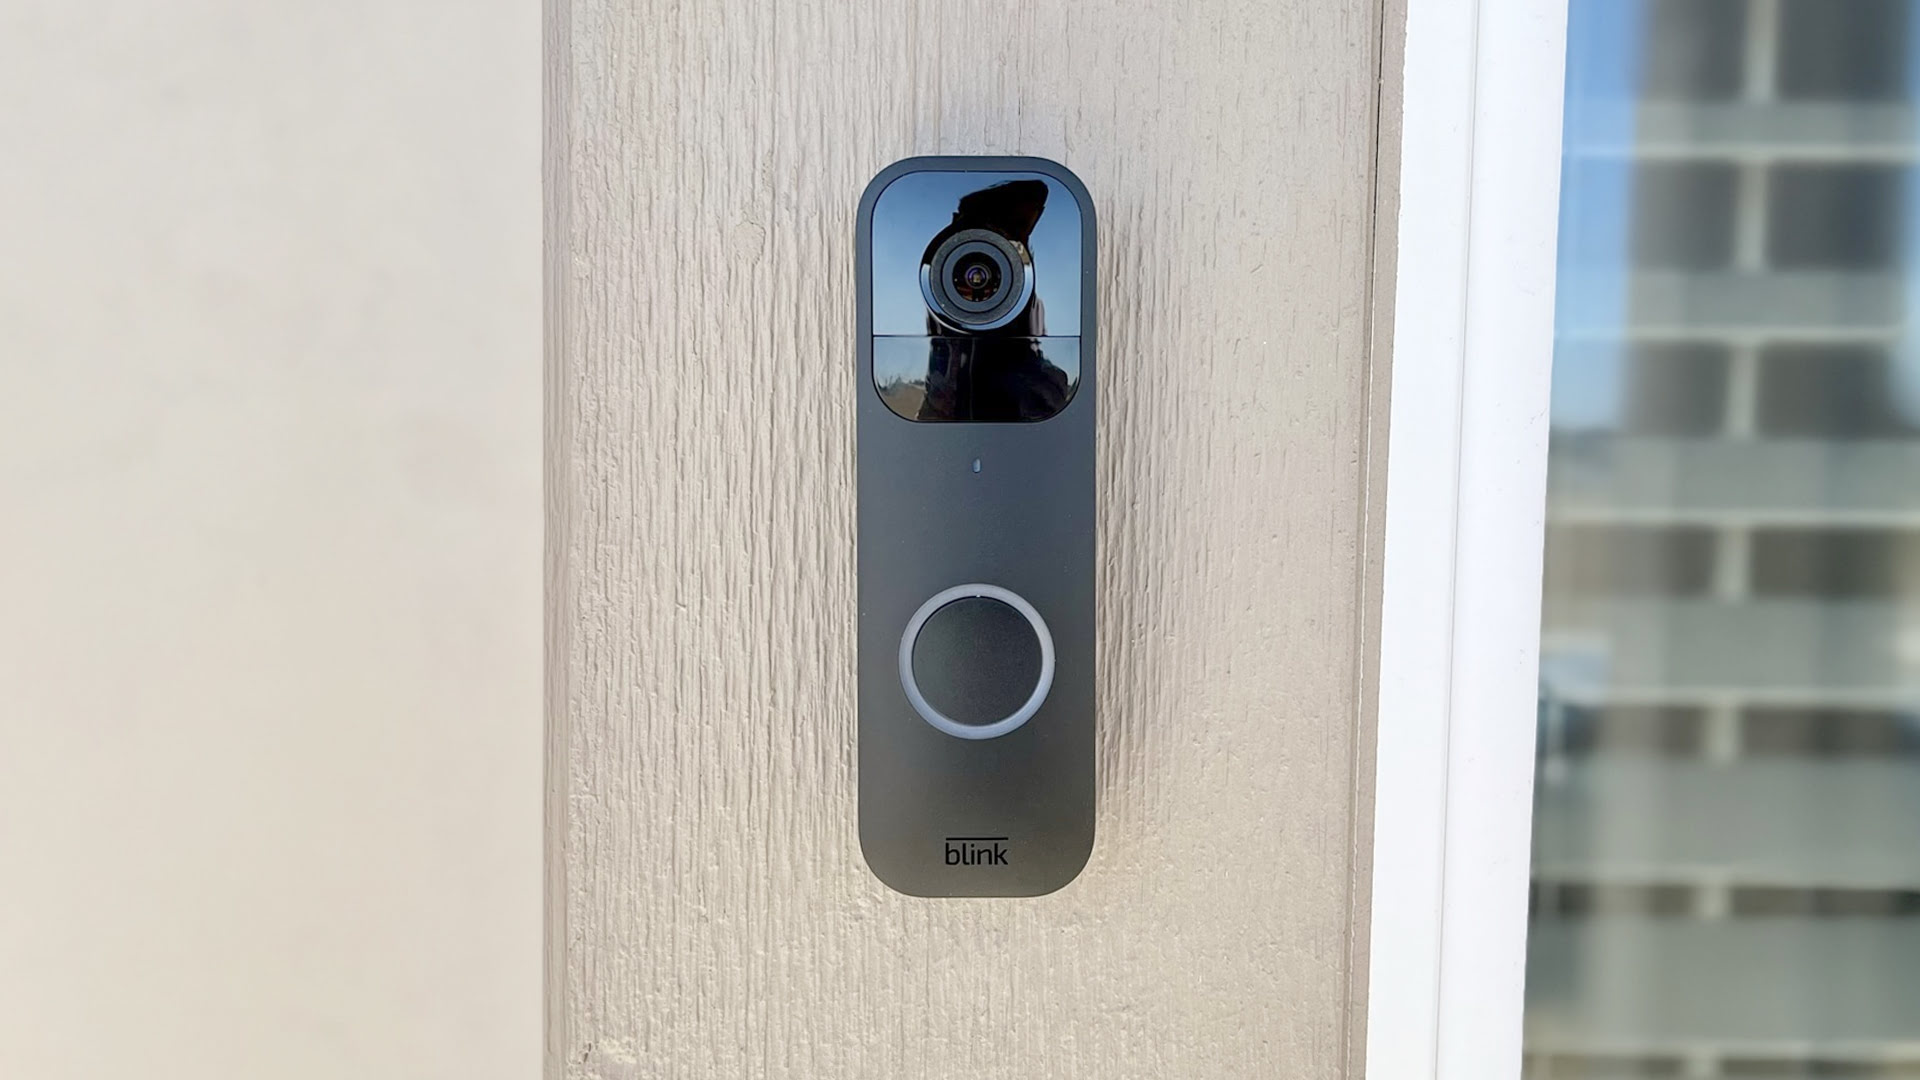
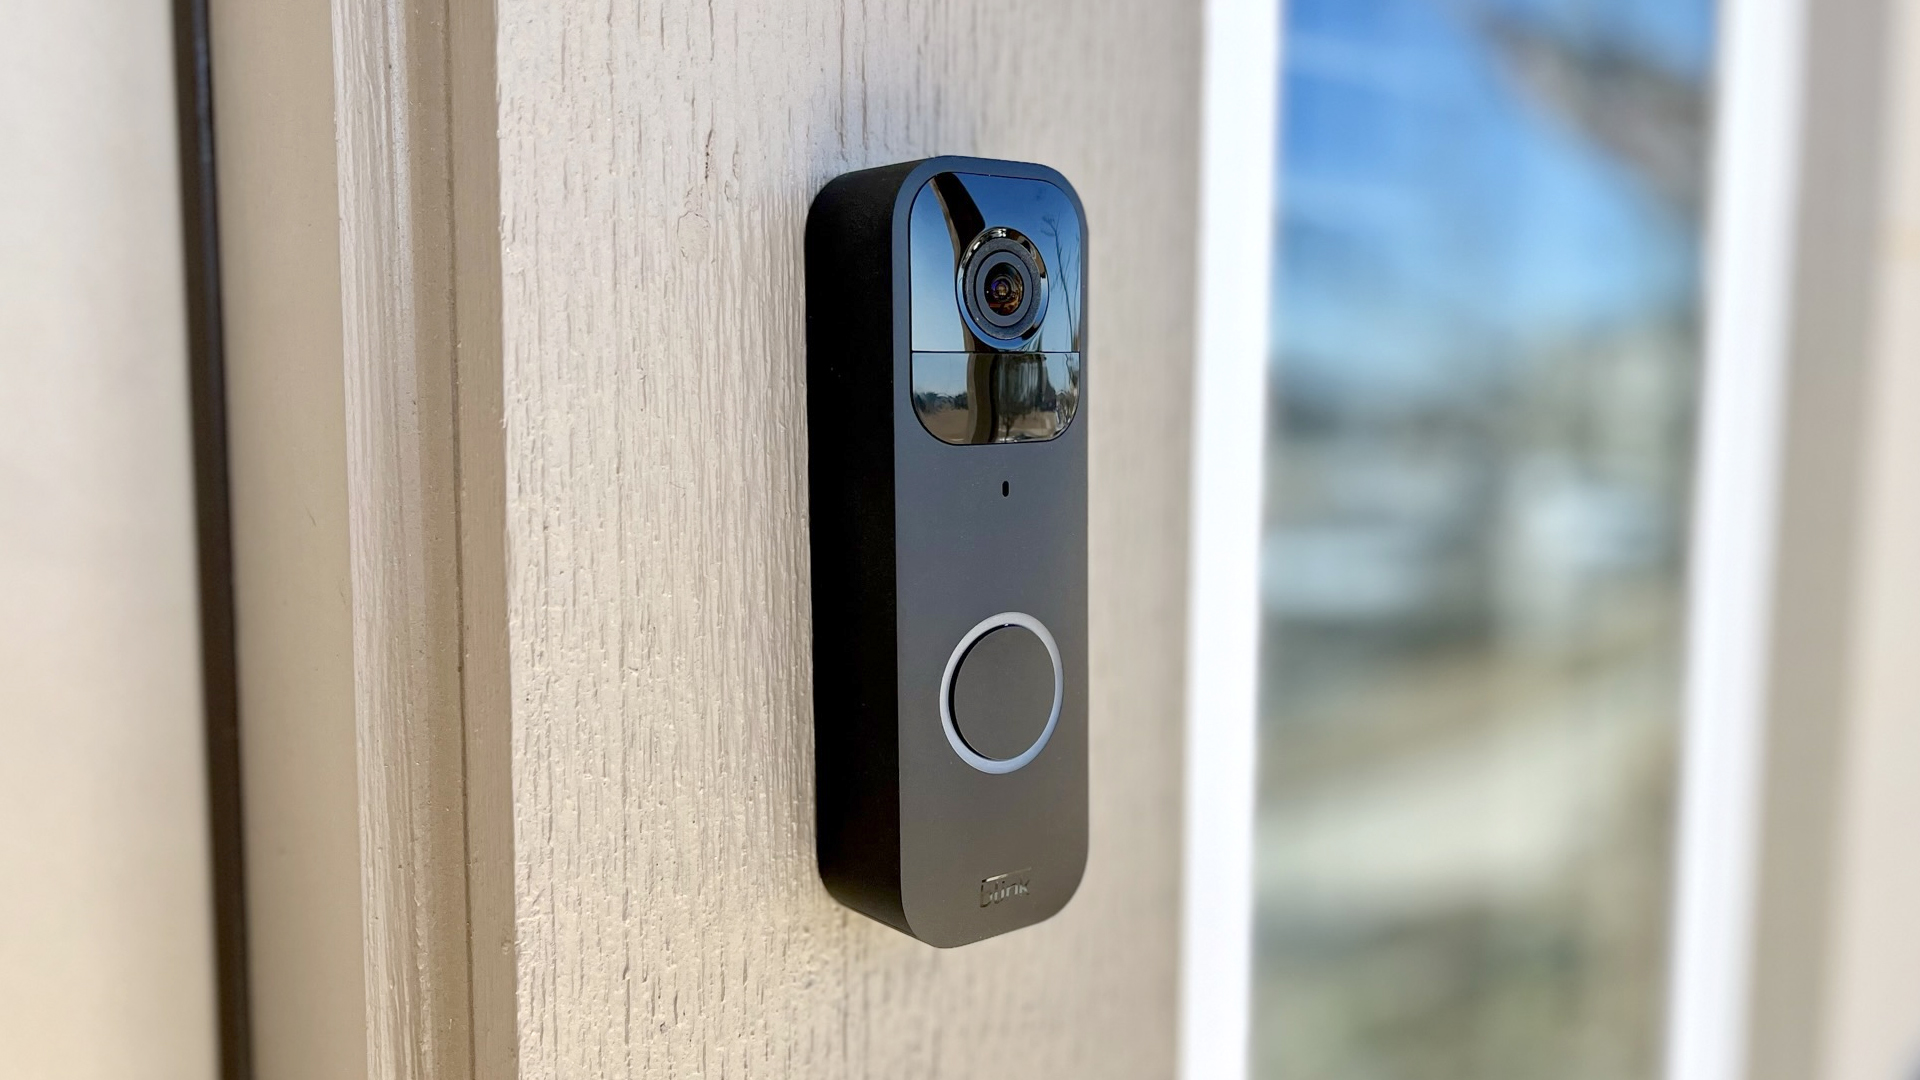
Installing a video doorbell can significantly enhance the security and convenience of your home. With the Blink video doorbell, you can monitor your front door, receive notifications of visitors, and even communicate with them remotely via your smartphone or tablet. In this article, we will guide you through the step-by-step process of installing a Blink video doorbell to ensure a successful setup.
Before we dive into the installation process, let’s first discuss the equipment you will need. You will require the Blink video doorbell itself, a mounting bracket, screws, a screwdriver, and a power source, such as a wired doorbell transformer or batteries, depending on the model you have chosen. Additionally, you will need a Wi-Fi connection in order to connect your video doorbell to the Blink app for remote access and control.
Before you begin the installation process, it’s important to check the compatibility of your existing doorbell setup. Make sure that your existing doorbell system is either wired or battery-powered, as there are different installation procedures for each. It’s also a good idea to read through the user manual and familiarize yourself with the specific instructions provided by Blink for your particular model.
Now that you have gathered all the necessary equipment and familiarized yourself with the user manual, it’s time to move on to the installation process. The first step involves preparing the location where you want to install your video doorbell. Choose a spot near your front door that provides a clear view of your entryway and allows for easy access to the wiring or battery compartment. Ensure that the installation area is clean and free of any obstructions.
Once you have prepared the location, you can proceed to remove your existing doorbell if you have one. This step may vary depending on the type of doorbell you currently have. If it is a wired doorbell, you will need to turn off the power at the breaker box before disconnecting the wires. If you have a battery-powered doorbell, simply remove it from its mounting bracket.
Next, you will need to install the mounting bracket for your Blink video doorbell. Align the screw holes on the mounting bracket with the pre-existing holes from your previous doorbell. Secure the bracket using the provided screws and a screwdriver or drill. Ensure that the bracket is firmly attached to the wall or door frame to provide a stable base for your video doorbell.
Key Takeaways:
- Enhance Home Security and Convenience
Installing a Blink video doorbell provides seamless monitoring, notification alerts, and remote communication with visitors. Ensure compatibility, proper installation, and thorough testing for optimal performance. - Simplify Installation and Setup Process
From gathering equipment to completing the setup in the Blink app, follow the step-by-step guide for a successful installation. Test and troubleshoot to address any potential issues and enjoy enhanced home security.
Read more: How To Install Blink Doorbell Without Screws
Step 1: Gather the Equipment
Before you can begin the installation process of your Blink video doorbell, it’s essential to ensure that you have all the necessary equipment. Here is a checklist of the items you will need:
- Blink video doorbell: This is the main component of your video doorbell system. It is responsible for capturing video footage, detecting motion, and providing live video streaming.
- Mounting bracket: The mounting bracket serves as the foundation for your video doorbell. It securely attaches the doorbell to your wall or door frame.
- Screws: These are used to fasten the mounting bracket to the wall or door frame.
- Screwdriver or drill: You will need a screwdriver or drill to tighten the screws and secure the mounting bracket.
- Power source: Depending on the model of your Blink video doorbell, you will either need a wired doorbell transformer or batteries as a power source.
- Wi-Fi connection: A stable Wi-Fi connection is essential for connecting your video doorbell to the Blink app and accessing its features remotely.
Before purchasing your Blink video doorbell, make sure to check the compatibility and power requirements of the specific model. Some Blink video doorbells are only compatible with wired installations, while others can be battery-powered. Additionally, the power source you choose should meet the voltage and current requirements specified by the manufacturer.
When selecting a location for your video doorbell installation, consider factors such as the angle of the camera, proximity to your front door, and accessibility to power. You may also want to choose a spot that provides a clear view of the entryway and minimizes the chances of false motion detection.
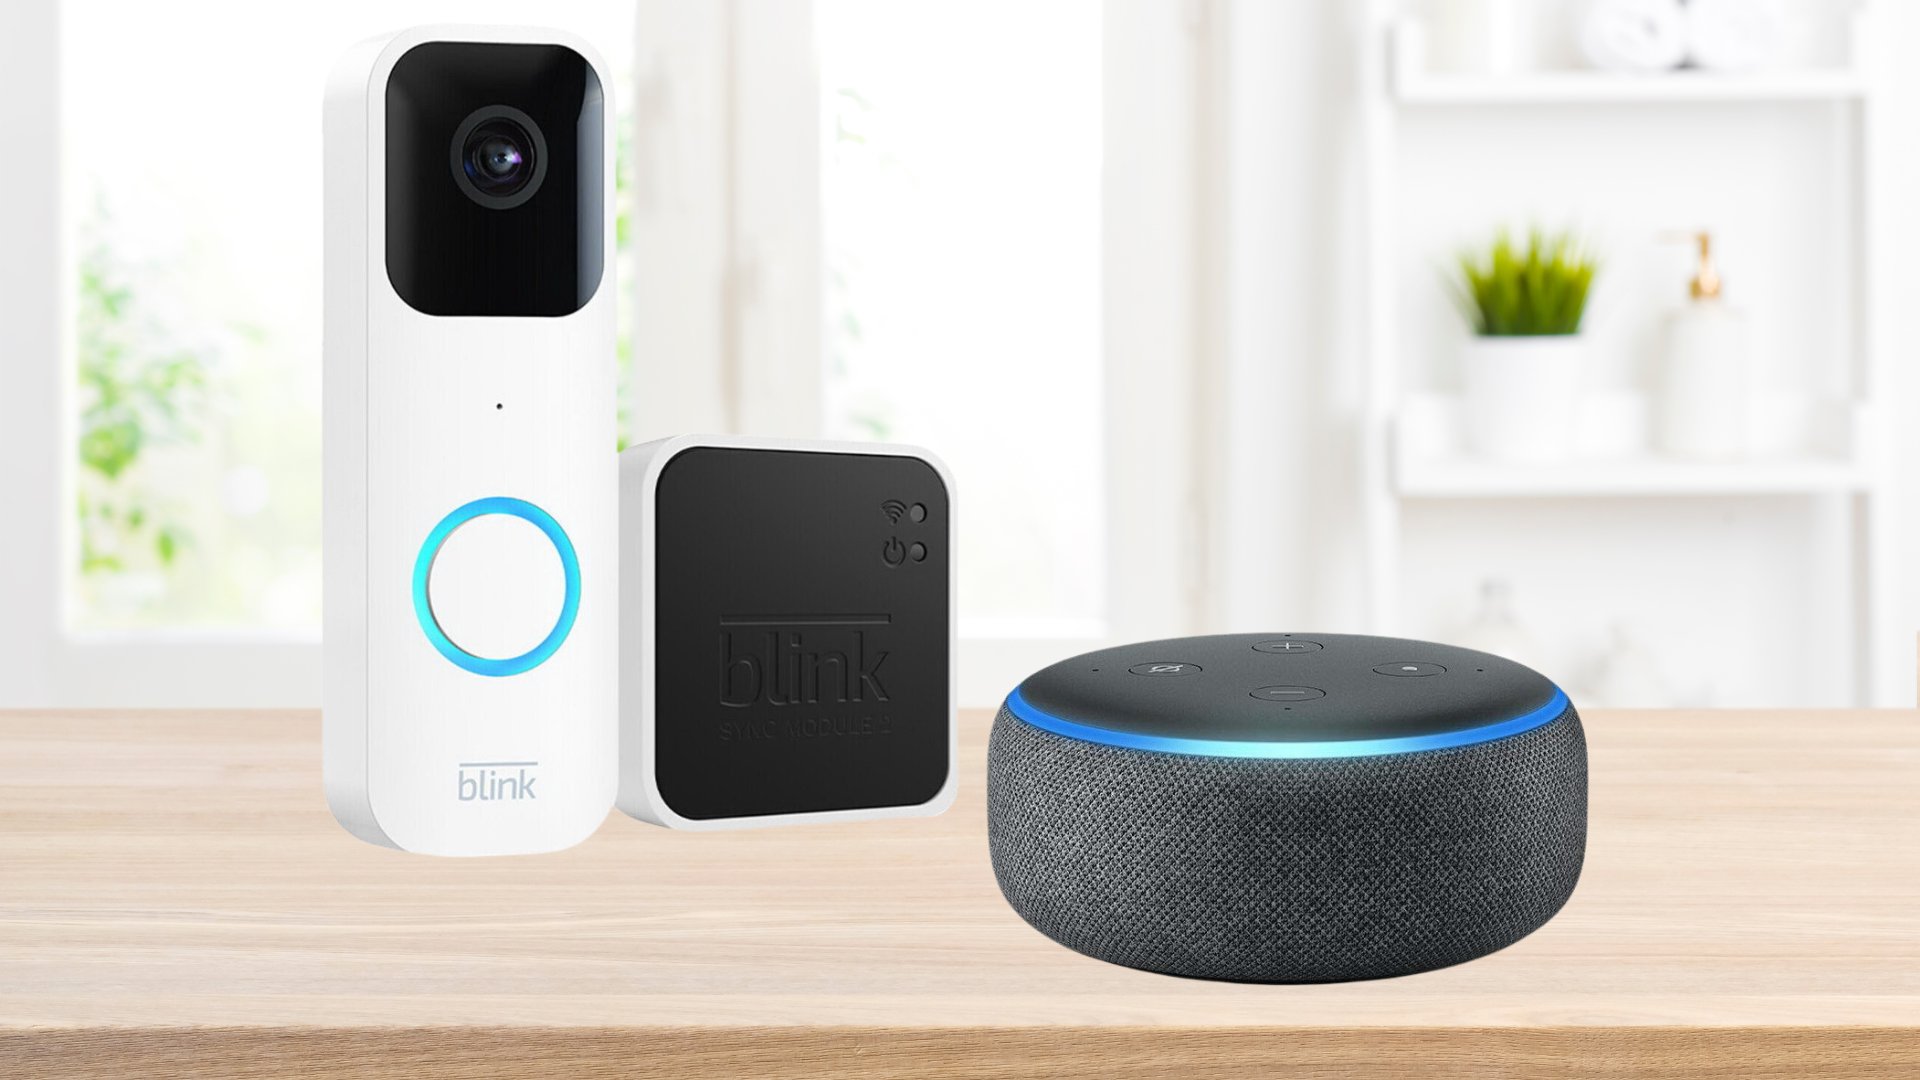
In addition to the required equipment, it’s also a good idea to have a smartphone or tablet with the Blink app installed. The Blink app allows you to control and monitor your video doorbell, receive notifications, and view live video footage from anywhere.
By ensuring that you have all the necessary equipment before starting the installation process, you can minimize any delays or interruptions and ensure a smooth setup of your Blink video doorbell.
Step 2: Check Compatibility
Before proceeding with the installation of your Blink video doorbell, it’s important to check its compatibility with your existing doorbell setup. This step will help ensure that the installation process goes smoothly and that your video doorbell functions optimally.
Firstly, determine whether your Blink video doorbell is suitable for a wired or battery-powered installation. Different models may have different power requirements and installation methods. Refer to the user manual or manufacturer’s instructions to confirm the specific requirements for your model.
If you plan to connect your video doorbell to an existing wired doorbell system, ensure that your current setup meets the necessary requirements. Check if there is an existing wired doorbell transformer and the voltage rating it provides. The Blink video doorbell typically requires a transformer output of 8-24 volts. If your current doorbell system doesn’t meet this criteria, you may need to upgrade or install a compatible transformer.
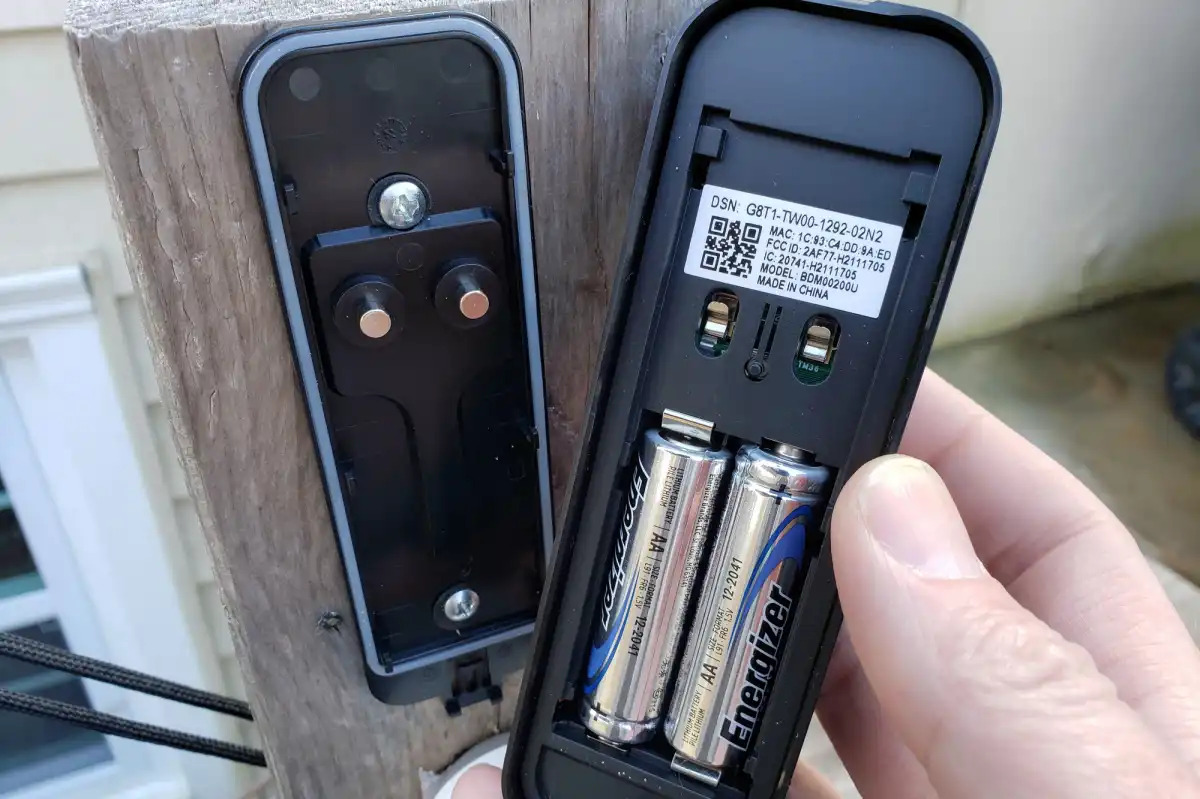
For battery-powered installations, make sure to have the appropriate batteries on hand. Most Blink video doorbell models use AA lithium batteries, but it’s always recommended to verify the specific battery type required for your particular model.
In addition to power compatibility, ensure that your Wi-Fi network meets the requirements for connecting your video doorbell. The Blink video doorbell relies on a stable Wi-Fi connection to communicate with the Blink app and provide remote access features. Check your Wi-Fi signal strength in the area where you plan to install the doorbell to ensure a reliable connection.
It’s also worth checking the compatibility of your smartphone or tablet with the Blink app. Verify that your device’s operating system is supported and meets the minimum requirements for running the app effectively. This will ensure that you can fully utilize the features and functions offered by the Blink video doorbell.
By taking the time to confirm the compatibility of your Blink video doorbell with your existing doorbell setup, power source, Wi-Fi network, and mobile device, you can avoid any potential issues or complications during the installation process. This step sets a solid foundation for a successful installation and ensures that your video doorbell functions seamlessly once installed.
Step 3: Prepare Your Doorbell Location
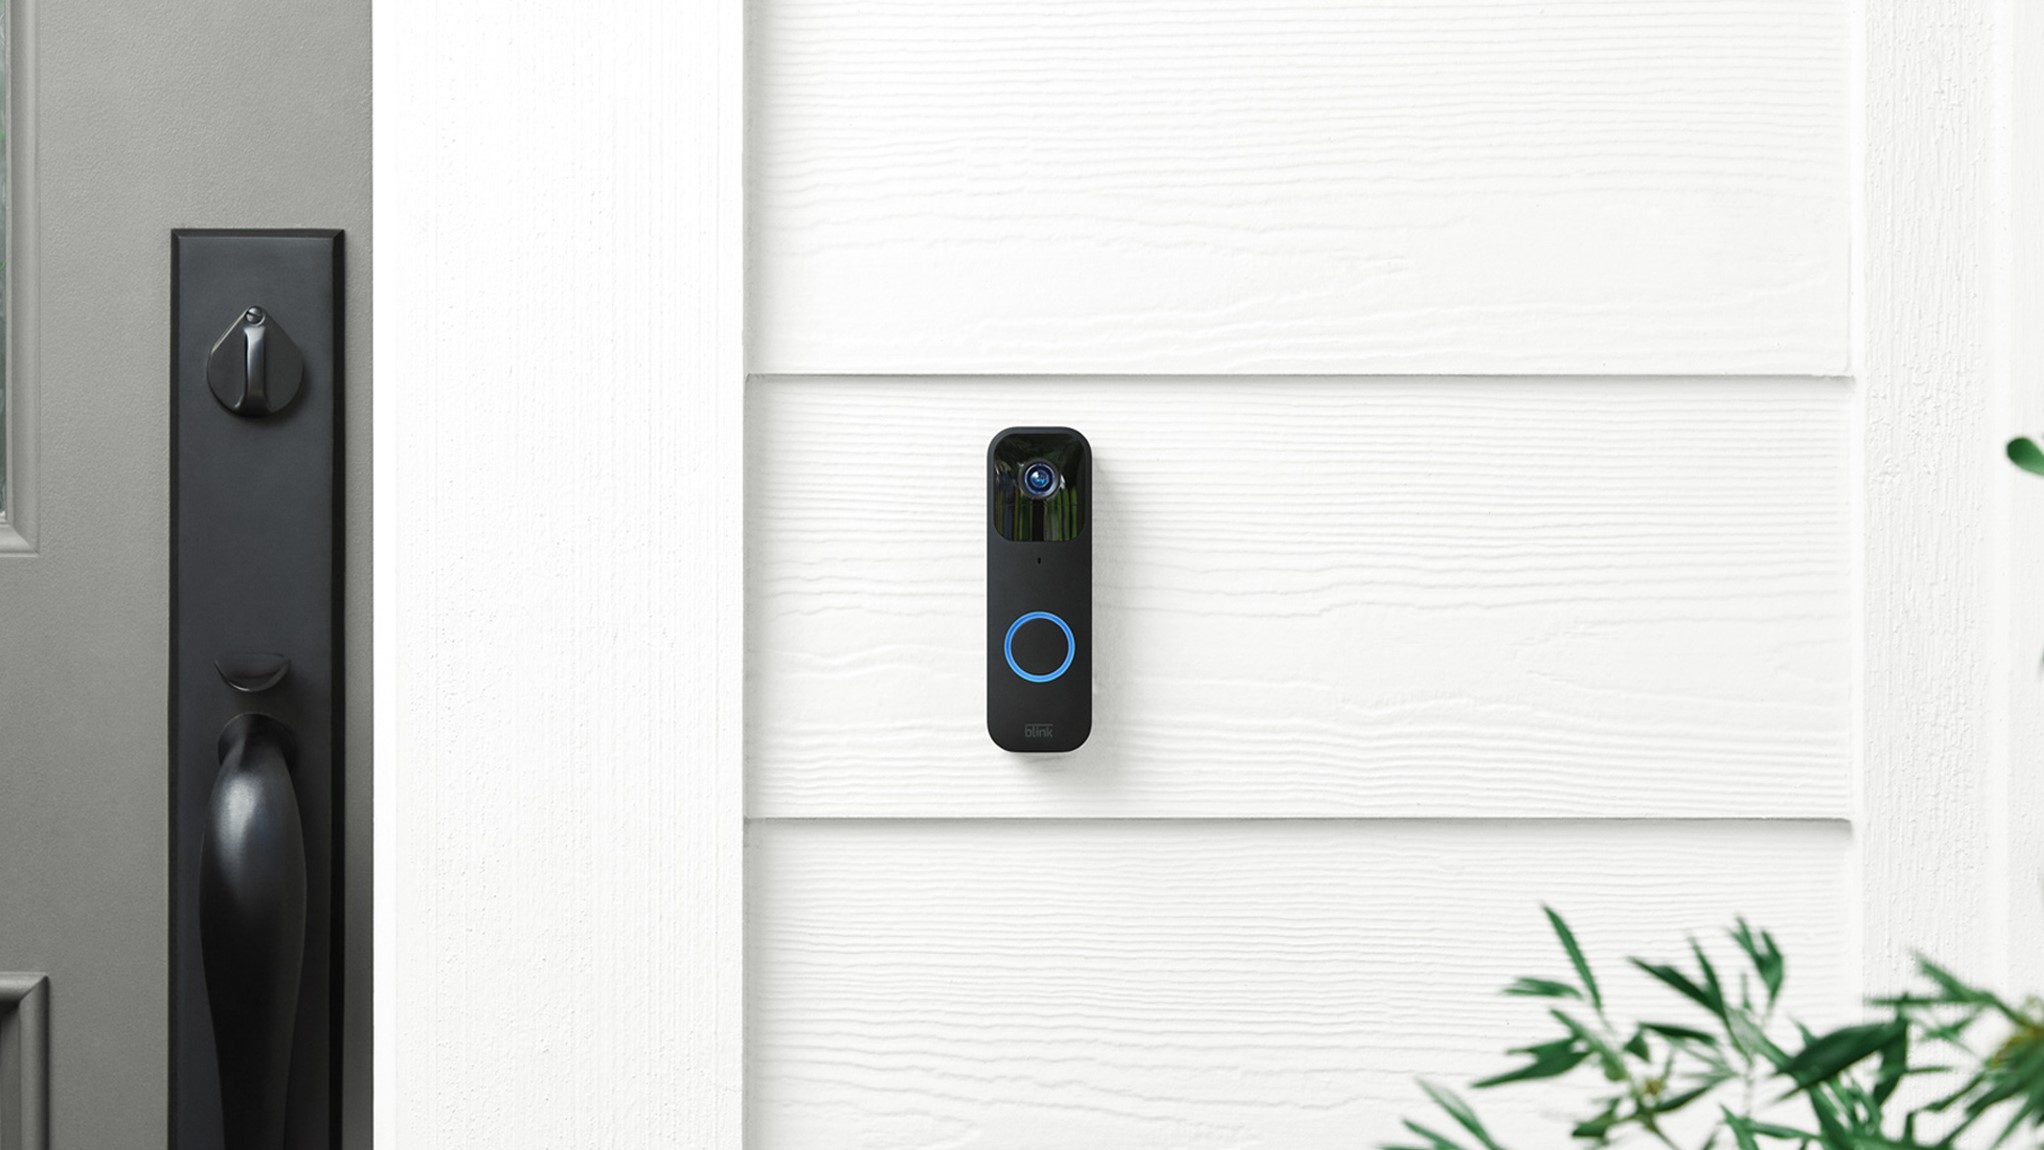
Now that you have gathered the necessary equipment and confirmed compatibility, it’s time to prepare the location where you will install your Blink video doorbell. Choosing the right location is crucial for the optimal performance and functionality of your video doorbell.
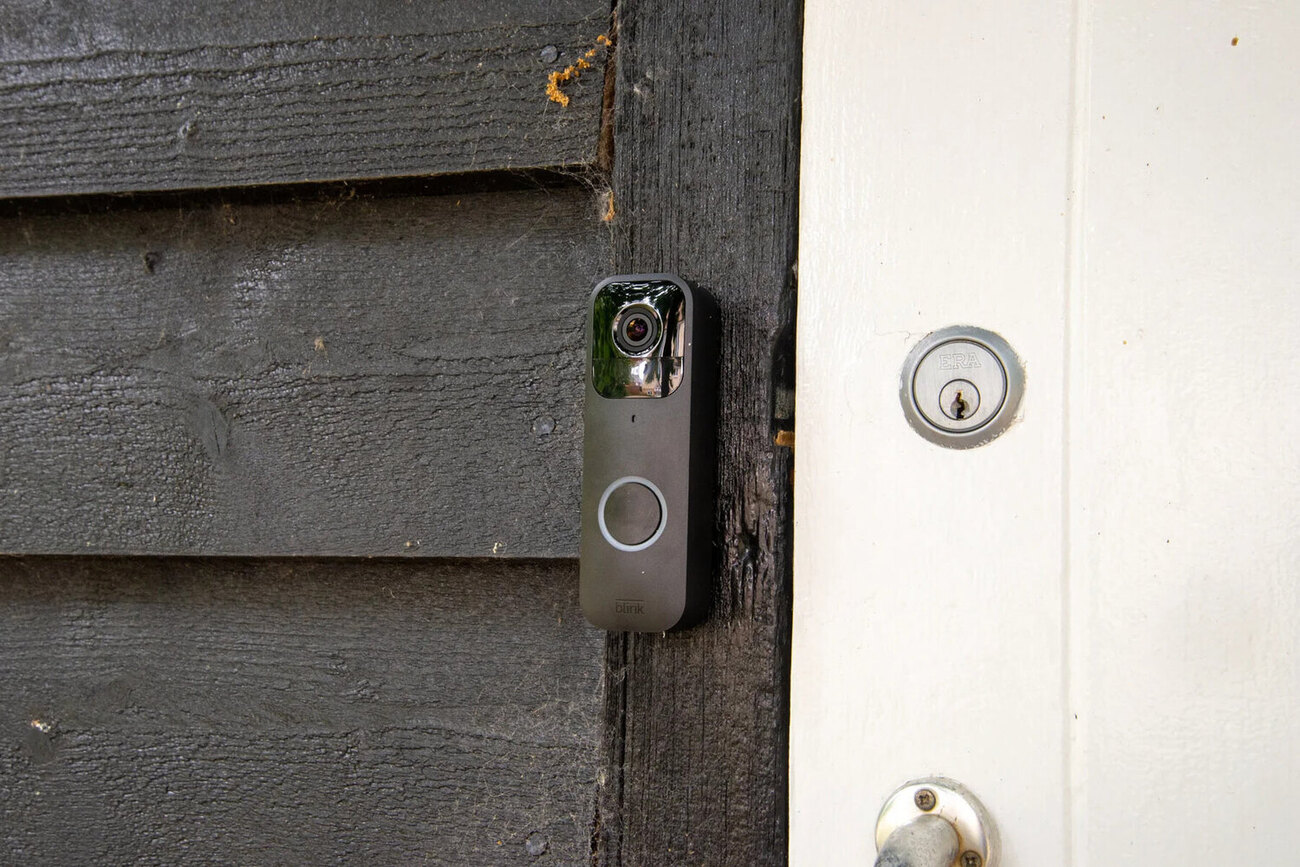
Firstly, consider the placement of your video doorbell in relation to your front door. Ideally, it should be positioned near the entrance to provide a clear view of anyone approaching your home. This will enable your video doorbell to capture accurate footage and provide effective security monitoring.
Ensure that there is ample space around the installation area, free from any obstructions that may hinder the field of view or motion detection capabilities of the doorbell. Trim any overhanging branches or foliage that could potentially interfere with the camera’s line of sight.
It’s also important to consider the height at which you will install the video doorbell. Aim to position it at a comfortable eye level for most individuals, typically around 48-55 inches above the ground. This height ensures that your video doorbell captures the faces of visitors and minimizes the chances of capturing irrelevant footage, such as the tops of people’s heads.
In addition to positioning, assess the accessibility of the chosen location for wires or battery replacement. If installing a wired doorbell, ensure that there is easy access to the existing doorbell wiring or the location where you intend to connect the wiring. If using batteries, ensure that you can easily open the battery compartment for replacements when necessary.
Lastly, take into account the environmental factors surrounding your chosen installation site. Consider whether the area is exposed to direct sunlight or extreme weather conditions. If so, you may need to take additional measures, such as using a sunshade or weatherproofing the area, to protect your video doorbell from potential damage.
By carefully selecting and preparing the location for your Blink video doorbell, you can ensure optimal performance, efficient monitoring, and ease of maintenance. Taking the time to consider these factors now will set the stage for a successful installation and enhance the overall functionality of your video doorbell.
Step 4: Remove Existing Doorbell
Before installing your new Blink video doorbell, you will need to remove any existing doorbell that may be in place. This step is necessary to ensure a clean and smooth installation process. Here’s how to remove your existing doorbell:
1. Turn off the power: If your doorbell is wired, the first step is to turn off the power at the breaker box. Locate the circuit breaker that controls the power supply to your doorbell and switch it off to ensure your safety during the removal process.
2. Remove the cover: Most doorbells have a cover or housing that protects the internal components. Gently remove the cover by unscrewing any screws or clips that may be holding it in place. Set the cover aside in a safe location.
3. Disconnect the wires: Carefully loosen the screws that secure the doorbell wires to the terminals. Grip the wires close to the terminals and pull them out gently to disconnect them. Take note of which wire corresponds to which terminal for easier reconnection later on.
4. Remove the mounting plate: Some doorbells may have a mounting plate or bracket attached to the wall or door frame. Use a screwdriver to remove any screws that are securing the mounting plate. Once the screws are removed, carefully pull the mounting plate away from the wall or door frame.
5. Inspect and clean the area: With the existing doorbell removed, take a moment to inspect the area and ensure that it is clean and free from any debris or loose wires. Use a dry cloth or brush if necessary to remove any dust or dirt. This will ensure a smooth installation of your new Blink video doorbell.
Remember to exercise caution when handling electrical wires or working with power supplies. If you are unsure about disconnecting the wiring, it is recommended to consult a professional electrician to ensure it is done safely.
By properly removing the existing doorbell, you can create a clean and clear space for the installation of your new Blink video doorbell. This step sets the stage for a successful installation and ensures that your new doorbell functions optimally.
Read more: Why Is My Blink Doorbell Blinking Red
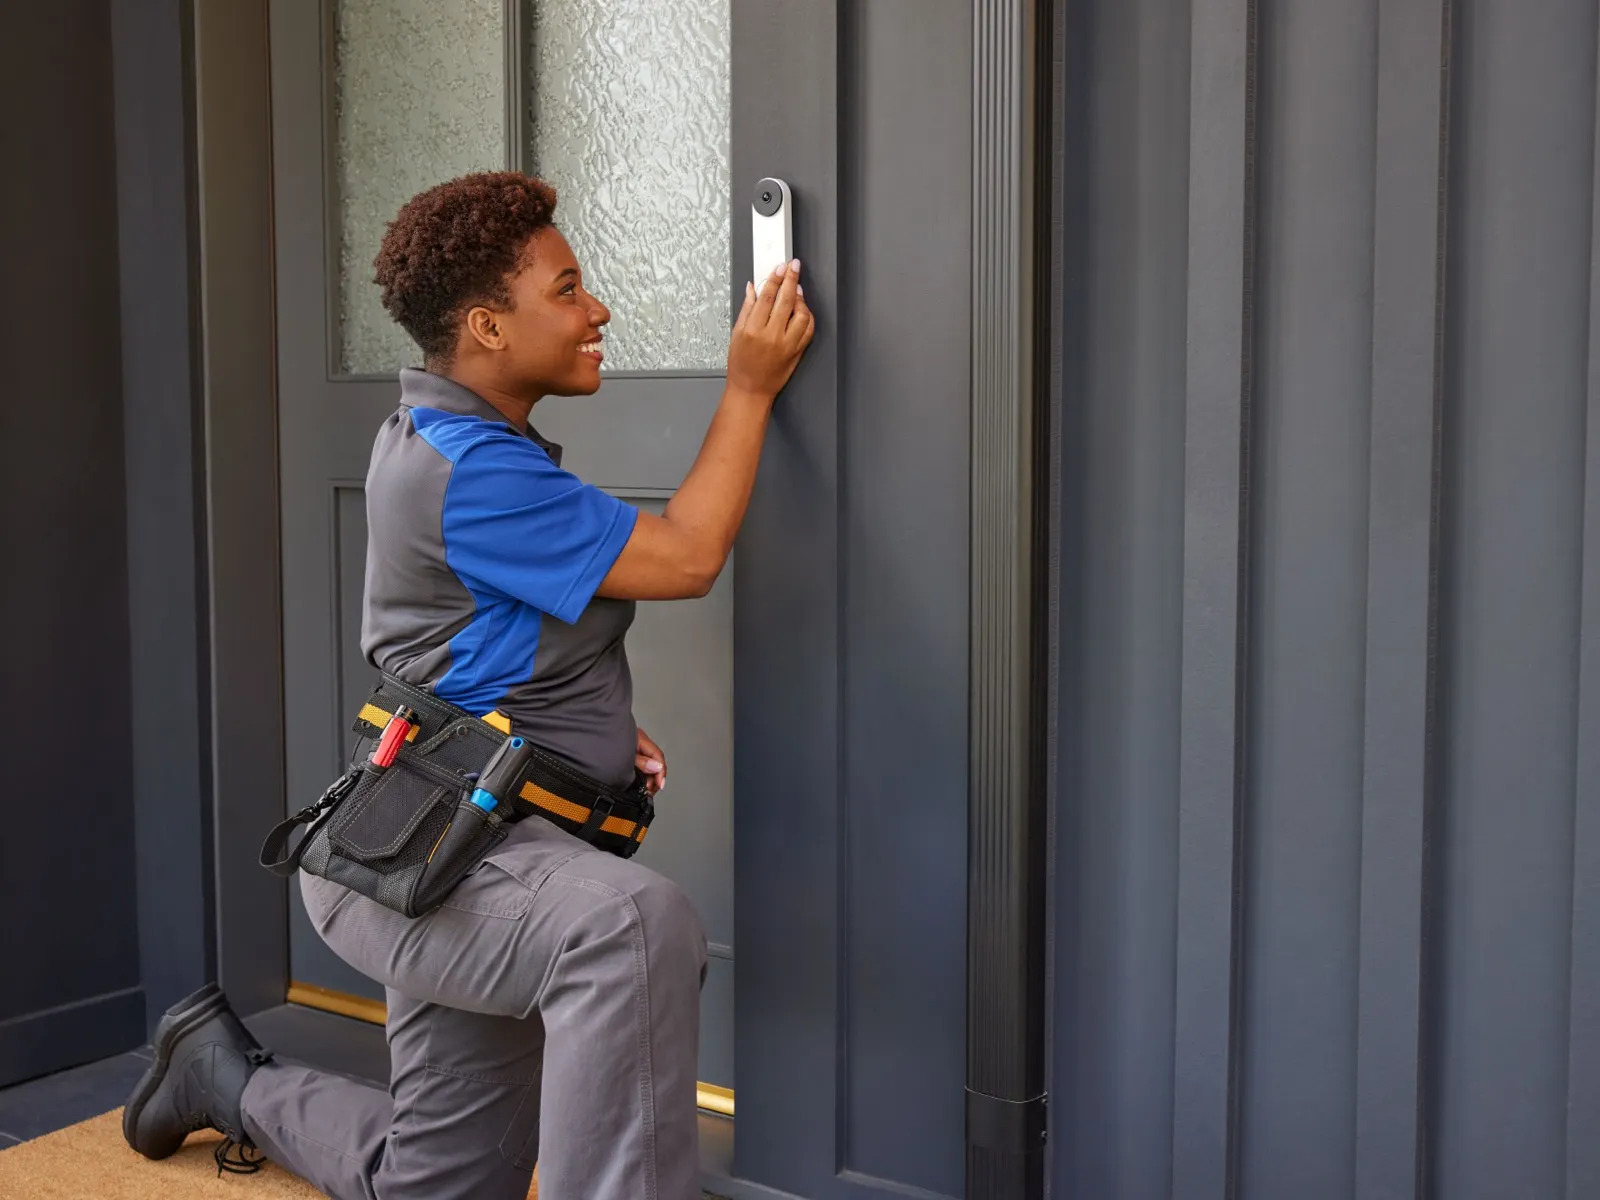
Step 5: Install Mounting Bracket
Once you have removed the existing doorbell, it’s time to install the mounting bracket for your Blink video doorbell. The mounting bracket provides a secure anchor for your doorbell and ensures its stability. Follow these steps to install the mounting bracket:
1. Position the mounting bracket: Hold the mounting bracket against the wall or door frame in the desired location for your video doorbell. Ensure that the bracket is level and aligned with the area where your existing doorbell was mounted. Use a pencil to mark the screw hole positions on the wall or door frame.
2. Pre-drill pilot holes: Using a drill and a drill bit of an appropriate size, pre-drill pilot holes at the marked screw hole positions. This will make it easier to insert the screws and prevent the wall or door frame from splitting or cracking during installation.
3. Secure the mounting bracket: Position the mounting bracket back onto the wall or door frame, aligning the pre-drilled screw holes with the pilot holes. Insert the screws provided with the mounting bracket through the holes and use a screwdriver or drill to tighten them securely. Ensure that the mounting bracket is firmly attached to the surface, with no wobbling or movement.
4. Check the level: Use a level to ensure that the mounting bracket is installed perfectly level. Adjust as necessary by loosening the screws and repositioning the bracket until it is level.
5. Test stability: Gently tug on the mounting bracket to ensure that it is securely fastened to the wall or door frame. It should feel stable and not shift or move easily.
Throughout the installation process, it’s essential to refer to the user manual or manufacturer’s instructions specific to your Blink video doorbell model. They may provide additional guidance or steps specific to your device.
By properly installing the mounting bracket, you create a solid foundation for your Blink video doorbell. The bracket ensures that the doorbell is securely attached to your wall or door frame, minimizing the risk of it falling or shifting over time. With the mounting bracket in place, you are now ready to proceed with the remaining installation steps.
Before installing a Blink Video Doorbell, make sure to check the compatibility of your existing doorbell wiring and voltage requirements to ensure a smooth installation process.
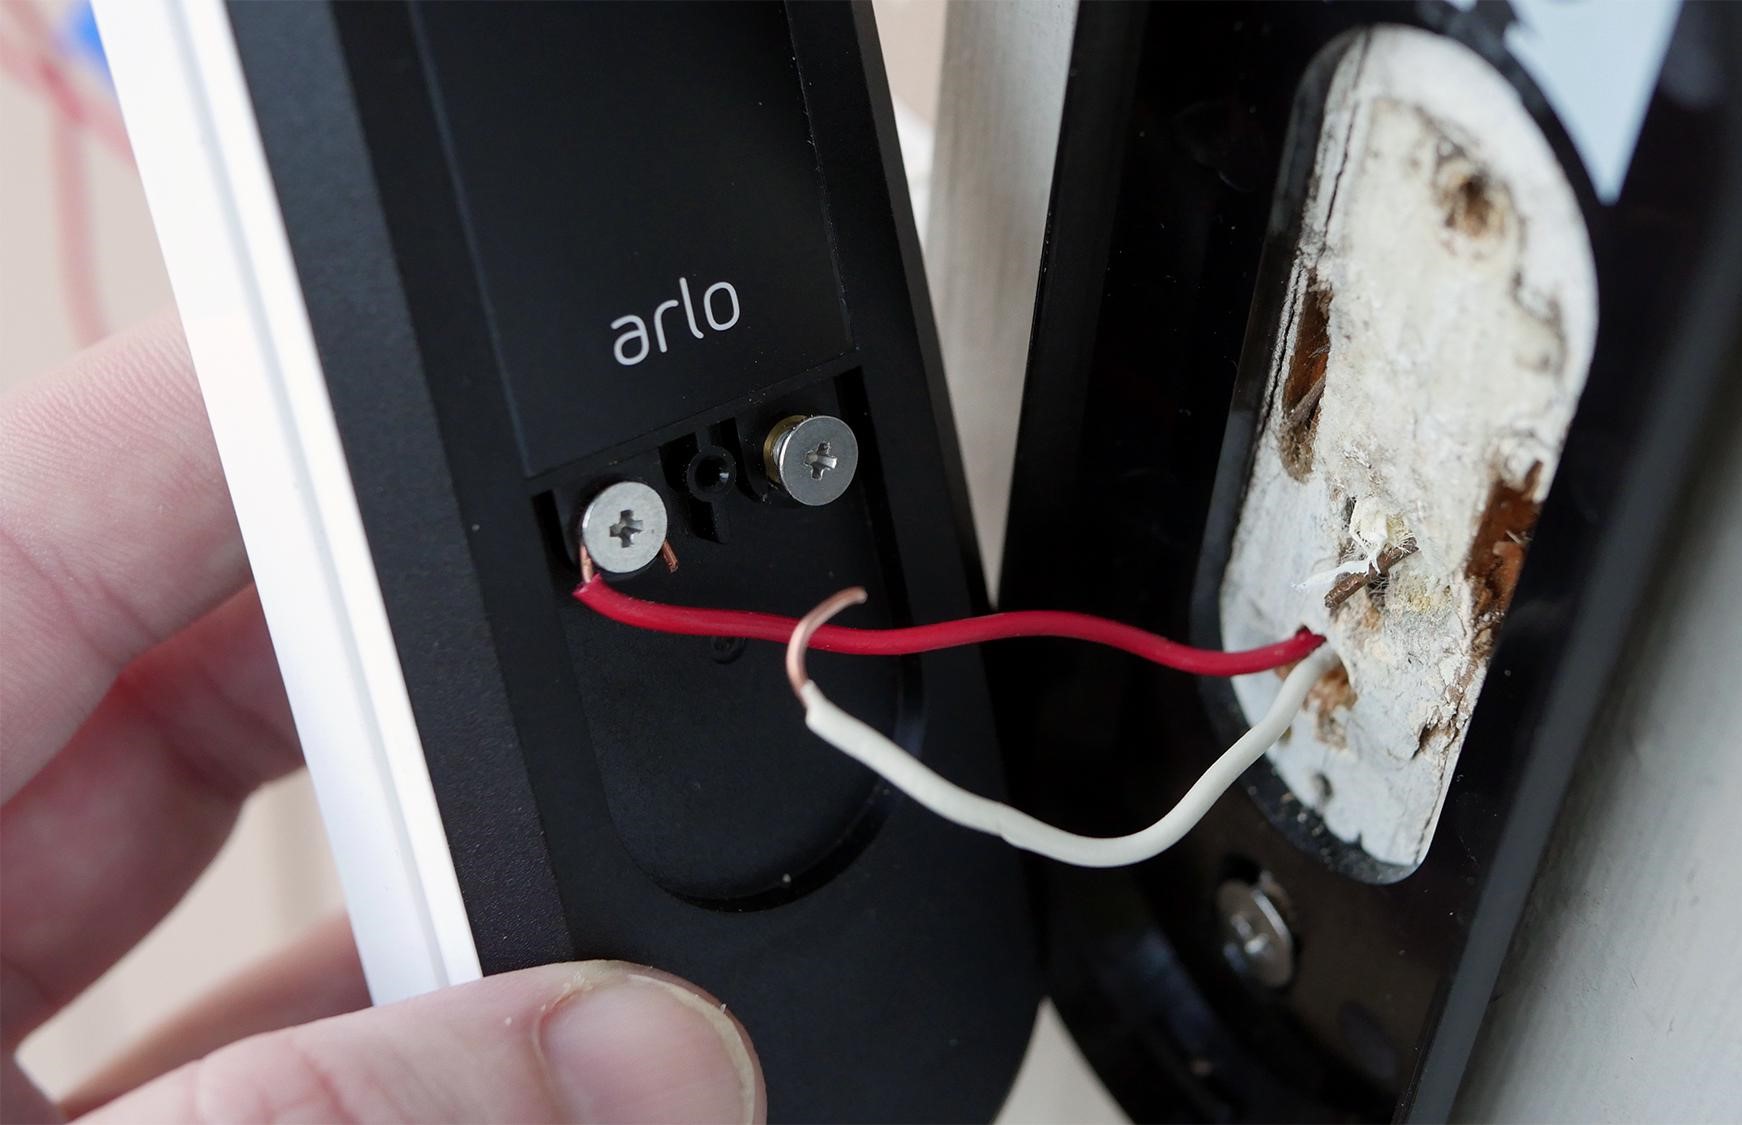
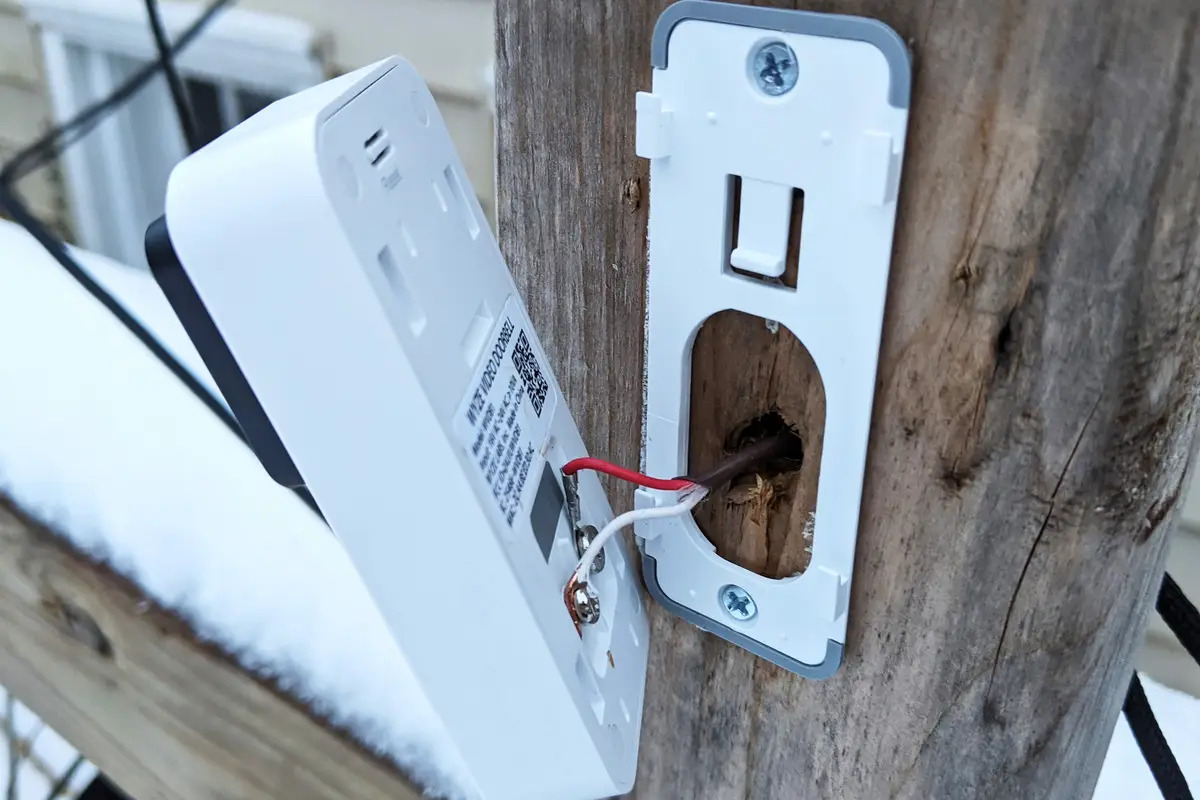
Step 6: Connect Wires
If you are installing a wired Blink video doorbell, the next step is to connect the wires to the appropriate terminals on the device. Follow these instructions to properly connect the wires:
1. Identify the wires: Locate the wires that were previously connected to your old doorbell. Typically, there will be two wires: one labeled “Front” or “Trans” and one labeled “Rear” or “Bell”. In some cases, these wires may be different colors, such as red and white.
2. Strip the wire ends: Use a wire stripper to carefully strip off a small amount of insulation from the ends of the wires. This will expose the metal conductor inside. Take caution not to strip off too much insulation.
3. Connect the wires: Insert the stripped ends of the wires into the appropriate terminals on the back of the Blink video doorbell. Typically, there will be two terminals labeled “Front” and “Transformer”. Insert the wire into the corresponding terminal and tighten the screws to secure the connection. If your doorbell has an additional terminal for a rear doorbell, repeat this process for the second wire.
4. Double-check the connections: Once the wires are securely connected, gently tug on them to ensure that they are firmly in place. Check that there is no exposed wire and the connection is secure.
If you are unfamiliar with electrical wiring or are unsure about the process, it is recommended to seek the assistance of a qualified electrician. They will ensure that the wires are connected safely and according to the appropriate electrical codes.
For battery-powered Blink video doorbells, this step is not applicable as there are no wires to connect. Simply move on to the next step in the installation process.
By properly connecting the wires to your Blink video doorbell, you ensure that it receives the necessary power to function. Double-checking the wire connections will help prevent any issues with power supply and ensure the doorbell’s proper operation. With the wires securely connected, you are now ready to proceed with the installation of your video doorbell.
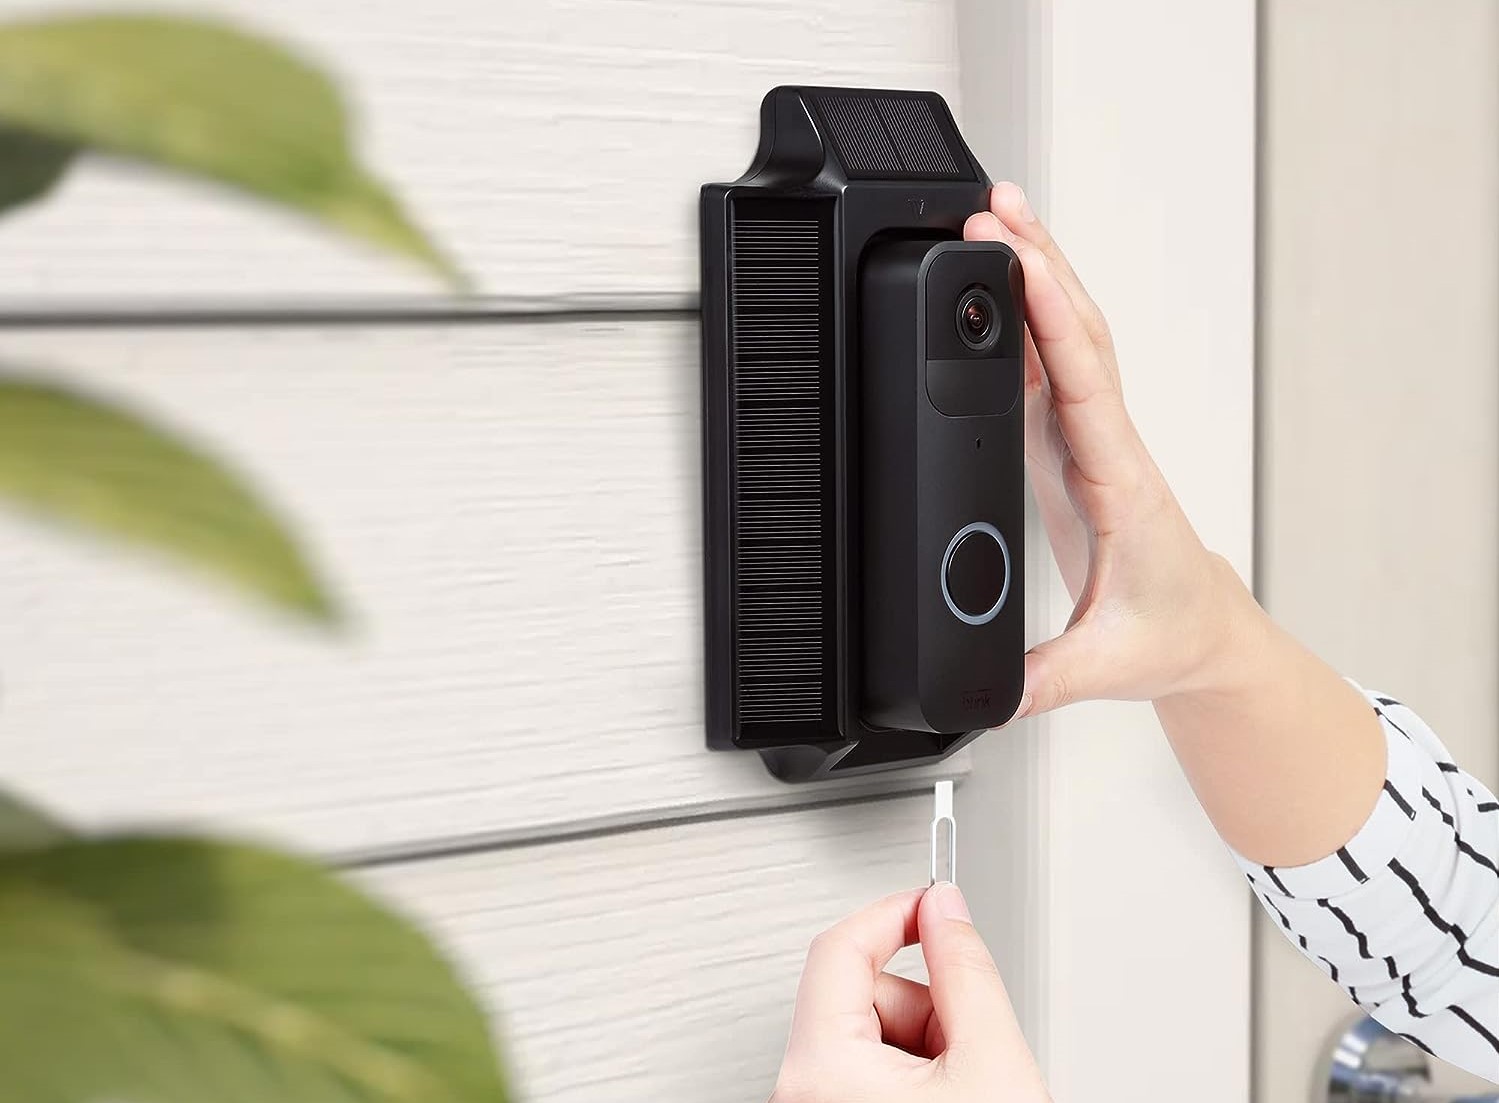
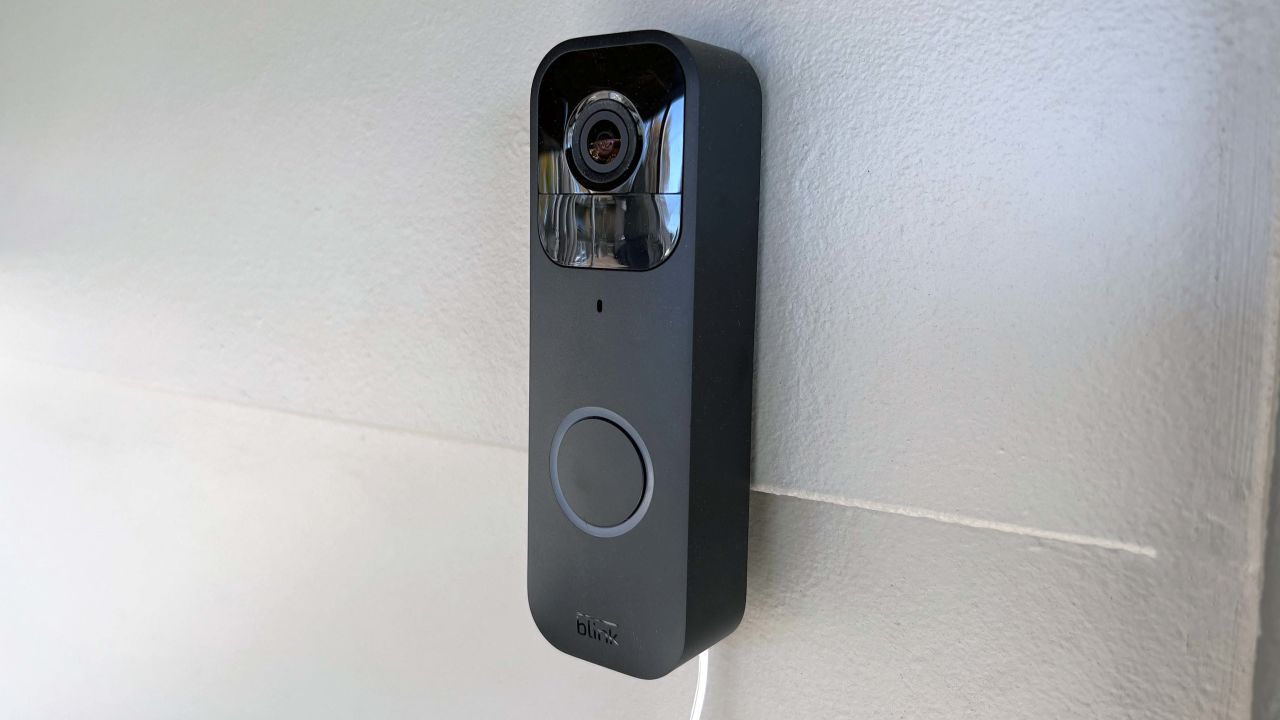
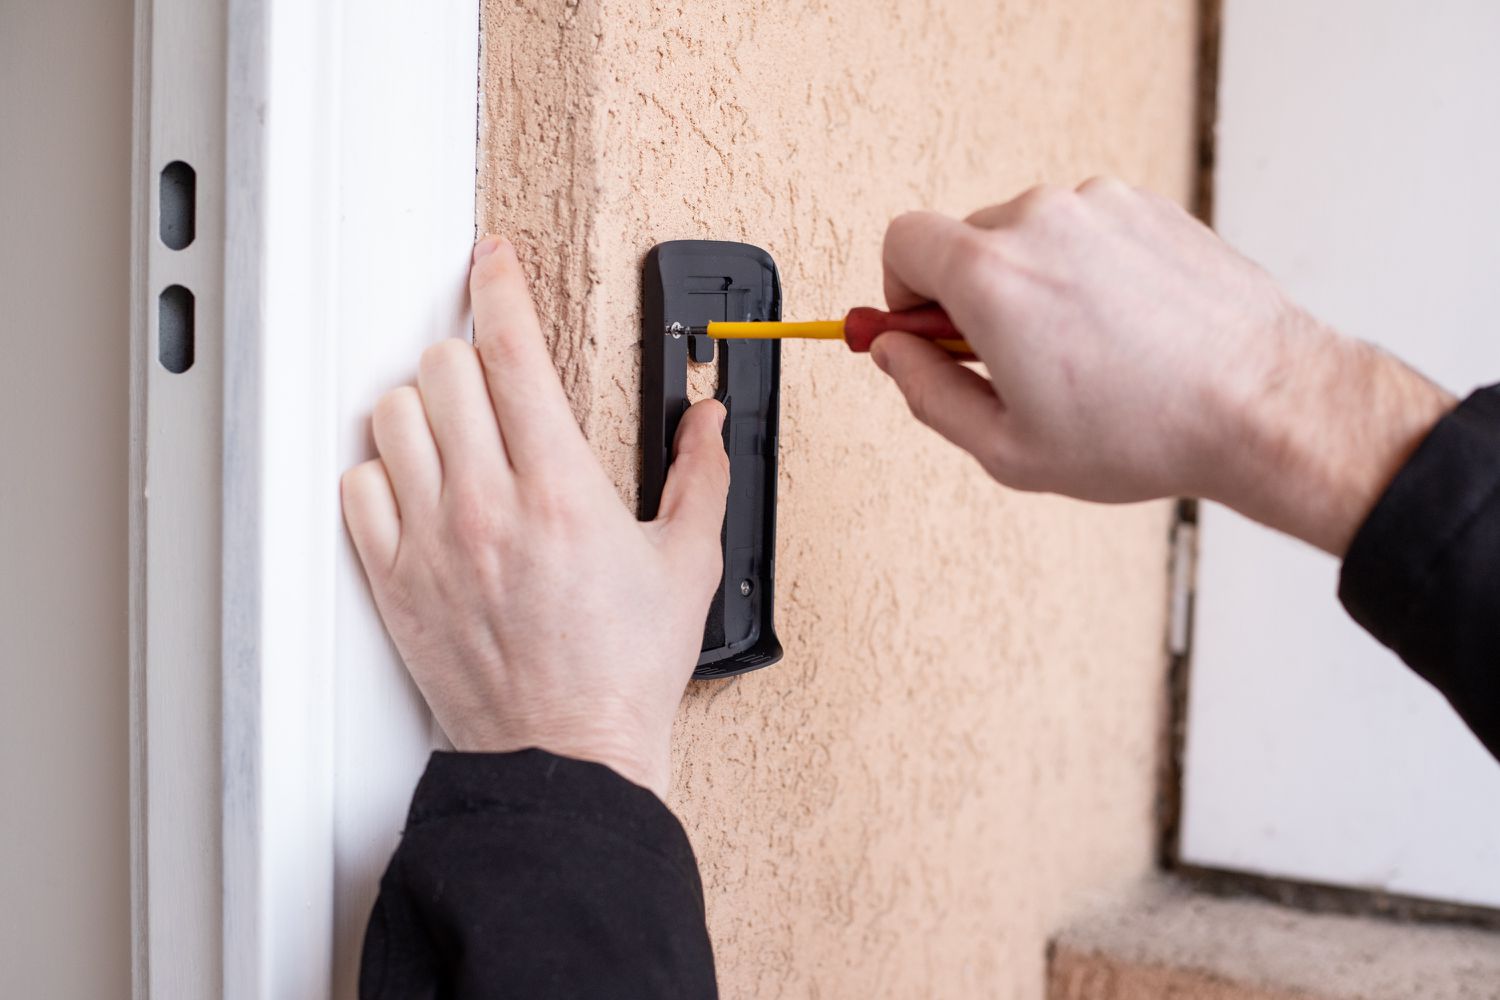
Step 7: Attach Video Doorbell
With the mounting bracket in place and the wires connected (if applicable), it’s time to attach your Blink video doorbell to the mounting bracket. Follow these steps to securely attach the doorbell:
1. Align the mounting holes: Hold the Blink video doorbell in front of the mounting bracket, aligning the screw holes on the back of the doorbell with the holes on the mounting bracket. Ensure that the doorbell is oriented correctly, with the camera facing the desired direction.
2. Insert and tighten the screws: Insert the screws provided with your Blink video doorbell into the screw holes on the mounting bracket. Use a screwdriver or drill to tighten the screws, securing the doorbell to the bracket. Be careful not to overtighten the screws, as this could damage the doorbell or mounting bracket.
3. Test the stability: Gently shake the doorbell to ensure that it is securely attached to the mounting bracket. It should not wiggle or move easily. If the doorbell feels loose, double-check the screws and tighten them further if necessary.
4. Adjust the angle: Most video doorbells allow you to adjust the angle of the camera to ensure optimal viewing. Refer to the user manual or manufacturer’s instructions to learn how to adjust the angle of your specific Blink video doorbell. Make any necessary adjustments to position the camera to capture the desired area.
It’s important to note that some Blink video doorbells have removable faceplates or covers. If your model has a removable faceplate, you may need to remove it before attaching the doorbell to the mounting bracket. Once the doorbell is securely attached, you can reattach the faceplate.
By attaching your Blink video doorbell to the mounting bracket, you ensure that it is firmly in place and ready for use. Testing the stability and adjusting the camera angle will ensure that you achieve the best performance and coverage from your video doorbell. With the doorbell securely attached, you can now proceed to the next step in the installation process.
Step 8: Power Up and Connect to Wi-Fi
After attaching your Blink video doorbell to the mounting bracket, it’s time to power it up and connect it to your Wi-Fi network. Follow these steps to complete this crucial stage of the installation process:
1. Power source selection: Determine the power source for your Blink video doorbell based on the model you have. If your doorbell is battery-powered, proceed to the next step. If it requires a wired connection, ensure that the power is turned on at the breaker box.
2. Insert batteries (if applicable): If your Blink video doorbell is battery-powered, open the battery compartment and insert the required number of batteries according to the manufacturer’s instructions. Ensure that the batteries are inserted correctly, following the polarity markings indicated inside the battery compartment.
3. Power on the doorbell: If your doorbell is battery-powered, close the battery compartment securely. If it’s wired, the power will already be on. Your Blink video doorbell should power on and enter setup mode, indicated by a blinking light or other visual cues.
4. Connect to Wi-Fi: On your smartphone or tablet, open the Blink app and follow the on-screen instructions to add a new device. Select your Blink video doorbell model and begin the setup process. The app will guide you through connecting your doorbell to your Wi-Fi network.
5. Enter Wi-Fi credentials: Follow the prompts in the Blink app to enter your Wi-Fi network name (SSID) and password. Ensure that you enter the credentials correctly to establish a successful connection.
6. Set up the doorbell in the app: Once the Blink video doorbell is connected to your Wi-Fi network, the app will prompt you to complete the setup process. This may involve naming your device, selecting motion detection settings, setting up notifications, and customizing other preferences.
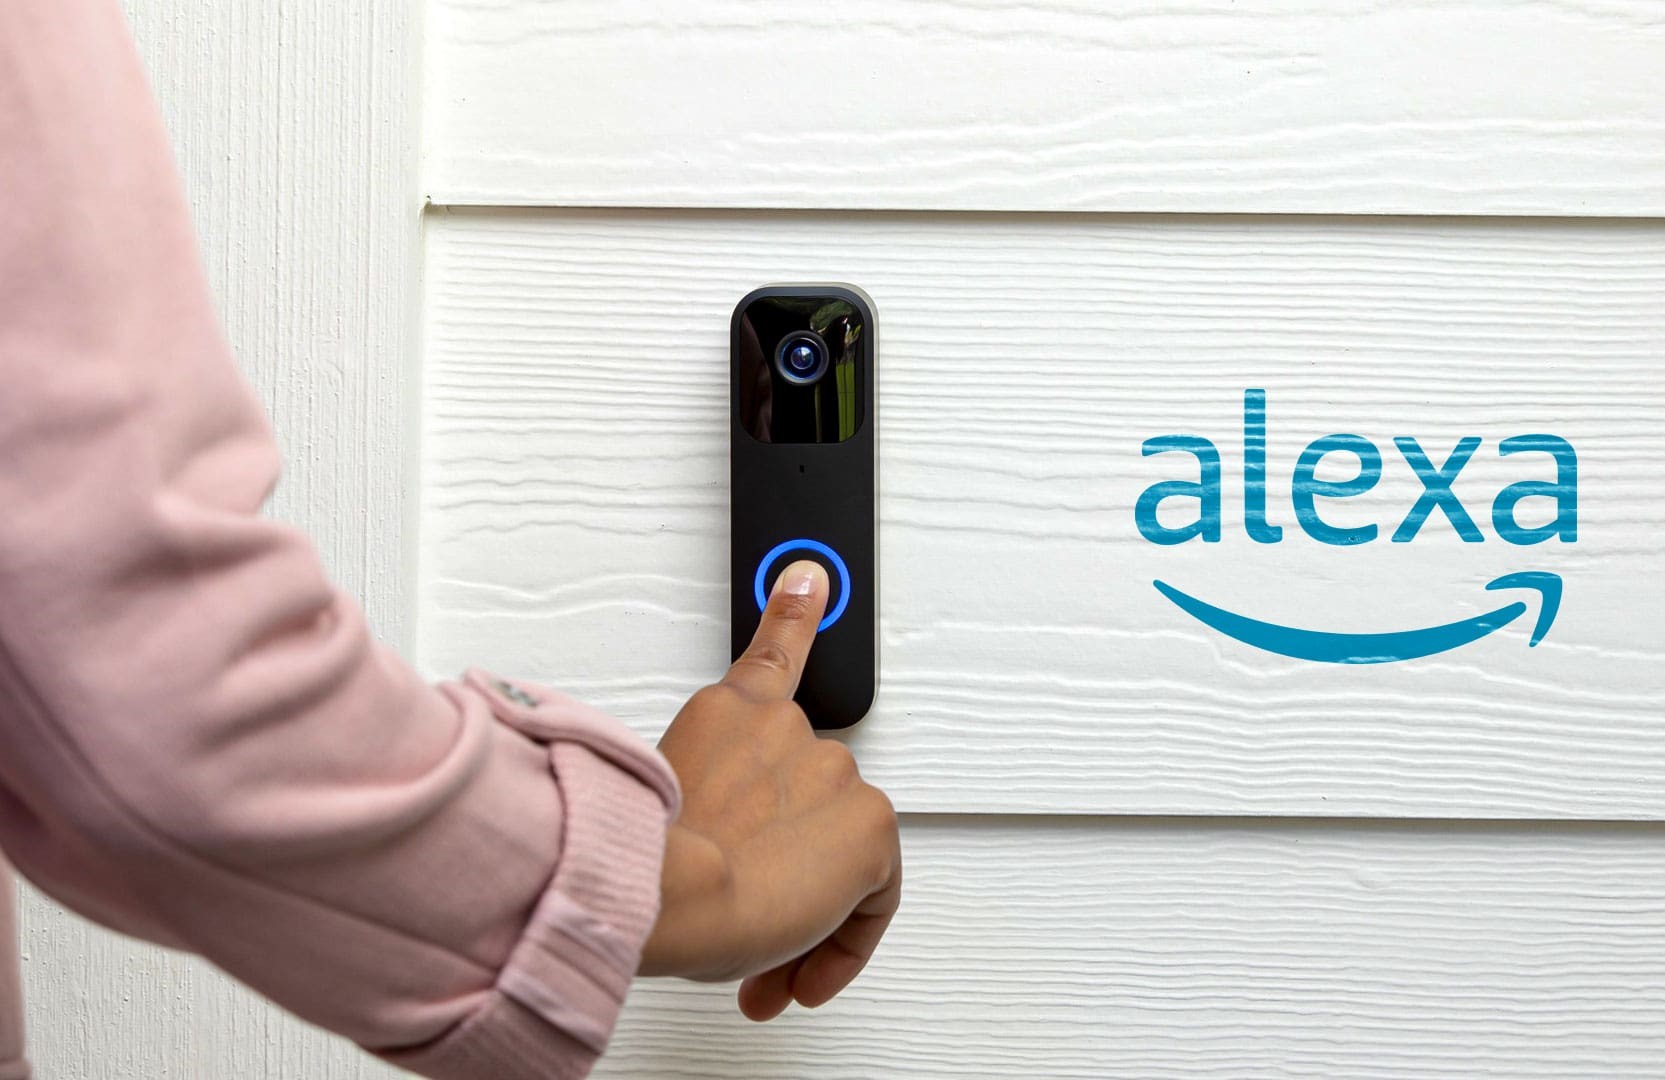
7. Perform a test: After completing the setup process, it’s a good idea to perform a test to ensure that your Blink video doorbell is functioning properly. Walk in front of the camera to trigger the motion detection and confirm that the doorbell captures video footage and sends the appropriate notifications to your device.
By powering up your Blink video doorbell and connecting it to your Wi-Fi network, you enable its remote monitoring and control features. This step is essential for accessing live video footage, receiving notifications, and managing the settings of your video doorbell through the Blink app. Once you have successfully completed these steps, you are ready to finalize the setup process and begin enjoying the benefits of your Blink video doorbell.
Read more: How To Hardwire Blink Doorbell
Step 9: Complete Setup in the Blink App
With your Blink video doorbell powered up and connected to your Wi-Fi network, the next step is to complete the setup process in the Blink app. The app provides you with complete control over your video doorbell’s settings and features. Follow these steps to finalize the setup in the Blink app:
1. Open the Blink app: Launch the Blink app on your smartphone or tablet. If you haven’t already done so, sign in to your Blink account or create a new one.
2. Add the video doorbell: Tap on the (+) icon or the “Add Device” option in the app to add your Blink video doorbell. Follow the on-screen instructions to select your doorbell model and initiate the setup process.
3. Connect to the doorbell: The app will prompt you to connect to the Blink video doorbell that you installed. Follow the instructions provided, which may include pressing a button on the doorbell or scanning a QR code to establish a connection.
4. Customize settings: Once your video doorbell is connected to the app, you can customize various settings to meet your preferences. These settings may include adjusting motion detection sensitivity, setting up activity zones, setting up scheduling, and configuring notification preferences.
5. Enable additional features: Depending on your Blink video doorbell model, you may have access to additional features in the app. These features may include two-way audio communication, customized motion detection zones, cloud storage options, and more. Explore the app and familiarize yourself with the available features.
6. Test and troubleshoot: After completing the setup process, it’s a good idea to perform a test to ensure that your Blink video doorbell is functioning as expected. Test the live streaming, motion detection, and other features to ensure everything is working properly. If you encounter any issues, consult the Blink app’s help documentation or contact customer support for further assistance.
By completing the setup process in the Blink app, you gain control over the various features and settings of your video doorbell. Customizing the settings according to your preferences allows you to fine-tune the doorbell’s performance and tailor it to meet your specific needs. With the setup complete, you can now fully utilize the remote monitoring and management capabilities of your Blink video doorbell through the app.
Step 10: Test and Troubleshoot
After completing the setup process for your Blink video doorbell, it is crucial to perform testing and troubleshooting to ensure that everything is functioning correctly. This final step will help you identify any issues and address them promptly. Follow these steps to test and troubleshoot your video doorbell:
1. Test live view: Open the Blink app on your smartphone or tablet and check if you can access the live view of your video doorbell. Verify that you can see a clear and real-time video stream.
2. Check motion detection: Walk in front of your video doorbell to test the motion detection feature. Verify that you receive notifications on your device when motion is detected and that video recordings are captured properly.
3. Test two-way audio: If your Blink video doorbell has two-way audio capability, test it by speaking through your device and listening for the sound coming from the doorbell. Ensure that the audio is clear and that both the speaker and microphone are functioning as expected.
4. Adjust settings: Explore the settings in the Blink app and make adjustments to motion detection sensitivity, activity zones, and notification preferences if needed. Fine-tune the settings to optimize the doorbell’s performance in your specific environment.
5. Troubleshooting: If you encounter any issues during testing, consult the troubleshooting section in the Blink app or visit the manufacturer’s website for guidance. Common issues can include connectivity problems, poor video quality, or inconsistent motion detection. Follow the recommended steps to troubleshoot the issue and resolve it.
6. Contact customer support: If you are unable to resolve any issues through troubleshooting, it is advisable to reach out to the manufacturer’s customer support for further assistance. They can provide additional guidance and recommend specific solutions to address any persistent problems you may be experiencing.
By thoroughly testing and troubleshooting your Blink video doorbell, you can ensure that it is functioning properly and meeting your expectations. Regularly checking the device and addressing any issues promptly will help maintain its performance and reliability over time. With the testing and troubleshooting completed, you can now enjoy the peace of mind and convenience that your Blink video doorbell brings to your home security system.
Conclusion
Installing a Blink video doorbell can provide an added layer of security and convenience to your home. By following the step-by-step process outlined in this guide, you can successfully install and set up your video doorbell with ease. From gathering the necessary equipment to completing the final testing and troubleshooting, each step ensures that your Blink video doorbell functions optimally and meets your specific needs.
Starting with checking compatibility and preparing the installation location, you create the foundation for a successful installation. Removing any existing doorbell and installing the mounting bracket sets the stage for securely attaching the video doorbell. Whether you connect the doorbell to a power source or rely on batteries, ensuring proper wiring or battery insertion is essential. Connecting to your Wi-Fi network through the Blink app allows for remote monitoring, notification alerts, and other convenient features.
Completing the setup in the Blink app gives you full control over customizing settings and accessing advanced functionality. Testing and troubleshooting your video doorbell help ensure that it operates smoothly and addresses any issues that may arise. Through thorough testing and troubleshooting, you can resolve any potential connectivity, video quality, or motion detection problems.
By taking the time to properly install and set up your Blink video doorbell, you enhance the security and convenience of your home. Monitoring your front door, receiving notifications, and communicating with visitors remotely become seamless and efficient processes. Remember to review the user manual and consult manufacturer resources for any specific instructions or troubleshooting assistance related to your Blink video doorbell model.
Enjoy the peace of mind and enhanced home security that your Blink video doorbell provides. With its reliable performance and advanced features, you can rest assured that your front door is well protected. Stay connected and informed, no matter where you are, with the power of your Blink video doorbell at your fingertips.
Now that you're all set with your new Blink video doorbell, why stop there? Enhancing home safety goes beyond just installation. Dive into our next feature on the essentials of home security systems and discover why bolstering your defenses is more than a luxury—it's a necessity. For tech enthusiasts, our comprehensive guide on the latest in home automation offers an exciting glimpse into the gadgets that can make your life easier and your home smarter in the coming year. Get ready to transform your living space with these cutting-edge technologies!
Frequently Asked Questions about How To Install A Blink Video Doorbell
Was this page helpful?
At Storables.com, we guarantee accurate and reliable information. Our content, validated by Expert Board Contributors, is crafted following stringent Editorial Policies. We're committed to providing you with well-researched, expert-backed insights for all your informational needs.
0 thoughts on “How To Install A Blink Video Doorbell”