Furniture
How To Paint Zebra Stripes On A Dresser
Modified: August 28, 2024
Learn how to paint zebra stripes on a dresser with this step-by-step guide. Transform your furniture into a bold statement piece!
(Many of the links in this article redirect to a specific reviewed product. Your purchase of these products through affiliate links helps to generate commission for Storables.com, at no extra cost. Learn more)
Introduction
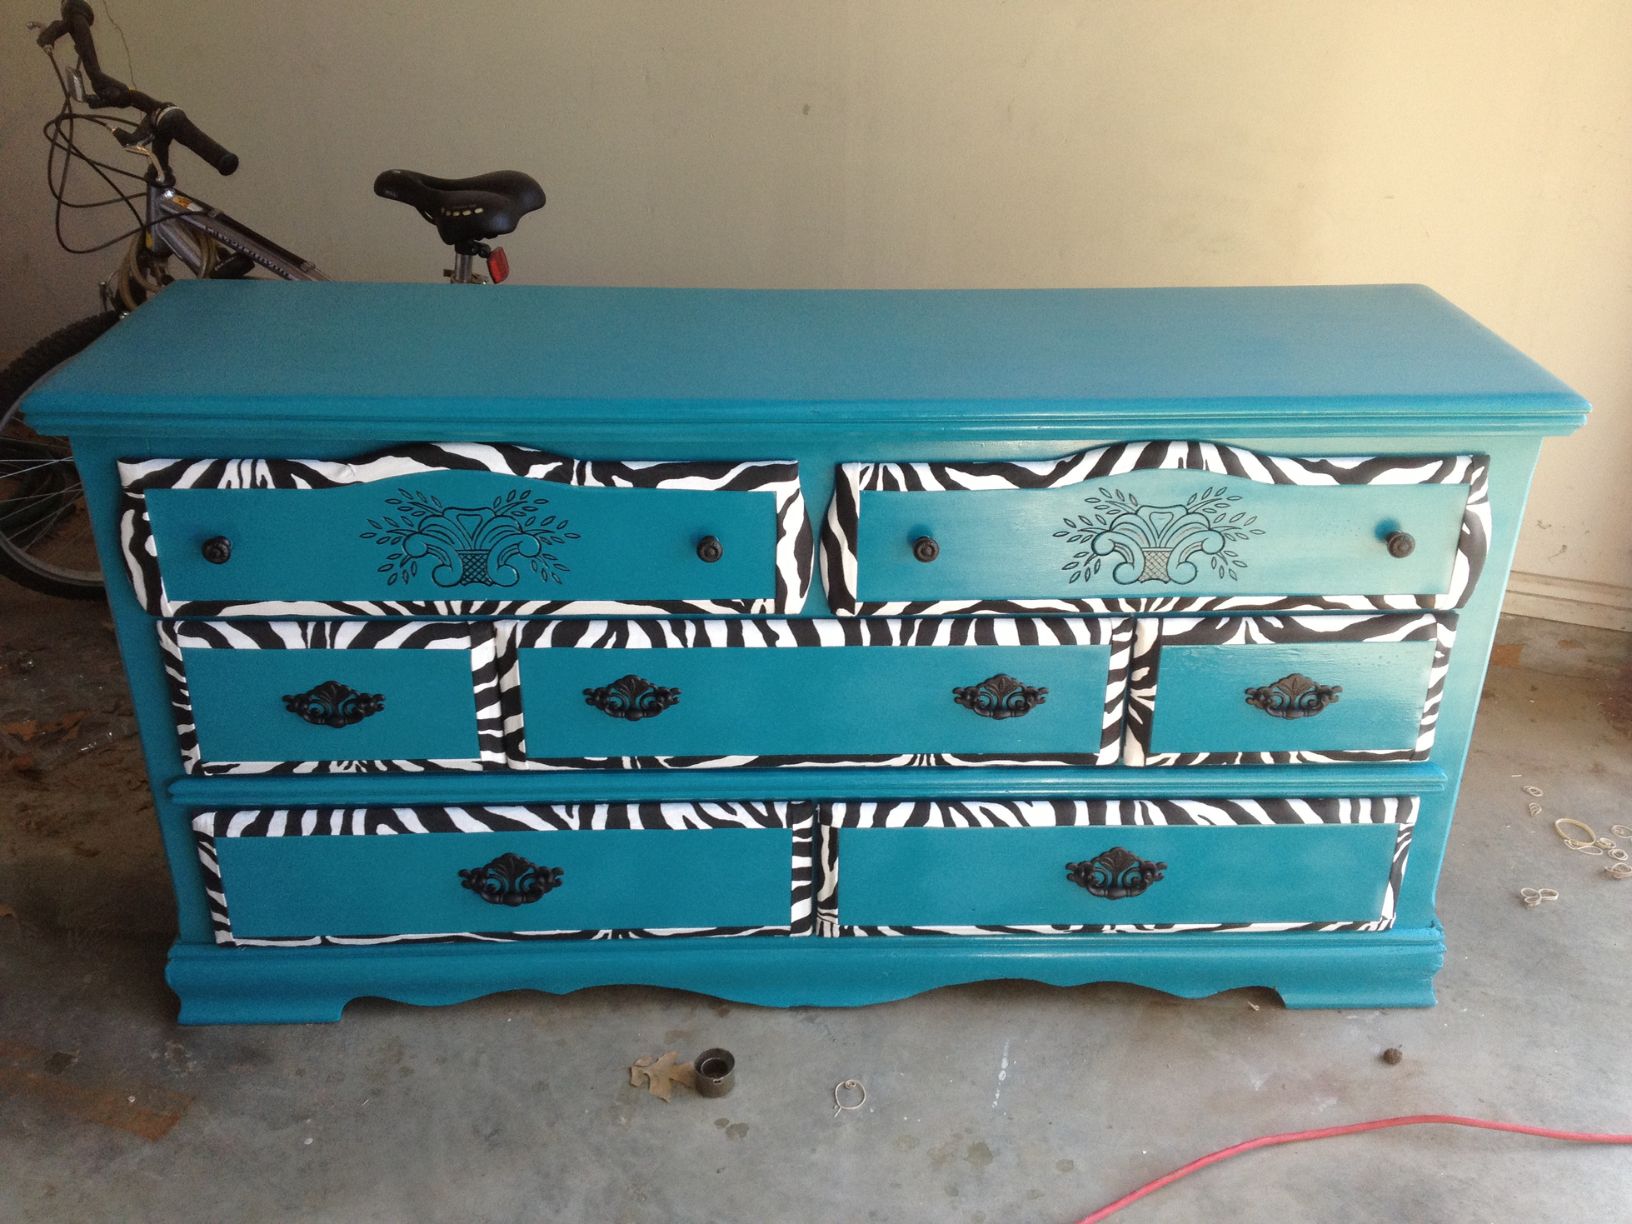
Do you have a dresser that’s seen better days? Want to give it a fresh new look that will make it the centerpiece of your room? Why not try painting zebra stripes on it? This bold and unique design will add a touch of glamour and intrigue to any space.
Painting zebra stripes on a dresser may seem like a daunting task, but with the right materials and a little bit of patience, you can transform your old dresser into a stylish statement piece. In this article, we’ll guide you through the step-by-step process of creating zebra stripes on a dresser, giving you the confidence to tackle this fun DIY project.
Whether you’re a seasoned DIY enthusiast or just getting started with furniture makeovers, painting zebra stripes is a great way to express your creativity and personalize your space. So, let’s gather our materials and get started!
Key Takeaways:
- Unleash Your Creativity: Transform an ordinary dresser into a bold, visually striking centerpiece by painting zebra stripes. Express your unique style and personalize your space with this fun and engaging DIY project.
- Elevate Your Furniture: Add depth and dimension to your home decor with zebra-striped dressers. Embrace the natural, organic look of zebra patterns and enhance your space with a visually captivating and conversation-starting piece.
Read more: How To Spray Paint A Dresser
Materials Needed
Before we dive into the painting process, let’s gather the materials you will need:
- A dresser
- Sandpaper or a sanding block
- Tack cloth or a clean cloth
- Primer
- Paint (black and white)
- Paintbrushes (medium-sized and small for detailing)
- Paint roller and tray
- Painter’s tape or masking tape
- Drop cloth or newspaper
- Clear topcoat or varnish (optional)
Make sure to choose paint and primer suitable for the type of dresser you have. If your dresser has a shiny or laminated surface, consider using a primer designed for adhesion to ensure better paint coverage and durability.
Once you have all the materials ready, you can start prepping the dresser for the transformation!
Step 1: Preparing the Dresser
Before you begin painting, it’s important to properly prepare the dresser to ensure a smooth and long-lasting finish. Follow these steps:
1. Remove any hardware: Take off knobs, handles, and any other hardware attached to the dresser. This will make it easier to paint and avoid getting paint on them.
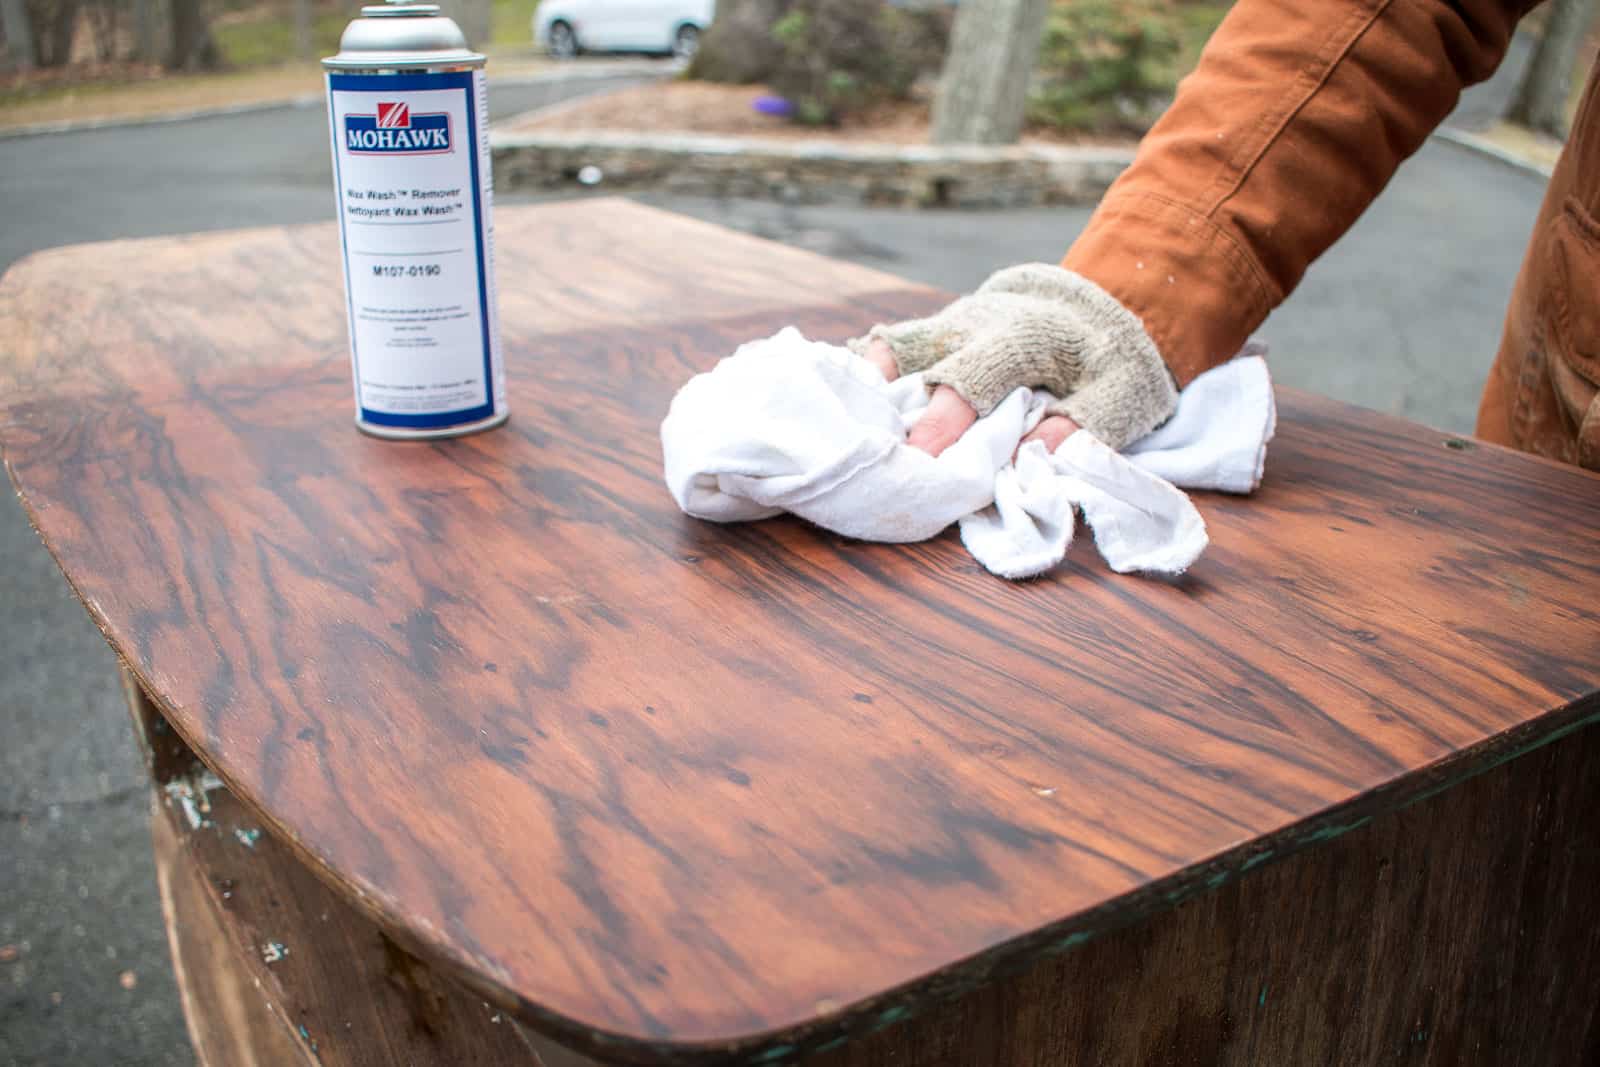
2. Clean the surface: Wipe down the dresser with a damp cloth to remove any dust or dirt. For a more thorough clean, you can use a mild detergent and water solution. Allow the dresser to dry completely before proceeding.
3. Sand the surface: Lightly sand the dresser to create a rough surface for better paint adhesion. Use sandpaper or a sanding block and gently go over the entire surface, including the edges and corners. Be careful not to oversand, as you only want to remove any glossiness or imperfections. After sanding, wipe away any dust with a tack cloth or a clean cloth.
4. Apply primer: Apply a thin, even coat of primer to the dresser using a paintbrush or a paint roller. This step is crucial, as it helps the paint adhere better and provides a uniform base for the zebra stripes. Allow the primer to dry according to the manufacturer’s instructions. If necessary, apply a second coat for better coverage.
By properly preparing the dresser, you’ll create the ideal canvas for the zebra stripe transformation. Now that the dresser is prepped and primed, it’s time to move on to the next step: applying the base coat.
Step 2: Base Coat
Now that the dresser is prepped and primed, it’s time to apply the base coat. The base coat will serve as the background color for your zebra stripes. Follow these steps:
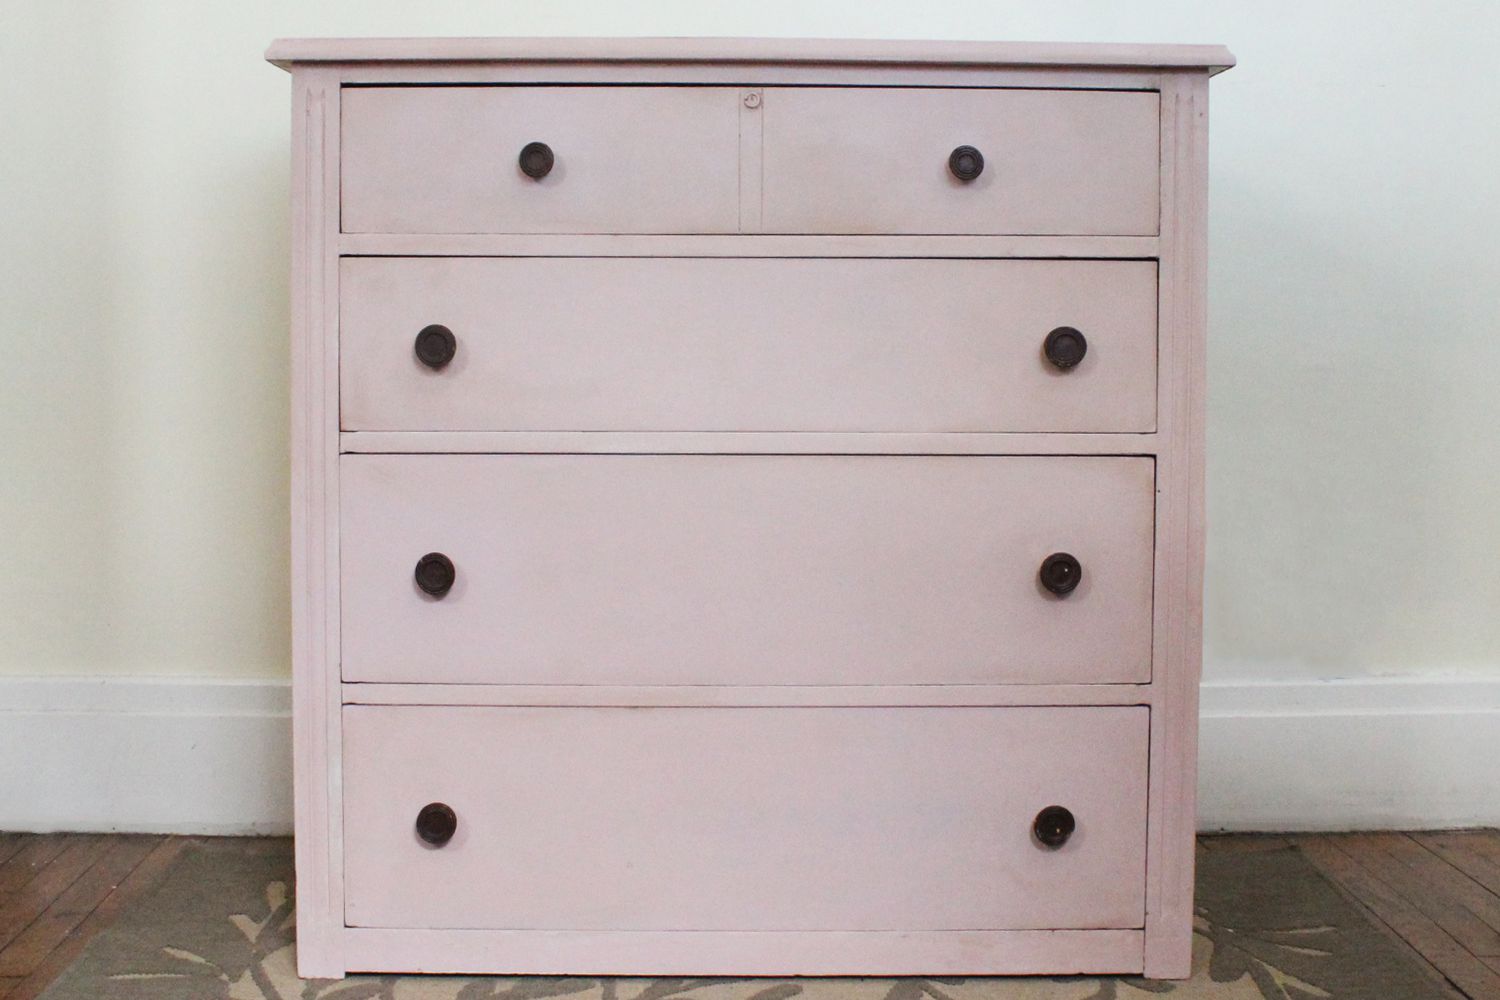
1. Choose your base color: Decide on the color you want for the background of your zebra stripes. Typically, people choose white or a light neutral color to contrast with the black stripes. Pour the paint into a paint tray.
2. Start painting: Dip a paint roller or a medium-sized paintbrush into the paint tray and evenly coat the entire dresser with the base color. Work in small sections, starting from the top and moving down, to ensure even coverage. If needed, apply a second coat once the first coat is dry. Allow the base coat to dry completely before moving on to the next step.
3. Optional: Distress the base coat (optional): If you want to achieve a distressed or vintage look, you can distress the base coat. After the base coat is dry, use sandpaper or a sanding block to lightly sand certain areas of the dresser, such as the edges or corners, to expose some of the wood or previous layers of paint. This will create a worn, rustic effect.
Remember to take breaks and step back to assess your progress. It’s important to ensure that your base coat is smooth and has an even finish. Once the base coat is dry and you’re satisfied with the result, it’s time to move on to the exciting part: creating the zebra stripes!
Step 3: Marking the Stripes
Before you start painting the zebra stripes, it’s essential to mark them on the dresser to ensure accuracy and consistency. Here’s how you can do it:
1. Gather your materials: You will need a measuring tape, a ruler, and painter’s tape or masking tape.
2. Determine the thickness of the stripes: Decide on the desired thickness of your zebra stripes. Measure the width of each stripe using a measuring tape or a ruler. You can choose to have uniform stripe widths or vary them for a more natural and organic look.
3. Mark the starting point: Choose a side of the dresser to start marking the stripes. Ideally, begin from the top or bottom, making it easier to line up the stripes horizontally across the dresser’s surface.
4. Apply the painter’s tape: Using the measurements you determined earlier, cut pieces of painter’s tape or masking tape to the appropriate length for each stripe. Place the tape horizontally across the dresser, ensuring it remains straight and aligned with the other stripes. Press it firmly onto the dresser’s surface to prevent any paint bleed-through.
5. Ensure consistent spacing: As you continue marking the stripes, make sure to maintain consistent spacing between them. You can use a ruler or measuring tape to help guide you and ensure equal distances.
6. Tape off edges and corners: If your dresser has any edges or corners that you want to leave unpainted, use painter’s tape or masking tape to tape them off. This will help create clean lines and prevent any accidental paint application.
By carefully marking the stripes on the dresser, you’ll ensure that your zebra pattern looks seamless and uniform. Once you’ve finished marking the stripes, you’re ready to move on to the next step: painting the stripes!
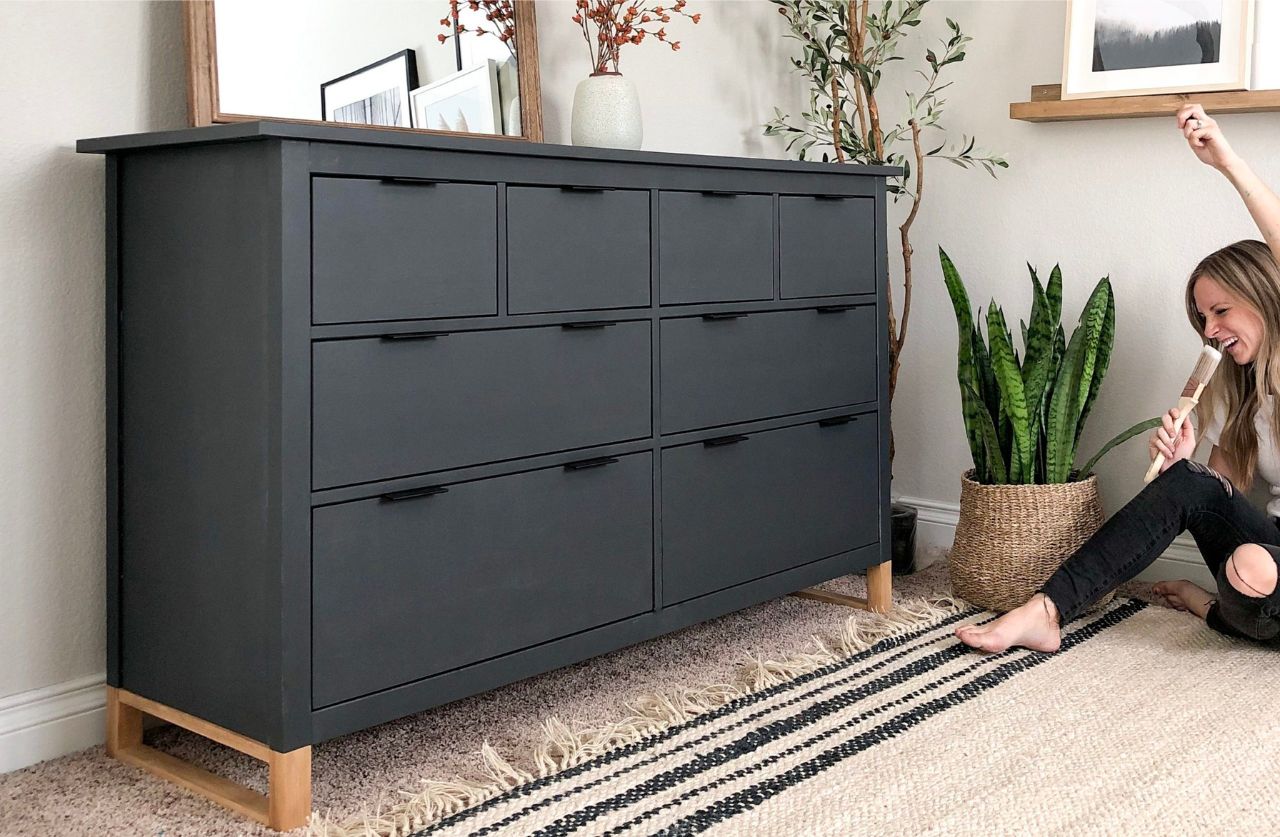
Use painter’s tape to create the outline of the zebra stripes on the dresser. Paint the base color first, then remove the tape and paint the stripes. Use a small brush for precision.
Step 4: Painting the Stripes
Now that the stripes are marked on the dresser, it’s time to bring them to life by painting them in the contrasting color. Follow these steps for precise and clean zebra stripes:
1. Prepare the contrasting color: Choose a black or dark-colored paint for the stripes. Pour the paint into a paint tray or onto a palette.
2. Start painting: Using a small paintbrush, carefully paint the exposed areas between the painter’s tape with the contrasting color. Be sure to paint right up to the edge of the tape to create crisp lines. Work in small sections at a time, ensuring each stripe is fully painted before moving on to the next one.
3. Apply multiple coats if needed: Depending on the desired intensity and opacity, you may need to apply multiple coats of the contrasting color. Allow each coat to dry fully before applying the next one, to avoid smudging or mixing colors.
4. Remove the tape: When you’ve finished painting all the stripes and the paint is dry to the touch, carefully remove the painter’s tape or masking tape. Pull the tape off at a slight angle to avoid peeling any dry paint along with it.
5. Touch up any imperfections: Inspect the painted stripes and touch up any areas where the paint coverage may be uneven or where there might be slight bleeding under the tape. Use a small paintbrush to correct any imperfections and ensure clean, sharp lines.
By taking your time and using a steady hand, you can achieve beautifully painted zebra stripes on your dresser. The next step will add more detail and dimension to your design.
Step 5: Adding Detail
Now that you have the zebra stripes painted on your dresser, it’s time to add some detail to make them more realistic and visually appealing. Follow these steps to enhance your zebra-inspired design:
1. Create the zebra pattern: Use a small detail brush and black paint to add the characteristic zebra pattern within each stripe. Zebra stripes are not solid black but have a random pattern of black lines, dots, and curves. Look at reference images of zebras to get an idea of how the pattern should look and add these details with a steady hand. Remember, these details do not need to be perfectly aligned or symmetrical – embrace the natural, organic look of the zebra pattern.
2. Add shading: To give your zebra stripes depth, lightly shade some areas with gray or a slightly darker black paint. Apply the shade to the edges of the stripes or along the curves and contours of the dresser. This shading will create dimension and make the stripes appear more realistic.
3. Blend the stripes: To achieve a softer and more natural look, consider lightly blending the edges of the stripes with a dry brush. This technique will create a gradient effect, mimicking the natural texture of zebra fur.
4. Optional: Add metallic accents (optional): If you want to add a touch of glamour to your zebra-inspired dresser, consider adding metallic accents. You can use gold or silver paint to add highlights or fine details to the zebra pattern. Apply these accents sparingly to avoid overwhelming the overall design.
By adding these details, you’ll bring your zebra stripes to life and elevate the visual impact of the dresser. Take your time and experiment with different techniques to achieve the desired effect.
Step 6: Finishing Touches
Now that the zebra stripes on your dresser are complete, it’s time to apply the finishing touches to protect your masterpiece and ensure its longevity. Follow these final steps to complete your zebra-inspired furniture:
1. Allow the paint to cure: Before applying any further coatings, allow the paint to cure fully. Follow the manufacturer’s instructions for the recommended drying time. This step is crucial to ensure that the paint is fully hardened and durable.
2. Apply a clear topcoat or varnish (optional): If you want to add an extra layer of protection and sheen to your dresser, consider applying a clear topcoat or varnish. Choose a product specifically designed for furniture to ensure adhesion and durability. Apply the topcoat using a paintbrush or a foam brush, following the manufacturer’s instructions. This will protect the paint from scratches and make it easier to clean in the future.
3. Reattach the hardware: Once the topcoat is dry, reattach any hardware that you removed earlier. Ensure that the knobs, handles, or any other accessories are securely fastened to the dresser.
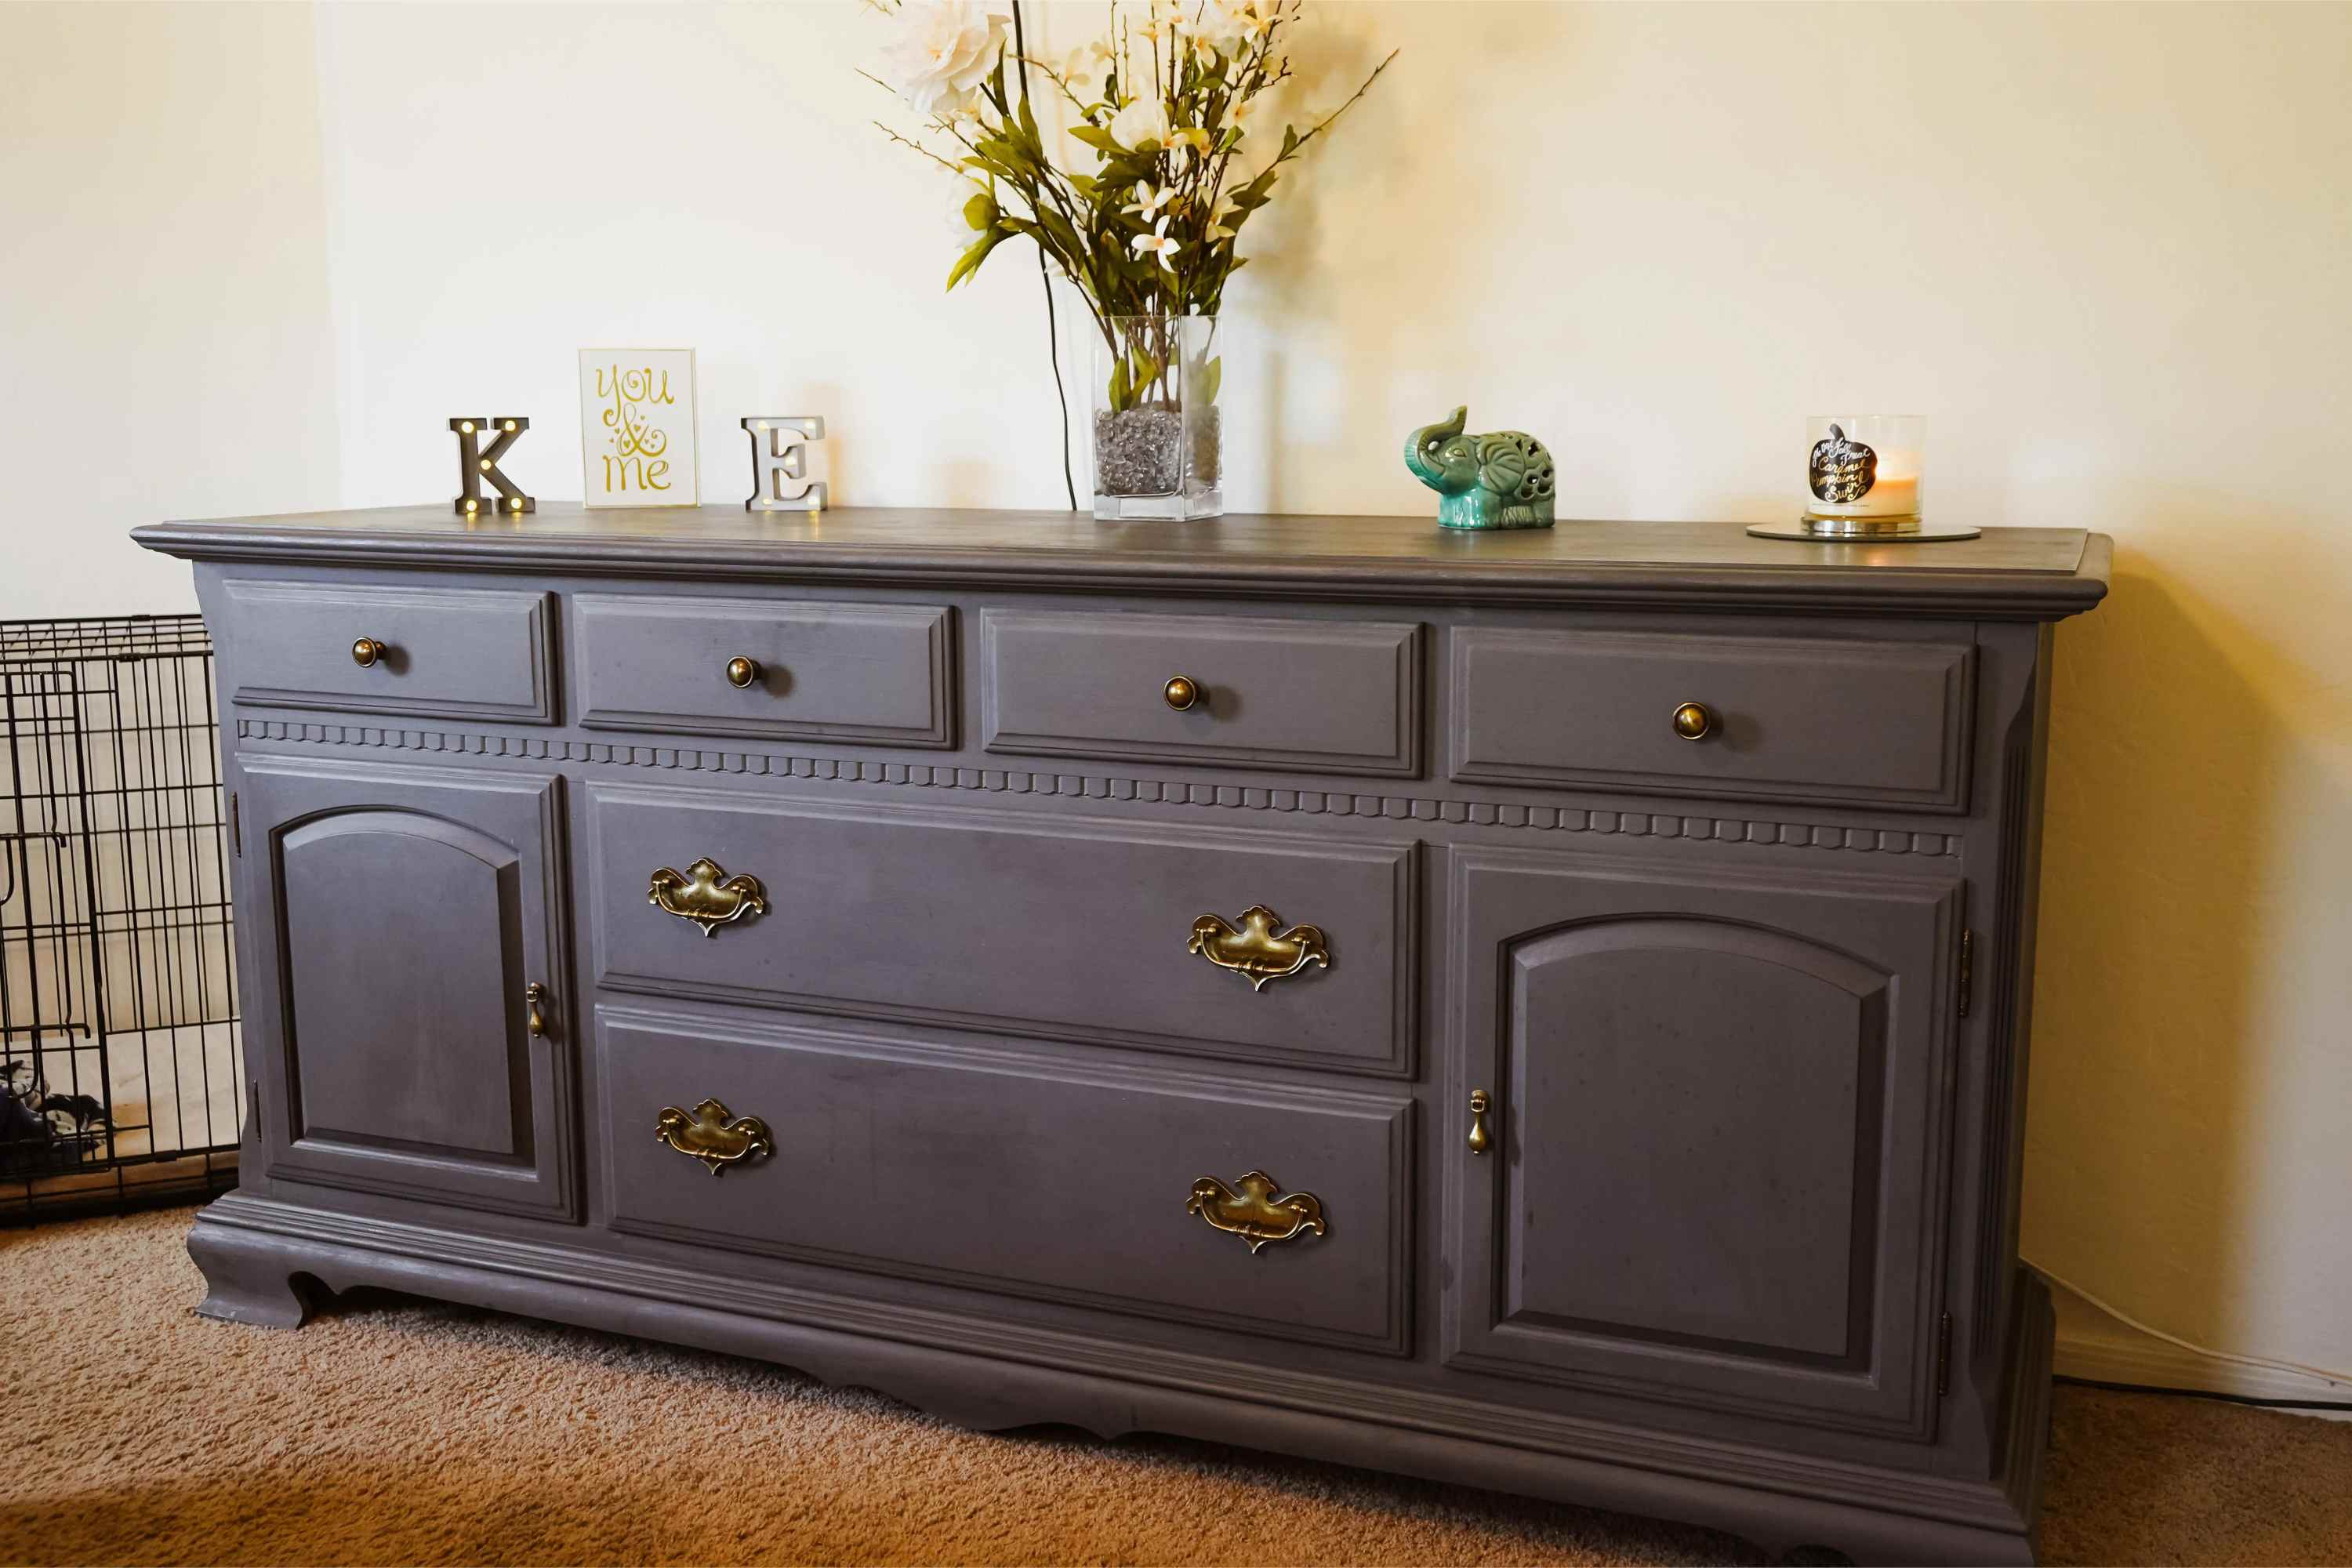
4. Style and enjoy: Finally, place your zebra-striped dresser in its designated spot and style it with complementary decor items. Let your creativity shine by adding accessories in colors that accentuate the zebra stripes. A mix of textures and patterns can also enhance the overall visual appeal of the space.
Now step back and admire your handiwork! Your zebra-striped dresser is now a unique and eye-catching piece of furniture that will add character and charm to any room.
Remember to clean and maintain your zebra-striped dresser according to the manufacturer’s instructions to ensure its longevity.
Conclusion
Congratulations on successfully painting zebra stripes on your dresser! You have transformed an ordinary piece of furniture into a bold and visually striking centerpiece for your room. This DIY project not only allows you to unleash your creativity but also gives you the opportunity to personalize your space with a unique design.
Throughout this article, we have provided you with a step-by-step guide on how to paint zebra stripes on a dresser. From preparing the dresser to adding the finishing touches, each step was designed to help you achieve a seamless and professional-looking result.
By using the right materials, carefully marking the stripes, and paying attention to detail, you can create zebra stripes that are vibrant, natural-looking, and visually captivating. Don’t be afraid to get creative with shading, blending, and adding metallic accents to make your zebra stripes truly stand out.
Remember to allow the paint to fully cure and, if desired, apply a clear topcoat or varnish to protect your design and make it easier to maintain in the long run. Reattaching the hardware and styling the dresser with complementary decor will complete the look and tie the whole room together.
Now, sit back and enjoy the result of your hard work and creativity. Your zebra-striped dresser is sure to be a conversation starter and a stunning addition to your home decor. So, embrace your inner artist, take on this DIY project, and let your furniture reflect your unique style!
Frequently Asked Questions about How To Paint Zebra Stripes On A Dresser
Was this page helpful?
At Storables.com, we guarantee accurate and reliable information. Our content, validated by Expert Board Contributors, is crafted following stringent Editorial Policies. We're committed to providing you with well-researched, expert-backed insights for all your informational needs.


0 thoughts on “How To Paint Zebra Stripes On A Dresser”