Home>Furniture>Living Room Furniture>How To Build A Lift Top Coffee Table
Living Room Furniture
How To Build A Lift Top Coffee Table
Modified: March 16, 2024
Learn how to build a lift top coffee table for your living room! Transform your space with this practical and stylish piece of living room furniture.
(Many of the links in this article redirect to a specific reviewed product. Your purchase of these products through affiliate links helps to generate commission for Storables.com, at no extra cost. Learn more)
Introduction
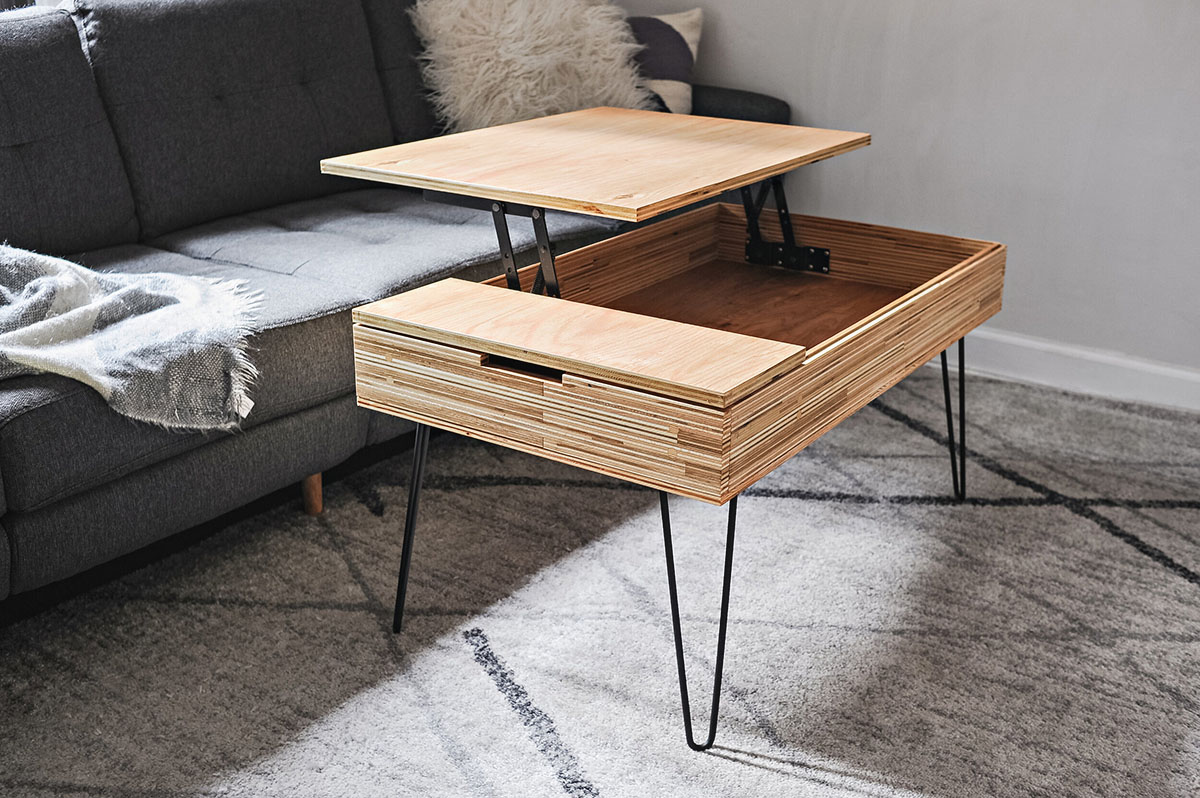
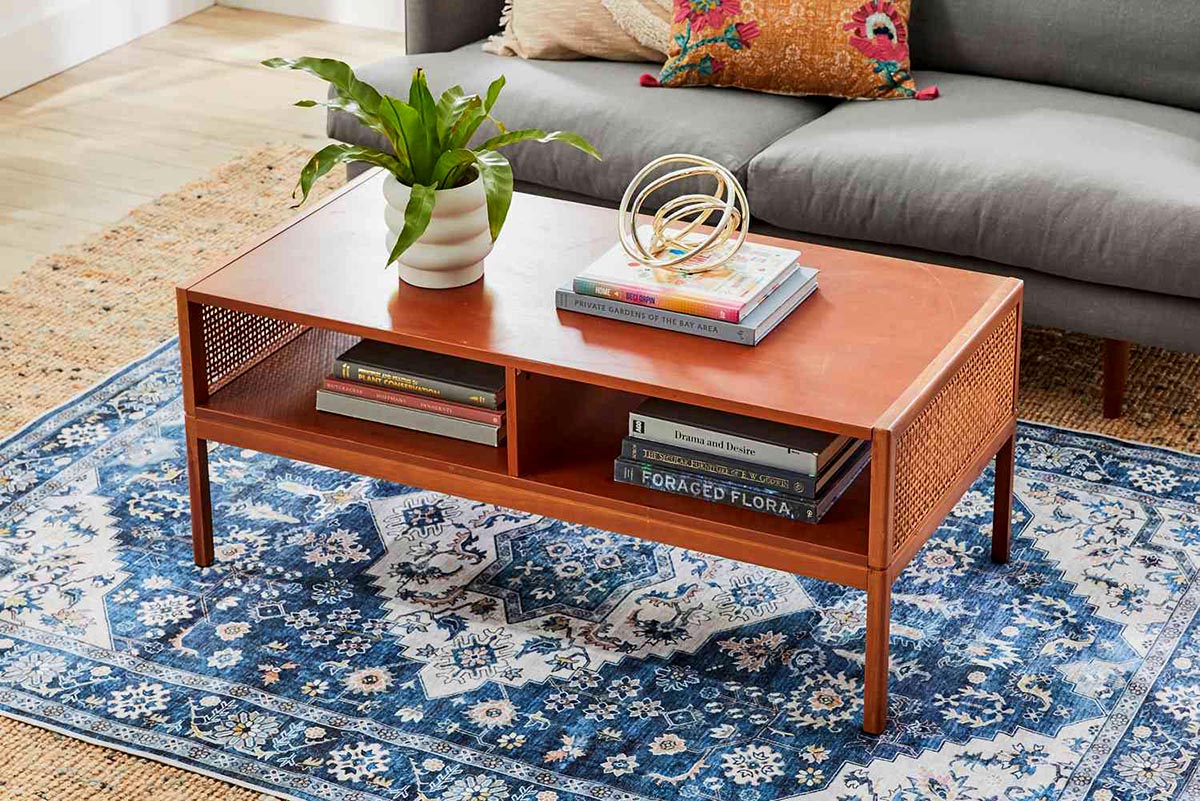
When it comes to living room furniture, a coffee table is an essential piece that adds both functionality and aesthetic appeal. And if you’re looking to take your coffee table game to the next level, a lift top coffee table could be just what you need. With its innovative design, a lift top coffee table allows you to adjust the height of the tabletop, providing versatility and convenience.
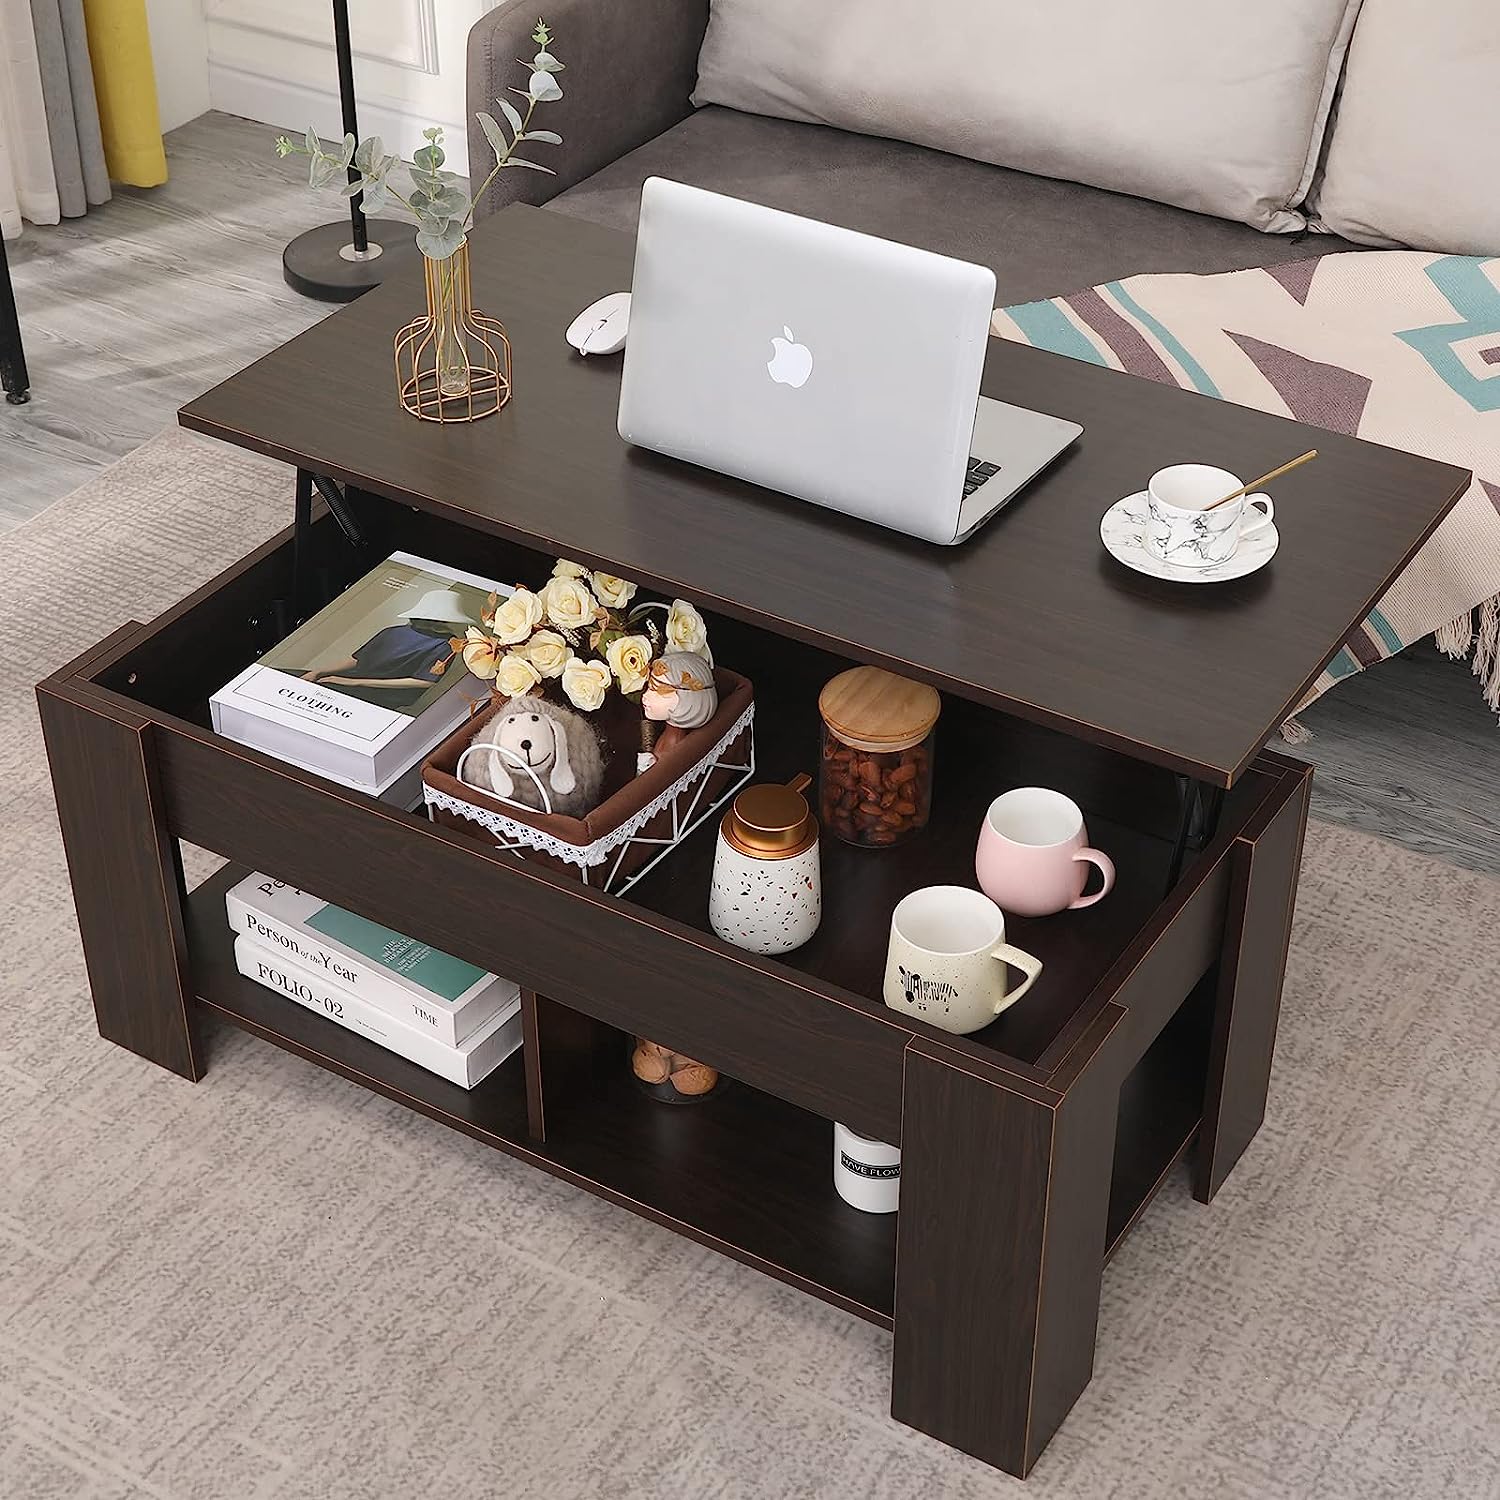
Imagine enjoying a cup of coffee or working on your laptop with the tabletop at a comfortable height. Or lifting the top to reveal hidden storage compartments, perfect for stashing away remote controls, magazines, or even board games. This versatile piece of furniture is not only practical but can also be an eye-catching centerpiece that enhances the overall look of your living room.
Building your own lift top coffee table may seem like a daunting task, but with the right tools and materials, it can be a rewarding DIY project. In this article, we will guide you through the step-by-step process of building a lift top coffee table. Whether you’re a seasoned DIY enthusiast or a beginner looking to take on a new challenge, this guide will equip you with the knowledge and skills needed to create your very own functional and stylish lift top coffee table.
Key Takeaways:
- Elevate your living room with a DIY lift top coffee table that offers adjustable height and hidden storage, adding both functionality and style to your space.
- Enjoy the satisfaction of building a personalized lift top coffee table, complete with optional storage compartments and decorative touches, to enhance your living room experience.
Read more: How To Build A Glass Top Coffee Table
Tools and Materials Needed
Before you begin building your lift top coffee table, it’s important to gather all the necessary tools and materials. Here’s a list of what you’ll need:
- Measuring tape
- Power drill
- Screwdriver
- Saw
- Sander
- Wood glue
- Wood screws
- Hinges
- Lift mechanism
- Plywood or solid wood boards for the base and top
- Sanding paper or sanding block
- Stain, paint, or finish of your choice
- Optional: Decorative hardware, such as knobs or handles
Make sure to have all the necessary tools and materials on hand before starting the project. This will help you work efficiently and ensure that you have everything you need during each step of the process. Additionally, it’s important to choose high-quality materials that suit your style and preferences. Whether you prefer a rustic look or a sleek modern design, selecting the right materials will contribute to the overall aesthetic appeal of your lift top coffee table.
Step 1: Gather the necessary materials
Before diving into the construction of your lift top coffee table, it’s crucial to gather all the necessary materials. The materials you’ll need will depend on the design and size of the table, as well as your personal preferences. Here’s a general list of materials that you’ll typically need for this project:
- Plywood or solid wood boards for the base, sides, and top of the coffee table.
- Wood screws of various sizes to secure the pieces together.
- Hinges that will allow the top of the coffee table to lift up and stay in place when needed.
- A lift mechanism that will provide the lifting action for the top. Make sure to choose a mechanism that can handle the weight of the top and operate smoothly.
- Sanding paper or a sanding block to smooth out the rough edges of the wood.
- A power drill and screwdriver to assemble the pieces together.
- Wood glue to reinforce the joints for added stability.
- Stain, paint, or finish of your choice to protect and enhance the appearance of the coffee table.
Once you have gathered all the necessary materials, you’ll be ready to move on to the next steps of the construction process. It’s important to have all the materials on hand before starting to ensure a smooth and efficient building experience. Take the time to carefully select the materials that align with your design vision and meet your quality standards. Remember, the choice of materials will have a significant impact on the overall look and durability of your lift top coffee table.
Step 2: Prepare the coffee table base
Now that you have gathered all the necessary materials, it’s time to start building your lift top coffee table. The first step is to prepare the base of the table. Here’s how to proceed:
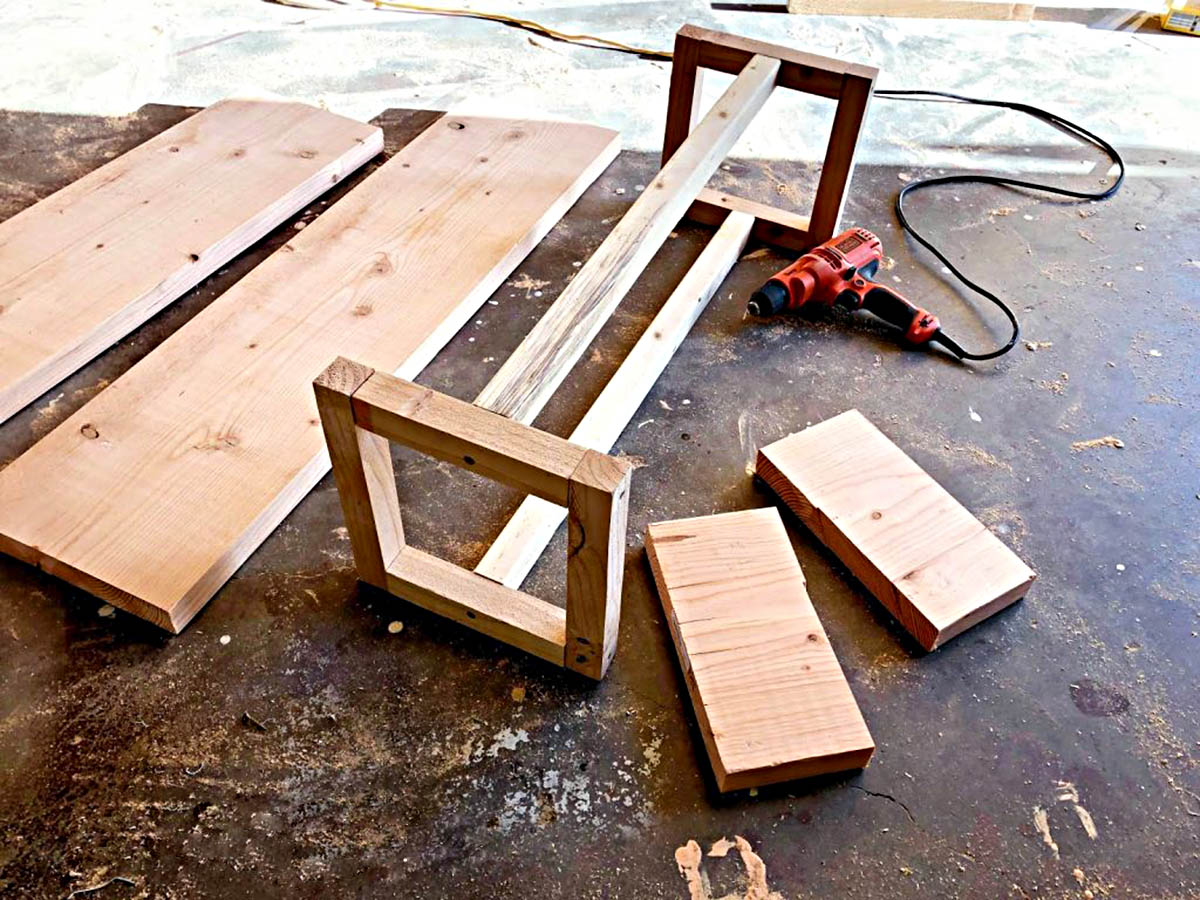
- Measure and cut the plywood or solid wood boards according to the desired dimensions of your coffee table. You’ll need a top, bottom, and four sides for the base.
- Using a power drill and screws, assemble the base by attaching the four sides to the bottom piece. Make sure the corners are square and the boards are securely fastened.
- Apply wood glue to reinforce the joints and provide extra stability. Wipe off any excess glue with a damp cloth.
- If desired, you can add decorative elements to the base, such as molding or trim, to enhance the visual appeal of the coffee table.
- Sand the base to smooth out any rough edges or imperfections. This will create a clean and polished surface for painting or staining.
By carefully preparing the coffee table base, you are building a solid foundation for the lift top mechanism and the tabletop. Take your time to ensure that the base is sturdy and properly aligned. If necessary, use clamps to hold the pieces in place while the glue dries. Remember, the quality of your base will directly affect the stability and longevity of the finished lift top coffee table.
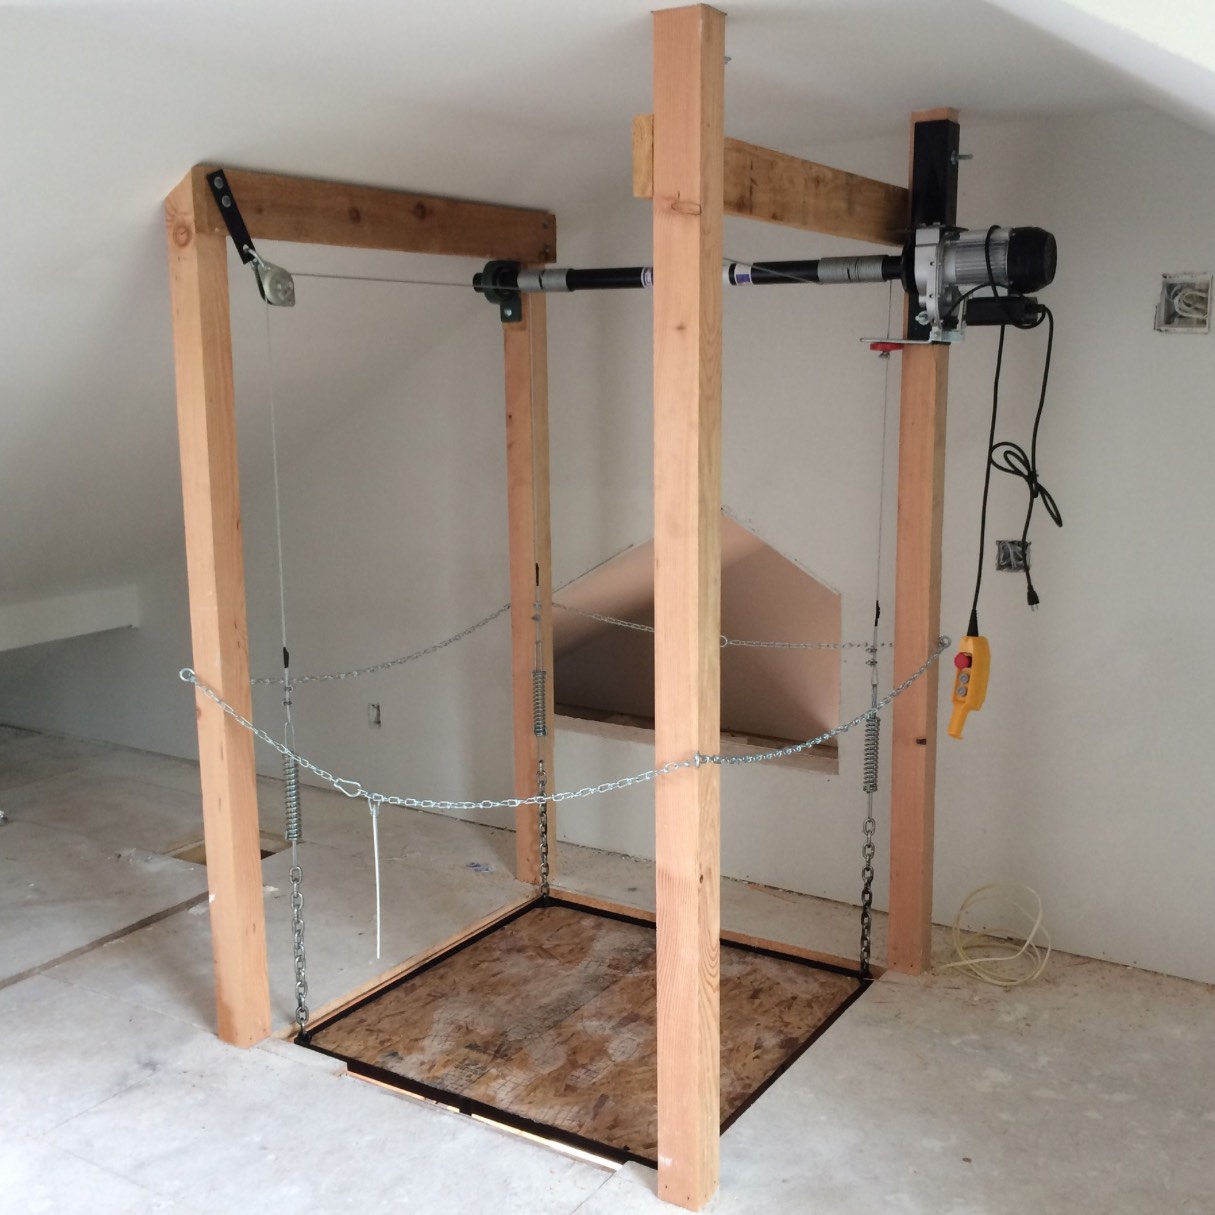
Step 3: Build the lift mechanism
The lift mechanism is the key component that allows the top of the coffee table to elevate. Building a sturdy and reliable lift mechanism is crucial for the functionality of your lift top coffee table. Follow these steps to construct the lift mechanism:
- Start by measuring and cutting the necessary pieces of wood to create the frame of the lift mechanism. This will typically consist of four corner pieces and additional support beams.
- Using a power drill and screws, assemble the frame by attaching the corner pieces and support beams. Ensure that the frame is square and securely fastened.
- Attach the lift mechanism hardware to the frame according to the manufacturer’s instructions. This will typically involve placing metal brackets and hinges in specific locations to allow for smooth lifting and lowering of the tabletop.
- Test the lift mechanism to ensure that it operates smoothly and holds the weight of the tabletop securely. Make any necessary adjustments to ensure proper functionality.
Building the lift mechanism requires precision and attention to detail. Take your time to measure and cut the pieces accurately, and double-check your assembly before moving on to the next step. It’s important to follow the manufacturer’s instructions when attaching the lift hardware to guarantee optimal performance and safety. By building a solid and reliable lift mechanism, you’ll be able to enjoy the convenience and versatility of your lift top coffee table for years to come.
Read also: 14 Best Lift Top Coffee Table For 2025
Step 4: Attach the lift mechanism to the coffee table base
With the lift mechanism constructed, it’s time to attach it to the coffee table base. This step is crucial in ensuring that the lift top operates smoothly and securely. Follow these steps to securely attach the lift mechanism:
- Position the lift mechanism onto the base, aligning it with the corners and ensuring it is centered.
- Pre-drill holes through the corner pieces of the lift mechanism and into the base.
- Secure the lift mechanism to the base using screws, making sure they are tightened securely but not over-tightened, which could cause damage.
- Test the lift top to ensure that it moves up and down smoothly. Make any necessary adjustments to ensure proper alignment and functionality.
Attaching the lift mechanism to the coffee table base is a critical step that requires precision and attention to detail. Take your time during this process to ensure that the lift mechanism is securely fastened and aligned properly. Testing the lift top before moving on to the next step will save you time and effort later on. By following these steps, you will have a solid and functional lift top coffee table base that is ready for the next phase of construction.
When building a lift top coffee table, make sure to use strong and durable hinges to support the weight of the tabletop when it is lifted. This will ensure the table is sturdy and safe to use.
Step 5: Construct the top of the coffee table
Now that you have the base and the lift mechanism in place, it’s time to construct the top of the coffee table. This step will involve creating a flat, sturdy surface that will be attached to the lift mechanism. Here’s how you can proceed:
- Measure and cut the plywood or solid wood boards to the desired dimensions for the table top. Ensure that the dimensions align with the dimensions of the coffee table base.
- Consider adding design elements such as rounded edges or decorative trim to enhance the aesthetics of the tabletop.
- Using a power drill and screws, attach the boards together to create a solid and flat surface. Make sure the screws are evenly spaced and securely fastened.
Once you have constructed the top of the coffee table, place it on top of the lift mechanism. Ensure that the corners are aligned and the top is centered on the base. This will allow the lift mechanism to function properly when raising and lowering the tabletop. Take the time to double-check the alignment and make any necessary adjustments before proceeding to the next step.
Creating a strong and stable top for your coffee table is crucial for its overall functionality and durability. Choose high-quality materials and ensure that the boards are securely attached to create a sturdy surface that will withstand regular use. By constructing a well-built tabletop, you will be well on your way to enjoying a functional and stylish lift top coffee table.
Step 6: Connect the lift mechanism to the top
With the coffee table top constructed, it’s time to connect it to the lift mechanism. This step is crucial in ensuring that the lift top operates smoothly and securely. Follow these steps to properly connect the lift mechanism to the coffee table top:
- Carefully lift the tabletop and align it with the lift mechanism, making sure that the corners match up.
- Pre-drill holes through the lift mechanism brackets into the underside of the tabletop.
- Securely attach the lift mechanism brackets to the tabletop using screws.
- Ensure that the screws are tightened securely but not over-tightened, as this could damage the plywood or solid wood of the tabletop.
- Test the lift top to ensure it raises and lowers smoothly and securely. Make any necessary adjustments to ensure proper alignment and functionality.
Connecting the lift mechanism to the coffee table top is a critical step in completing your lift top coffee table. Take your time during this process to ensure that the lift mechanism brackets are securely fastened to the tabletop. Testing the lift top after installation is vital to ensure its stable operation. By following these steps, you will have a fully functional lift top coffee table that elevates and lowers with ease.
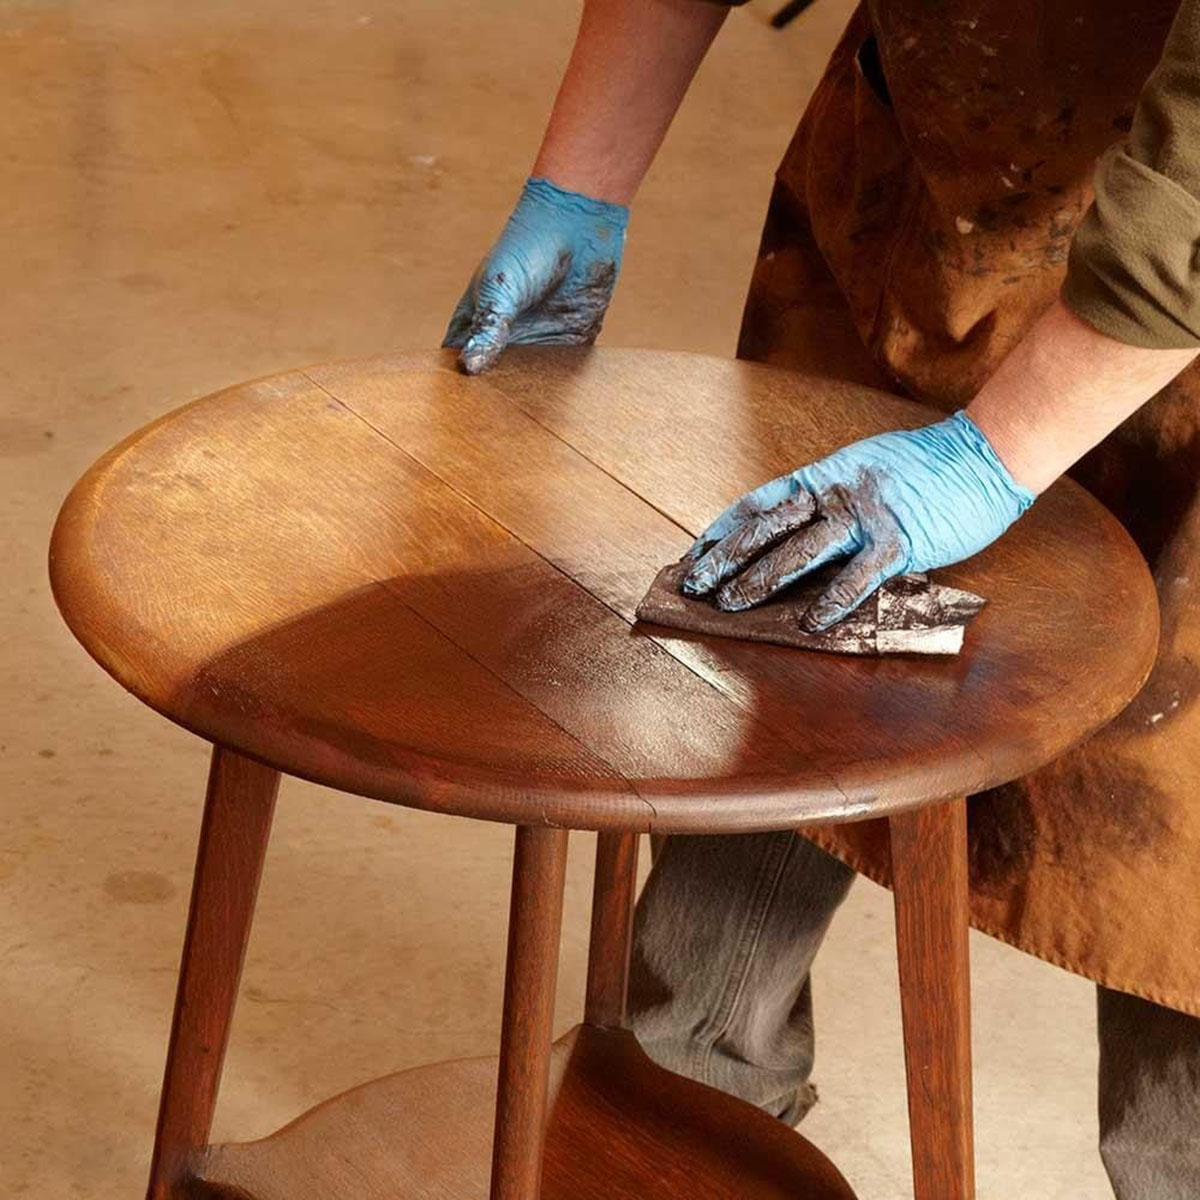
Step 7: Sand and finish the coffee table
Now that the lift top coffee table is taking shape, it’s time to focus on refining the surface and adding a finish that will protect and enhance its appearance. Follow these steps to sand and finish the coffee table:
- Start by using sandpaper or a sanding block to smooth out the entire surface of the coffee table, including the base, top, and edges. This will remove any rough spots or imperfections.
- Begin with a coarse-grit sandpaper to remove any prominent blemishes or uneven areas. Gradually move to finer-grit sandpaper to achieve a smooth and uniform finish.
- After sanding, wipe down the coffee table with a clean, damp cloth to remove any dust or debris.
- Choose a finish that suits your desired look and the type of wood you used for the coffee table. Options include stain, paint, or clear sealants such as varnish or polyurethane.
- Apply the finish according to the manufacturer’s instructions, using a brush or a clean cloth to ensure even coverage.
- Allow the finish to dry completely before applying additional coats if desired. Sand lightly between coats for an even and smooth surface.
Sanding and finishing the coffee table will not only enhance its appearance but also protect it from wear and tear. The type of finish you choose will depend on your personal preference and the desired look you want to achieve. Whether you prefer a natural wood look or a bold, painted finish, taking the time to sand and apply a suitable finish will elevate the overall aesthetic of your lift top coffee table.
Read more: How To Lift The Stove Top
Step 8: Optional: Add storage compartments
If you’re looking to maximize the functionality of your lift top coffee table, consider adding storage compartments. This optional step allows you to create additional space for storing items such as remote controls, magazines, or even board games. Here’s how you can add storage compartments to your coffee table:
- Measure and mark the desired locations for the storage compartments on the coffee table base.
- Using a saw or a router, carefully cut out the openings for the compartments. Make sure to measure accurately and use appropriate safety measures.
- Create dividers or shelves within the compartments to organize the storage space. This can be done by cutting and attaching additional pieces of plywood or solid wood inside the openings.
- Sand and finish the compartments to match the rest of the coffee table.
Adding storage compartments to your lift top coffee table not only increases its practicality but also helps you keep your living room neat and organized. Whether you choose to have one large compartment or multiple smaller ones, customizing your coffee table to fit your storage needs allows you to make the most of the available space.
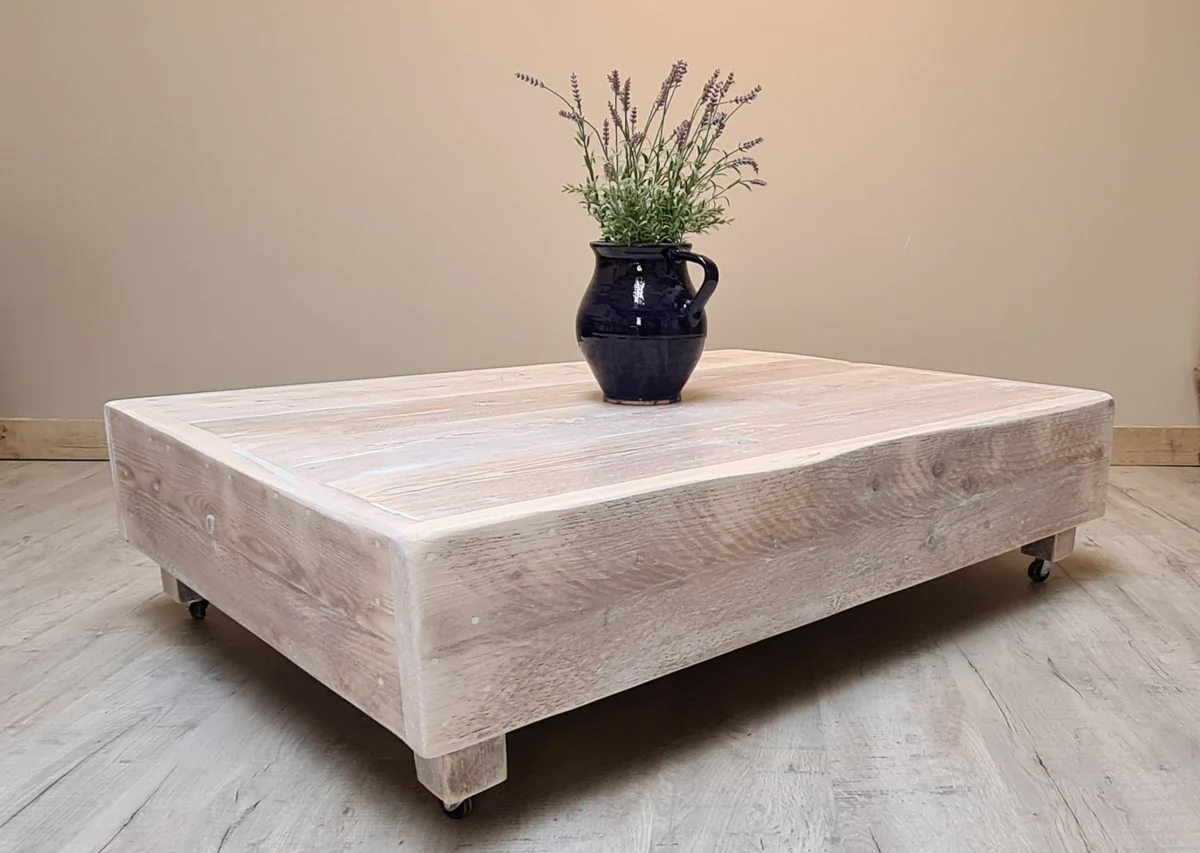
Step 9: Optional: Decorate and personalize the coffee table
Once you have completed the construction and functional aspects of your lift top coffee table, you can take it a step further by adding personal touches and decorative elements. This optional step allows you to put your own unique stamp on the table and make it truly yours. Here are some ideas to decorate and personalize your coffee table:
- Consider staining or painting the coffee table in a color that complements your living room decor. Choose a finish that enhances the natural beauty of the wood or matches the style you want to achieve.
- Add decorative hardware, such as knobs or handles, to the storage compartments or the sides of the coffee table. This can give it a unique and personalized look.
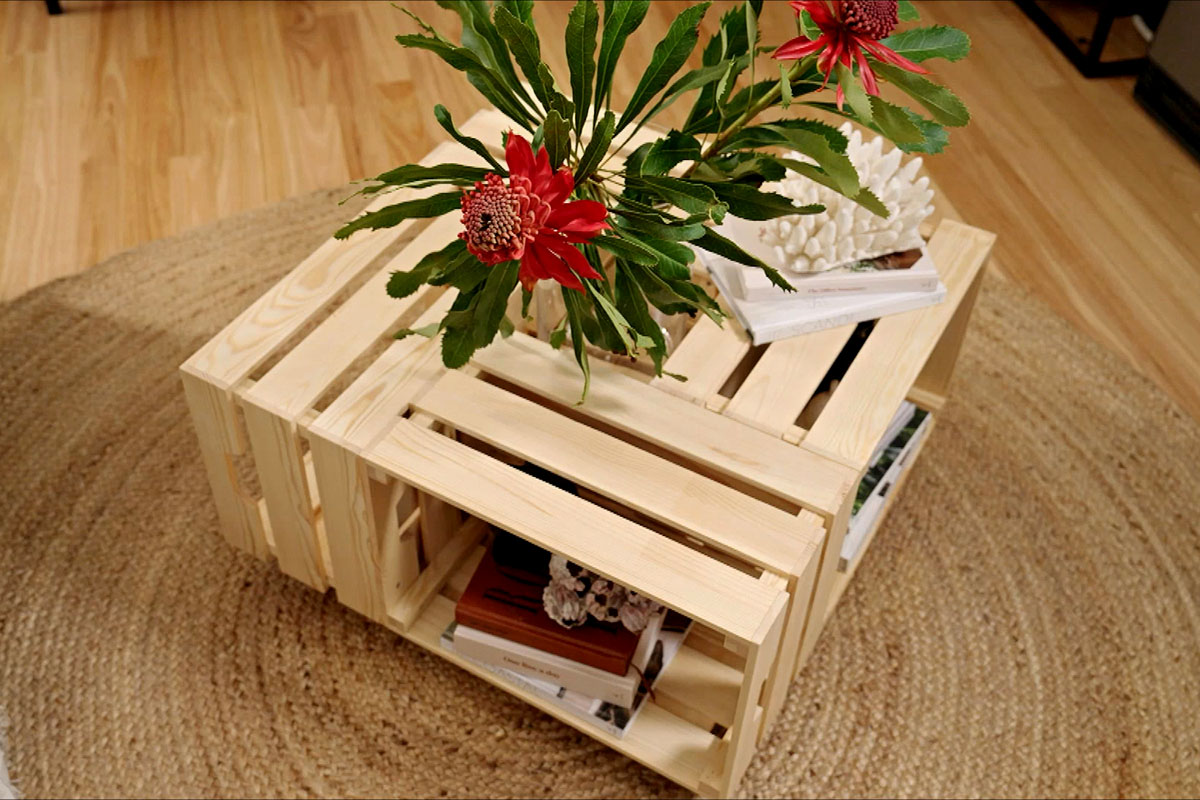
- Include artwork or a decorative tray on the top of the coffee table. This can serve as a focal point and add visual interest to the overall design.
- Add decorative accessories, such as vases, candles, or small sculptures, to the tabletop. These can enhance the style of the table and reflect your personal taste.
- Consider adding a glass top to protect the surface while showcasing any intricate details or artwork underneath.
Personalizing your lift top coffee table allows you to make it a reflection of your style and personality. Whether you prefer a minimalist, contemporary look or a more eclectic and artistic vibe, adding decorative touches will elevate the overall aesthetics of your living room. Get creative and have fun with this optional step to truly make your lift top coffee table stand out.
Conclusion
Congratulations! You have successfully completed the process of building your very own lift top coffee table. In just a few steps, you have created a functional and stylish piece of furniture that will be a valuable addition to your living room. By following this guide, you have not only saved money but also had the opportunity to personalize and customize your coffee table to suit your style and needs.
Throughout the construction process, you have learned how to gather the necessary materials, prepare the coffee table base, build the lift mechanism, attach it to the base, construct the top, connect the lift mechanism to the top, sand and finish the coffee table, and even add optional storage compartments and decorative elements. Each step has been carefully outlined to help you create a high-quality and reliable lift top coffee table.
Not only does your new coffee table provide a convenient surface for enjoying coffee, working on your laptop, or entertaining guests, but it also offers the added versatility of a lift mechanism to adjust the height and reveal hidden storage compartments. This functionality will undoubtedly enhance your living room experience and bring convenience to your everyday life.
Remember to take pride in your craftsmanship and the time and effort you have dedicated to this project. Enjoy the satisfaction of knowing that your lift top coffee table is a unique piece that you have built with your own hands.
Now, all that’s left to do is sit back, relax, and admire your creation. Whether you’re hosting game nights, enjoying a cozy movie marathon, or simply adding a touch of elegance to your living space, your lift top coffee table will undoubtedly be the center of attention and a practical asset in your home.
Thank you for joining us on this DIY journey to create a lift top coffee table. May it bring you many years of enjoyment and serve as a testament to your creativity and craftsmanship!
Frequently Asked Questions about How To Build A Lift Top Coffee Table
Was this page helpful?
At Storables.com, we guarantee accurate and reliable information. Our content, validated by Expert Board Contributors, is crafted following stringent Editorial Policies. We're committed to providing you with well-researched, expert-backed insights for all your informational needs.


0 thoughts on “How To Build A Lift Top Coffee Table”