Home>Furniture>Outdoor Furniture>How To Fix Sunken Patio Pavers
Outdoor Furniture
How To Fix Sunken Patio Pavers
Modified: March 7, 2024
Learn how to easily fix sunken patio pavers and restore the beauty of your outdoor furniture. Follow our step-by-step guide today!
(Many of the links in this article redirect to a specific reviewed product. Your purchase of these products through affiliate links helps to generate commission for Storables.com, at no extra cost. Learn more)
Introduction
Welcome to our comprehensive guide on how to fix sunken patio pavers. If you have noticed uneven or sunken areas in your outdoor space, this article is here to help you restore your patio to its former glory.
Having a patio with sunken pavers not only affects the aesthetic appeal of your outdoor area but also poses safety risks for anyone using it. Uneven surfaces can cause trips and falls, which is why it’s important to address this issue as soon as possible.
In this article, we will discuss the reasons behind sunken patio pavers, how to assess the damage, the tools and materials you’ll need, and provide a step-by-step guide to fix the problem. By following these instructions, you’ll be able to lift, level, and reinstall your patio pavers, creating a smooth and visually appealing outdoor space once again.
So, let’s dive in and discover the necessary steps to fix sunken patio pavers and transform your outdoor area into a safe and beautiful oasis.
Key Takeaways:
- Fixing sunken patio pavers involves assessing the damage, gathering tools and materials, and following a step-by-step process to lift, level, and reinstall the pavers. This ensures a safe and visually appealing outdoor space.
- Regular maintenance, such as cleaning, preventing weed growth, and protecting against winter elements, is essential for preserving the condition and longevity of your patio pavers. Enjoy your newly repaired outdoor oasis!
Read more: How To Fix A Paver Patio
Reasons for Sunken Patio Pavers
There are several factors that can contribute to sunken patio pavers. Understanding these reasons will help you address the root cause of the problem and prevent it from recurring in the future. Here are some of the common reasons for sunken patio pavers:
- Poor Base Preparation: One of the main causes of sunken patio pavers is inadequate base preparation. If the base layer, which typically consists of compacted gravel or sand, is not properly leveled and compacted, it can lead to shifting and sinking over time.
- Insufficient Compaction: Proper compaction is crucial to ensure the stability and longevity of patio pavers. If the base layer is not adequately compacted, it can settle over time, causing the pavers to sink and become uneven.
- Water Drainage Issues: When water doesn’t drain properly from the patio area, it can seep into the base layer and weaken its structure. Over time, this can lead to sinking and displacement of the pavers.
- Freeze-Thaw Cycles: In regions with freezing temperatures, the repeated expansion and contraction of water within the base layer can cause the pavers to shift and sink. The freeze-thaw cycles can weaken the base and compromise the stability of the patio surface.
- Soil Erosion: If the area surrounding your patio experiences soil erosion, it can affect the stability of the base layer. As the soil erodes, it creates voids beneath the pavers, leading to sinking and unevenness.
Identifying the specific reason for the sunken patio pavers is essential for implementing the most effective repair strategy. By addressing the underlying cause, you can ensure lasting results and prevent future issues.
Assessing the Damage
Before you begin the process of fixing your sunken patio pavers, it’s important to assess the extent of the damage. Understanding the severity and scope of the problem will help you determine the appropriate repair approach. Here are the steps to assess the damage:
- Walk the Patio: Take a walk around your patio and carefully observe any areas where the pavers appear sunken or uneven. Look for visible gaps between the pavers or signs of displacement.
- Check for Stability: Gently step on the sunken pavers to check for stability. If the pavers shift or move significantly when pressure is applied, it indicates that the underlying base has been compromised.
- Measure Sunken Depth: Use a tape measure or ruler to measure the depth of the sunken area. This will help you determine how much material you will need to level the pavers.
- Inspect Surrounding Pavers: Assess the neighboring pavers to see if they show signs of sinking or displacement. It’s important to address any adjacent problem areas to ensure a seamless and even repair.
- Consider Larger Structural Issues: In some cases, sunken patio pavers may be a symptom of larger underlying structural problems, such as poor soil conditions or drainage issues. If you suspect these issues, it may be necessary to consult with a professional to address the root cause of the problem.
By thoroughly assessing the damage, you will be better equipped to plan and execute the repair process. Remember to document any measurements or observations to guide you through the next steps. With a clear understanding of the damage, you can move forward confidently towards restoring your patio’s functionality and appearance.
Tools and Materials Needed
Repairing sunken patio pavers requires a few essential tools and materials. By gathering these items beforehand, you can ensure a smooth and efficient repair process. Here is a list of the tools and materials you’ll need:
Tools:
- Shovel: A sturdy shovel will be necessary for removing the sunken pavers and excavating the affected area.
- Rubber Mallet: A rubber mallet is useful for tapping and leveling the pavers during the repair process.
- Tape Measure: A tape measure will come in handy for measuring the depth of the sunken area and ensuring accuracy in your work.
- Vibrating Plate Compactor: This tool is essential for compacting the base material and ensuring a solid foundation for the repaired pavers.
- Level: A level will help you check the flatness and evenness of the pavers as you lift, level, and reinstall them.
- Safety Gear: Don’t forget to prioritize safety by wearing gloves, safety goggles, and a dust mask during the repair process.
Read more: What Is A Paver Patio
Materials:
- Gravel or Sand: You will need enough gravel or sand to create a strong and stable base for the patio pavers.
- Paver Base Material: Depending on the condition of your existing base, you may need to replenish the base material to ensure proper support and prevent future sinking issues.
- Paver Sand: Paver sand is crucial for filling the gaps between the pavers and providing stability and interlock.
- Pavers: If any of the sunken pavers are damaged or beyond repair, you may need to purchase replacement pavers that match the existing ones.
- Landscaping Fabric: Landscaping fabric can help prevent weed growth and maintain the integrity of the base material.
- Polymeric Sand (optional): Polymeric sand can be used as an alternative to regular paver sand for added stability and weed deterrence.
Having the right tools and materials on hand will save you time and ensure a successful repair. Before starting the project, double-check that you’ve gathered everything you need so that you can work efficiently and effectively.
Step-by-Step Guide to Fix Sunken Patio Pavers
Now that you have assessed the damage and gathered the necessary tools and materials, it’s time to start fixing your sunken patio pavers. Follow this step-by-step guide to ensure a successful repair:
Step 1: Prepare the Work Area
Begin by clearing the patio area of any furniture, plants, or debris. This will give you a clean and accessible space to work in. Take extra care when handling heavy pavers or equipment to avoid injury.
Step 2: Remove the Sunken Pavers
Using a shovel, carefully lift and remove the sunken pavers. Place them in a safe and organized manner nearby, making sure to note their original positions if necessary. This will make it easier to reinstall them later.
Read more: What Are Pavers For Patio
Step 3: Excavate the Area
With the sunken pavers removed, excavate the area to create a deeper space for the base material. Remove enough soil to accommodate the appropriate thickness of the base material and allow for proper compaction.
Step 4: Add and Level the Base Material
Add a layer of gravel or sand as the base material. Spread it evenly throughout the excavated area, ensuring a uniform thickness. Use a level to check for evenness and adjust as needed.
Step 5: Compact the Base Material
Use a vibrating plate compactor to compact the base material. Start from the edges and work your way towards the center, making multiple passes to achieve a firm and stable foundation. Check the level periodically to ensure proper compaction.
Step 6: Fill with Paver Sand
Add a layer of paver sand on top of the compacted base material. Spread it evenly, making sure to fill the gaps between the pavers. Use a broom to sweep the sand into the joints, ensuring proper interlock and stability.
Read more: How To Sand Patio Pavers
Step 7: Place and Level the Pavers
Carefully place the sunken pavers back into their original positions. Use a rubber mallet to tap them lightly and level them with the surrounding pavers. Check the level periodically to ensure an even surface.
Step 8: Fill the Gaps
Fill the gaps between the pavers with more paver sand or polymeric sand if desired. Sweep the sand into the joints and use a broom to remove any excess. This will help stabilize the pavers and discourage weed growth.
Step 9: Compact the Pavers
Use the vibrating plate compactor once again to gently compact the pavers and ensure that they are securely in place. This will help set them and create a solid and stable patio surface.
Step 10: Clean and Maintain
Finally, clean the repaired patio surface by lightly spraying it with water. Regularly sweep and maintain the area to prevent debris buildup and preserve the integrity of the pavers.
By following these step-by-step instructions, you can successfully fix your sunken patio pavers and restore your outdoor space to its former beauty and functionality.
Read more: How To Maintain Patio Pavers
Lifting and Leveling the Pavers
Once you have prepared the work area and excavated the sunken patio pavers, it’s time to lift and level them. This step is crucial for ensuring an even and stable surface. Follow these steps to lift and level the pavers:
Step 1: Clean the Pavers
Before lifting the pavers, clean off any dirt, debris, or old sand that may be stuck on them. A broom or hose can be used to gently sweep away any loose particles.
Step 2: Reset the Base
If the base material beneath the sunken pavers has shifted or settled, you may need to add or adjust it. Make sure the base material is level and evenly distributed to provide a solid foundation for the pavers.
Step 3: Lift the Pavers
With the base material prepared, carefully lift the sunken pavers using a shovel or by hand. Be cautious not to damage the adjacent undamaged pavers.
Read more: How To Reseal Patio Pavers
Step 4: Add or Remove Base Material
If necessary, add or remove base material beneath the lifted pavers to achieve the desired level. Use a level to ensure the pavers are flush with the surrounding ones.
Step 5: Tap and Adjust
Once the pavers are in the correct position, use a rubber mallet to tap them lightly and adjust their level. Be gentle to avoid cracking or damaging the pavers.
Step 6: Check for Evenness
Regularly check the surface with a level to ensure that the pavers are even and seamless. Make any necessary adjustments by tapping or adding/removing base material until the desired level is achieved.
Step 7: Repeat the Process
Continue lifting, leveling, and adjusting each sunken paver until the entire area is properly aligned and even. Remember to maintain consistent spacing and alignment with the surrounding undamaged pavers.
Read more: How To Make A Patio With Pavers
Step 8: Verify Stability
Once all the pavers are lifted and leveled, gently walk on them to ensure that they are stable and do not shift or sink under your weight. If any pavers feel loose or unstable, remove and readjust them as needed.
Lifting and leveling the pavers is a crucial step in the repair process. By ensuring that each paver is properly aligned and stable, you can create a safe and visually appealing patio surface.
Fill and Compaction
After successfully lifting and leveling the sunken patio pavers, the next step is to fill the gaps between the pavers and compact the surface. This will help enhance the stability and longevity of the repaired area. Follow these steps for proper fill and compaction:
Step 1: Choose the Right Filling Material
Select the appropriate material for filling the gaps between the pavers. Common options include paver sand and polymeric sand. Paver sand is more traditional, while polymeric sand has added binding properties for increased stability and weed deterrence.
Step 2: Fill the Gaps
Using a broom or your hands, spread the filling material evenly over the patio surface, ensuring that it fills the gaps between the pavers. Make sure to work the material into the joints, ensuring a consistent and level fill.
Read more: How To Edge A Paver Patio
Step 3: Use a Broom to Sweep
Take a stiff-bristle broom and sweep the filling material into the gaps between the pavers. This will help distribute the material evenly and remove any excess from the surface of the pavers.
Step 4: Check for Proper Fill Level
Inspect the filled gaps to ensure they are properly filled and leveled. Use a straight edge or your finger to assess the height of the fill material. Adjust as necessary to maintain a consistent and level surface.
Step 5: Compact the Surface
To ensure a solid and stable surface, use a vibrating plate compactor to compact the newly filled gaps between the pavers. Start from the edges and work your way towards the center, making multiple passes to achieve proper compaction. Follow the manufacturer’s instructions for the specific compactor you are using.
Step 6: Repeat the Compaction
Make additional passes with the compactor, overlapping the previous paths to ensure thorough compaction. Pay extra attention to the edges and corners to ensure proper stability in these areas. Check the level periodically to ensure even compaction.
Read more: How To Care For A Paver Patio
Step 7: Remove Excess Filling Material
After compacting, use a broom or leaf blower to remove any excess filling material from the surface of the pavers. Be gentle while doing this to avoid dislodging the fill from the gaps.
By following these steps, you will achieve proper fill and compaction of the repaired patio surface, enhancing its stability, durability, and overall appearance. This will also help prevent the accumulation of debris and weed growth between the pavers, ensuring a long-lasting and visually appealing outdoor space.
Reinstalling the Pavers
With the gaps filled and the surface compacted, it’s time to reinstall the lifted and leveled patio pavers. Follow these steps to ensure a seamless and secure reinstallation:
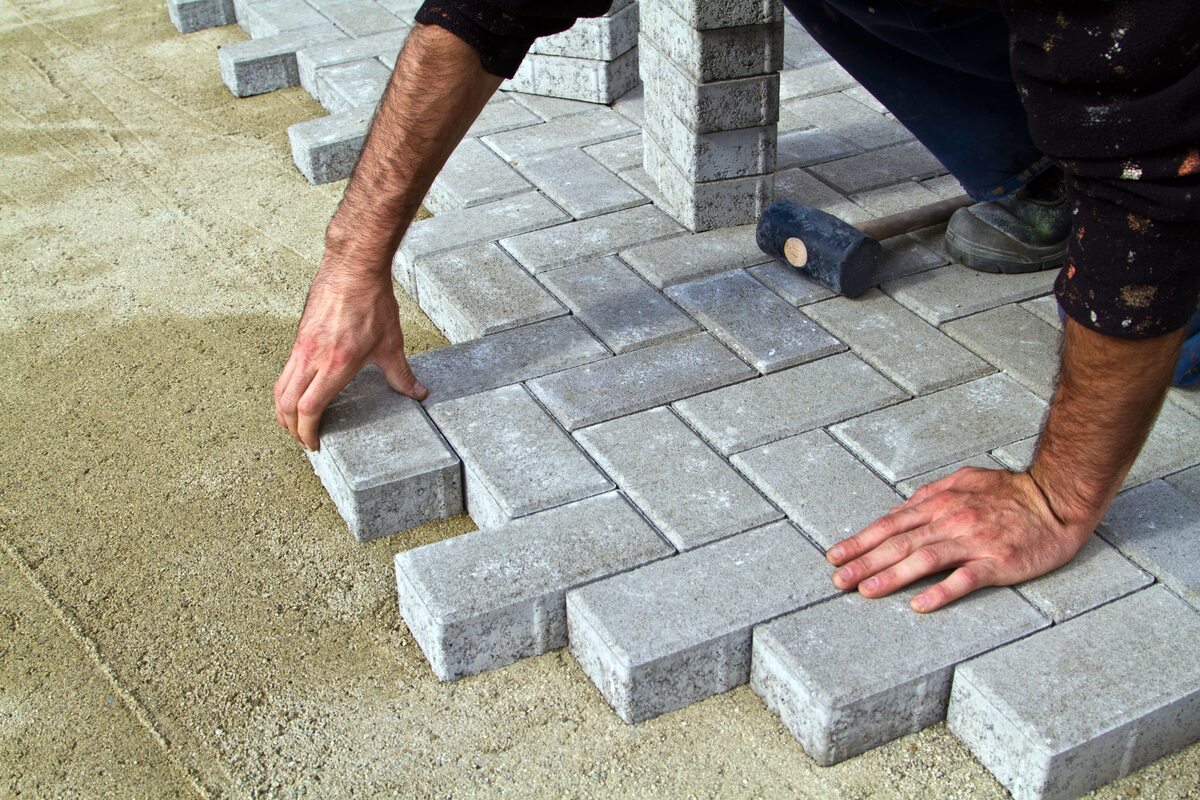
Step 1: Start at an Edge
Begin the reinstallation process by placing the first paver along one edge of the patio area. Ensure that it is properly aligned with the adjacent undisturbed pavers.
Step 2: Maintain Consistent Spacing
As you continue to install the pavers, use spacers to maintain a consistent gap between each paver. This will create an even and visually appealing pattern. Ensure that the pavers fit snugly together without any overlap.
Read more: How To Create A Paver Patio
Step 3: Tap and Level
Using a rubber mallet, lightly tap each paver to ensure it is securely seated on the base material. Check the level periodically to ensure that the pavers are even with each other and the surrounding undisturbed pavers.
Step 4: Seamlessly Blend Sizes and Shapes
If your patio features different sizes or shapes of pavers, make sure to seamlessly blend them during the reinstallation process. This will create a pleasing and visually cohesive look.
Step 5: Make Adjustments as Needed
If you encounter any pavers that are not level or do not align properly, adjust or reposition them as necessary. Use the rubber mallet to tap them gently into the correct position.
Step 6: Check Stability and Alignment
Periodically walk on the pavers to test their stability and alignment. Ensure that they do not shift or sink under pressure. Make any necessary adjustments to achieve a firm and even surface.
Read more: How To Seal A Paver Patio
Step 7: Double-check the Pattern and Design
Once all the pavers have been reinstalled, take a moment to step back and inspect the overall pattern and design. Make any final adjustments to ensure a visually pleasing layout.
Step 8: Allow for Bedding-In Time
Give the newly reinstalled pavers some time to “bed-in.” This means allowing them to settle and lock into place naturally. Avoid any heavy foot traffic or placing heavy items on the patio for a few days.
By following these steps, you can successfully reinstall the lifted and leveled patio pavers, creating a visually appealing and stable outdoor surface. Take your time and pay attention to detail to achieve the best results.
Final Touches and Maintenance Tips
After completing the repair and reinstallation of your patio pavers, there are a few final touches and maintenance tips to keep in mind. These will help ensure the longevity and attractiveness of your outdoor space. Follow these guidelines:
Reseal the Pavers (Optional)
If your patio pavers are made of natural stone or porous material, you may want to consider applying a sealer. Sealing the pavers can help protect them from stains, water damage, and UV fading. Follow the manufacturer’s instructions for the specific sealer you are using.
Read more: How To Lay A Paver Patio
Regular Cleaning
To maintain the appearance of your patio, it’s important to regularly clean the surface. Sweep away debris, leaves, and dirt using a broom or leaf blower. You can also use a mild detergent or soapy water and a soft brush or mop to remove stains or stubborn grime.
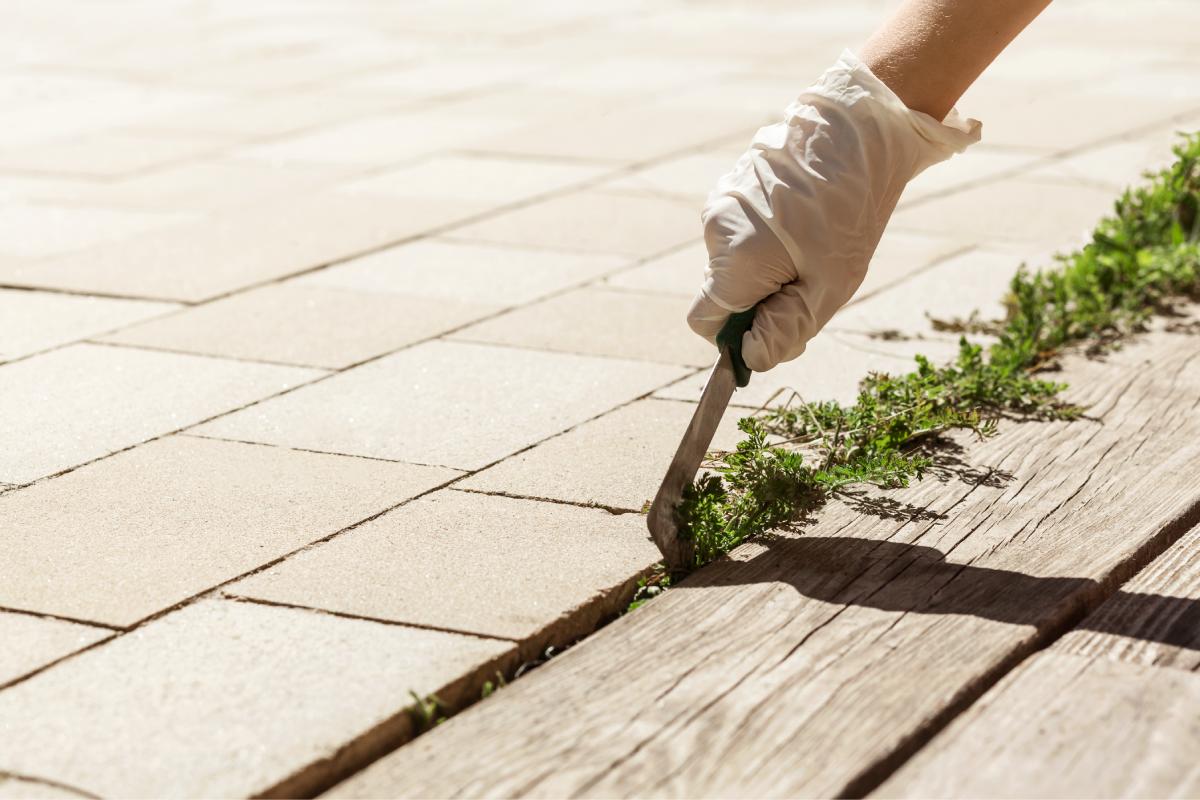
Prevent Weeds
To prevent weed growth between the pavers, apply a weed-resistant landscaping fabric before filling the gaps with sand. This will help minimize weed growth and make maintenance easier in the long run.
Inspect and Repair Regularly
Periodically inspect your patio for any signs of damage or sinking. Address any issues promptly to prevent further damage and ensure the stability of the pavers. Fix any loose or damaged pavers by lifting them, adding base material if needed, and releveling them.
Protect Against Winter Elements
If you live in an area with freezing temperatures, it’s important to protect your patio against the potential damage caused by freeze-thaw cycles. Consider using a snow removal method that is gentle on the pavers, such as a plastic shovel, and avoid using salt or de-icing chemicals that can erode the pavers.
Read more: How To Slope A Paver Patio
Regularly Reapply Joint Sand (Optional)
Over time, the joint sand between the pavers may erode or wash away. If you notice gaps appearing between the pavers, you can reapply joint sand to maintain stability and prevent weed growth. Follow the manufacturer’s instructions for the specific sand you are using.
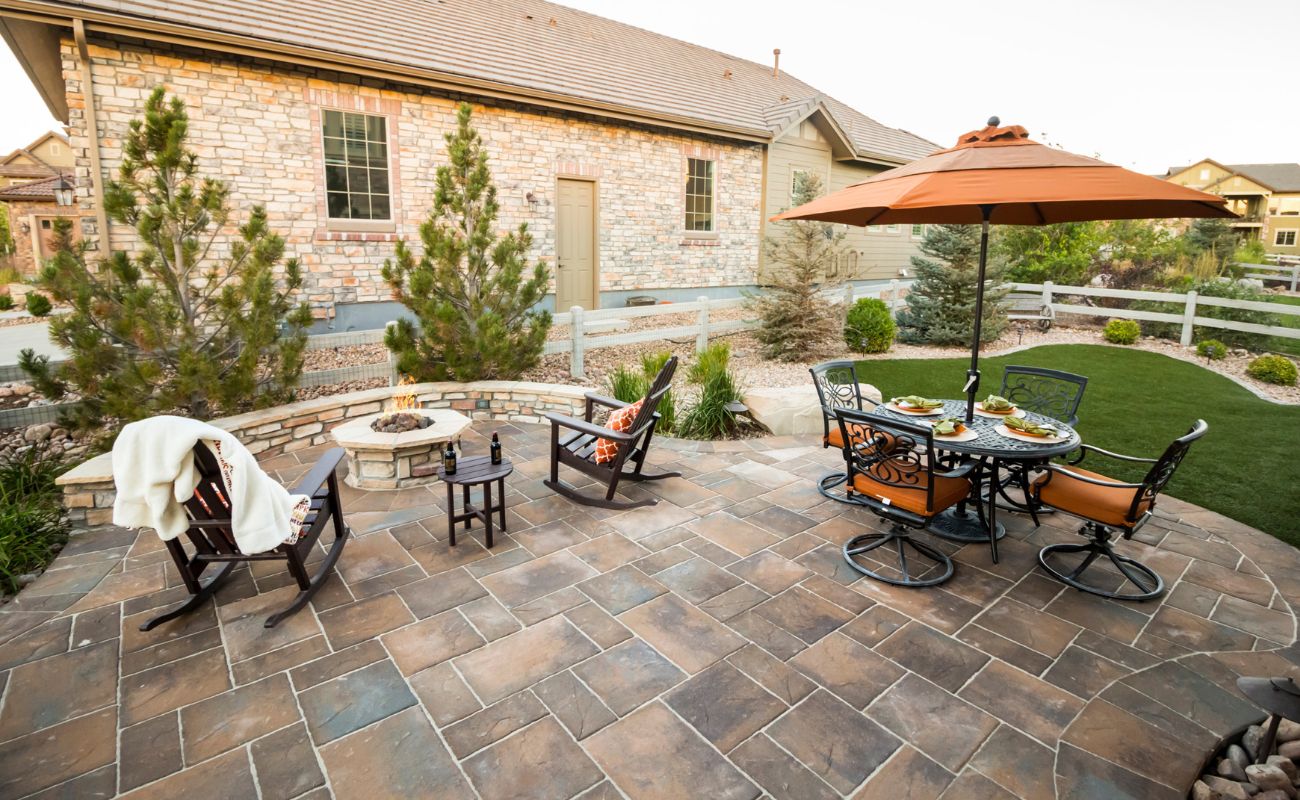
Enjoy Your Inviting Outdoor Space
Now that your patio pavers are repaired and maintained, take the time to enjoy your beautiful outdoor space. Whether you’re hosting gatherings, lounging with a book, or simply spending time with loved ones, your patio will provide a comfortable and inviting environment.
By following these final touches and maintenance tips, you can ensure the long-term beauty and functionality of your patio pavers. Regular care and periodic inspections will help preserve their condition and extend their lifespan.
Conclusion
Congratulations on successfully fixing your sunken patio pavers! By following the step-by-step guide and implementing the necessary repairs, you have transformed your outdoor space into a safe, visually appealing, and functional area. Your efforts will be rewarded with a patio that can be enjoyed for years to come.
We explored the reasons behind sunken patio pavers, the importance of assessing the damage, the tools and materials needed for the repair, and a comprehensive guide on lifting, leveling, filling, and compacting the pavers. Additionally, we provided maintenance tips to ensure the longevity and attractiveness of your patio.
Remember, regular maintenance and periodic inspections are key to preserving the condition of your patio pavers. By addressing any issues promptly, you can prevent further damage and maintain the stability and beauty of your outdoor space. Cleaning the surface, preventing weed growth, and protecting against winter elements will all contribute to the durability and longevity of your patio.
Enjoy your newly repaired patio and create lasting memories in your outdoor oasis. Whether you’re hosting barbecues, relaxing with a book, or spending quality time with loved ones, your patio will provide a comfortable and inviting environment for all to enjoy.
Thank you for joining us on this journey to fixing sunken patio pavers. We hope this guide has provided you with the knowledge and confidence to tackle the repair process successfully. If you have any questions or require further assistance, feel free to reach out. Happy patio restoration!
Frequently Asked Questions about How To Fix Sunken Patio Pavers
Was this page helpful?
At Storables.com, we guarantee accurate and reliable information. Our content, validated by Expert Board Contributors, is crafted following stringent Editorial Policies. We're committed to providing you with well-researched, expert-backed insights for all your informational needs.

0 thoughts on “How To Fix Sunken Patio Pavers”