Home>Garden Essentials>How To Plant Lithops Seeds
Garden Essentials
How To Plant Lithops Seeds
Modified: October 18, 2024
Learn how to plant Lithops seeds and start your own garden with these helpful tips and techniques.
(Many of the links in this article redirect to a specific reviewed product. Your purchase of these products through affiliate links helps to generate commission for Storables.com, at no extra cost. Learn more)
Introduction
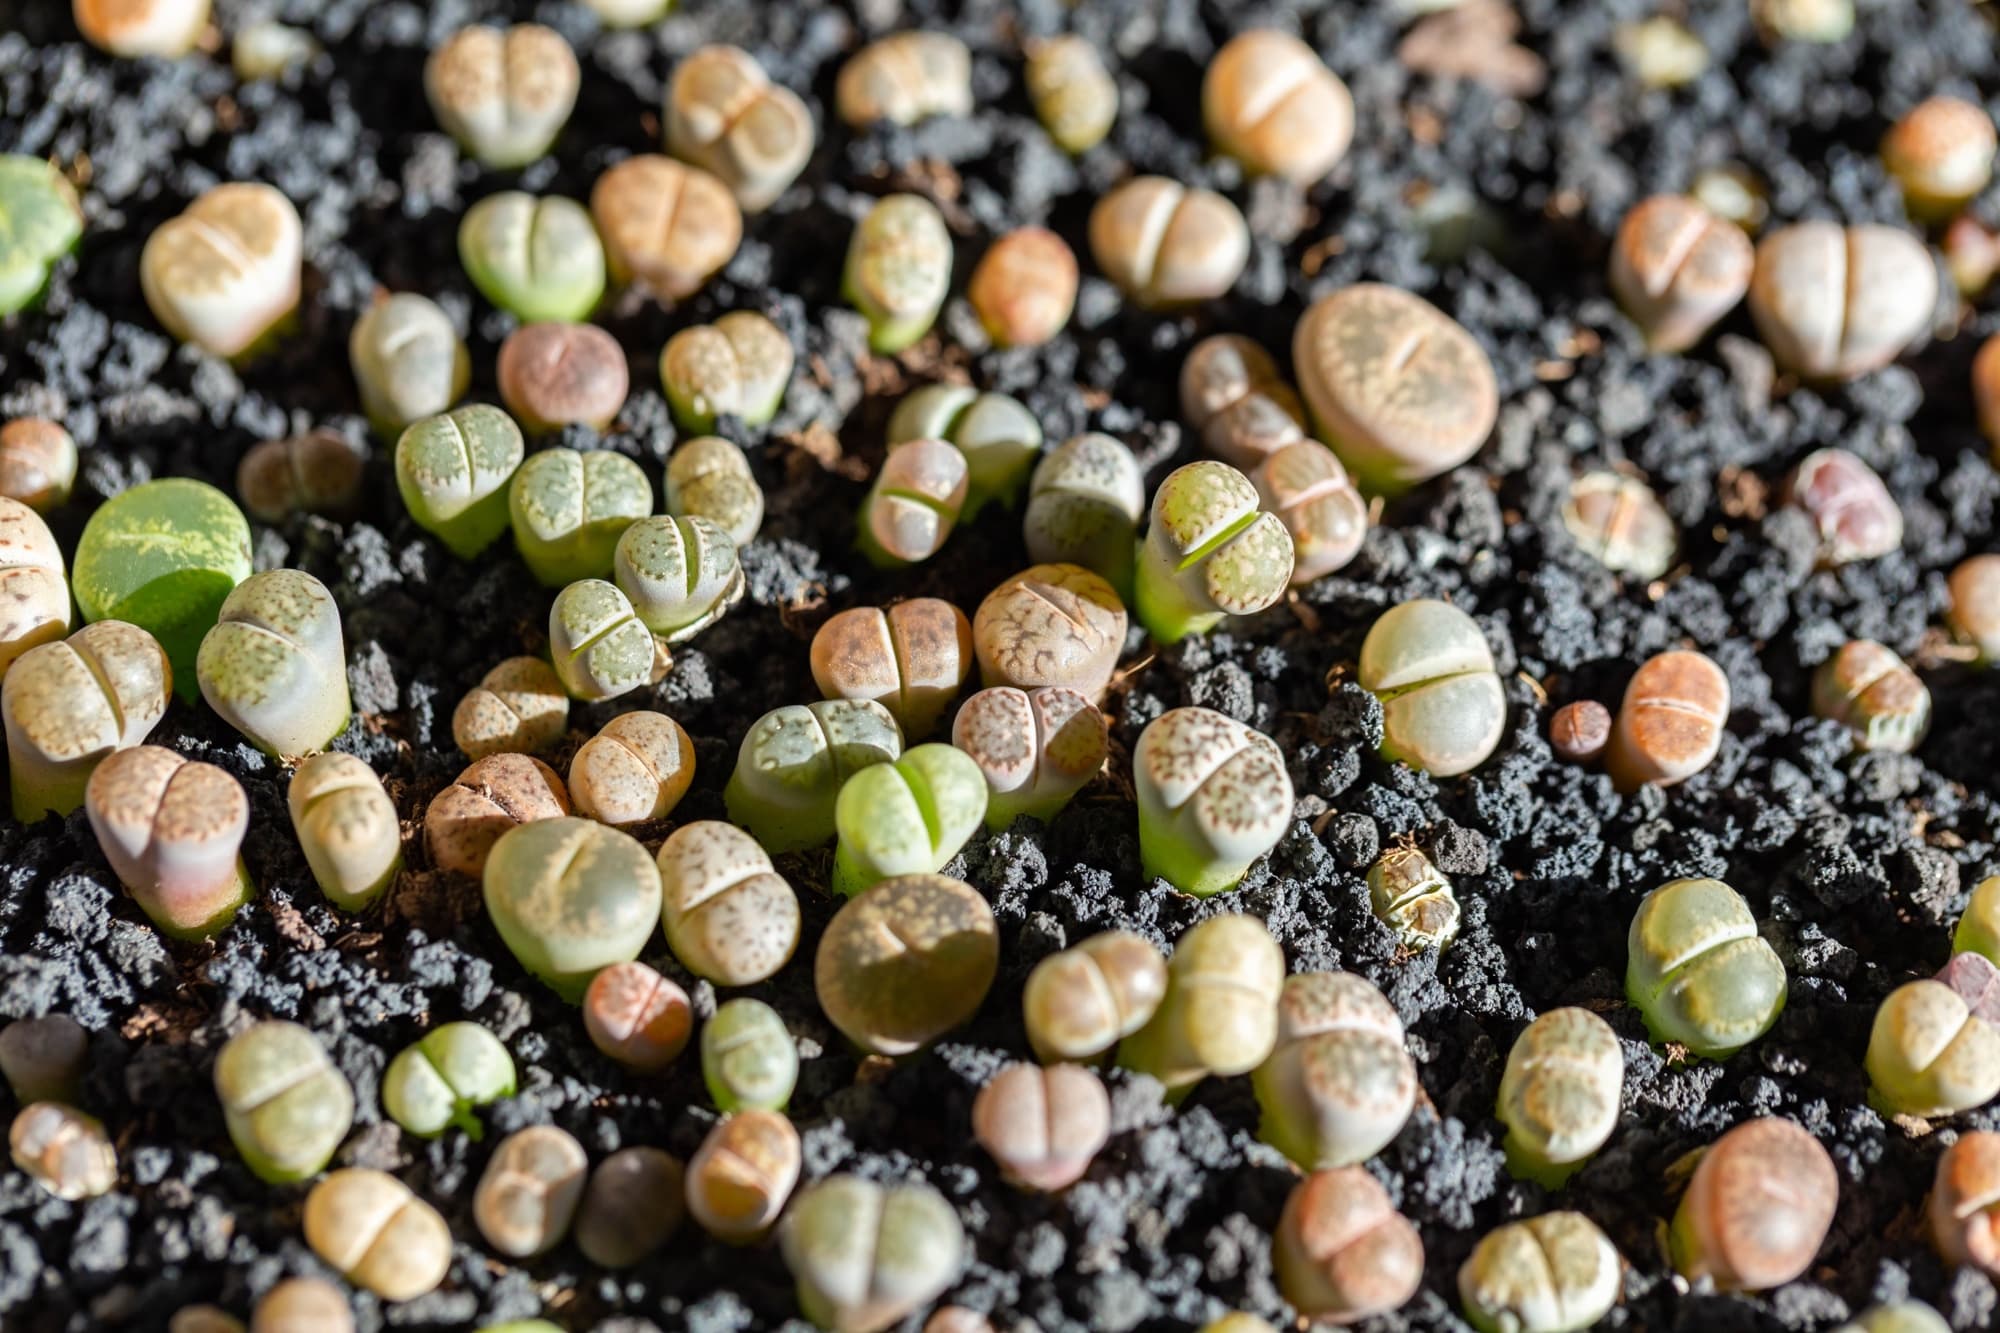
Gardening is a wonderful hobby that offers a multitude of benefits, including the joy of watching plants grow and thrive. If you’re looking to add an interesting and unique plant to your garden, consider growing lithops. Lithops, also known as “living stones,” are fascinating succulent plants that resemble small pebbles or stones, making them a captivating addition to any garden or indoor plant collection.
In this article, we will explore the process of planting lithops seeds, from selecting the right seeds to caring for the young seedlings. By following these steps, you can successfully grow lithops and enjoy their charming and distinctive appearance.
Before we delve into the planting process, it’s important to understand a few key factors about lithops. These plants are native to South Africa and thrive in arid climates. They have evolved to adapt to their harsh environments, which is why they have a unique appearance and water-storing capabilities.
Lithops plants have a range of colors and patterns, including shades of green, brown, and grey. Some varieties even have vibrant markings that resemble intricate designs. These striking features make lithops an excellent choice for adding visual interest to your garden.
Now that we have a basic understanding of lithops, let’s move on to the first step in the process: choosing the right lithops seeds.
Key Takeaways:
- Choose high-quality lithops seeds from a reputable supplier, prioritize freshness, viability, and germination rate. This sets the stage for successful growth and vibrant lithops plants.
- Prepare an optimal growing environment for lithops seeds by selecting the right container, creating a well-draining soil mix, and sterilizing the planting materials. This encourages successful germination and healthy development.
Read more: How To Germinate A Plant
Choosing the Right Lithops Seeds
When selecting lithops seeds, it’s essential to choose high-quality seeds from a reputable source. This ensures that you are starting with the best possible chance of successful germination and healthy plant growth.
First, determine which species or variety of lithops you would like to grow. There are numerous lithops species available, each with its own unique characteristics. Some popular varieties include Lithops optica, Lithops salicola, and Lithops fulviceps. Research the different species and select the ones that appeal to you the most.
Once you have identified the lithops species you want to grow, it’s time to find a reliable supplier. Look for suppliers who specialize in succulent plants or cacti, as they are more likely to have a wide variety of lithops seeds available. Check customer reviews and testimonials to ensure that the supplier has a reputation for providing high-quality seeds.
When purchasing lithops seeds, consider factors such as freshness, viability, and germination rate. Fresh seeds have a higher chance of germinating successfully, so choose seeds that have been harvested recently. A viable seed is one that is capable of germination, so ensure that the seeds you purchase are not too old or damaged. Additionally, look for seeds with a high germination rate, as this indicates a higher likelihood of successful growth.
It’s also worth noting that lithops seeds come in various sizes and colors. Some seeds may be smaller or larger than others, and they can range in color from light brown to dark brown or even black. While the size and color of the seeds do not necessarily indicate their quality, you may have personal preferences, such as wanting larger seeds for easier handling or selecting a specific color for aesthetic reasons.
In summary, when choosing lithops seeds, consider the species or variety you want to grow, find a reputable supplier, and prioritize freshness, viability, and germination rate. By selecting high-quality seeds, you’ll give yourself the best chance of nurturing healthy and vibrant lithops plants.
Preparing the Planting Materials
Before you start planting lithops seeds, it’s crucial to prepare the right planting materials to create an optimal growing environment for your seedlings.
The first step in preparing the planting materials is to choose the right container. Lithops have a shallow root system, so selecting a wide and shallow container is ideal. This allows their roots to spread out comfortably. Additionally, make sure the container has drainage holes to prevent waterlogging and promote healthy root growth.
Next, you’ll need to create a well-draining soil mix for your lithops seeds. These plants thrive in sandy or gritty soil with excellent drainage. You can either purchase a pre-made cactus or succulent potting mix or create your own by mixing equal parts of ordinary potting soil, coarse sand, and perlite or pumice. This mixture provides the perfect balance of water retention and drainage.
Once you have the container and soil ready, it’s important to sterilize them before planting. This helps prevent the growth of harmful fungi or bacteria that could harm the delicate lithops seedlings. You can sterilize the container by soaking it in a solution of 1-part bleach to 9-parts water for about 15 minutes. Rinse thoroughly afterward to remove any remaining bleach. For the soil, spread it out on a baking tray and heat it in the oven at 180°F (82°C) for about 30 minutes. Allow it to cool completely before using.
Now that your container and soil are sterilized, it’s time to fill the container with the prepared soil mix. Gently pat down the soil to create a level surface, leaving about 1 inch (2.5 cm) of space from the top of the container.
Lastly, before planting the lithops seeds, it’s advisable to moisten the soil slightly. This can be done by spraying a fine mist of water onto the soil surface until it feels slightly damp but not saturated. The moisture will help the seeds settle into the soil and aid in germination.
By properly preparing the planting materials, including selecting the right container, creating a well-draining soil mix, and sterilizing the container and soil, you will provide an optimal growing environment for your lithops seeds. This sets the stage for successful germination and healthy development of your lithops seedlings.
Planting Lithops Seeds
Now that you have the container and planting materials prepared, it’s time to plant your lithops seeds. Follow these steps to ensure proper planting and give your seeds the best chance of germination.
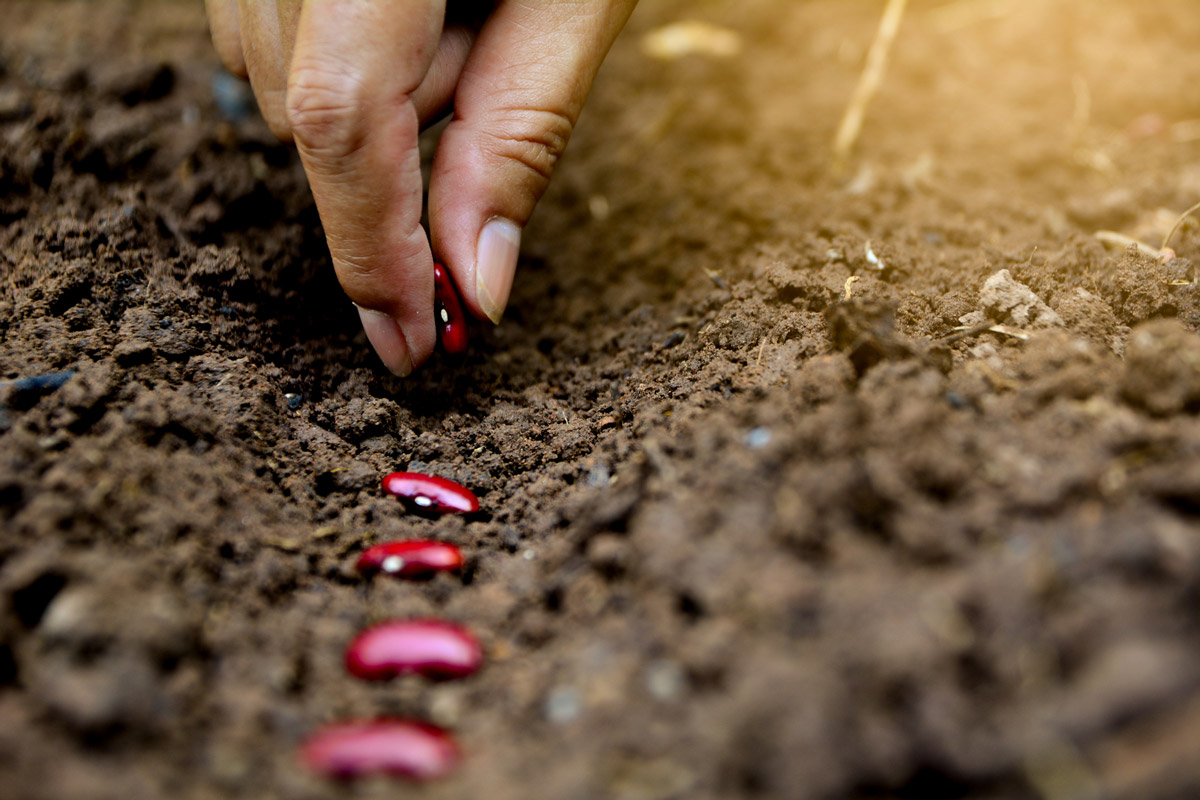
1. Gently scatter the lithops seeds across the surface of the soil. Space them out evenly, providing enough room for each seedling to grow without crowding. As lithops seeds are small, it’s important to handle them with care to avoid accidentally burying them too deep or clumping them together.
2. Once the seeds are scattered, it’s recommended to lightly cover them with a thin layer of fine sand or grit. This layer of sand helps to anchor the seeds and provides an additional level of protection. It mimics the natural habitat of lithops and aids in preventing excess moisture around the seeds, which can lead to rot. Be cautious not to bury the seeds too deeply; a light covering is sufficient.
3. After covering the seeds, mist the surface of the soil lightly with water to settle the sand or grit and provide a moist environment. It’s crucial to avoid saturating the soil as lithops prefer arid conditions and excessive moisture can cause their roots to rot.
4. Place the container in a warm and brightly lit area, such as a sunny windowsill or under grow lights. Lithops require ample sunlight to thrive and promote healthy growth. A temperature range between 70°F to 80°F (21°C to 27°C) is ideal for germination.
5. Be patient and maintain consistent moisture levels. Check the soil regularly and mist it lightly whenever it starts to dry out. Avoid overwatering as it can harm the delicate seedlings. Aim to keep the soil slightly moist but not overly saturated.
6. Germination time can vary for lithops seeds. It typically takes anywhere from a few days to a few weeks for the first seedlings to emerge. Continue to provide adequate light, warmth, and moisture during this period.
7. As the lithops seedlings grow, they will develop their characteristic pebble-like appearance. At this stage, it’s important to gradually reduce the moisture levels. Allow the soil to dry out between waterings to promote the establishment of a healthy root system.
By following these steps, you will successfully plant lithops seeds and create an environment that encourages germination and healthy growth. Patience and attentive care are key during this process as lithops seeds require specific conditions to thrive.
When planting lithops seeds, make sure to use well-draining soil and water sparingly to avoid rotting. Place the seeds on top of the soil and cover lightly with a thin layer of sand. Keep the soil moist but not wet, and provide plenty of sunlight.
Caring for Young Lithops Seedlings
Once your lithops seedlings have emerged and started to grow, it’s important to provide them with proper care to ensure their health and development. Follow these guidelines to care for your young lithops seedlings:
1. Light: Lithops seedlings require bright light to grow well. Place them in a location where they can receive at least 6 to 8 hours of sunlight every day. If natural sunlight is limited, you can provide supplemental grow lights to give them the necessary light intensity.
2. Watering: Unlike mature lithops, young seedlings have more delicate and fragile roots. It’s crucial to be cautious when watering them. Water sparingly and only when the soil has completely dried out. Overwatering can lead to root rot and other issues. Remember, lithops are desert plants and are well adapted to surviving with minimal water.
3. Soil: Lithops prefer well-draining soil mixes. The same mix that was used for planting the seeds can be continued to be used for young seedlings. Make sure the soil is gritty and allows excess water to drain away freely.
4. Temperature: Lithops prefer warm temperatures. Try to maintain a temperature range of 70°F to 80°F (21°C to 27°C) during the seedling stage. Avoid exposing them to extreme temperature fluctuations or cold drafts as they can cause stress and hinder growth.
5. Fertilization: Young lithops seedlings do not require frequent fertilization. In fact, it’s best to avoid applying fertilizer during the first year of growth. Their nutrient requirements are minimal, and excessive fertilization can harm their delicate root systems. If you feel the need to fertilize, use a diluted, balanced fertilizer specifically formulated for succulents, and apply it sparingly.
6. Thinning: As your lithops seedlings grow, they may cluster together and become overcrowded. It’s important to thin them out to provide enough space for each plant to grow and thrive. Gently remove the excess seedlings, being careful not to disturb the roots of the remaining plants.
7. Repotting: As lithops grow, they may outgrow their initial containers. Repotting is usually necessary every few years to accommodate their increasing size. When repotting, use a larger container with well-draining soil and handle the seedlings with care to avoid damaging their delicate root systems.
By providing proper light, watering sparingly, using well-draining soil, maintaining appropriate temperatures, avoiding excessive fertilization, thinning overcrowded seedlings, and repotting when necessary, you will ensure the healthy growth and development of your young lithops seedlings.
Read more: How To Plant Seed
Common Issues and Troubleshooting
While growing lithops can be a rewarding experience, like any plant, they can face certain issues. Here are some common problems you may encounter when caring for your lithops seedlings and troubleshooting tips:
1. Overwatering: One of the most common mistakes when caring for lithops is overwatering. Too much water can cause their roots to rot. To avoid this, only water when the soil is completely dry. Allow the soil to dry out between waterings and ensure the container has proper drainage to prevent waterlogging.
2. Underwatering: On the flip side, underwatering can also be an issue. While lithops are drought-tolerant plants, they still require some water to survive. Make sure to water your lithops seedlings regularly but sparingly. Signs of underwatering include wrinkled or shriveled leaves.
3. Sunburn: Lithops require bright light, but intense sunlight can scorch their leaves. If you notice brown or yellow spots on the leaves, it could be a sign of sunburn. Provide some shade during the hottest part of the day or move them to a location with indirect sunlight.
4. Pests: Aphids, mealybugs, and spider mites are common pests that can infest lithops. These pests can cause damage to the leaves and disrupt the growth of the plants. Keep a close eye on your lithops seedlings and regularly inspect them for any signs of pest infestation. If pests are present, treat them with organic pest control methods or insecticidal soap.
5. Improper Soil Mix: Using a poorly draining soil mix can lead to root rot and other problems. Make sure the soil mix you use for your lithops seedlings is well-draining and allows excess water to flow out freely. Adjust the soil mix if necessary by adding more perlite or coarse sand to improve drainage.
6. Lack of Air Circulation: Insufficient air circulation can lead to fungal diseases or the growth of mold on lithops. Ensure that your lithops seedlings are placed in an area with good airflow. Avoid crowding them together, as this can prevent proper ventilation around the plants.
7. Stress from Repotting: When repotting lithops seedlings, they may experience a period of stress. It’s normal for lithops to undergo a period of dormancy or rest after being repotted. During this time, reduce watering and provide minimal light until they resume growth.
Remember, prevention is key when it comes to dealing with common issues. Provide proper care, maintain a balanced watering schedule, ensure good drainage, and monitor your lithops seedlings regularly to catch any problems early. Addressing issues promptly will help your lithops seedlings stay healthy and thrive.
Conclusion
Congratulations on successfully planting and caring for your lithops seedlings! By following the steps outlined in this article, you have taken the first steps towards growing these fascinating succulent plants.
Gardening is a continuous learning process, and as your lithops seedlings grow, you will gain more experience and understanding of their unique needs. Remember to provide them with ample light, water sparingly, use well-draining soil, and maintain appropriate temperatures to ensure their healthy development.
Be prepared for the slow growth rate of lithops. These plants are known for their slow and deliberate growth, sometimes taking several years to reach maturity. Patience is key when it comes to watching your lithops seedlings evolve into mature and visually striking plants.
As your lithops plants mature, they will eventually produce new leaves that replace the old ones. This process, known as leaf splitting or shedding, is a natural part of their growth cycle. It is fascinating to witness as the new leaves emerge, displaying intricate patterns and colors.
Remember to monitor your plants for any signs of pests, proper watering, and provide adequate light. By addressing any issues promptly, you can maintain the health and longevity of your lithops plants.
In conclusion, growing lithops from seeds is both a rewarding and enjoyable experience. These unique plants will add a touch of intrigue and beauty to your garden or indoor plant collection. With proper care and attention, your lithops seedlings will thrive and become stunning specimens for years to come.
So, go ahead and embark on your lithops growing journey. Enjoy the process, embrace the uniqueness of these living stones, and relish in the joy of watching them flourish in your care.
Frequently Asked Questions about How To Plant Lithops Seeds
Was this page helpful?
At Storables.com, we guarantee accurate and reliable information. Our content, validated by Expert Board Contributors, is crafted following stringent Editorial Policies. We're committed to providing you with well-researched, expert-backed insights for all your informational needs.


0 thoughts on “How To Plant Lithops Seeds”